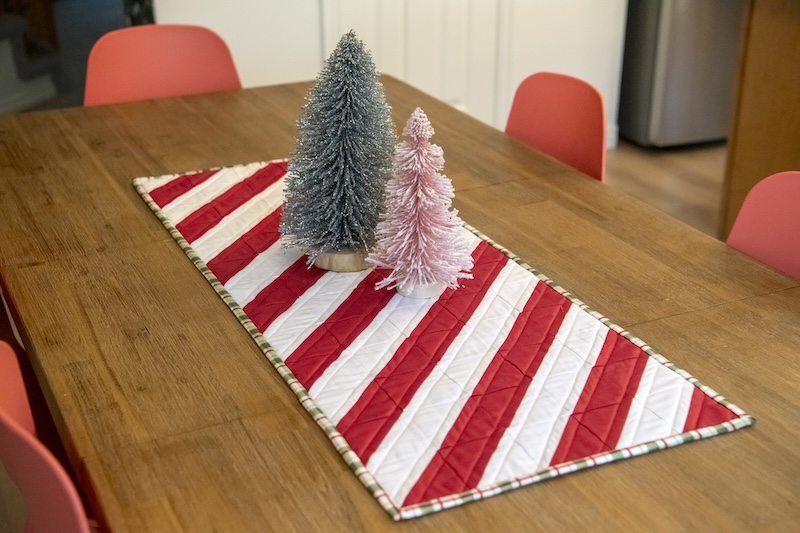
Today we’re going to sew a red and white striped candy cane inspired table runner. The finished runner measures approximately 15”x39”. You can easily make it bigger or smaller by making larger half square triangles or adding more rows. For this tutorial I’m going to assume you’ve done some piecing and quilting before. If not all add a link to a tutorial that’s more in depth for adding the binding. Always a nice refresher even if you have done binding before but it’s been awhile. Let’s get started.
Supplies:
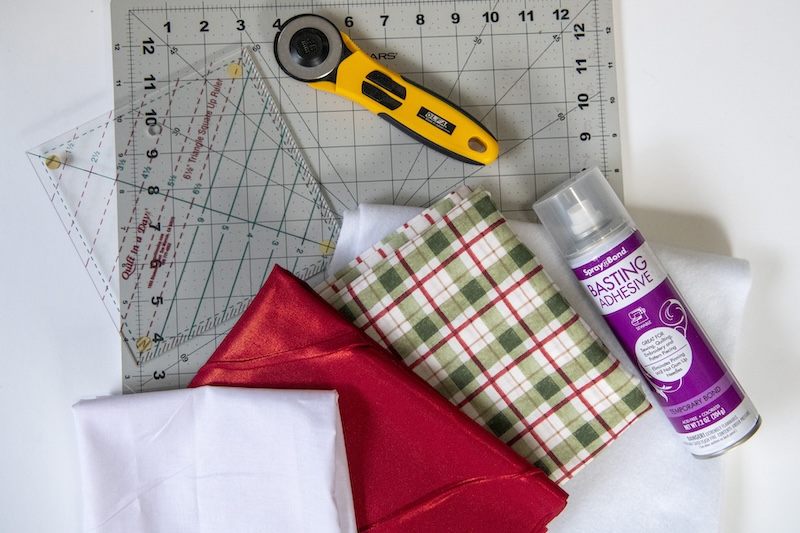
- ½ yard red cotton fabric
- ½ yard white cotton fabric
- ¾ yard plaid of other Christmasy themed cotton fabric for backing and binding
- SpraynBond Basting Adhesive Fabric Spray
- StitchNSew High Loft Sew-In Fleece
- Quilt In A Day 9.5” square ruler
- Hand Sewing needle/thread
- Pen
- Pins/Clips
- Cutting Mat/Rotary Cutter
**¼” seam allowance unless otherwise specified.

Take your red and white fabrics and iron them. Cut into 4-inch squares. You’ll need 33 white and 33 red 4-inch squares.
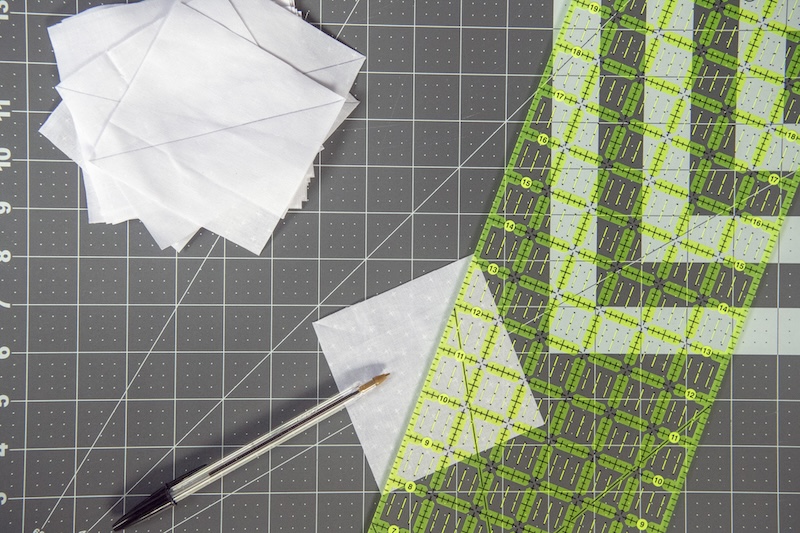
Take your white squares and on the back of each draw a diagonal line from one corner to the other.
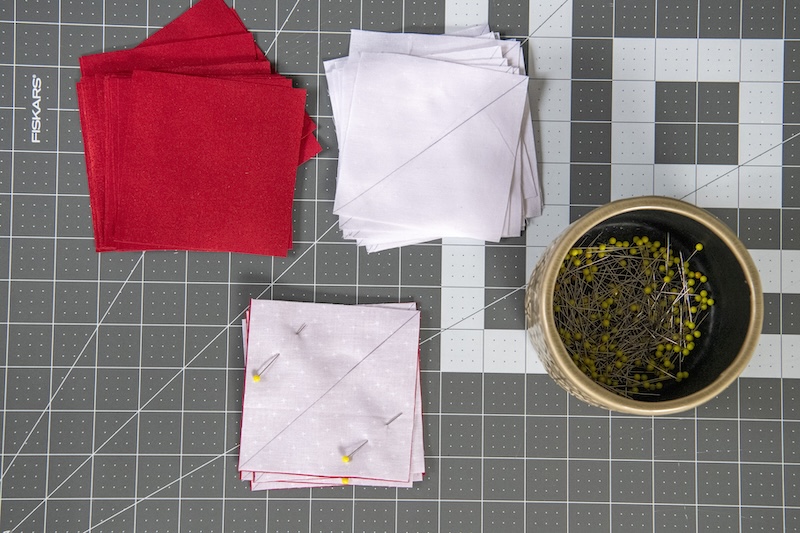
Next take your red squares and match each up with one white square, right sides together. Use a couple of pins to hold the two together in the opposite corners of your pen mark.
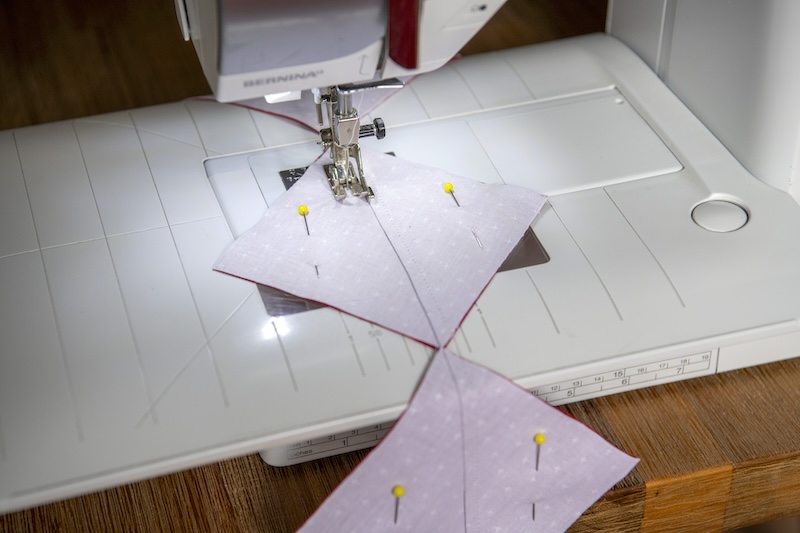
Take your stack of pinned squares to your sewing machine. We will be making half square triangles. I like to chain stitch mine. Using your drawn diagonal line as your guide and sew ¼” to one side of your line. Flip then sew ¼” from the line on the other side.
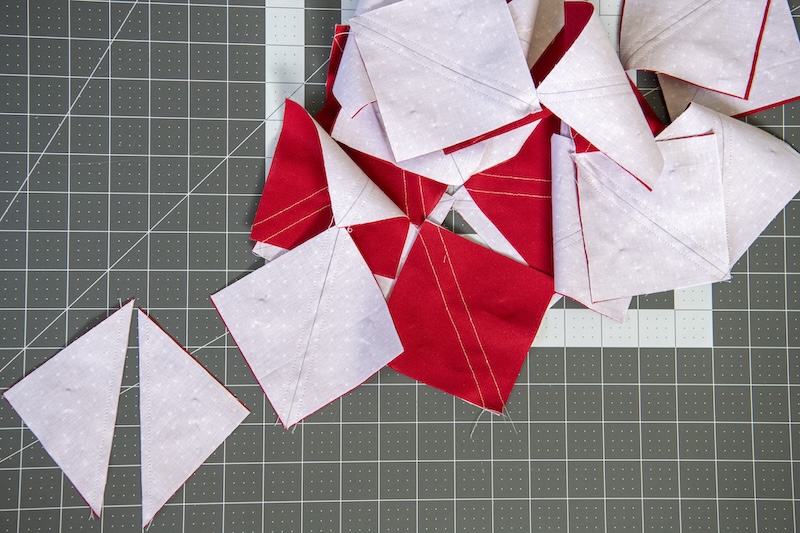
Once you’ve sewn all your squares cut the threads between each and then cut down the middle of your square right on your drawn line.
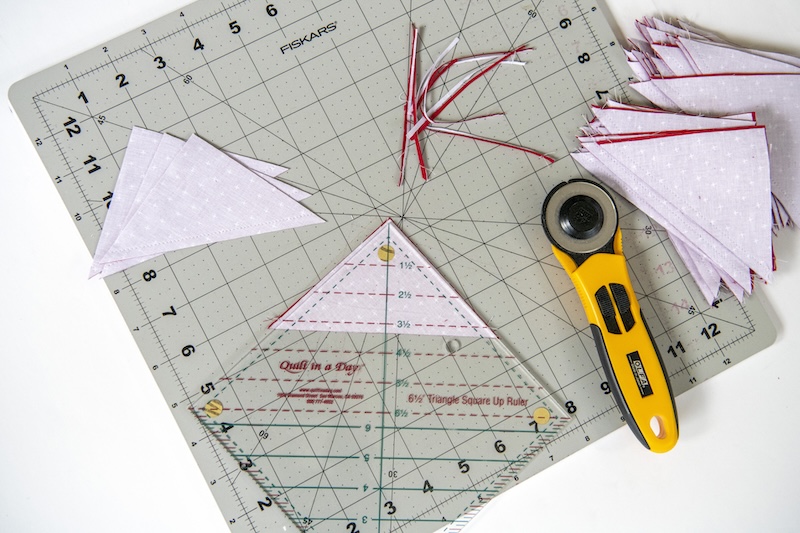
Now we need to trim our half square triangles down to 3.5” squares. I use a Quilt In a Day acrylic ruler. It’s magical. If you don’t have one and do a lot of piecing I highly recommend adding it to your Christmas list. To use, line your sew line up on the 3.5” mark and trim the excess.
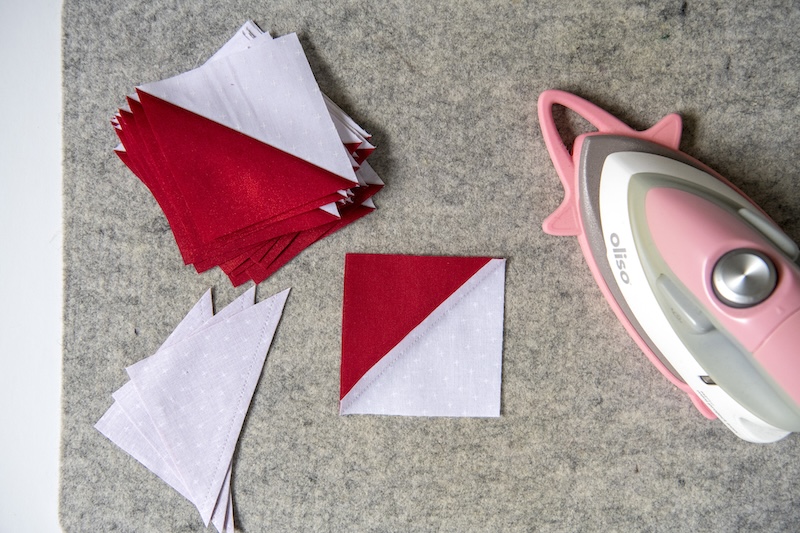
Take to your iron and press each square open with the seam allowance facing toward the red side.
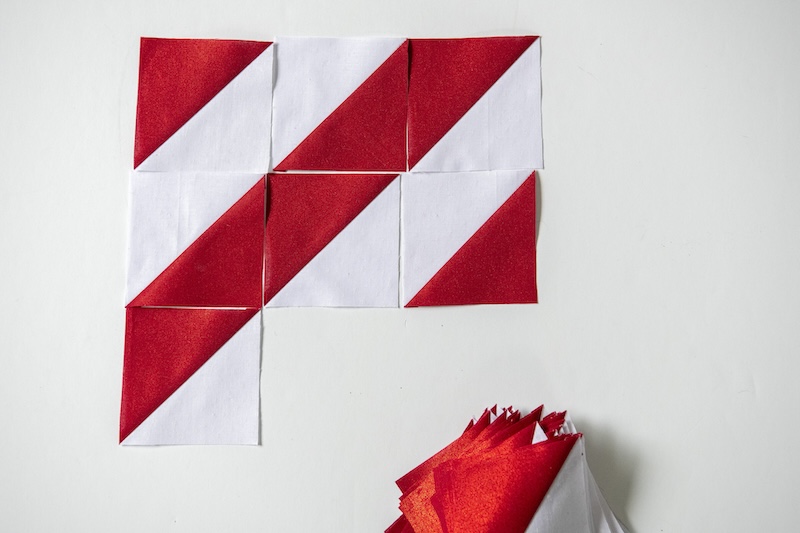
Ok, let’s start laying out our squares. Start in one corner with red up place the next two squares in a diagonal line with the whites facing up. Each line you match the color that is on the bottom of the previous diagonal line with the same color facing up. Hope that makes sense. Lay all of your squares out 5 wide by 13 down.

Sew your squares together.
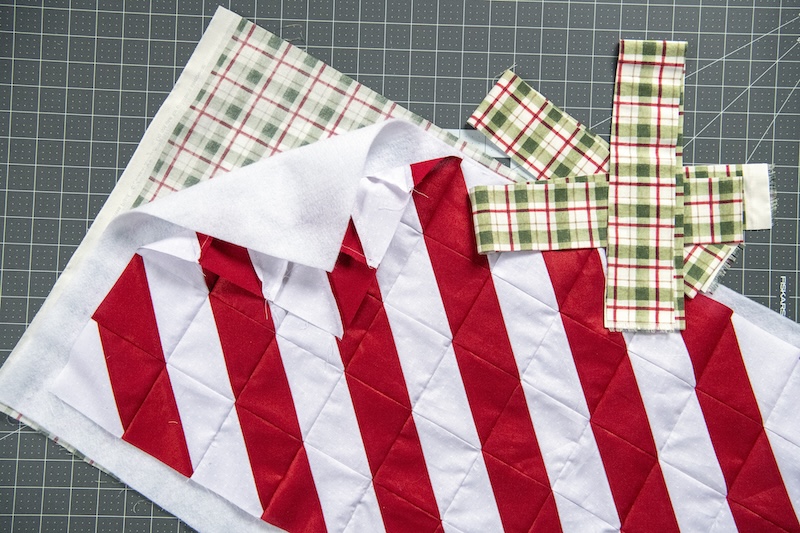
Grab your backing fabric and iron it. Cut three 2.5” wide strips by the width of your fabric for your binding. Cut a rectangles for the backing (I cut it a bit larger and trim down after, so I did 17” by the width of my fabric from salvage to salvage). Also cut your StitchNSew Sew-in Fleece the same size.
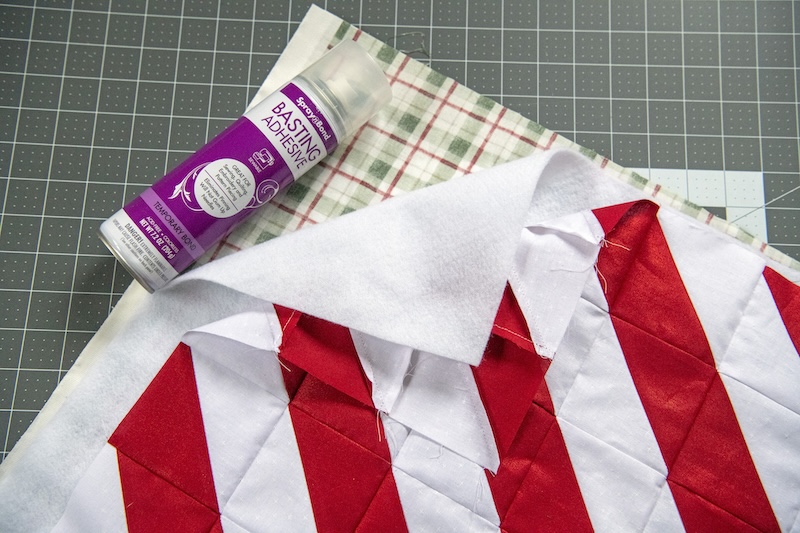
Lay your backing on your work table with the right side facing down. Take your basting spray and attach your sew-in fleece on top. Next lay your pieced runner and lay it on top of your fleece, right side up. Use your basting spray to adhere the two layers together. I’ve used a couple of quilting pins to make sure the layers don’t shift on me as well.
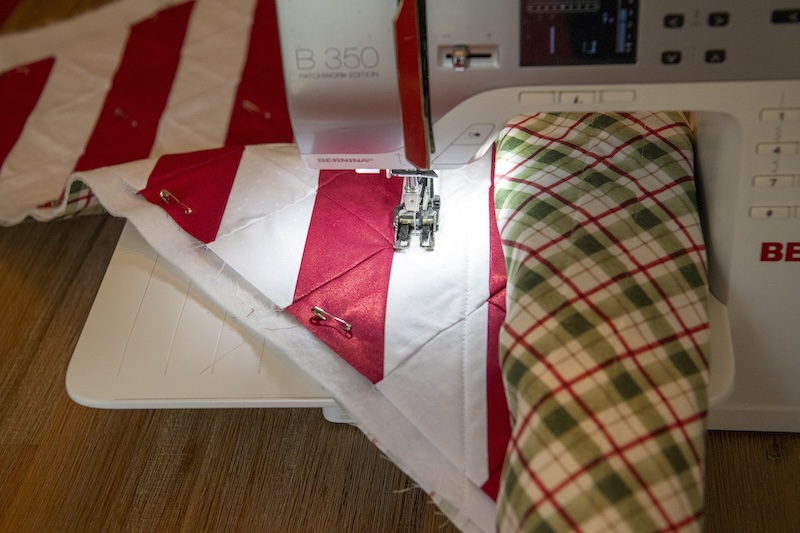
Take to your sewing machine and quilt your runner.
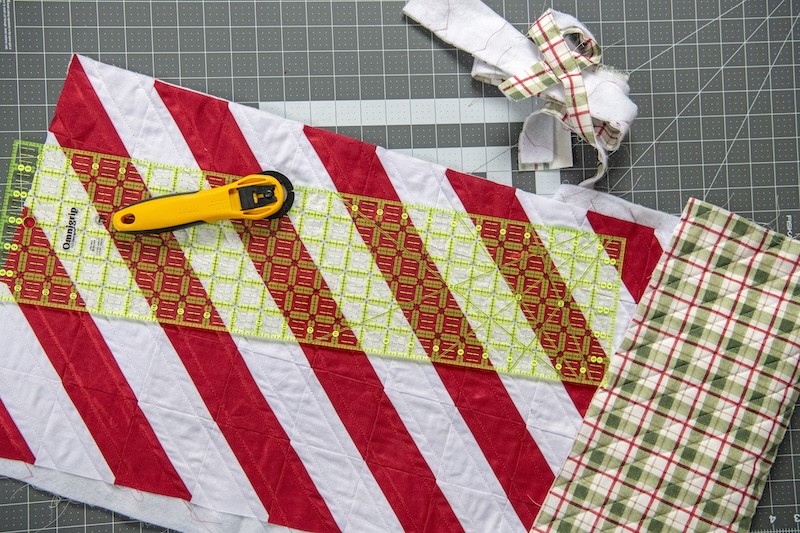
Trim up your table runner.
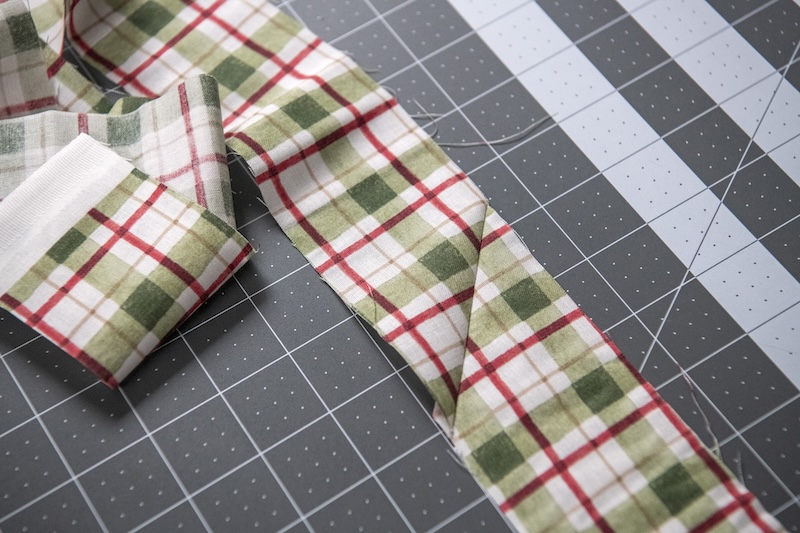
Ok, now let’s get into making and adding our binding. If you have never done so you can find a tutorial that will walk you through the process more in depth here. Take your 2.5” strips and sew them together.
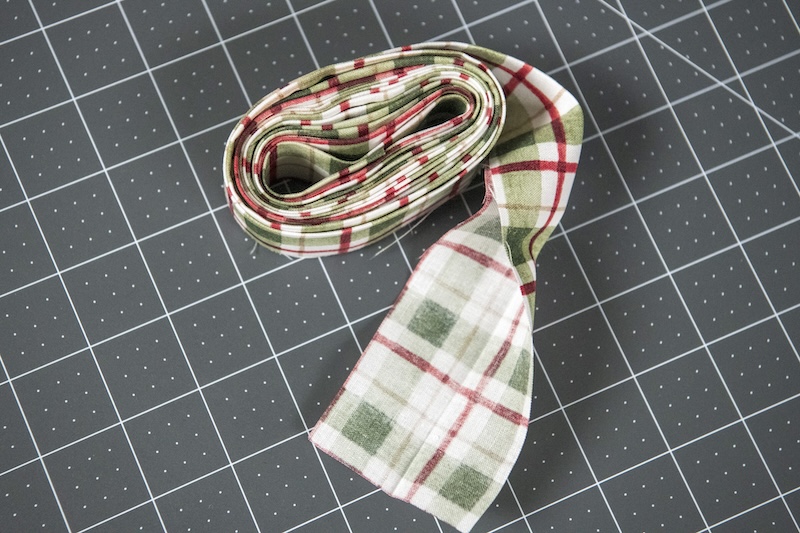
Iron your strips in half, right side facing out.
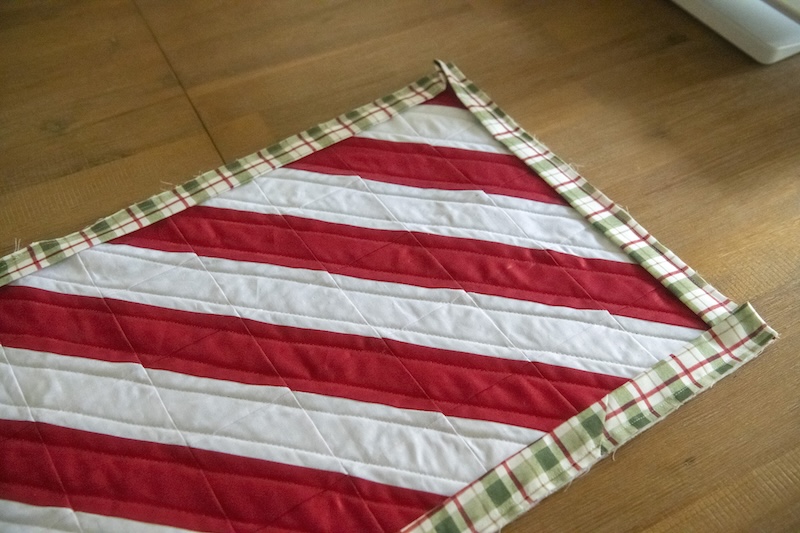
Using your ¼” seam allowance, sew your binding around the outside of your table runner with the raw edges facing out. If you need a refresher or more direction on how to do the corners please check out the link you can find under the previous step.
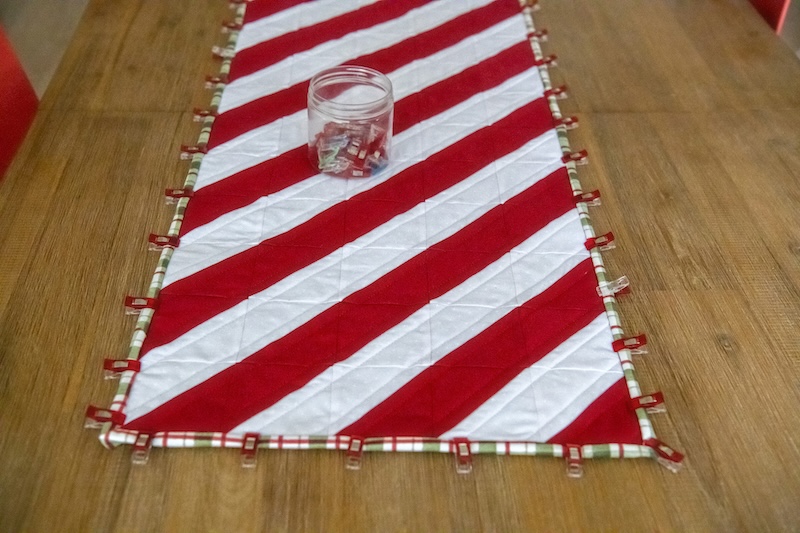
Press the binding and push to the back. Clip in place.
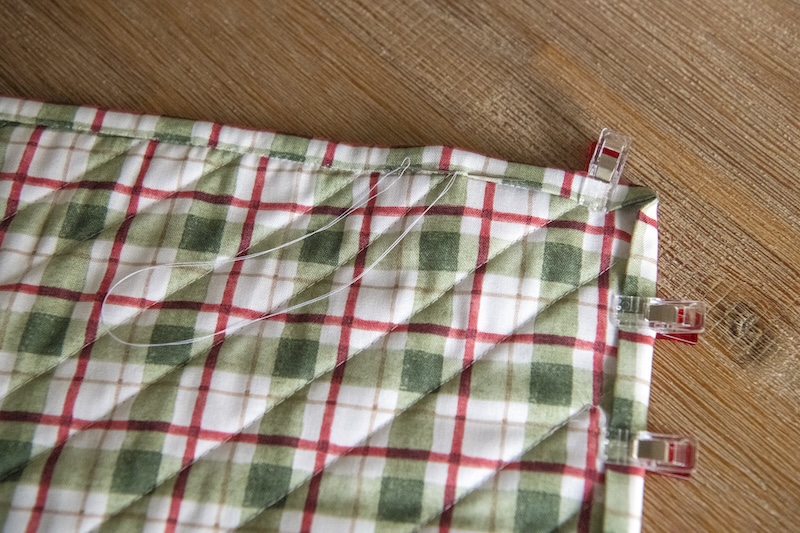
Hand stitch the binding or machine topstitch and you’re done!
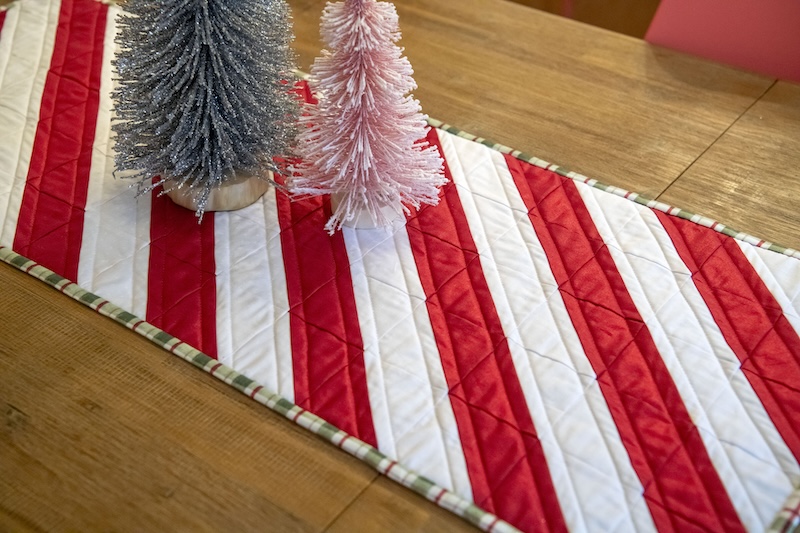
I hope you love your new table runner and found joy in sewing it together. Thanks for sewing along!