


Hello everyone and thanks for stopping by, Deb Riddell here with you today. I’m thrilled to be sharing a Butterfly Birthday easel card created with Rebekah Meier Designs Mixed Media line from Therm O Web and some wonderful products I received from Brutus Monroe, what fun I had playing with them!
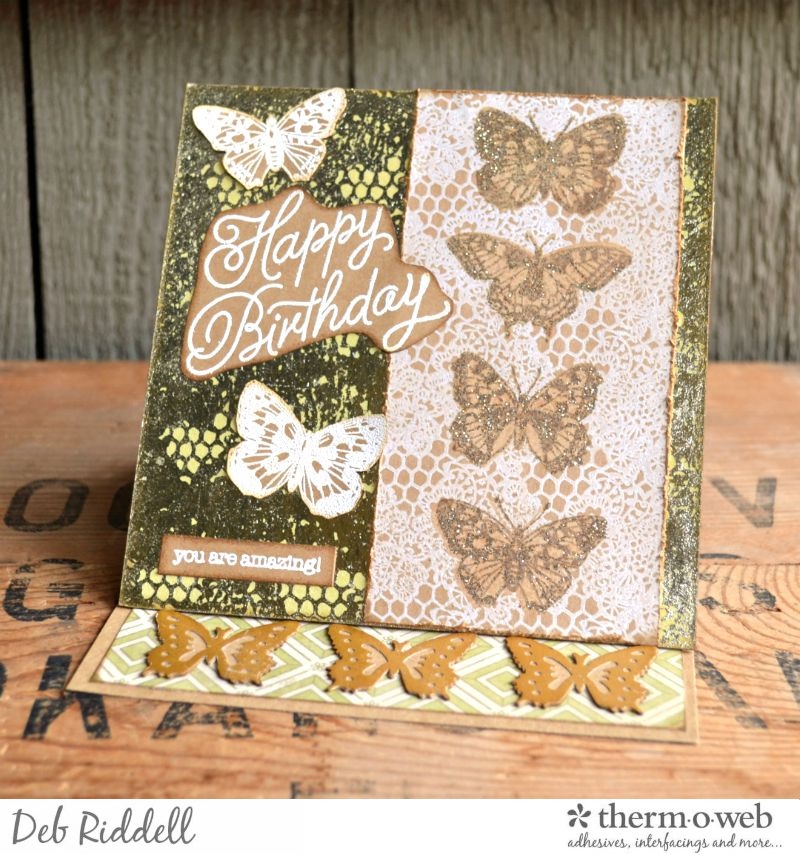
Butterfly Birthday Easel Card With Rebekah Meier Designs and Brutus Monroe
Therm O Web Supplies Used:
Rebekah Meier Designs Mixed Media Art Paper 9″ x 12″ (4 sheets per pack)
Rebekah Meier Designs Mixed Media Art Tape 1.5″ x 8 yd
Rebekah Meier Designs Mixed Media Adhesive Sheets 9″ x 12″ (3 sheets per pack)
Rebekah Meier Designs Transfer Foil 6″ x 6″ (12 sheets per pack) • Vintage Tin
Rebekah Meier Designs Transfer Foil 6″ x 6″ (12 sheets per pack) • Old Gold (Satin)
Rebekah Meier Designs Mixed Media Medium Jar 4 fl oz
iCraft Adhesive™ Tape • 1/2 in
Other supplies used:
Brutus Monroe – Heart Lace Background stamp; Butterfly Sentiments 2.0 stamp; Sticky Glue Pad; Premium Surface Board; Suede Surface Ink; Alabaster Pigment Ink
Foil Laminator • 12 inch
Vintage Photo Distress Archival Ink; Vintage Platinum Glitter Dust – Ranger Ink
Americana Acrylic paint Jade Green; Media Fluid Acrylic paint Titanium White – DecoArt
Birthday Balloons clear stamps – Simon Says Stamp
Wallflower Paper Stash – Advantus
Butterfly Layering punch – EK Success
Miscellaneous – brayer; scissors; paper trimmer; scoreboard; ruler; kraft cardstock; white cardstock; vintage image scrapbook paper; white embossing powder; heat tool
Butterfly Birthday Easel Card Instructions:
Stamp the Brutus Monroe Heart Lace Background stamp onto kraft cardstock with Alabaster Pigment ink.

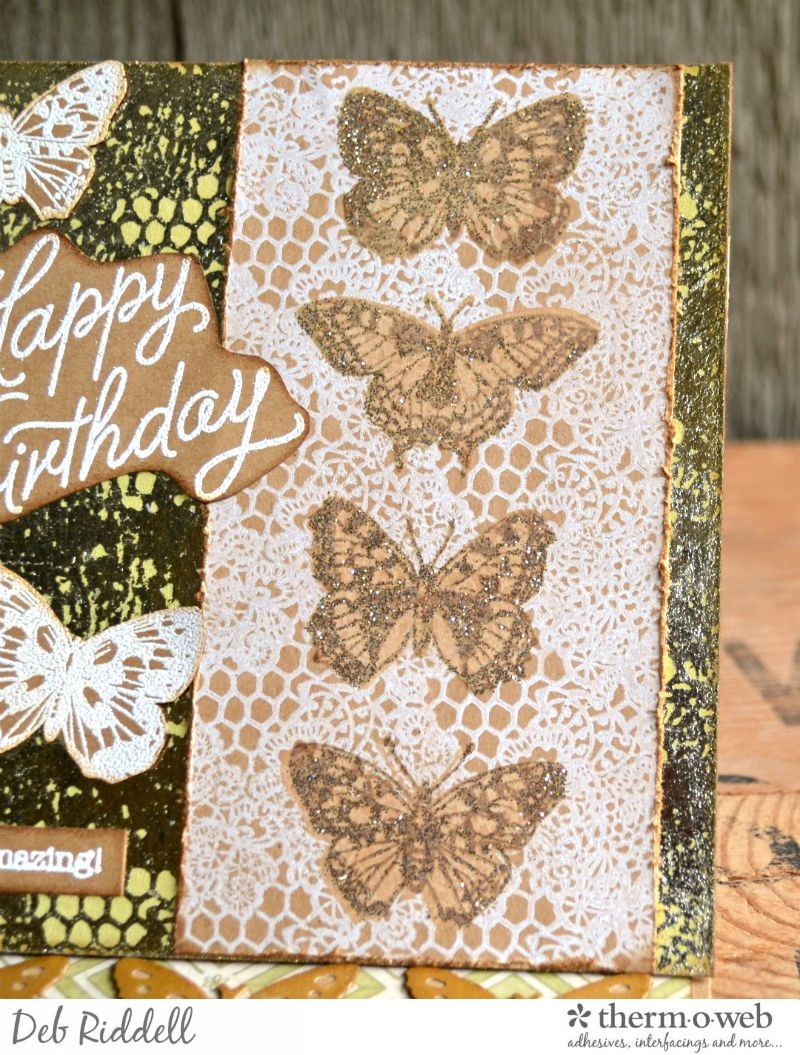
Stamp the solid butterflies from the Butterfly Sentiments 2.0 stamp set down the center of the lace stamped card with Suede Surface ink (love how this ink is just about the same colour as the kraft cardstock!).
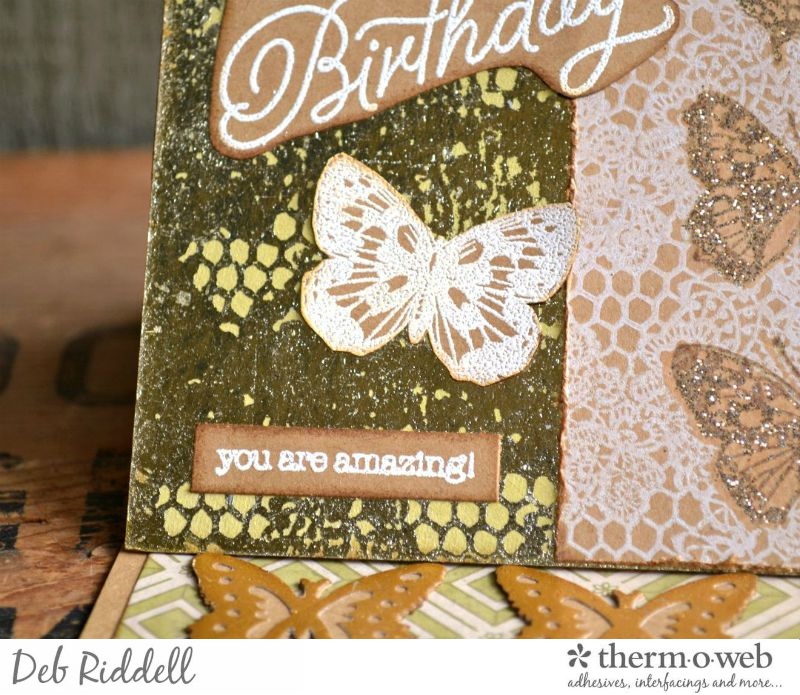
Stamp the detailed butterflies from the Butterfly Sentiments 2.0 stamp set over top the Suede stamped butterflies with the Sticky Glue Pad. Sprinkle on the glitter of your choice (this is Vintage Platinum Glitter Dust) and heat set with your heating tool. Set aside for the time being.
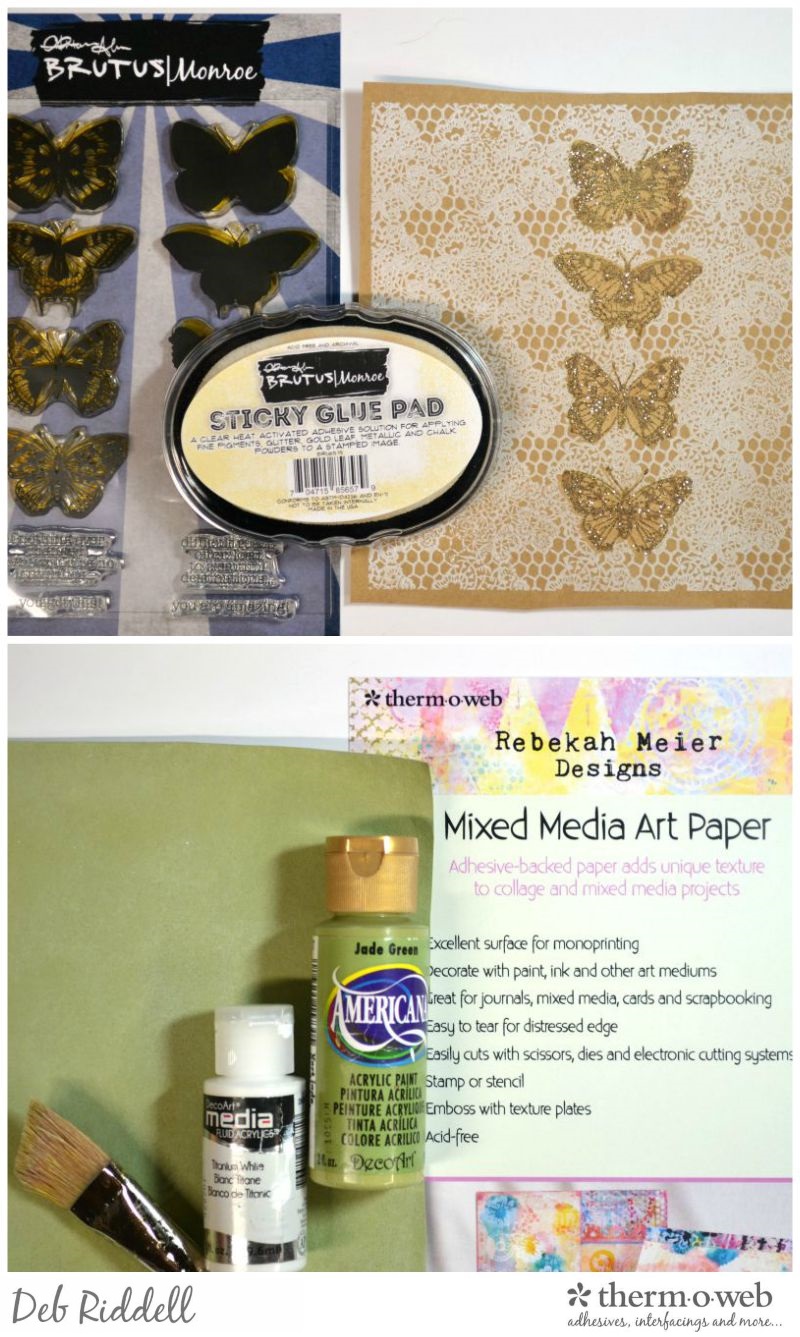
Paint a piece of Rebekah Meier Designs Mixed Media Art Paper (about 5 1/2″ square) with a pale green acrylic paint (this is Jade Green Americana paint with a white wash over top). Dry thoroughly.
Spread some of Rebekah Meier Designs Mixed Media Medium onto your craft mat and run a 6″ brayer through so that it has a LIGHT even coat of medium on it. LIGHTLY brayer the medium onto the Heart Lace Background stamp until it is completely covered and then stamp it onto the painted Mixed Media Art Paper. Don’t push too hard on the stamp, just apply an even pressure and then peel off the Mixed Media Art Paper and set it aside to dry till tacky.
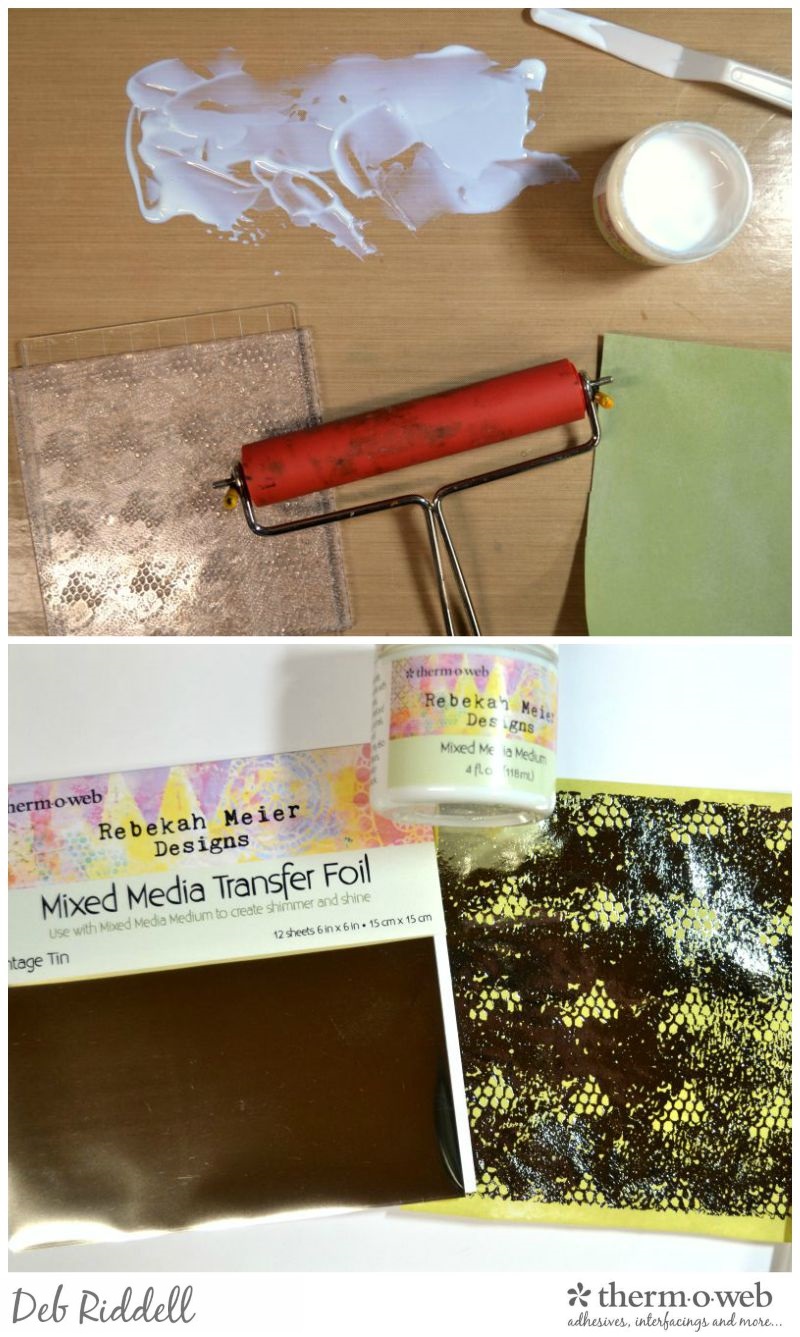
Pre-heat your foil laminator and run the the painted and stamped Art Paper through with some of Rebekah Meier Designs Vintage Tin Mixed Media Transfer Foil.
Important note: if you are a perfectionist this technique will drive you nuts! You will never get a clear foiled stamped image using any wet medium, especially with a stamp as detailed as Brutus Monroe’s Heart Lace Background stamp, regardless of how many times you try. But I just wanted an echo of the lace background on the foiled Mixed Media Art Paper for this project so was actually quite happy with the results!
Peel off the backing paper on the Mixed Media Art Paper to reveal the adhesive and apply it to a piece of Brutus Monroe Premium Surface Board. Trim the board to 5″ square.
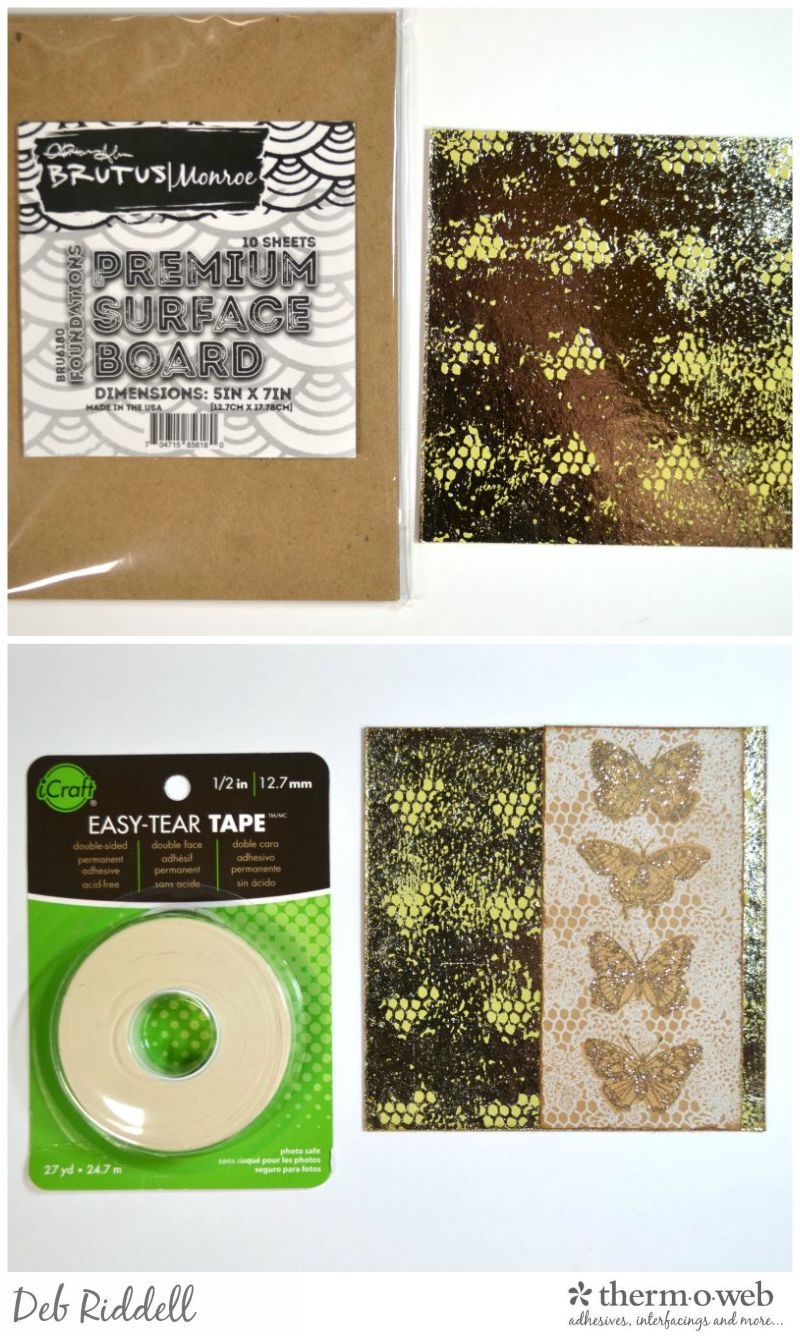
Trim the stamped and glittered butterflies to a strip about 2 1/2″ wide by 5″ long and adhere them to the foiled board with iCraft Easy-Tear Tape. You can tatter and ink the edges of the butterflies if desired as I did. Set the board aside for the moment.
Stamp the ‘you are amazing!’ sentiment from the Butterfly Sentiments stamp set onto kraft cardstock with the Sticky Glue Pad and sprinkle on some white embossing powder. Heat set the embossing powder and trim the sentiment. Repeat the process with a happy birthday sentiment (this one is Birthday Balloons from Simon Says Stamp) and fussy cut.
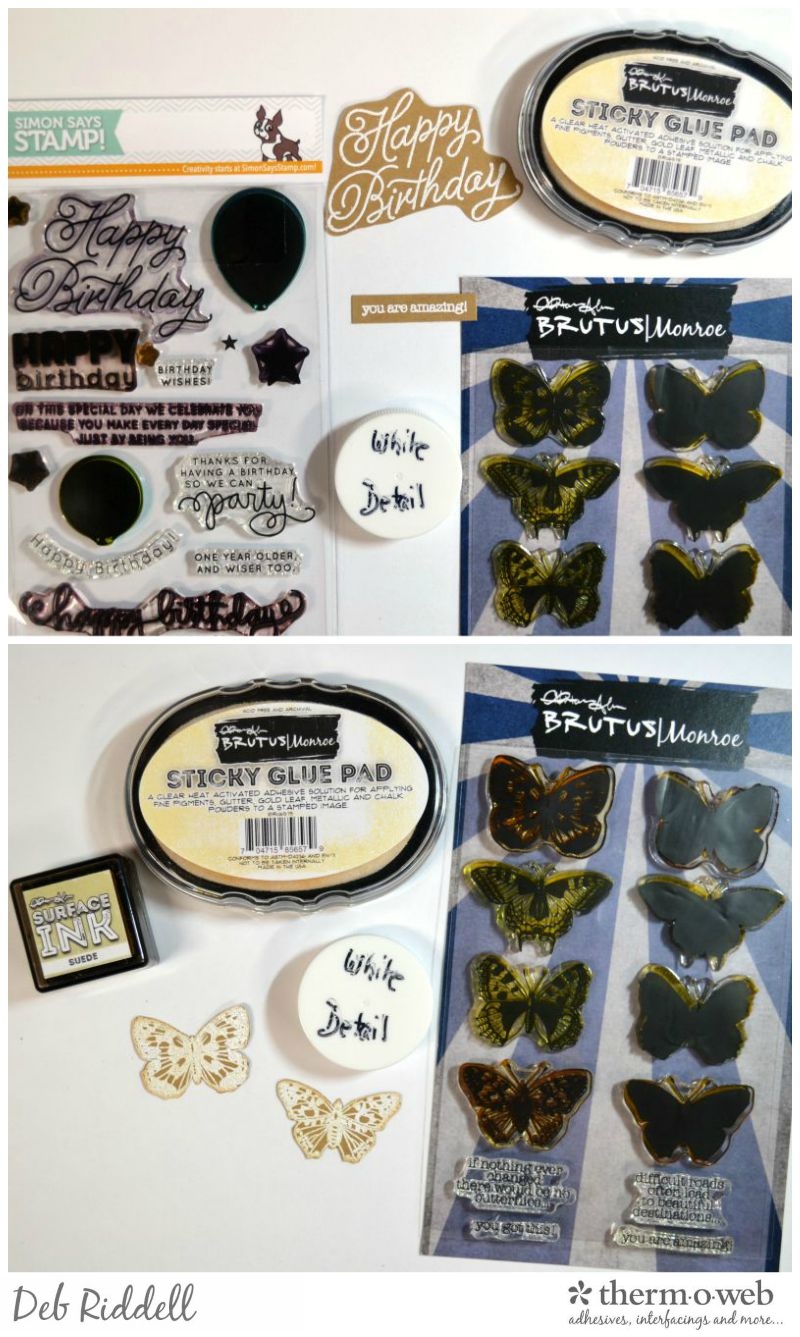
Stamp a couple of the solid butterflies from the Butterfly Sentiment stamp set onto white cardstock with Suede Surface ink. Let dry thoroughly and then stamp the detailed butterflies over top with the Sticky Glue Pad, sprinkle on some white embossing powder and heat set. Fussy cut the embossed butterflies.
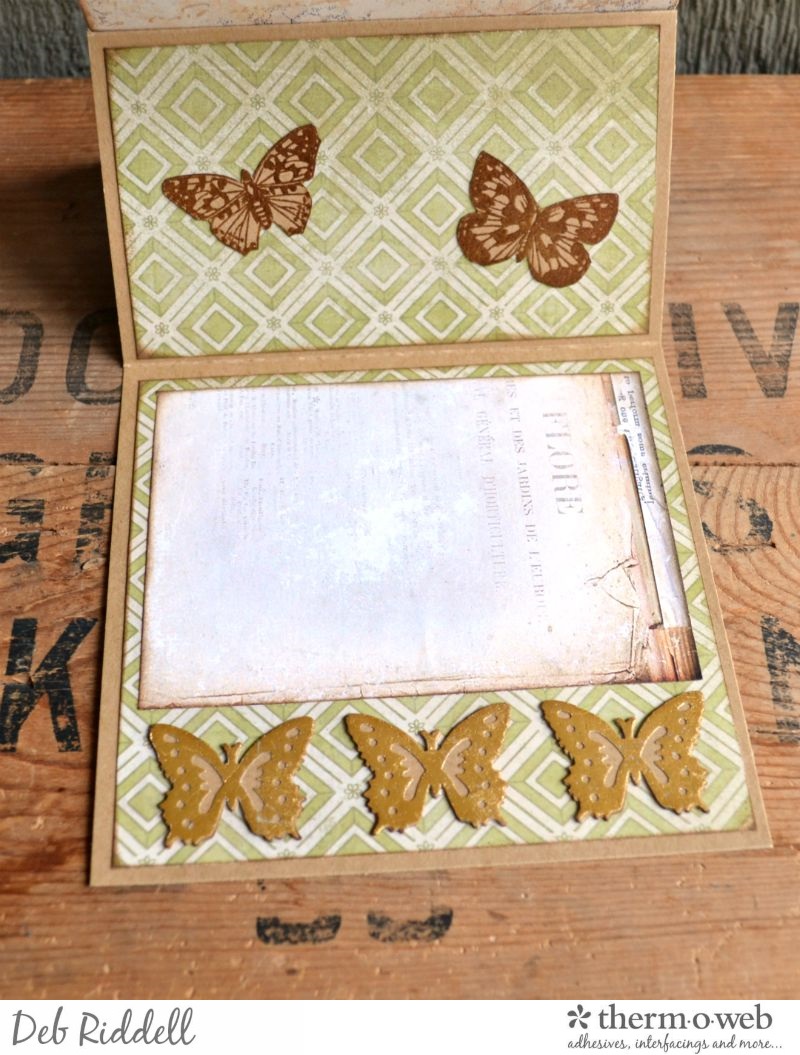
Cut out an easel card from kraft cardstock (this card is 5″ wide x 10″ long, scored at 5″ and 8″) and mat the card front and back with some decorative cardstock (this is from the Wallflower Paper Stash) using iCraft Easy-Tear Tape. Apply some of the Easy-Tear Tape to the card panel where your prepared board will go. If you aren’t sure how to make an easel card, they have a great tutorial over at Craftsy, click here to see it.
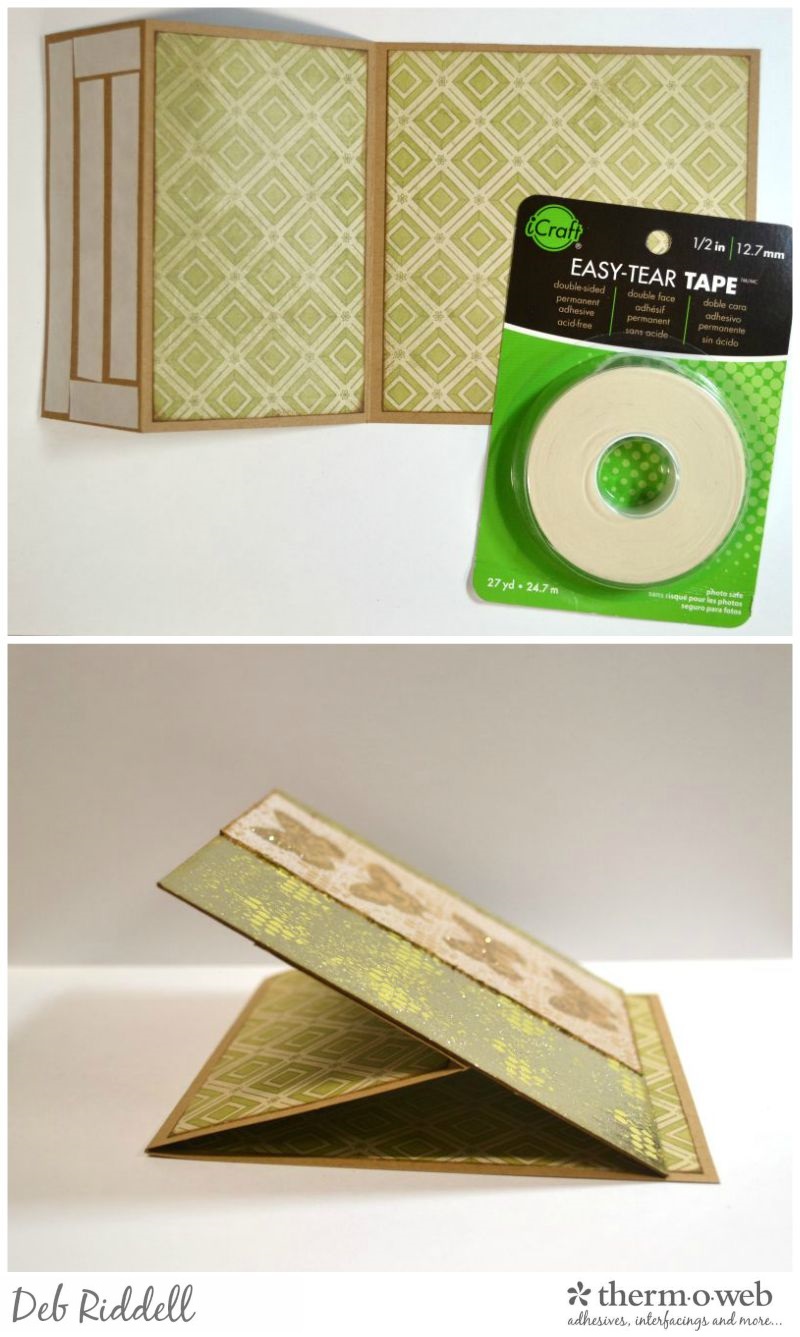
Remove the backing from the Easy-Tear Tape and square up your prepared panel with the easel card and press firmly into place.
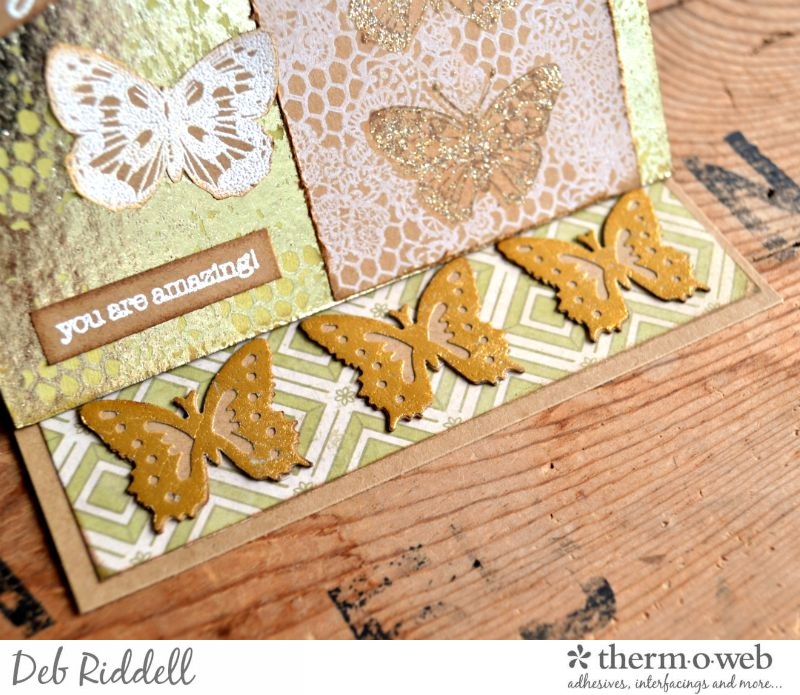
Remove the backing from a length of Rebekah Meier Designs Mixed Media Art Tape and burnish on some of her Old Gold Mixed Media Transfer Foil. Apply a length of Mixed Media Adhesive Sheet to the unfoiled side of the Art Tape and punch or die cut some butterflies from the foiled art tape (this is the EK Success Butterfly Layering Punch).
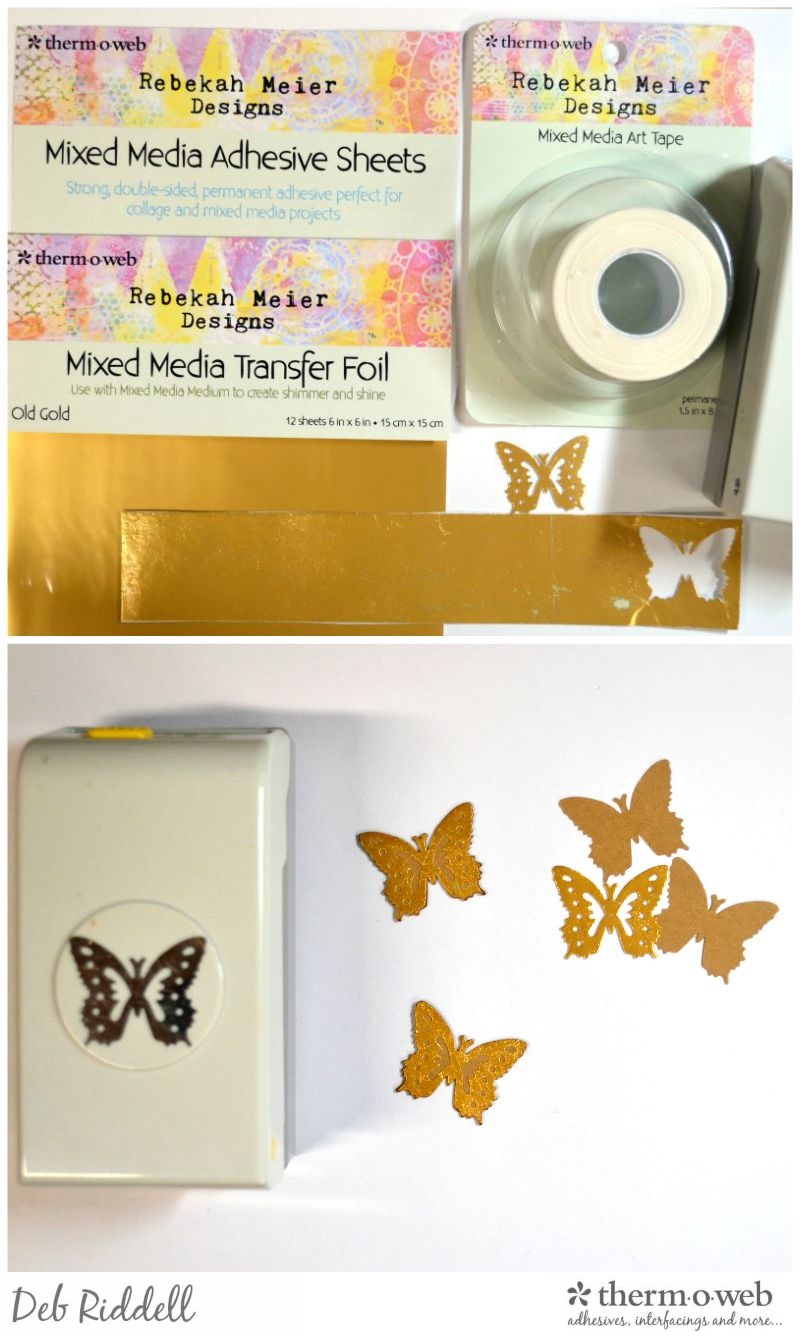
We need to make some ‘stops’ so that our card will stay open in the easel position, so punch or die cut more butterflies from kraft cardstock and layer the foiled butterflies on top (just peel off the backing paper from the Mixed Media Adhesive Sheet on the back of the foiled butterflies and stick them on). I used two layers of kraft butterflies with the foiled butterfly on top for each of my three stops.
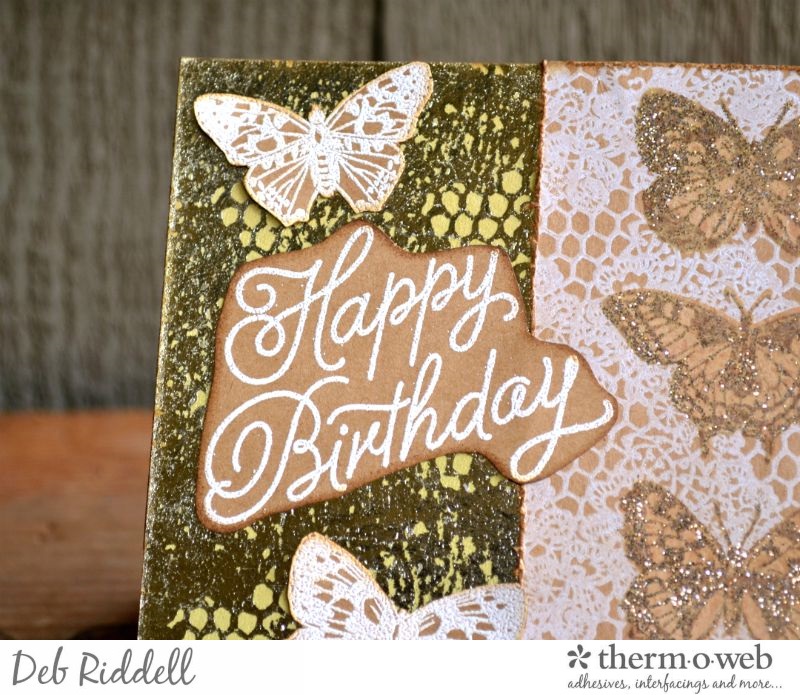
Adhere the embossed sentiments and butterflies to the front of your card.
Adhere the butterfly ‘stops’ along the bottom edge of the card and then add a panel of vintage cardstock above them to write your birthday greeting. I stamped a couple of more butterflies from the Butterfly Sentiments stamp set onto kraft cardstock with brown ink and then fussy cut them to add to the back panel but that step is totally optional.
And with that your Butterfly Birthday easel card is complete, thanks so much to Brutus Monroe for sharing their wonderful products with us here at Therm O Web!
Here are a few close ups of the finished card.
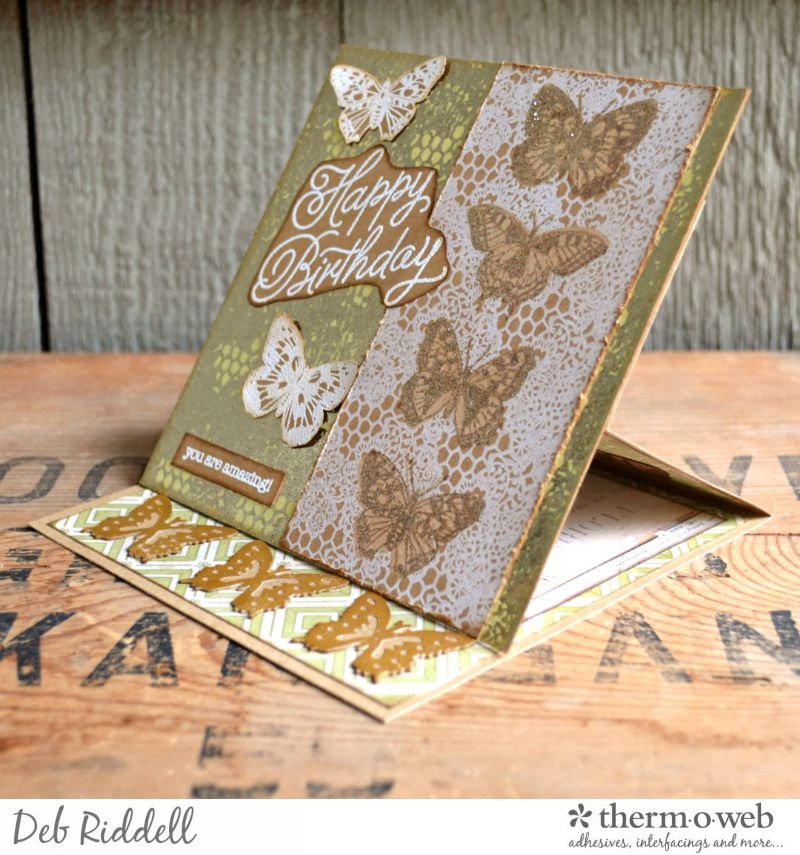
Hope you’ve enjoyed seeing how this card came together, I had so much fun making it. Thanks as always for stopping by today and happy creating!
Deb xo
Once you pick your jaw up after seeing that incredible project…we’d like to invite you to enter to win a $25 Gift Certificate to shop our online store! Select just what is on your wish list! From Deco Foil products, to Gina K. Designs, Zots and SuperTape to Rebekah Meier Designs. Follow the Rafflecopter steps to get yourself entered to win. Then when you’re done…head on over to the Brutus Monroe Blog for more inspiration!
a Rafflecopter giveaway