A big bowl of strawberries with whipped cream sounds so yummy right now! Don’t you think so? Luckily, with warmer weather soon arriving we’ll be seeing baskets of rosy red strawberries in the grocery stores and in our gardens. Just looking at the Strawberry Festival fabrics by Jennifer Heynen of Jennifer Jangles makes it seem like those strawberries have already arrived! Strawberry Festival’s sweet looking strawberries, bright-colored flowers, and polka dots make an amazing combination of fabrics for sewing and quilting.
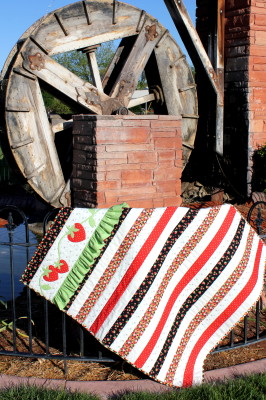
This 40” x 46” row quilt shows off Jennifer’s fabrics and it is so quick and easy, especially since it quilts itself as you sew…fun! With a ruffle, appliqued strawberries, and an added pocket in the back to tuck in a stuffed animal, gift card, or note, this quilt makes a great gift for a baby. Jennifer’s pattern for the Little Love Bunny shown in the photos can be found in her shop.
Strawberry Rows Quilt
![]()
Strawberry Rows Quilt by Carol Swift
What you will need:
Heat N Bond® EZ Print Lite sheets, 8½” x 11”
Heat N Bond® Lite Iron-on Adhesive
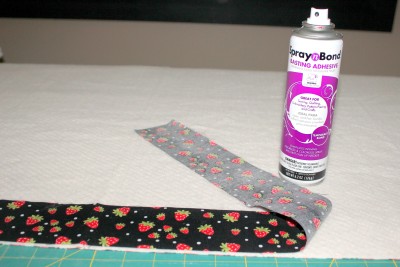
Spray N Bond® Basting Adhesive
Batting/fleece, 42” x 48”
Fabrics of your choice: 3/4 yard each of 6 different fabrics and 42” x 48” fabric for the backing
Cutting Instructions:
Strawberry Festival Black/Gray Starburst: Cut 1 – 6½” x 40½” (applique row)
Strawberry Festival Black/Gray Starburst: Cut 4 – 2½” x 40½”
Strawberry Festival Lime Dot: Cut 2 – 7” x WOF, cut off selvages (ruffle)
Strawberry Festival Lime Dot: Cut 1 – ¼” x WOF, cut off selvages (vine)
Strawberry Festival Black Small Flowers: Cut 3 – 2½” x 40½”
Strawberry Festival BlackBerries: Cut 1 – 4½” x 40 ½” (behind ruffle)
Strawberry Festival BlackBerries: Cut 3 – 2½” x 40½”
Strawberry Festival Red Dot: Cut 3 – 2½” x 40½”
Solid cream fabric: Cut 5 – 2½” x 40½”
Strawberry Festival Black Flower Tiles: Cut 5 – 2½” x WOF, cut off selvages (binding)
Strawberry Quilt Sewing and Applique Instructions
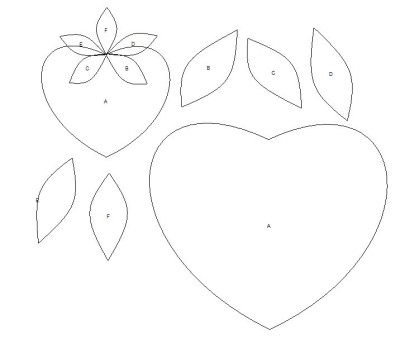
Step 1: *Strawberries and leaves—using an inkjet printer, print out applique pieces on Heat N Bond EZ Print Lite sheets or trace designs to the smooth side of Heat N Bond Lite Iron-on Adhesive. Following the manufacturer’s directions, iron adhesive side to wrong sides of fabrics. Let cool. Cut out applique pieces.
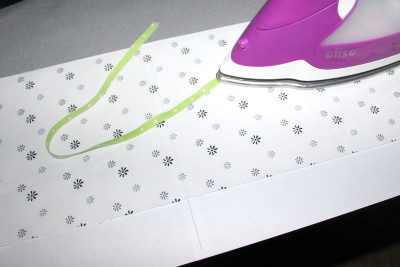
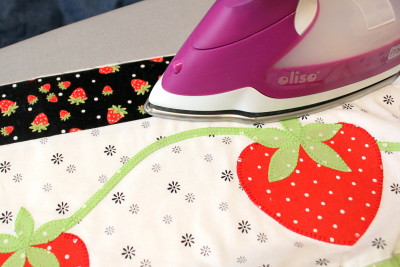
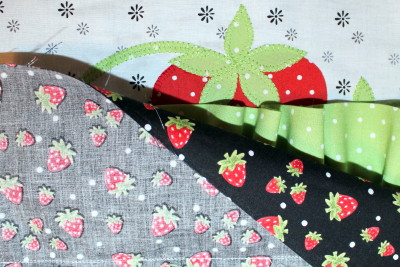
Step 2: Strawberry vine—iron ¼” x 44” Heat N Bond Adhesive to the wrong side of ¼” x WOF vine strip fabric following manufacturer’s instructions. Let cool. Remove backing and apply vine strip to 6½” x 40½” fabric strip as shown below, ironing small sections at a time. The fabric will curve as you iron it in place.

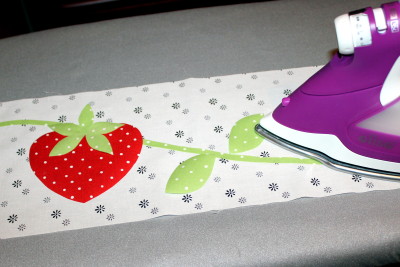
Step 3: Strawberries and leaves—remove the backing from the strawberries and leaves. Apply applique pieces following manufacturer’s instructions to the right side of 6½” x 40 ½” fabric strip placing over vine as shown. *It is recommended that all applique pieces be positioned in place before ironing. Blanket stitch, straight stitch, or zigzag around pieces after appliqueing to the fabric.
Step 4: Quilt backing–this is an easy way to prepare quilt back: Protect the area where you will be working by placing an old sheet of paper under and around the area you’ll be spraying. Place the quilt backing wrong side up on your working surface. Using the Spray N Bond Adhesive, spray about 6-8 inches across the top portion on the wrong side of the fabric from one edge to the other. Place batting on top of the wrong side of the quilt back over the sprayed surface. Smooth fleece/batting to ensure it adheres to the sprayed fabric. Continue this method of spraying and smoothing just 6-8 inches at a time until you reach the bottom of the quilt back. Check for creases or folds.
Step 5: With a washable pen, mark 40½” across and 46½” down on batting as shown in the illustration. Trim along lines to remove excess batting and fabric.
Step 6: Using Spray N Bond Adhesive, spray the wrong side of the first/top 2½” strip. Place strip right side up across top of batting on quilt batting/fleece. Smooth into place making sure it is straight and goes from one side to the other.
Step 7: Place 6½” x 40½” wide appliqued strip right side down on the right side of the first strip. Make sure it will be going the right direction once it is flipped open. Sew ¼” seam across strips. Open and press seam flat.
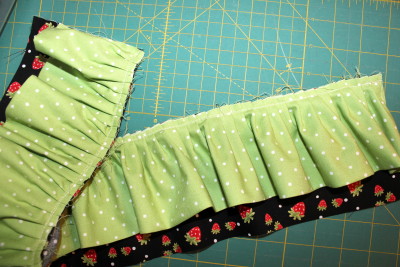
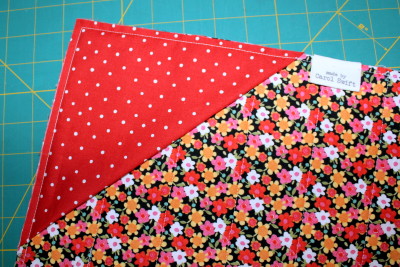
Step 8: To make ruffle–Sew 7” x WOF (remove selvages), right sides together at one short end. Press seam open. Fold in half lengthwise and press to crease.
![]()
Step 9: Gather the raw edge using a long basting stitch or a machine ruffler. Ruffle should be 40½” long when gathered.
![]()
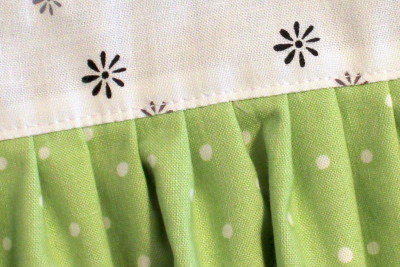
Step 10: Place raw edge of ruffle along the top edge of 4½” strip, right sides up. Stitch ¼” from the top, securing ruffle to 4½” strip.
Step 11: Sew gathered piece, right sides together, to the appliqued row along the ruffled edge. Flip down and press. Sew close to seam above the ruffle.
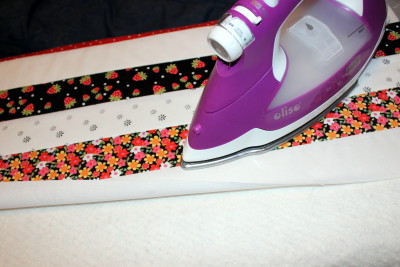
Step 12: Continue sewing strips across quilt batting by placing right sides of strips together, sewing with a ¼” seam, flipping open, and pressing.
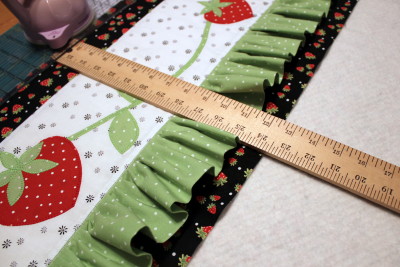
Note: Be sure to measure after adding a few rows to make sure you are keeping the strips straight. It’s easier to make a slight adjustment as you go along rather than finding you are way off when you reach the bottom. Also, changing sewing directions by sewing left to right and then right to left helps keep rows straight, too.
Step 13: After all strips have been added, trim away any excess fabric and batting from the top, bottom, and sides of the quilt. Sometimes there is a little extra at the bottom of the quilt depending on seam sizes.
Step 14: Add addition decorative quilting, if desired.
Step 15: Optional –A pocket can be added to the back of the quilt to tuck in a stuffed animal, note, or gift card. Cut a 7 ½” square and fold to create a triangle. Place on the lower corner and sew raw edges to quilt.
Step 16: Finish with binding using your favorite method. *Bunny pattern not included.