Hello Friends and happy summer!!!
Have you ever wanted to make a Clasp Purse and just haven’t quite had the courage to make one because the clasp part just seems so intimidating? Well, that is ME!!! For so many years I’ve loved the thought of making one… but never quite have the courage to follow through on that thought! Recently I decided the time was right to just do it! So, now that I’ve got a few under my belt and have learned some tips and tricks, I’m here to share it with you today!!!
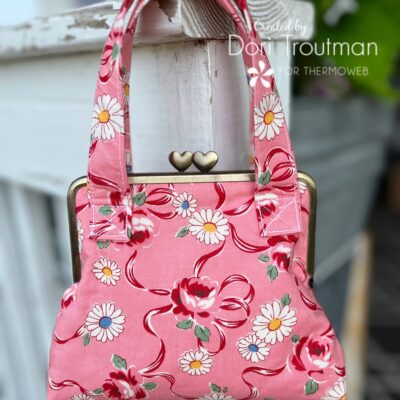
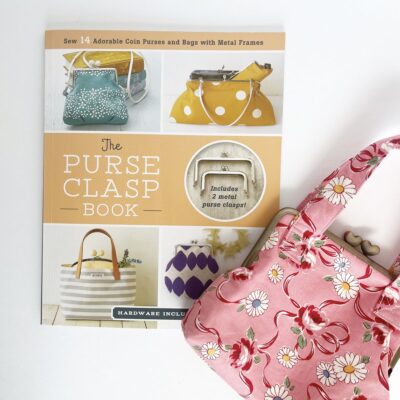
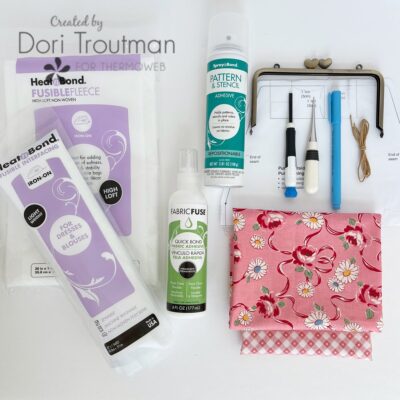
The first thing I need to talk about is this book called The Purse Clasp Book by Zakka Workshop. Included with the book are two metal clasps. Along with all my favorite Therm-O-Web supples… it is such a great way to get an introduction to sewing a clasp purse! Today we are going to make the Happy Heart Purse from the book!
Heart Clasp Purse Supplies
- The Purse Clasp Book
- Metal purse clasp
- Fabric for outer bag, lining, and handle
- Heat n Bond Fusible Fleece
- Heat n Bond Fusible Interfacing (light weight)
- Quick Bond Fabric Fuse
- Spray n Bond Pattern & Stencil Adhesive
- Screwdriver (small flat head)
- Stiletto (optional)
- Erasable Fabric Marker
Step By Step Instructions
Step One: Choose the purse that you will making from the book and gather your supplies. I chose the Happy Heart Purse; however, the clasp for this purse is not included in the book so I ordered it from Zakka. (All the tips and the supplies I’ll be sharing today are for every pattern in the book. Using the clasps included with the book you could make either the Gusseted Coin Purse on page 5 or the Square Pouch on page 38. If you want to make any of the other patterns, you can purchase the correct clasp here.)
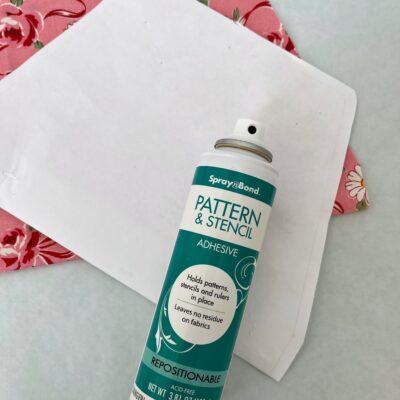
Step Two: Photo copy (or trace) your pattern pieces. Cut out your fabric pieces and fusible fleece according to the pattern instructions.
TIP #1: It is VERY important to cut carefully and exactly along the pattern pieces and fusible fleece. You’ll be glad later, trust me! I used pattern and stencil adhesive to hold my pattern in place to cut and it made all the difference.
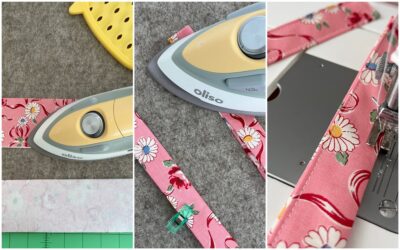
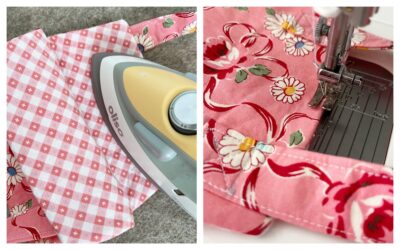
Step Three: My purse has handles so that was the first step in the pattern. The pattern does not call for using the lightweight fusible interfacing, but I chose to use it as I knew it would add the perfect amount of stability to the handles. Simply cut the interfacing the same size as the handle pieces and iron to the wrong side of the fabric to fuse! Fold the short end edges of the handles to the wrong side 3/8 inch and press. Do the same to the long edges. Fold the handle in half, lengthwise and press. Use clips or pins to hold it in place. Topstitch each handle and set aside for now.
TIP #2: Use lightweight fusible interfacing for handles if your purse calls for them.
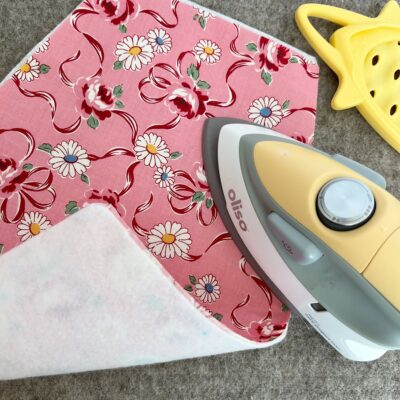
Step Four: Adhere fusible fleece to the wrong side of the purse outside. Be sure to double check that it is completely adhered.
TIP #3: The better the fleece is adhered to the fabric, the easier it will be to work with later.
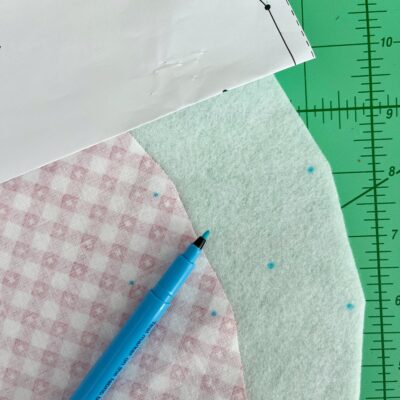
Step Five: Using a fabric marking pen, transfer marks from the pattern piece to the fusible fleece AND to the wrong sides of the lining pieces. (This is also a good time to mark handle location on the the outside of your purse piece – if your purse has handles.)
TIP #4: This is a super important step to get accurate. Basically you lay the pattern piece on the fleece and gently fold over the pattern edge where the dots are and just simply place a dot on your fleece. Do the same on the purse lining fabric.
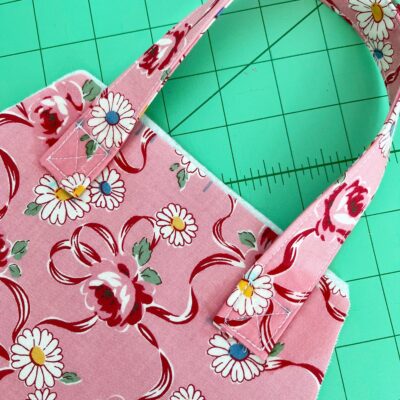
Step Six: If your purse has handles like mine, this is the time to attach them. Follow the instructions on your particular pattern.
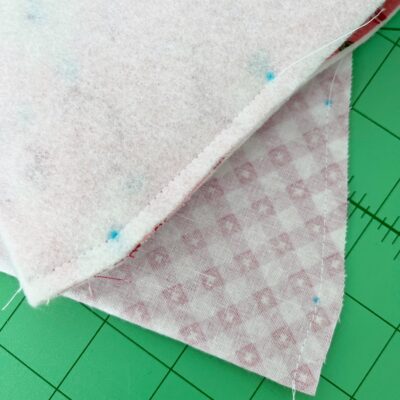
Step Seven: We will begin sewing the purse together now. My pictures and instructions are for the Happy Heart Purse. Fold the purse outside in half with right sides together and sew a 1/4 inch seam along each side, stopping at the end of the seam marks. Repeat with purse lining.
TIP #5: Be very sure that you stop right exactly at the end seam mark, not before it or past it! This makes all the difference in how your clasp will fit on the purse. Back stitch so the seam doesn’t come undone. On my purse the bottom mark is where the seam pivots.
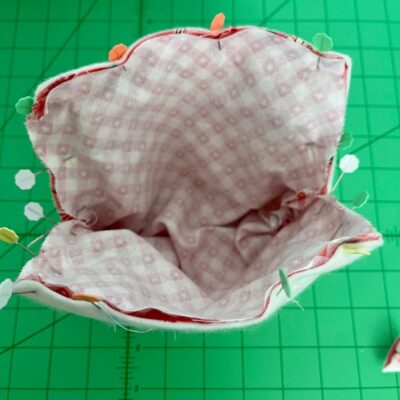
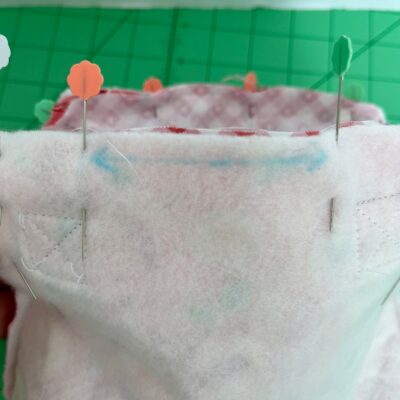
Step Eight: Turn the purse wrong side out and the lining right side out. Place the lining inside the purse, right sides together and pin or clip all the way around. (Be sure to push the handles inside between the lining and outside fabrics.) You will need to leave an opening for turning.
TIP #6: Use your fabric marking pen to draw a line where you will leave an opening for turning. It will help you remember not to sew it closed!
TIP #7: As you sew around the edges, be sure to sew a precise 1/4 inch seam. Sew slowly and carefully. It is tricky when you go around the marked seam ends, but if you go slow you’ll be just fine! I VERY carefully clip the seam allowance along the curve so that when you turn the bag right side out, you can really press that area flat. Be careful not to clip through the seam.
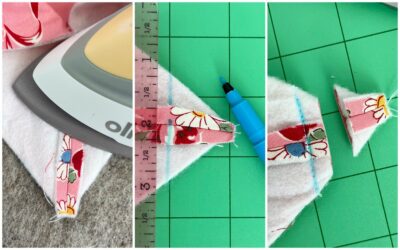
Step Nine: Miter the corners of the purse pressing the side seams. Bring each side seam to meet the bottom fold of the purse. Mark a line at exactly one inch from the edge. Sew along that line. Cut fabric end at 1/4 inch from the seam you just sewed.
Step Ten: Turn the purse right side out, pushing it through the opening you left at the top. Be sure to push the mitered corners at the bottom of the bag so that you can confirm they are accurate! Once you have it all pushed out, iron the opening at the top of the bag carefully and then close it up with an 1/8 inch seam. (This seam will be hidden in the clasp when it is attached.)
Now the fun part starts (seriously)!! Lets install the clasp. Here are a few tips before we begin:
TIP #8: Use ONLY Therm-O-Web fabric fuse adhesive. The first purse I made, I used another glue and I fought and fiddled with it to get it to stick and hold. It was about that time that I received the fabric fuse adhesive and I tried again… absolute game changer. So this is a MUST for this project. (I’ve shared this tip with many people and everyone tells me later that it changed the whole process for the better!)
TIP #9: This is not a difficult step but if you know going into it that it requires a little time and patience it will make it all the easier! Also, a great thing to be aware of is that the glue does not dry immediately; you have time to work slowly. So do not feel rushed. TAKE YOUR TIME!!!
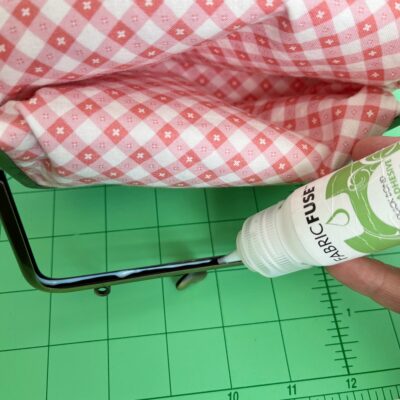
TIP #10: You don’t need a lot of glue, just a consistent bead in the channel. The fabric fuse bottle has the perfect tip and opening to do this absolutely flawlessly.
TIP #11: I used a stiletto to gently push the fabric into the clasp and I was really happy with the result. However, be careful that you aren’t actually poking holes in the fabric, just gently pushing and guiding. You can also just use your fingers to guide for this as well but I did prefer the stiletto as it really helped move the fabric.
TIP #12: Work with one clasp side at a time. Do not worry about the other side until you are perfectly comfortable with the placement of the first side of the purse! Keep the clasp open.
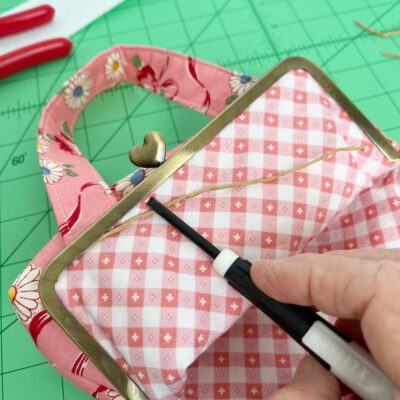
Step Eleven: Run a bead of the fabric fuse inside the channel of the clasp. Remember my tip: it doesn’t require a lot of glue and honestly if you have too much glue it is actually worse as it will ooze out and cause loads of frustration. My picture below shows exactly the amount you want to place.
Step Twelve: Okay, so… take a deep breath and lets begin placing the your purse inside the channel. Remember we are only working with one side. So take a minute to get things kind of situated to make it the easiest way for you to hold your fabric, your purse clasp and your stiletto (if using) in order to begin sliding the fabric into the channel. You can choose to work your fabric either on the outside of the purse or the inside. I seem to find it easier to work on the outside for this part of the step. Just keep gently and patiently working to slide it into place. Once you have it where you want it, let it (and yourself!) rest a few minutes and then do any little tweaking that needs to be done. This is where I found the stiletto to be really handy. I could move the fabric just a tiny bit. By now the glue is holding it very well, but it can still be moved.
TIP #13: Do NOT expect it to just slide in perfectly the first try!!! Take your time kind of gently working one bit at a time. If you’ve just used a nice light bead of glue it will be the perfect amount to begin sticking and holding your fabric (but it still VERY moveable).

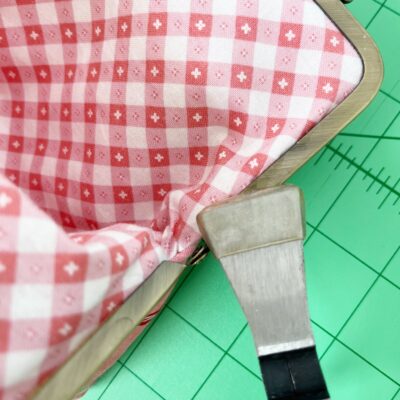
Step Thirteen: Now you will use the twine that came with your clasp. Cut three pieces for each side of the purse. (Your instructions will show you the length to do this for the pattern you have chosen.) Lay the little twine on the inside of the purse along one side. Use the little flat head screw driver to gently push the twine into the chanel of the purse. By now your fabric is set and probably already adhering to the glue but it is still wet so the twine will begin to stick to the fabric and the channel very quickly. This seems like an unnecessary step but it is very important as it creates one more thing for the fabric to stick to and it fills any void left in the channel. You may have to really work and push to get it to go up in the channel and that is good. You want it to really fill that void in the channel. Repeat with remaining pieces and take your time!
TIP #14: Once you have one side completely in place, let it rest about 10 minutes and then repeat the whole process on the other side of the clasp.
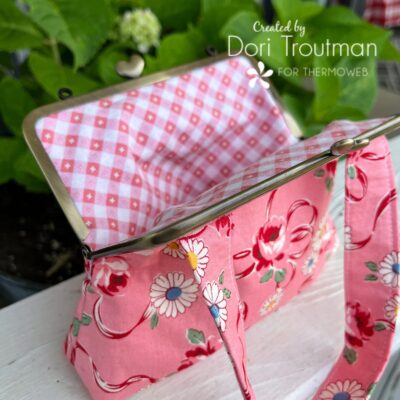
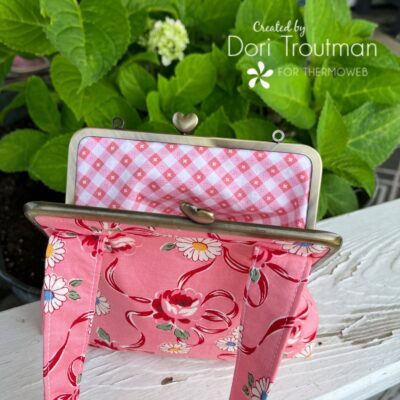
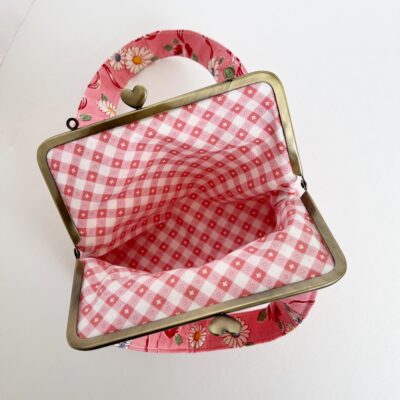
Keep in mind that when your clasp is properly installed there will be a gap in the fabric below the hinge when the purse is open. That gap will close when the purse is closed. If you have sewn your seams exactly as they were marked on the pattern this is how is will look (open and closed):
Step Fourteen: Once you have your purse clasp completely installed, leave it and walk away!!!
TIP #15: Don’t be temped to close or open the clasp just yet! Been there, made that mistake! You want your glue to be completely and totally dry. I leave it at least 3 hours.
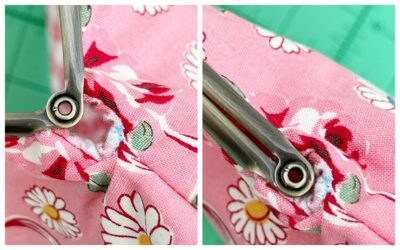
Step Fifteen: The very last step is to use a pair of pliers to gently squeeze the very end of the clasp on each side. You don’t want to over-squeeze it or you will leave an indent in the clasp. Be very careful not to scratch your clasp.
TIP #16: Place a piece of batting over the edge of the clasp to keep it from getting damaged from the pliers. OR if you have pliers that are used for attaching other metal pieces (like a key fobs, etc..) and have a plastic cover, be sure to use those. That is what I used.
TIP #17: Final tip!!! If you end up with any glue on the clasp, you can easily remove it with a little rubbing alcohol on a paper towel. Gently rub the glue until it is gone.
And WOW WOW WOW!!!!! Your clasp purse is finished!! Open and close it to your hearts desire!! And be honest… isn’t it the absolute cutest thing ever?!!!