


Today we are celebrating animals with this bright and cheery, picnic quilt.
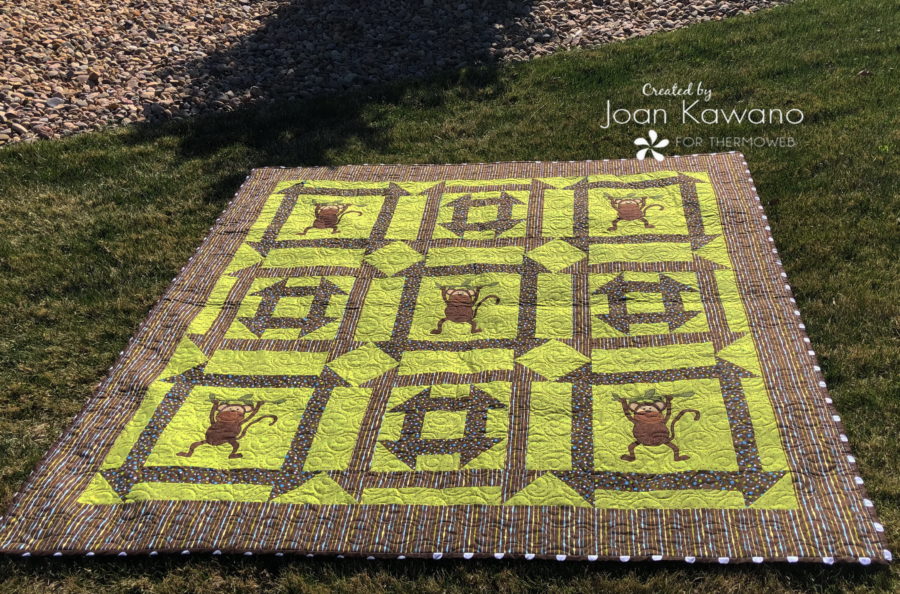
5 Little Monkeys Picnic Quilt
by Joan Kawano @ MooseStashQuilting
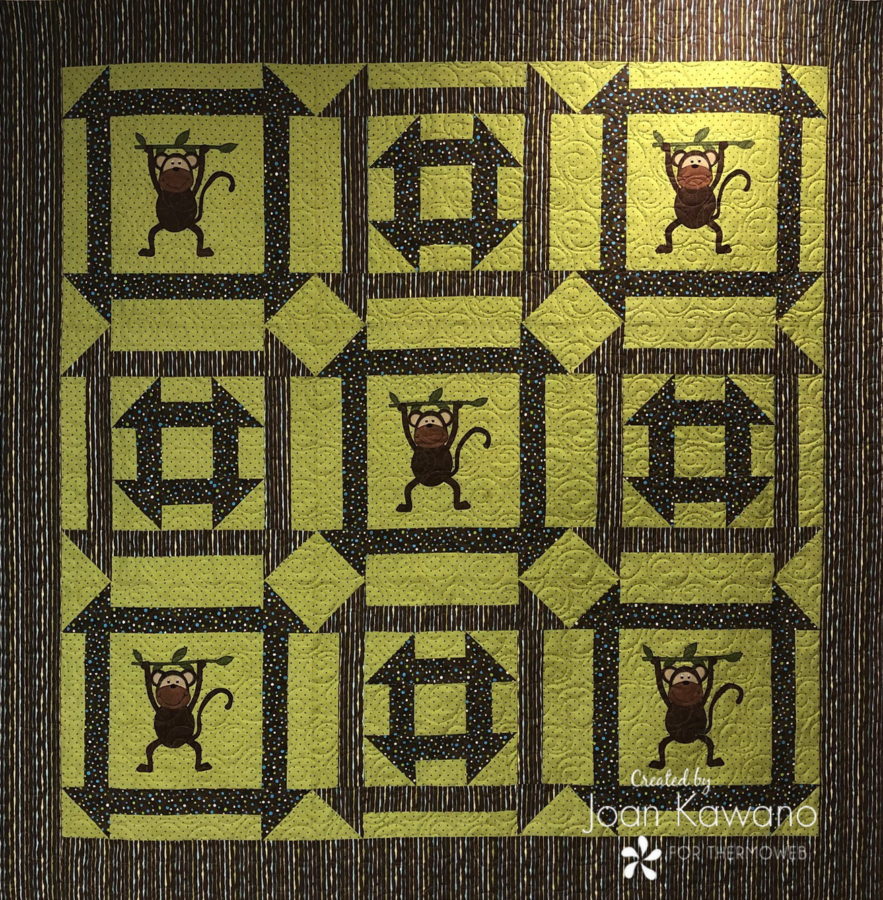
This 68 1/2″ x 68 1/2″ quilt is the perfect size to seat all the monkeys, at your picnic.
Start with downloading the“5 Little Monkeys” pattern. You will find the applique and layout sheet included.
Supplies
Fabric
3 yards of background fabric
1 1/3 yards fabric A (dots)
1-yard fabric B (stripe)
1 1/4 yard border fabric
4 yards backing
1/2 yard binding fabric
(if using backing fabric there should be plenty leftover, for binding)
NOTE: if you use a stripe as I did, you will need to allow extra for the border, to keep stripes
going in the correct direction. The border length is approximately 68 ½” long.
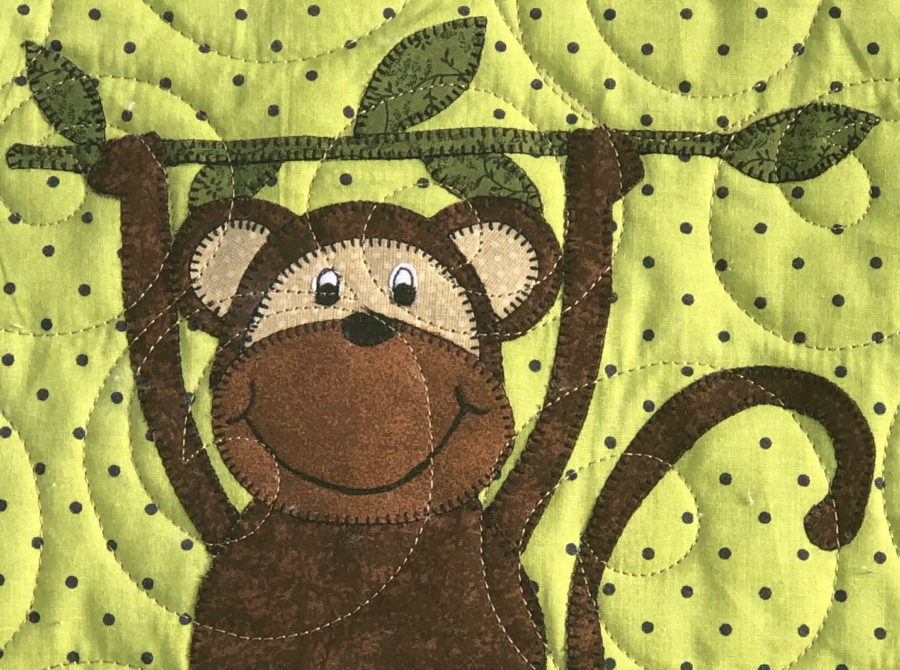
Applique scraps
Fat quarter dark brown for monkey body applique
2 ½” x 15” light brown for muzzles
2” x 15” tan for face and inner ears
7 ½” x 10” for leaves and branches
Scraps of black and white for eyes
Additional supplies
1 twin-size batting
Thread to match
Applique pressing sheet
Rotary cutter, mat and ruler
Please read through the complete pattern before beginning.
Cutting
Background fabric
5 strips, 12 ½” wide (subcut into 5- 12 ½” x 12 ½” squares and 36- 2 ½” x 12 ½” rails)
3 strips, 10” wide (subcut into 7- 10” squares for corner half-square triangles)
2 strips, 4 ½” wide (subcut into 4- 4 ½” squares and 16- 2 ½” x 4 ½” rails)
Fabric A (dots)
2 strips, 10” wide (subcut into 5- 10” squares for corner half-square triangles)
2 strip, 12 ½” wide (subcut into 20- 2 ½” x 12 ½” rails)
1 strip, 4 ½” wide (subcut into 16- 2 ½” x 4 ½” rails)
Fabric B (stripe)
1 strip, 10” wide (subcut into 2- 10” squares for corner half-square triangles)
1 strips, 12 ½” wide (subcut into 8- 2 ½” x 12 ½” strips)
3 strips 2 ½” wide (subcut into 8- 2 ½” x 12 ½” strips)
Border fabric – 7 strips 5 ½” wide
Binding fabric – 7 strips 2 ½” wide
Assembly (use ¼” seam unless otherwise noted)
Start with layering the 7, background 10” squares with the 2 fabric A and 5 fabric B, 10” squares right sides together. Draw an X on the lighter side of each set.
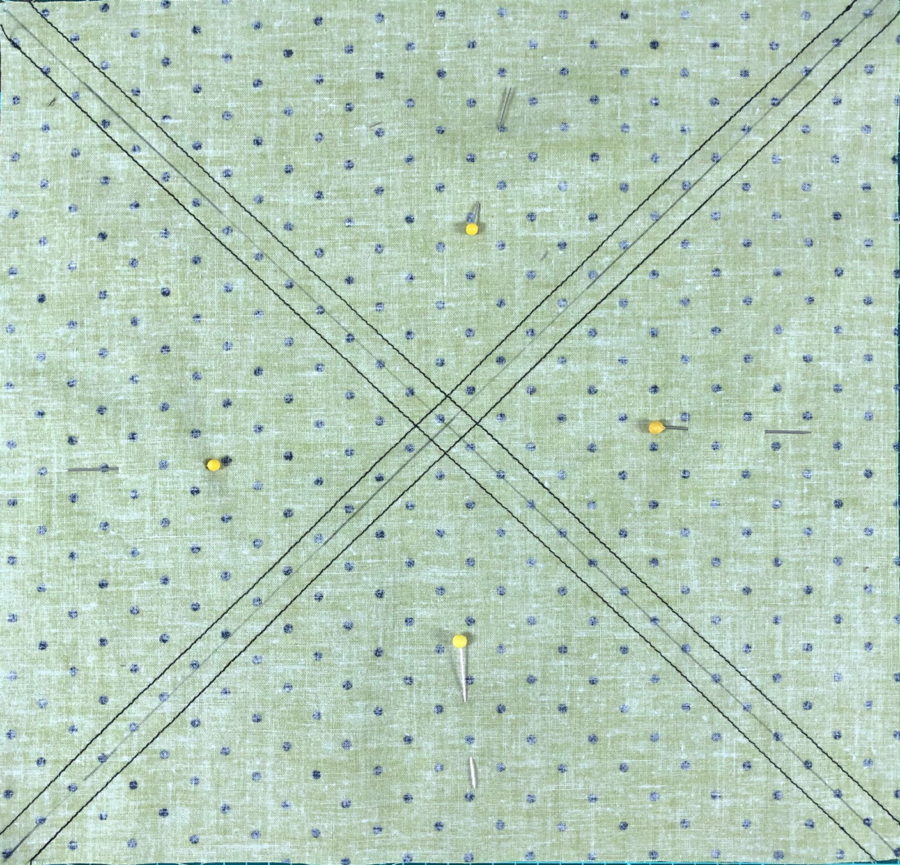
Pin and stitch using a scant ¼” on either side of the “X” from corner to corner. Using your rotary cutter and ruler, carefully make 1 cut 5” in from the side and 1 cut 5” up from the bottom. Take care to make sure your block doesn’t shift during this process. Cut apart on drawn lines. You will now have 8 separate pieces that will create your corner half-square triangles. Press open and trim to 4 ½” square.
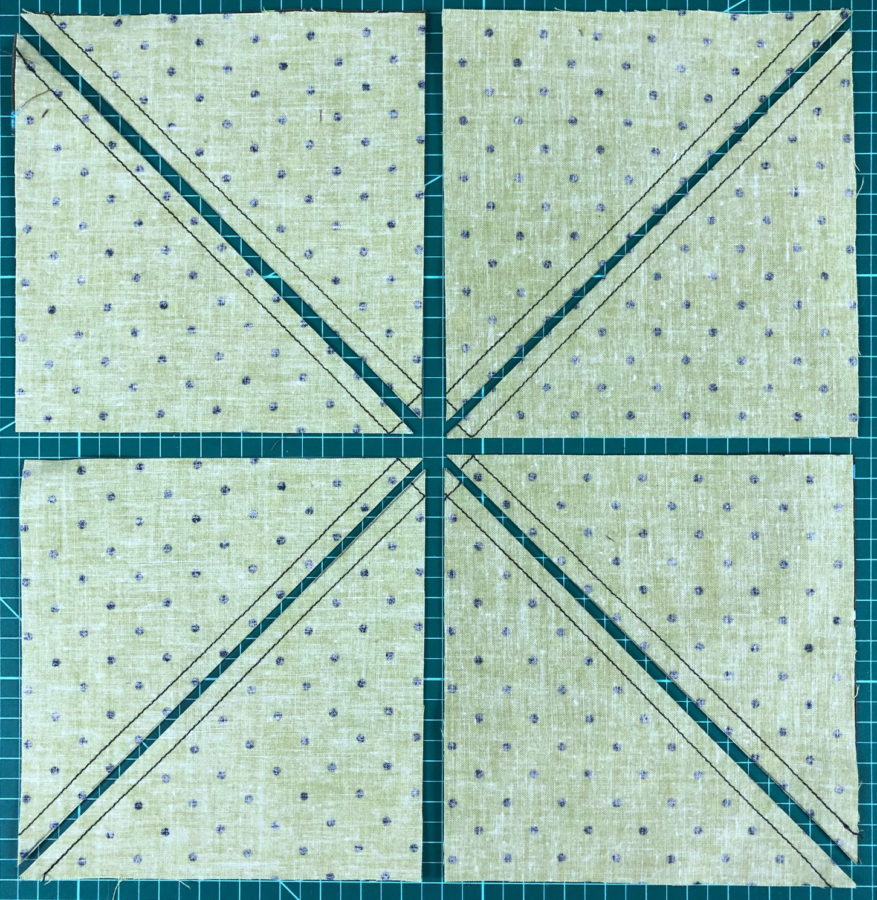
Here’s a tip…The nice thing about this process when working with stripes is that it automatically will give you enough half square triangles, for 2 blocks with the stripes going in the correct direction.
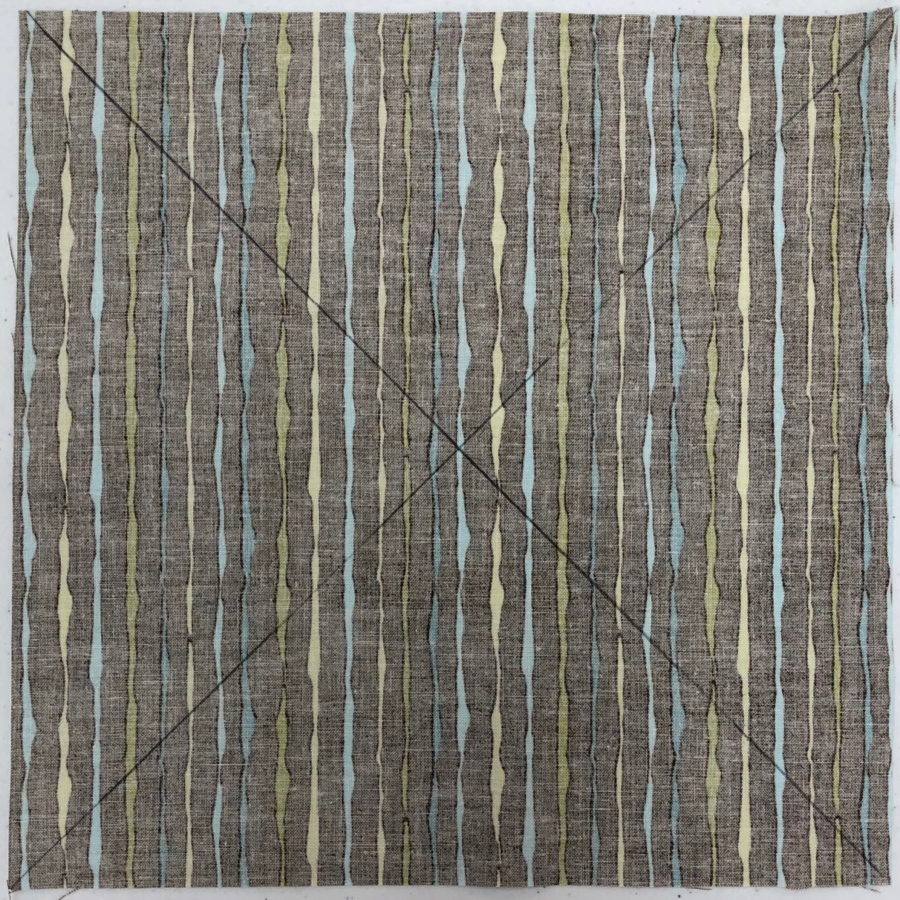
Did you know that you can make any size half-square triangles with this method? Start by doubling the “finished” size of your desired block, then add an additional 1 ¾” and round up. For this block, our “finished” size is 4”. Doubled makes it 8” plus the 1 ¾” is 9 ¾. Round up to the nearest ¼”. That’s 10”.
Churn Dash Block
Take your 16, 4 ½” rails of background and fabric A and piece them together. Press open.
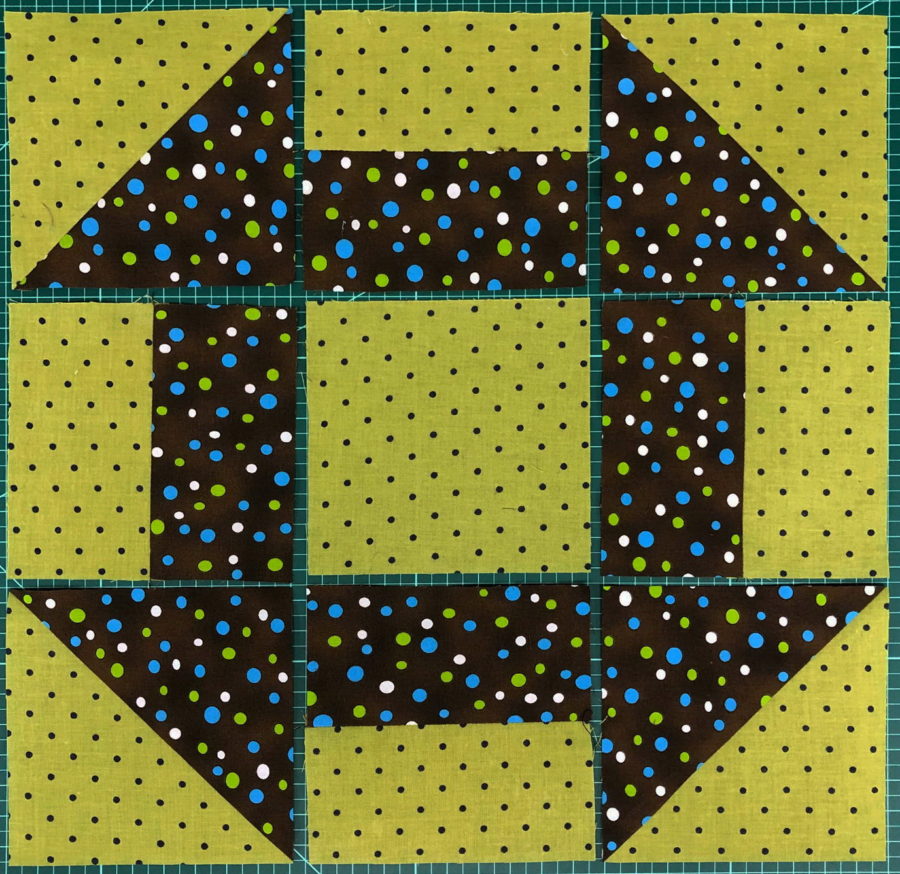
Using the photo as a guide, make 4 blocks. When complete blocks will be 12 ½” square. Set aside for now.
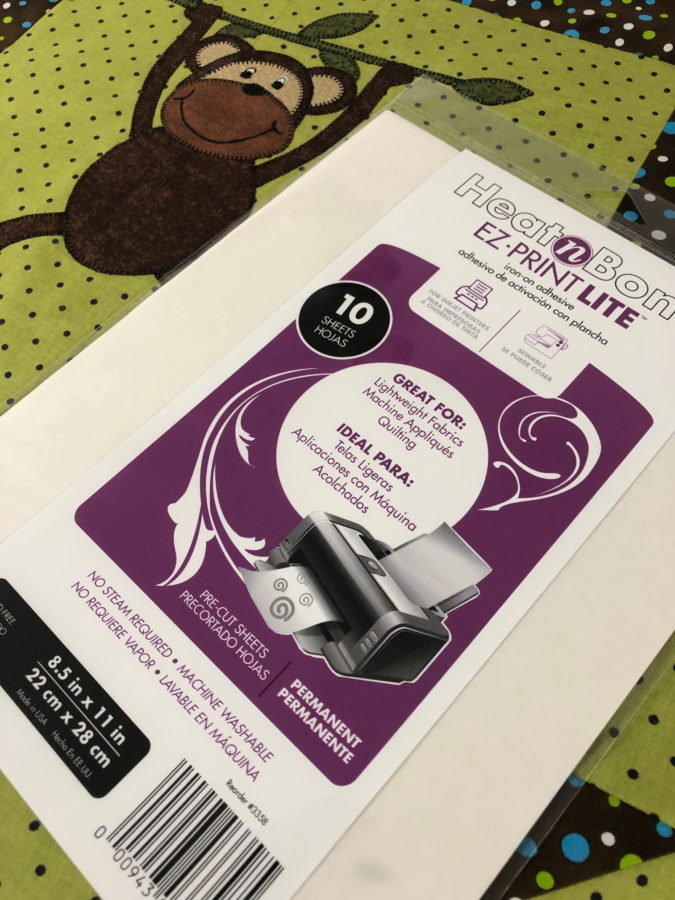
Make 5 copies of the applique pattern on page 5, using HeatNBond®EZ Print Lite. Make sure you print them full size, with no paper scaling. Pattern pieces have been reversed for you. I love using HeatNBond® EZ Print Lite. No more tracing.
Cut apart your pieces and arrange on corresponding fabrics. Fuse to the reverse side of fabrics, using manufacturers’ recommendations. Cut out the applique shapes. Trace and embroider mouth on muzzle front. The layout sheet is included. You will need to tape the 2 halves together. Build your applique on an applique pressing sheet. Once it’s cool, remove and center on the front of your 5, 12 ½” squares of background fabric. Stitch applique down using your preferred method. You now have 9, 12 ½” blocks that we will finish off with another Churn Dash Row. This time we will be stitching the remaining 12 ½” rails from both fabrics A and B to the 36 rails of background fabric. Using the photos below as a guide, stitch all 9 blocks keeping the orientation of the striped half-square triangles in mind.
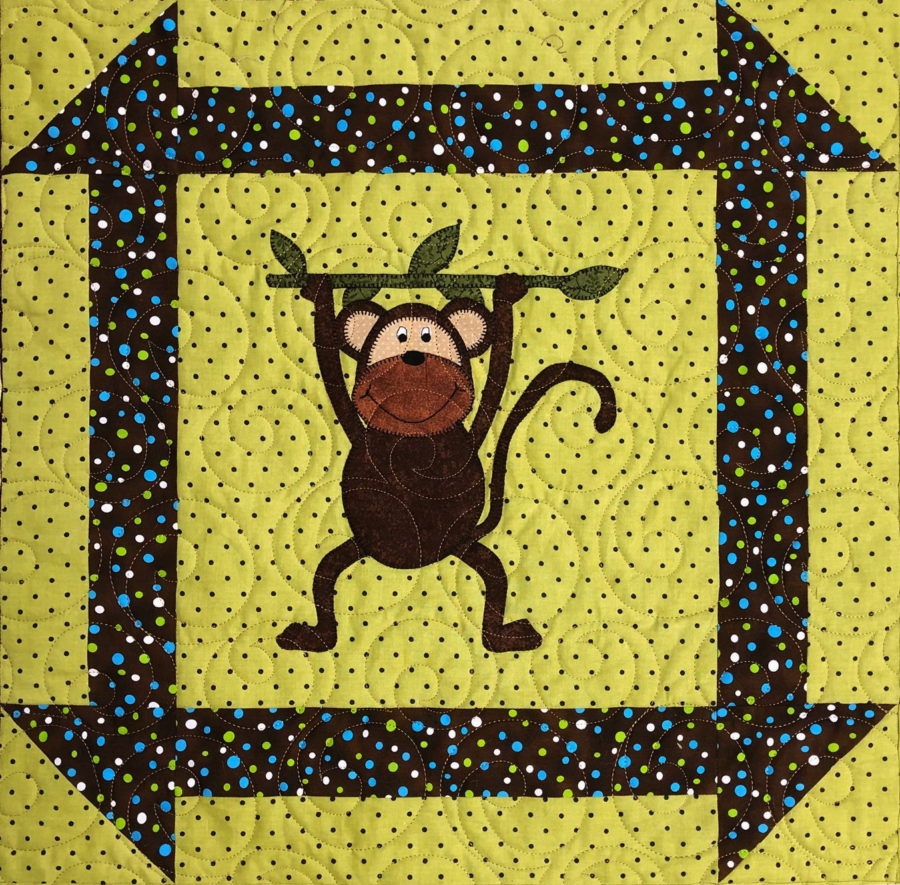
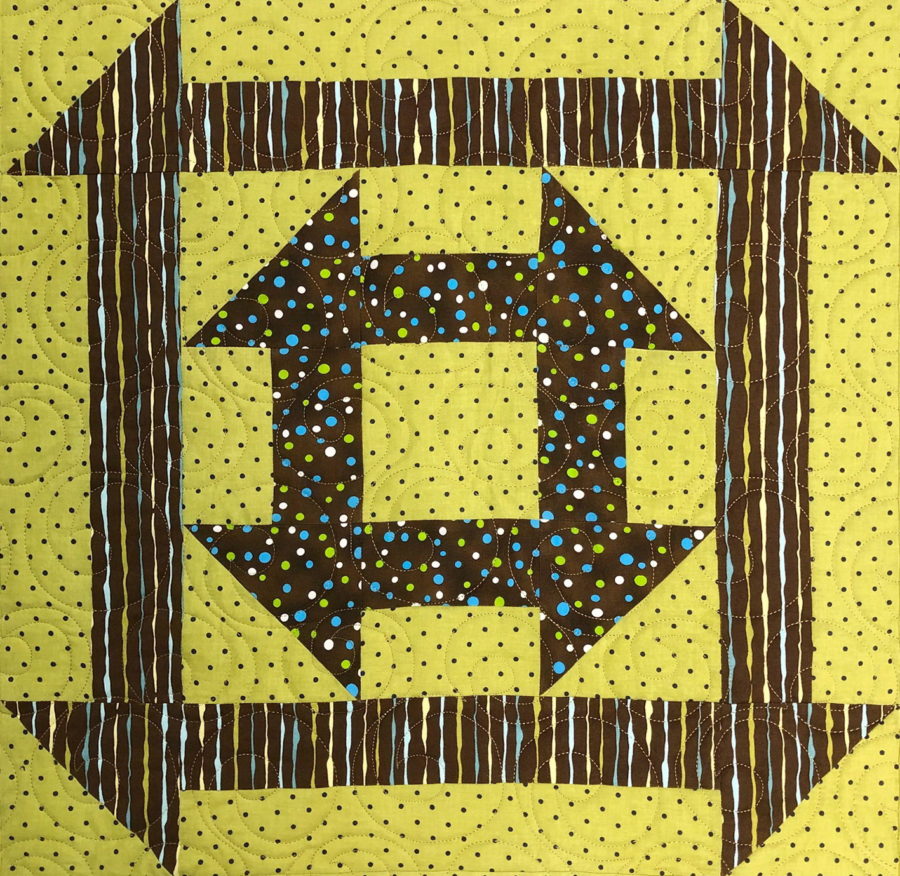
These blocks will now measure 20” each.
Stitch your blocks into rows. Stitch your rows together.
Borders
Stitch your 5 ½” border strips together. Using the measurements of your quilt, attach the border to the top and bottom first, then measure sides and attach.
Quilt as desired and enjoy!
While we all seemed to be cooped up in our homes right now, a backyard picnic is a great way to keep those little ones entertained.
Enjoy!
4 Comments on 5 Little Monkeys Picnic Quilt
1Pingbacks & Trackbacks on 5 Little Monkeys Picnic Quilt
-
[…] “5 Little Monkeys” picnic quilt has a new friend and matching […]
Edi
April 21, 2020 at 2:58 pm (4 years ago)This is such an adorable quilt. Thank you so much for sharing it with us.
Brenda @ Songbird Designs
April 21, 2020 at 4:19 pm (4 years ago)So cute, Joan!!
Judy Chastain
April 23, 2020 at 7:17 am (4 years ago)So cute! I know a little boy who would love this quilt. I’m not a big fan of appliqué, but I’d do it for him! Thanks for sharing the pattern, Joan.