You Got This Hybrid Card with Mixed Media Sheets
Hey there, it’s Katrina from Paper, Scissors and Glue here on the blog today. Lately I have really gotten into hybrid scrapping. What is hybrid scrapping? It’s using digital scrapbooking supplies/kits along with your traditional supplies to create fun projects. And since the new iCraft® Mixed Media Sheets can be printed on, it’s a perfect union!
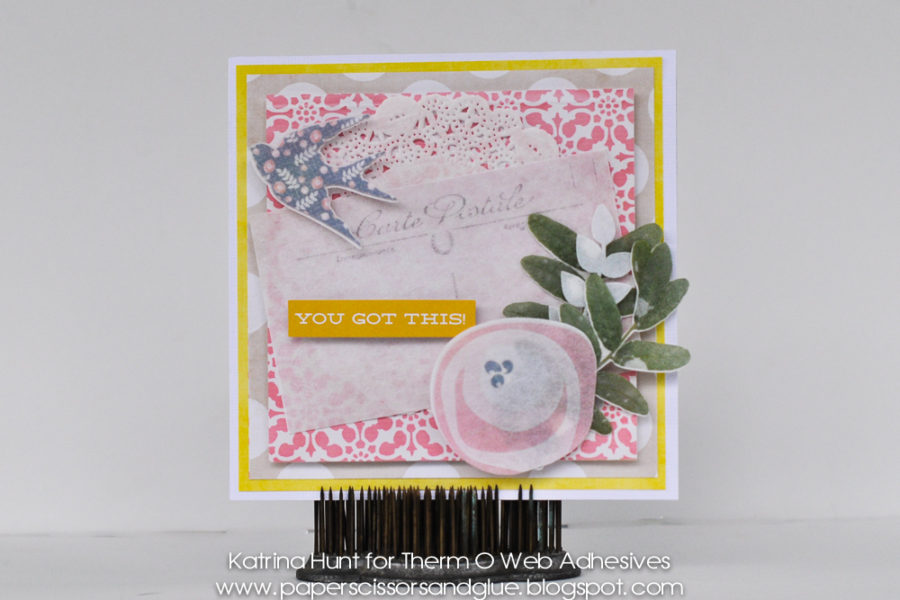
You Got This-Hybrid Card
Therm O Web Supplies:
Therm O Web 3D White Foam Squares-Combo Pack
Therm O Web iCraft® DecoFoil™ Foam Adhesive
Therm O Web iCraft® DecoFoil™ Mixed Media Sheets Heavyweight
Therm O Web Sticky Tape Mini Runner
Other Supplies: Cardstock-American Crafts; Reflections Digital Scrapbooking Kit-Amber LaBau; Silhouette Cameo with Print and Cut feature
Project Instructions:
I will be sharing several screen shots of the Print and Cut process that I did with the Mixed Media Sheets.
Decide on your card size. I decided on 5.5 x 5.5 inches. You will need this to determine how big you want your elements to print at.
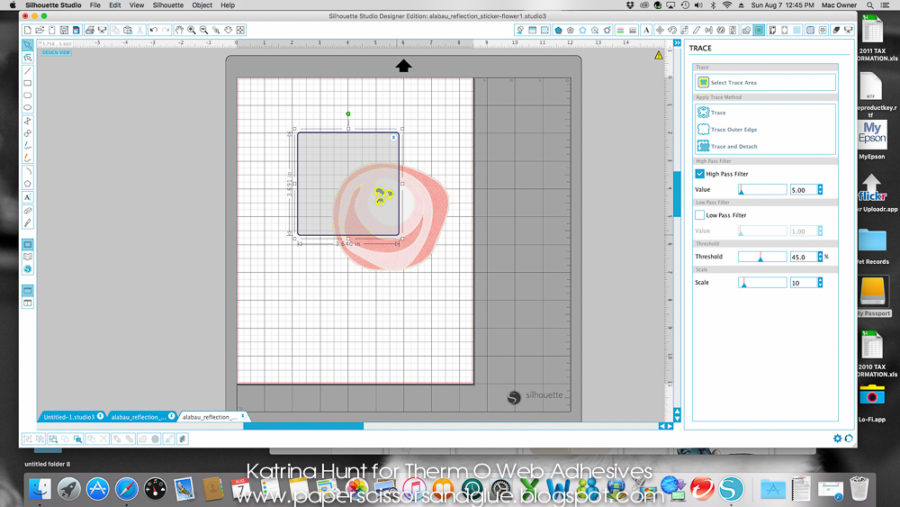
Pick elements out and open them in your Silhouette (or other machine) software. You will need to use the trace feature for each element. Once your element is open, you will want to click on the 8th icon from the right side of your toolbar, you can see it’s a darker blue than the rest. This will open the Trace option, then you will click on “Select Trace Area” which will allow you to draw a box around your element that you are using.
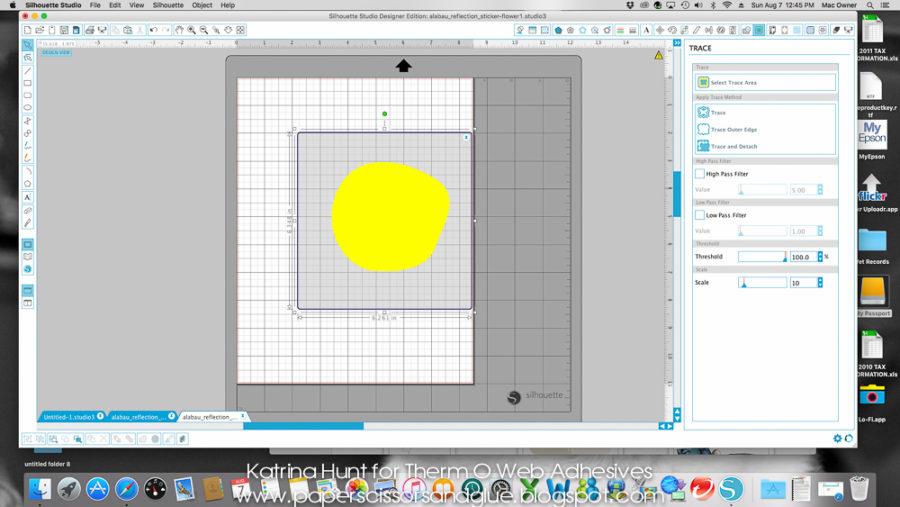
Turn off the “high pass” filter and then move the slider on “threshold” until your element is completely colored yellow. Then you will select the “trace outer edge”. This will give you cut lines around your picture.
Then cut and paste your element to a new mat that has your registration marks on it so that you will know where to place your items.
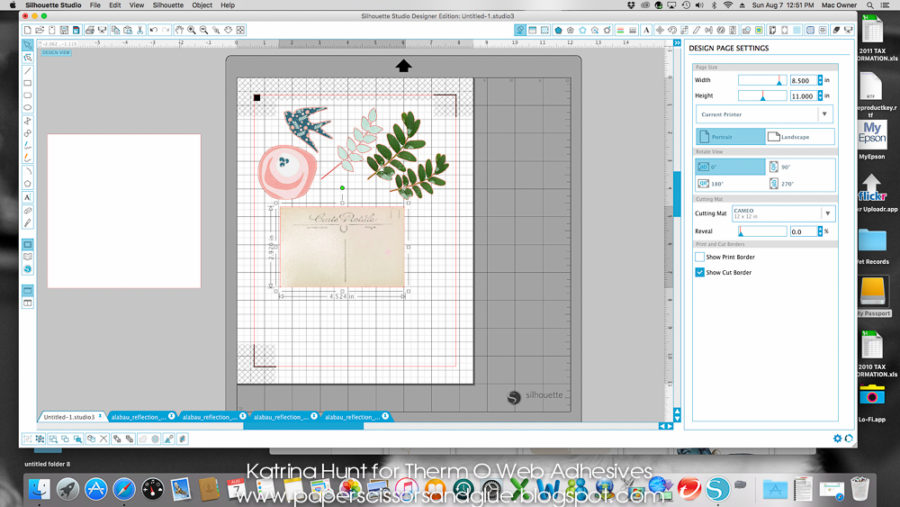
Below you can see that I created a square about the size of my card so that I could resize my elements to fit the size of my card front. Once I have a good idea, I just delete that square (in white).
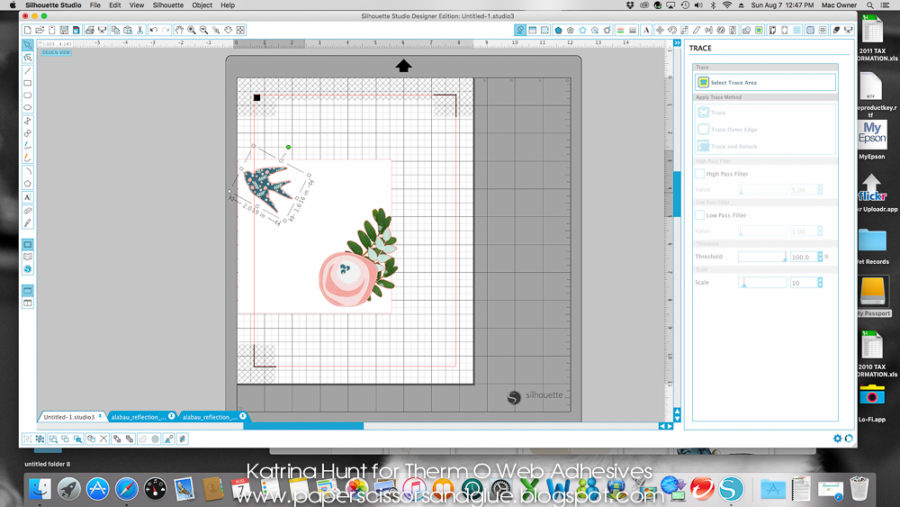
Group all items that you are wanting to print and cut on the mat with the registration marks. Do not go outside the red lines OR into any area that has the hashmarks. Those are where the machine “reads” the file and knows where to cut after that. You will now hit print and send the file to your regular printer, printing on your Mixed Media Heavyweight Sheet.
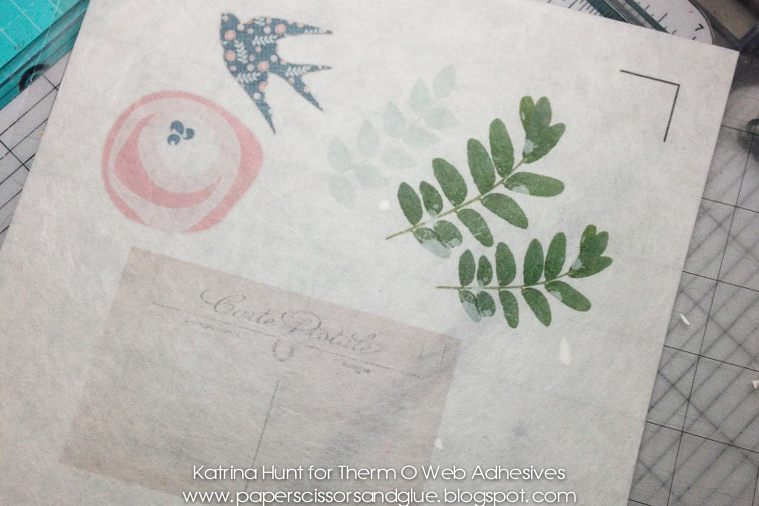
Here is my sheet after it was printed but before it was cut. I love the soft look the iCraft® Mixed Media sheets give these elements!
Then, place your Mixed Media Sheet back on your mat exactly like the picture that is on your Silhouette software. Load your mat into your machine and now you will just hit cut. I used the Silhouette Cotton Canvas setting, but play around and figure out what works best with your machine.
Once you have everything printed out and cut, then piece your card together using Sticky Tape Mini Runner, 3D Foam Squares and any other supplies you want to add. You can use paper from your traditional supplies, or you can use paper from the digital kit you used and just print it out. That is what I did here.
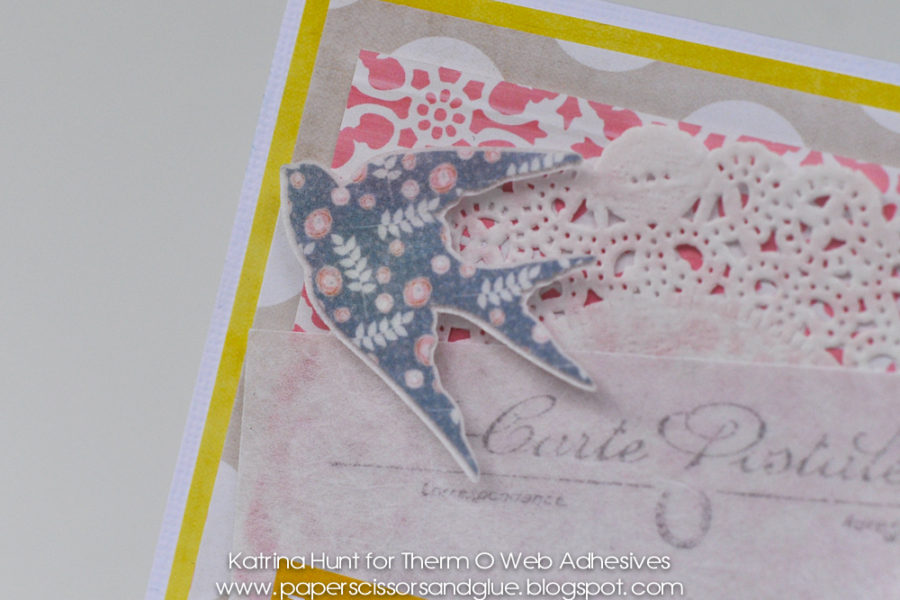
I just love how everything looks so touchable and velvety! Those leaves look like they have fuzzy on them!
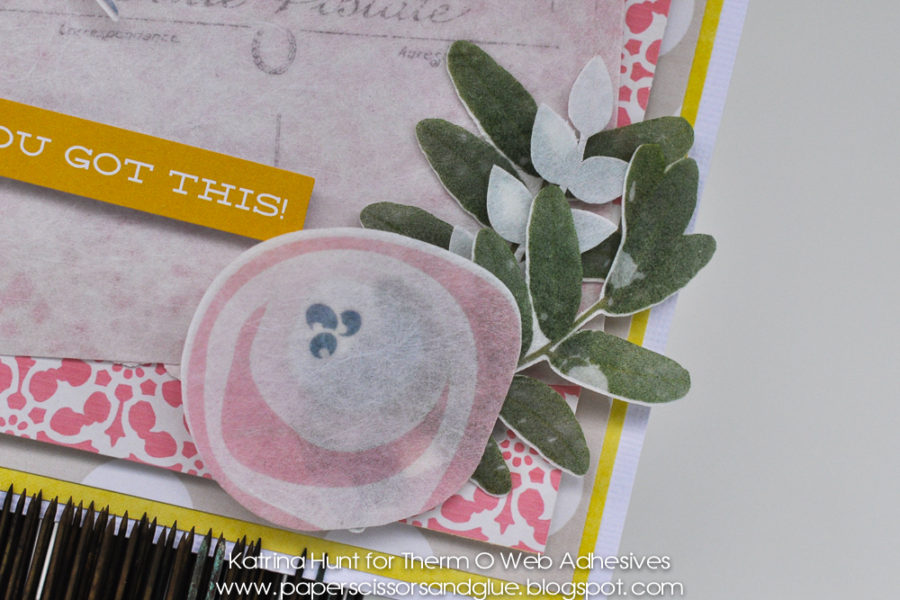
So, what a fun new way to use those Mixed Media Sheets!!! Have a great week and thanks for stopping by today!
Be sure to pick up some of our NEW iCraft® Mixed Media Sheets available now in two weights! Then print this free project to see just how versatile the sheets are!

Ali
August 10, 2016 at 2:53 pm (9 years ago)Awesome!!!!