Have you ever traveled by air and found that the 1-quart bag the TSA allows in carry on’s, has ripped or torn in the middle of the trip? Arrrrgh!
Well, fear no more, because it’s quick and easy to make your own bags, with clear vinyl.
TSA Clear Travel Size Bag
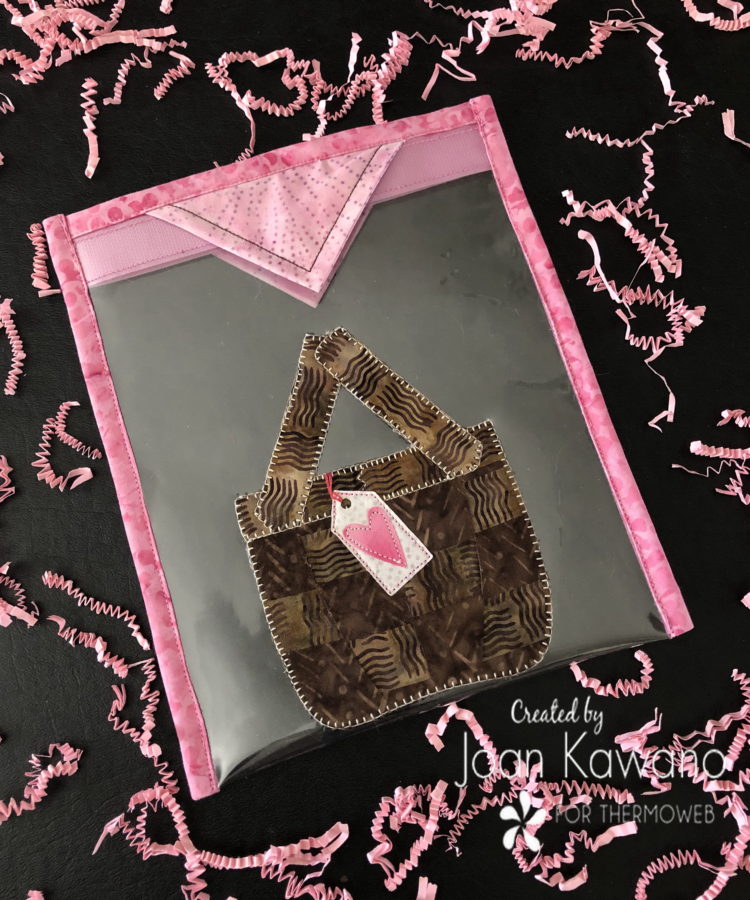
No more boring bags, with this “Beautiful Posey Die Set” from “Crafter’s Edge”.
TSA Travel Size Bag Pattern
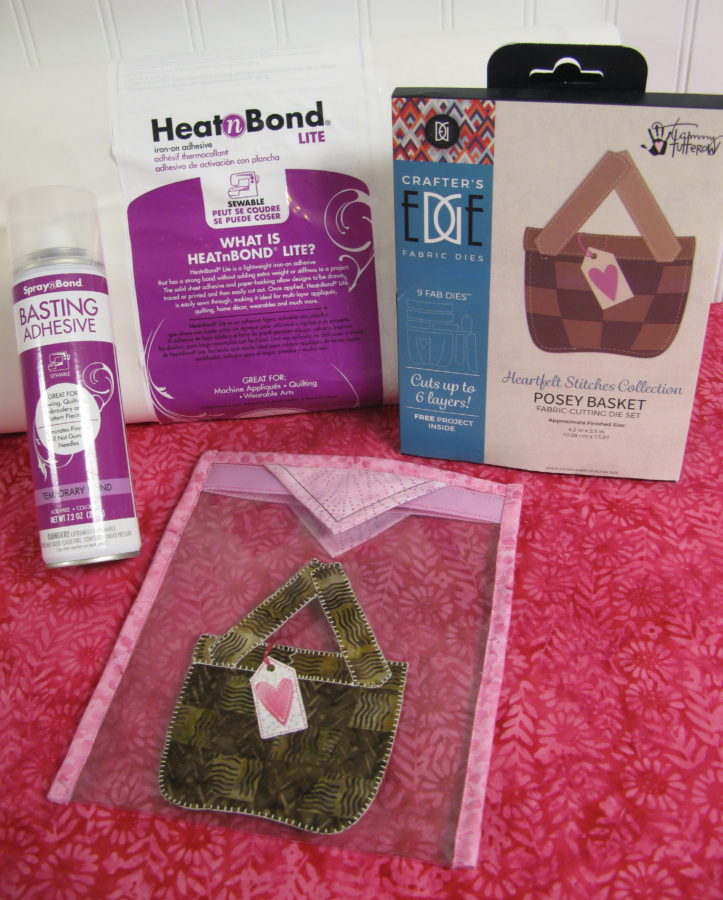
Supplies
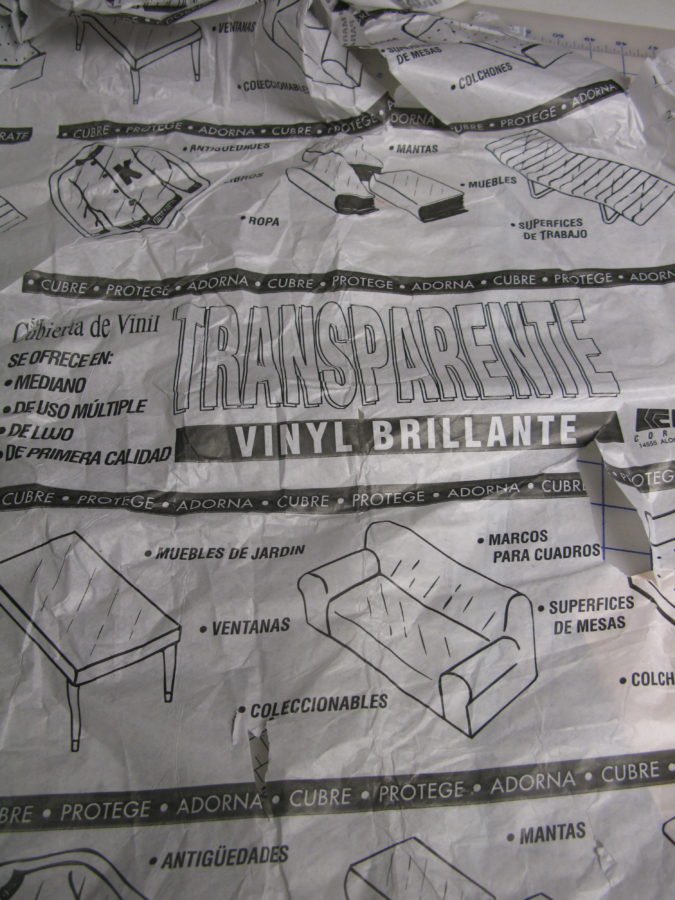
¼ yard – medium to heavyweight “Transparent Vinyl” (sold in fabric/hobby stores) It’s found in various weights, on a long roll with a tissue paper backing. The photo below shows what this particular brand looks like. I personally prefer the medium to heavyweight vinyl.
1 – 2 1/4” x 45″ strip of fabric for binding
2- 5” squares of fabric for pull tabs
Assorted fabrics for applique’s
1 – 7 1/4” piece of hook and loop tape, commonly known as Velcro
Crafters Edge® – Beautiful Posey Basket Die Set
Additional Supplies
Teflon foot for sewing machine
Thread to match
Applique pressing sheet
SprayNBond®Basting Adhesive
Crossover II Die Cutting Machine or
Accuquilt GO cutter with Conversion Platform
Please read through the complete pattern before starting.
NOTE: When working with vinyl, you can not use pins, as holes will show. Use clips if necessary.
Cutting Instructions
Cut 1 – 7 1/2” x 18” piece of Vinyl
From 2 1/4” strip, cut
2 – 8” pieces for top bindings
2 – 9 1/2” pieces for side bindings
TSA Bag Assembly
Fuse HeatNBond®Lite to the back of the fabrics for your applique.
Using the “Beautiful Posey Basket die, cut out appliques, using a Crossover II die cut machine or an Accqquilt GO cutter with a Conversion Platform Set. Assemble all applique pieces on an applique pressing sheet.
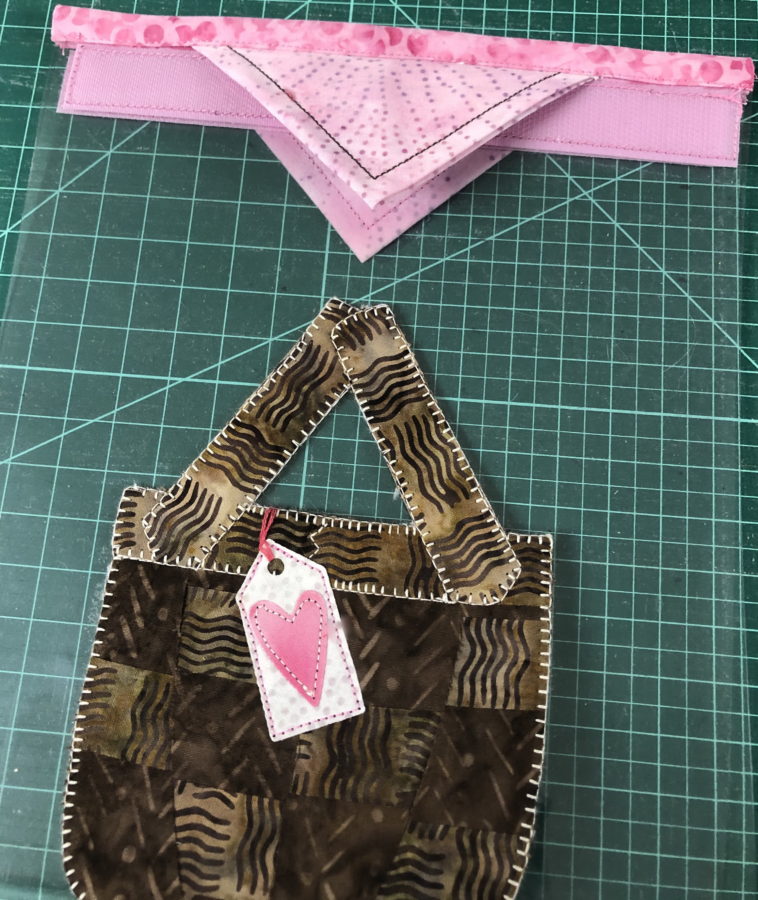
Once your entire basket is fused, lay on top of a matching piece of fabric, and fuse pieces “wrong“ sides together. Carefully trim back fabric from the front. Stitch all basket elements, matching your bobbin thread to the backing fabric. This will give you a nice clean look on both sides of the applique, since the vinyl bag is clear. Set aside for now.
Take all the 2 1/4” pieces, fold under 1/4” on each end and press.
Fold each of these pieces in half lengthwise and press to create a binding.
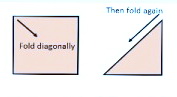
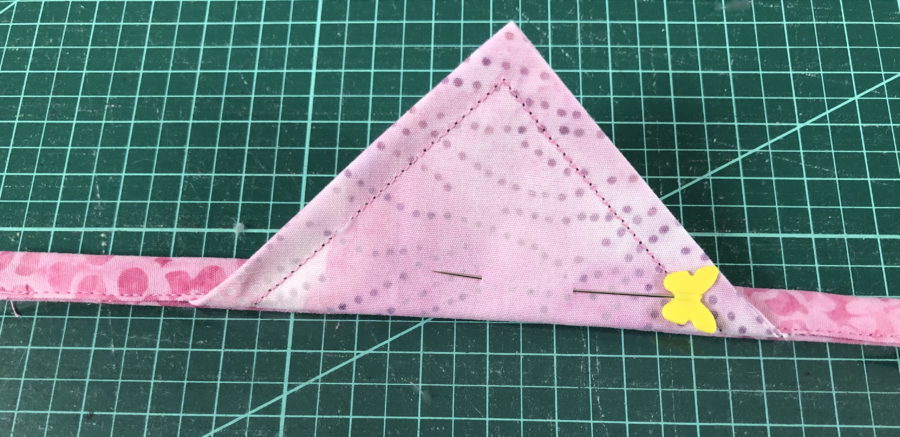
Take the 2 – 5” squares and fold them into Prairie Points as shown below.
Topstitch folded edges.
Find the center of each short end of vinyl as well as prairie point. Line them up carefully, raw edges at the top. Stitch across the top of prairie point using scant ¼”, making sure the prairie point is on top of the vinyl on both ends.
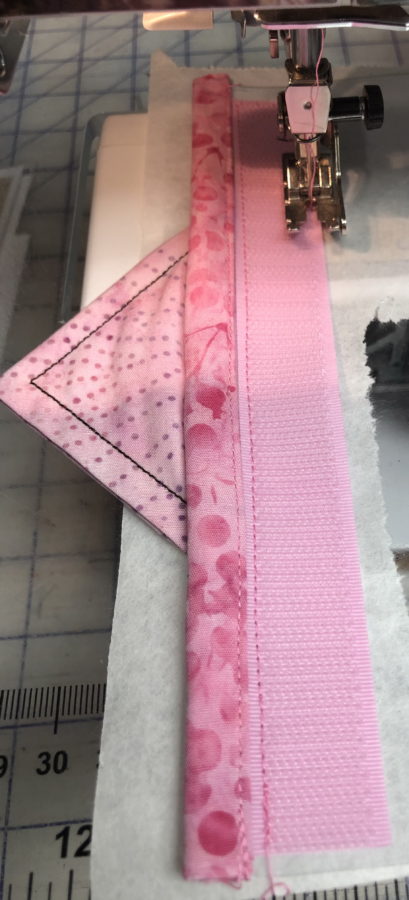
NOTE: you will find that by laying a piece of paper in between the vinyl and the bed of your sewing machine, will keep them from sticking to each other. Paper is easily torn off after stitching.TooltipTextStitch the 7 1/2” prepared binding pieces to the backside of the top and bottom of the clear vinyl strip with the prairie point attached. Fold over to the front and stitch down, encasing the prairie point edges under the binding. NOTE: you will need to finger press these as you can not use an iron with vinyl.
Carefully pin the prairie points out of the way, so they do not get stitched into the hook and loop tape. (This is the only time a pin can be used, as it’s in the binding)
Take your hook and loop pieces, centering them from side to side, stitch to back, just below the binding.
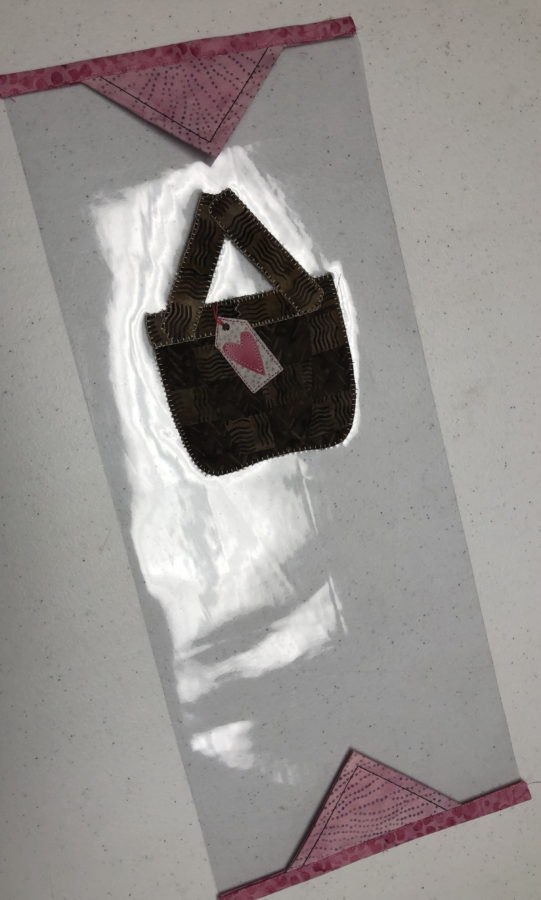
To place applique, fold vinyl in half, hook and loop sides together. Spray the back of your applique piece with SprayNBond, and place where desired. Open the bag up and stitch applique to the front of the bag.
The paper underneath tears off nicely when you use a straight stitch. If you are using and applique stitch, you will need to take a little extra time to remove the small pieces of paper from under the stitches on the backside.
Fold in half once again hook and loop sides together and attach side bindings, just as you did on the top edges.
Thanks to Thermoweb and Crafters Edge, you are now ready to go with your TSA Approved “Size” Travel Bag.