


Sugar Cookie Hoop Ornaments featuring SpraynBond
Greetings creative friends! It’s Belinda Karls-Nace from Blue Ribbon Designs, here today with a brand new project tutorial featuring an assortment of my favorite Therm O Web products. Today, I am excited to share my “Sugar Cookie Hoop Ornaments” with you.
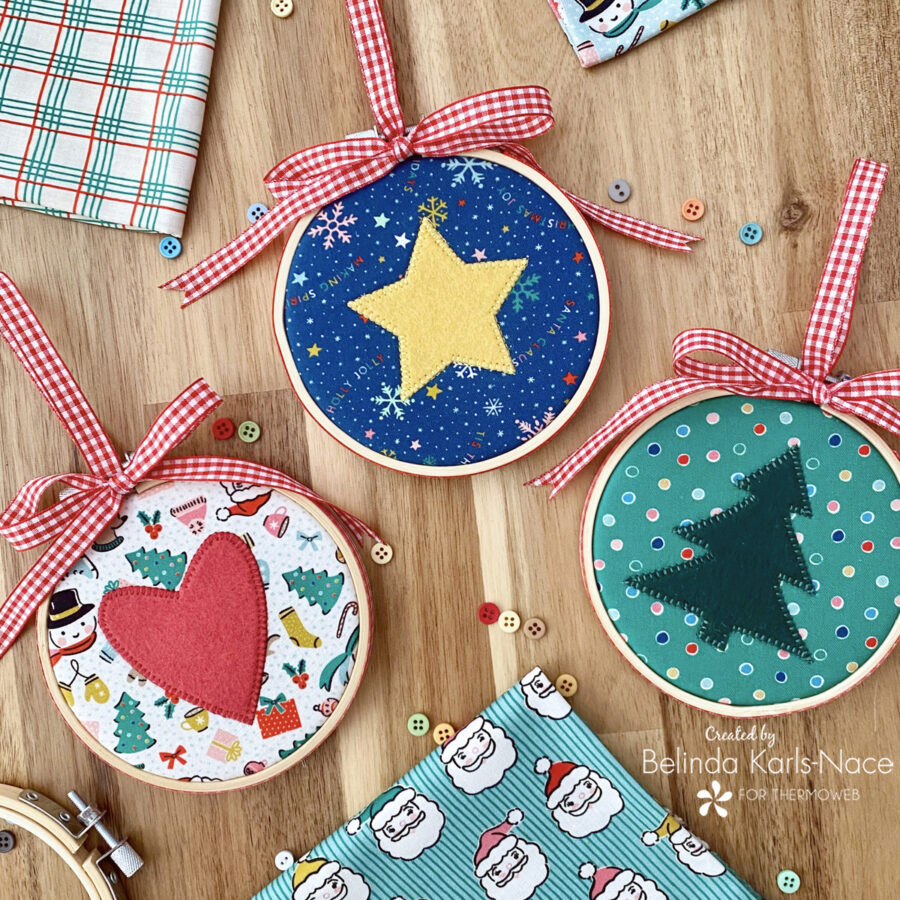
As we close in on Christmas, I know many are looking for quick holiday gift ideas and last minute decorations. This is an easy project, perfect for holiday decorating and gift giving. These simple, step-by-step instructions will have you making your own hoop ornament(s) in no time! These are the perfect size to tie on a package, hang on a tree, or use for dinner table decor.
Let’s get started! Simply gather the materials/supplies listed below, then download the pattern with PDF templates.
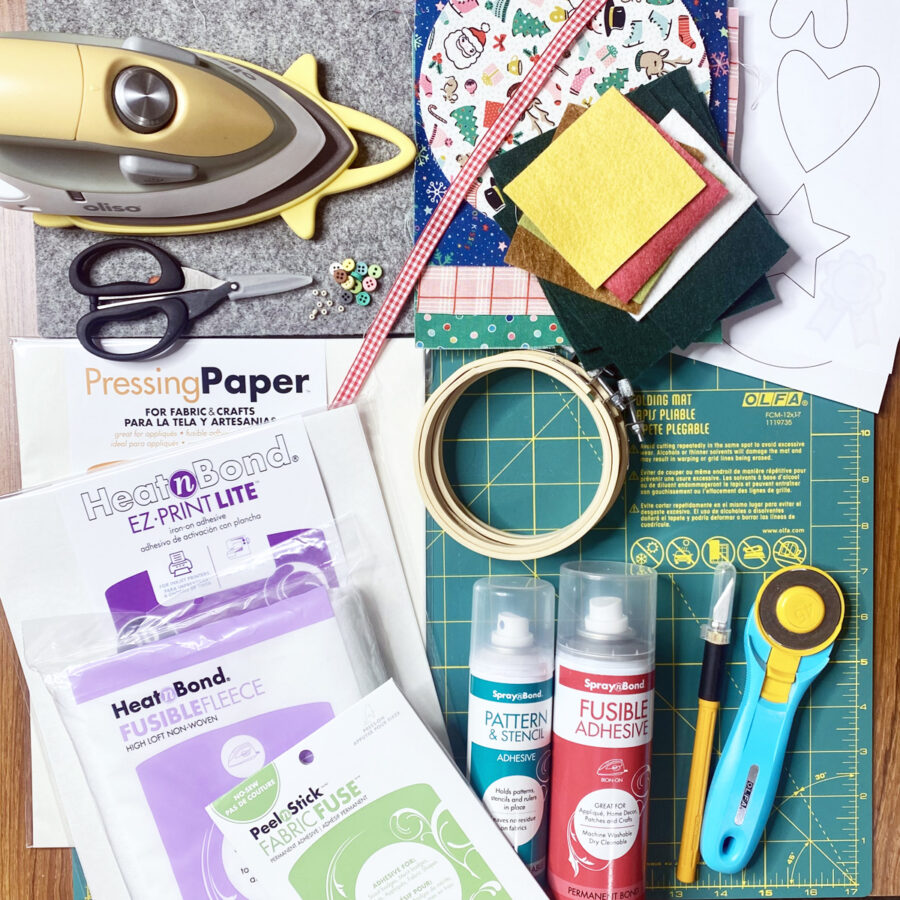
What you need (for one hoop ornament):
- HeatnBond Fusible Fleece
- 1 – 6½” x 6½”
- HeatnBond Lite EZ-Print Iron-On Adhesive Sheets
- 1 Sheet
- SpraynBond Pattern & Stencil Spray
- SpraynBond Fusible Adhesive Fabric Spray
- HeatnBond Fabric Fuse PeelnStick Adhesive Sheet
- 1 Sheet
- Pressing Paper Fabric and Craft Sheets
- 1 Sheet
- 4” Wooden Round Embroidery/Craft Hoop
- Cotton Fabric: model uses Oh What Fun by Elea Lutz for Poppie Cotton – I encourage you to use your favorite holiday fabric!
- 1 – 6½” x 6½” (front of ornament)
- Wool Blend Felt: Model uses Benzie Design
- 1 – 4¾” x 4¾” (back of ornament) Emerald
- 1 – 3½” x 3½” (star) Ochre
- ⅜” Ribbon (model used ⅜” red and white gingham ribbon)
- 1 – 12” piece (outside of hoop)
- 1 – 10” piece (hanger)
- 1 – 24” piece (bow)
- Sharp Needle (an embroidery or chenille needle will work well)
- Strong thread or unwaxed dental floss (Nymo beading thread size D)
- Oliso Iron
- Olfa Cutting Tools (cutting mat, rotary cutter)
- Sewing Machine
- Basic Sewing Supplies/Tools (small sharp scissors, rulers, sewing thread, etc.)
- OPTIONAL: Small Buttons, Beads, Decorative Pins, Assorted Trims and Embellishments
How to Make a Sugar Cookie Hoop Ornament
1. Download and print the Sugar Cookie Hoop Ornaments Pattern/Templates PDF.
Sugar Cookie Hoop Ornaments – A Project for the ThermOWeb Blog
- Print actual size (do NOT “fit to page” or “shrink to fit”).
- Print pages one and two on regular printer paper.
- Print page three on a HeatnBond Lite EZ-Print Iron-On Adhesive Sheet.
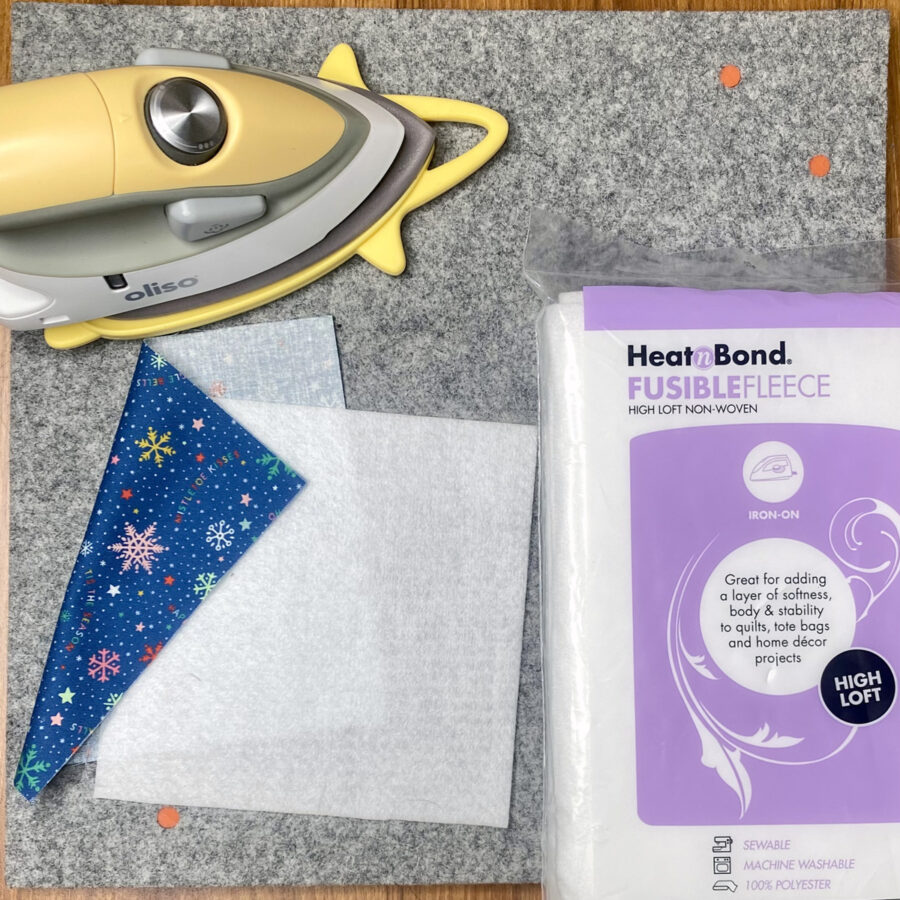
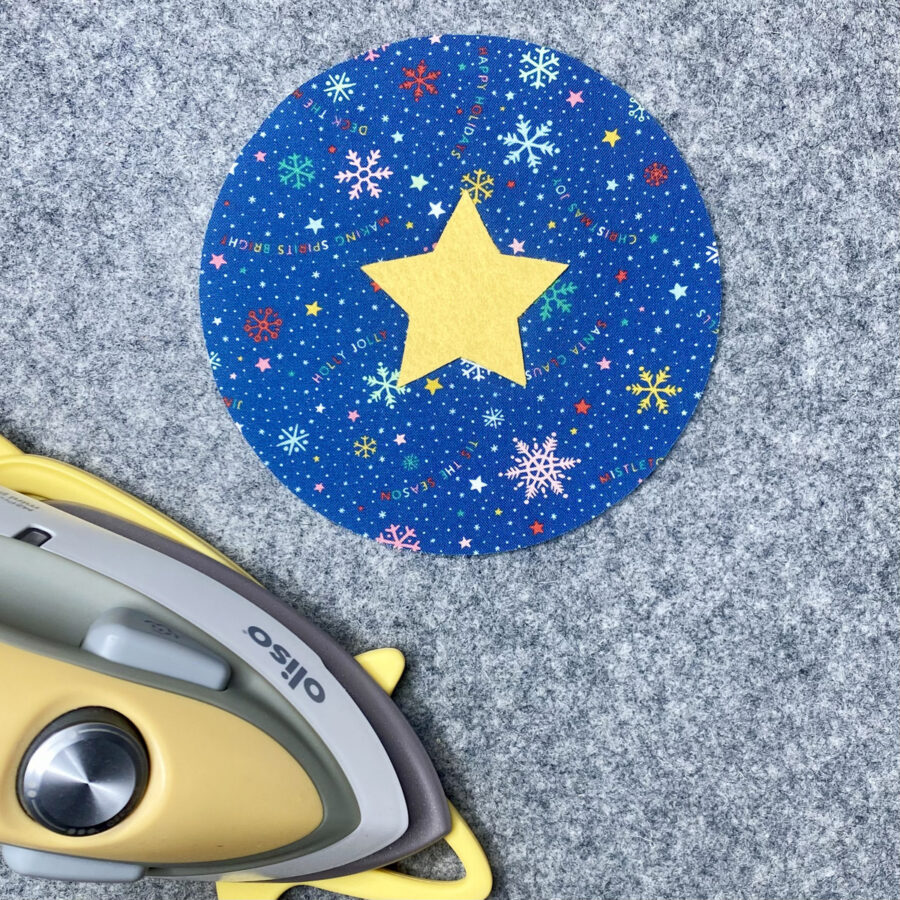
2. Prepare the front and back of the ornament.
- Fuse a 6½” x 6½” piece of HeatnBond Fusible Fleece to the wrong side of the 6½” x 6½” ornament front fabric, following the package instructions.
- Pre-heat iron to a medium setting, no steam.
- Place the rough side of the fusible fleece against the wrong side of the ornament front fabric.
- Cover with a lightweight, dry pressing cloth.
- Press and hold iron with medium pressure for 10-15 seconds. Repeat by lifting iron to new area, slightly overlapping previous area until the entire surface is bonded.
- Allow it to cool.
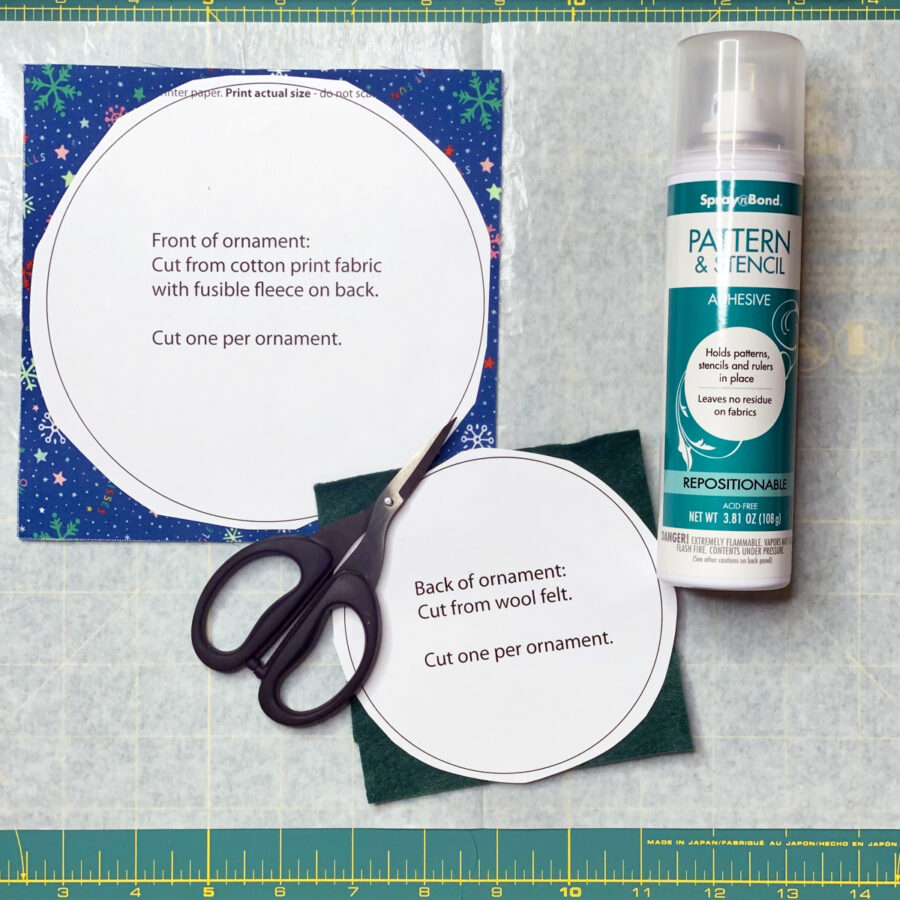
- Cut front and back circle shapes.
Loosely cut out the front and back circle templates printed on regular printer paper. Apply to fabrics using SpraynBond Pattern & Stencil Spray.- Place a Pressing Paper Fabric and Craft Sheet under pattern pieces to protect your work surface from the adhesive spray.
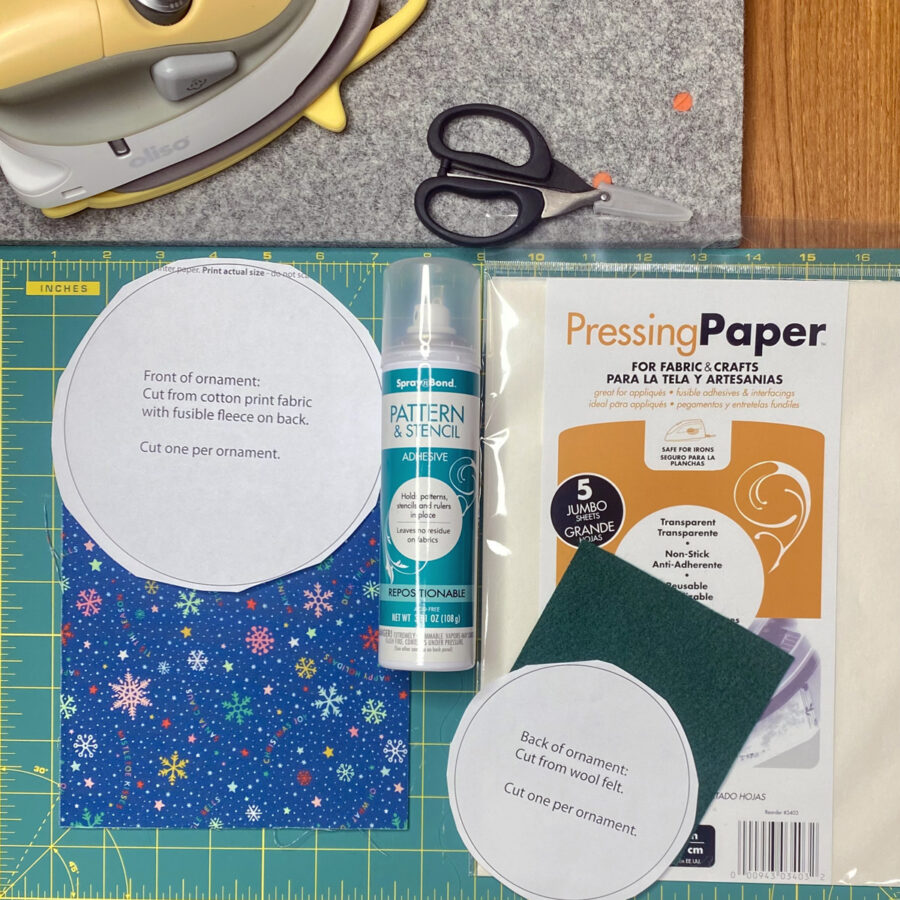
- Shake can well. Hold can upright, 12” from paper template(s). Press nozzle and apply adhesive using a sweeping motion to lightly cover paper template(s).
- Let dry for 1 minute then press the large circle paper template to the cotton fabric (with fusible fleece on the back). Press the small circle paper template to the wool blend felt for the back.
- Cut out circle templates.
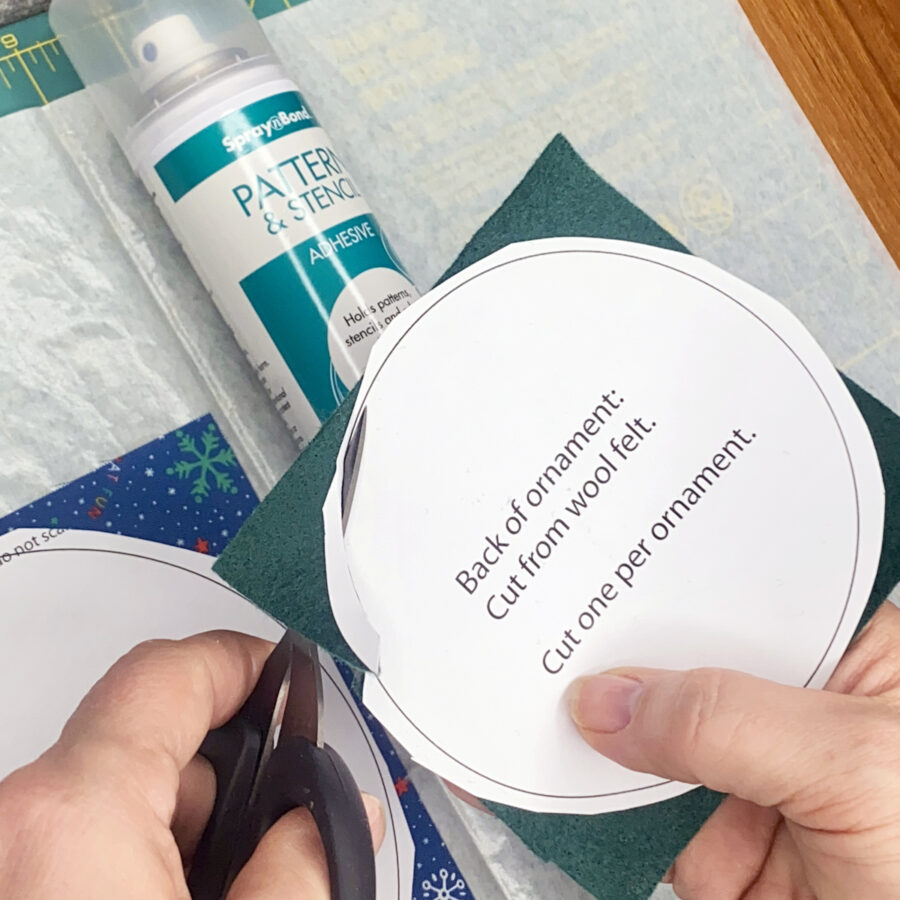
- Remove template papers.
- Place a Pressing Paper Fabric and Craft Sheet under pattern pieces to protect your work surface from the adhesive spray.
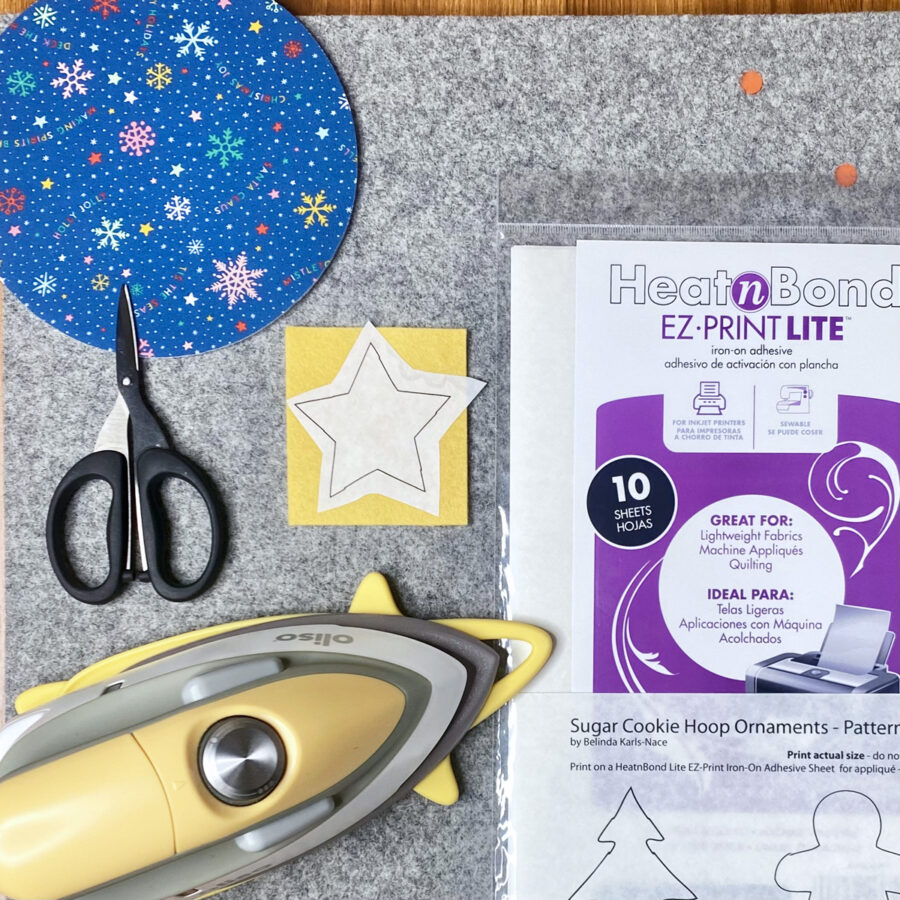
3. Add the appliqué shape.
- Loosely cut out the appliqué template(s) printed on HeatnBond Lite EZ-Print Iron-On Adhesive and apply to the back of wool blend felt following the package instructions.
- Loosely cut out the star shape, leaving the paper in place.
- Pre-heat iron to medium heat, no steam.
- Place loosely cut apart template(s) on the wrong side of wool blend felt (printed paper, smooth side, should be face up).
- Place and hold the iron on the paper for 2-3 seconds. Repeat, overlapping slightly, until entire surface is bonded.
- Allow it to cool.
- Cut or trim the piece(s) on the solid lines printed on the paper to create the desired shape. Leave paper in place until ready to fuse in place.
- Place the cut shape in the center of the large fabric circle. Use the 4” wooden hoop to help with placement.
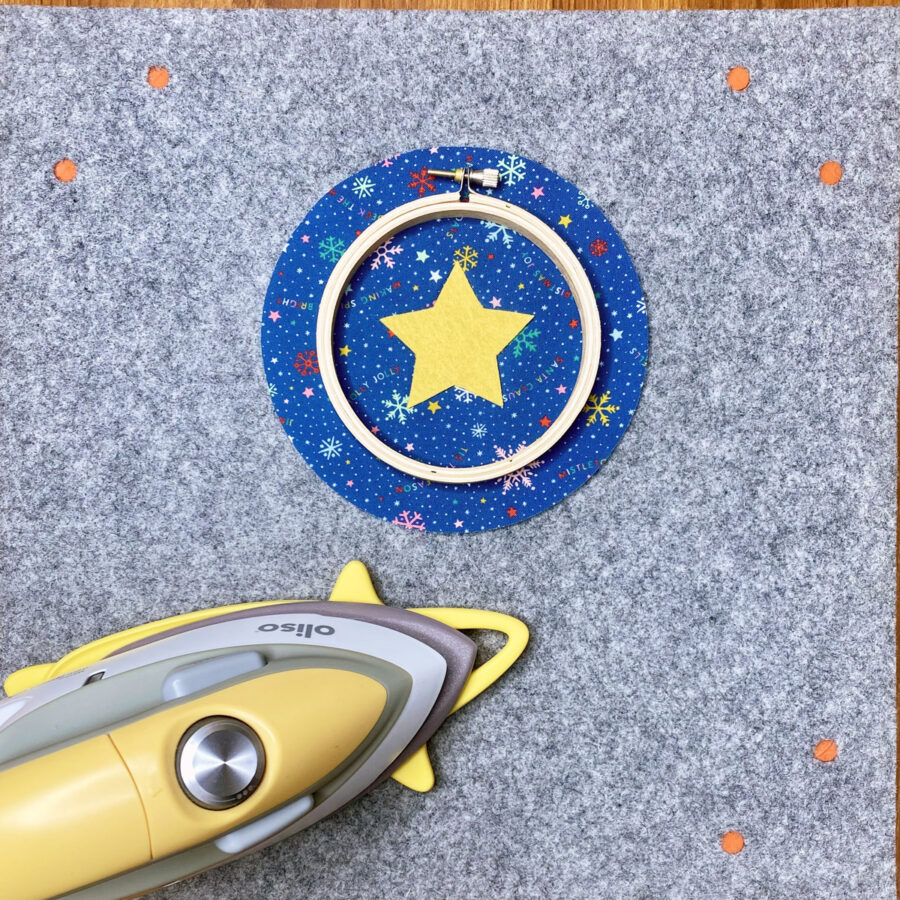
- Remove the paper back from appliqué piece(s). Center and fuse into place on the large fabric circle following the package instructions.
- Pre-heat iron to medium heat, no steam.
- Peel off paper.
- Place fabric shape, adhesive side down on top of the large fabric circle.
- Press and hold iron for 6 seconds on each section, overlapping slightly, until the entire piece is bonded.
- Using your favorite appliqué stitch (machine or hand) and coordinating sewing thread, sew the pieces in place. I chose to use a machine blanket stitch.
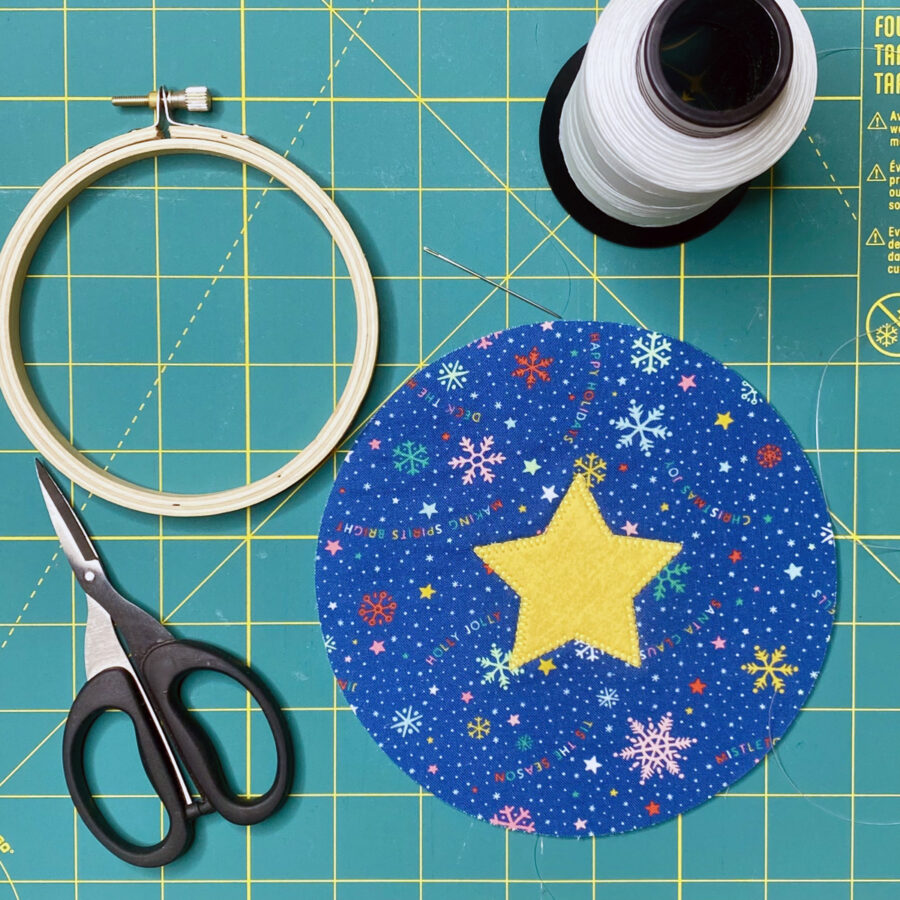
- OPTIONAL: Add buttons or beads or embellishments to your ornament (see ideas in the final image at the end of this post).
4. Create the hoop ornament.
- Loosen the hoop bracket.
- Place the inside center hoop on the table.
- Place the large fabric circle with appliqué over on top of the inside center hoop.
- Place the large outside hoop with bracket on top and push down to layer the fabric in the hoop.
- Center fabric and appliqué and pull taught.
- Tighten bracket (a small screwdriver may help with this). (Image 1)
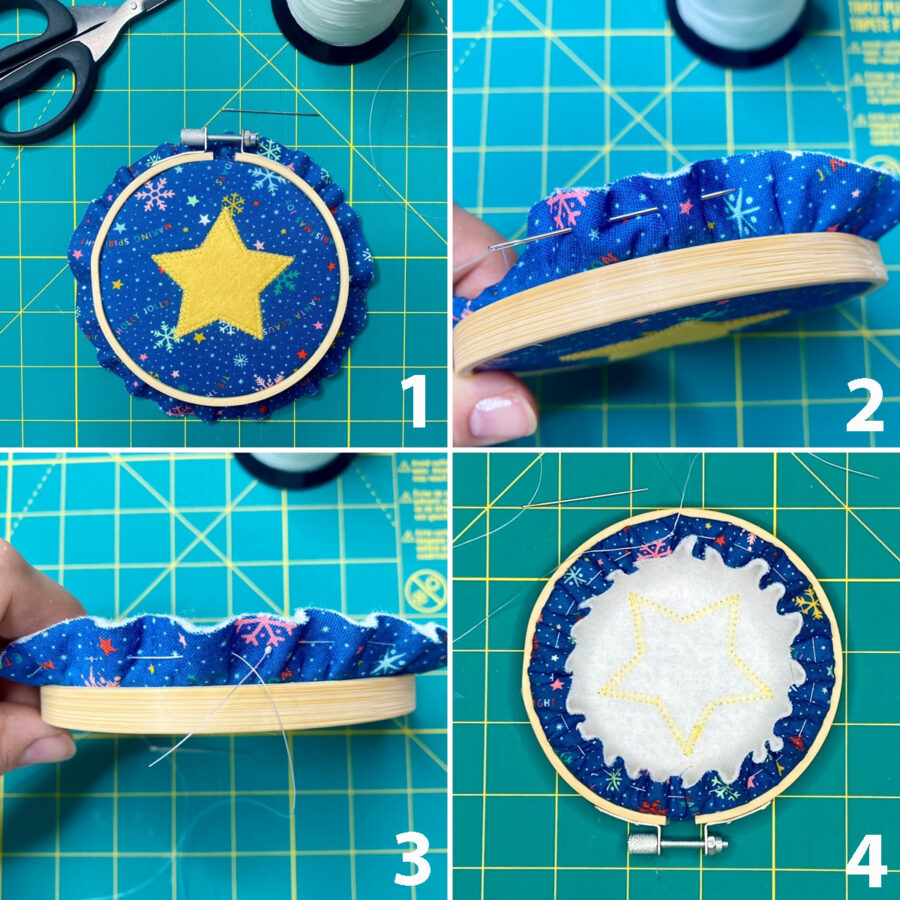
- Thread a sharp hand sewing needle with strong thread and knot the end.
- Leaving the knot on the outside (right side of the fabric), work a running stitch around the entire perimeter of the fabric circle. (Images 2 and 3)
- Gather thread ends to tighten the excess fabric on the back of the hoop. Tie tightly. You may choose to lace back and forth across the back of the ornament, as well. (Image 4)
- Press the back well to make it as flat as possible.
- Attach the back (wool blend felt circle) using SpraynBond Fusible Adhesive Fabric Spray.
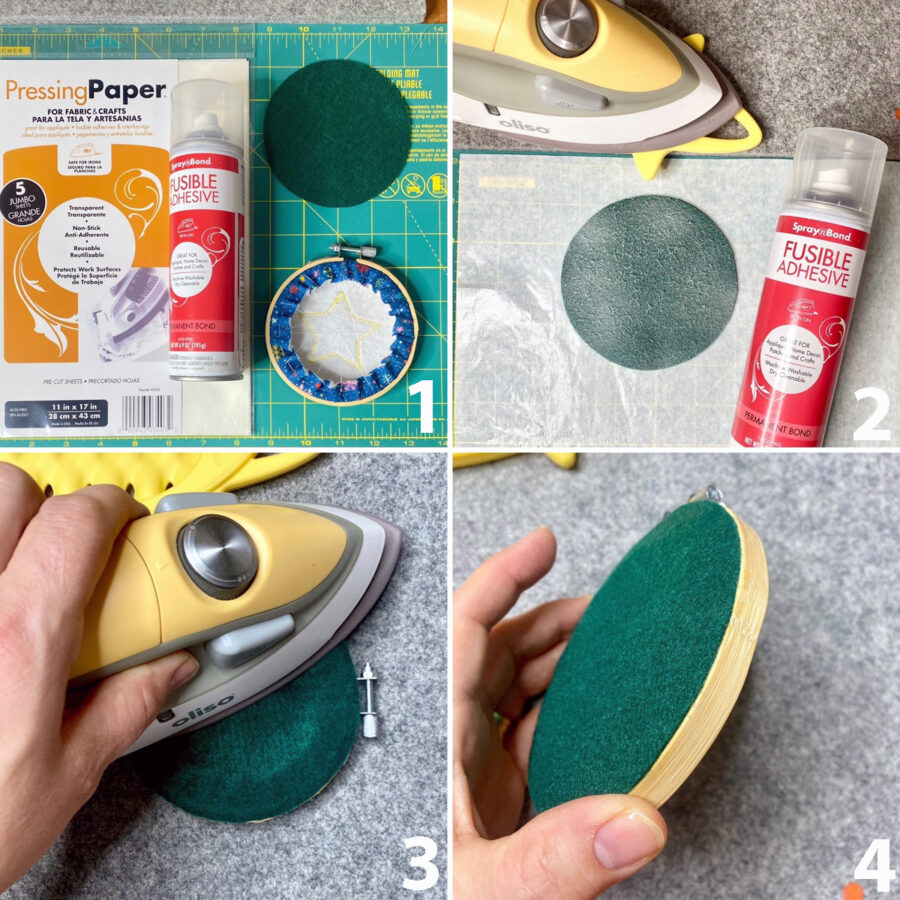
- Place a Pressing Paper Fabric and Craft Sheet under pieces to protect your work surface from the adhesive spray. (Image 2)
- Preheat iron to medium to high heat, no steam.
- Shake can well. Hold can upright, 8 – 10” from wool blend felt circle. Press nozzle and apply adhesive in short bursts using a sweeping motion to evenly coat the back of the felt circle. (Image 2)
- Allow it to dry. Place the felt circle, adhesive side down covering the back of the ornament. Center the felt circle on the back.
- Iron, using firm pressure in a circular motion for 30-45 seconds on each section until the entire piece is bonded. Let cool. (Images 3 and 4)
- Attach ribbon around the outside of the hoop using a HeatnBond Fabric Fuse PeelnStick Adhesive Sheet.
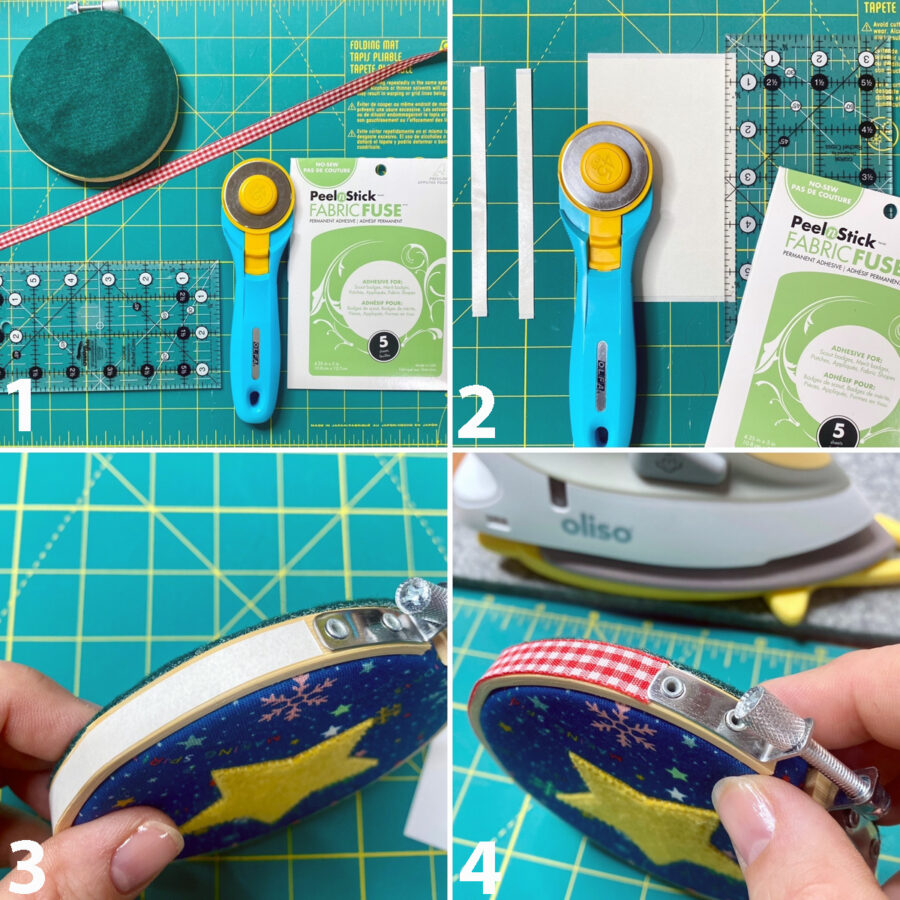
- Cut two ¼” – ⅜” wide strips. (Image 2)
- Peel off the paper liner.
- Place one strip of adhesive on the outside of the hoop starting at the bracket. Press firmly. I used two pieces and worked from the bracket on each side, with a small gap at the bottom center of the hoop. (Image 3)
- Remove paper backing. Press 12” of ribbon firmly into place around the outer perimeter of the hoop. Trim to fit. Rub with firm pressure. You may be able to put the ends of the ribbon slightly under the bracket. (Image 4)
- Tie a 10” piece of ribbon around the screw in the bracket to create a hanger.
- Tie a bow around the bracket using the 24” piece of ribbon. Once it is shaped to your liking, trim the ends of the ribbon to an eye-pleasing length.
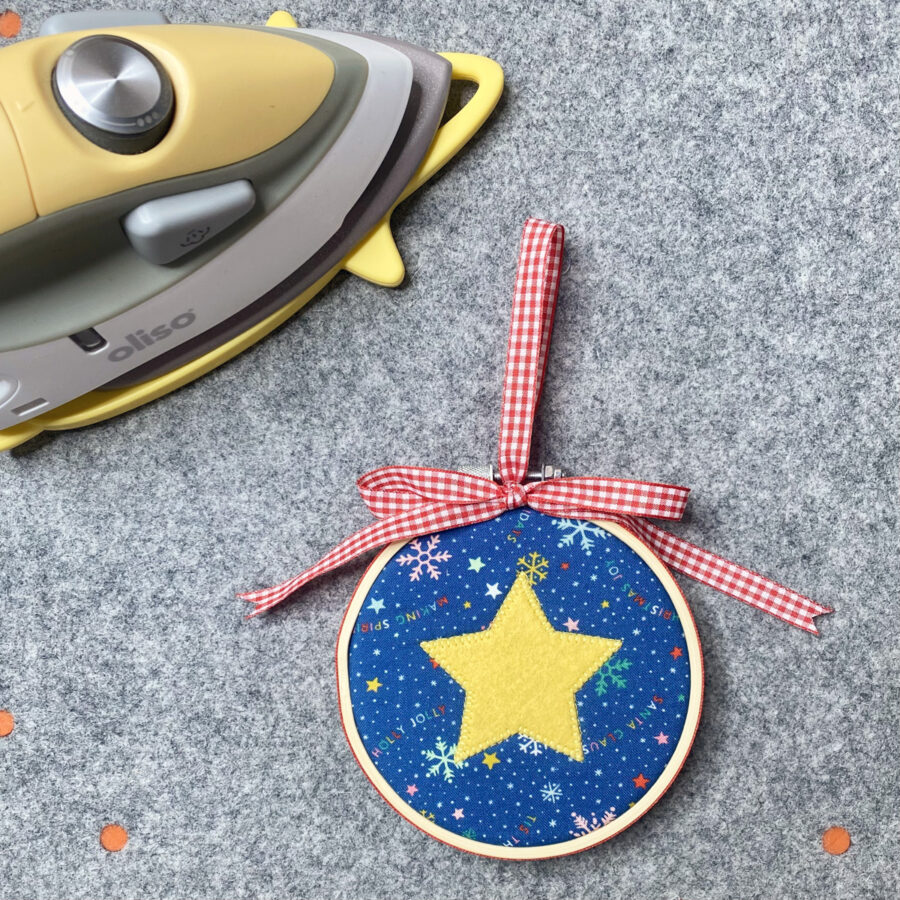

Your Sugar Cookie Hoop Ornament is complete. Wasn’t that fun and easy?! Hang on a Christmas tree or garland, tie on a holiday present, or use to decorate a holiday dinner table. These are great for gift giving and holiday decor. Enjoy!
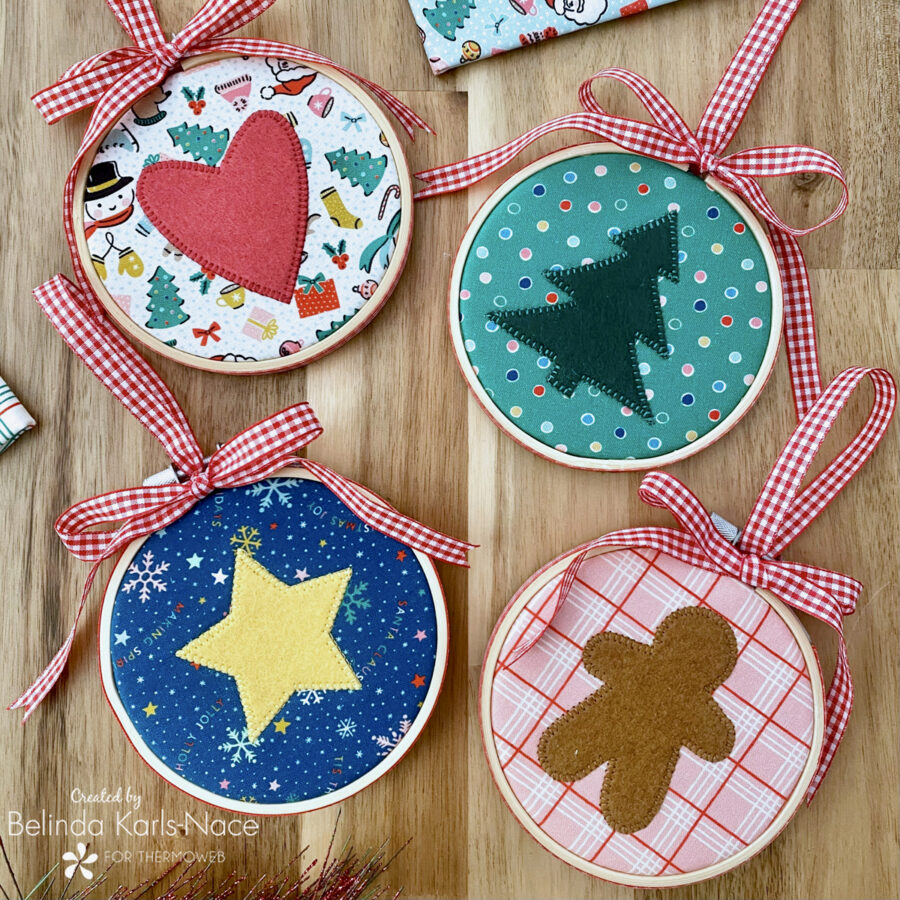
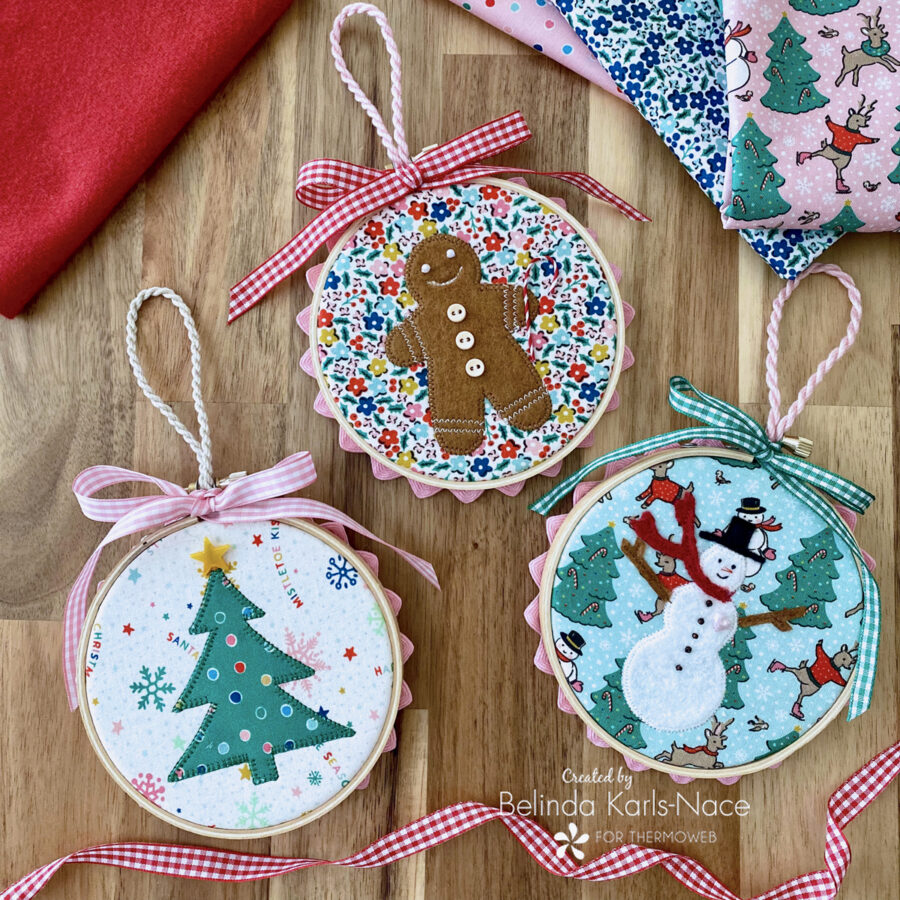
Thank you for joining me today for my Therm O Web blog tutorial. I hope this post inspires you to create a few hoop ornaments for yourself or for gifts, using materials you have on hand. Play with embellishments and make them your own. To see more of my projects and patterns, stop by my blog, website, and/or Instagram – I would love to visit with you and see what you create!