Autumn is my favorite season. So many things to love… warm, sunny days and crisp, cool nights… apples, pumpkins, homemade soup… Halloween (and an excuse to eat Reese’s peanut butter cups) and if you are lucky enough to live in part of the country where the leaves change, beautiful fall foliage. Even if the leaves don’t put on a colorful display where you live, you could still create this autumn banner using artificial leaves from the craft store. It looks complicated, but it’s not… let me walk you through the steps for how to create your own.
 First, let’s start with the tags. Cut or die-cut a tag from autumn paper. Back thinner paper with a tag cut from cardstock and then glue the paper on top (using a SuperStik glue stick, of course!)
Next, cut out a square of paper that is slightly larger than the alphabet die you are using – one for each letter in your banner.
 Now, cut out a piece of iCraft adhesive and adhere it to the FRONT of the paper and then die cut a letter from each square.
Then use a glue stick to adhere the letter to the tag. Of course, you could put iCraft on both sides before die-cutting and then you wouldn’t need the glue stick, but I’m a bit frugal and want to save my iCraft for where it really shines.
Peel off the protective sheet on the front of the letter and cover with glitter.
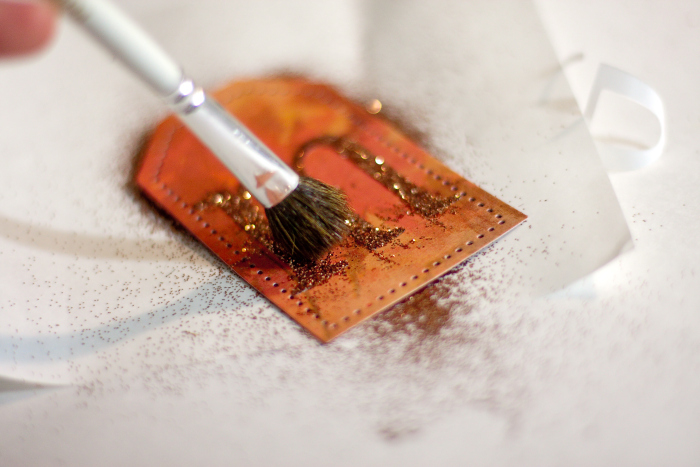
 Brush off as much of the excess glitter as you can…
 and then go back with an Adhesive Pick-Up Square to get the few remaining bits. (One of the best $2 you will ever spend… I use mine all the time for cleaning up stray adhesive and other things).
 Now that all the tags are done, let’s start on the leaves… I bought some inexpensive fall leaves from the craft store and cut them off the branch they were attached to… try to remove as much of the fake plastic stems as possible. Then spray the leaves with Gold Glitter Dust (an old cardboard box is great for catching over-spray). They only take a few minutes to dry.
For the banner itself, I used a wide brown satin wired ribbon. Cut the length you want for the banner and then add about 12″ on each end… tie a loose knot and trim the end in a beak point.
Now comes the fun part – start attaching your glittered leaves and tags to the banner. I used a tiny stapler to attach the leaf stems to the ribbon and then used Small Craft Zots to keep them in position. I used a variety of brads to cover up the staples. Buttons would work well too.
This was a challenge to photograph… it looks better in person. I love how the iCraft helped give such a clean finish to the glittered letters… no way I could have ever used a liquid glue and achieved such a good result.
 and I love the touch of sparkle Glitter Dust adds to the leaves… like they are reflecting afternoon sunlight.
Thanks for stopping by today! Now I’m off to the farmer’s market in the hope that they still have some Silver Queen corn left… another of my favorite things about early fall. 🙂


Debi Walton
September 4, 2013 at 9:06 am (12 years ago)What a pretty fall project.
Going to make one for myself and then I think I will also use it as a sample to do an art project for my grandson’s class at school.