


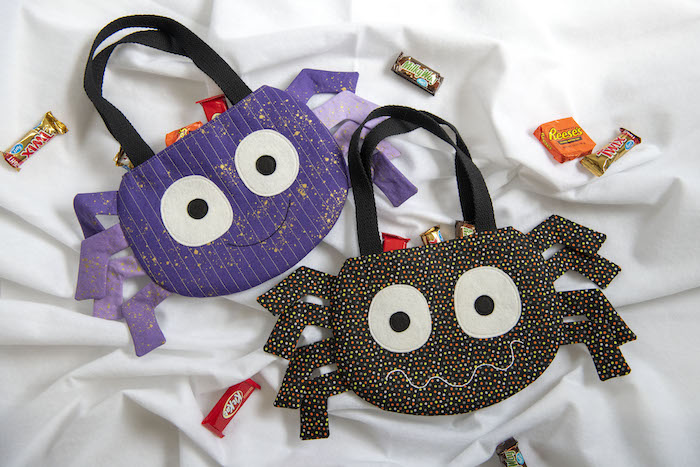
It’s my favorite time of year. School begins and fall weather is on its way. I love all the holidays, cozy sweaters, the leaves changing colors and hot cocoa. Why not get our holiday sewing started? Today we are going to make a fun spider trick-or-treat bag together. Let’s get started.
Halloween Fabric Spider Trick-or-Treat Bag with Fusible Fleece
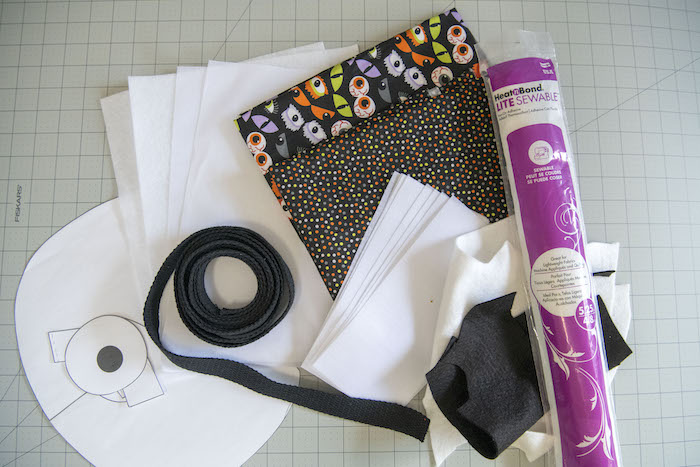
Supplies:
- Spider Pattern (DOWNLOAD HERE)
- 1/2 yard main
- 1/3 yard lining
- HeatnBond Fusible Fleece: cut 2 (9.5”x12.5”)
- ½ yard Lightweight interfacing: cut 2 (9.5”x12.5”), 8 (4” X8.5”)
- Heat n Bond Lite Iron-on Adhesive
- Black felt
- White felt
- Webbing for handles: cut 2 (18” long)
- Embroidery floss/hand sewing needle
- Frixion Pen
Let’s Make A Halloween Spider Bag

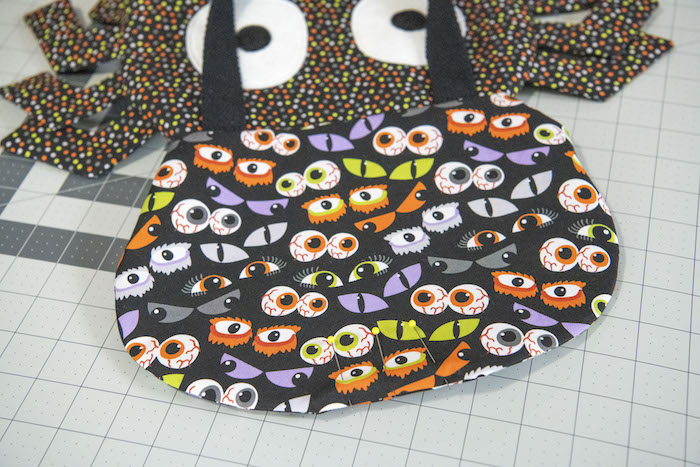
Cut out all your pattern pieces and tape together the main body piece. Press your fabrics. Adhere the fusible fleece and all eight of your 4”x8.5” rectangles to the back side of your main fabric. On the lining fabric adhere to your remaining two lightweight interfacing pieces.
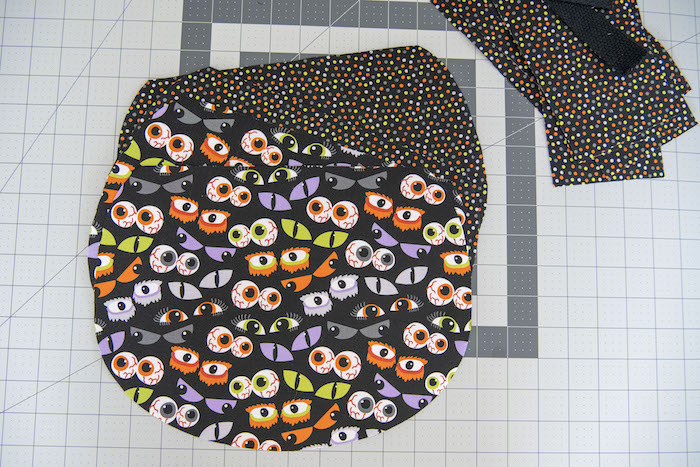
Trace your main body pattern piece onto the back of all four 9.5”x12.5” pieces and cut out. If you want to quilt your spider do so before cutting him out. I just like the look but it is not necessary.
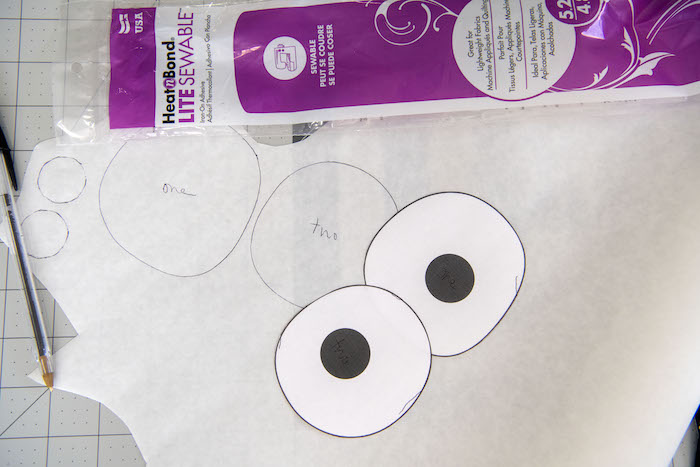
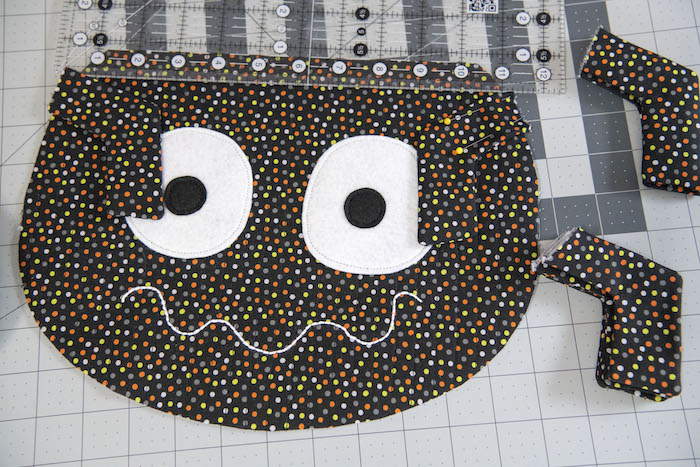
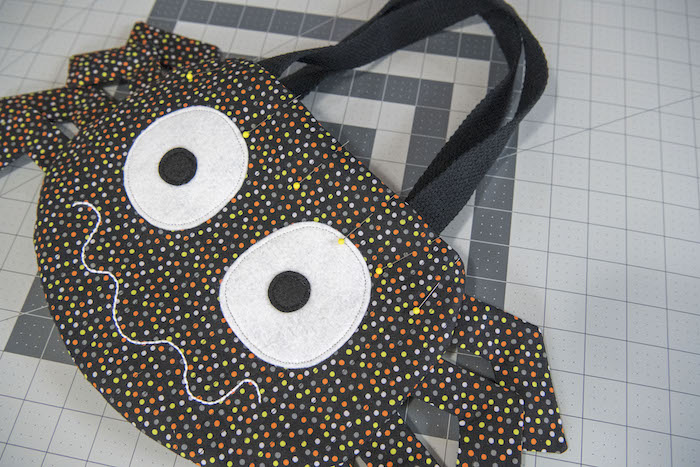
Grab your Heatn’Bond Lite Iron-on adhesive. Trace your eyes onto the smooth side, two pupils and two whites of the eyes. Adhere the pupils to your black felt and the whites to white felt. Be sure to use a barrier fabric between the felt and iron so as to not melt the felt. Cut the pieces out.
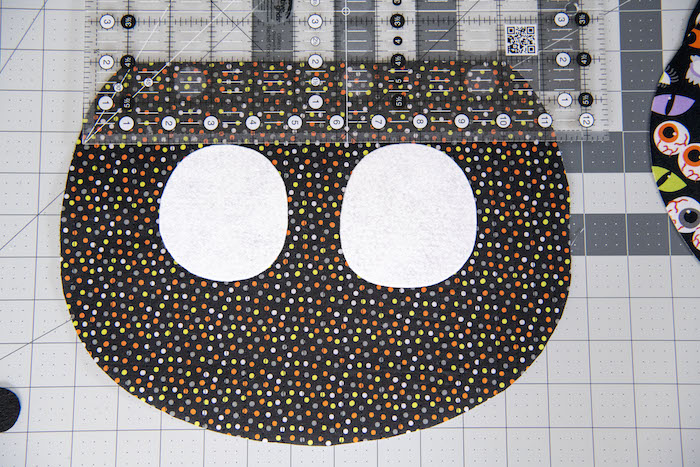
Grab one of your main spider bag pieces with a straight edge on top. Place the eyes whites by measuring down 2-inches from the top and 2 ¼-inches from each side. Iron in place. Sew around the perimeter of each. Pull the thread tails to the back and tie them off.
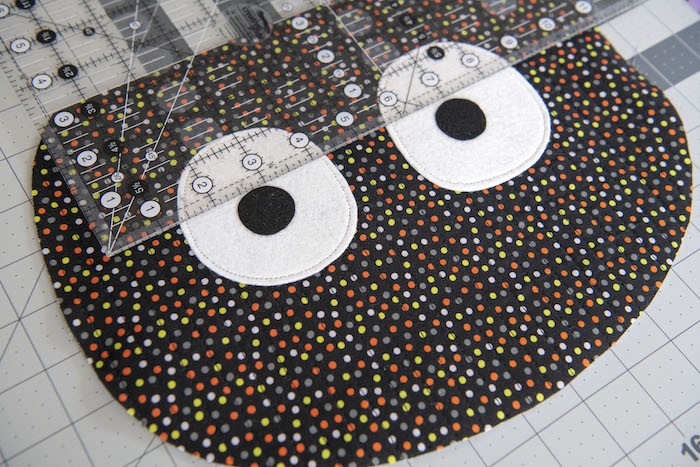
For the pupils measure down 1 ¼–inches from the top of the eye whites and iron in place. Top stitch around the perimeter.
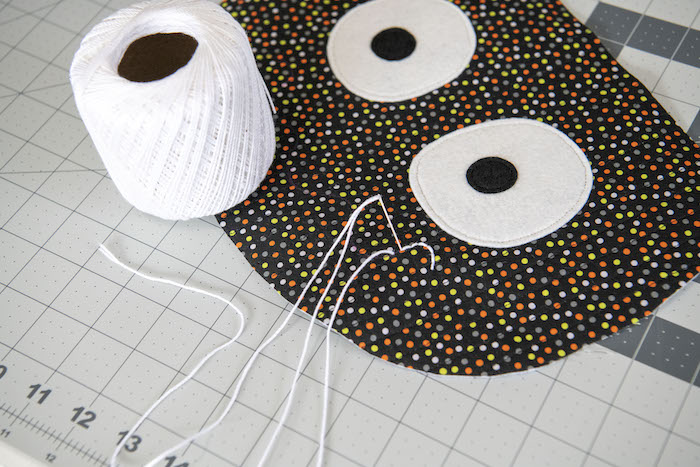
Next, we will be embroidering our spider’s mouth. Draw a mouth below your eyes with a Frixion pen. Then grab your embroidery floss and sewing needle. Follow your drawn line making small backstitches all across your drawn line to make your spider’s mouth. Tie off when finished.
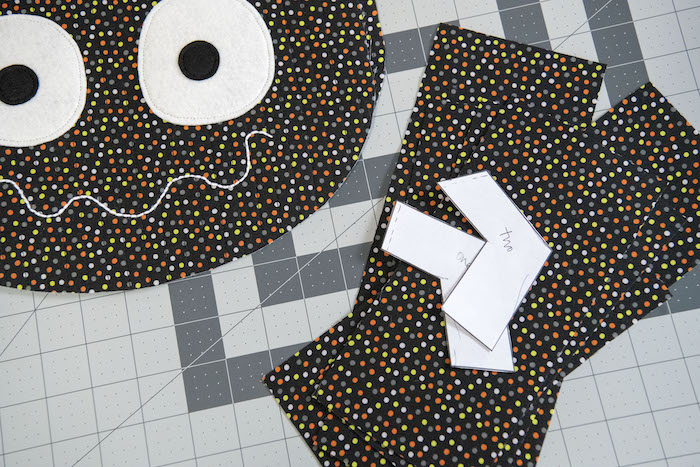
Once done with your smile grab your fabric strips and your leg pattern(s). There are two different leg patterns. I like to make four of each just to make them less uniform but you can use just one of them for all eight legs or do half and half.
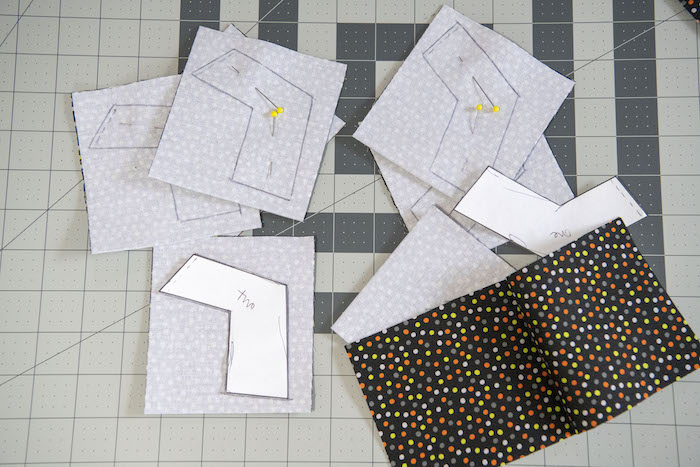
Fold each fabric rectangle in half, right sides together, and trace your leg pattern onto the back making sure there is negative space around all sides. Mark the dotted line side as you trace each. Use a couple straight pins to keep the two layers together.
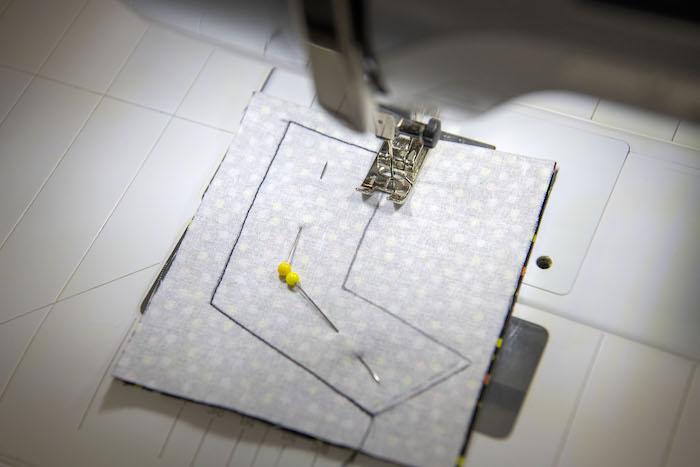
Take to the sewing machine and sew right on the line around each leg leaving the dotted line edge un-sewn. Make sure to back stitch at the beginning and end.
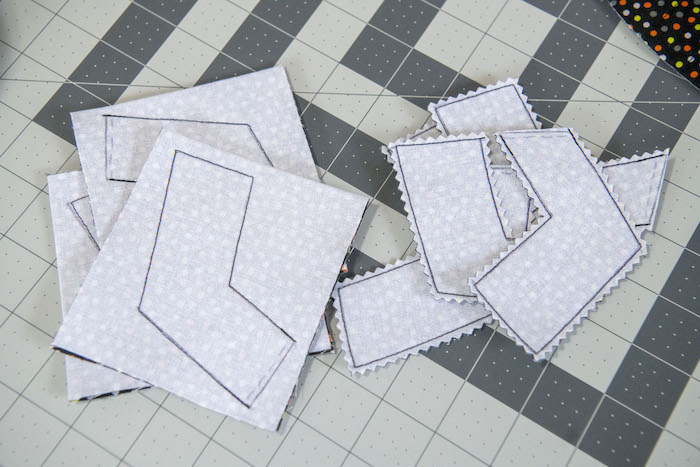
Once they are all sewn cut each out close to the sewn line but make sure not to cut the stitches. I used pinking shears but you can use regular scissors as well.
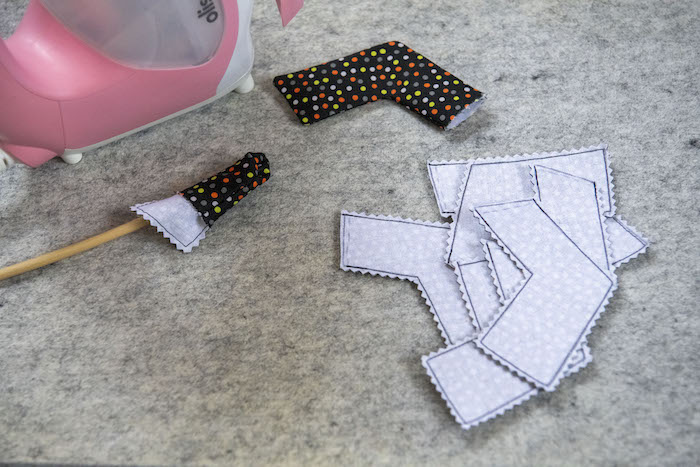
Take to your ironing board and turn each leg right side out before pressing.
To place the legs on your spider’s body measure down ¾” from the top straight edge of your body to place your first two legs (one on each side). You want the top corner of your leg to meet that ¾” measurement and then pin the leg along the edge with the raw edge of the leg just overlapping the outer edge of the body and the rest of the leg facing in toward the spider’s face.
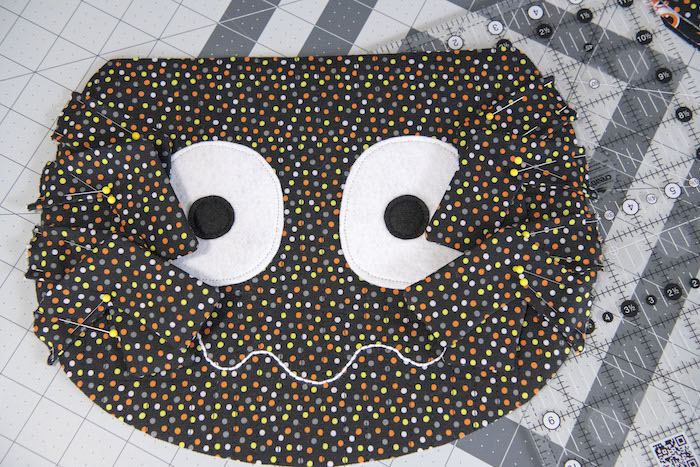
Place each of the other legs ½” down from the bottom edge of the leg above it. Four legs on each side (I trade off the two different leg shapes). Pin them in place and then when they are all pinned tack them in place with your machine ⅛” in from the edge.
Next, take the other main body pieces and pin them to the front, and right sides together. Take to your sewing machine and sew around the rounded sides and bottom using a ¼” seam allowance. Leave the straight top edge un-sewn.
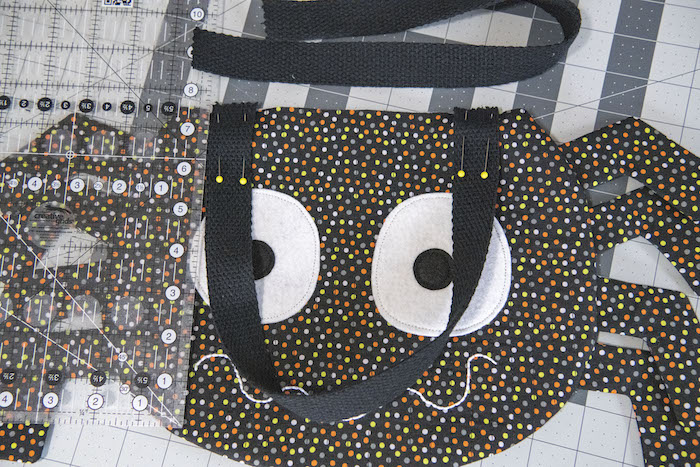
Turn right side out and press. Grab your webbing. Measure in ¾ an inch from each outer edge and place the outside edge of one end of your first webbing strap, raw side facing up and just overlapping the raw edge of your bag. Take the other end of the same strap and repeat on the other edge measuring in ¾”. Flip your bag over and repeat with the second webbing strap.
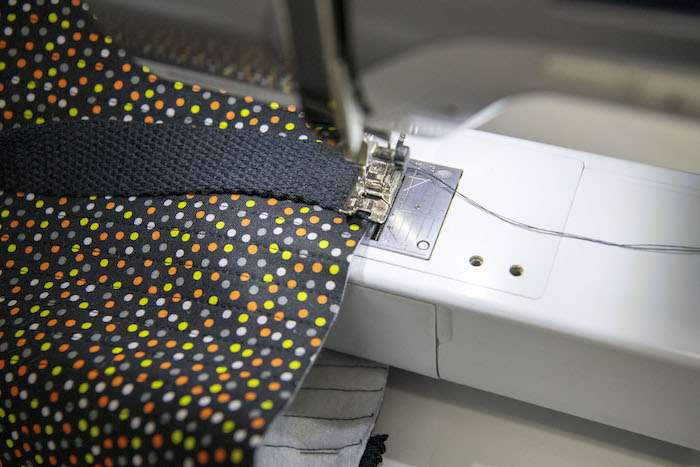
Tack the top edges of the webbing to the bag.
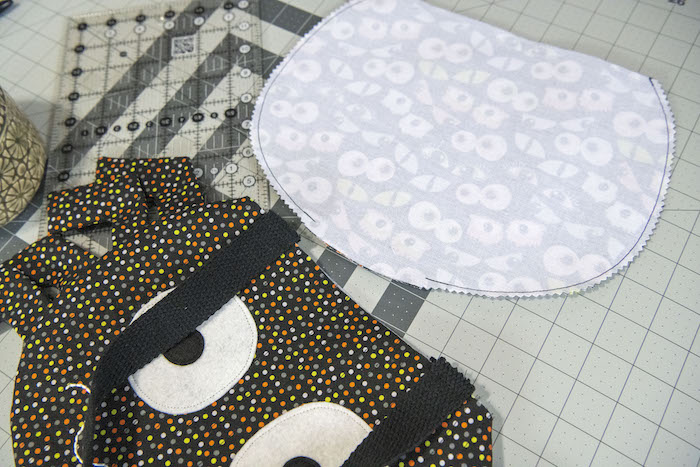
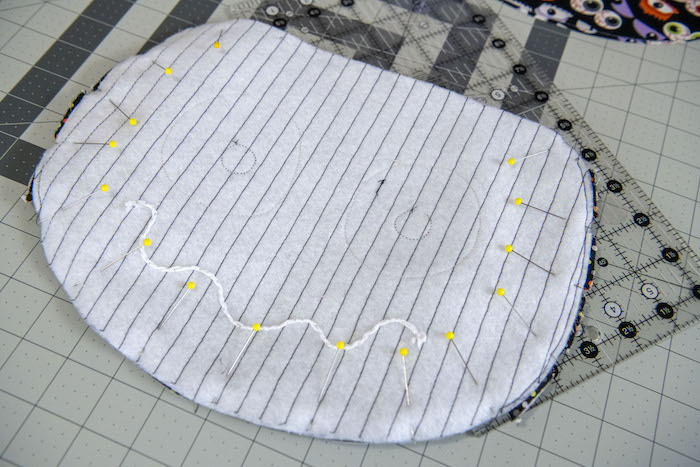
Grab your lining fabrics. Pin right sides together and sew leaving a 3 to 4-inch opening along the bottom (the rounded edge) for turning. I trimmed the seam just to help with the bulk.
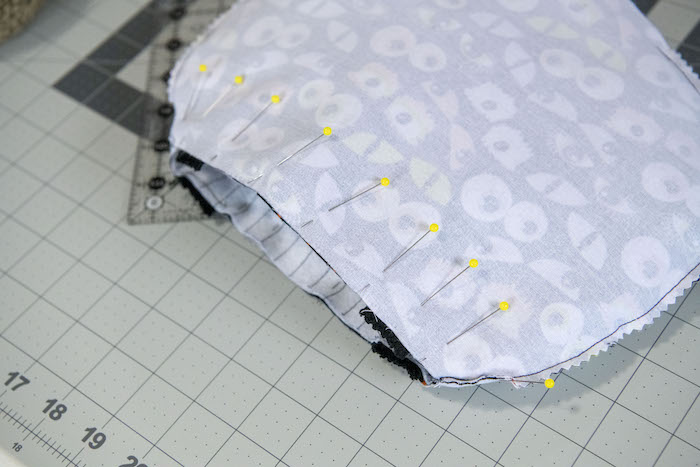
Place your main spider into the lining, right sides together. Make sure all the legs and webbing handles are fully inside (except the tacked edges of the webbing). Pin at the side seams first and then all around the perimeter. Take to your sewing machine and sew all around the top.
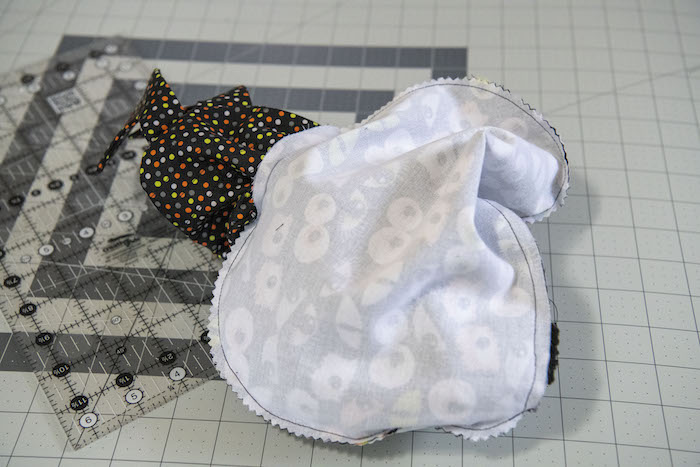
Pull the bag out of the opening at the bottom of your lining.
Press the opening closed with raw edges caught inside, pin, and top stitch.
Press the lining inside the main bag and press along the top edge. Top stitch and you are done! Now we just have to wait until Halloween to fill it up with treats. I hope you love our fun spider trick-or-treat bag! If you make one and post it on Instagram please tag me @stubbornlycrafty so I can see it! Thanks for sewing along.
[…] Therm O Web blog has a cute tutorial for a spider treat bag designed by Stubbornly […]