


Hello and welcome!
It’s Julia from Inflorescence Designs! I’m so joyful you are visiting today. For today’s tutorial, I am going to show you how to make this quilt block applique sweatshirt!
Have you ever made or seen a quilt block that looks amazing, and you think “I love it, but don’t want to make an entire quilt out of it,” or “I don’t have time or energy to create a full project.” If this has ever come across your mind and you love the idea of wearable art than this project is for you!
This project is also great for any orphan quilt blocks you have lying around or a new quilt block pattern you are testing.
Quilt Block Sweatshirt

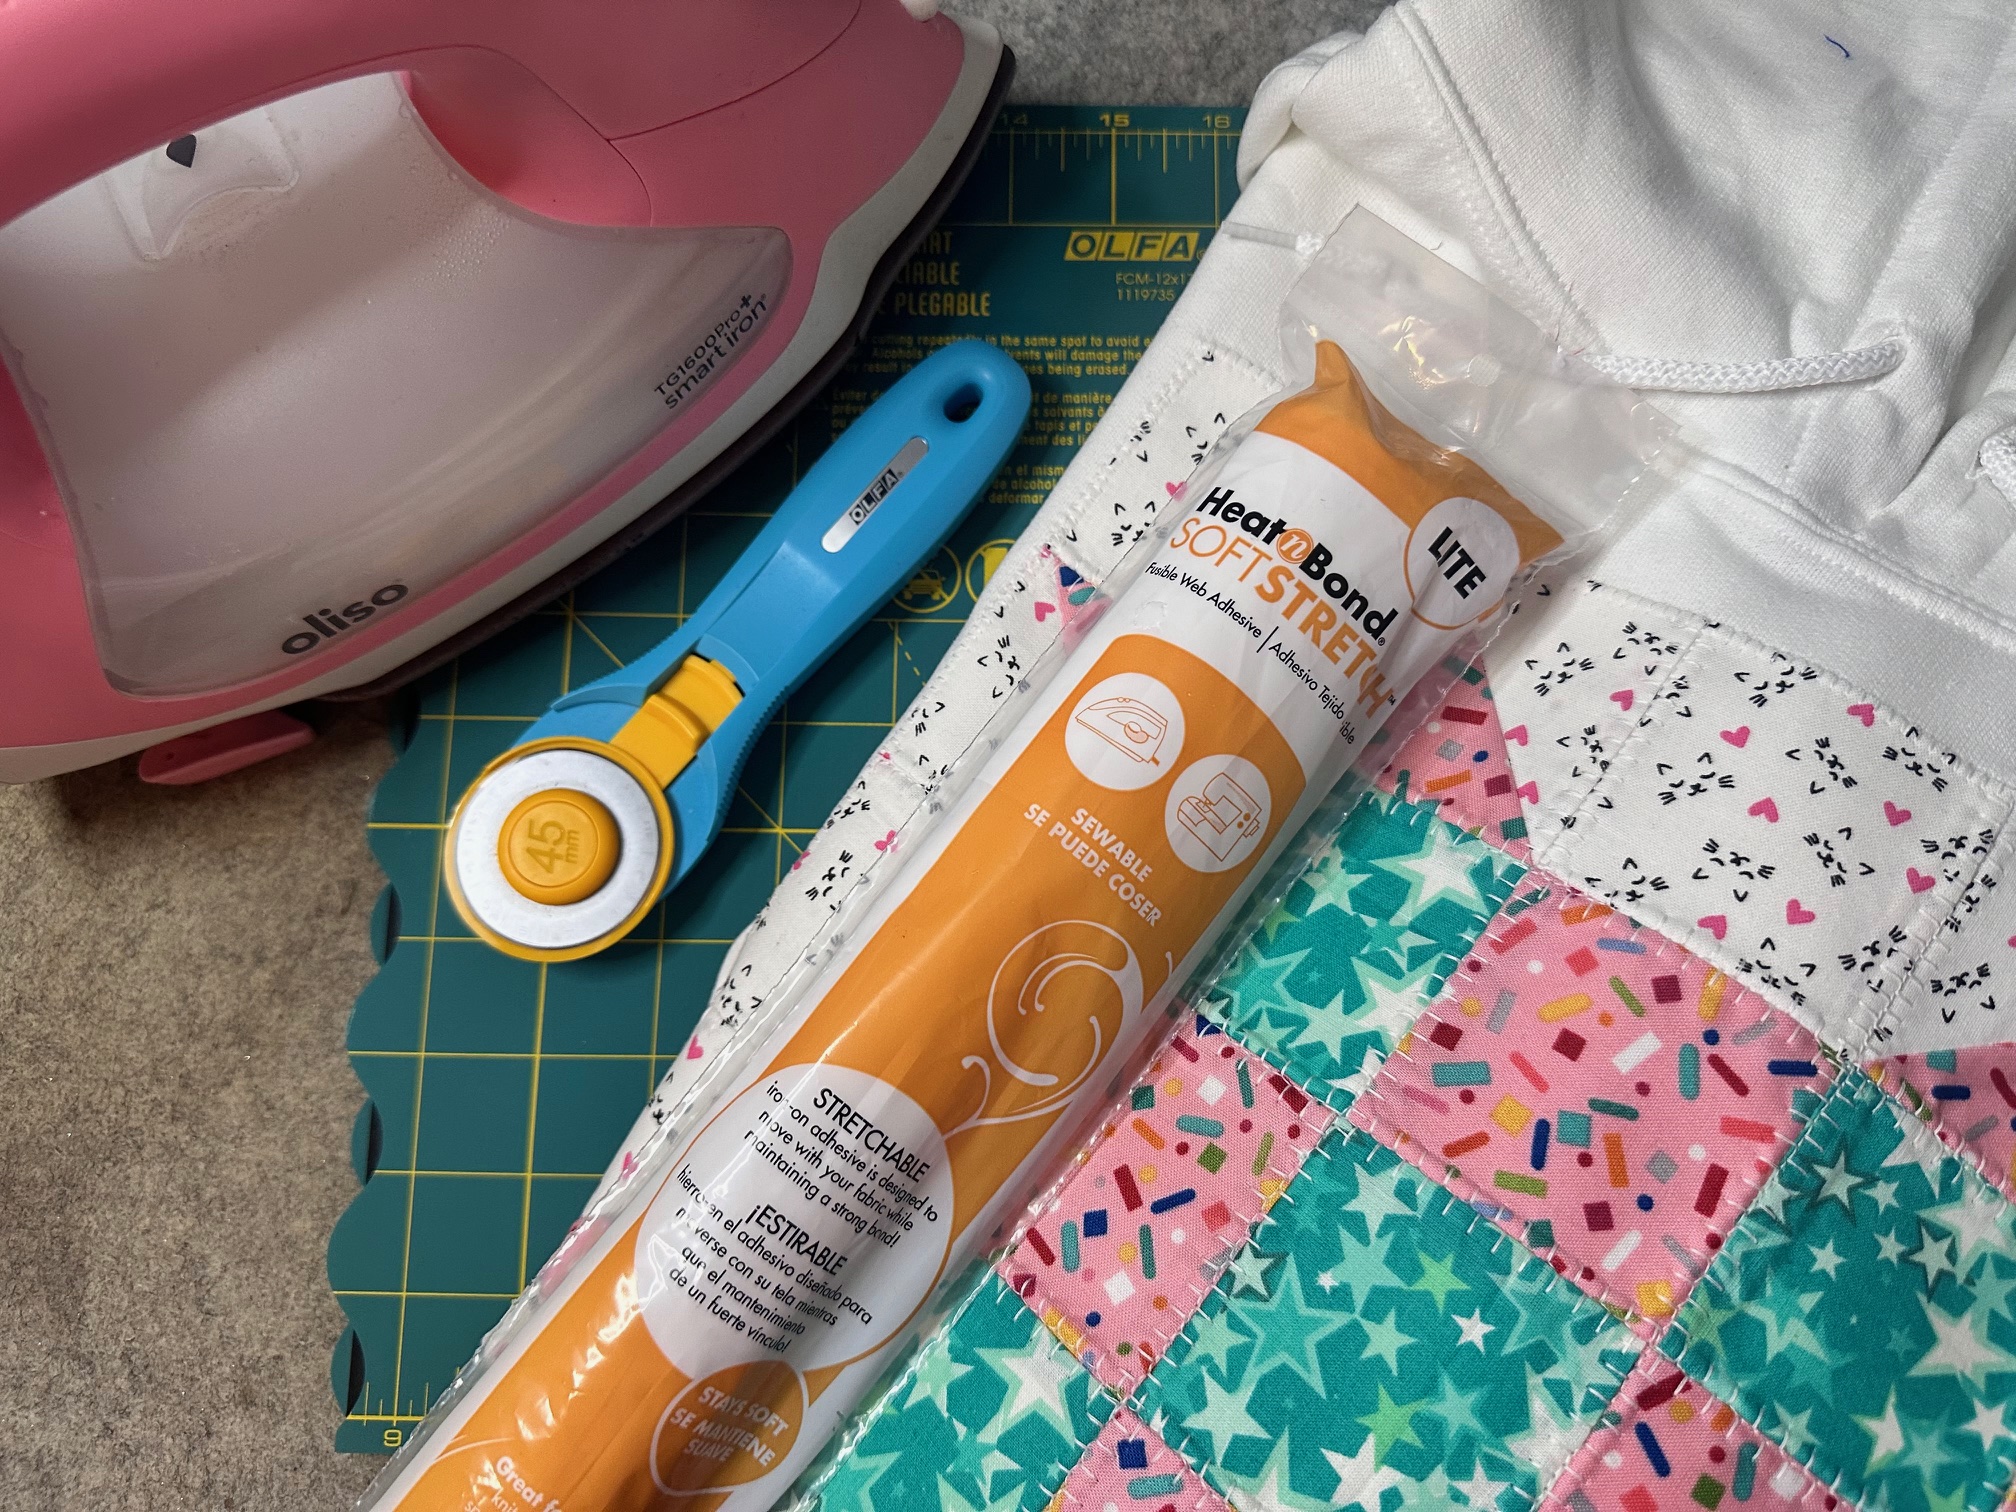
Supplies:
- HeatnBond Soft Stretch Lite
- Assorted fabrics for quilt block or an already made block (***sizing varies)
- Sweatshirt
- Basic sewing notions
- Oliso Iron
- Olfa Cutting Mat and Rotary Cutter
***Size Varies depending on your sweatshirt size. Measure the area that you want your quilt block to go and make a block that is 1/2″ larger than that size. For my sweatshirt (which is an XL) I made a 12 1/2″ block.
In the instructions below I will walk you through how I made the block you see in the images as well as the cutting requirements. You can, however, use any block you would like!
Block Instructions:
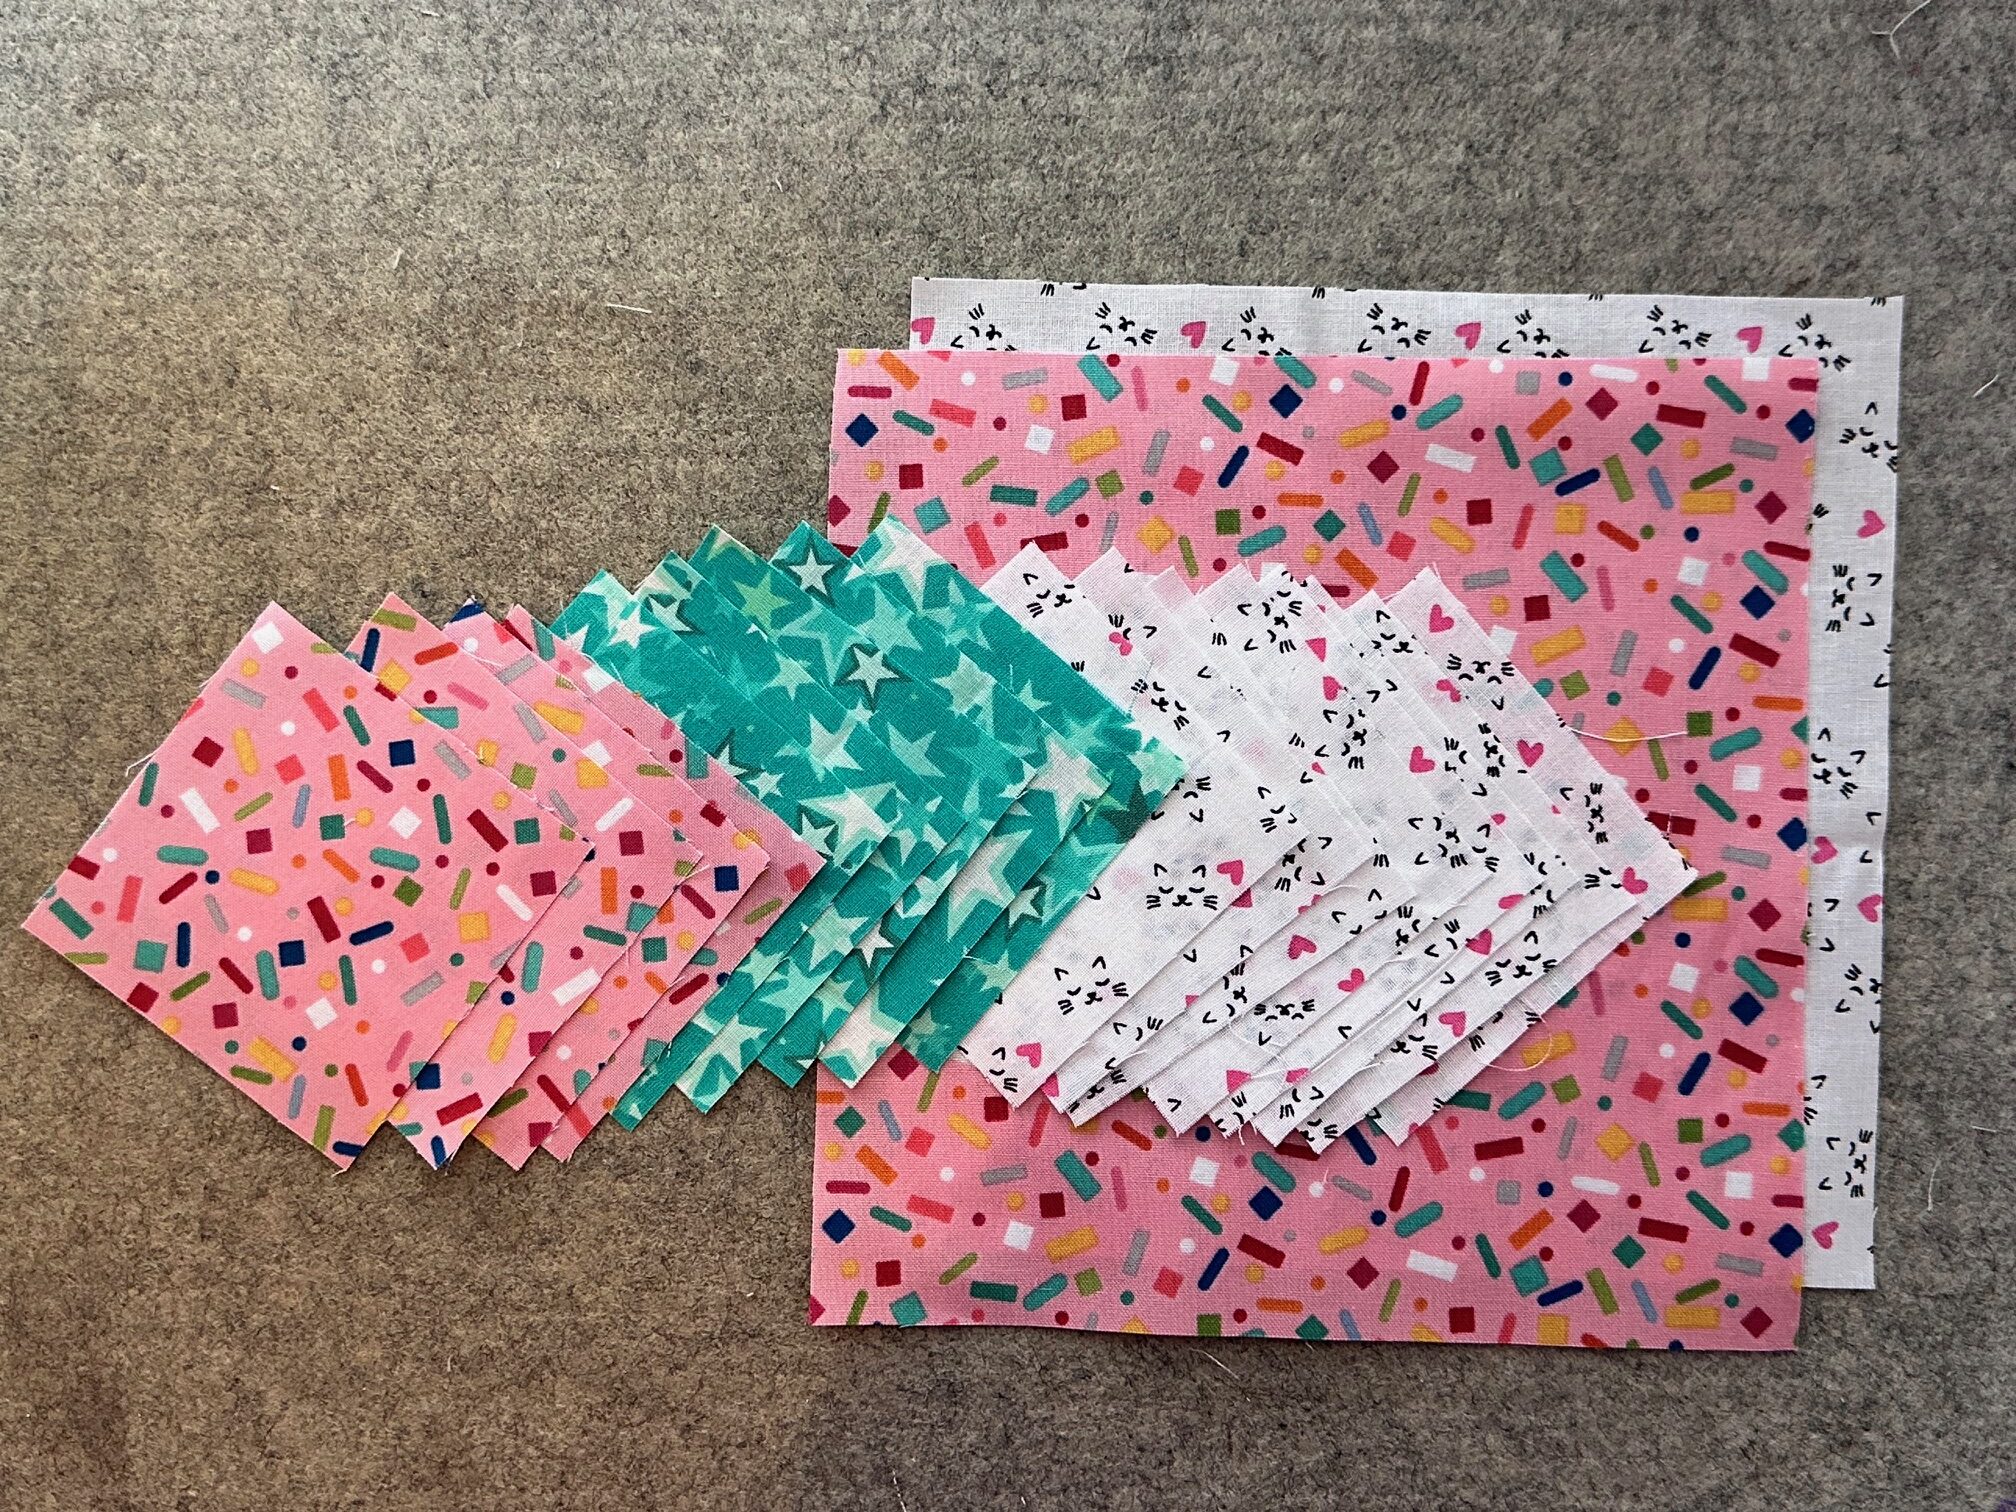
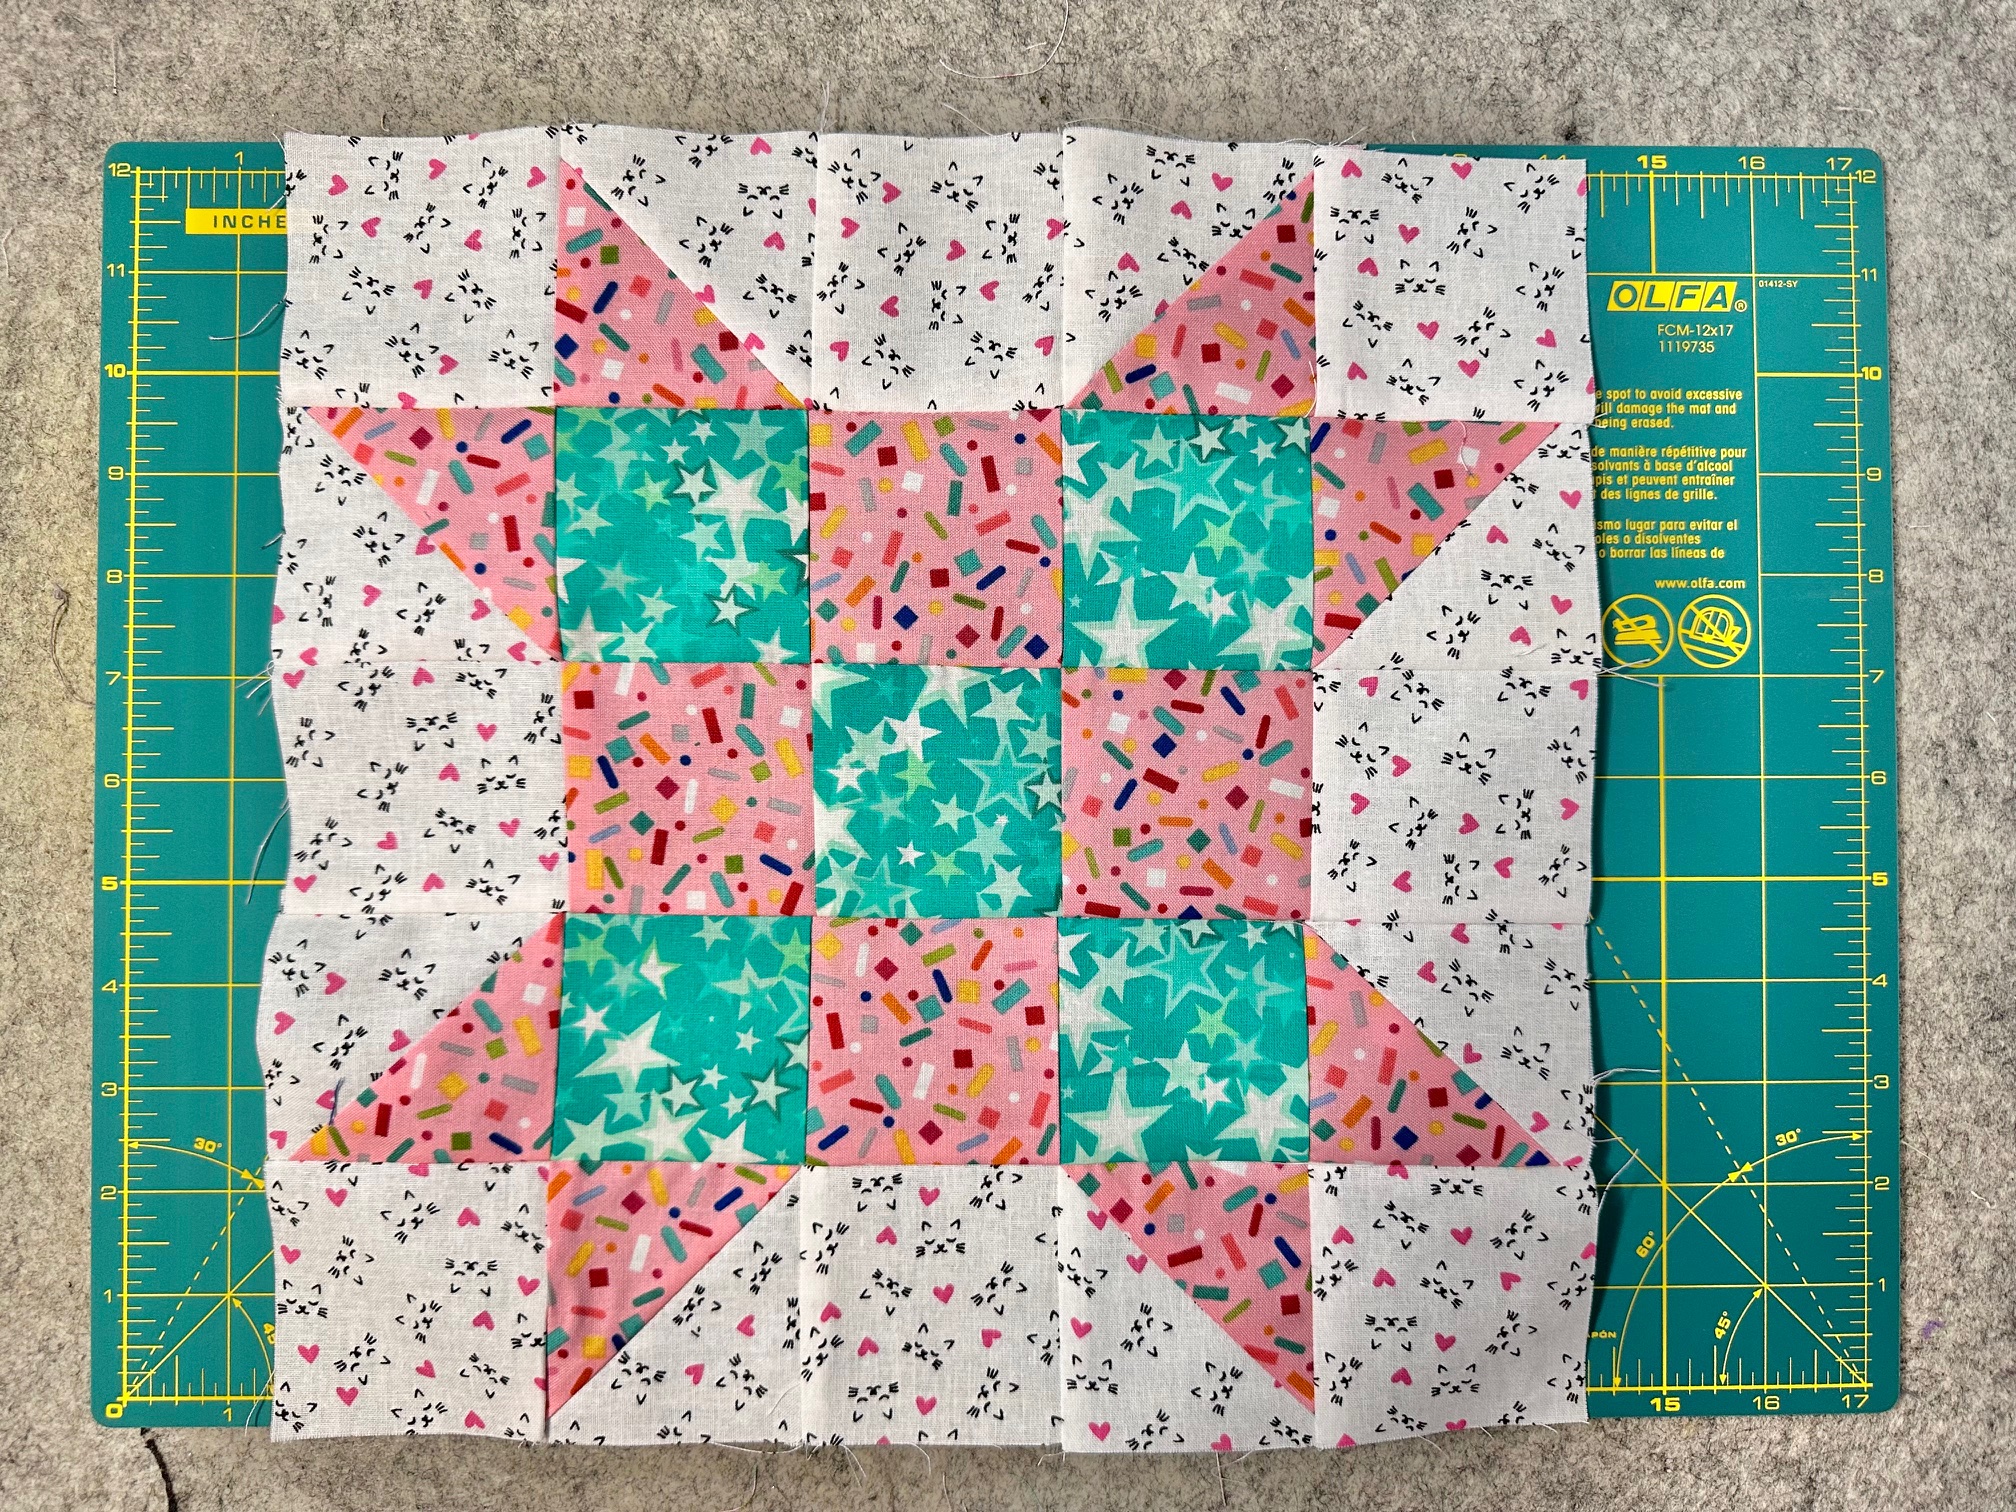
Cut out the following pieces:
- (1) 7 1/4″ square (white fabric)
- (1) 7 1/4″ square (pink fabric)
- (5) 3″ squares (teal fabric)
- (4) 3″ squares (pink fabric)
- (8) 3″ squares (white fabric)
Next…
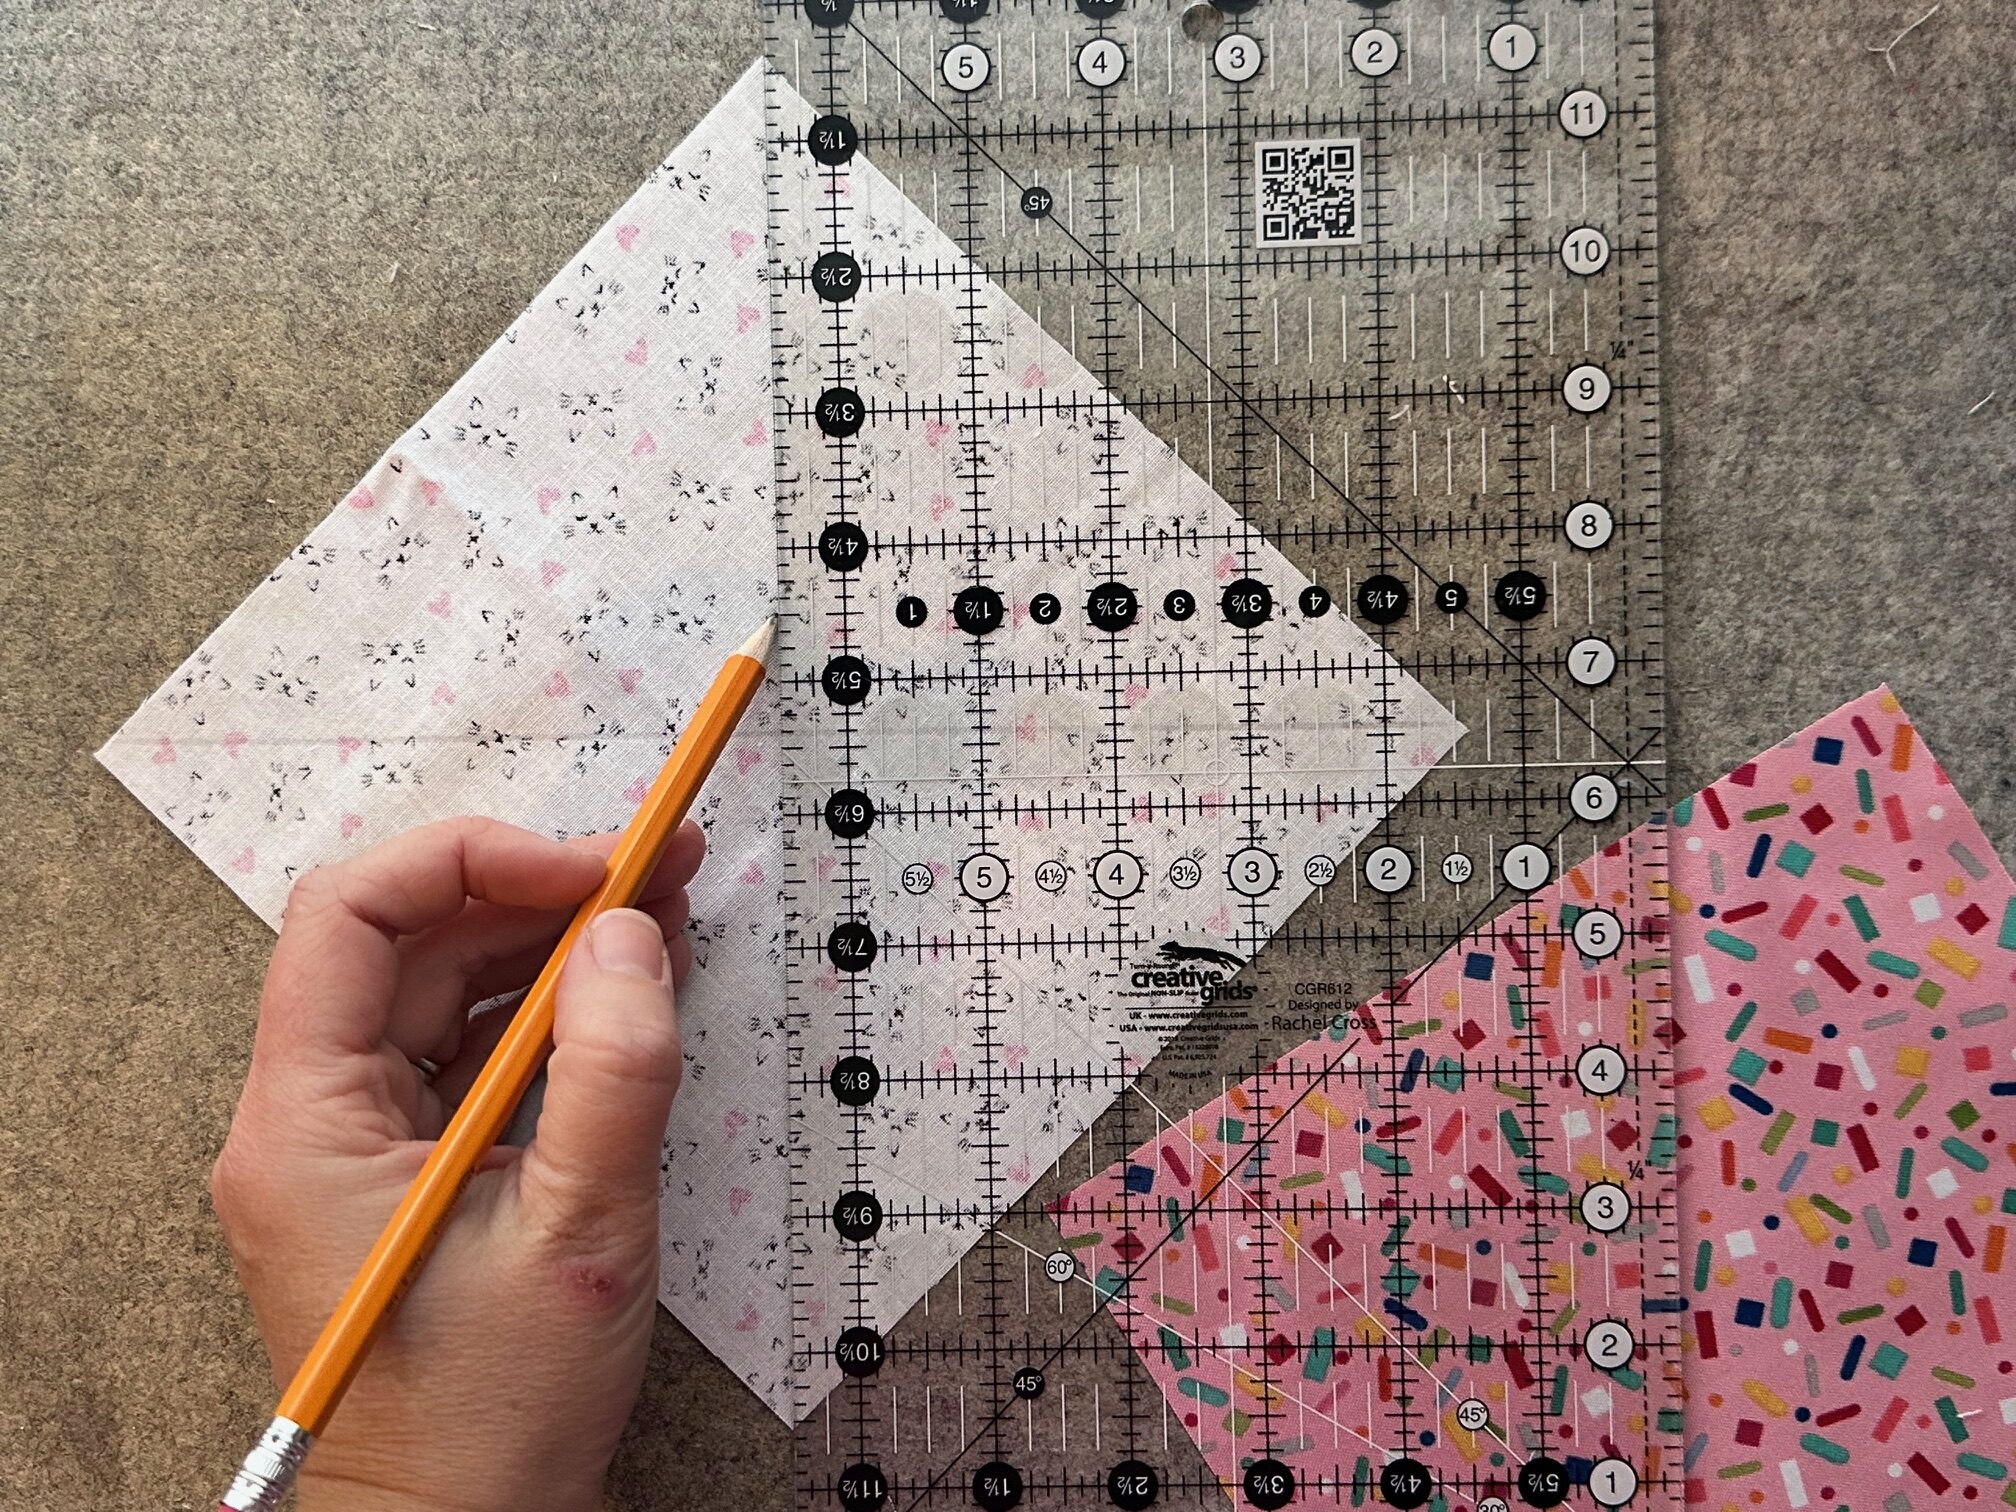
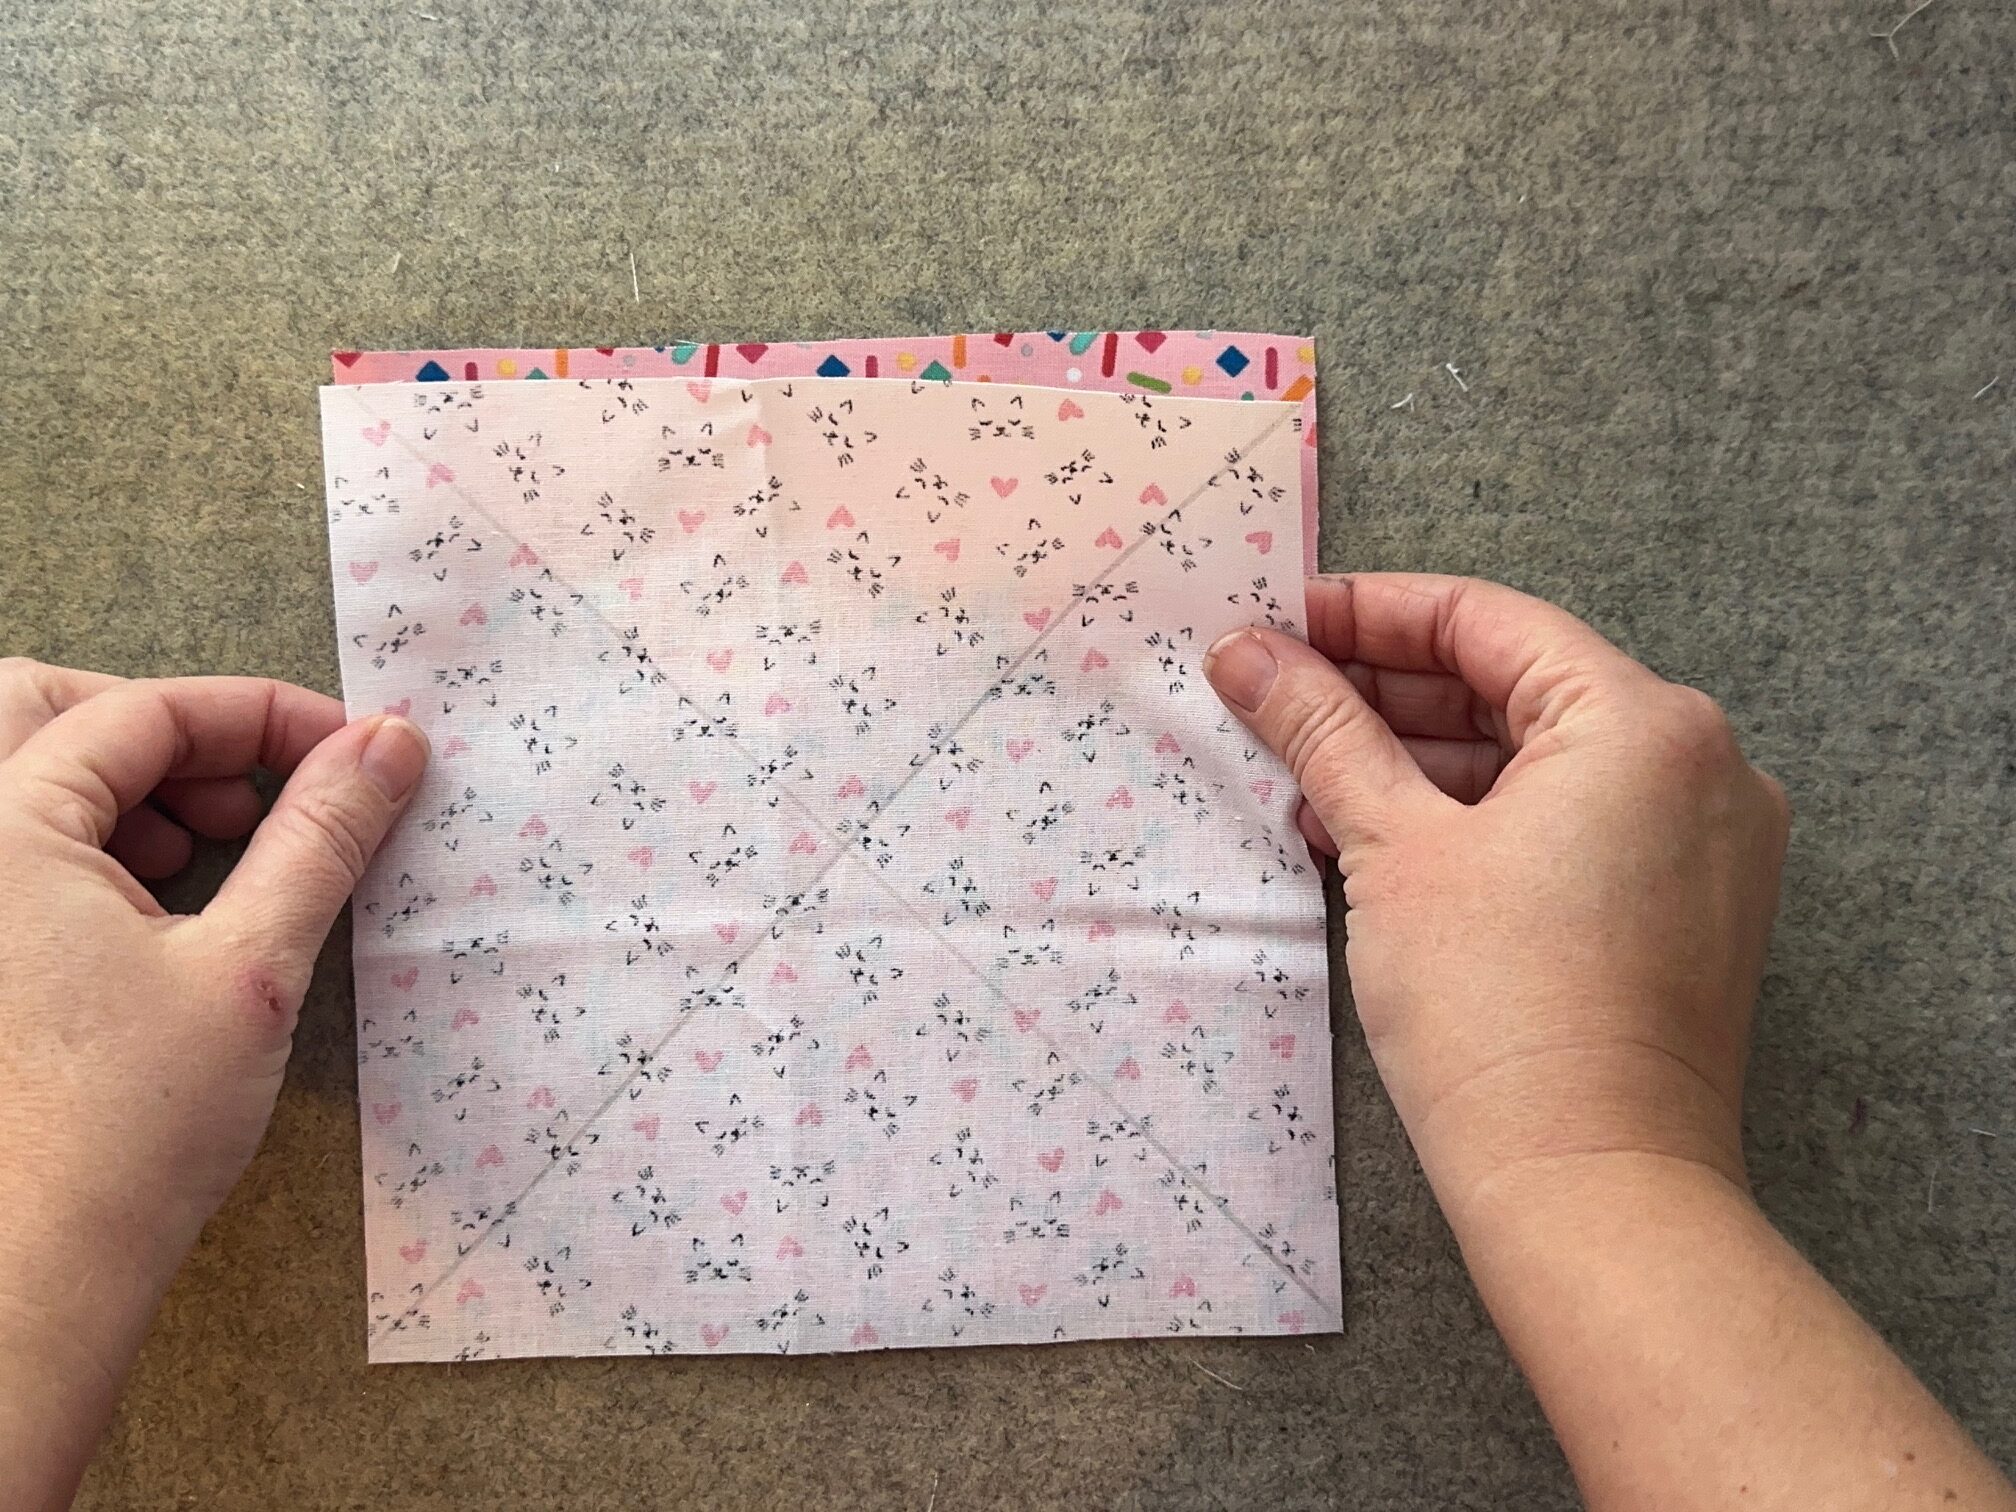
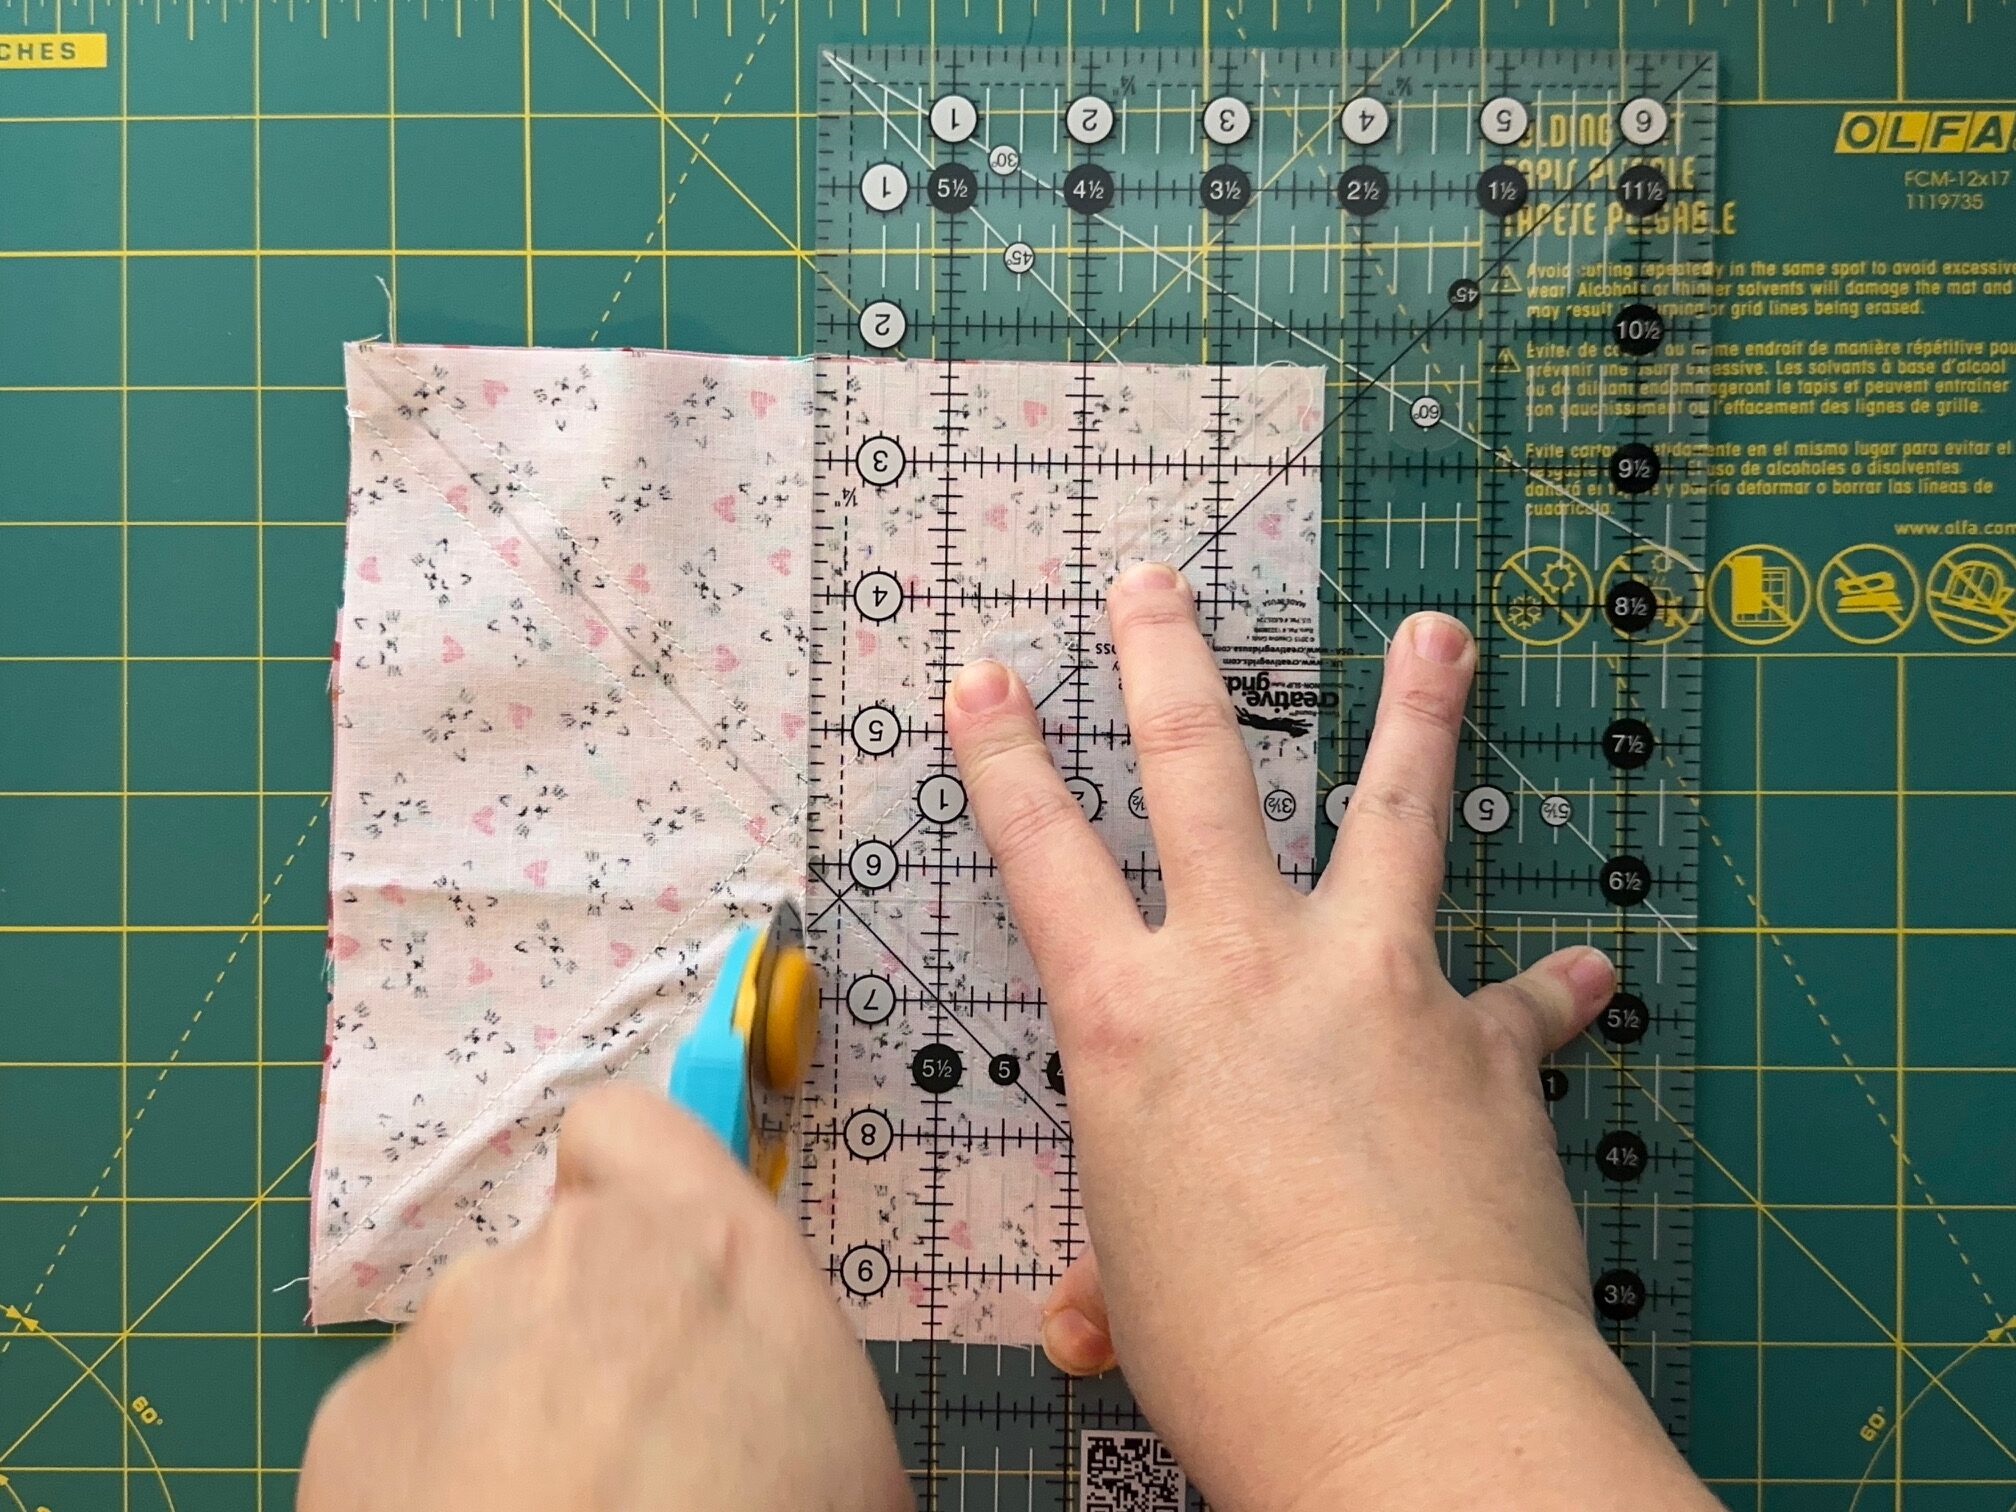
Draw a 2 diagonal lines from corner to corner on the wrong side of one of your 7 1/4″ fabrics.
Then…
Place your 7 1/4″ fabrics right sides together and sew a 1/4″ on both sides of each diagonal.

Next…
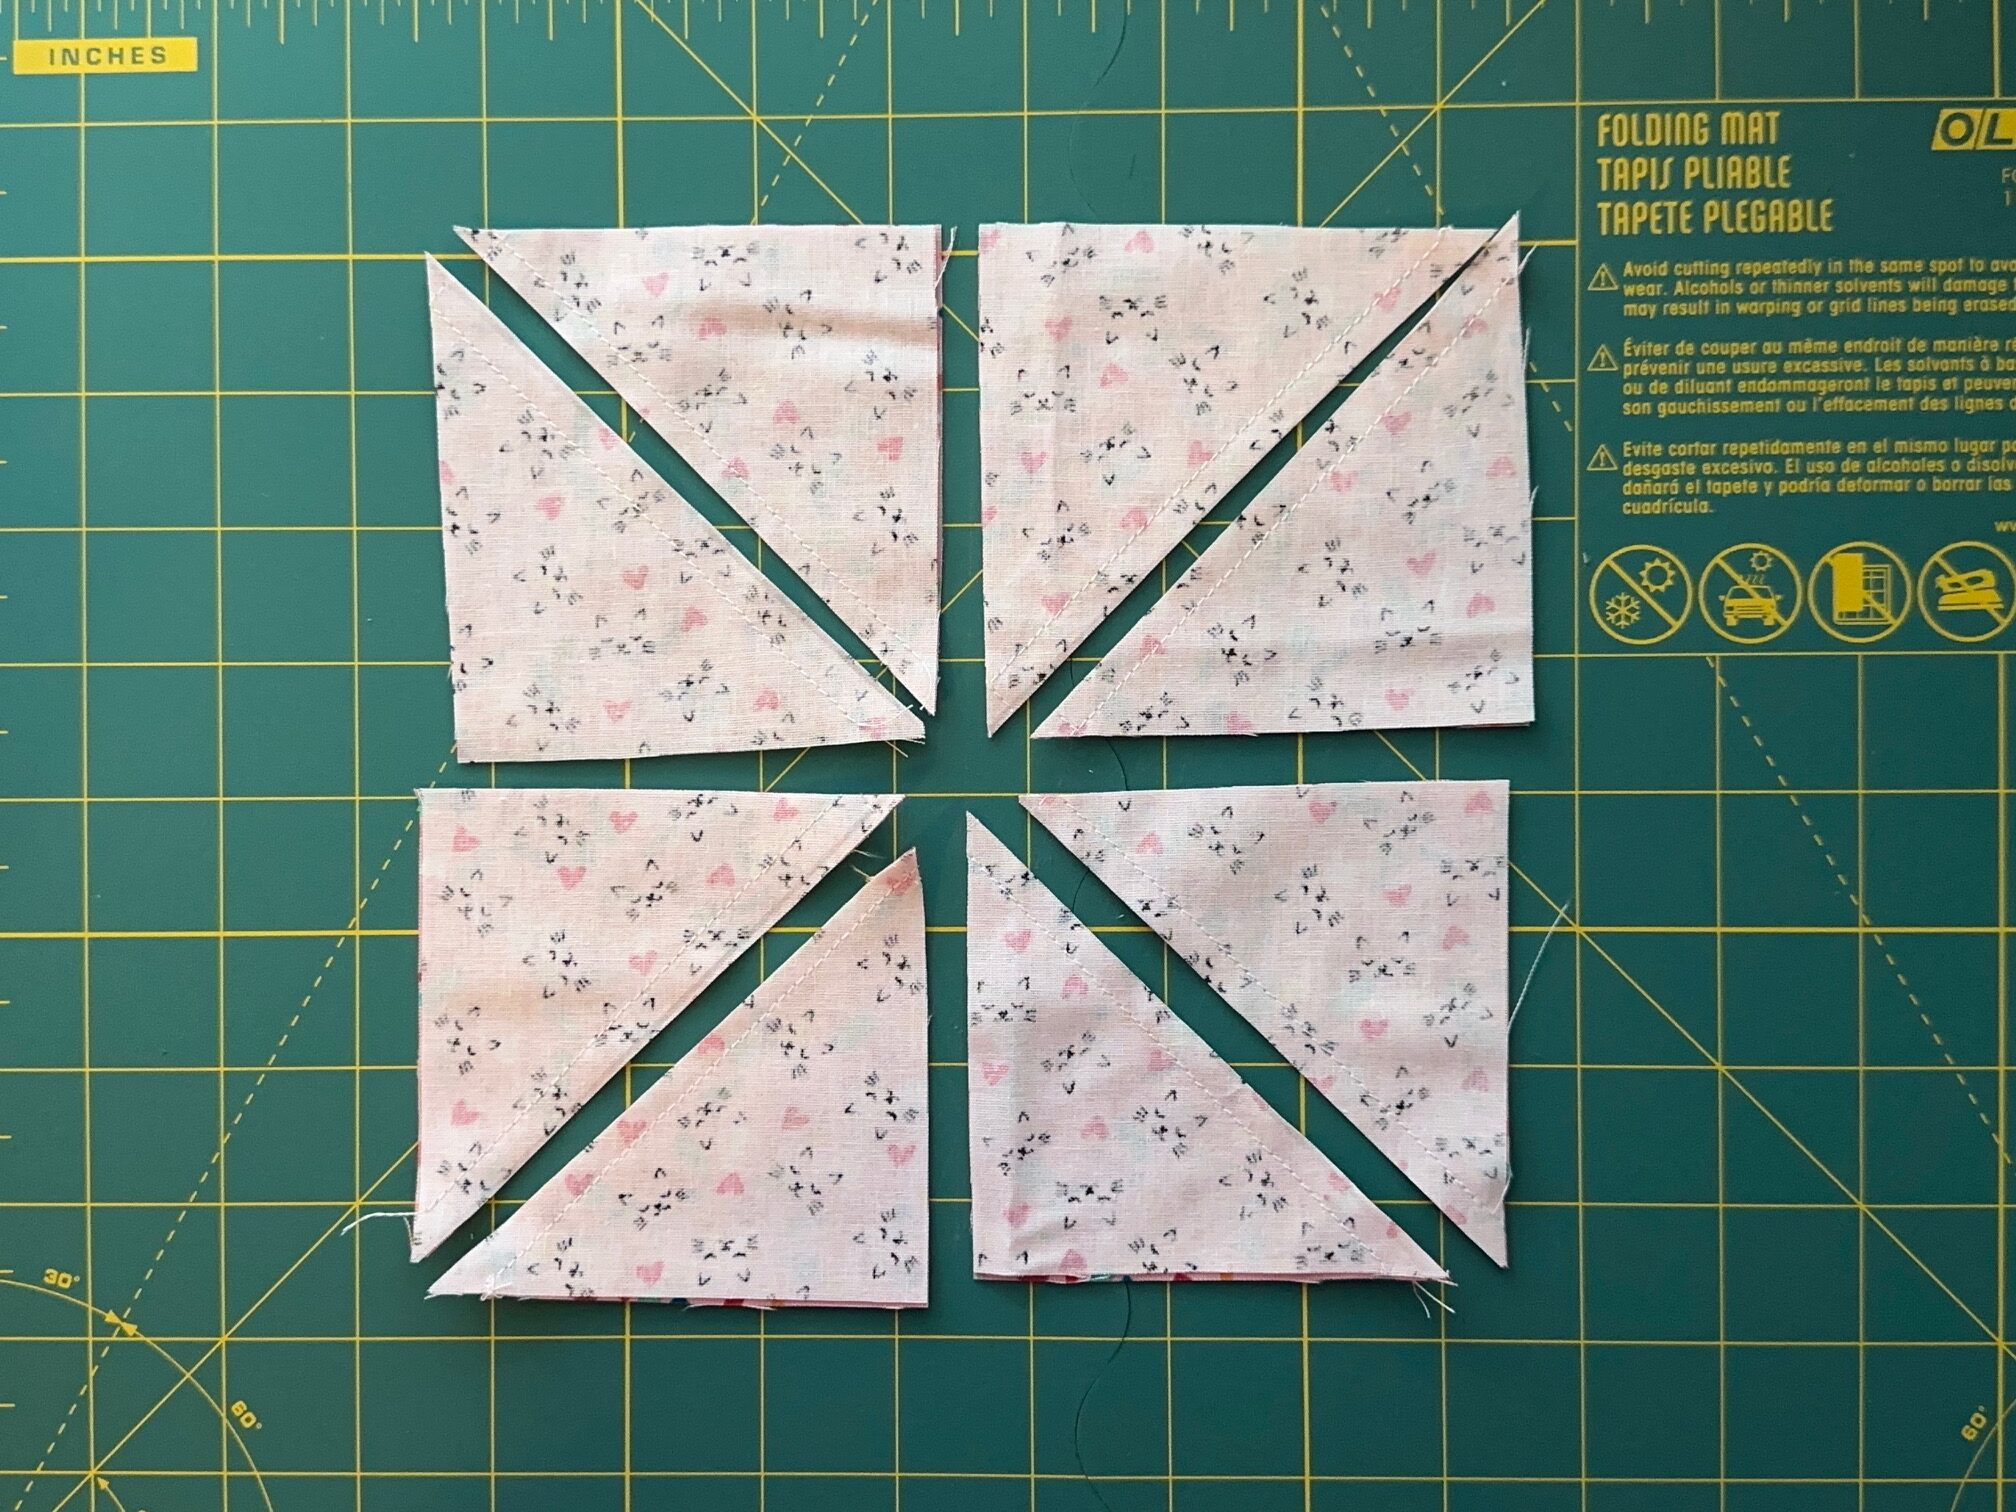
Trim your square into 8 half square triangles. Begin by cutting the square in half and then cut each of those halves in half again. Finish trimming by cutting on the drawn diagonal lines.
Continue by…
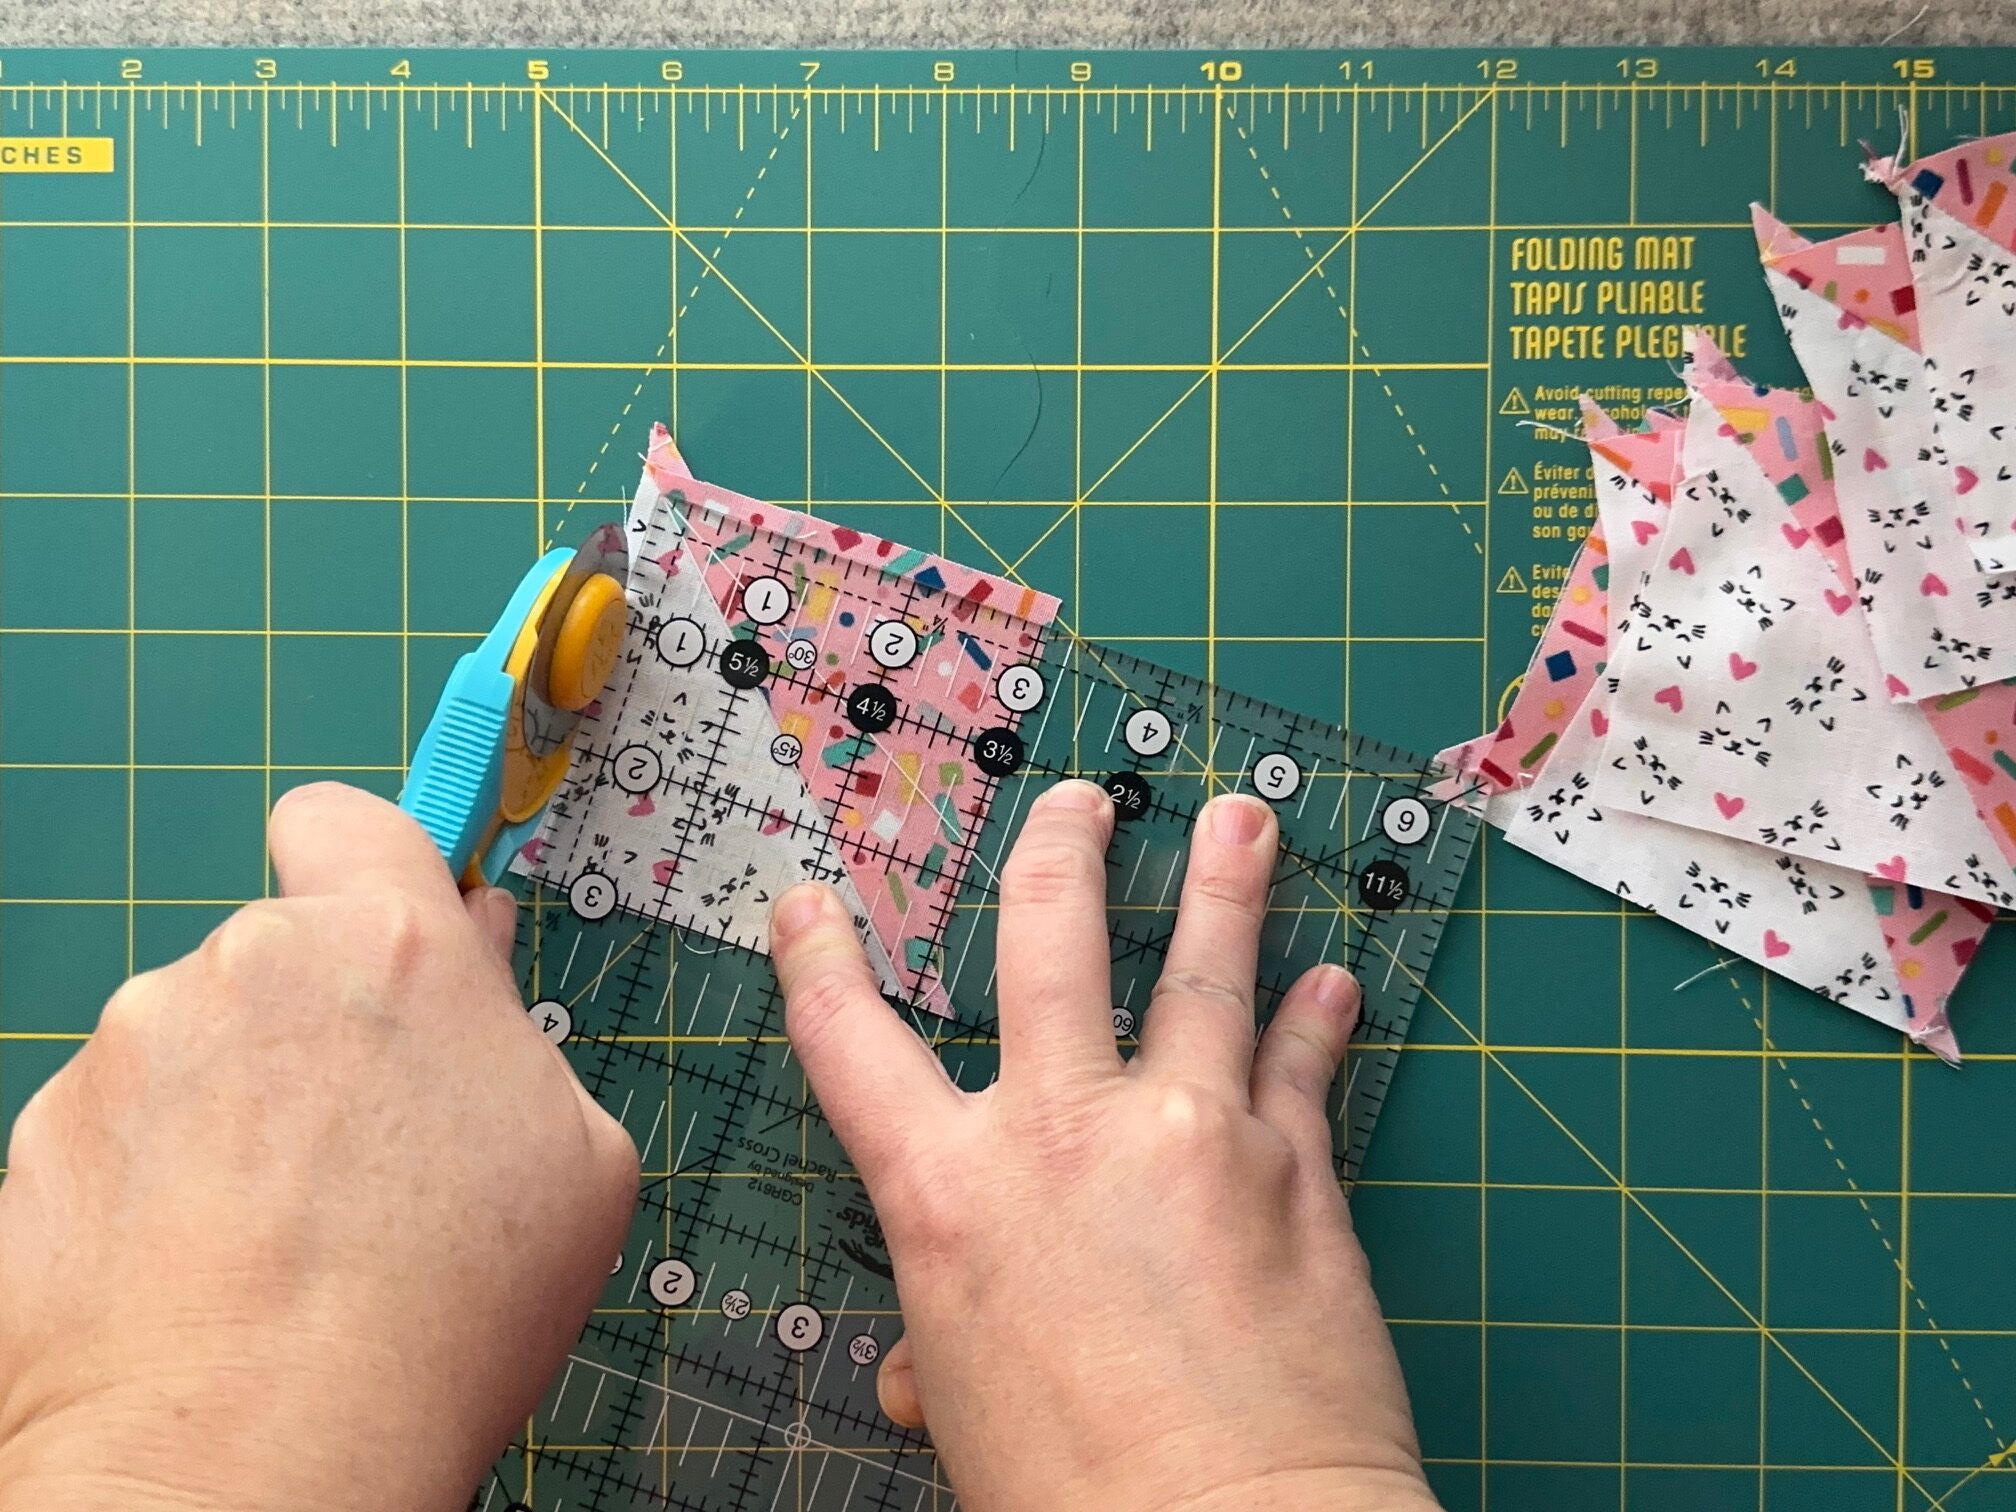
Press each half square triangle open and trim to 3″

Next…
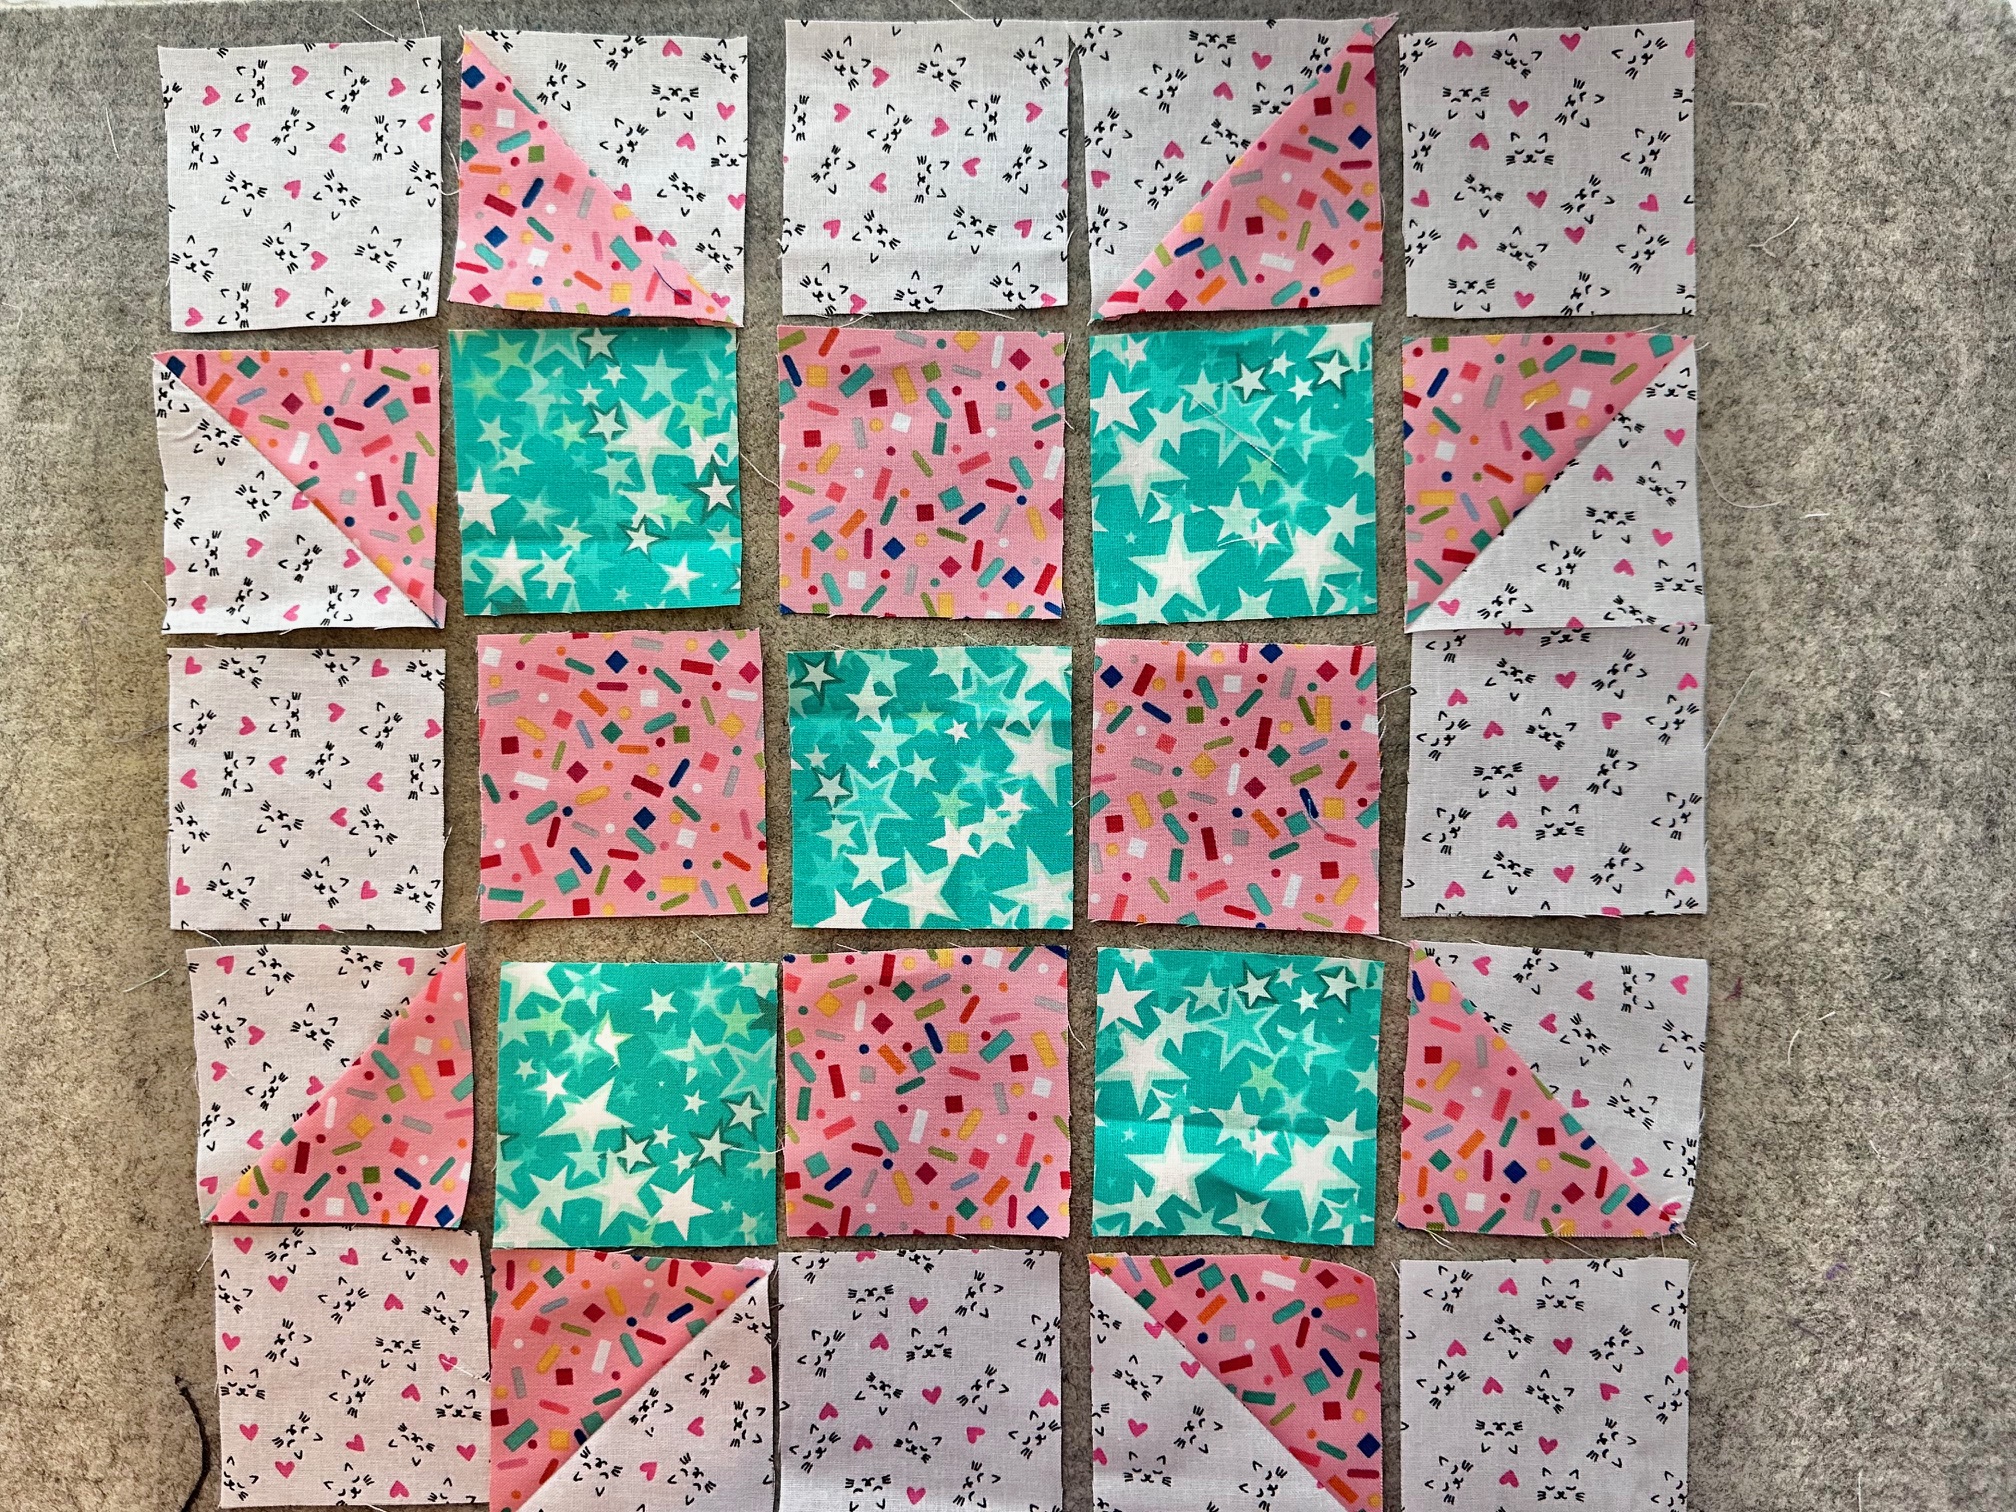
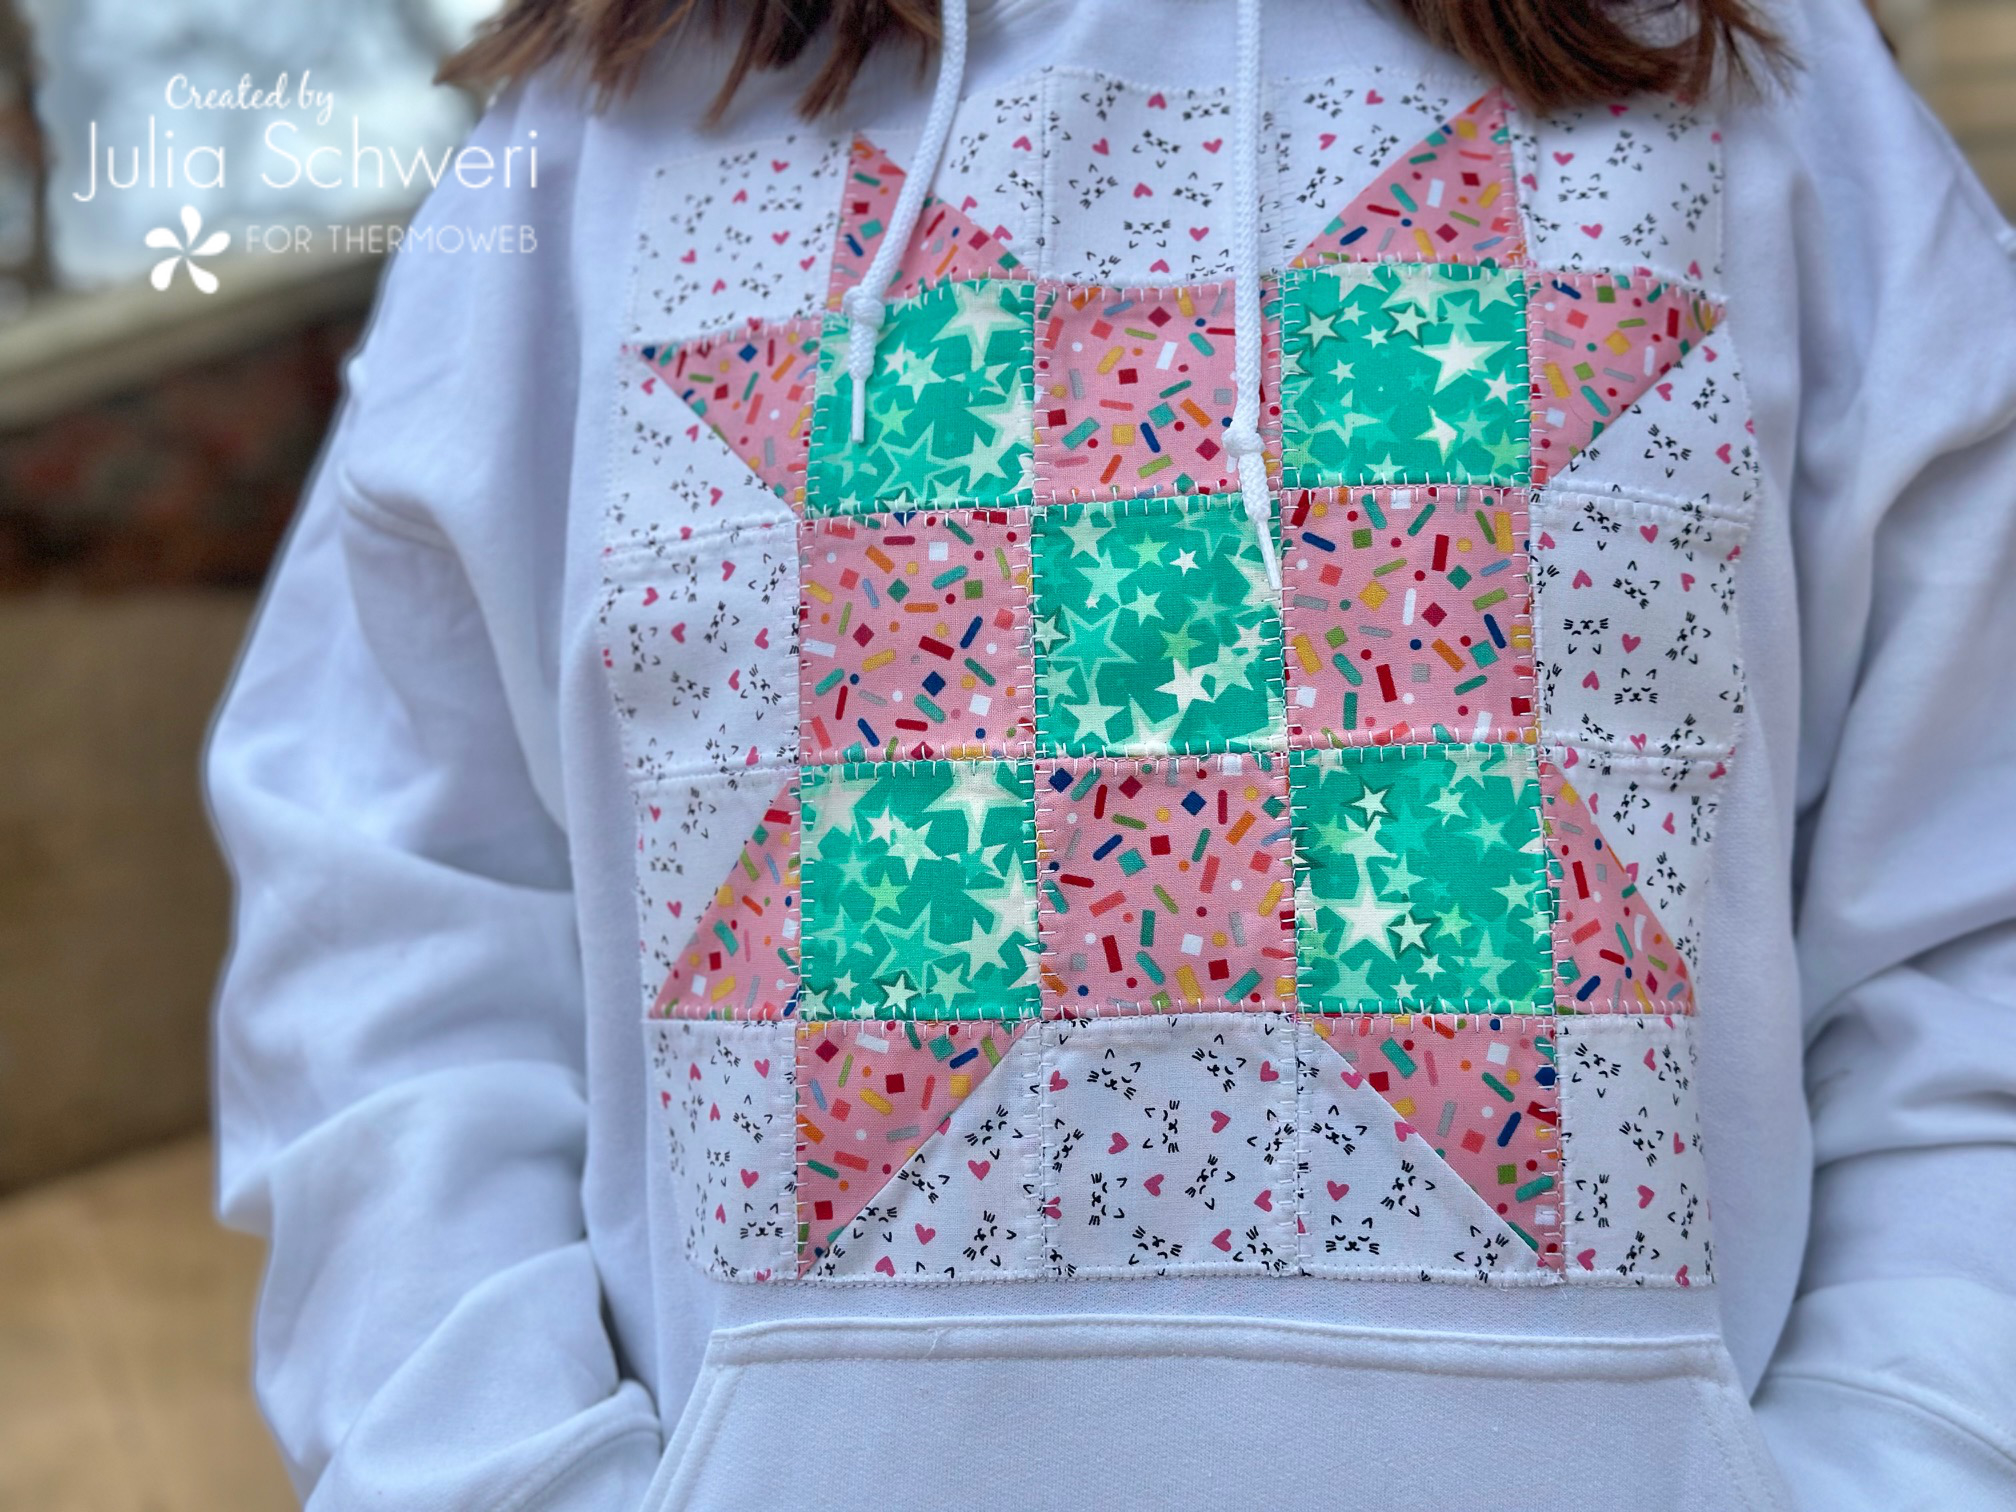
Arrange your pieces according to the photo below. Sew each of the pieces together horizontally and then sew those strips together vertically, nesting the seams.
Finished!
Sweatshirt Application Instructions:
Begin by…
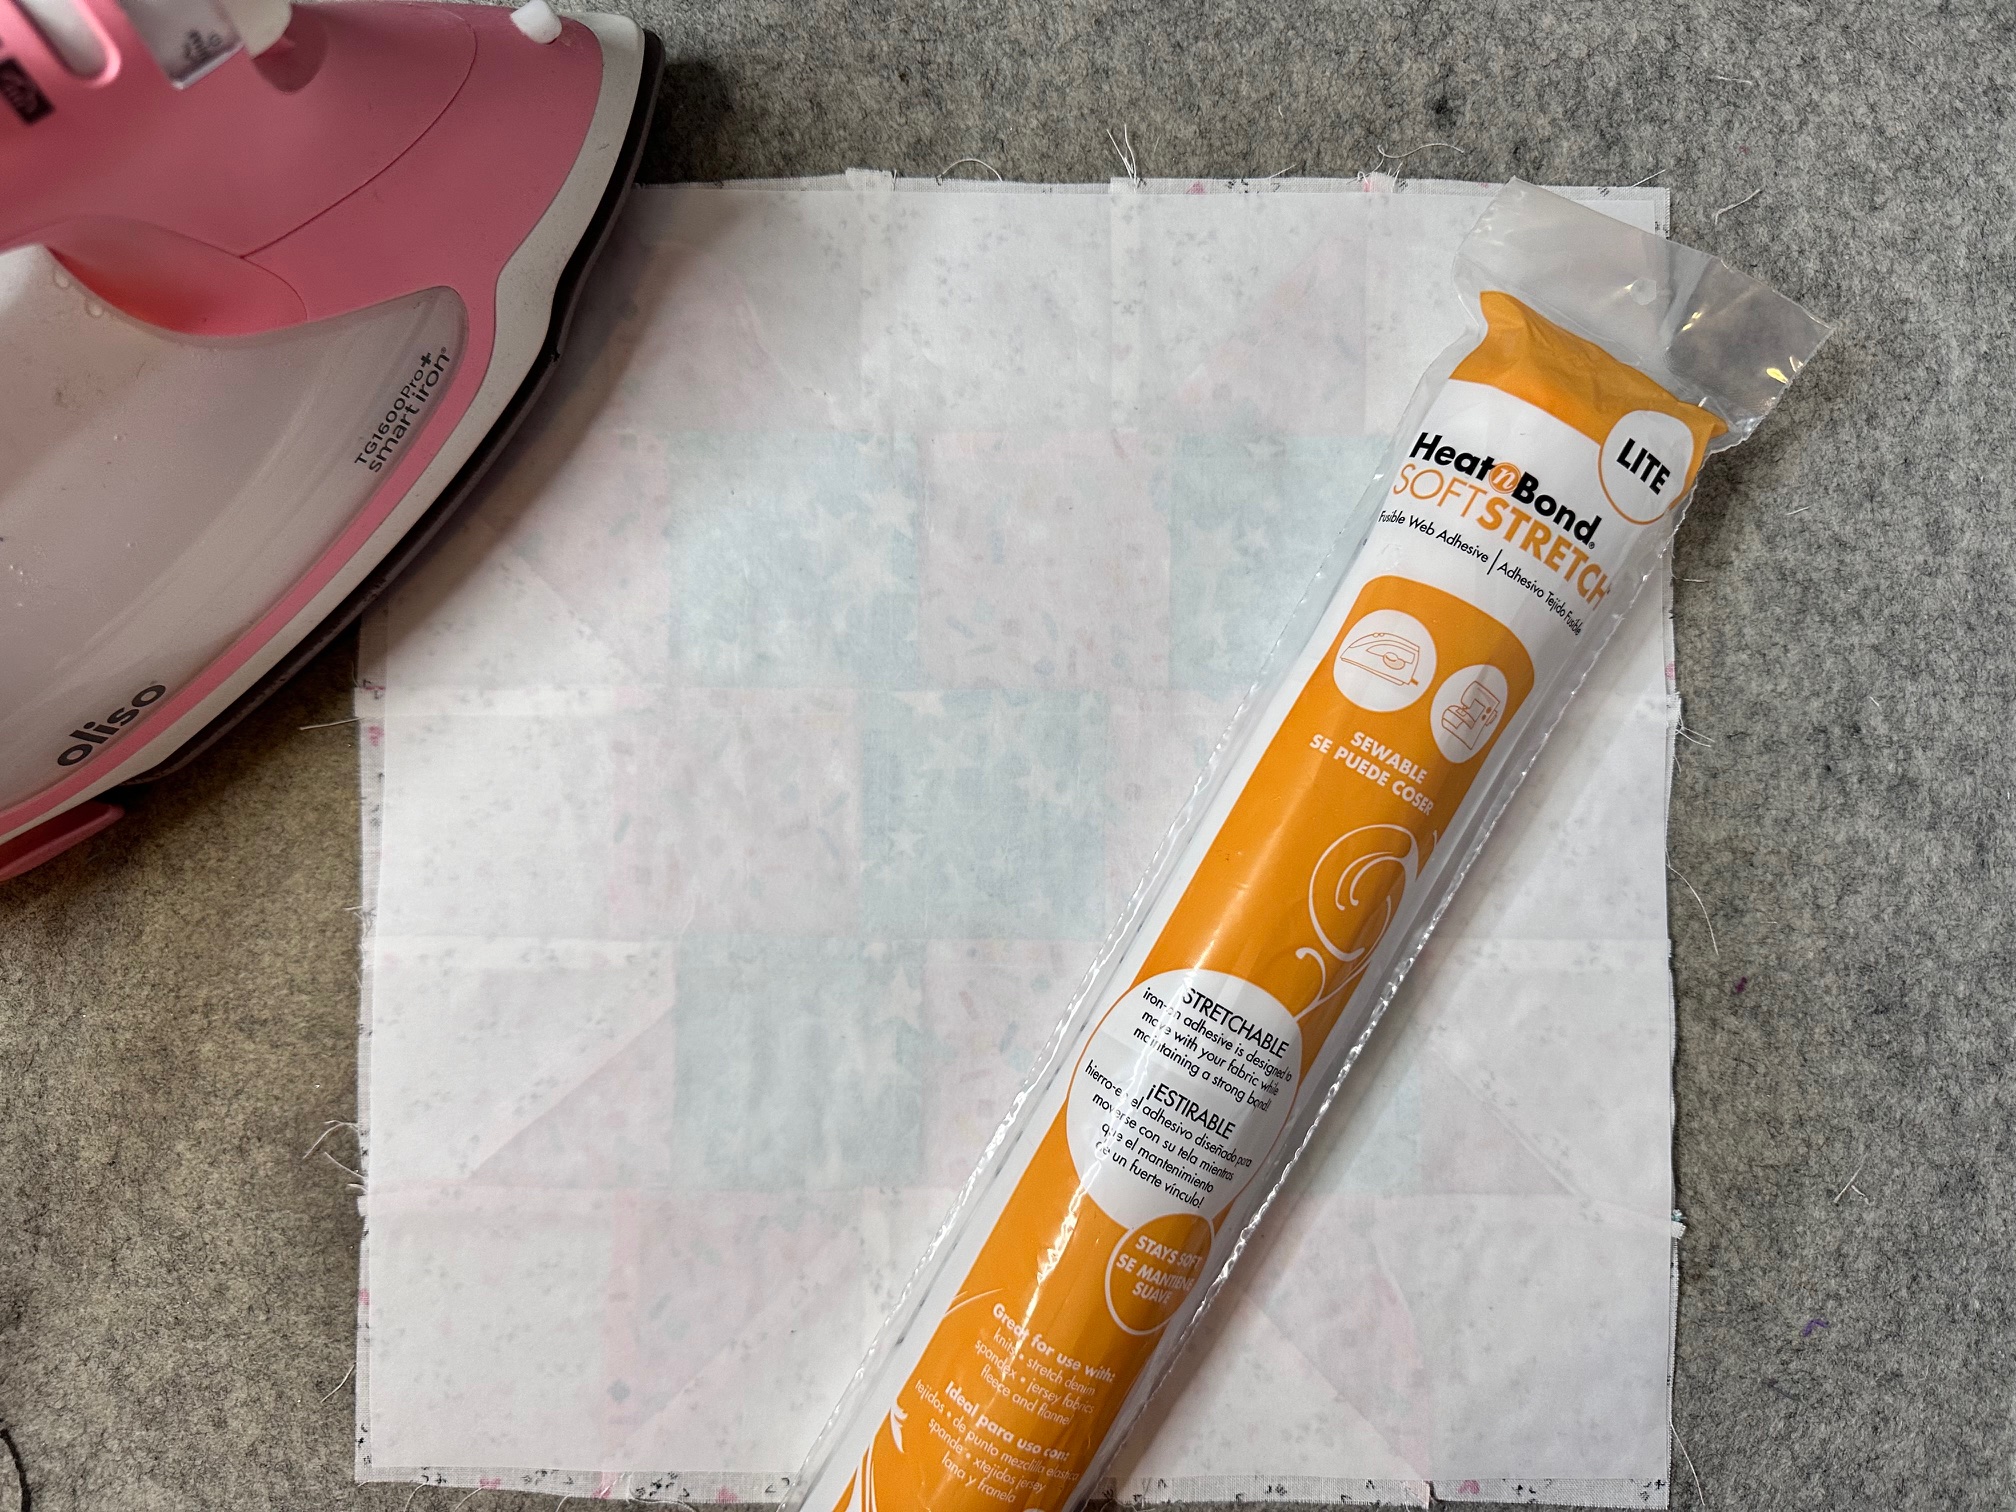
Press your quilt block well. Cut out a piece of HeatnBond Soft Stretch Lite 1/2″ smaller than your block. Adhere the Soft Stretch Ultra to the wrong side of your block with high heat for a few seconds till it is bonded.
Next…
Trim 1/4″ off around the entire block. This will ensure you have clean edges as well as the Soft Stretch Lite will be on the edge of the block. This step is why it is important to make whatever block you are using 1/2″ larger than your finished size.
Then…
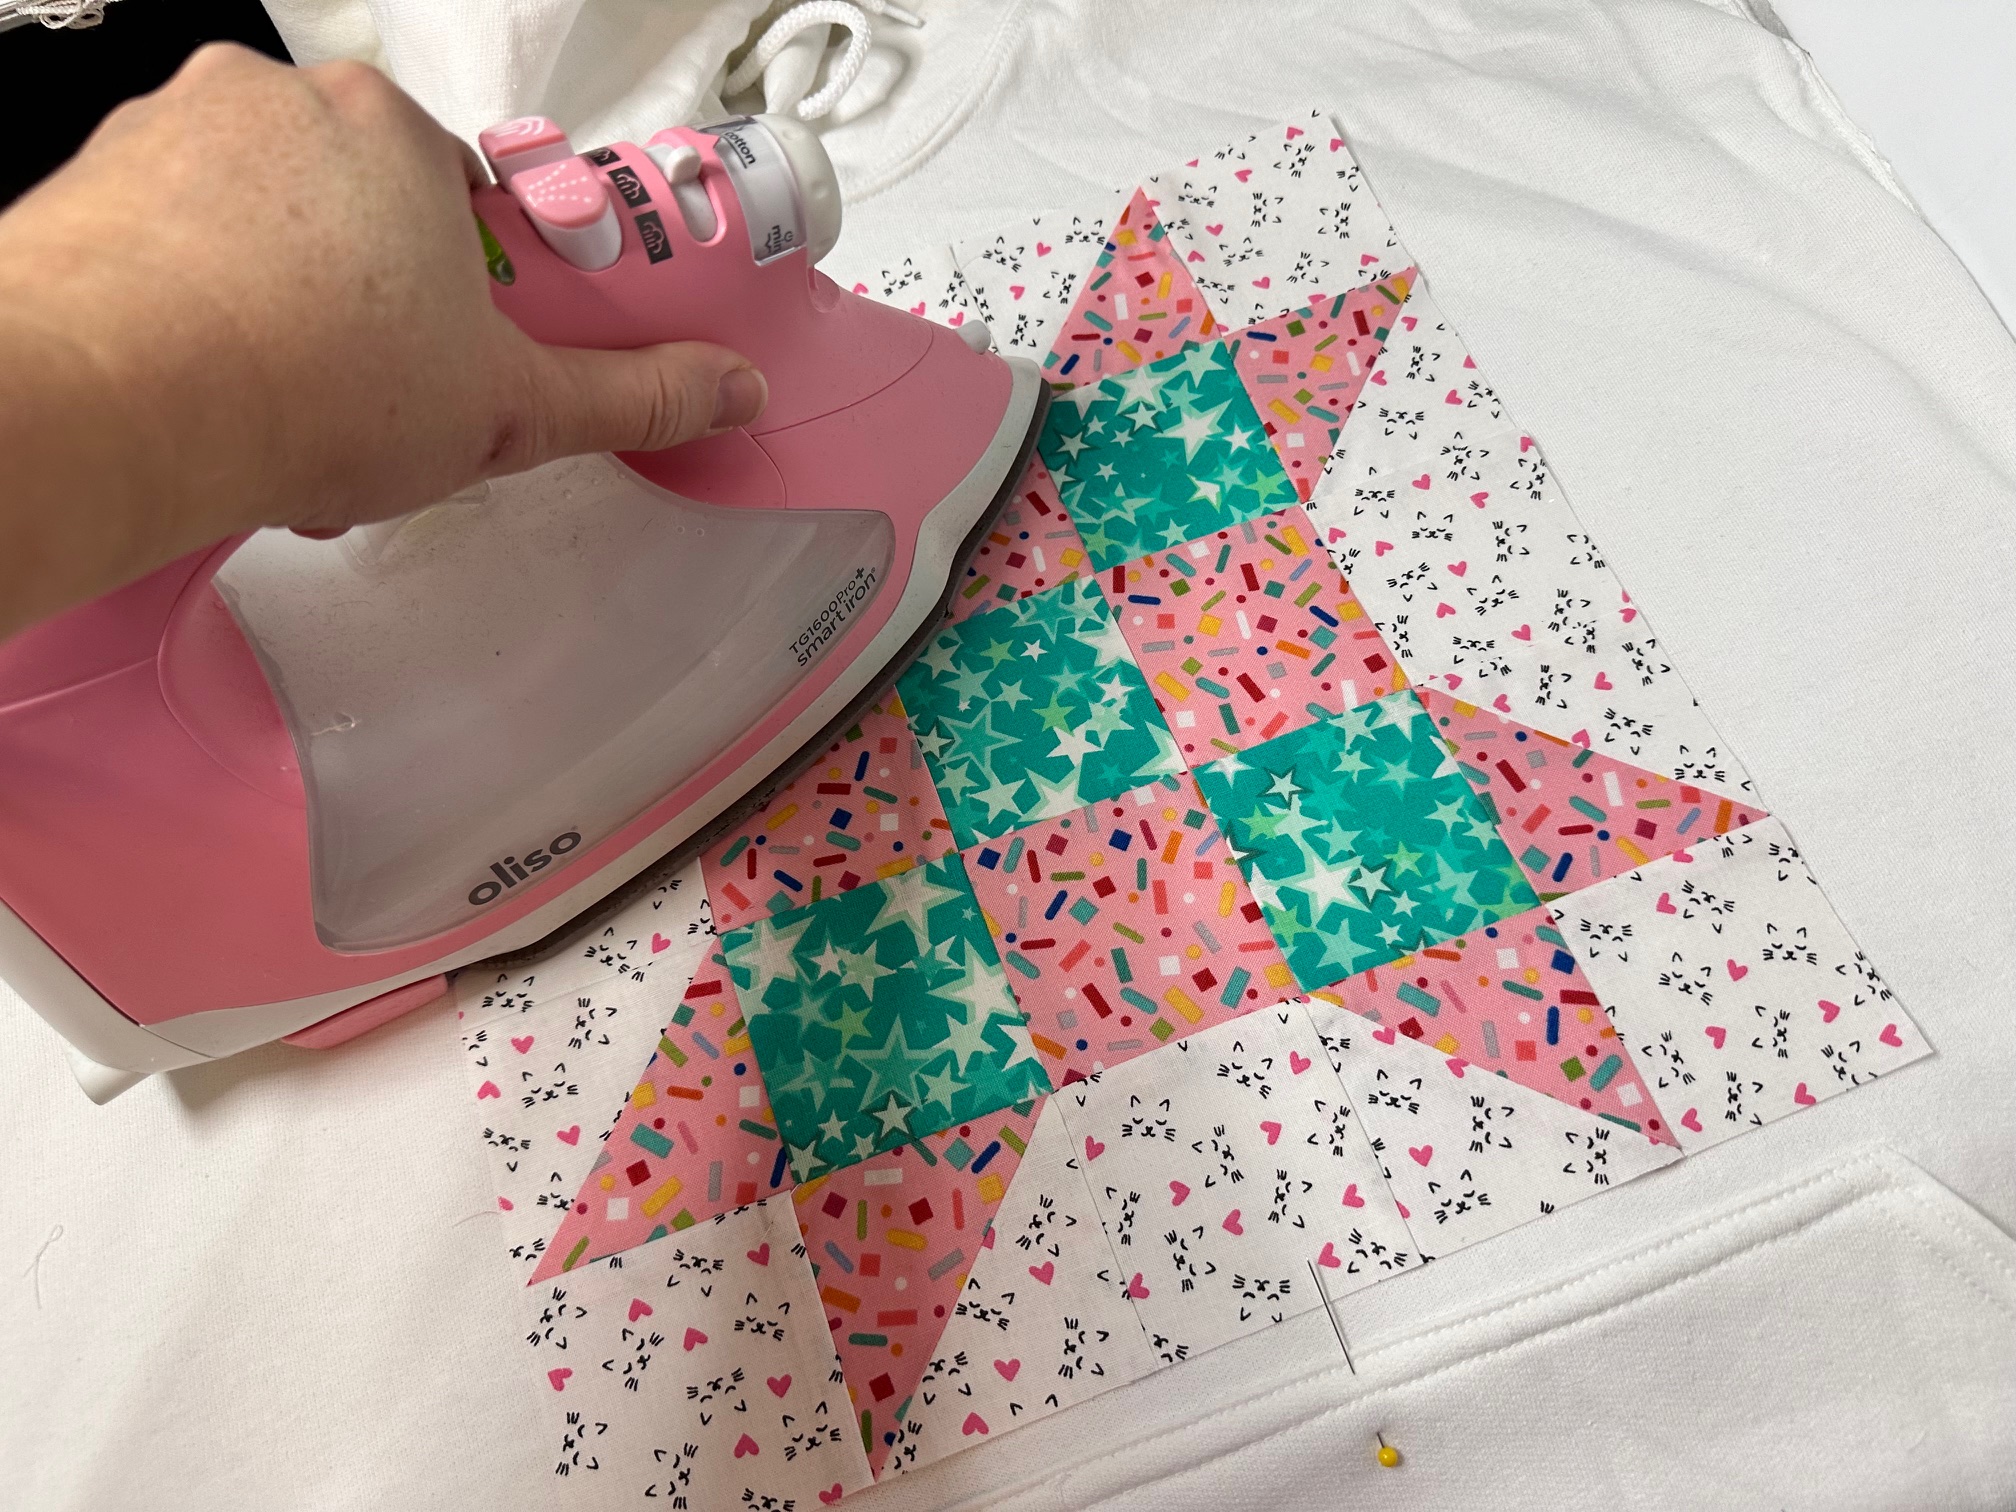
Peel the paper backing off and center on your sweatshirt. Center on the front (or back) of the sweatshirt and fuse the block with high heat and steam.
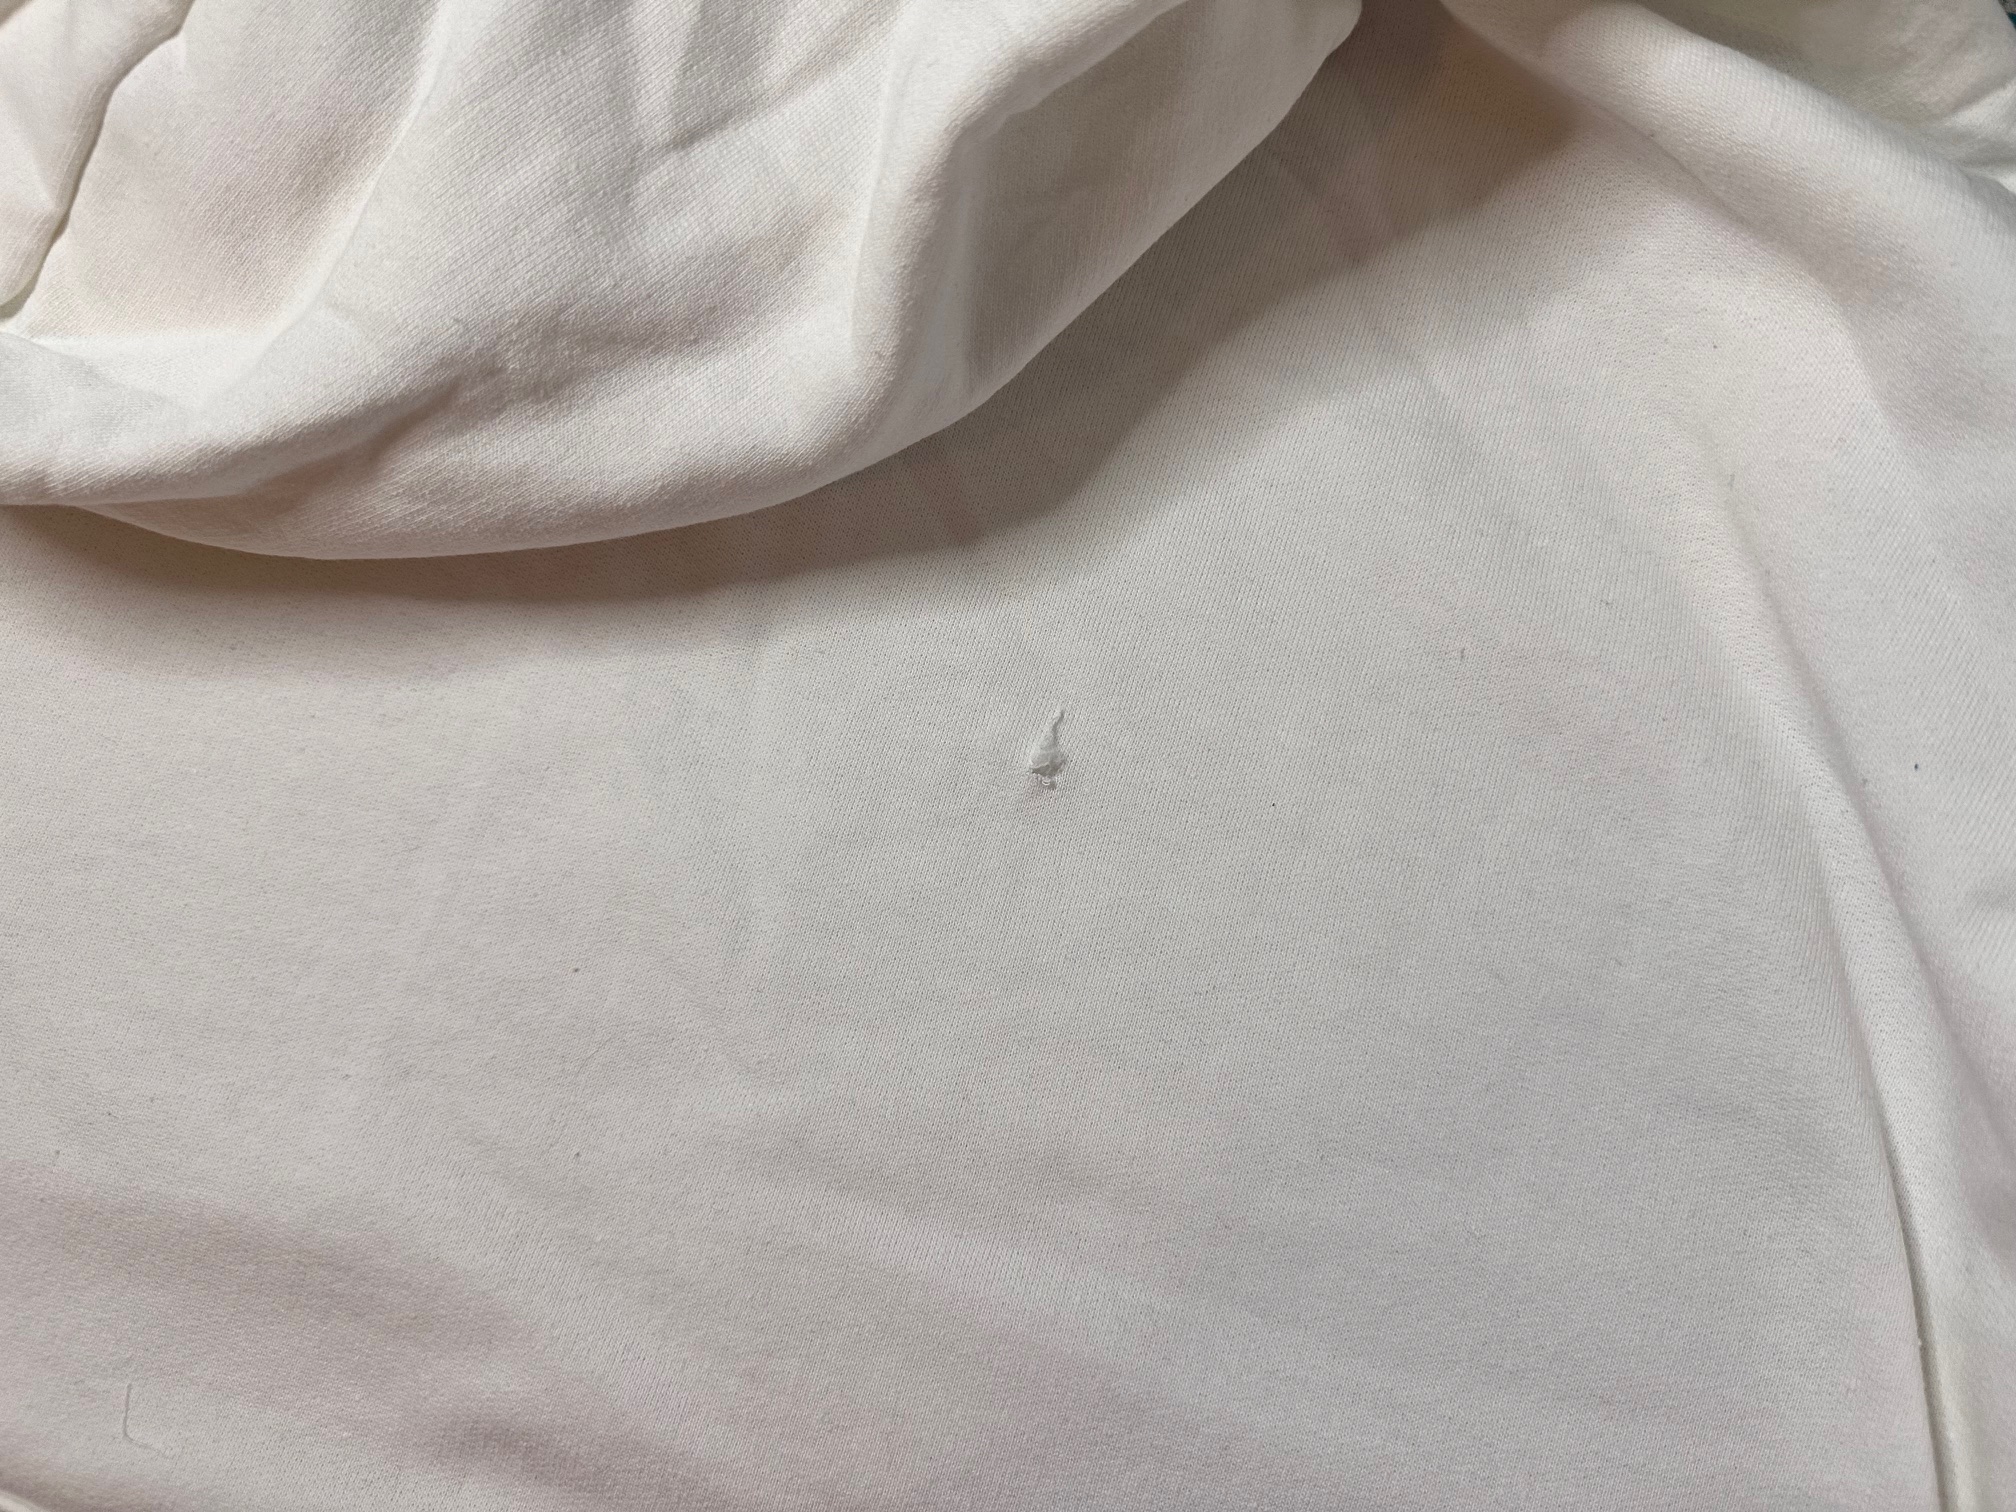
Important Tip: You can use a new sweatshirt or used one. I used a sweatshirt that I got for free as it was going to be trashed because of the hole on the front. This project saved this sweatshirts life and now the hole is completely covered!
Finally…
Once your block is fused you will need to sew it. HeatnBond Soft Stretch Lite is not permanent and therefore must be sewn. I did a blanket stitch around the perimeter. I then finished it with some “quilting” along the lines of block.

Finished!
Thank you for visiting today! Come back soon to see what else will be starting to bloom with Inflorescence Designs!
Starting to bloom by choosing JOY ~ Julia