Hello everyone and thanks so much for stopping by, it’s Deb Riddell here today with a project created with the SIX NEW Deco Foil Transfer Foicolorsrs and SIX new Deco Foil Designer Stencils just revealed at Creativation 2018 in Phoenix, Arizona!
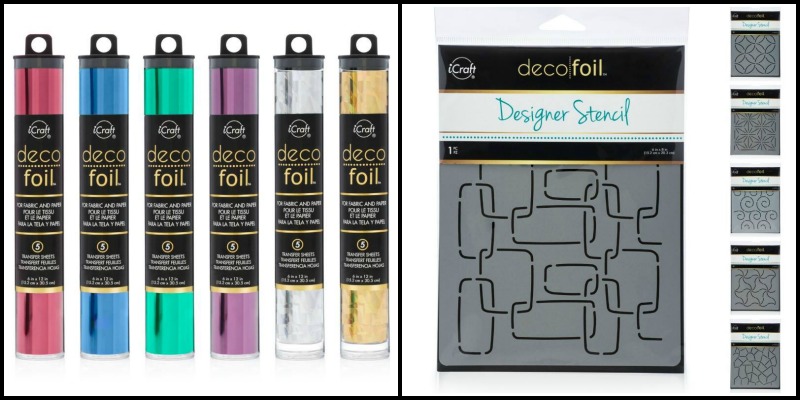
I was lucky enough to get them before they were officially released and decided to make a notecard holder complete with notecards created with all six of the new Deco Foil colors and Designer Stencils.(coming soon!)
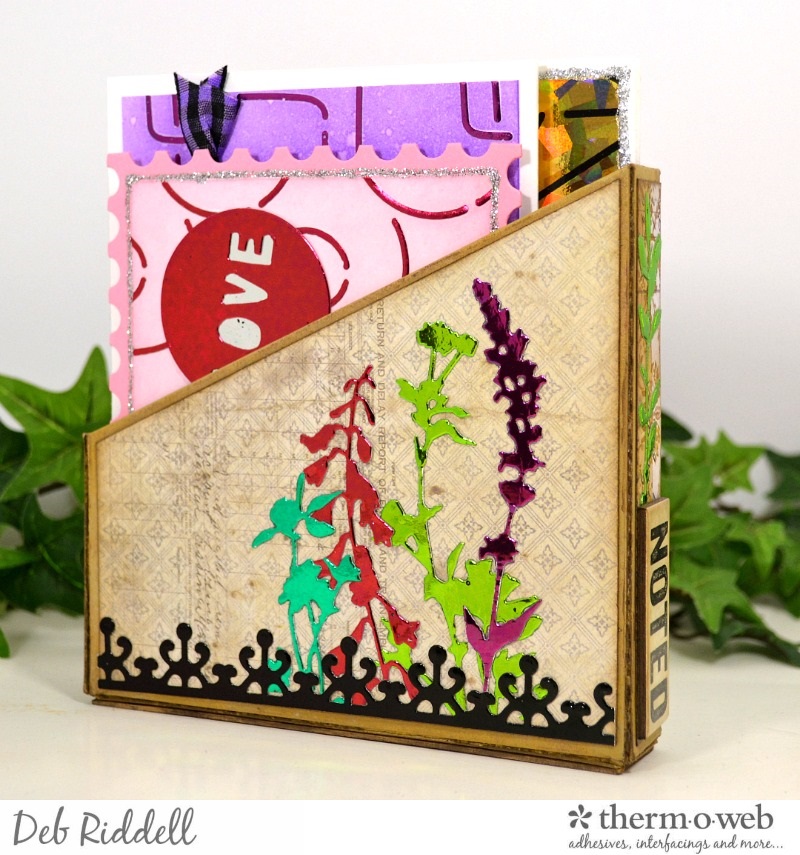
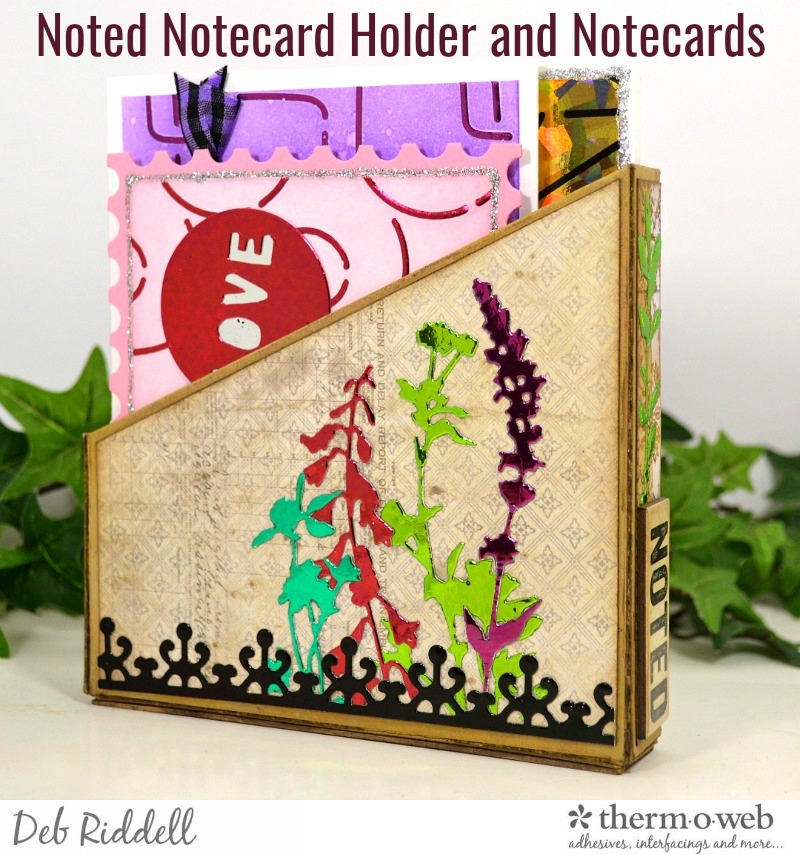
Noted Notecard Holder and Notecards
Deco Foil Supplies used:
Deco Foil™ Transfer Sheets • Denim
Deco Foil™ Transfer Sheets • Gold Shattered Glass
Deco Foil™ Transfer Sheets • Jade
Deco Foil™ Transfer Sheets • Plum
Deco Foil™ Transfer Sheets • Silver Shattered Glass
Deco Foil™ Transfer Sheets • Wild Cherry
Deco Foil™ Transfer Sheets • Lime (Satin)
Deco Foil™ Transfer Sheets • Black
Deco Foil™ Transfer Sheets • Champagne
Deco Foil™ Transfer Sheets • Silver
Deco Foil™ Abstract Circles Stencil
Deco Foil™ Crackle Stencil
Deco Foil™ Modern Links Stencil
Deco Foil™ Pinwheels Stencil
Deco Foil™ Starburst Stencil
Deco Foil™ Swirls Stencil
Deco Foil™ Transfer Gel
Deco Foil™ PeelnStick Toner Sheets
iCraft Mixed Media Adhesive 2.1 fl oz
Memory Tape Runner XL™
SuperTape™ Roll • 1/4 in
Gina K. Designs StampnFoil Clear Stamps Where Flowers Bloom
Gina K. Designs Premium Cardstock 8.5″ x 11″ • White
Gina K. Designs Gingham Fancy Ribbon 5/8″ x 10 yd • Black/White
Gina K. Designs (4) Nested Tag Dies
Rebekah Meier Designs Mixed Media Adhesive Sheets 9″ x 12″ (3 sheets per pack)
Foil Laminator • 12 inch
I don’t have any step out photos to share with you I’m afraid but will give you a brief rundown on the Noted notecard holder and each of the notecards.
Noted Notecard Holder Instructions:
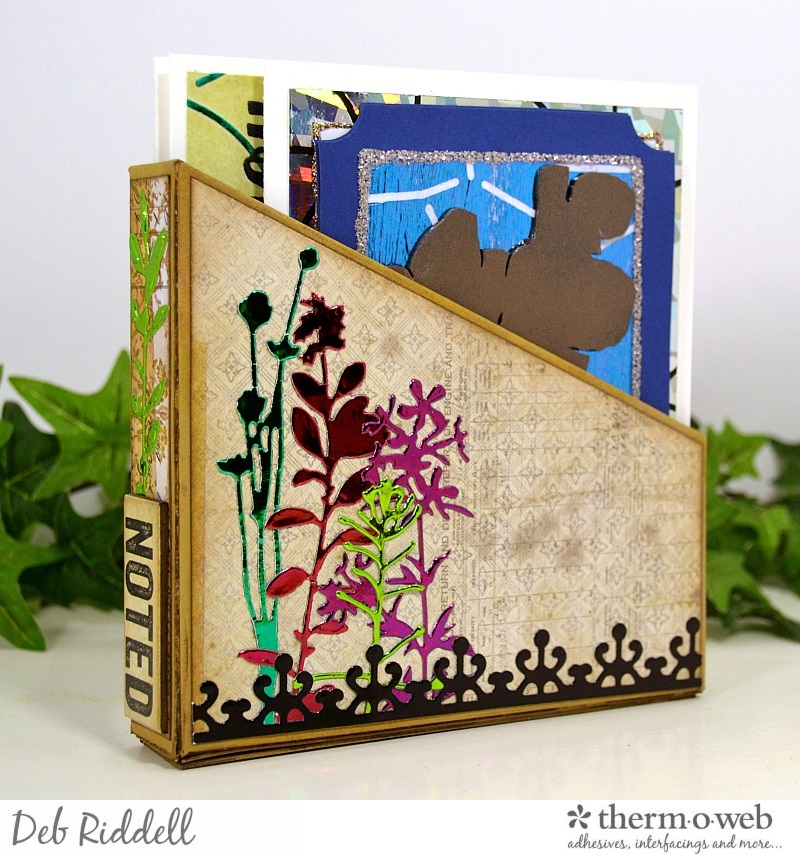
The notecard holder was created with Eileen Hull’s new Card Box, Planner Storage and Organizer die. Tim Holtz’s Wildflowers and Wildflowers #2 dies were cut from PeelnStick Toner Sheet covered with Jade, Wild Cherry, Plum and Lime Deco Foils and the trim along the bottom was die cut with a Spellbinders Iron Works Accents die from PeelnStick Toner Sheet covered with Black Deco Foil.
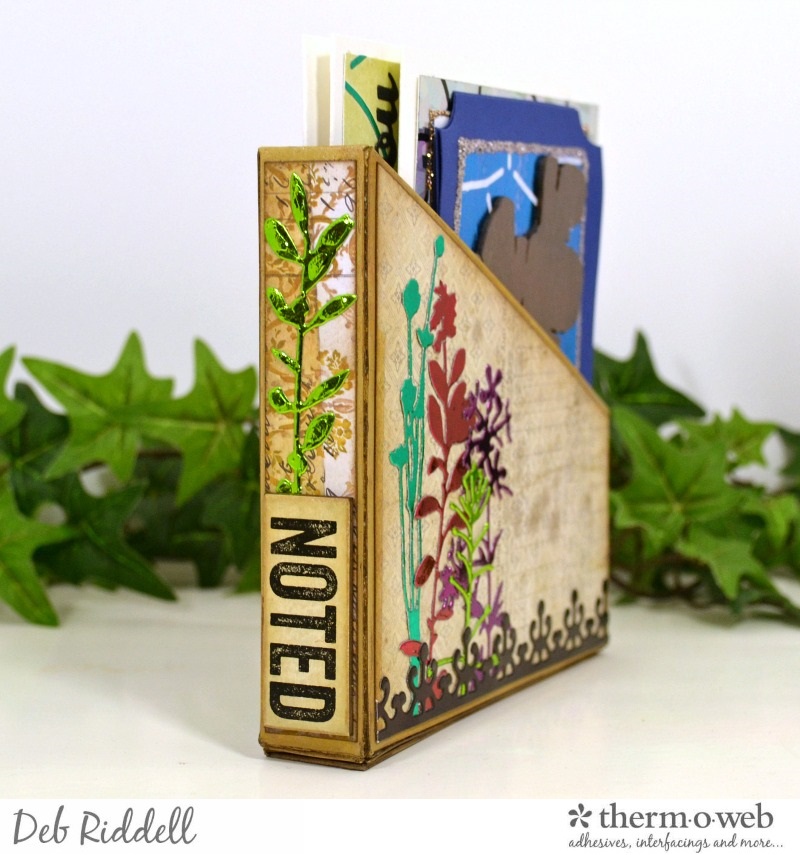
Lime Deco Foil covered PeelnStick Toner Sheet was die cut with Tim Holtz’s Garden Greens die on the spine of the notecard holder and a ‘Noted’ Quote Chip laid over top.
Now onto the notecards contained inside.
Celebrate Notecard Instructions:
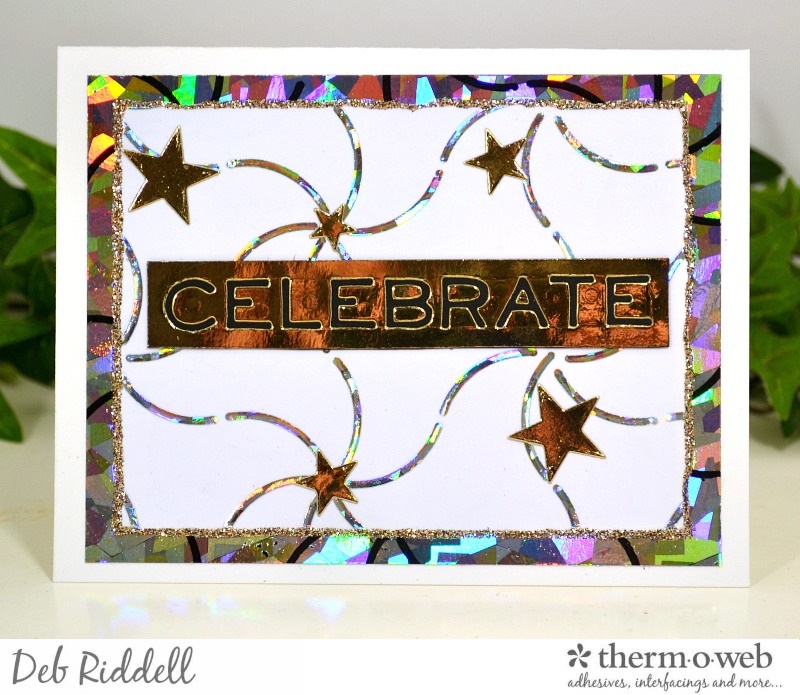
The Celebrate notecard was created with Silver Shattered Glass Deco Foil and the Pinwheel Designer Stencil. Deco Foil Transfer Gel was applied through the Pinwheel stencil and then Silver Shattered Glass Deco Foil heat set with a laminator over top.
The Pinwheel stencil negative left on the Silver Shattered Glass Deco Foil was then laminated onto PeelnStick Toner Sheet and used for the back panel. Champagne Deco Foil on PeelnStick Toner Sheet was die cut for the ‘Celebrate’ sentiment along with the stars and Platinum Stickles Glitter glue around the front panel completed the notecard.
Congratulations Notecard Instructions:
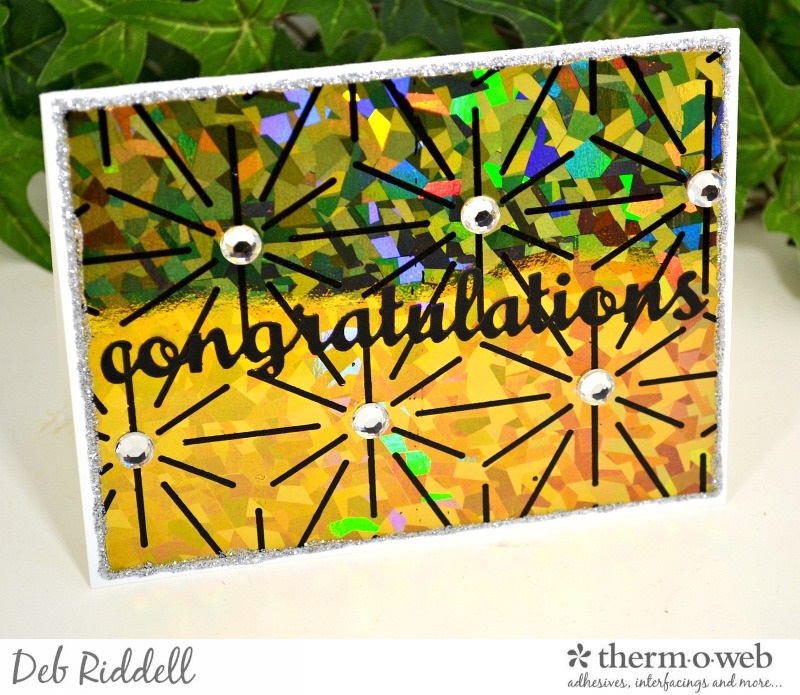
The Congratulations notecard was created with Gold Shattered Glass Deco Foil and the Starburst Designer Stencil. Deco Foil Transfer Gel was applied through the Starburst stencil and the Gold Shattered Glass Deco Foil heat set with a laminator.
The Starburst stencil negative left on the Gold Shattered Glass Deco Foil was then laminated onto PeelnStick Toner Sheet for this card. A sentiment die cut from black cardstock, some flat back gems and Silver Stickles Glitter glue around the edges completed the card. The Shattered Glass Deco Foils are just stunning in person, my pictures don’t begin to do them justice!
Friends Are Flowers Notecard Instructions:
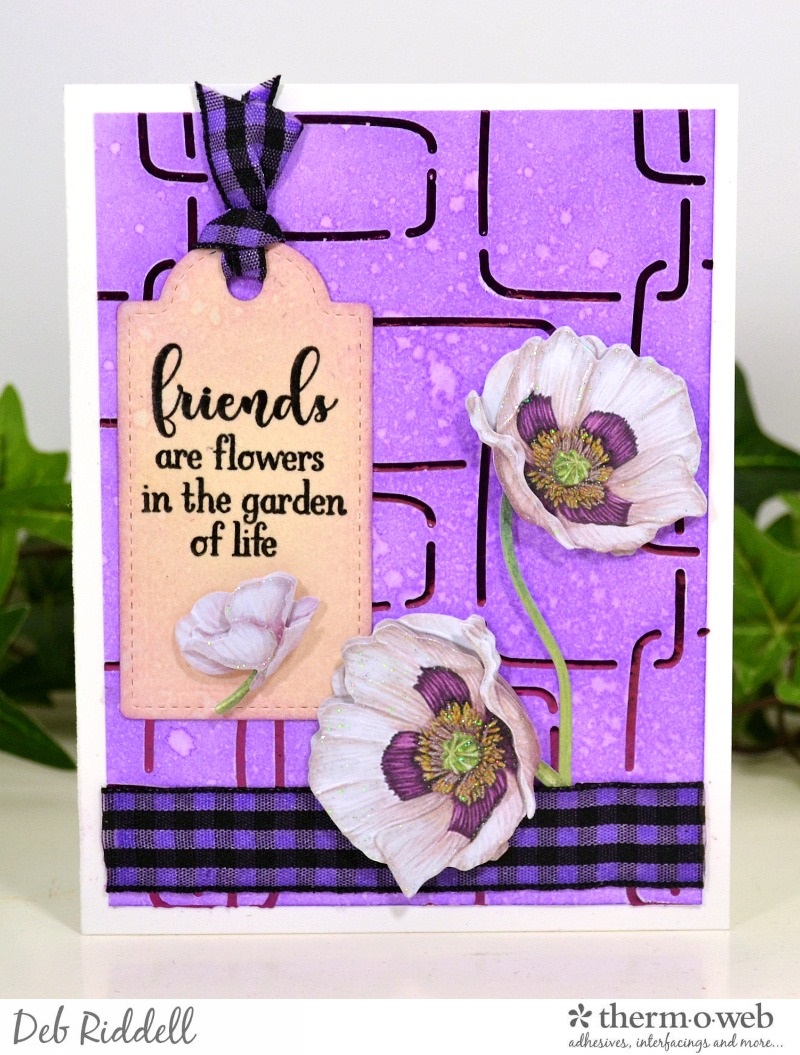
The Friends Are Flowers notecard was created with Plum Deco Foil and the Modern Links Designer Stencil. Deco Foil Transfer Gel was applied through the Modern Links stencil, Plum Deco Foil laminated over top and the panel then colored with purple ink. Gina K. Designs Gingham Fancy Ribbon was colored with purple stain and applied along the bottom edge.
A tag was die cut with Gina K. Designs Nested Tag Dies and a sentiment stamped onto it from Gina’s brand new and fabulous Where Flowers Bloom Clear Stamps (stay tuned for more about that!) and some floral stickers added to finish the notecard.
Love Hearts Notecard Instructions:
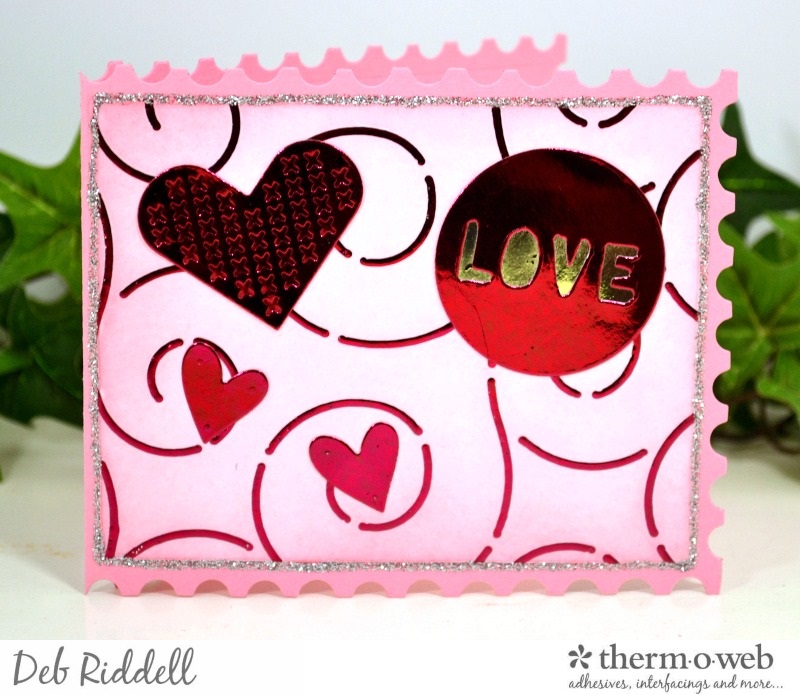
The Love Hearts notecard was created with Wild Cherry Deco Foil and the Swirls Designer Stencil. As before, Deco Foil Transfer Gel was applied through the Swirls stencil, Wild Cherry Deco Foil laminated over top and the panel then inked with pink and red inks. PeelnStick Toner Sheet covered with Wild Cherry Deco Foil was die cut with a couple of heart dies and a circular love die cut was backed with Silver Deco Foil. Silver Stickles Glitter glue around the edges completed the notecard.
Thinking of You Notecard Instructions:
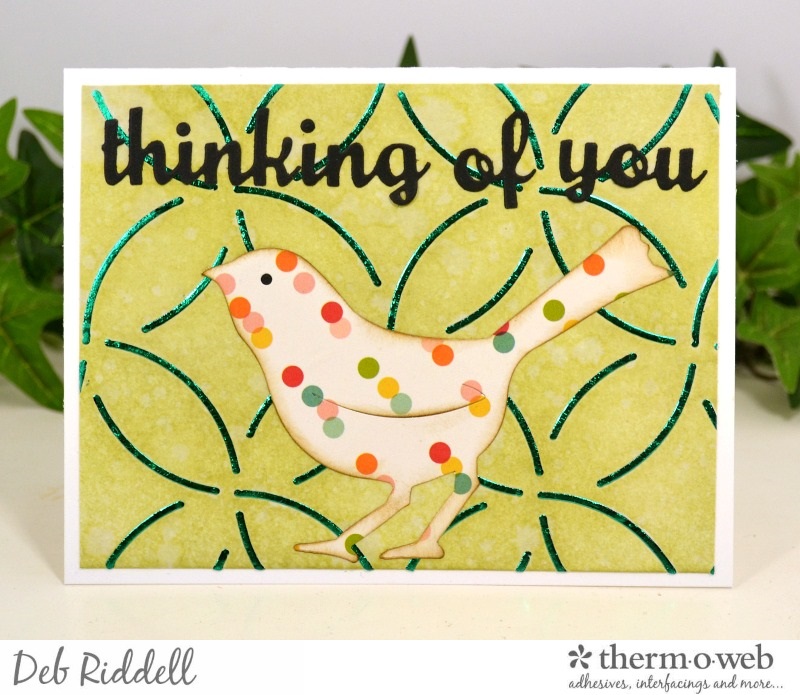
The Thinking of You notecard was created with Jade Deco Foil and the Abstract Circles Designer Stencil. Deco Foil Transfer Gel was applied through the stencil, Jade Deco Foil was laminated over top and the panel inked with green inks. A sentiment was die cut from black cardstock and the wee bird die cut from some Simple Stories scrapbook paper.
Ticket To Ride Birthday Notecard Instructions:
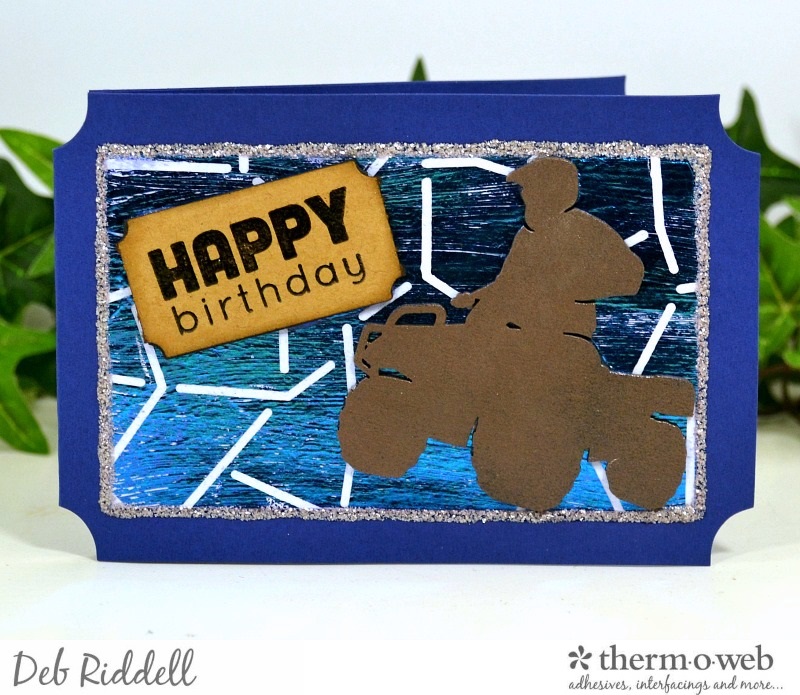
The Ticket To Ride notecard was created with Denim Deco Foil and the Crackle Designer Stencil. Deco Foil Transfer Gel was applied through the Crackle stencil and Denim Transfer Foil applied over top. That panel was set aside for use on another project and more Deco Foil Transfer Gel was then applied to white cardstock.
Once dried, the Crackle stencil negative left on the Denim Transfer Foil was laminated onto the white cardstock to create the background panel. A ticket was die cut from kraft cardstock and stamped with the birthday sentiment and popped up on some black fun foam. An ATV rider chipboard piece was painted with brown acrylic paint and some Pumice Stone Stickles Glitter glue added around the edges to complete the notecard.
I hope that you’ve enjoyed seeing how I used the new Deco Foil Transfer Foils and Designer Stencils and that you’ve been inspired to give them a try yourself! Look for these to be available March 2018!
And be sure to stop by the blog often over the next while for many more wonderful projects created with Therm O Web’s new 2018 releases, I’ve seen some sneak peeks and they are all amazing! Thanks so much for stopping by today and happy creating!
Deb xo
