


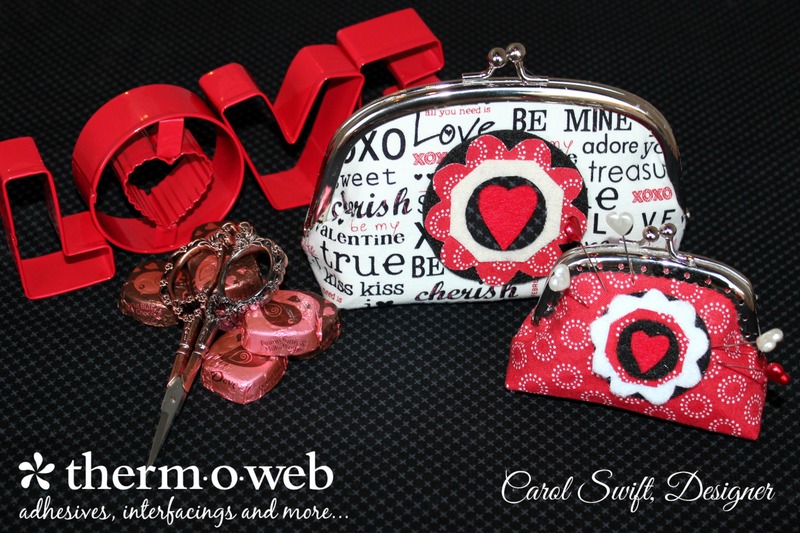
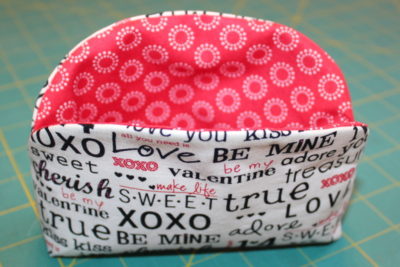
You can never have too many coin purses or at least that’s what my grandmother would say. She had a coin purse stashed in every corner of the house (or so it seemed.) Each one was filled with different things including money, sewing items, and candy. I have several coin purses, too, which are mostly filled with a variety of sewing needs based on the craft like embroidery, quilting, and hand sewing.
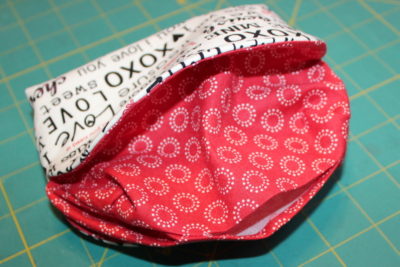
Using the Sizzix Coin Purse die to cut out a big and/or small coin purse was a breeze! I loved adding HeatnBond Fleece Fusible High Loft between the purse exterior and the lining to keep the shape without any stiffness. The smaller coin purse die cut made a fun pincushion that was easy to make.
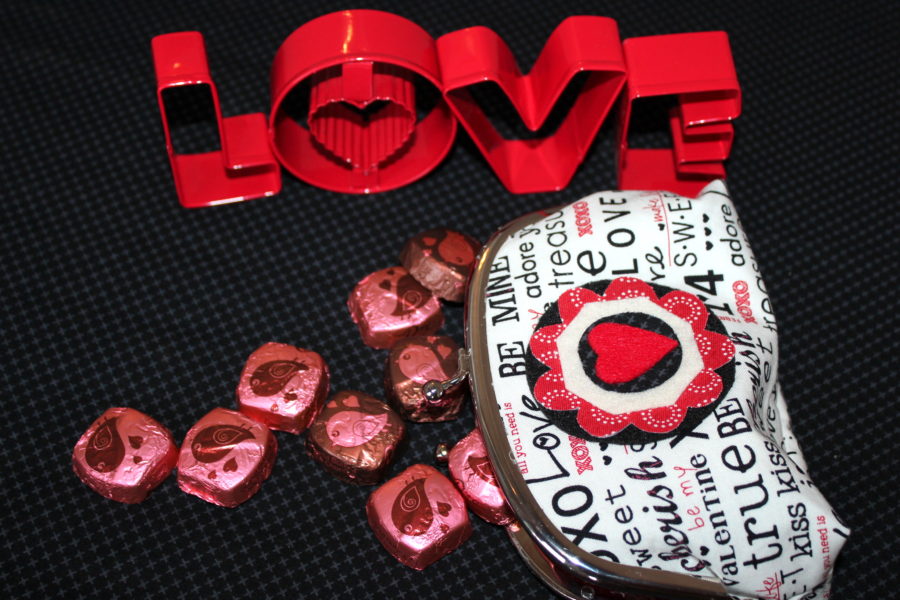
Sizzix Coin Purse and Mini Coin Purse Pincushion, by Carol Swift from Just Let Me Quilt
What you’ll need:
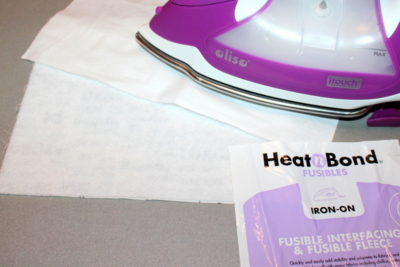
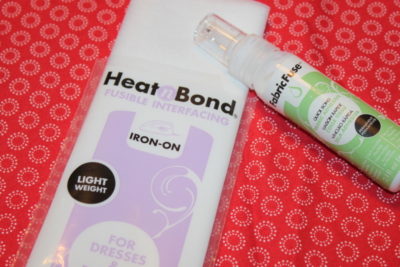
HeatnBond Fleece Fusible High Loft, cut into two 8″ x 9½” pieces
Therm O Web Fabric Fuse Adhesive
HeatnBond Fusible Interfacing – Light Weight
1 – fat quarter for exterior coin purse, cut into two 8″ x 9½” pieces
1 – fat quarter for the lining of a coin purse, cut into two 8″ x 9½” pieces
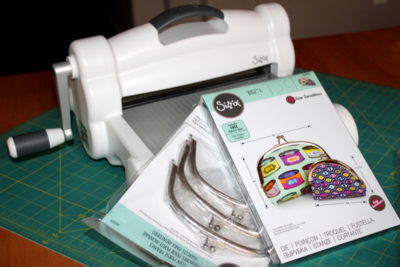
Sizzix Coin Purse Die, 2 cutting mats, and cutting machine
Sizzix Coin Purse with Flower Instructions
Heavy-duty glue that will bond fabric to metal
Oliso Iron (I love my purple one!)
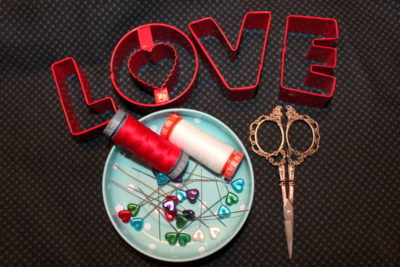
Aurifil Thread, 50 wt.
Coin Purse Instructions:
Step 1: Iron HeatnBond Fleece Fusible High Loft to wrong sides of exterior coin purse fabric. Pre-heat iron to wool (medium heat) setting with steam. Place the rough side of the interfacing onto the back (wrong side) of the fabric to be bonded. Cover with a light, dry pressing cloth. Press and hold iron with medium pressure for 10-15 seconds. Repeat by lifting the iron to the new area and pressing, slightly overlapping the previous area until the entire surface is bonded. Allow pieces to cool. If more ironing is needed iron an additional 5 seconds from the front of the project.
Step 2: Using the Sizzix Coin Purse die:
Cut 2 – exterior fabric coin purses with adhered HeatnBond Fleece Fusible High Loft
Cut 2 – lining fabric coin purses
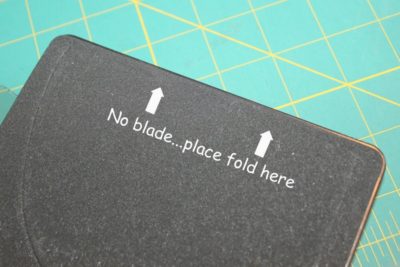
To cut out coin purses using the die and cutting machine, fold exterior fabric purse in half, wrong sides together. Place fold along the edge of Sizzix die that does not have a blade. Be careful…the blade is sharp! Sandwich the cutting die between two cutting mats being careful to keep the fabric in place.
At a slight angle, run die with fabric through your cutting machine. Repeat to make a total of two exterior fabric purse pieces with Heat n Bond Fleece Fusible High Loft, and two lining pieces.
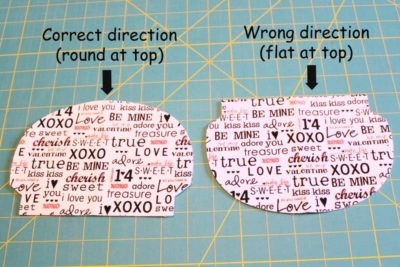
Note: If you’re using directional fabric, be sure to place the folded fabric correctly on the die!
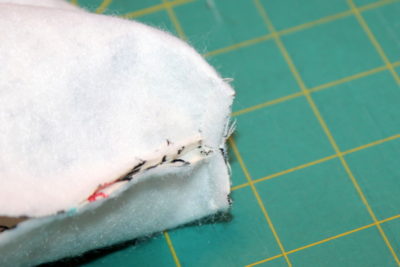
Step 3: With exterior fabric coin purses wrong sides together and using a 1/4″ seam allowance, sew edges from the notch to edge of the coin purse and along the straight edge as shown. The top rounded area is not sewn yet.
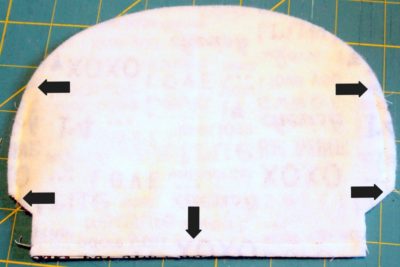
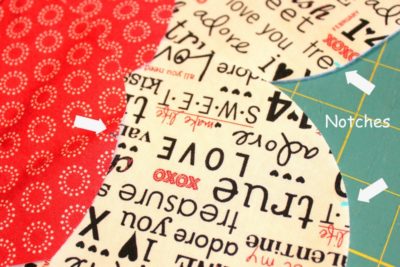
Using a water-soluble marker helps to clearly mark the notch. There’s two on each piece. (The notches are there, you just have to look for them because they are tiny.)
Step 4: Repeat Step 3’s instructions on the lining fabric, but leave a 3″ opening in the middle of the straight edge to enable turning it inside out.
Step 5: Pinch the small unsewn opening together and match seams on both sides. Sew 1/4″ seam allowance across edge as shown below. Repeat on the lining fabric.
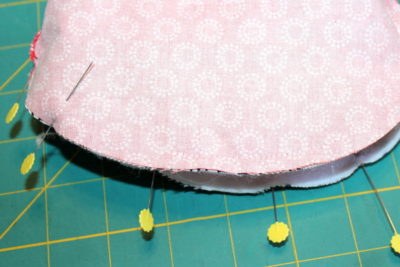
Step 6: Turn exterior fabric coin purse right side out. Place exterior coin purse inside lining fabric coin purse, right sides together, lining up seams and top edge. Pin or use clips to hold in place.
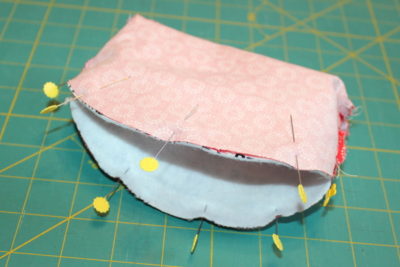
Step 7: Begin sewing from the center of the coin purse and stop at side seams. Turn coin purse and repeat on the other side. Do the same on the other side of the coin purse.
Step 8: Cut notches on the curved edge or trim with pinking shears.
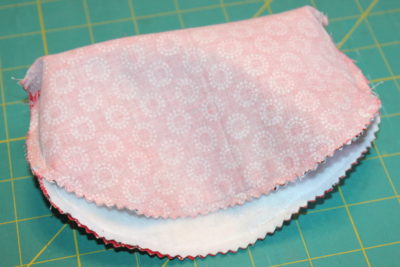
Step 9: Turn the coin purse right side out. Using a pointed tool, gently push the corners out. Press around the seam edges of the coin purse. Press lower corners to create a flat bottom.
Step 10: Stitch lining opening closed with slip stitches or by folding in seams and stitch 1/8″ from folded in the edge.
Step 11: Apply heavy-duty glue in the slotted area of the coin purse frame on one side. Gently push rounded edges of coin purse into the frame. Let dry. Repeat on the other side of the frame.
Step 12: Optional – Attach flower to one side of the coin purse. Use Heat N Bond Fusible Interfacing – Light Weight on the wrong sides of the fabric to add stability. Cover fabric and interfacing with pressing cloth. Press and hold iron with medium pressure for 10-15 seconds. Repeat and overlap to cover all areas. Let cool. Cut out flower shapes using fabrics, felt, lace, etc. Layer pieces with Fabric Fuse between each layer to hold them together. Let dry. Apply flower to coin purse with Fabric Fuse. Let dry.
Coin Purse Pincushion:
What you’ll need:
Therm O Web Fabric Fuse Adhesive
Heat N Bond Fusible Interfacing – Light Weight
Heat n Bond Fleece Fusible High Loft
Sizzix Coin Purse Die, 2 cutting mats, and cutting machine
Purse frame to fit coin purse, Heavy-duty glue, Oliso Iron, Aurifil Thread
2 – 4″ x 9″ pieces of Heat n Bond Fleece Fusible High Loft
2 – 4″ x 9″ fabric for the exterior coin purse
2 – 4″ x 9″ lining of the coin purse
Step 1: Create the small coin purse following the instructions above for the larger coin purse.
Step 2: Attach small flower, if desired, following flower assembly instructions above. Let dry.
Step 3: Fill the finished coin purse with walnut shells.

Step 4: Place a thin line of heavy-duty glue on the inside of the coin frame. Close purse frame and clip with clothespins to hold closed until the glue dries.
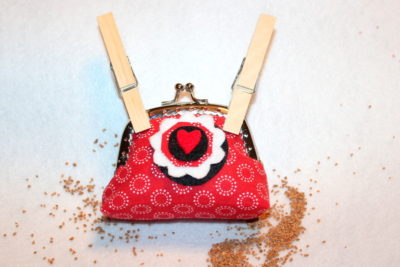
For a Valentine gift idea, fill a coin purse full of yummy chocolates!
Sherry of createology
January 22, 2018 at 5:59 pm (6 years ago)Carol Dear your coin purses are super adorable. And to make one into a pincushion is brilliant. Therm-O-Web products really do make the process easy. Thank you for sharing your tutorial! <3
mary
January 22, 2018 at 8:29 pm (6 years ago)Those are fabulous. I love the choice of fabrics too.
Brenda Montoya
January 24, 2018 at 7:02 pm (6 years ago)Carol,
Thanks for the tutorial. I’ve always wanted to make a coin purse but I am intimidated. Your tutorial makes me feel like I can jump in and make one. I love the sweet valentines theme too. I’m excited to try something new.