


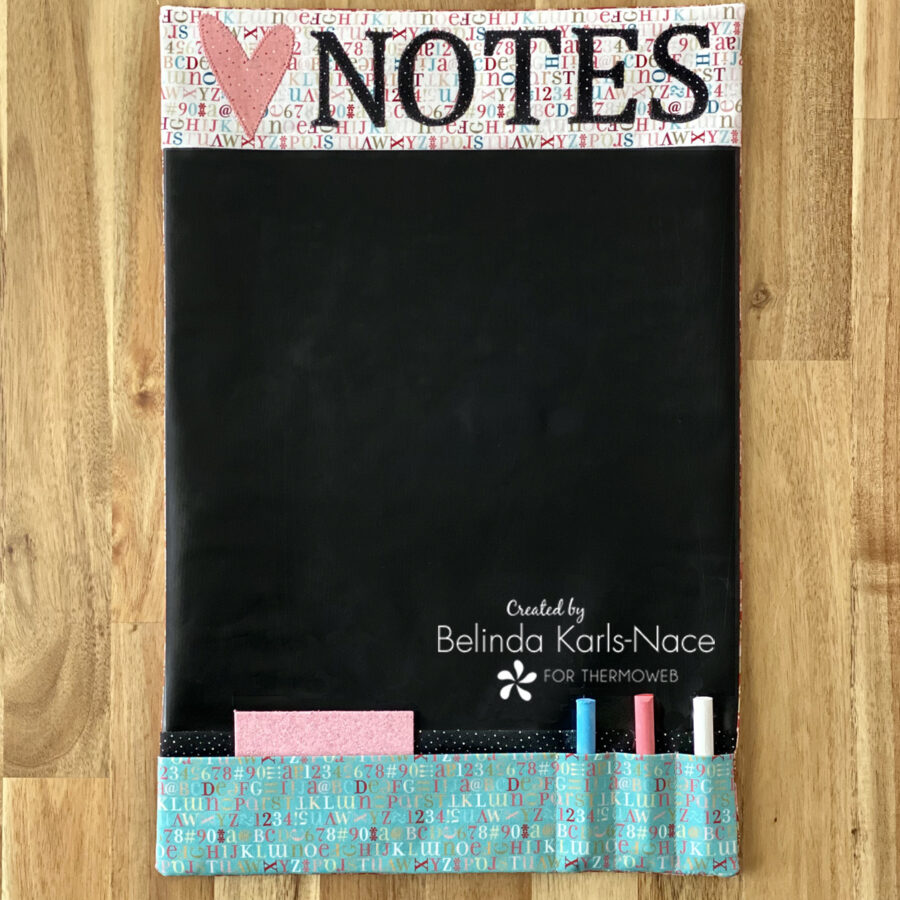
Love Notes Refrigerator Chalkboard with HeatnBond
Greetings! It’s Belinda Karls-Nace from Blue Ribbon Designs, here today with a brand new fabric project tutorial featuring an assortment of my favorite HeatnBond products. Today, I am excited to share my “Love Notes Refrigerator Chalkboard” with you.
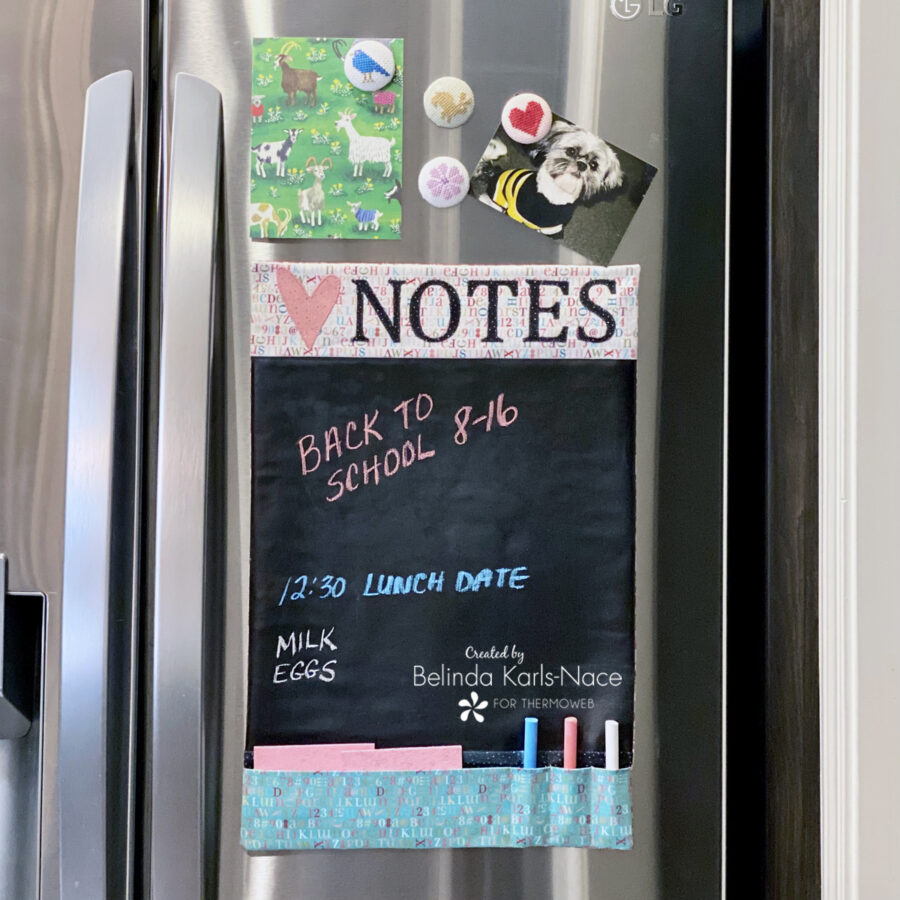
This month is filled with back to school and organization projects, so I thought I would do my best to combine the two. Back to school is a hectic time for a family – trying to keep to a new schedule, remain organized, and remember all the details can be a challenge. I designed my refrigerator chalkboard to communicate important notes in the common center of the home, the kitchen. This chalkboard is the perfect place to note reminders, list scheduled activities, make a list, or leave words of encouragement.
Let’s get creative! Simply gather the materials/supplies listed below, then download the PDF templates and layout diagram.
What you need:
- HeatnBond Lite EZ-Print Iron-On Adhesive Sheet 10 pk, 8.5 in x 11 in
- 1 sheet
- HeatnBond Fusible Fleece
- 1 – 12” x 18”
- HeatnBond Heavy Weight Non-Woven Fusible Interfacing
- 2 – 12½” x 3½”
- 1 – 12½” x 5½”
- HeatnBond Fabric Fuse Liquid Adhesive
- HeatnBond Hem Regular Weight Iron-On Adhesive Tape, ⅜” (OPTIONAL)
- Pressing Paper Fabric and Craft Sheets
- 1 Sheet
- Chalkboard Fabric (found in most quilt shops and craft stores)
- 1 – 12½” x 12½”
- Cotton Fabrics: model uses Kaisley Rose and Country Confetti, both from Poppie Cotton – I encourage you to use your favorite fabrics!
- Top base fabric – 12½” x 3½” (Kaisley Rose – Mia White Alphabet – 20506)
- Bottom pocket fabric – 12½” x 5½” (Kaisley Rose – Mia Blue Alphabet – 20508)
- Bottom base fabric – 12½” x 3½” (Country Confetti – Licorice Black – CC20188)
- Appliqué letters – 9” x 2½” (Country Confetti – Licorice Black – CC20188)
- Appliqué heart – 2½” x 3½” (Country Confetti – Cotton Candy – CC20181)
- Backing fabric – 12½” x 18½” (Kaisley Rose – Rosalie White Roses – 20503)
- Earth Magnets
- 7 small round
- Chalk with eraser or sponge
- Oliso Iron
- Olfa Cutting Tools (cutting mat, rotary cutter)
- Sewing Machine
- Basic Sewing Supplies/Tools (small sharp scissors, rulers, sewing thread, Wonder Clips, pencil, etc.)
How to Make a Love Notes Refrigerator Chalkboard
(12” W x 18” H)
1. Download and Print the Love Notes Refrigerator Chalkboard PDF.
Love Notes Refrigerator Chalkboard – A Project for the Therm O Web Blog
Print actual size – do NOT “fit to page” or “shrink to fit.” Use regular printer paper to print page 1 (layout). Print page 2 on HeatnBond Lite EZ-Print Iron-On Adhesive (Inkjet printer friendly – no tracing required).
2. Create the pocket unit.
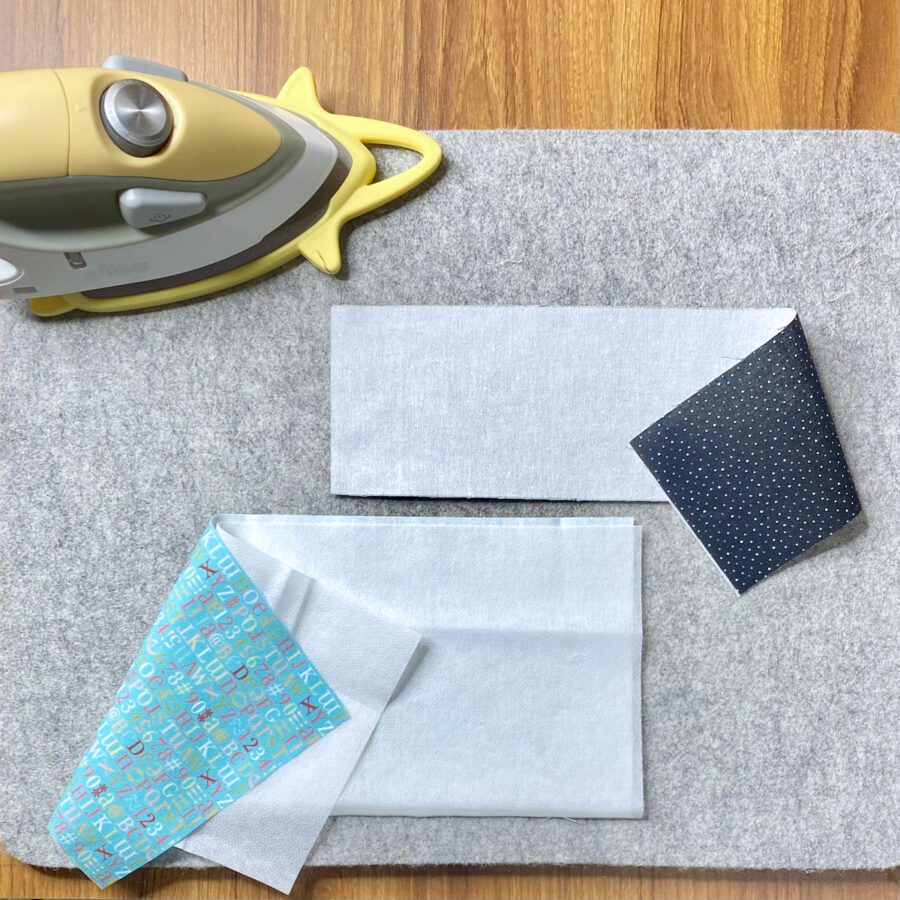
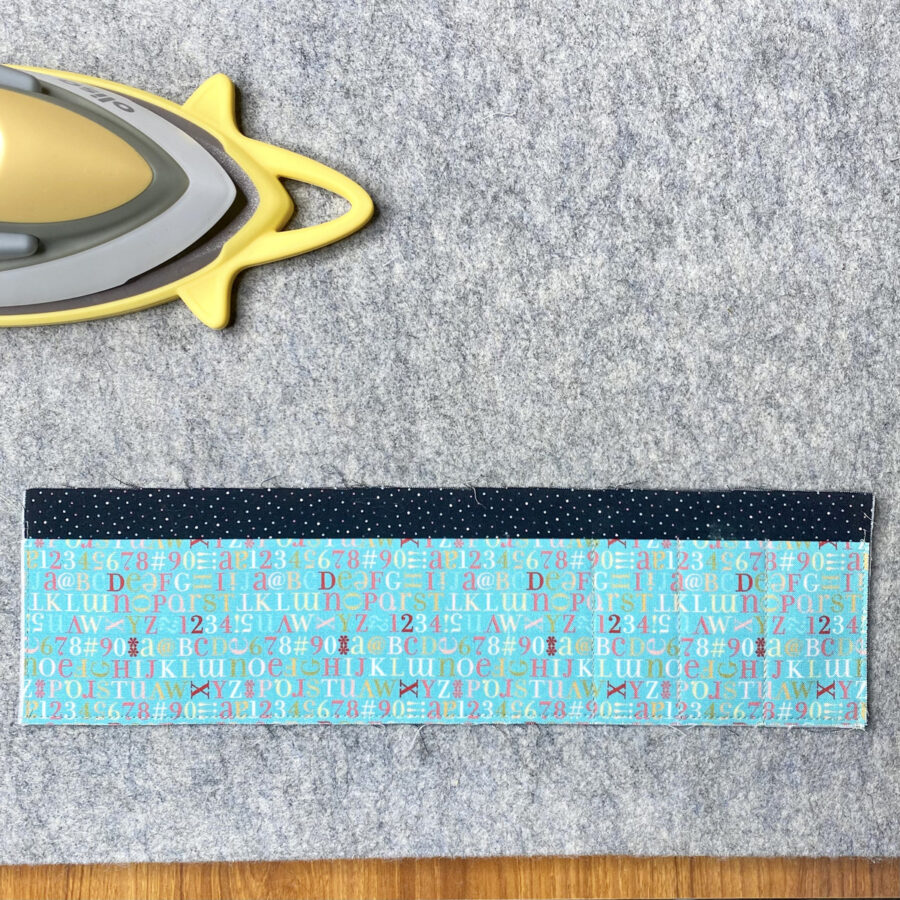
A. Fuse the 12½” x 3½” piece of HeatnBond Heavy Weight Non-Woven Fusible Interfacing to the wrong side of the 12½” x 3½” bottom base fabric, following the package instructions. Set it aside. The HeatnBond Heavy Weight Non-Woven Fusible Interfacing will make your pocket strong and sturdy.
- Pre-heat iron to high heat, no steam
- Place rough side of the Fusible Interfacing onto the back (wrong side) of the fabric.
- Cover with a lightweight, dry pressing cloth. Press and hold iron with medium pressure for 10 – 15 seconds. Repeat by lifting iron to a new area and pressing, slightly overlapping previous area until entire surface is bonded.
- Allow to cool then check for proper adhesion. Iron again if needed.
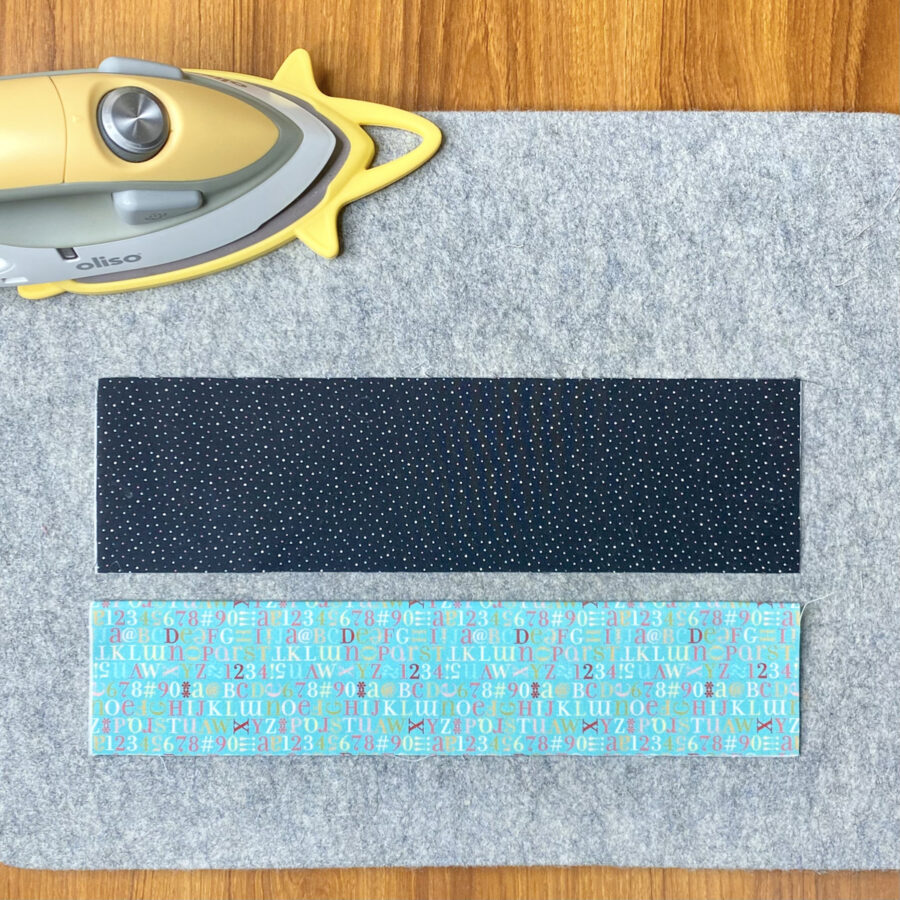
B. Fuse the 12½” x 5½” piece of HeatnBond Heavy Weight Non-Woven Fusible Interfacing to the wrong side of the 12½” x 5½” bottom pocket fabric, following the package instructions or instructions in step 2A.
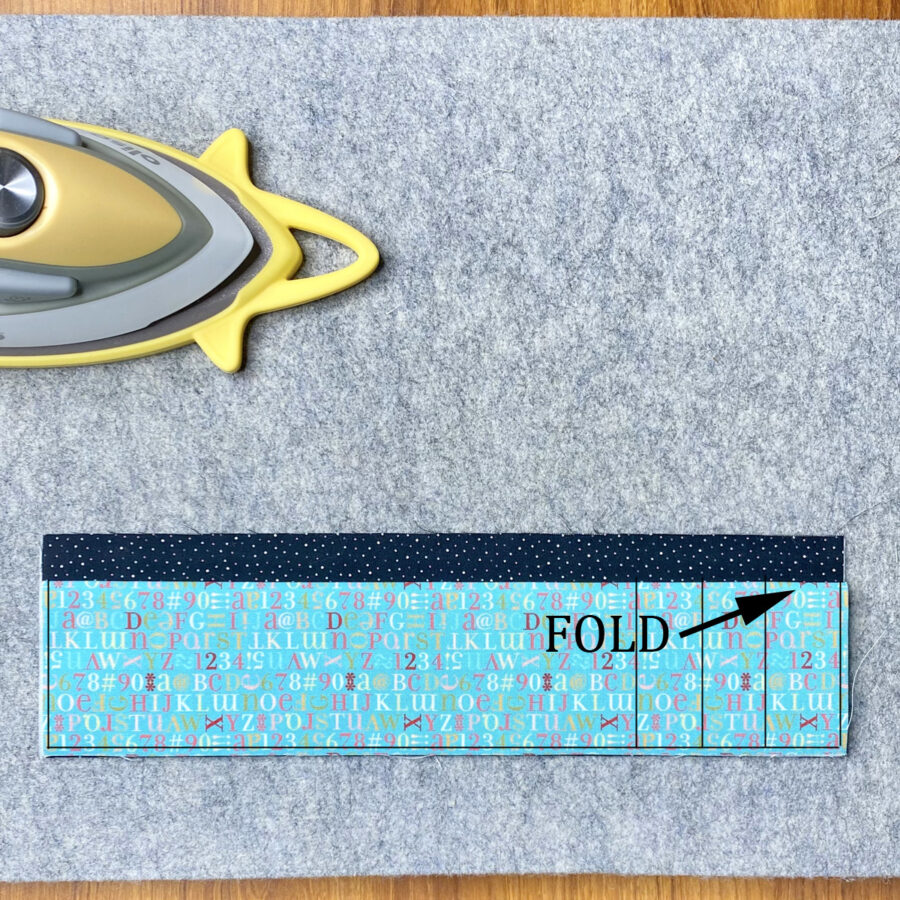
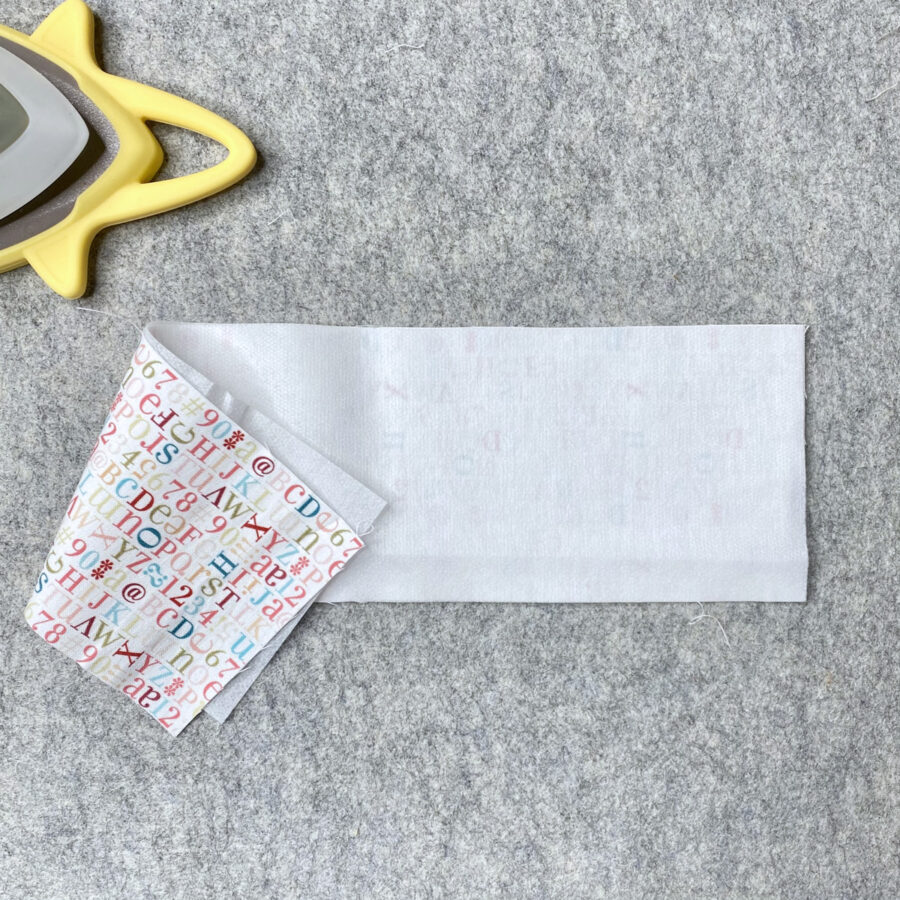
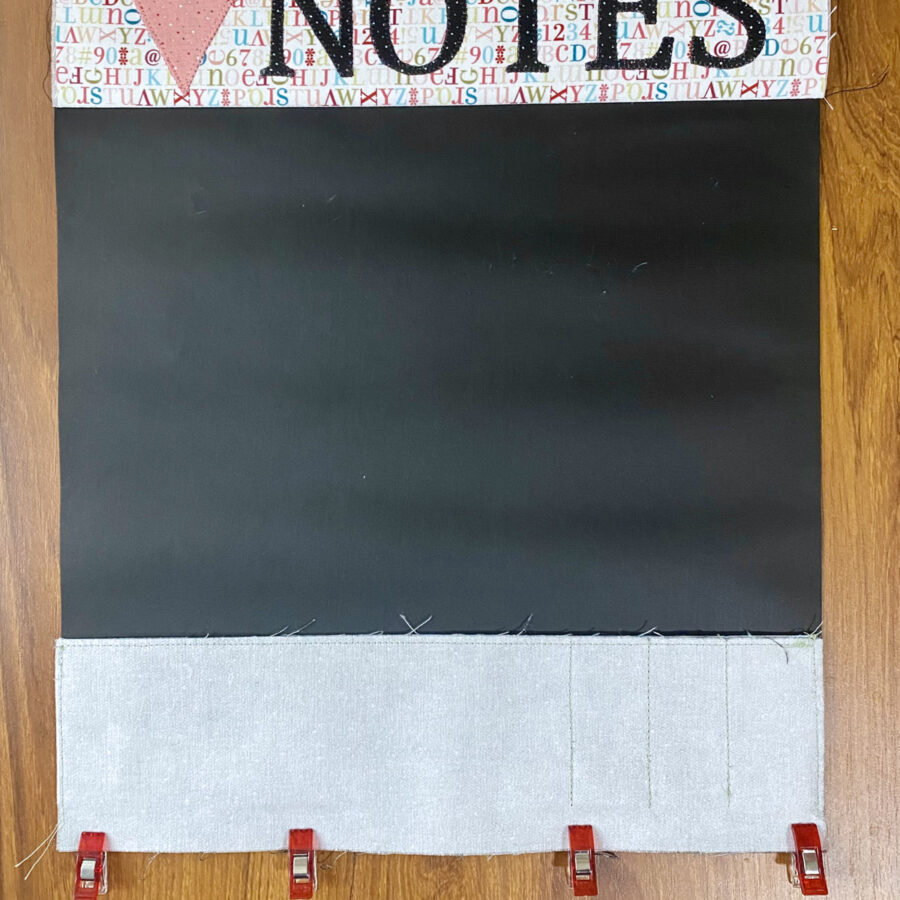
C. Fold the fused bottom pocket fabric in half lengthwise and press. It will now measure 12½” x 2¾”.
D. Place the folded pocket fabric on top of the bottom base fabric, lining up the bottom of the pocket fabric (raw edges) with the bottom of the base fabric. Baste the top and sides to hold the pocket in place.
E. Sew several dividers in the pocket to hold the chalk and eraser. From the rights side, measure over 1½” and sew a division line in the pocket. Starting at the first division, measure over 1¼” and sew another division line. Next, from the second division line, measure over 1¼” and sew another division line. This will create three pockets for chalk and one large pocket for an eraser or sponge. You can adjust these pocket separations to your preference.
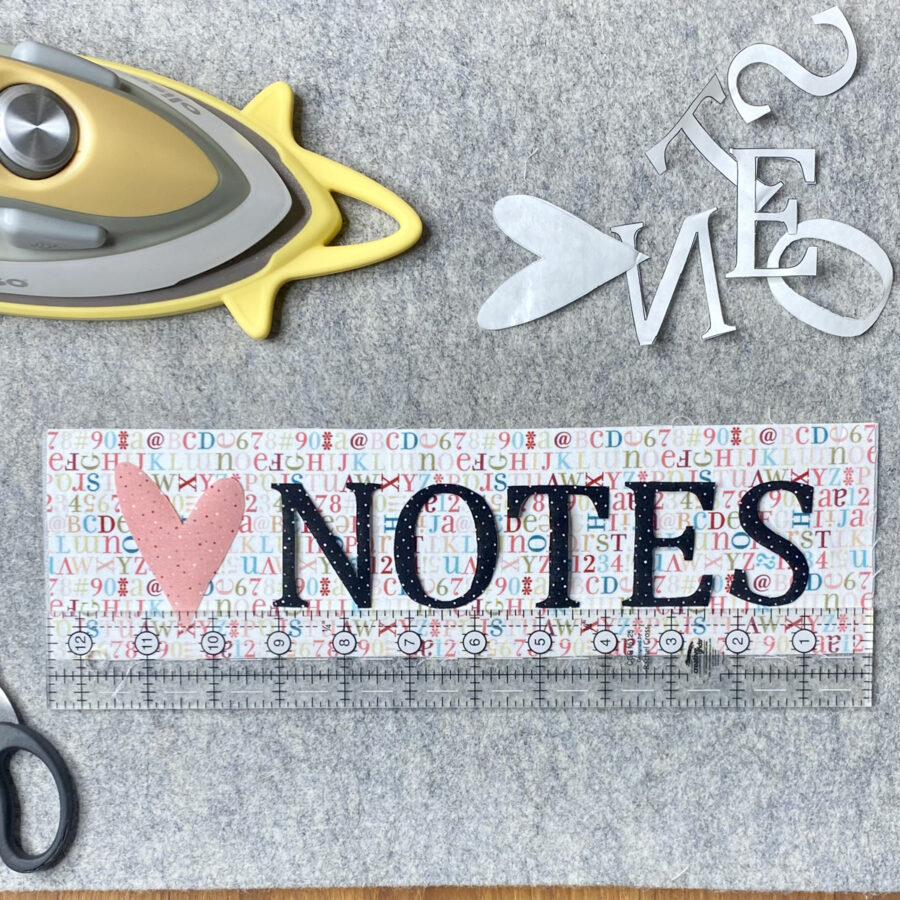
3. Create the top appliqué unit.
A. Fuse the 12½” x 3½” piece of HeatnBond Heavy Weight Non-Woven Fusible Interfacing to the wrong side of the 12½” x 3½” top base fabric, following the package instructions or instructions in step 2A. Set it aside. The HeatnBond Heavy Weight Non-Woven Fusible Interfacing will be a great base for the applique and keep your fabric(s) smooth without puckering.
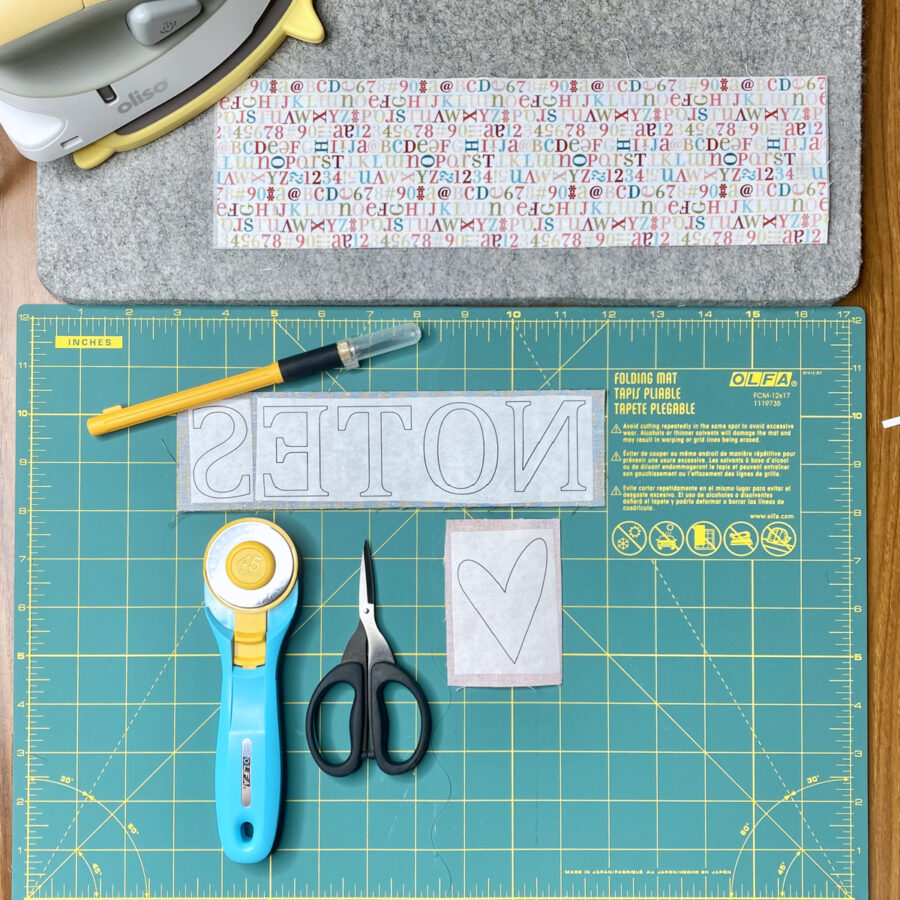
B. Loosely cut apart the applique templates printed on HeatnBond Lite EZ-Print Iron-On Adhesive and apply to the back of selected fabrics following the package instructions. Cut out all shapes on the solid lines, leaving the paper in place.
- Pre-heat iron to medium heat, no steam.
- Place loosely cut apart template(s) on the wrong side of selected cotton fabric (printed paper, smooth side, should be face up).
- Place and hold the iron on the paper for 2 seconds. Repeat, overlapping slightly, until entire surface is bonded.
- Allow it to cool.
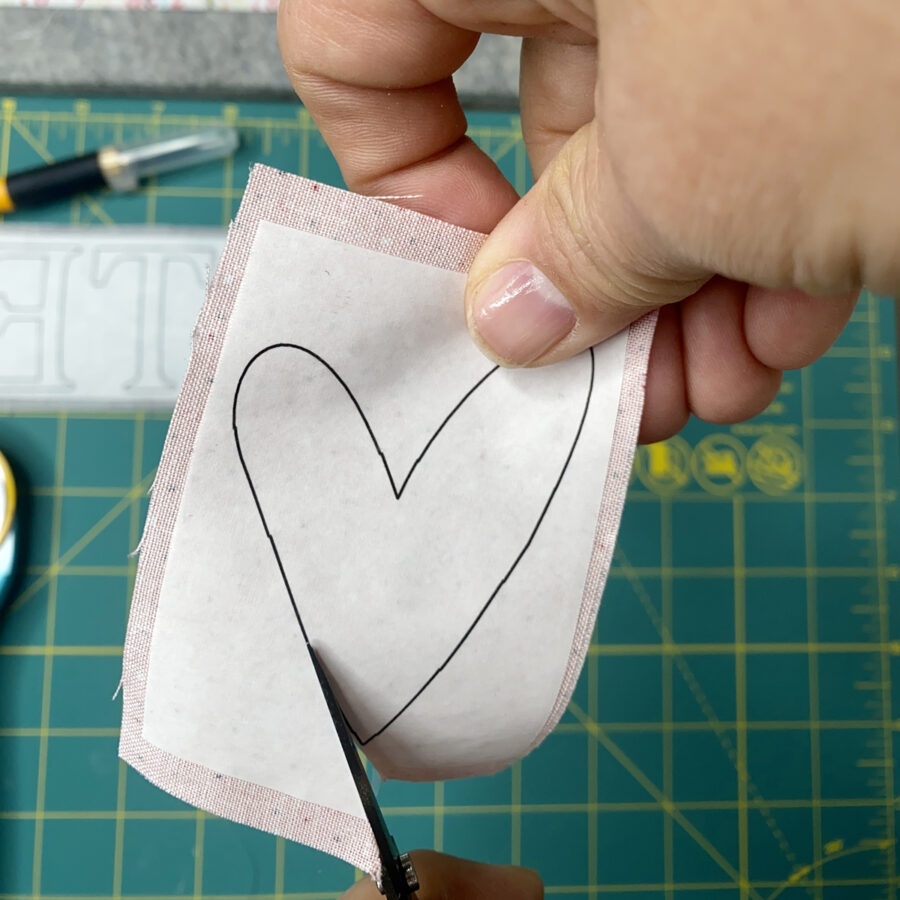
- Cut or trim on the solid lines printed on the paper to the desired shape. Leave paper in place until ready for layout.
C. Using the Appliqué Layout Guide (page 1 of PDF), remove the paper backs from all appliqué pieces and fuse into place on the top base fabric, following the package instructions. Make sure to leave at least ¼” seam allowance around the entire perimeter, so the applique pieces are not sewn into the seams.
- Pre-heat iron to medium heat, no steam.
- Peel off paper.
- Place fabric shape, adhesive side down on top of front base fabric.
- Press and hold iron for 6 seconds on each section, overlapping slightly, until entire piece is bonded.
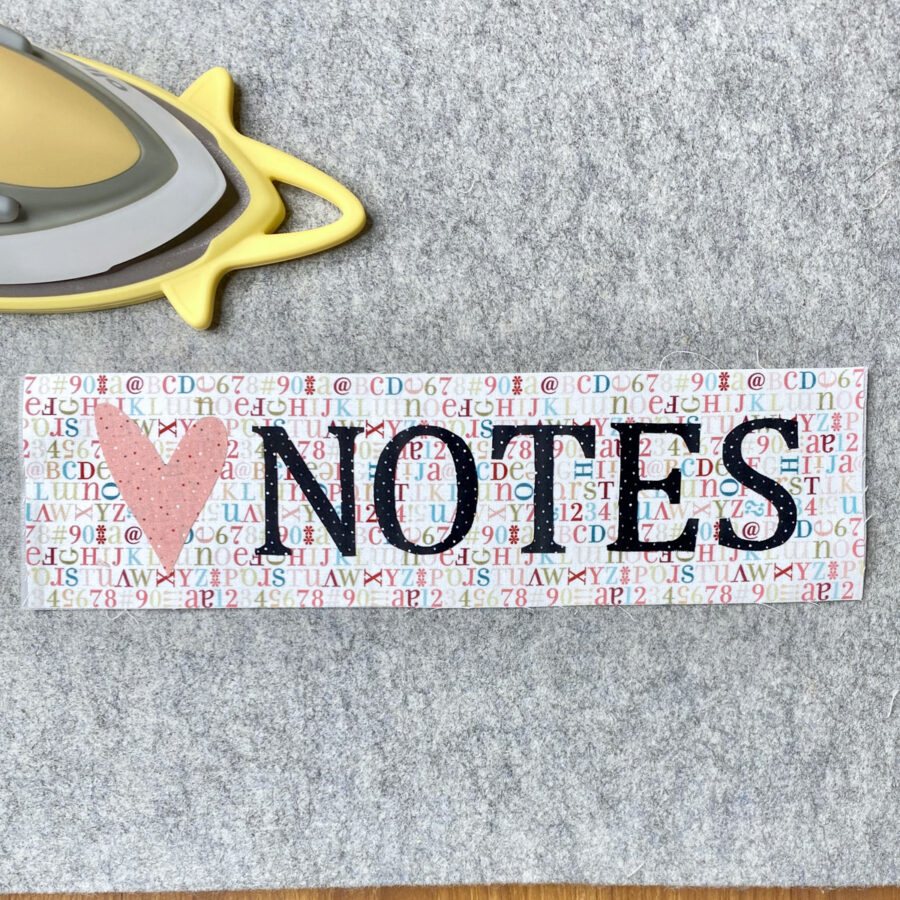
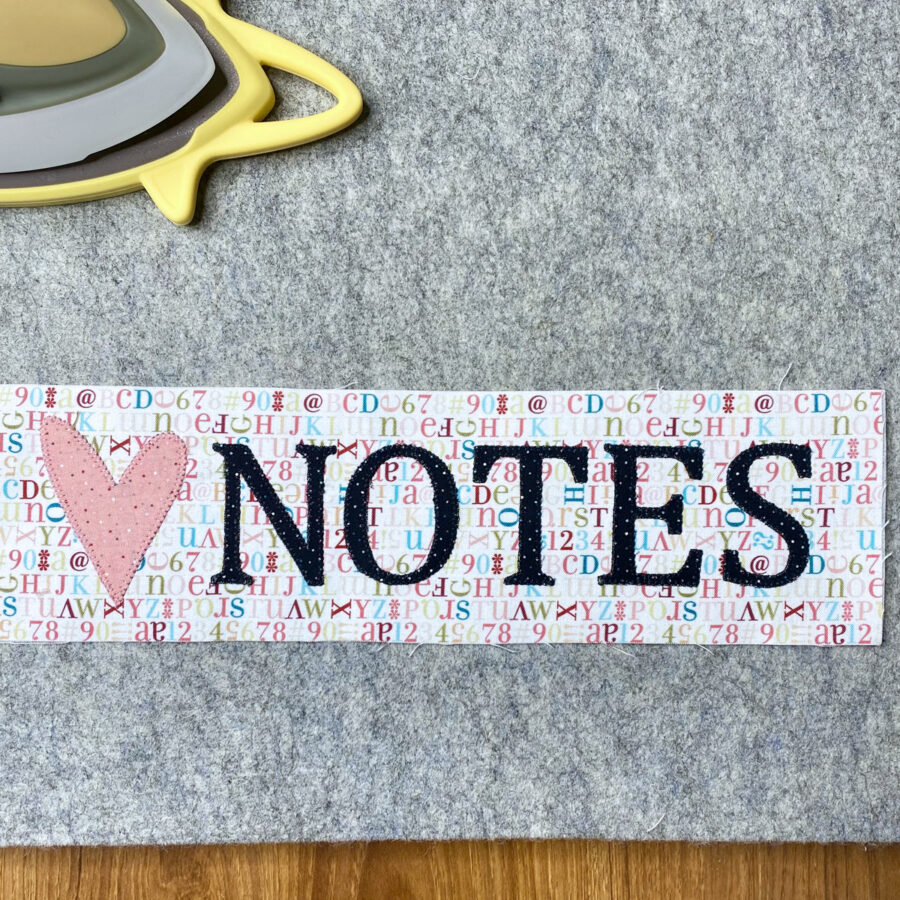
D. Using your favorite appliqué stitch (machine or hand) and coordinating sewing thread, sew the pieces in place (or leave them without sewing for a fast project – the HeatnBond Lite will hold them in place). I chose to use a machine blanket stitch.
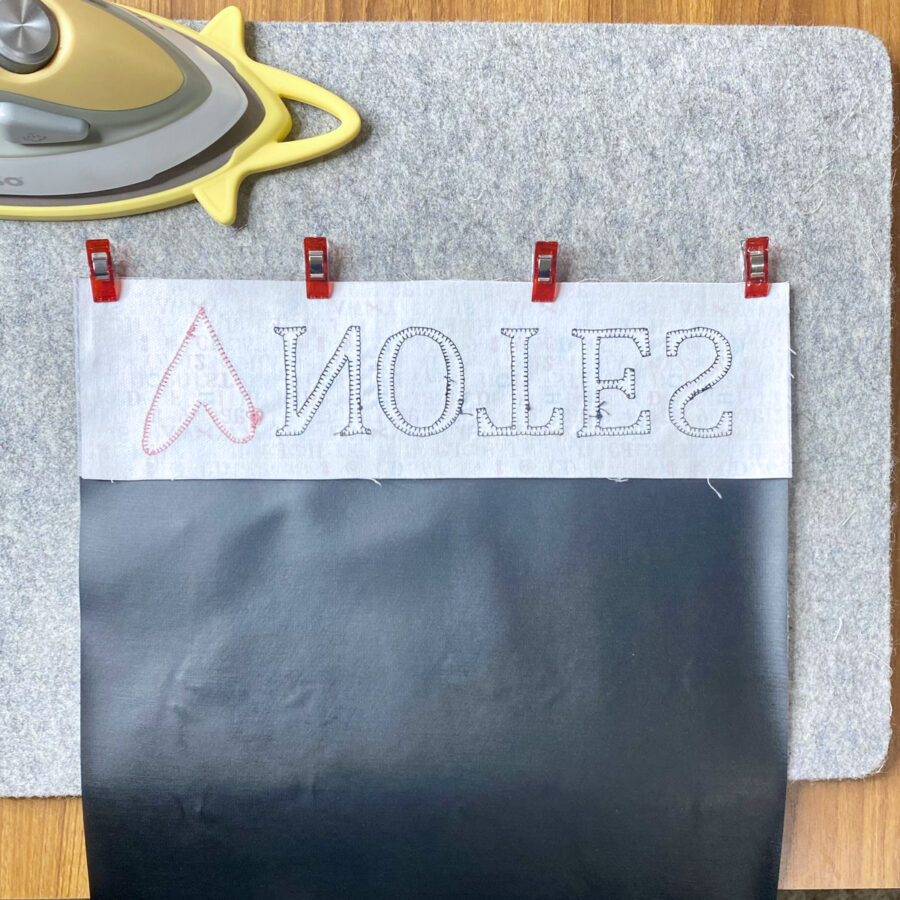
4. Create the chalkboard unit.
A. First some details about chalkboard fabric – please read carefully.
- Chalkboard cloth is like an oilcloth – you can write on it with chalk, wipe it off with a damp sponge or cloth, and use it again.
- Use a wool setting on your iron and a dry press cloth; press from the WRONG side to remove wrinkles. Do not iron directly on top with a hot iron, it can melt the fabric.
- Use Wonder Clips (no pins)
- Use a size 80 Universal needle
- Set the sewing machine for a longer stitch length, 3.0 or 3.5 mm. Shorter stitches can weaken the fabric.
B. Place the top appliqué unit on top of the 12½” x 12½” chalkboard fabric, right sides together. The bottom of the applique unit should be lined up with the top of the chalkboard fabric. Use Wonder Clips to hold in place. Stitch across the top with a ¼” seam allowance. Using a medium setting on your iron, cover the seam with a Pressing Paper Fabric and Craft Sheet (waxy side against your project, paper side up), carefully press the seam towards the appliqué unit.
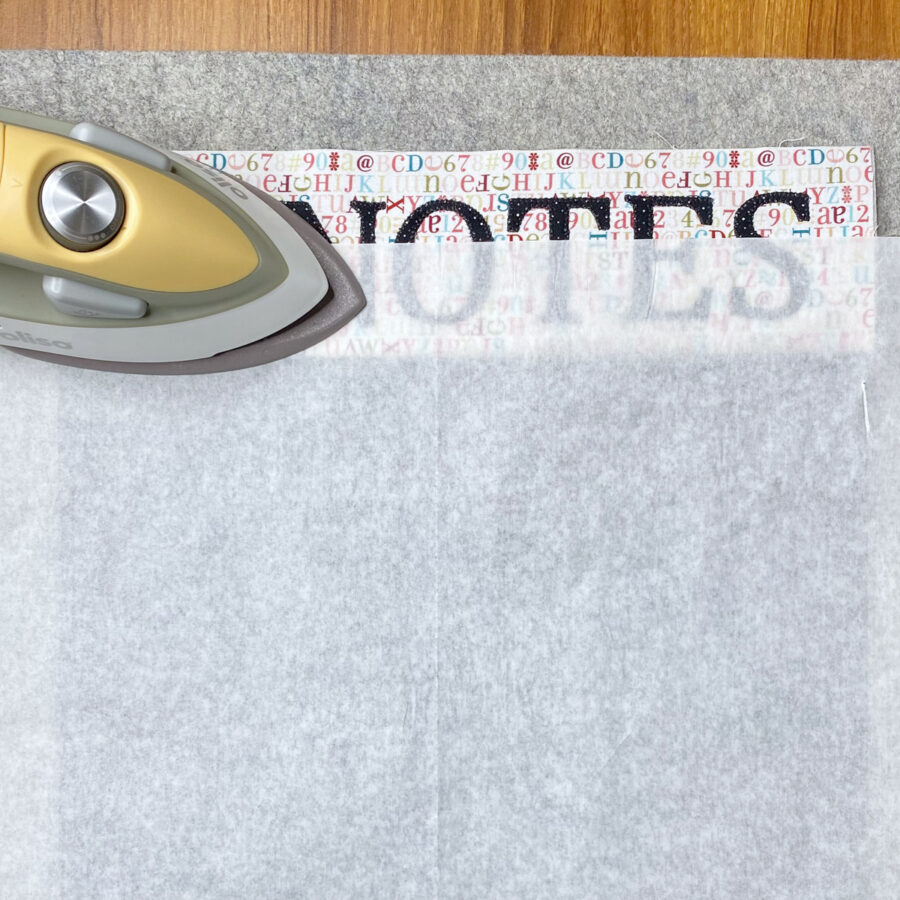
C. Place the bottom pocket unit on top of the chalkboard fabric unit, right sides together. The top of the pocket unit should be lined up with the bottom of the chalkboard fabric. Use Wonder Clips to hold in place. Stitch across the bottom with a ¼” seam allowance. Using a medium setting on your iron, cover the seam with a Pressing Paper Fabric and Craft Sheet (waxy side against your project, paper side up), carefully press the seam towards the appliqué unit.

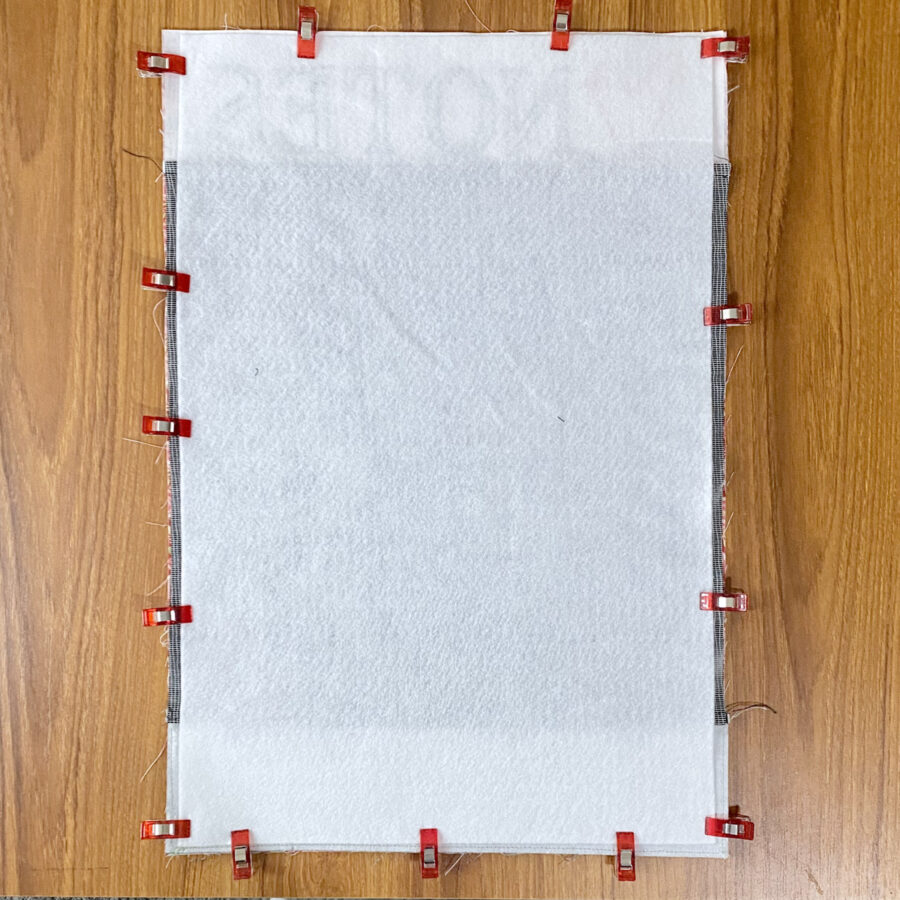
D. Center and fuse the 12” x 18” piece of HeatnBond Fusible Fleece to the wrong side of the 12 ½” x 18½” chalkboard unit, following the package instructions.
- Pre-heat iron to a medium setting, no steam. Normally, I would use a high/cotton setting, but I used a medium setting to protect the chalkboard fabric. If you have difficultly with the fleece adhering, use a high cotton setting when attaching to the cotton top and bottom and a medium heat over the chalkboard fabric.
- Place the rough side of the Fusible Fleece on the wrong side of the chalkboard fabric unit. Place it so there is a ¼” seam allowance on all four sides.
- Cover with a lightweight, dry pressing cloth.
- Press and hold iron with medium pressure for 10-15 seconds. Repeat by lifting iron to new area, slightly overlapping previous area until the entire surface is bonded.
- Allow it to cool.
E. Place the chalkboard unit and the backing fabric right sides together and sew around the perimeter with a ¼” seam allowance, leaving a 5” opening in the bottom for turning. Remember, use Wonder Clips instead of pins, if needed.
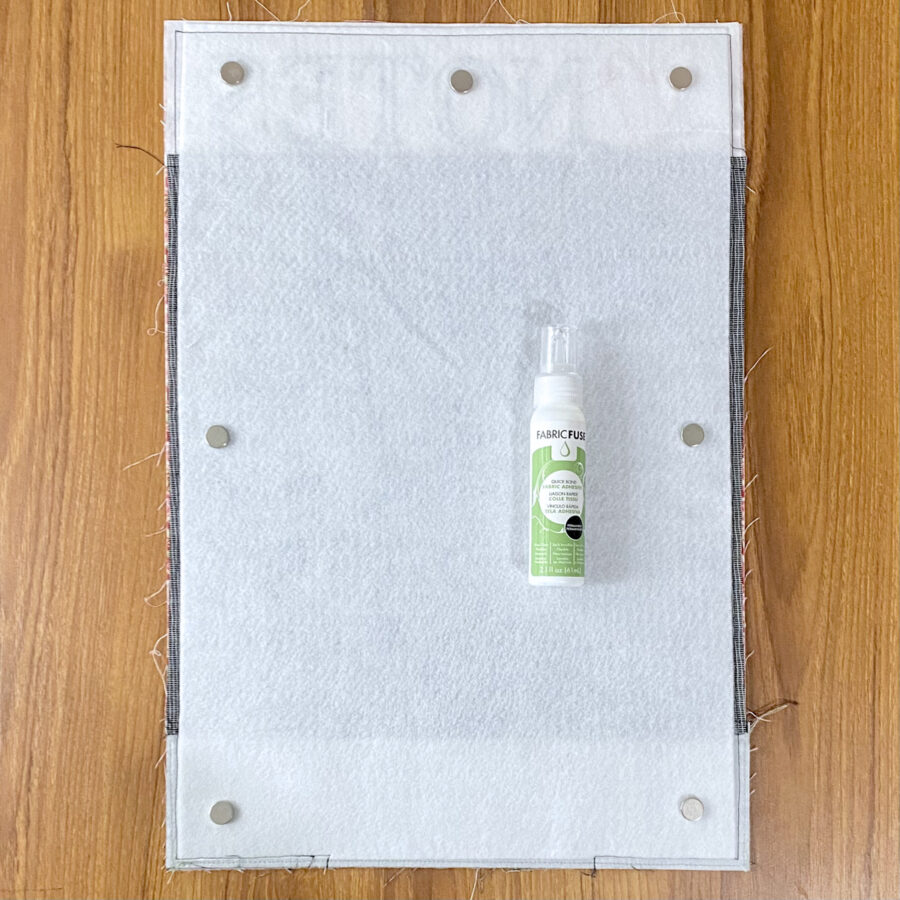
F. Use HeatnBond Fabric Fuse Liquid Adhesive to attach earth magnets to the fusible fleece side. For the model, I used 7 magnets (as shown). I did not place one bottom center where I left the opening for turning.
- Apply a large dot of glue on the fleece and a dot on the magnet.
- Press in place.
- Dry 4 – 6 hours. I let it dry overnight to make sure the magnets were secure.
G. Clip corners and turn right side out. Press from the back, being cautious of the magnets.
H. Hand sew the opening closed or use HeatnBond Hem Regular Weight Iron-On Adhesive Tape, to fuse the opening closed.
- Preheat iron to medium heat, no steam.
- Line up the opening and press closed.
- Place a piece of adhesive tape in the closure.
- Press and hold iron on the fabric for 3 – 5 seconds, until closure is bonded. This may take a second or two longer with all the layers of the pocket.
- Allow it to cool.
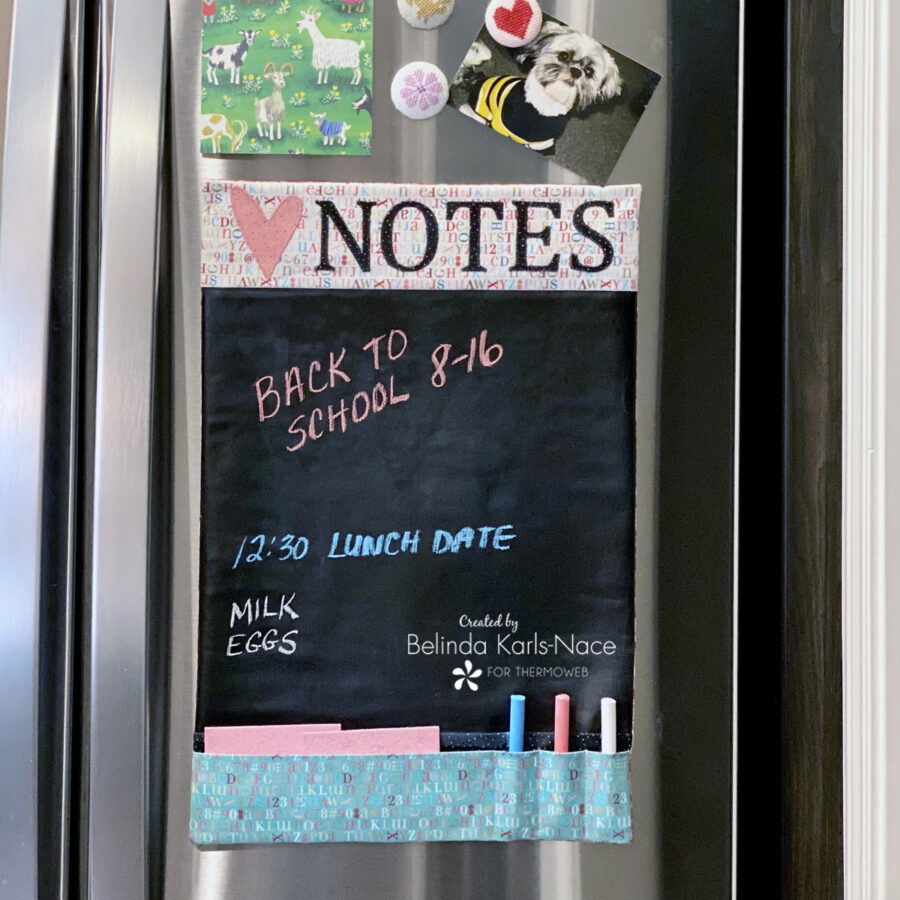
5. Add an eraser/sponge and chalk to the pockets and hang on the refrigerator.
6. Your Love Notes Refrigerator Chalkboard with HeatnBond is now complete and ready to use. Enjoy!
Thank you for joining me today for my ThermOWeb blog tutorial. I hope this post inspires you to create a refrigerator chalkboard that matches your personality and style, using materials you have on hand. To see more of my projects, stop by my blog, website, or Instagram – I would love to visit with you and see what you create!