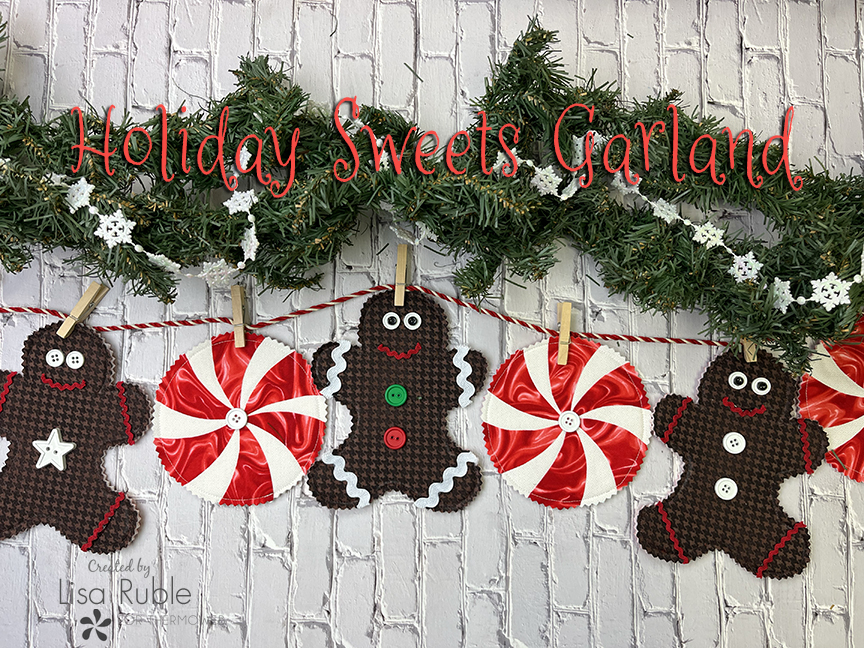
Hi! It’s Lisa Ruble from Quilty Zest and I’m here today sharing a new project – Holiday Sweets Garland. Aren’t garlands fun? They’re quick and easy to make, and they can hang anywhere, and you can make them using almost any theme. I chose gingerbread men and peppermints for my garland. Keep reading to find out how to make them!
You’ll Need (to make 4 each Gingerbread and Peppermint):
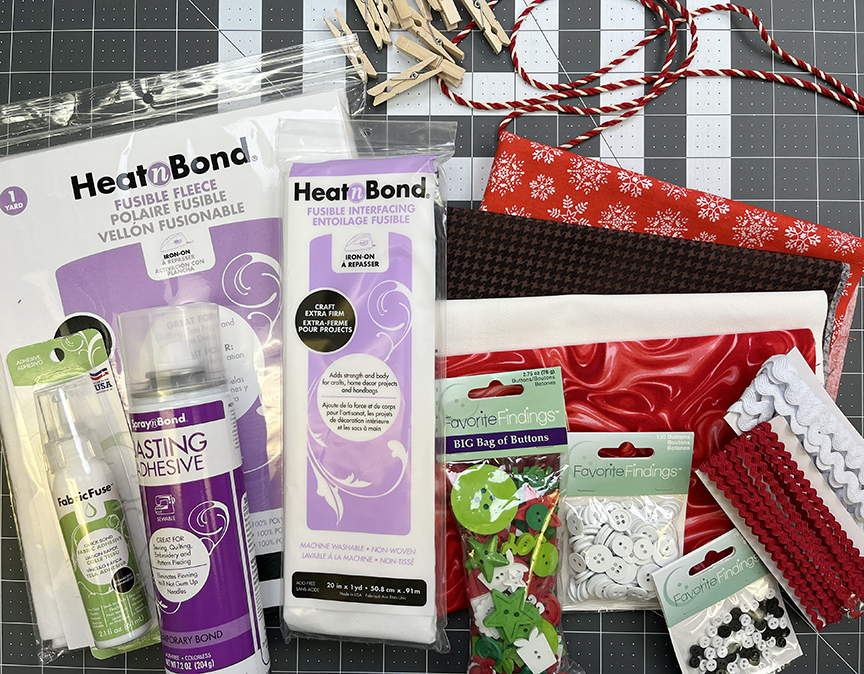
1 fat quarter each brown, red, and white tonal, plus color of choice for backing
HeatnBond Fusible Fleece
HeatnBond Craft Extra Firm Fusible Interfacing
HeatnBond Lite Iron-On Adhesive
SpraynBond Basting Adhesive
Fabric Fuse Liquid Adhesive
White or red rickrack – medium or small size
Assorted buttons
Red/white braided string
Mini clothespins
Pinking shears
Air or water soluble fabric marking pen
Download the template here.
Cutting
From the brown tonal:
(1) 8″ x 21″ strip
From the white tonal:
(4) 6″ squares
From the background print:
(1) 8″ x 21″ strip
(4) 6″ squares
From each of the Fusible Fleece and Craft Interfacing:
(1) 8″ x 21″ strip
(4) 6″ squares
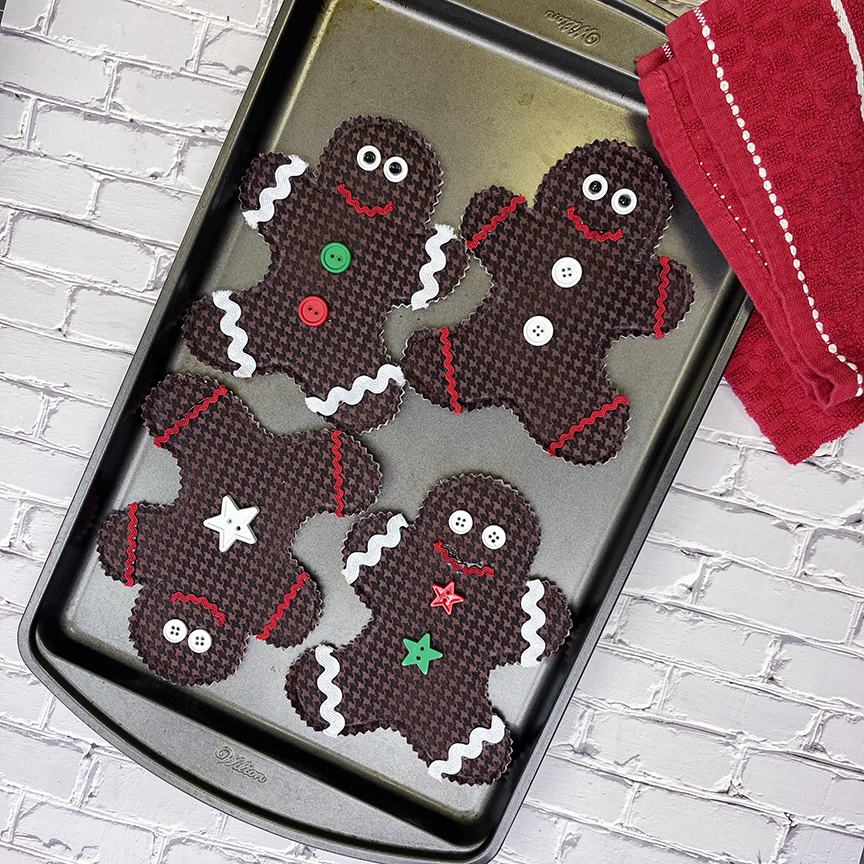
Make the Gingerbread:
Step 1 Fuse the 8″ x 21″ Fusible Fleece strip to the wrong side of the 8″ x 21″ brown tonal strip. Fuse the 8″ x 21″ Craft Interfacing strip to the wrong side of the background print strip. Use basting spray to adhere the two fused layers together so you have one quilt sandwich. 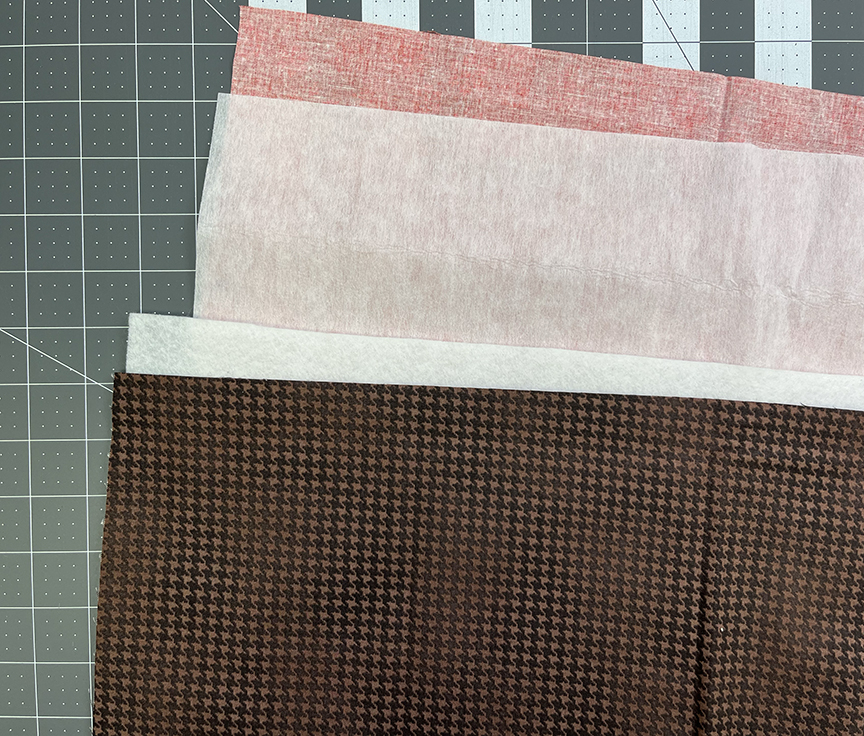
Step 2 Trace the gingerbread shape four times onto the quilt sandwich, leaving 1/2″ between. 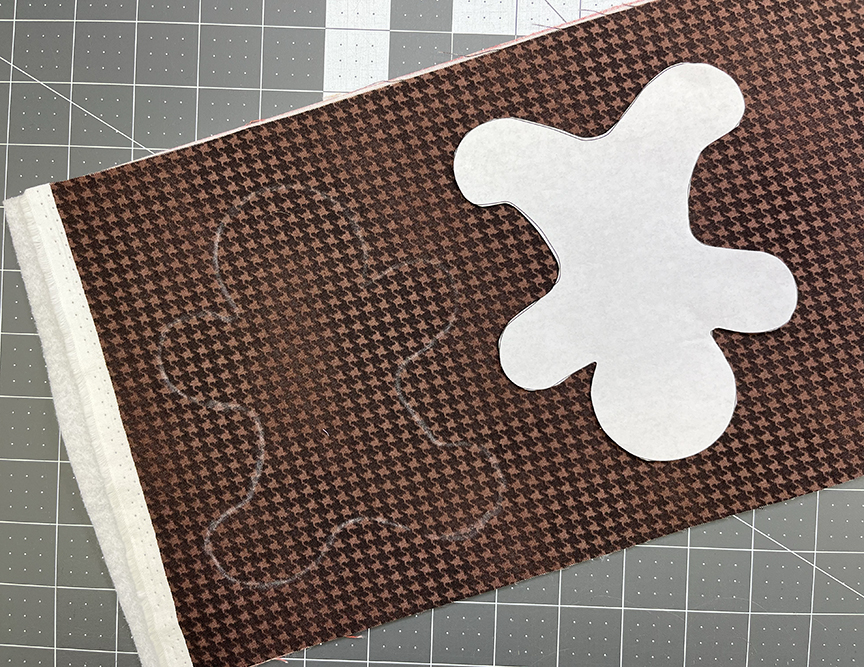
Step 3 Stitch on the gingerbread lines using coordinating thread. Tip: Use an open toe foot so you can see the line you’re following more easily. 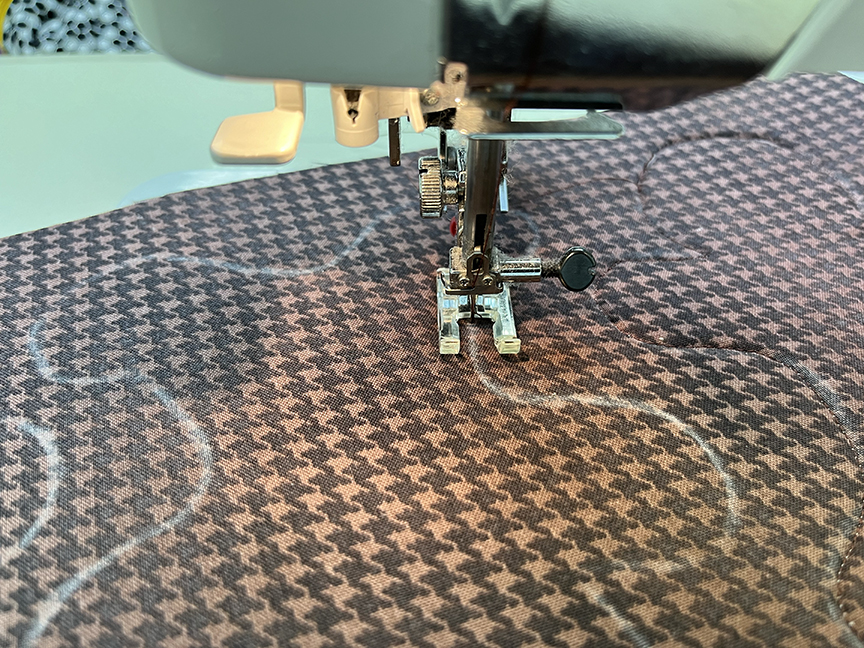
Step 4 Cut out each gingerbread just outside the stitched line using a pinking shears. 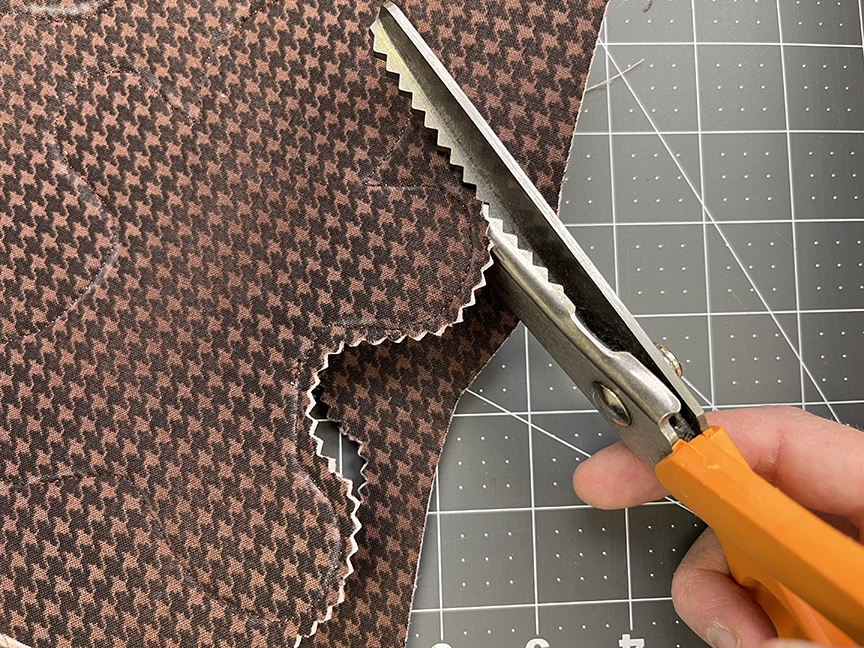
Here’s what your gingerbread should look like: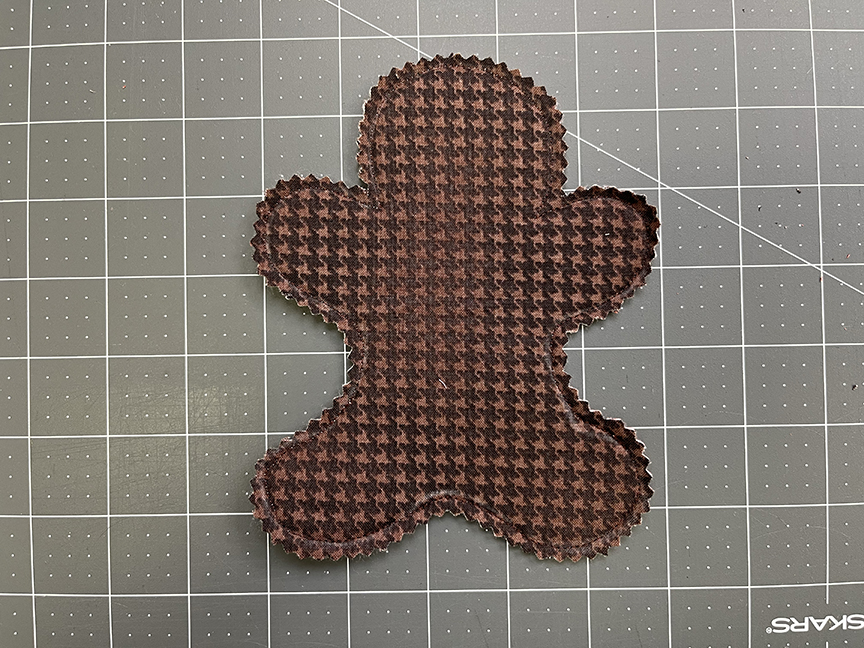
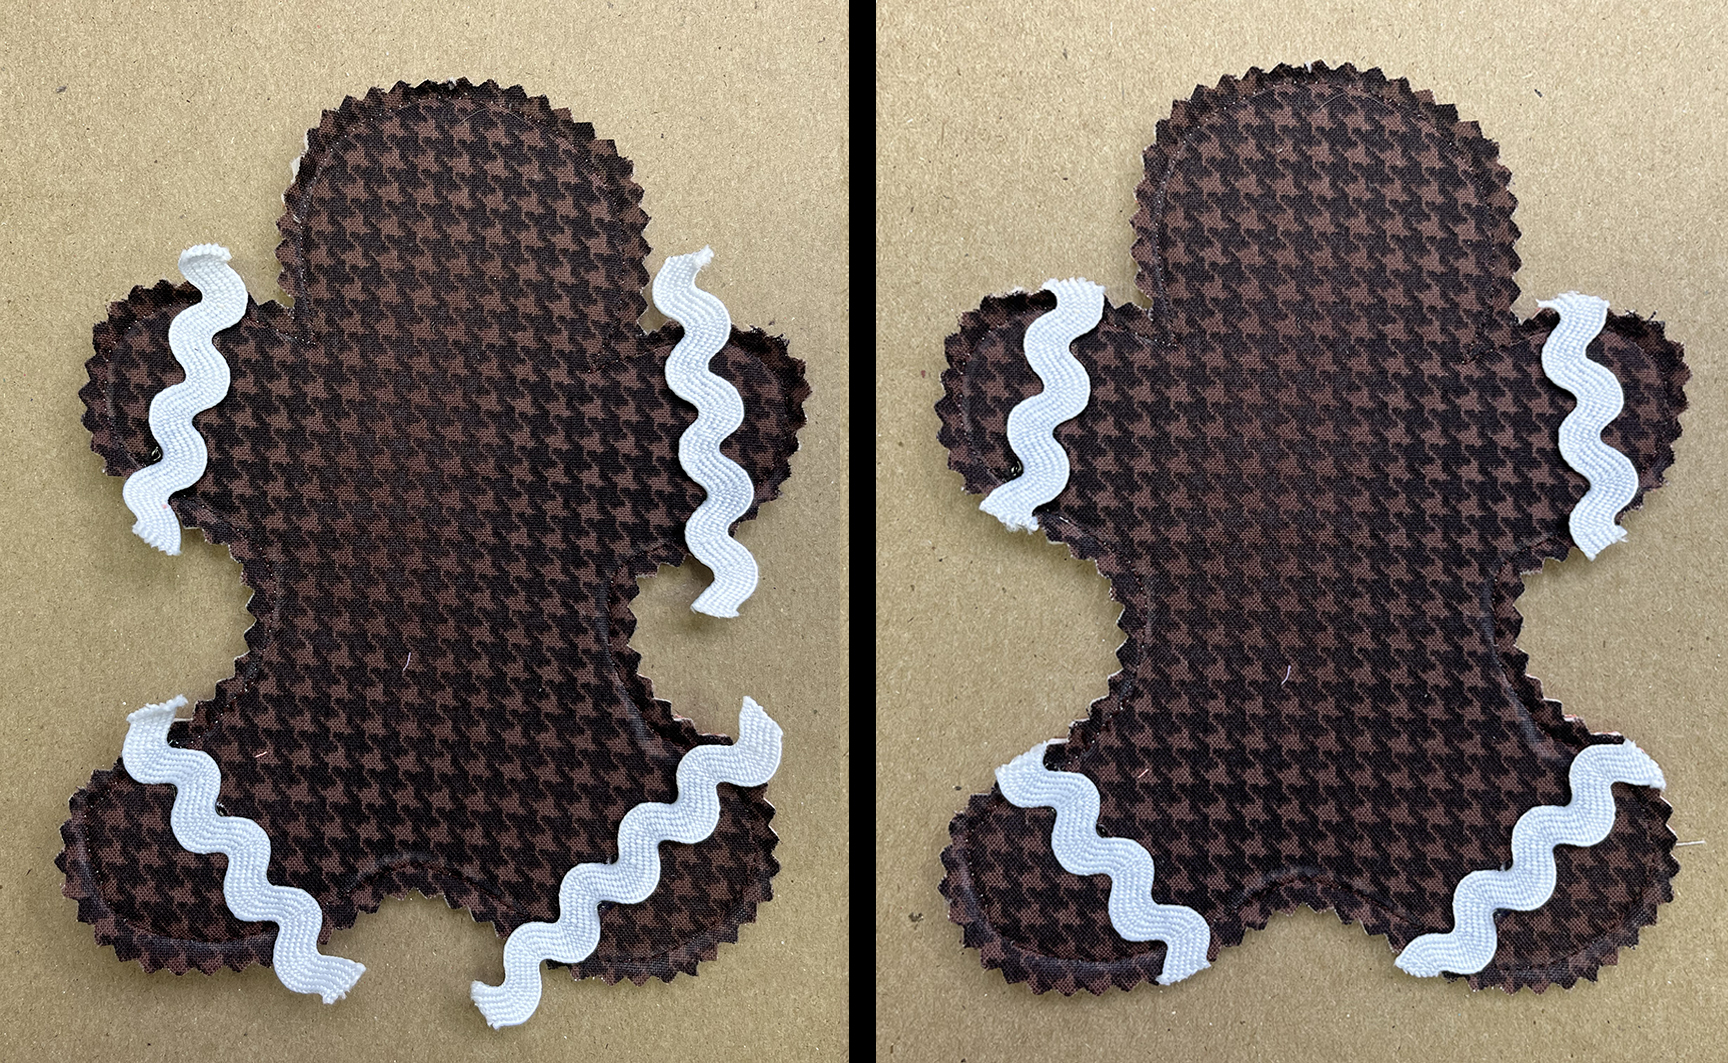
Step 5 Cut rick rack pieces slightly longer than your gingerbread arm and leg width. Using Fabric Fuse Liquid Adhesive, adhere each rick rack piece in place. 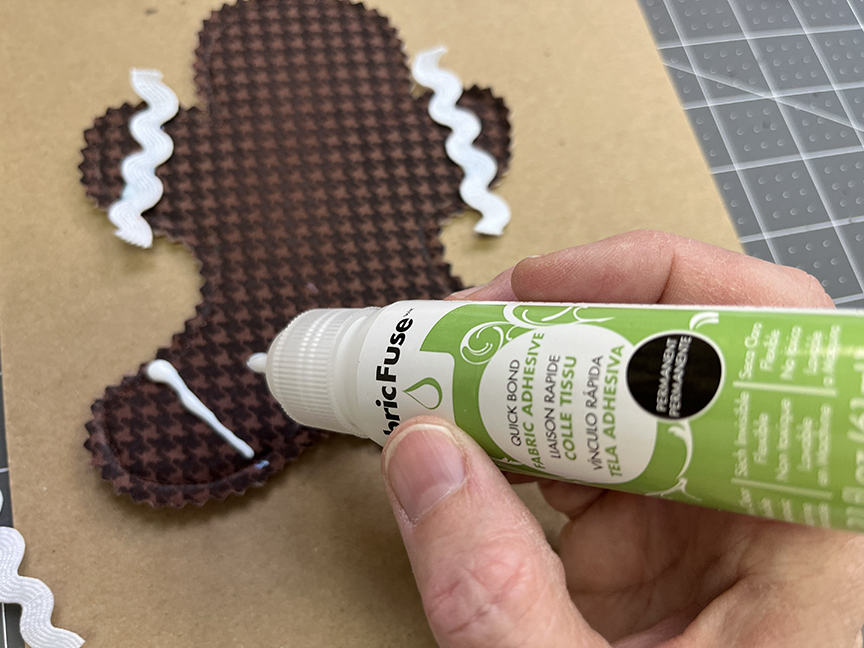
Step 6 After the adhesive dries, cut rick rack so it aligns with gingerbread edge.
Step 7 Add buttons and rick rack to further embellish your gingerbread man. I used white and black buttons for eyes, made a red rick rack mouth, and added buttons down his body. Use Liquid Adhesive to secure.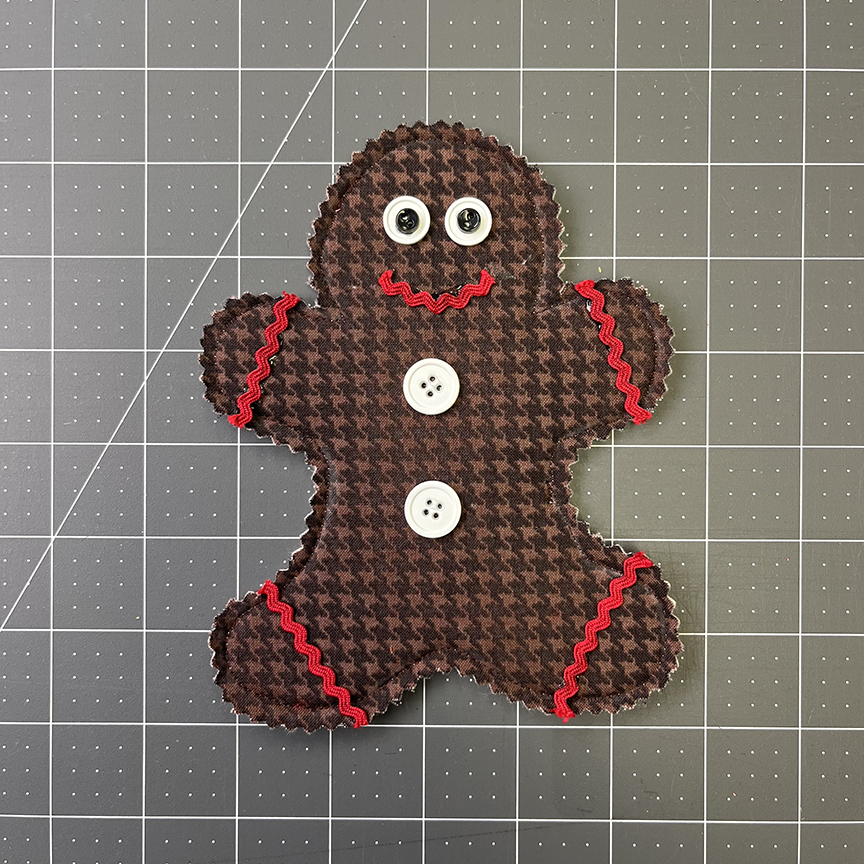
Step 8 Repeat steps 1-7 to make four gingerbread.
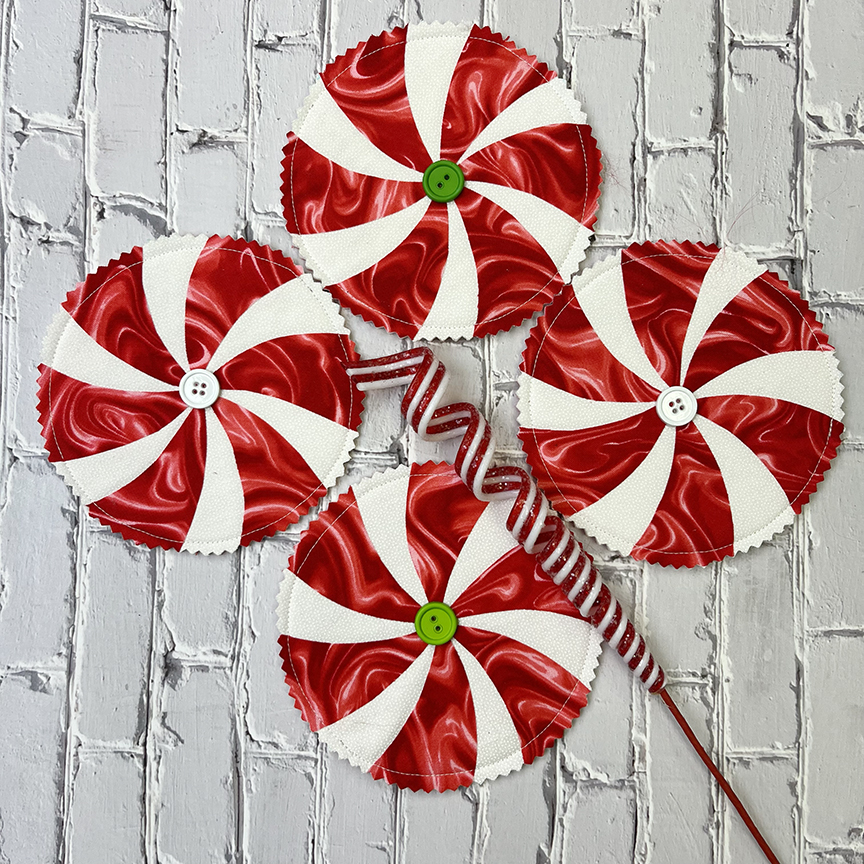
Making the Peppermint Candies
Step 1 Trace six of the peppermint curve onto the paper side of fusible web. Fuse to the wrong side of the red tonal fabric.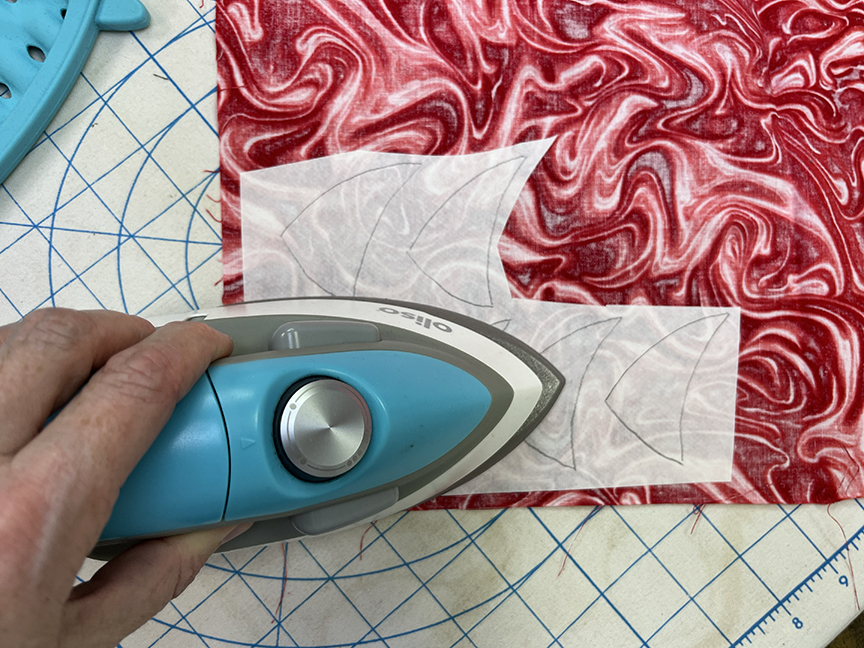
Step 2 Cut out each curve on the drawn lines. Trace the peppermint circle shape onto the right side of (1) 6″ white tonal square. Position the red curves on top so the points touch in the center. Don’t worry if the points don’t match up perfectly – they’ll be covered with a button. Fuse curves in place.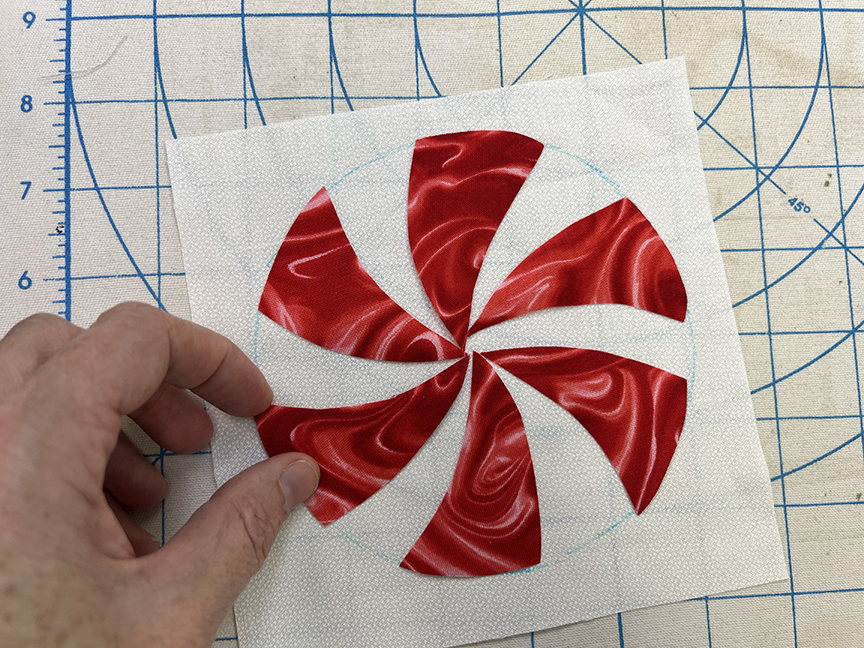
Step 3 Similar to the gingerbread, create a quilt sandwich using 6″ squares of the fusible fleece, craft interfacing, and backing.
Step 4 Using white thread, stitch just INSIDE the drawn circle line on the quilt sandwich. I used the inside of my sewing machine foot as a guide while sewing. 
Step 5 Using the pinking shears, cut along the marked circle line. 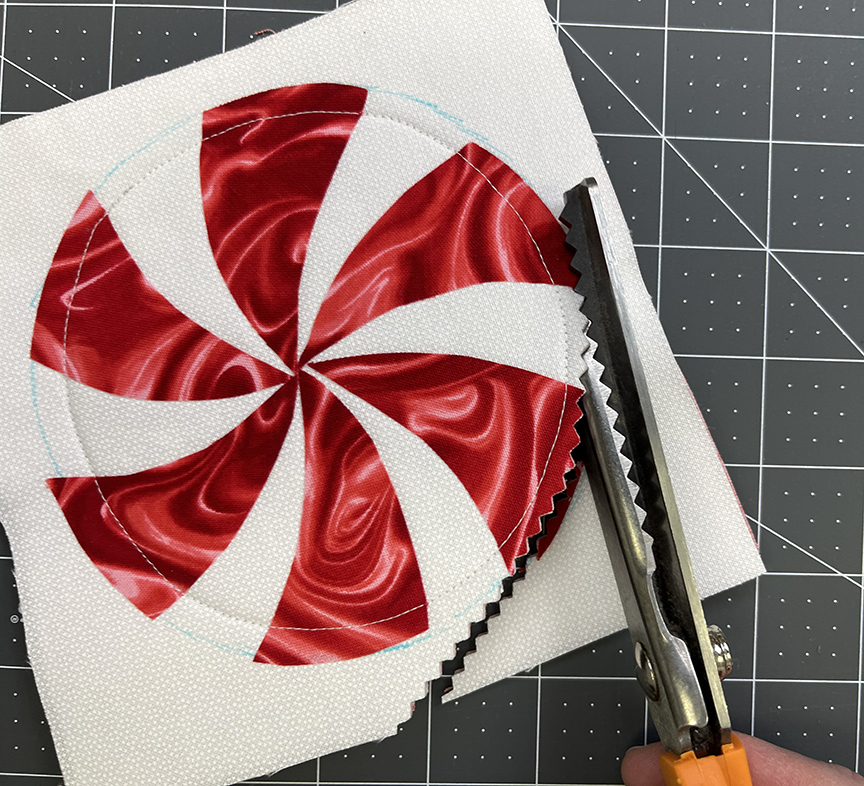
Step 6 Using Liquid Adhesive, secure a button to the center of the peppermint. 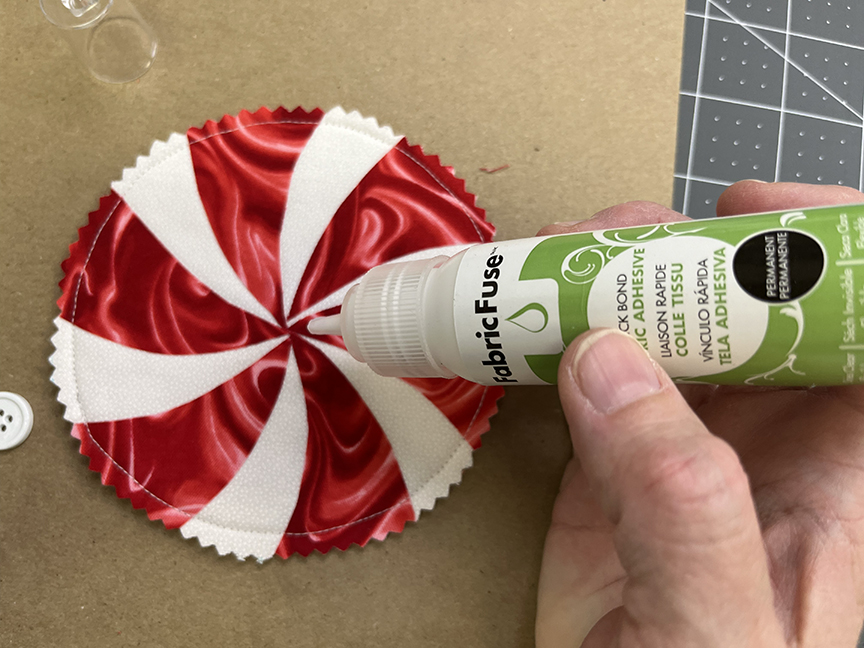
Step 7 Repeat steps 1-6 to make four peppermint candies.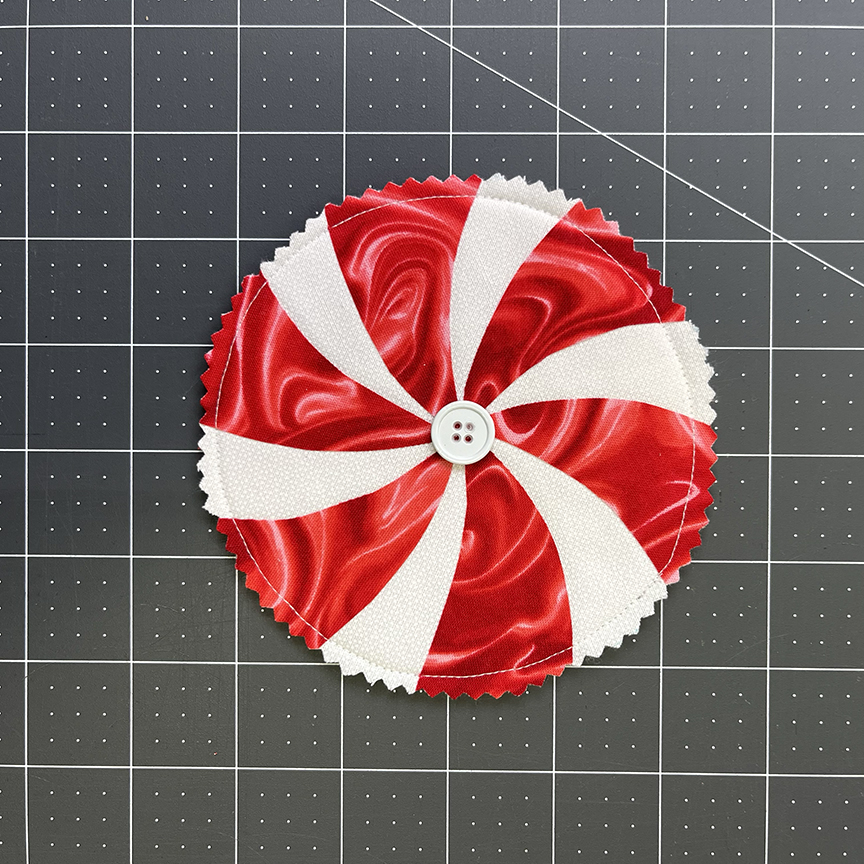
Use mini clothespins to secure your gingerbread and peppermint candies to the red/white string and then hang your garland!
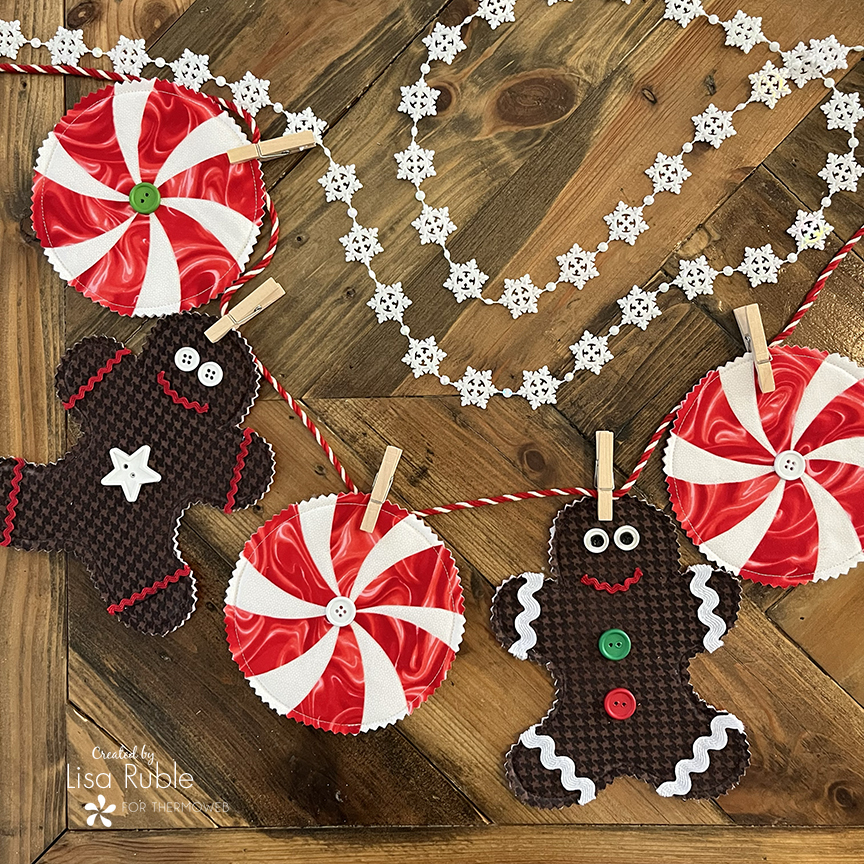
You could also use gingerbread or peppermint candies for ornaments or package tags – just add a hanging loop!