
I am excited to share the pattern for my “Favorite Zipper Pouch”.
I love my fabrics from xo.gigi fabrics! I needed a few gifts and whipped up some zipper pouches. I have made lots and lots of zipper bags. This is the one I always go back to. It holds a lot but isn’t huge. I have probably made over 50 of these!

Are you ready??
Prepare the bag:


Iron the Therm O Web HeatnBond Fusible Fleece to the wrong side of the outer bag fabric.
Measure a 1 1/2″ square and cut a notch out of the bottom corners of the outer pieces and the lining pieces. This will create the pleat in the bottom of the bag.


Prepare the zipper:
I like to put little tabs on my zipper so the zipper is not directly sewn into the seam of the bag. It reduces bulk and helps it lay flat. I always measure my tabs larger than cut them down.
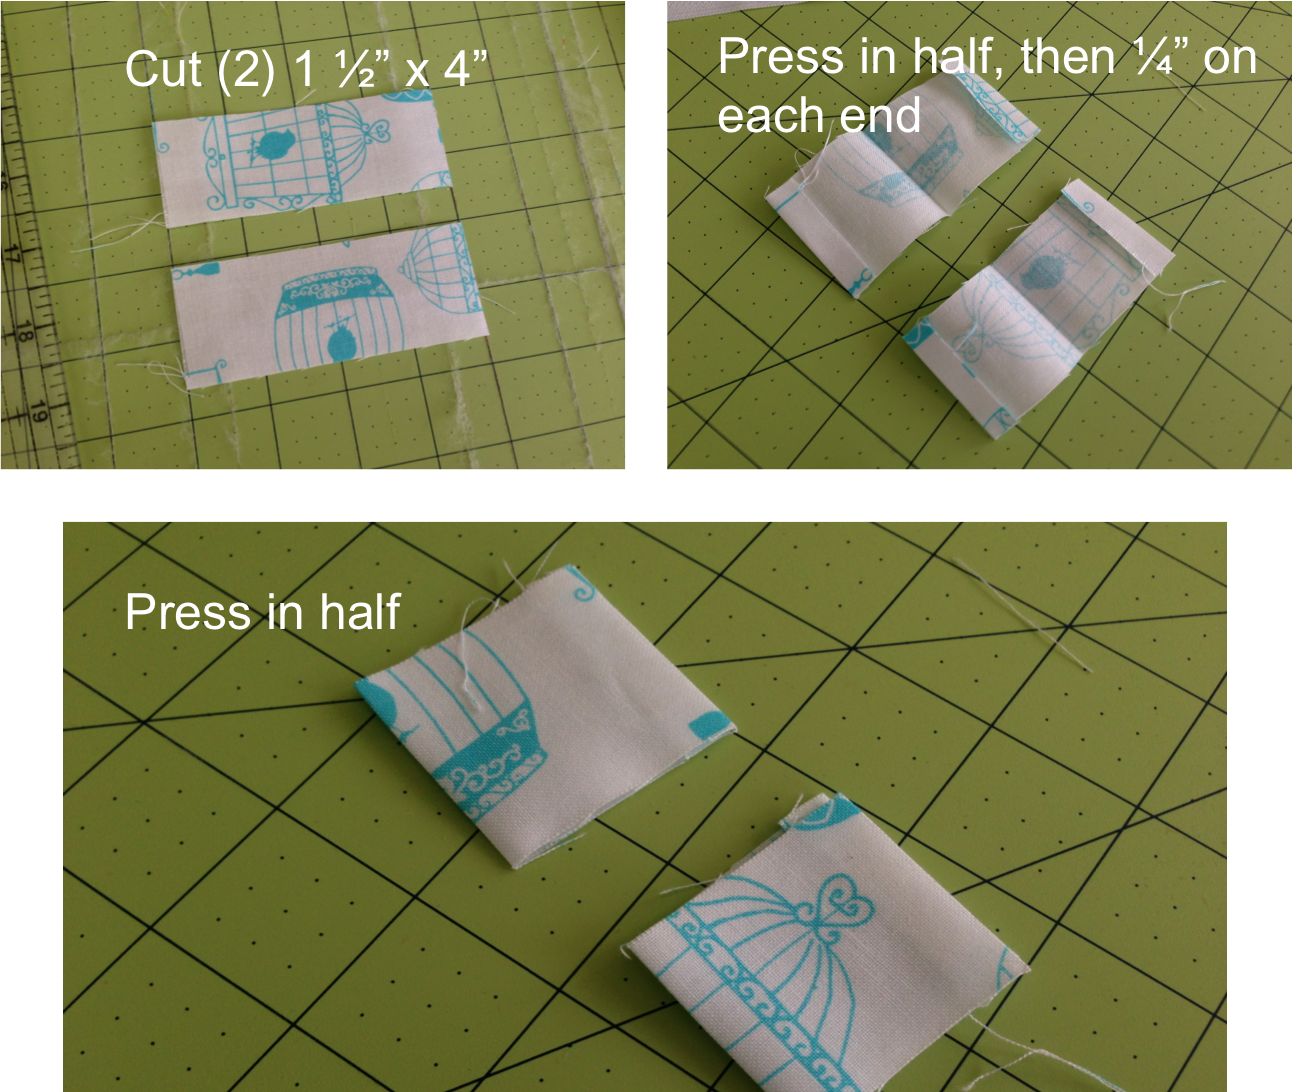
As you can see, I like to buy larger zippers than I need. You can always cut them down for smaller projects!

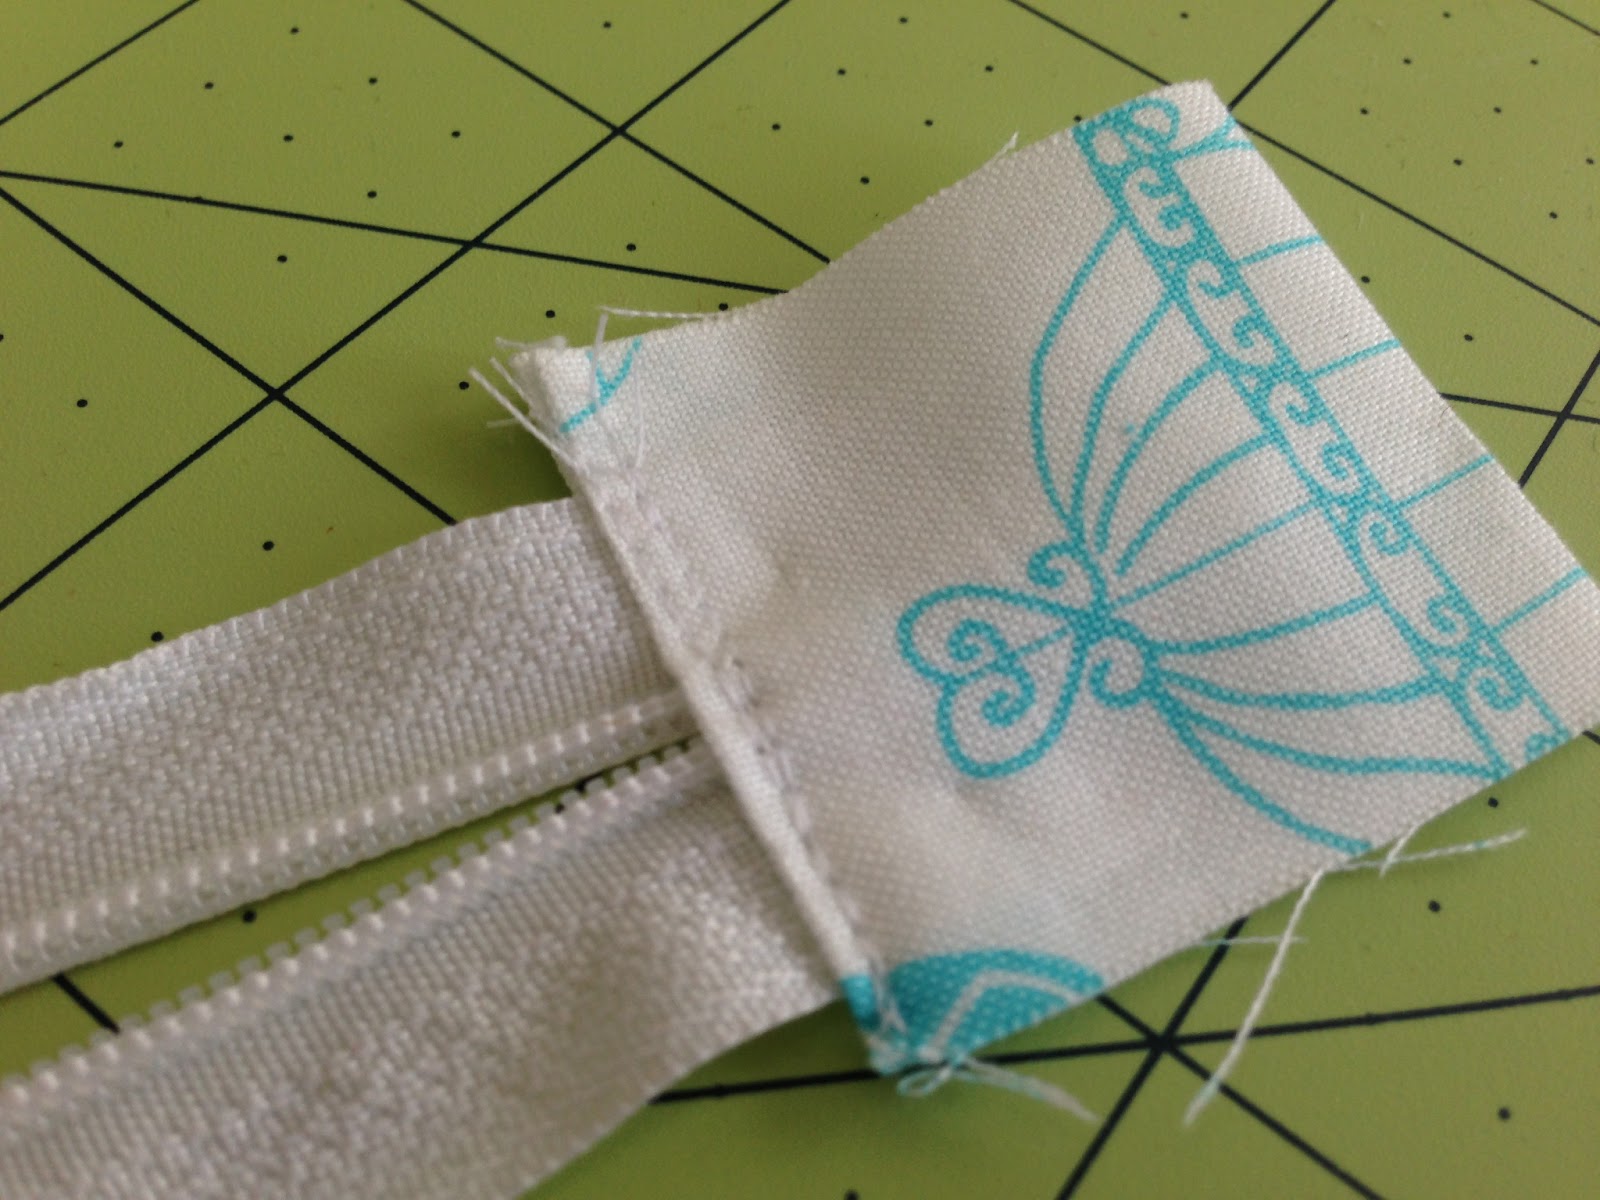
Cut off the metal ends of the zipper.

Sew one of the prepared tabs to the end of the zipper. Backstitch several times over the zipper teeth.

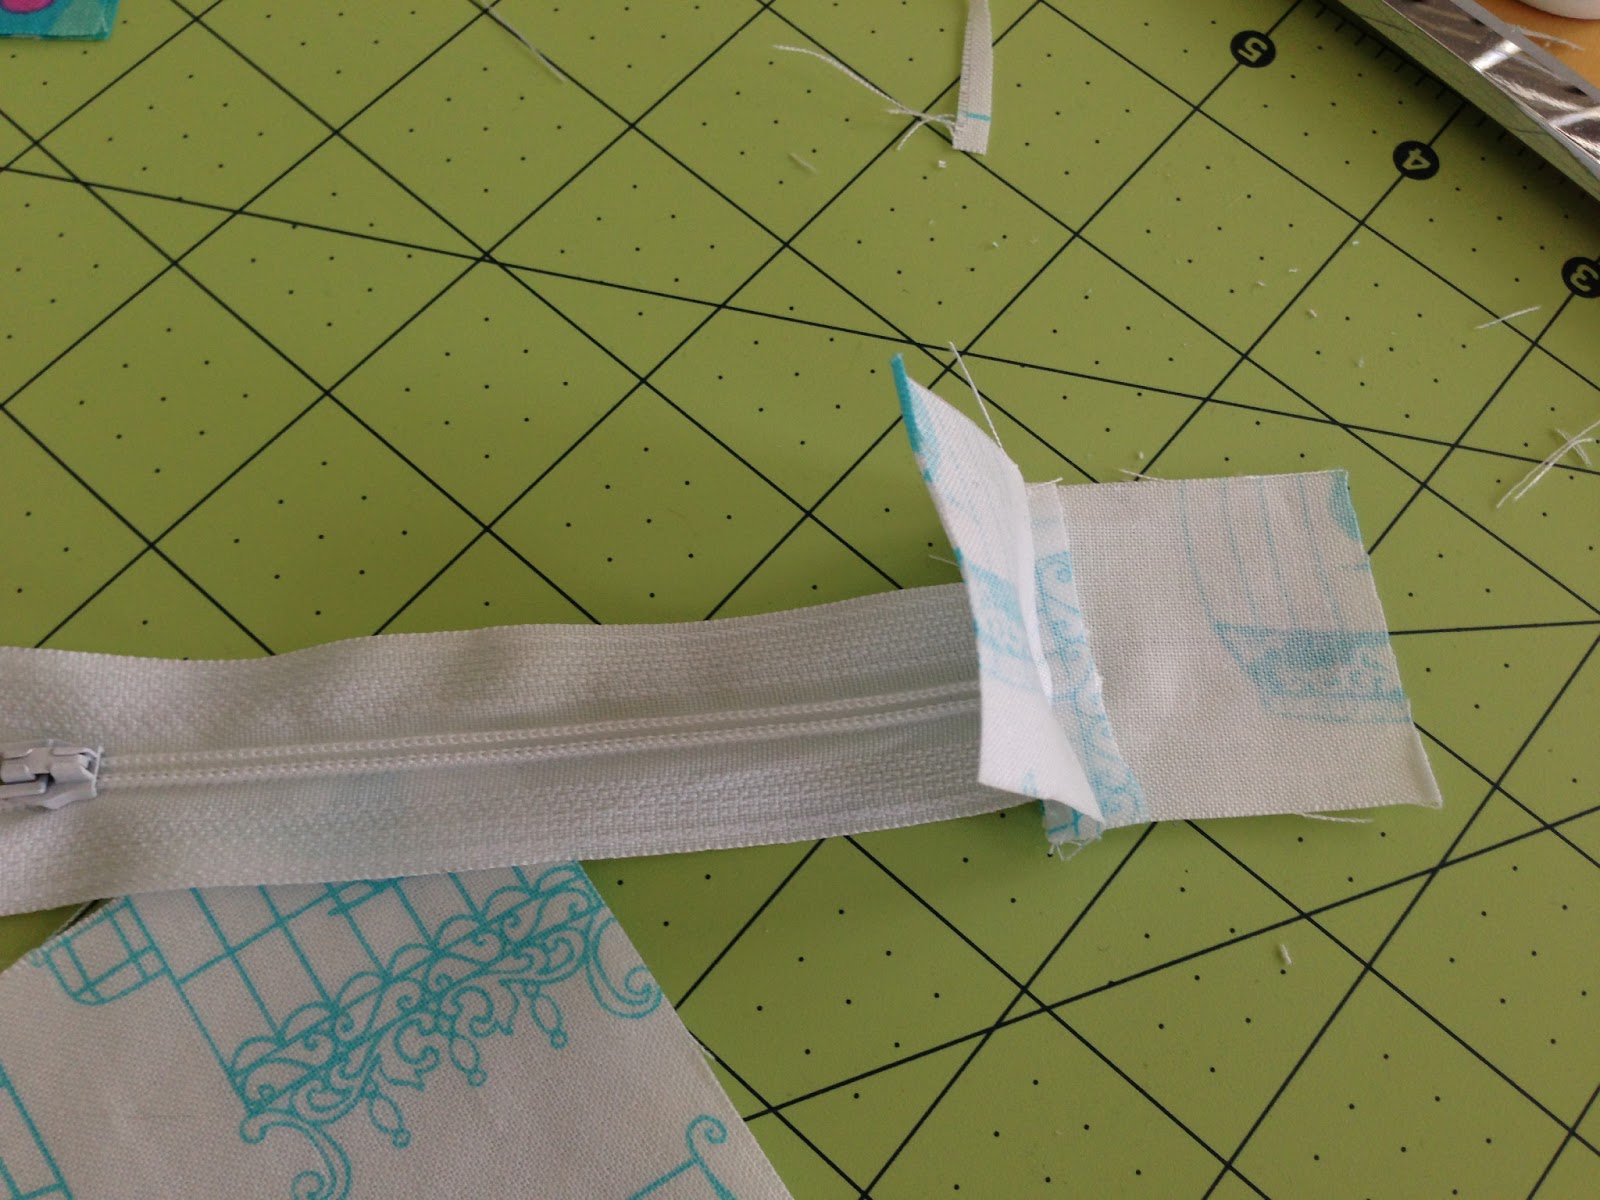
Now measure over and sew the tab on the opposite end of the zipper. There should be 1″ of tab on each side. The excess will be cut off in a minute.


Use your zipper foot and sew along the zipper.


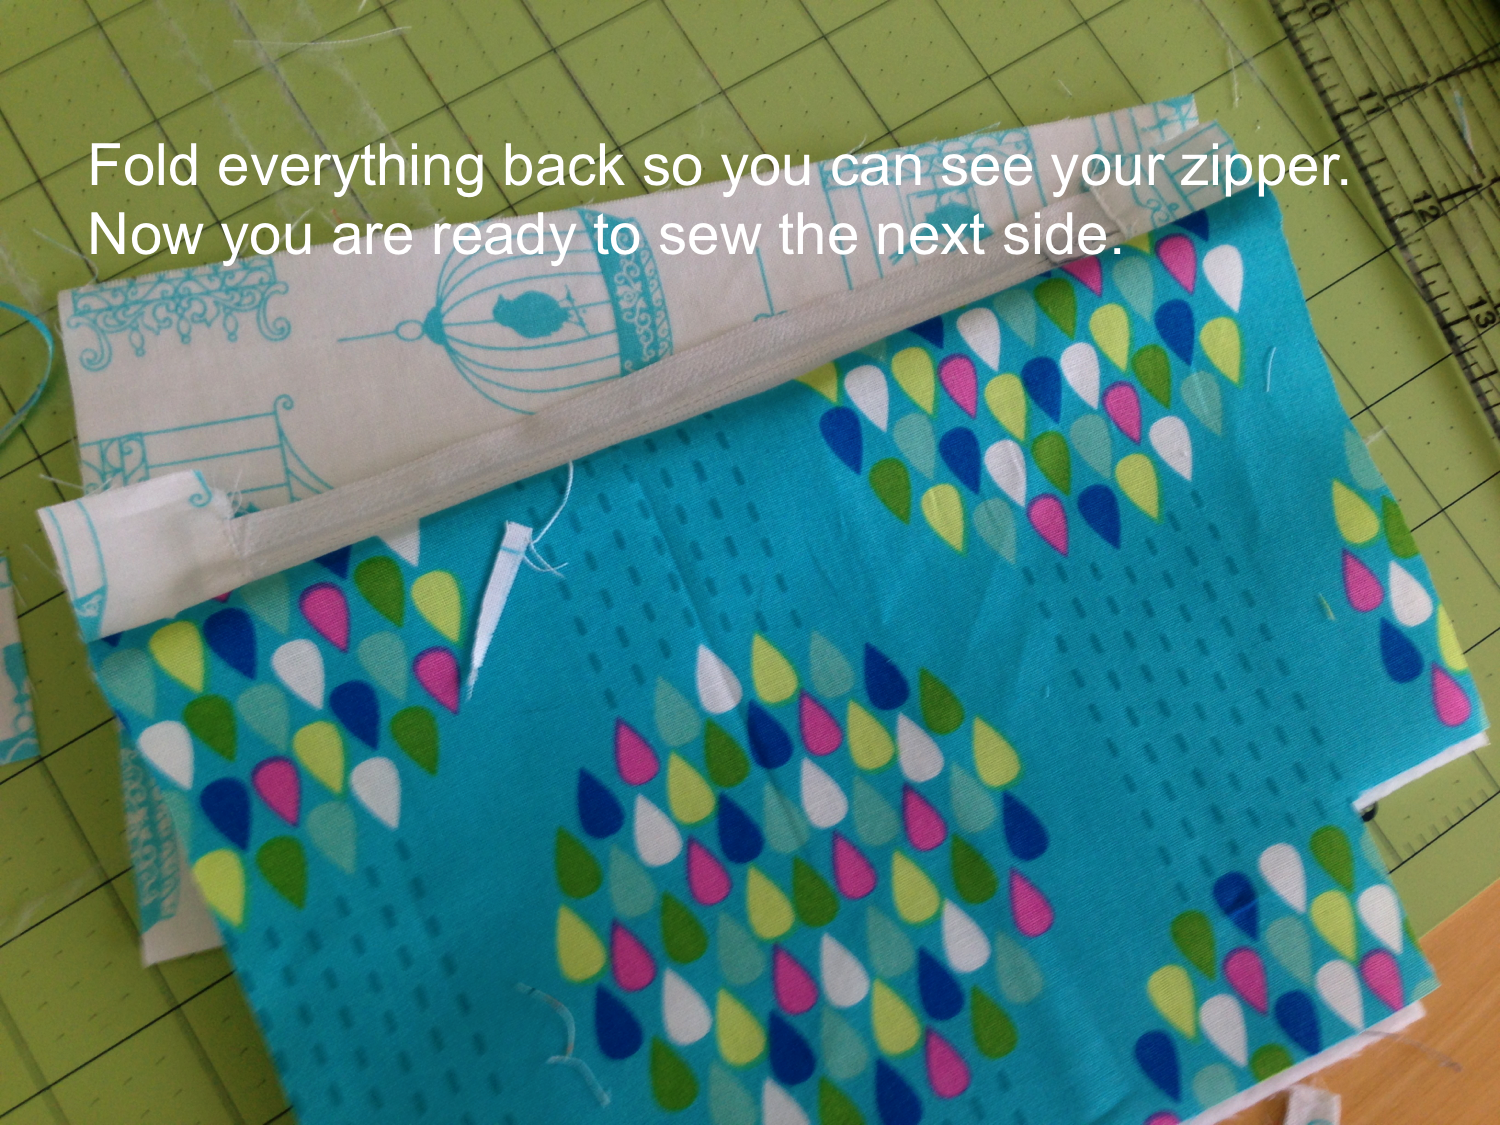

Now you do the same process to the other side of the zipper. Place the zipper face down on the right side of the outer fabric. Line up the edges. Layer the lining on top right side down. (pictured below)

Sew the zipper using the zipper foot.
Finish the bag:

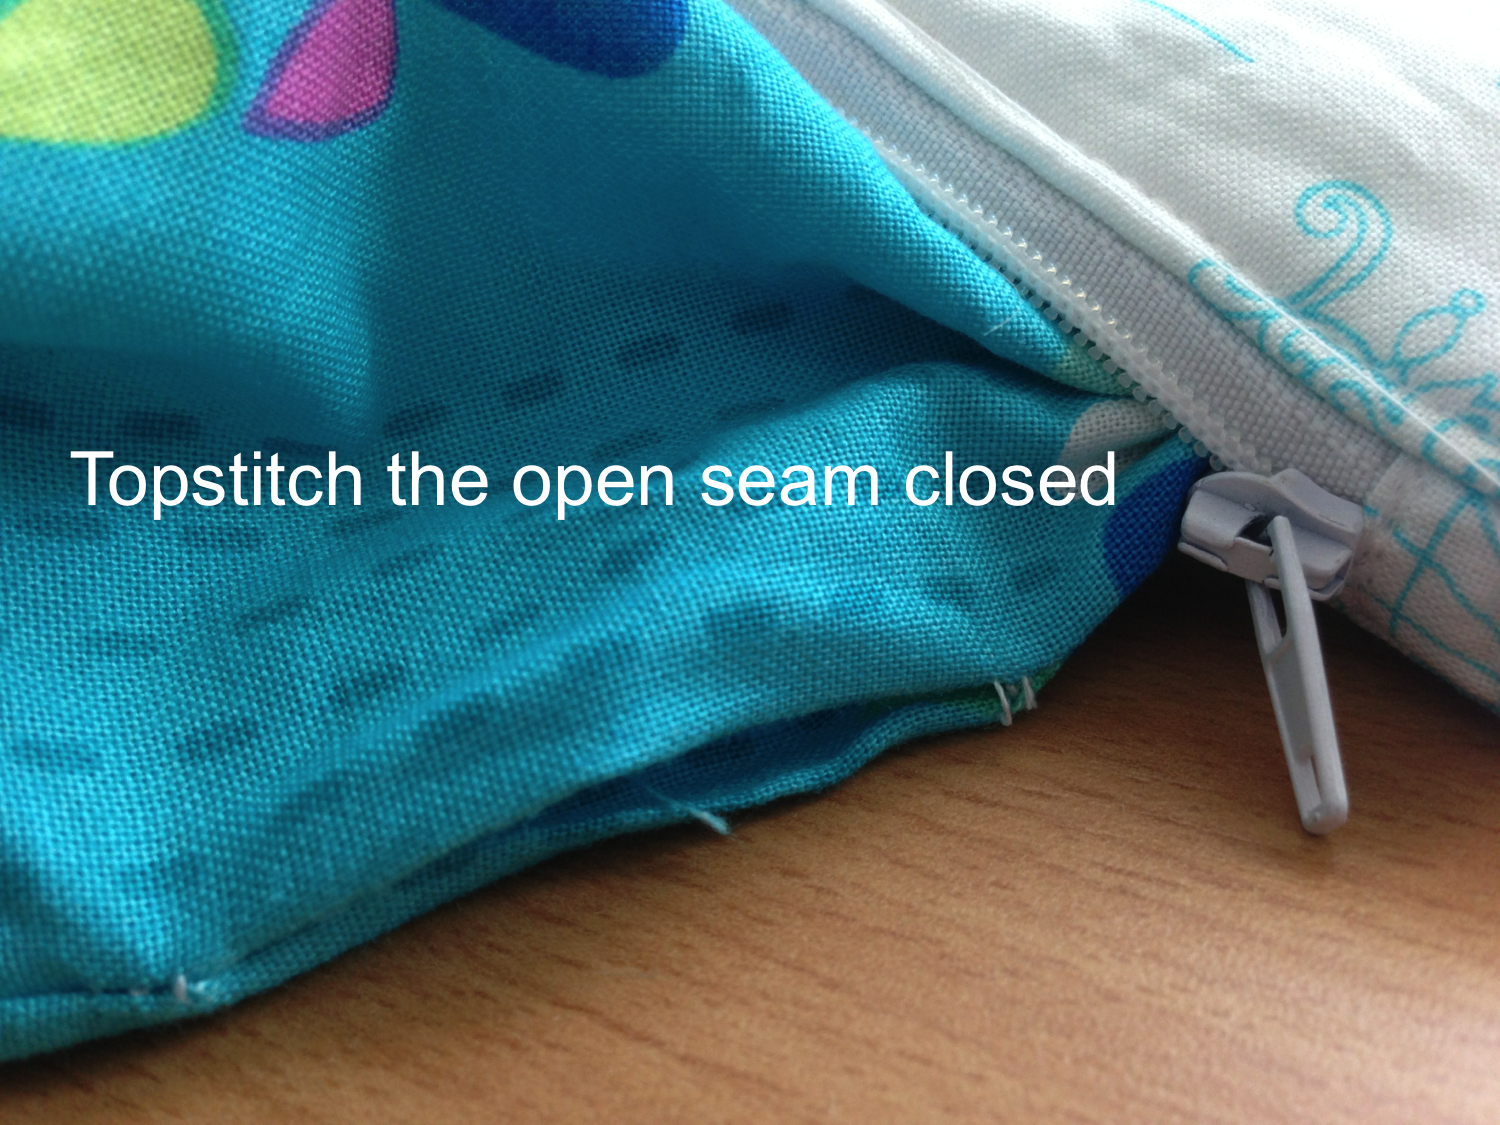
Top stitch about 1/8″ next to both sides of the zipper. This will hold the fabric in place and it won’t catch in the zipper.


Make sure the bag is unzipped!!!


Turn the bag right side out.
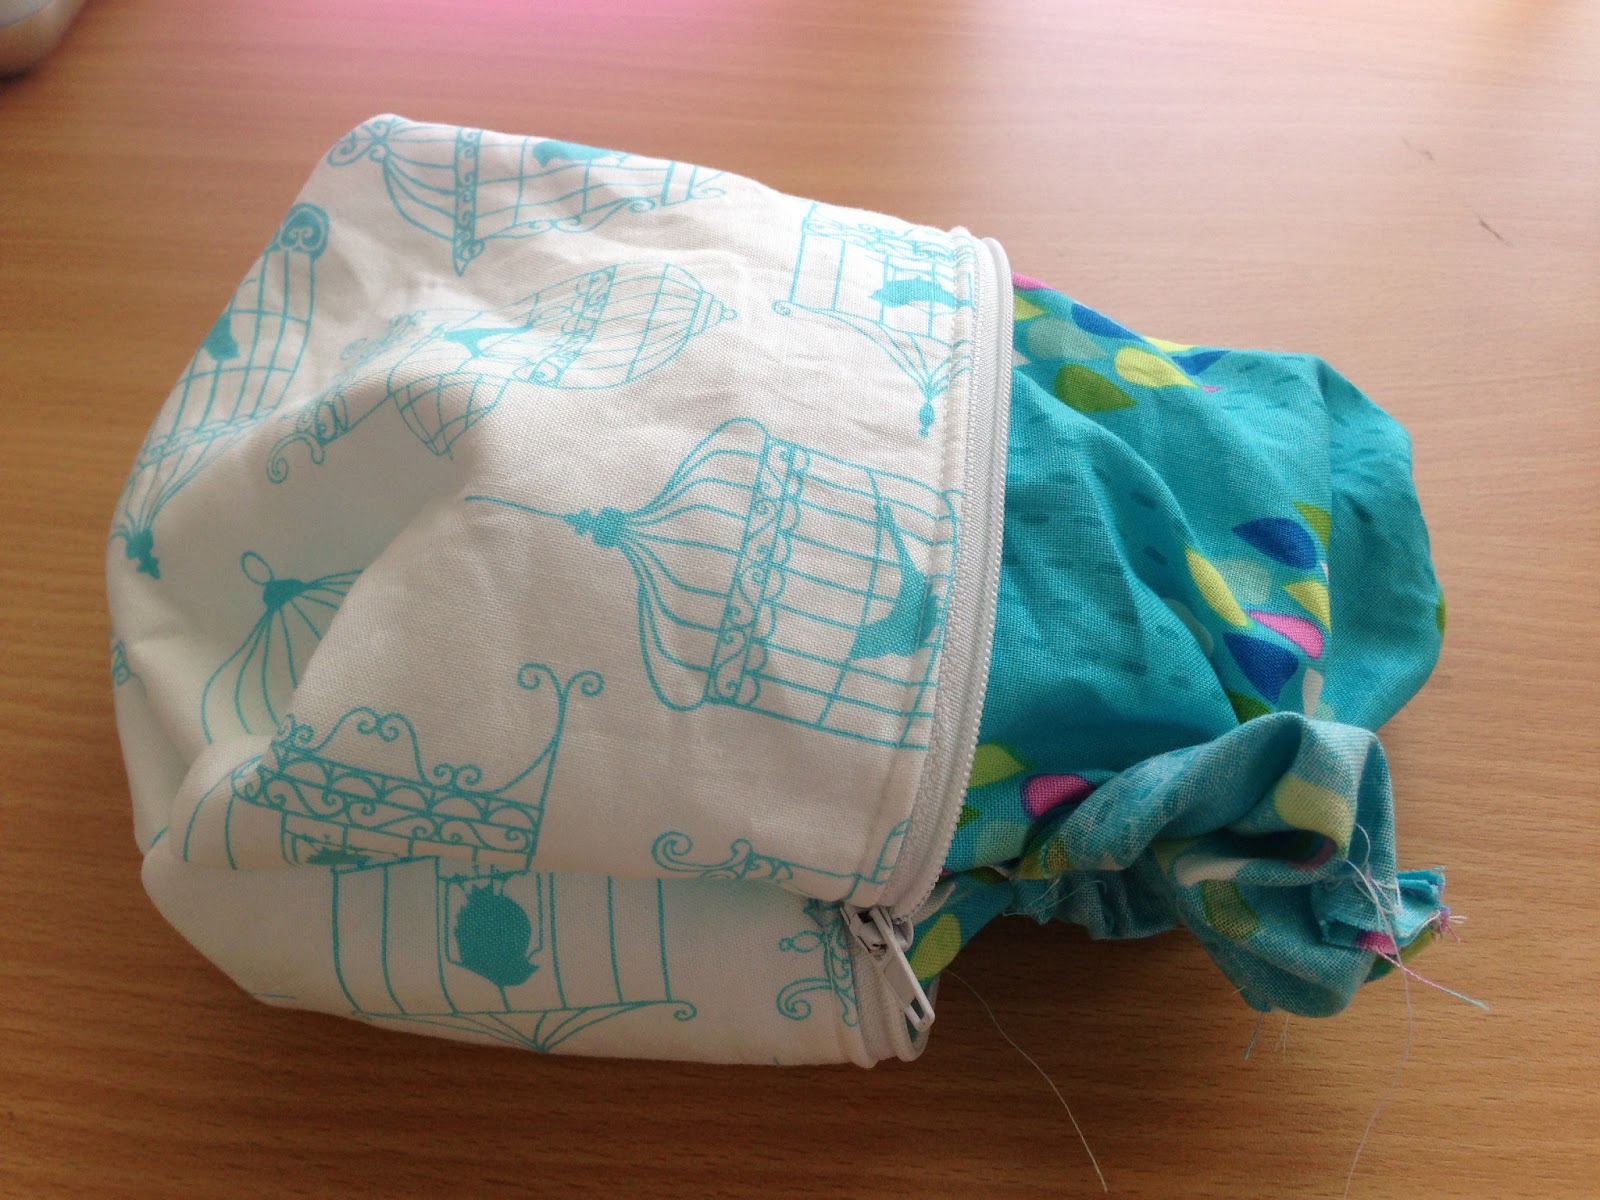
Stuff the lining down in the bag and press the bag as needed. Done!!!


How would you like to receive a box of some of our most popular HeatnBond products?
Such as our StitchnSew, our Fusible Fleece and our HeatnBond Lite along with some other products? Did you nod yes? If so..and we hope so…please follow the easy steps for our giveaway and we’ll enter you to win!
a Rafflecopter giveaway
Alicia @ Alicia's Homemaking
December 23, 2013 at 9:07 am (12 years ago)Thank you, I just made one of these successfully! My first time putting in a zipper, and I didn’t even have a zipper foot! Exciting. 🙂
Sheila Palkowitsh
September 20, 2015 at 11:01 am (10 years ago)I love the zipper tabs, it gives the zippers a professional finish!