


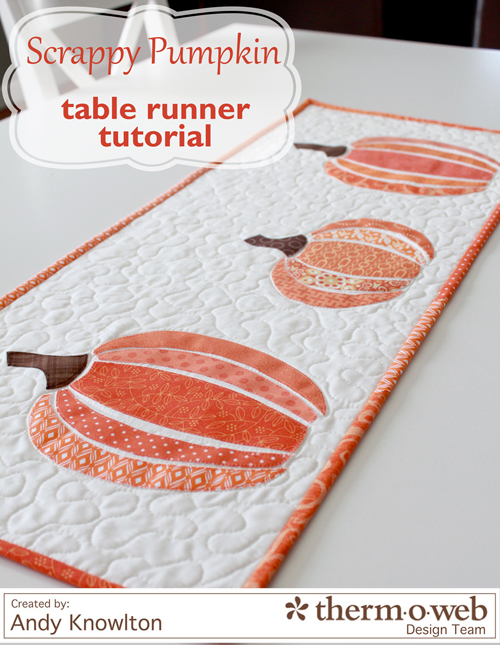
Hey there! Andy here from A Bright Corner and today I’m bringing you a tutorial for a Scrappy Pumpkin Table Runner. I know that Halloween is just over a week away, but guess what? This table runner is not only great for Halloween but works perfectly as Thanksgiving decor as well. So you can make one now and leave it out for another month! And if you’re so busy right now you can’t find time for any quilting projects, don’t worry – I have a quick and easy no-sew variation too! Let’s get started.
Supplies needed:
- A variety of orange fabric scraps (15 scraps, each about 3″ x 8″)
- brown fabric scraps (each about 3″ x 3″)
- piece of solid white fabric for background (12.5″ x 31.5″)
- piece of fabric for back of table runner (15″ x 34″)
- 1/4 yard orange fabric for binding
- Heat n Bond® Lite EZ Print Lite sheets (3 of them)
- SpraynBond® Basting Adhesive Spray
- Thin batting (at least 15″ x 34″)
- Scrappy Pumpkin templates
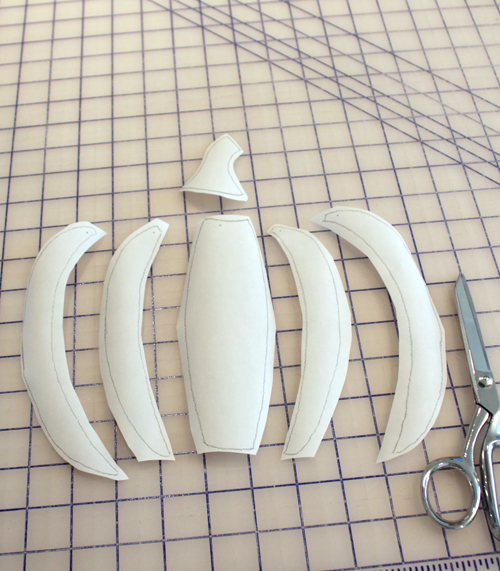
Step 1: Print the Scrappy Pumpkin templates on to the HeatnBond® Lite EZ Print Lite sheets. These sheets are great because you can just put them straight into your printer! There is one template for a tall pumpkin and one for a short. You will need to print the tall template twice. (You can use regular HeatnBond® Lite here as well. Just print each template once on to regular paper, and using a pencil, trace the shapes for one short and two tall pumpkins onto the HeatnBond® Lite.) Cut out around each shape, leaving about 1/4″ all the way around. **The little dots you see on the template pieces mark the top end of each piece. This will help later when laying out each pumpkin.
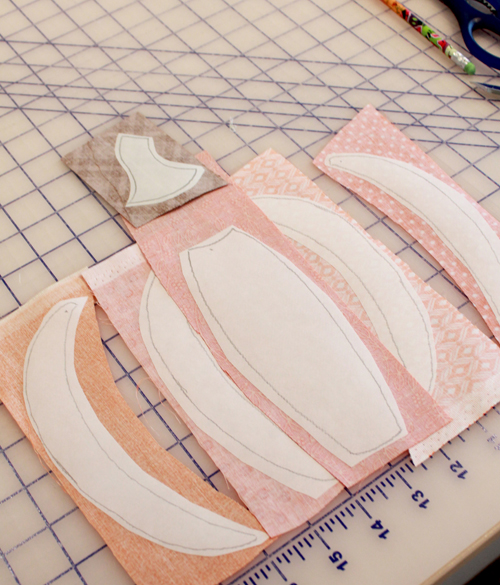
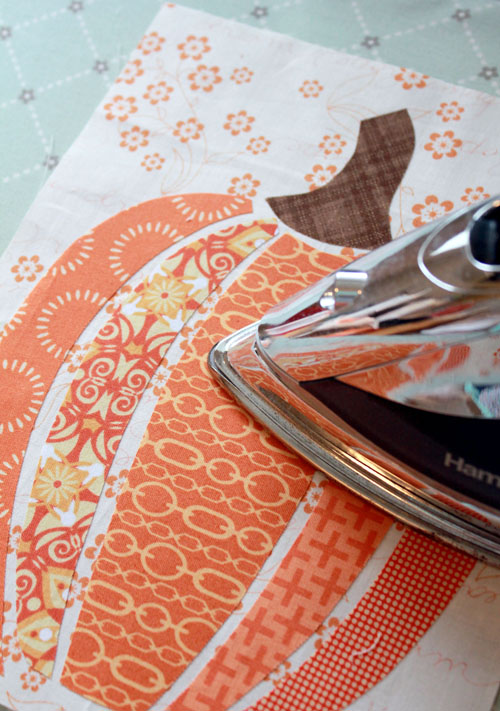
Step 2: Iron the HeatnBond® Lite pumpkin shapes to the wrong side of your orange fabric scraps. Iron the stem shapes to the wrong sides of the brown fabric scraps. Using sharp scissors, cut out along the drawn line.
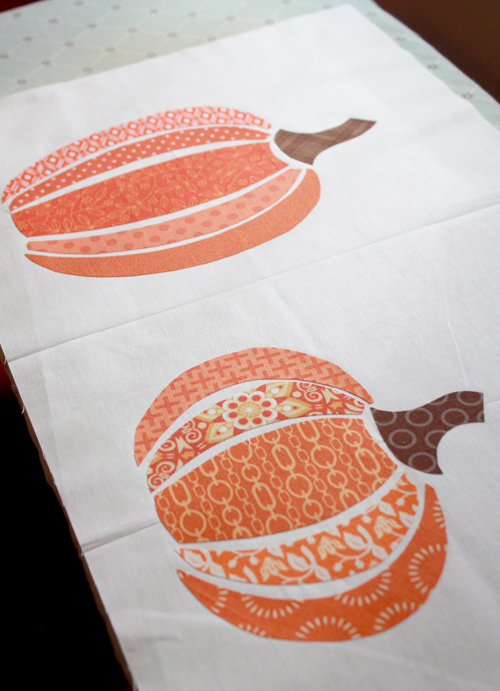
Step 3: Cut the table runner background piece to be 12.5″ x 31.5″. Find the center, and layout the short pumpkin shapes in the center of the table runner. Use the dots on the template pieces to know which end is the “top” of the pumpkin. Be sure to leave about 1″ of space between the bottom of the pumpkin and the bottom edge of the table runner, to allow for the binding. When you are happy with the layout, peel off the paper backing and press pieces in place.
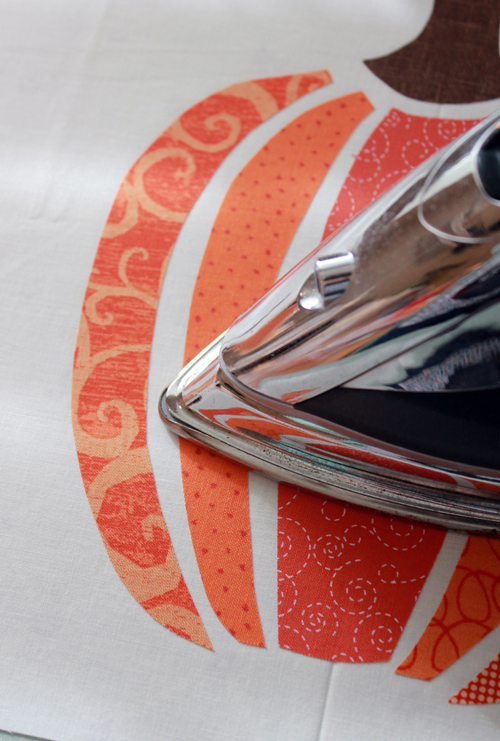
Step 4: Repeat for the two tall pumpkins. Place each tall pumpkin on either side of the short one, lining up the bottoms of the pumpkins. Press in place.
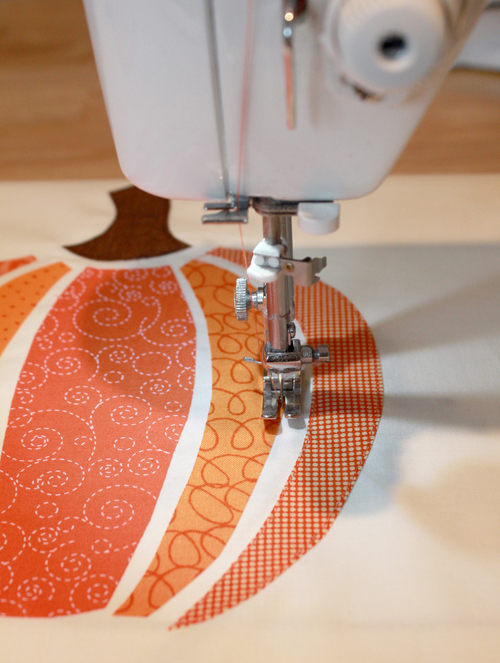
Step 5: Using coordinating thread and either a straight or zig zag stitch, sew around the outside edge of each piece.
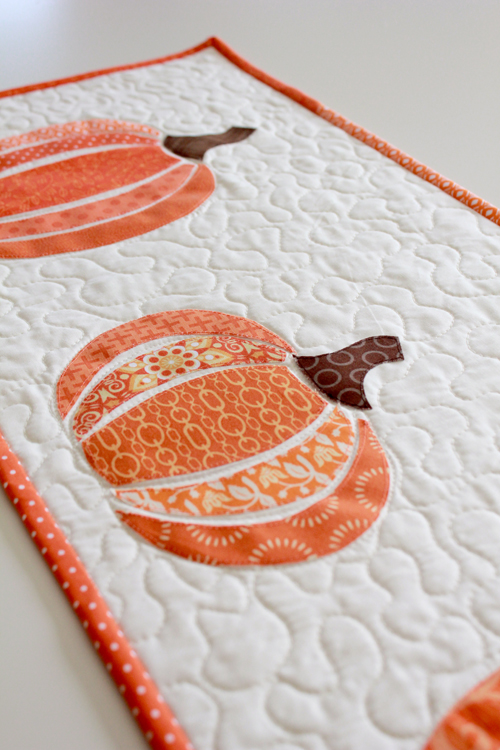
Step 6: Baste the layers of the table topper together using the Spray n Bond® basting adhesive spray: backing (right side down), thin batting, top (right side up). Quilt as desired. For mine, I did meandering quilting around each pumpkin and did some straight line quilting between each pumpkin slice to add some definition.
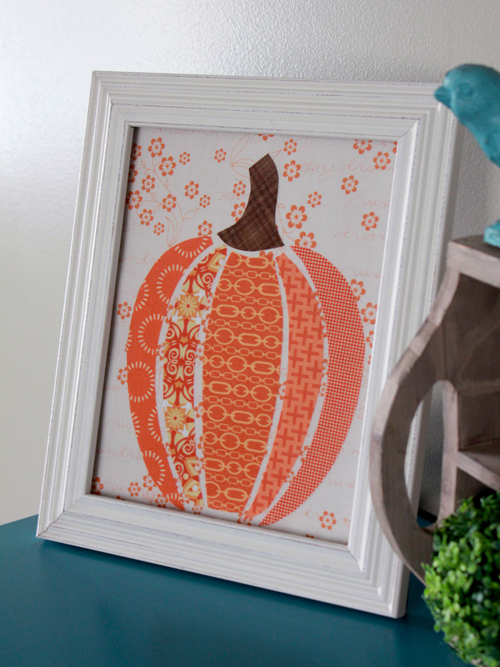
And now for the quick and easy, no-sew option! Print one tall pumpkin template onto a sheet of HeatnBond® EZ Print Lite, cut out the pieces and iron on to fabric scraps as in the full project above. Cut a piece of background fabric to be 8″ x 10″. Find the center, and iron the pumpkin pieces on, leaving space along the top and bottom.
Now just slip that 8″x 10″ piece of fabric into your favorite frame and display- no sewing needed! It’s a quick and fun way to add a bit of Halloween to a room!
23 Comments on HeatnBond EZ Print Scrappy Pumpkin Table Runner
8Pingbacks & Trackbacks on HeatnBond EZ Print Scrappy Pumpkin Table Runner
-
[…] HeatnBond EZ Print Scrappy Pumpkin Table Runner @ therm-o-web […]
-
[…] as a pillow.” Because a girl can never have too many pillows! Props to Andy for a beautiful table runner, and thanks for the […]
-
[…] Scrappy Pumpkin Table Runner – Therm-O-Web Blog […]
-
[…] 2. Scrappy Pumpkin Table Runner — Andy Knowlton for Thermoweb […]
-
[…] 8. Thanksgiving Table Runners’ Pumpkin Pattern […]
-
[…] 3 – Scrappy Pumpkin Table Runner by Therm-O-Web […]
-
[…] HeatnBond EZ Print Scrappy Pumpkin Table Runner thermoweb.com/… […]
-
[…] Scrappy Pumpkin Table Runner […]
Karen
October 30, 2014 at 6:27 am (10 years ago)Today, Oct. 30, 2014, cannot find the templates for these pumpkins…All I seem to get is a 404 error, page not found. Woe is me, less than 2 weeks after original posting and the templates seem to have vanished. O my.
admin
October 30, 2014 at 8:47 am (10 years ago)Hi Karen..sorry for any confusion as it requires two clicks to get to the pattern page. Here’s the link to it: http://thermoweb.com/blog/wp-content/uploads/2014/10/Scrappy-Pumpkin-templates.pdf
Mona
September 18, 2016 at 1:45 pm (8 years ago)Awesome! Thank You!
Colleen Baker
October 30, 2014 at 6:24 pm (10 years ago)Thanks for the tutorial and link. I’ve been looking for a Thanksgiving table runner project that was quick and easy 🙂
Terrie Arnold
August 24, 2015 at 6:58 pm (9 years ago)So cute.
Doris Hagen
August 25, 2015 at 11:12 pm (9 years ago)Kant download the Pumkin table runner
admin
August 26, 2015 at 8:45 am (9 years ago)Hi Doris..it’s working fine that we can tell. Could you try a different browser? Here is the direct link to the pattern: http://thermoweb.com/blog/wp-content/uploads/2014/10/Scrappy-Pumpkin-templates.pdf
Olga. Marquez
August 31, 2015 at 11:36 pm (9 years ago)Love them
Patti
September 10, 2015 at 7:42 am (9 years ago)I used the Heat n Bond Featherlight for a project recently and after I fused it to the fabric and was ironing it to the background, it ( the fusible) disappeared and the fabric back is loose. What did I do wrong? It’s like it melted away with no trace.
Jeanette Brodie
October 3, 2016 at 3:31 pm (8 years ago)Just in the middle of this project. It is looking good and really pleased with it. Thank you
Nancy Myers
October 14, 2016 at 7:11 pm (8 years ago)Found a link with this project. It is just gorgeous how Vicki made it up in batiks.
Ivory
October 9, 2017 at 10:56 pm (7 years ago)Wow, this is gorgeous . I love, love, love this
Barbara
October 12, 2018 at 8:02 pm (6 years ago)Can not find the template . I clicked on SCRAPPY PUMPKIN TEMPLATE several times but nothing happened.
admin
October 16, 2018 at 9:43 am (6 years ago)Hi! It is working fine on our end. Do check and make sure you do not have a pop-up blocker on as that will prevent the pattern from opening in another window.
Teri
October 24, 2019 at 12:02 pm (5 years ago)Exactly what I was looking for. Thank you.