
Welcome to Handmade Holidays with Benzie Design + Therm O Web! We’re sharing autumn-inspired creative tutorials on both blogs all week, along with chances to win gift cards from Therm O Web and Benzie Design. Find the giveaway details at the end of this colorful and cuddly Harvest Squirrel Pillow tutorial designed by Therm O Web sewing & quilting educator Belinda Karls-Nace.
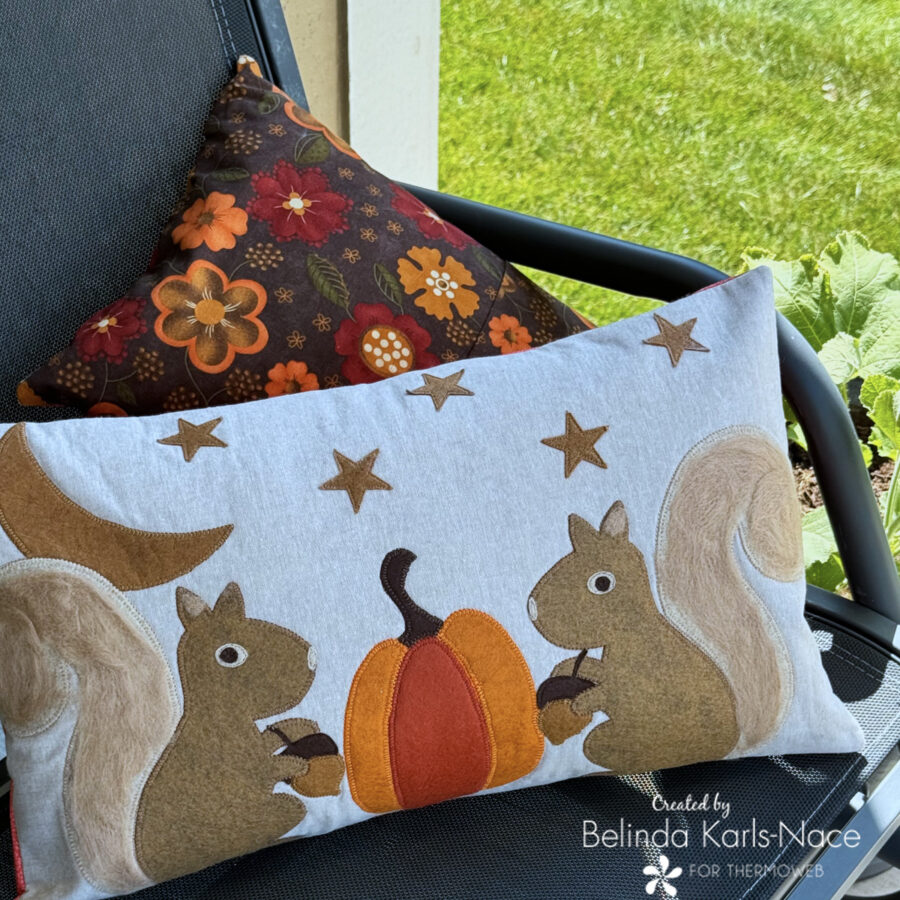
Harvest Squirrel Pillow featuring Benzie Design Felt
Greetings friends! It’s Belinda Karls-Nace from Blue Ribbon Designs, here with a brand new project tutorial featuring an assortment of my favorite products from Therm O Web and Benzie Design. Today, I am excited to share my Harvest Squirrel Pillow with you.
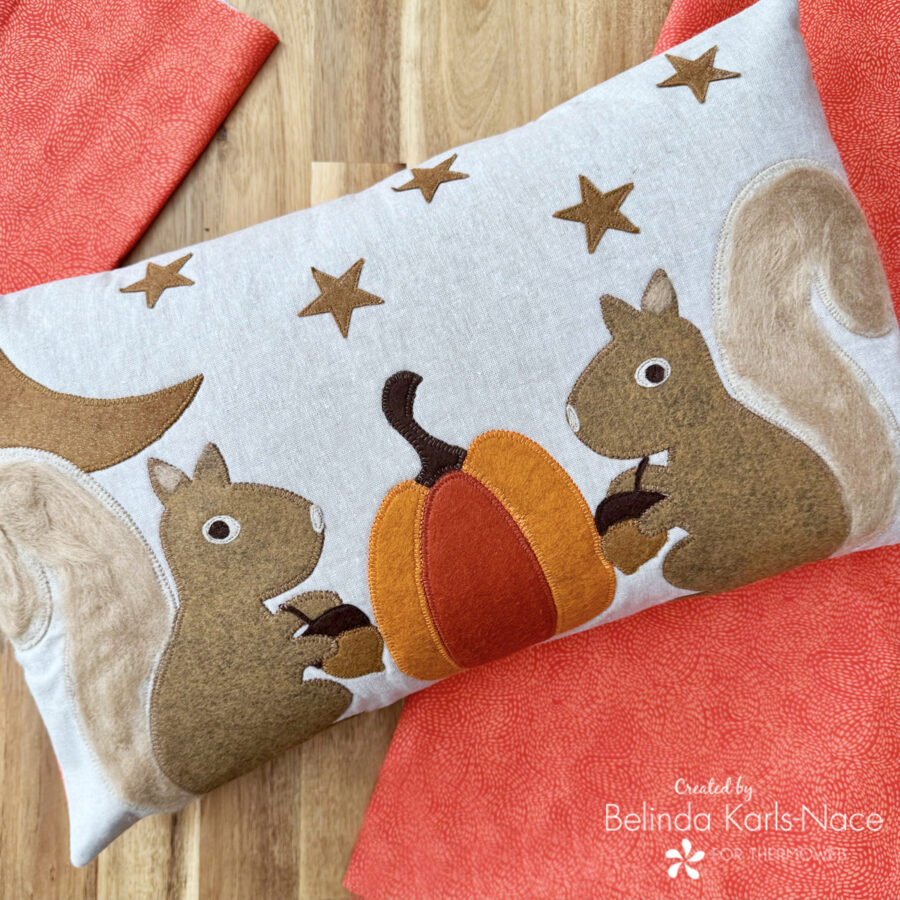
It is handmade holiday season and creating cozy designs for autumn always warms my heart. Many of my projects combine my love for appliqué and adding embellishments, so I was absolutely thrilled (I squealed when I got the message) to do a collaboration with my favorite stitchery and wool shop: Benzie Design! Everything about Benzie Design speaks to me; they have happy, colorful, and quality products that work wonderfully with my design style. For today’s project, I combined some of my very favorite HeatnBond products with Benzie Design Wool Blend Felt and Corriedale Wool Roving…plus some special sparkle from Therm O Web Glitter Dust Spray. Sew along with me (by hand and/or machine) to create your very own Harvest Squirrel Pillow, perfect fall decorating or gifting.
Let’s get started! Simply gather the materials/supplies listed below, then download the pattern with PDF templates and pillow image.
*NOTE*: This tutorial requires basic sewing and appliqué knowledge. If you need additional assistance, search/visit the Internet, or look at a basic sewing/appliqué book to learn the fundamentals.
What you need:
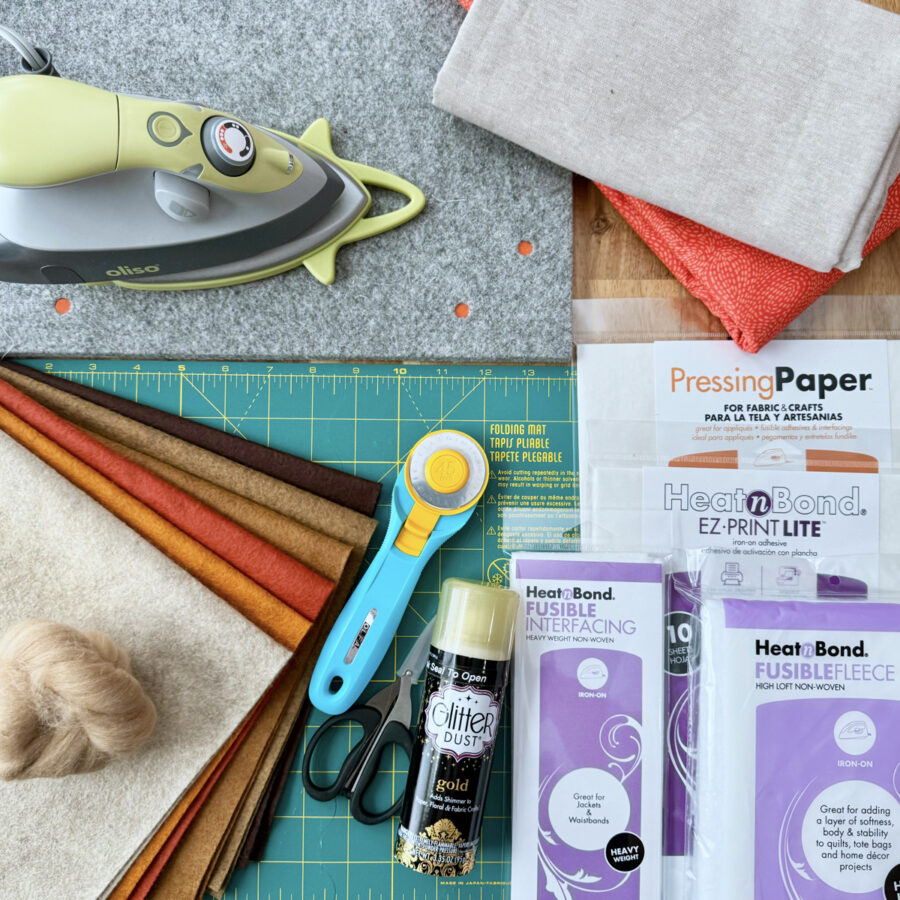
- HeatnBond Lite EZ-Print Iron-On Adhesive Sheets, 8.5 in x 11 in
- 3 sheets
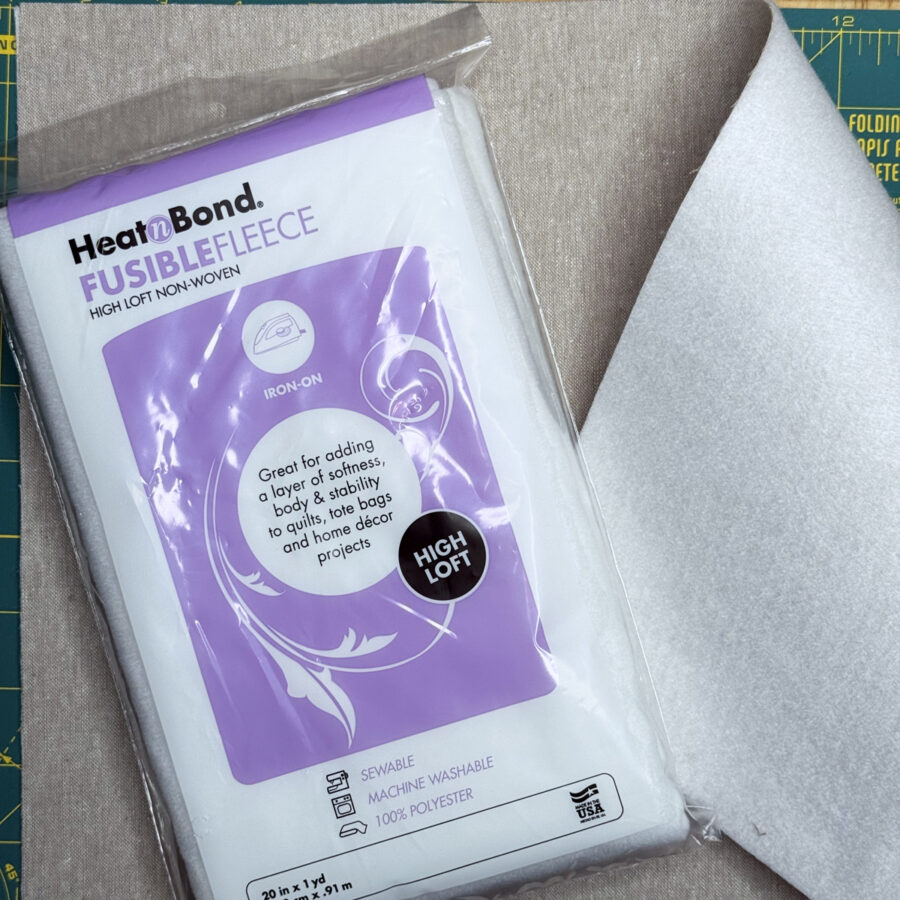
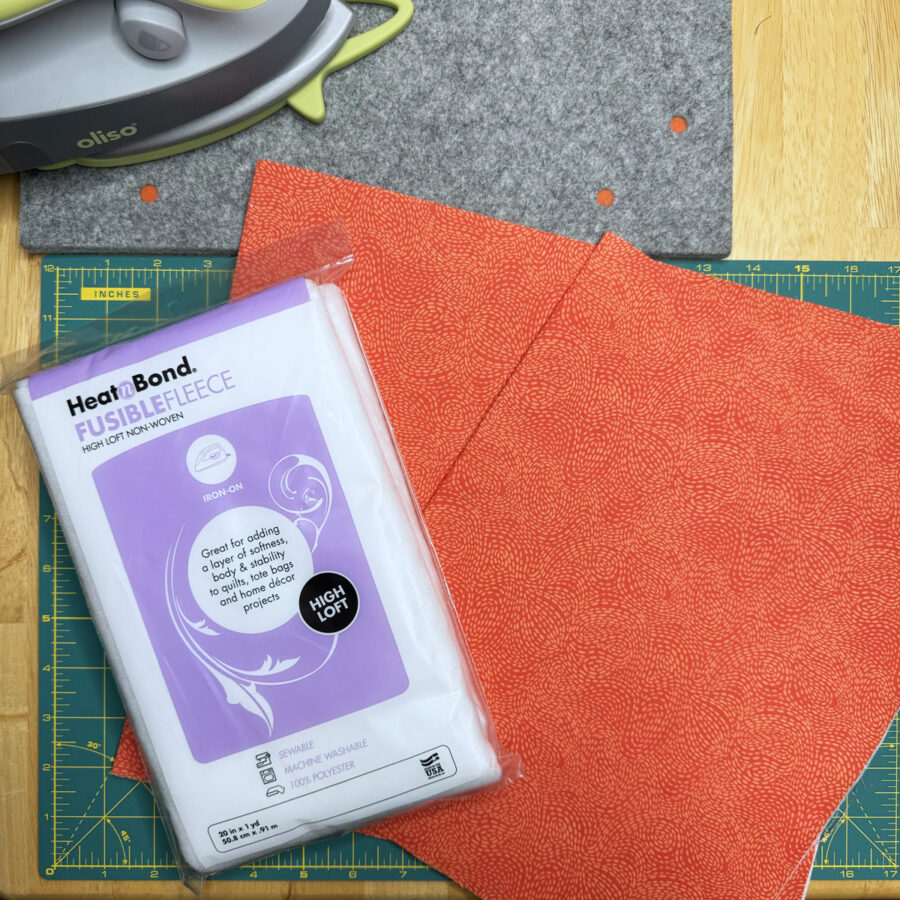
- HeatnBond Fusible Fleece
- 1 – 20½” x 12½”
- 1 – 10” x 12”
- 1 – 14” x 12”
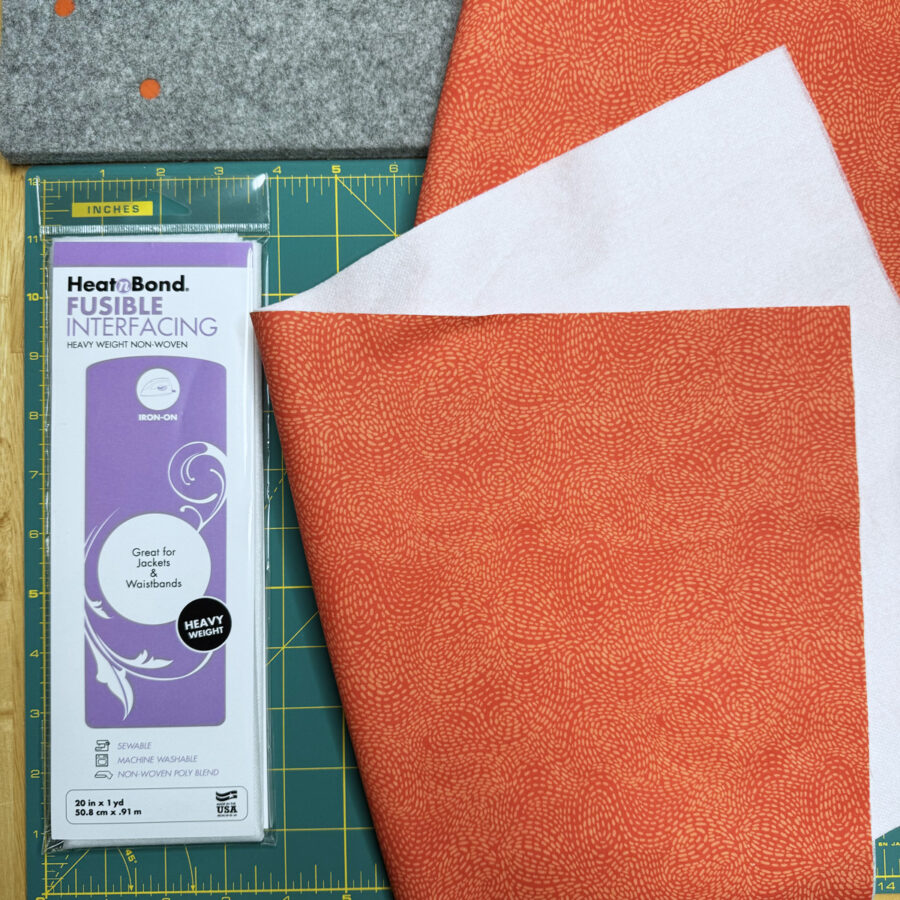
- HeatnBond Heavy Weight Non-Woven Fusible Interfacing
- 1 – 20½” x 12½”
- 1 – 28½” x 12½”
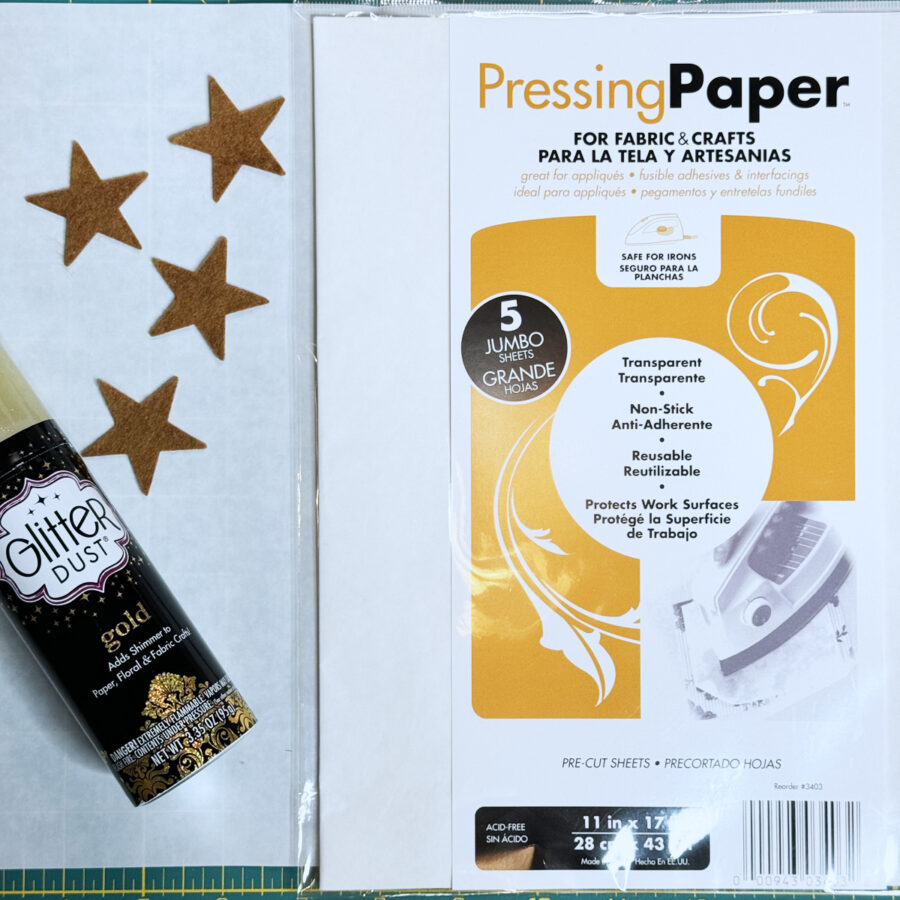
- Pressing Paper Fabric and Craft Sheet
- Glitter Dust Ultra Fine Glitter Spray, Gold
- Linen Fabric (appliqué background)
- 1 – 20½” x 12½”
- Backing Fabric (model used Waved – Orange by Erin Borja for PBS Fabrics)
- 1 – 20½” x 12½”
- 1 – 28½” x 12½”
- Wool Blend Felt from Benzie Design (Harvest Moon Palette)
- Optional Wool Roving and Needle Felting Tools or Machine
- 20” x 12” Pillow Form
- Oliso Iron
- Olfa Cutting Tools (cutting mat, rotary cutter)
- Sewing Machine
- Basic Sewing Supplies/Tools (small sharp scissors, wonder clips, rulers, sewing thread or embroidery thread, pencil, etc.)
How to Make a Harvest Squirrel Pillow (20” x 12″)
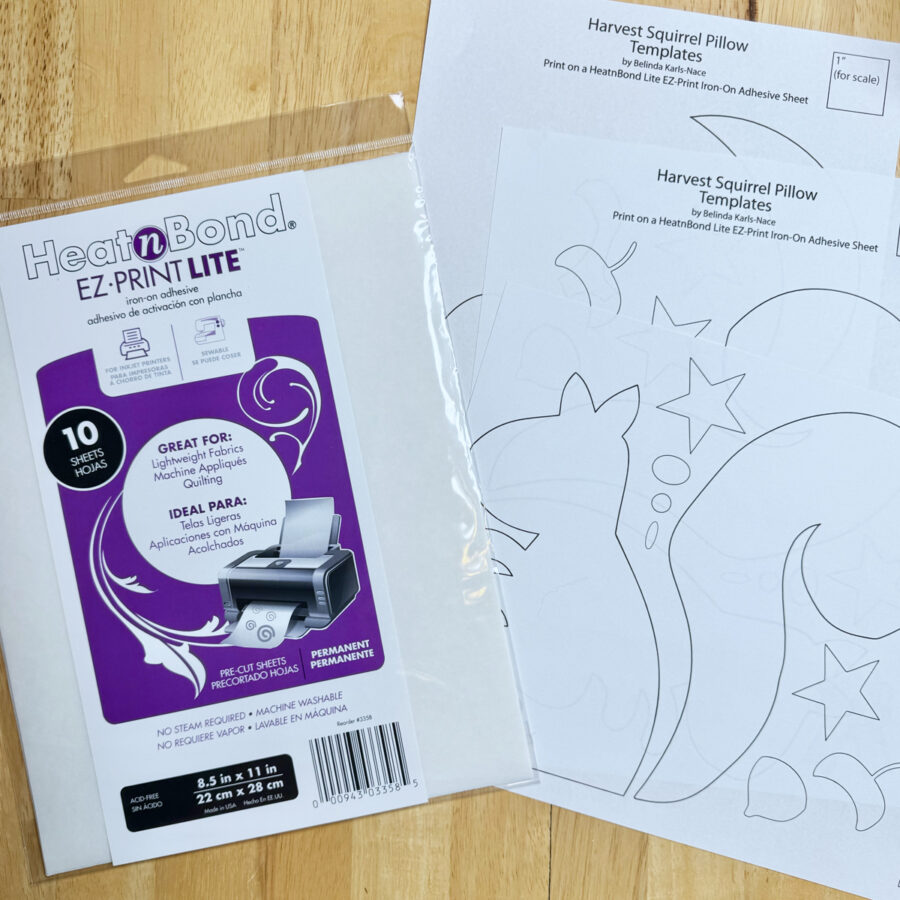
1. Download and print the Harvest Squirrel Pillow PDF.
Harvest Squirrel Pillow – A Project for the Therm O Web Blog
Print actual size – do NOT “fit to page” or “shrink to fit.”
-
Print page 1 (cover/pillow layout) on regular printer paper.
-
Print pages 2–4 (appliqué templates) on three sheets of HeatnBond Lite EZ-Print Iron-On Adhesive (no tracing necessary).
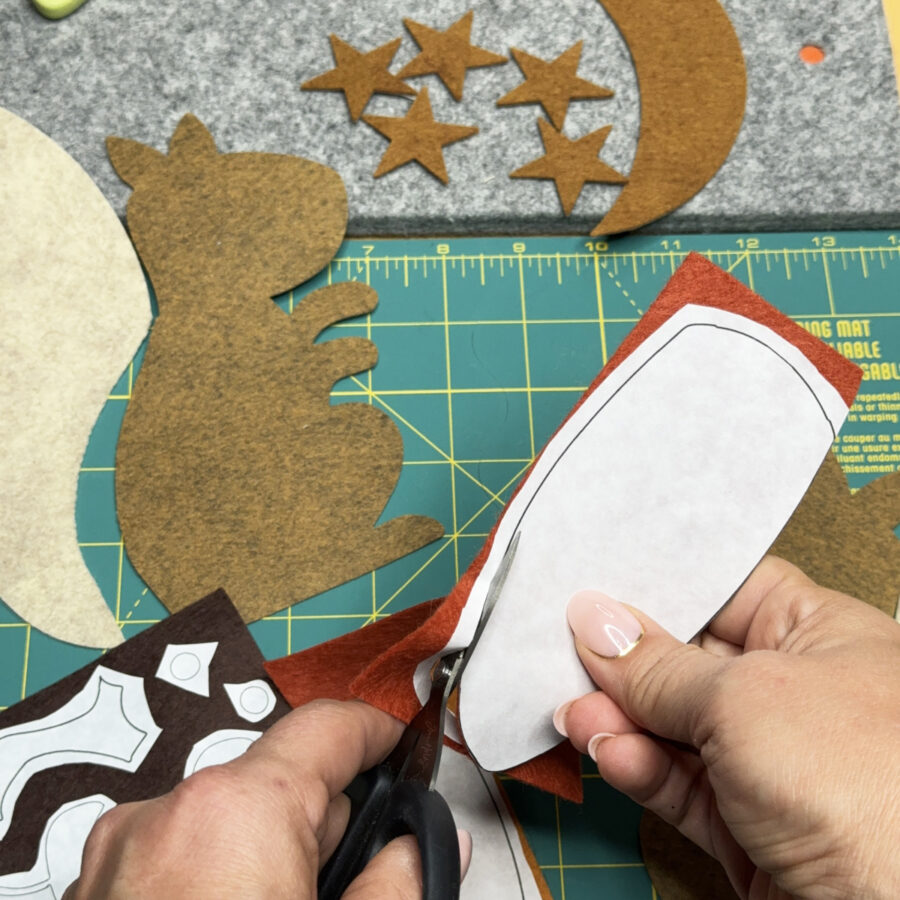
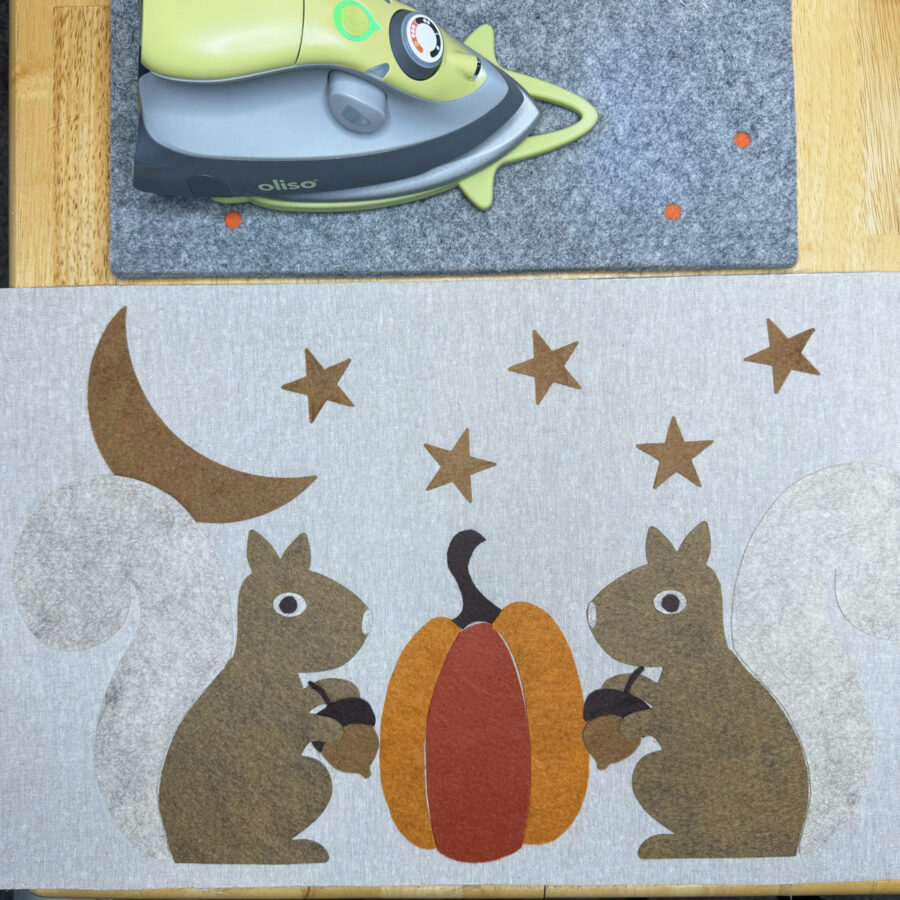
2. Prepare appliqué pieces.
Loosely cut out the appliqué template(s) printed on HeatnBond Lite EZ-Print Iron-On Adhesive and apply to the back of coordinating wool blend felts following the package instructions.
-
-
Loosely cut out all shapes, leaving the paper in place.
-
Pre-heat iron to medium heat, no steam.
-
Place loosely cut apart template(s) on the coordinating wool blend felts (printed paper, smooth side, should be face up).
-
Place and hold the iron on the paper for 2-3 seconds. Repeat, overlapping slightly, until entire surface is bonded.
-
Allow felt to cool.
-
Cut or trim the piece(s) on the solid lines printed on the paper to create the desired shape. Leave paper in place until ready to fuse in place.
-
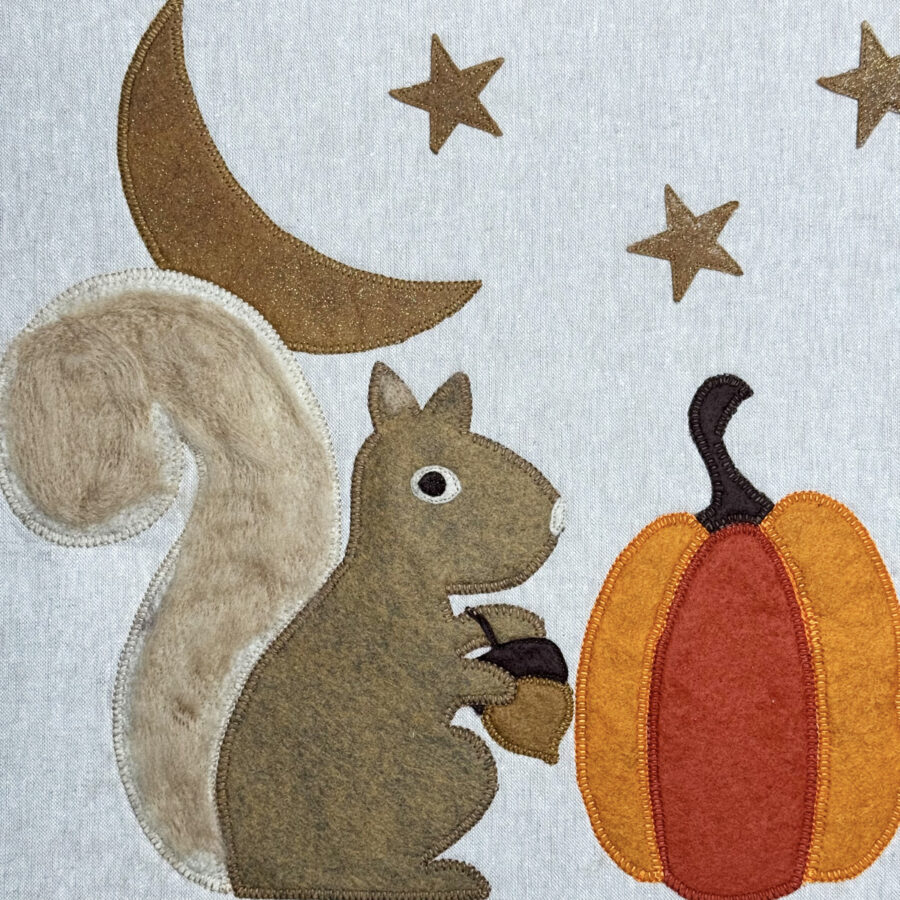
Apply Gold Glitter Dust Spray to the moon and star shapes, following the can instructions. It may be hard to see the sparkle in photographs, however, the Glitter Spray takes this project to the next level. Look carefully at the finished project photos and you will see the shimmering moon and stars.
-
-
Protect work surface with a Pressing Paper Fabric and Craft Sheet.
-
Shake the Glitter Spray can well before use.
-
Hold can upright, 12-15 inches from surface. Press nozzle and apply in short quick bursts using a sweeping motion to lightly cover wool shapes.
-
Allow wool shapes to dry for 2-3 minutes.
-
Hold the can upside down and press for a short burst to clear the nozzle before storing.
-
3. Create Pillow Top
Fuse the 20½” x 12½” piece of HeatnBond Fusible Fleece to the wrong side of the 20½” x 12½” linen fabric (appliqué background), following the package instructions.
-
-
Pre-heat iron to a medium setting, no steam.
-
Place the rough side of the Fusible Fleece on the wrong side of the linen fabric.
-
Cover with a lightweight, dry pressing cloth.
-
Press and hold iron with medium pressure for 10-15 seconds. Repeat by lifting iron to new area, slightly overlapping previous area until the entire surface is bonded.
-
Allow it to cool.
-
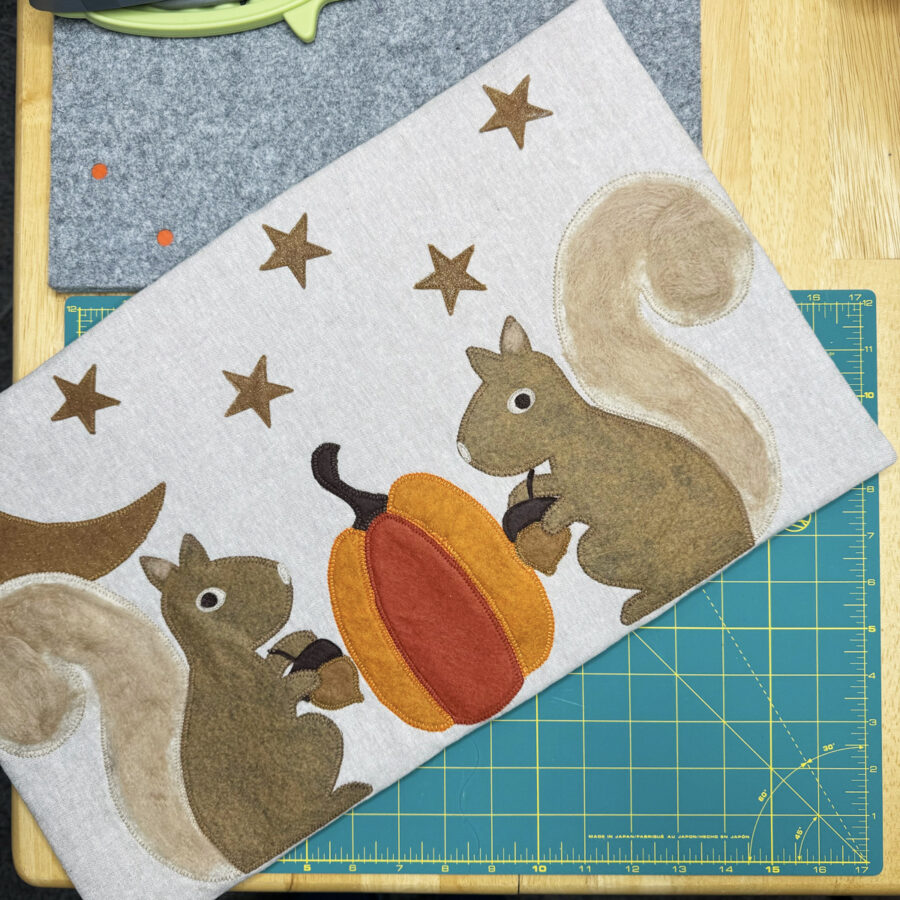
Center and fuse wool felt applique shapes in place on the 20½” x 12½” linen fabric unit, following the image on the pattern cover. Leave an approximate ½” seam allowance around the pillow top perimeter for finishing.
-
-
Pre-heat iron to medium heat, no steam.
-
Peel off paper.
-
Center/arrange shapes, adhesive side down on top of the linen fabric unit.
-
Press and hold iron for six seconds on each section, overlapping slightly, until the pieces are bonded.
-
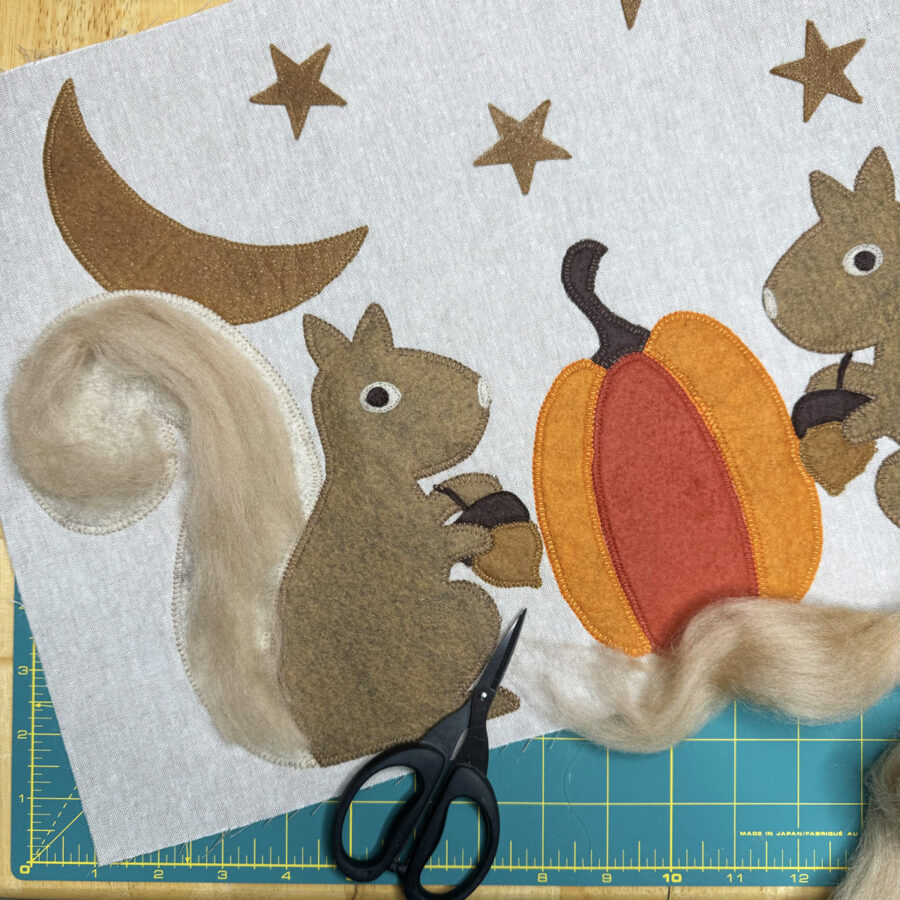
Using your favorite appliqué stitch (machine or hand) and coordinating sewing or embroidery thread, sew the pieces in place. I chose to use a combination of machine blanket stitches and straight stitches.
-
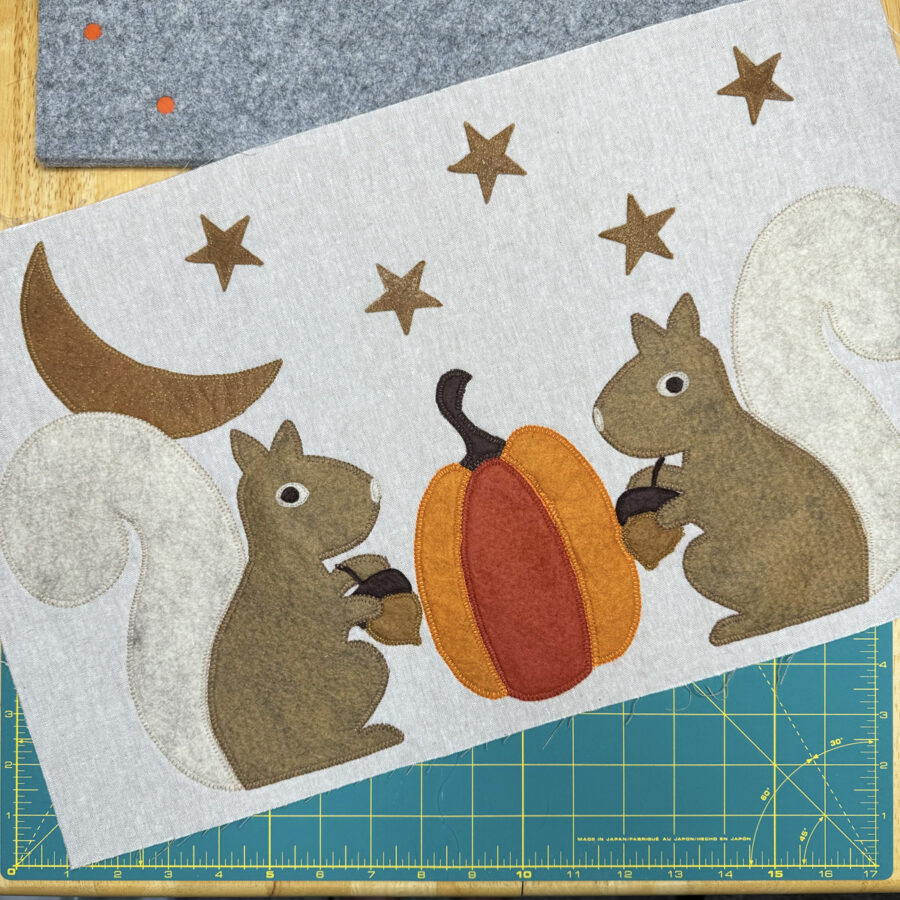
Optional – add wool roving to squirrel tail and ears.
In addition, I affixed wool roving to the tail and ears to give my pillow more texture and dimension. I used a needle felting machine (a Huskystar by Husqvarna Viking ER10 Felting & Embellishment Machine). You may choose to omit this step or use your favorite needle felting tools.
4. Prepare Pillow Envelope Back
Fuse a 20½” x 12½” piece of HeatnBond Heavy Weight Non-Woven Fusible Interfacing to the wrong side of the 20½” x 12½” piece of backing fabric.
-
-
Pre-heat iron to a high setting, no steam.
-
Place the rough side of the fusible interfacing against the wrong side of the backing fabric.
-
Cover with a lightweight, dry pressing cloth.
-
Press and hold iron with medium pressure for 10-15 seconds. Repeat by lifting iron to new area, slightly overlapping previous area until the entire surface is bonded.
-
Allow it to cool.
-
Repeat the same instructions to fuse a 28½” x 12½” piece of HeatnBond Heavy Weight Non-Woven Fusible Interfacing to the wrong side of the 28½” x 12½” piece of backing fabric.
Subsequently, fold both backing fabric units in half lengthwise, wrong sides together. One will measure 10¼” x 12½” and one will measure 14¼” x 12½”. These will make up the envelope back of the pillow.
Center against the fold and fuse the 10” x 12” piece of HeatnBond Fusible Fleece inside the 10¼” x 12½” backing fabric unit, following the package instructions (step 3A). Top Stitch the folded edge.
Center against the fold and fuse the 14” x 12” piece of HeatnBond Fusible Fleece inside the 14¼” x 12½” backing fabric unit, following the package instructions (step 3A). Top Stitch the folded edge.
Place the two backing units on top of the pillow top unit (right sides together), lining up the raw edges, with the top stitched sides overlapping in the center. Pin or clip in place.
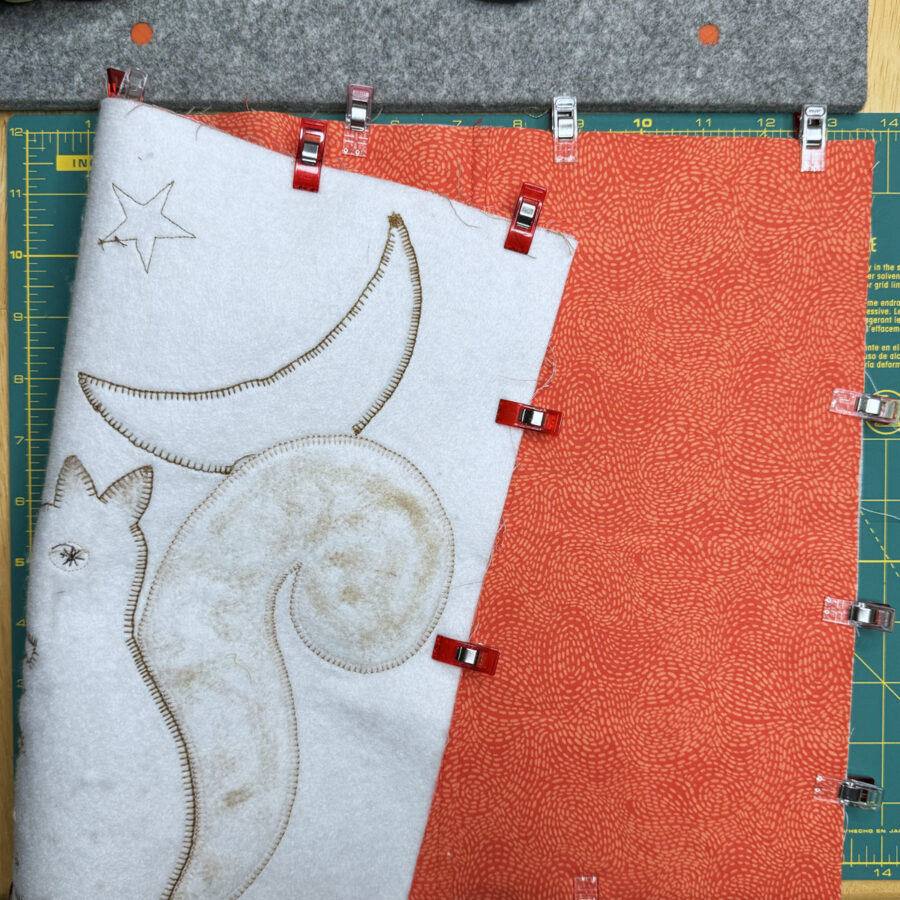
Stitch all the way around the perimeter (all four sides) with a ¼” seam allowance.
Clip corners and turn right side out. Press.
Finally, place 20” x 12” pillow form inside of finished cover.
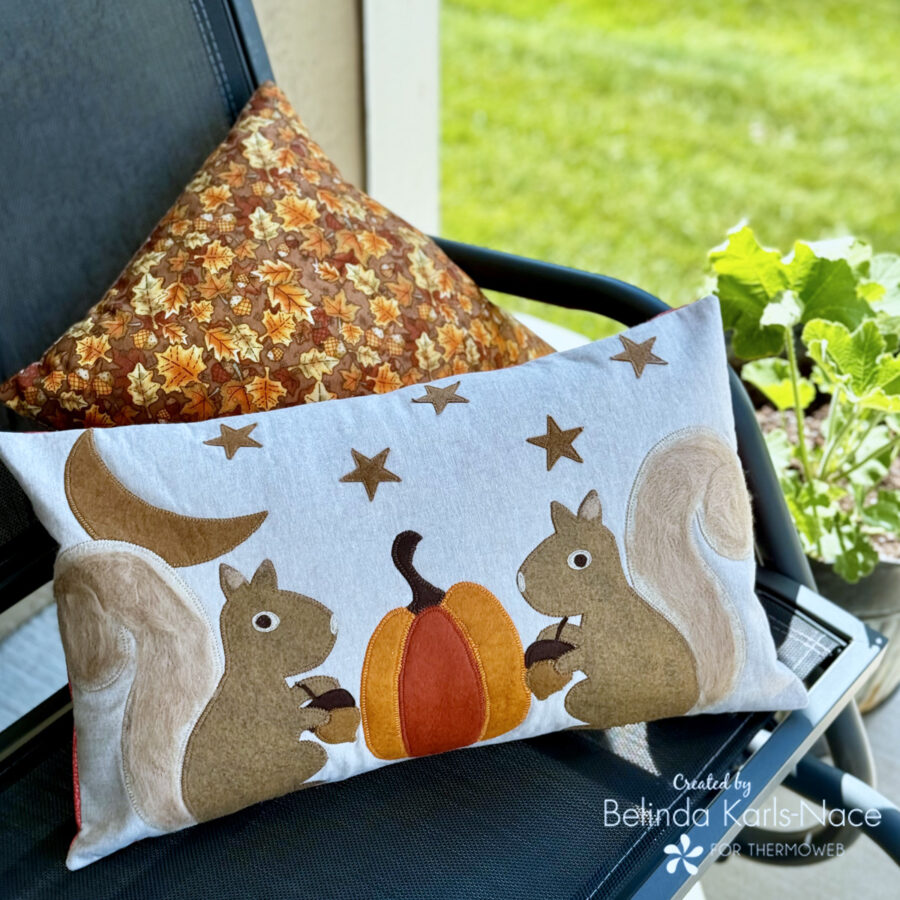
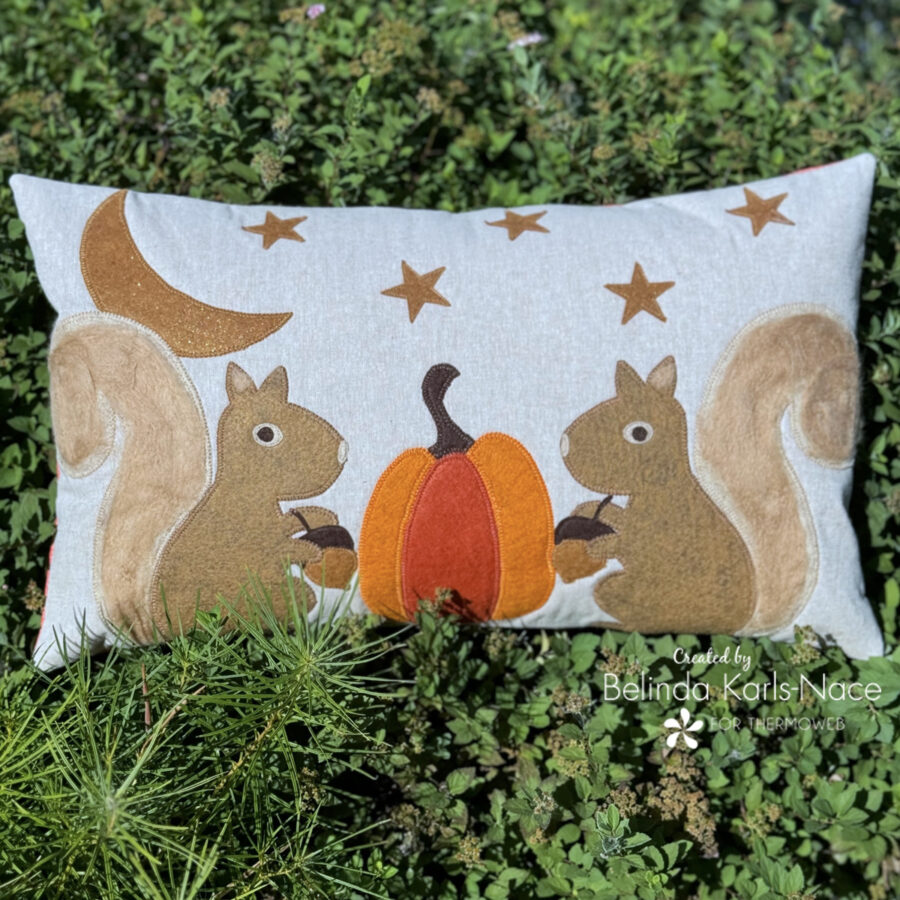
Your Harvest Squirrel Pillow is now complete. This happy pillow is certain to add a smile to your autumn decorating…and if you are like me, you just might leave it on display year-round!
Thank you for joining me today for my Therm O Web blog tutorial. I hope this post inspires you to create a Harvest Squirrel Pillow, using your favorite colors and materials. To see more of my projects and patterns, stop by my blog, website, and/or Instagram – I would love to visit with you and see what you create!
BENZIE DESIGN x THERM O WEB GIVEAWAY DETAILS
We wanted to send a huge THANK YOU to our friends at Benzie Design for supplying the gorgeous wool felt, wool-blend felt, wool roving, poms, floss and tools for the projects being featured this week. Be sure to follow both Therm O Web and Benzie Design on Instagram and comment on the Instagram post promoting this tutorial for a chance to win a $25 digital gift card to thermoweb.com. Watch for more chances to win and more Handmade Holidays projects all week on the Benzie Design and Therm O Web blogs.
Meghan Kennihan
September 23, 2024 at 5:10 pm (9 months ago)This pillow is DARLING! I LOVE the squirrels and pumpkin! Too cute!
Belinda Karls-Nace
September 28, 2024 at 2:03 pm (9 months ago)Thank you! I’m so happy you like my pillow design – I hope you will use the pattern/tutorial to make one for yourself.