Glitter Dust a Scrappy Fabric Summer Wreath
Here’s a super scrappy and super fun for your summertime front door, here’s what you’ll need to put this one together.
Supplies:
Fabric scraps measuring at least 3″ x 3″ in size
10″ Styrofoam wreath
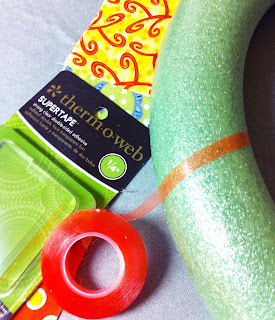
Therm O Web SuperTape Adhesive – 1/4 inch
1/4 yard hair canvas interfacing
4-6 floral straight/corsage pins
needle and thread
small amount of fiberfill
Therm O Web Glitter Dust Spray in Silver
Instructions:
1. Start by cutting strips of fabric that are 3″ wide. The length can be anywhere between 3″ and 7″. Make sure to vary the lengths so when the wrapping begins you don’t end up with too much of a pattern.
2. Start sewing the scraps together to make a long strip that is 3″ x 240″ approximately. At this point, you can press the seams and get ready to wrap the wreath or if you choose, you can throw this strip in the wash with some clothes. Once it’s dried in the dryer, the edges will be frayed and give it a more scrappy look. Either way works, but I chose to wash mine for the extra fraying.
3. Using the double sided super tape, wrap the entire wreath in it.
4. Peel the tapes backing off at one end and press an end of the fabric onto it. Continue to pull sections of the backing off the tape and wrap the fabric around the wreath as you go. When you have the whole wreath covered in fabric, trim the excess fabric. Place a piece of tape on the backside of the fabric end and smooth onto the wreath.
5. To make flowers I chose the Therm O web hair canvas interfacing. It look a lot like burlap that everyone is using in decorating but it it has two big pluses in my book. One it doesn’t fray like burlap and it’s not scratchy and dusty to work with. I made two different sizes of flowers by cutting petal shapes. To make a flower, I would run a gathering stitch continuously across the bottom of five to six petals. Once they are stitched, pull the thread so the petals come together in the center. Run some stitches along the base to hold the petals together.
6. For flower centers, fold a leftover 3″ x 12″ scrap in half and rolled to up. Then stitch into the center of a larger flower. The other centers are scraps of fabric cut into a 3″ diameter circle. Run a gathering stitch around the outer edge and before pulling snug I added a small ball of fiberfill.
7. Once the flowers are made, use a decorative floral pin to secure the flower to the wreath. If you look closely in the center of the flower photo above, you can see the pin.
8. When I had the wreath looking how I wanted it, I decided for fun to add a layer of glitter dust. I’m glad I did, the sparkle at different angles is nice.
Enjoy!
Visit my Website, Etsy Shop, Blog, Facebook
How would you like to receive a box of some of our most popular HeatnBond products? Like our StitchnSew, our Fusible Fleece and our HeatnBond Lite along with some other products? Did you nod yes? If so..and we hope so…please follow the easy steps for our giveaway and we’ll enter you to win!
a Rafflecopter giveaway


Janice Urffer
July 15, 2018 at 7:16 pm (7 years ago)Would love to try those products