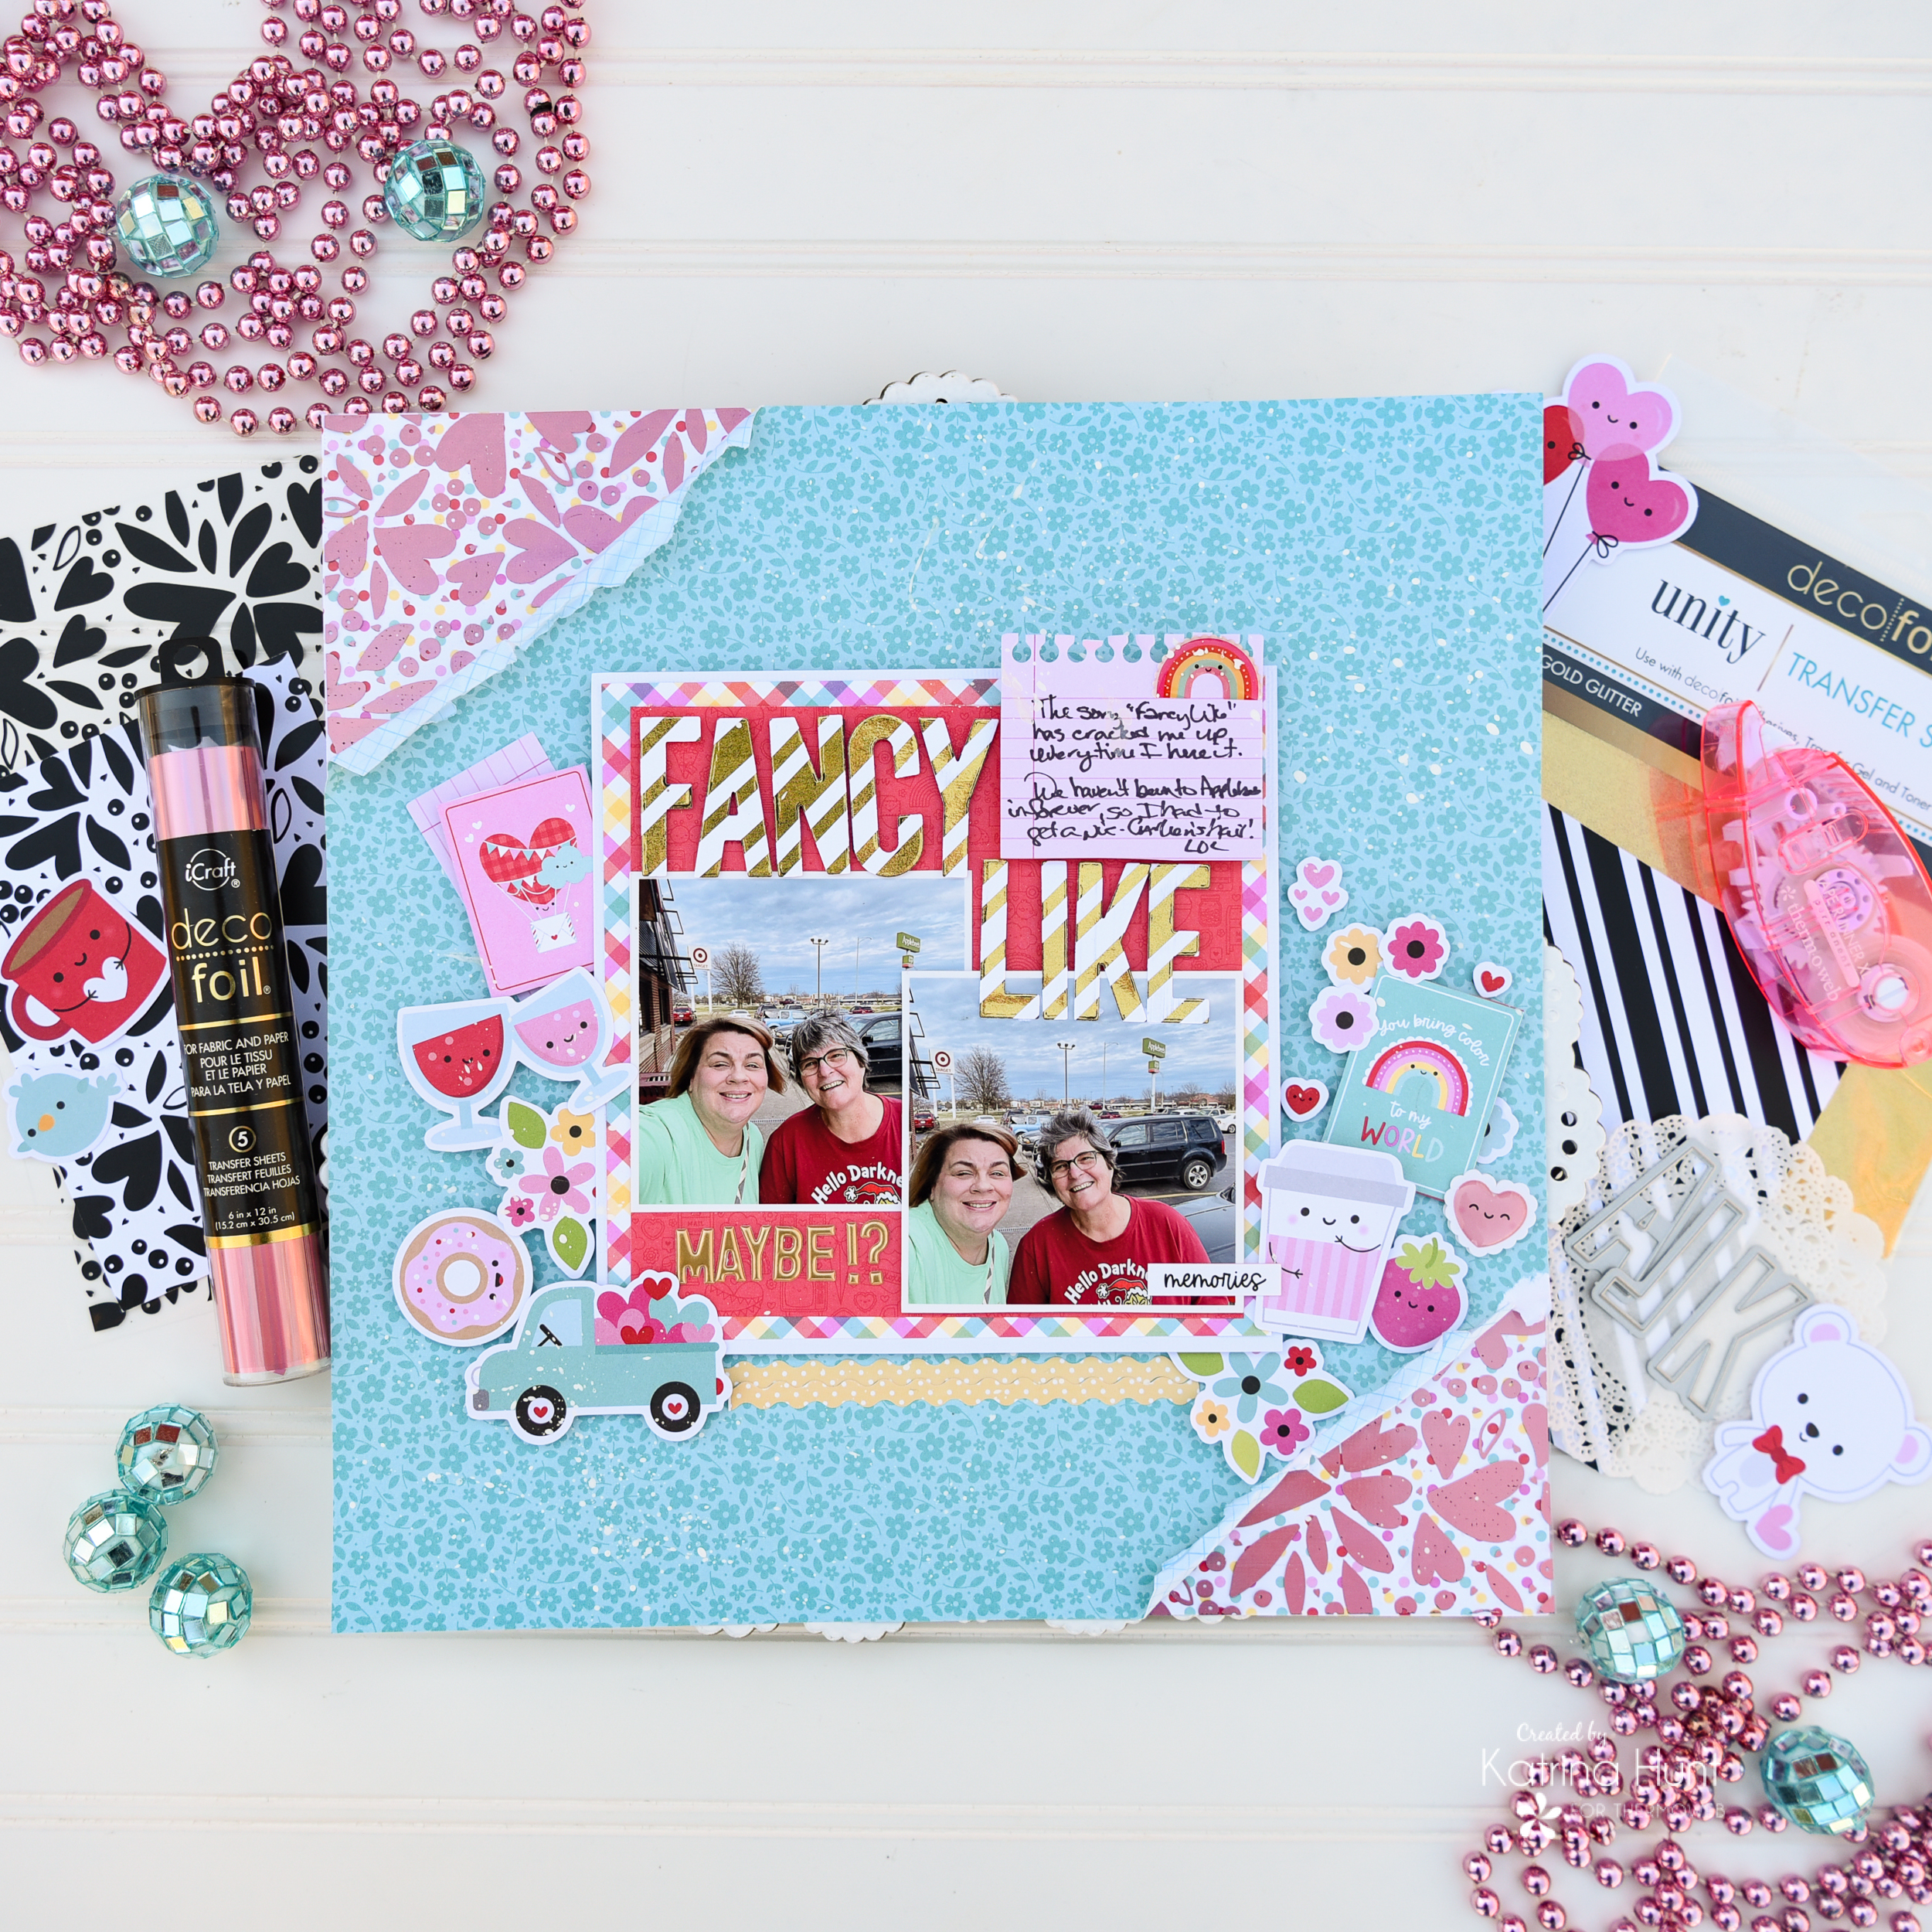
 Hi there!! Katrina here on the blog today! My layout today features TWO different toner sheets, one clear and one white-colored card front. These are SO great for scrapbooking and I am excited to show you what you can do with them! AND there is a sale on several toner sheets so grab them at a discount while you can! You can find all the sale items HERE!!
Fancy Like Scrapbook Layout with Deco Foil
Therm O Web Supplies Used
Memory Runner XL
Memory Runner XL Refill
3D Foam Squares – Combo Pack
NEW 3D FOAM SQUARES BOX
NEW 3D FOAM TAPE ROLL 1/16
Gina K Designs Foam Tape Black
Deco Foil Transfer Sheets – Enchanted Rose
Deco Foil Unity Transfer Sheets – Gold Glitter
Deco Foil Clear Toner Sheets – Love Blooms
Deco Foil Card Fronts – Love Blooms
Deco Foil Card Fronts – Candy Stripes
Ultra Bond Liquid Adhesive
Other Supplies Used
Doodlebug Designs Lots of Love Collection
Paper Issues Sketch
Elle’s Studio Jane Alpha Large Dies use code Katrina for 20% off at Paper Issues
White Acrylic Paint
Fancy Like Scrapbook Layout Details
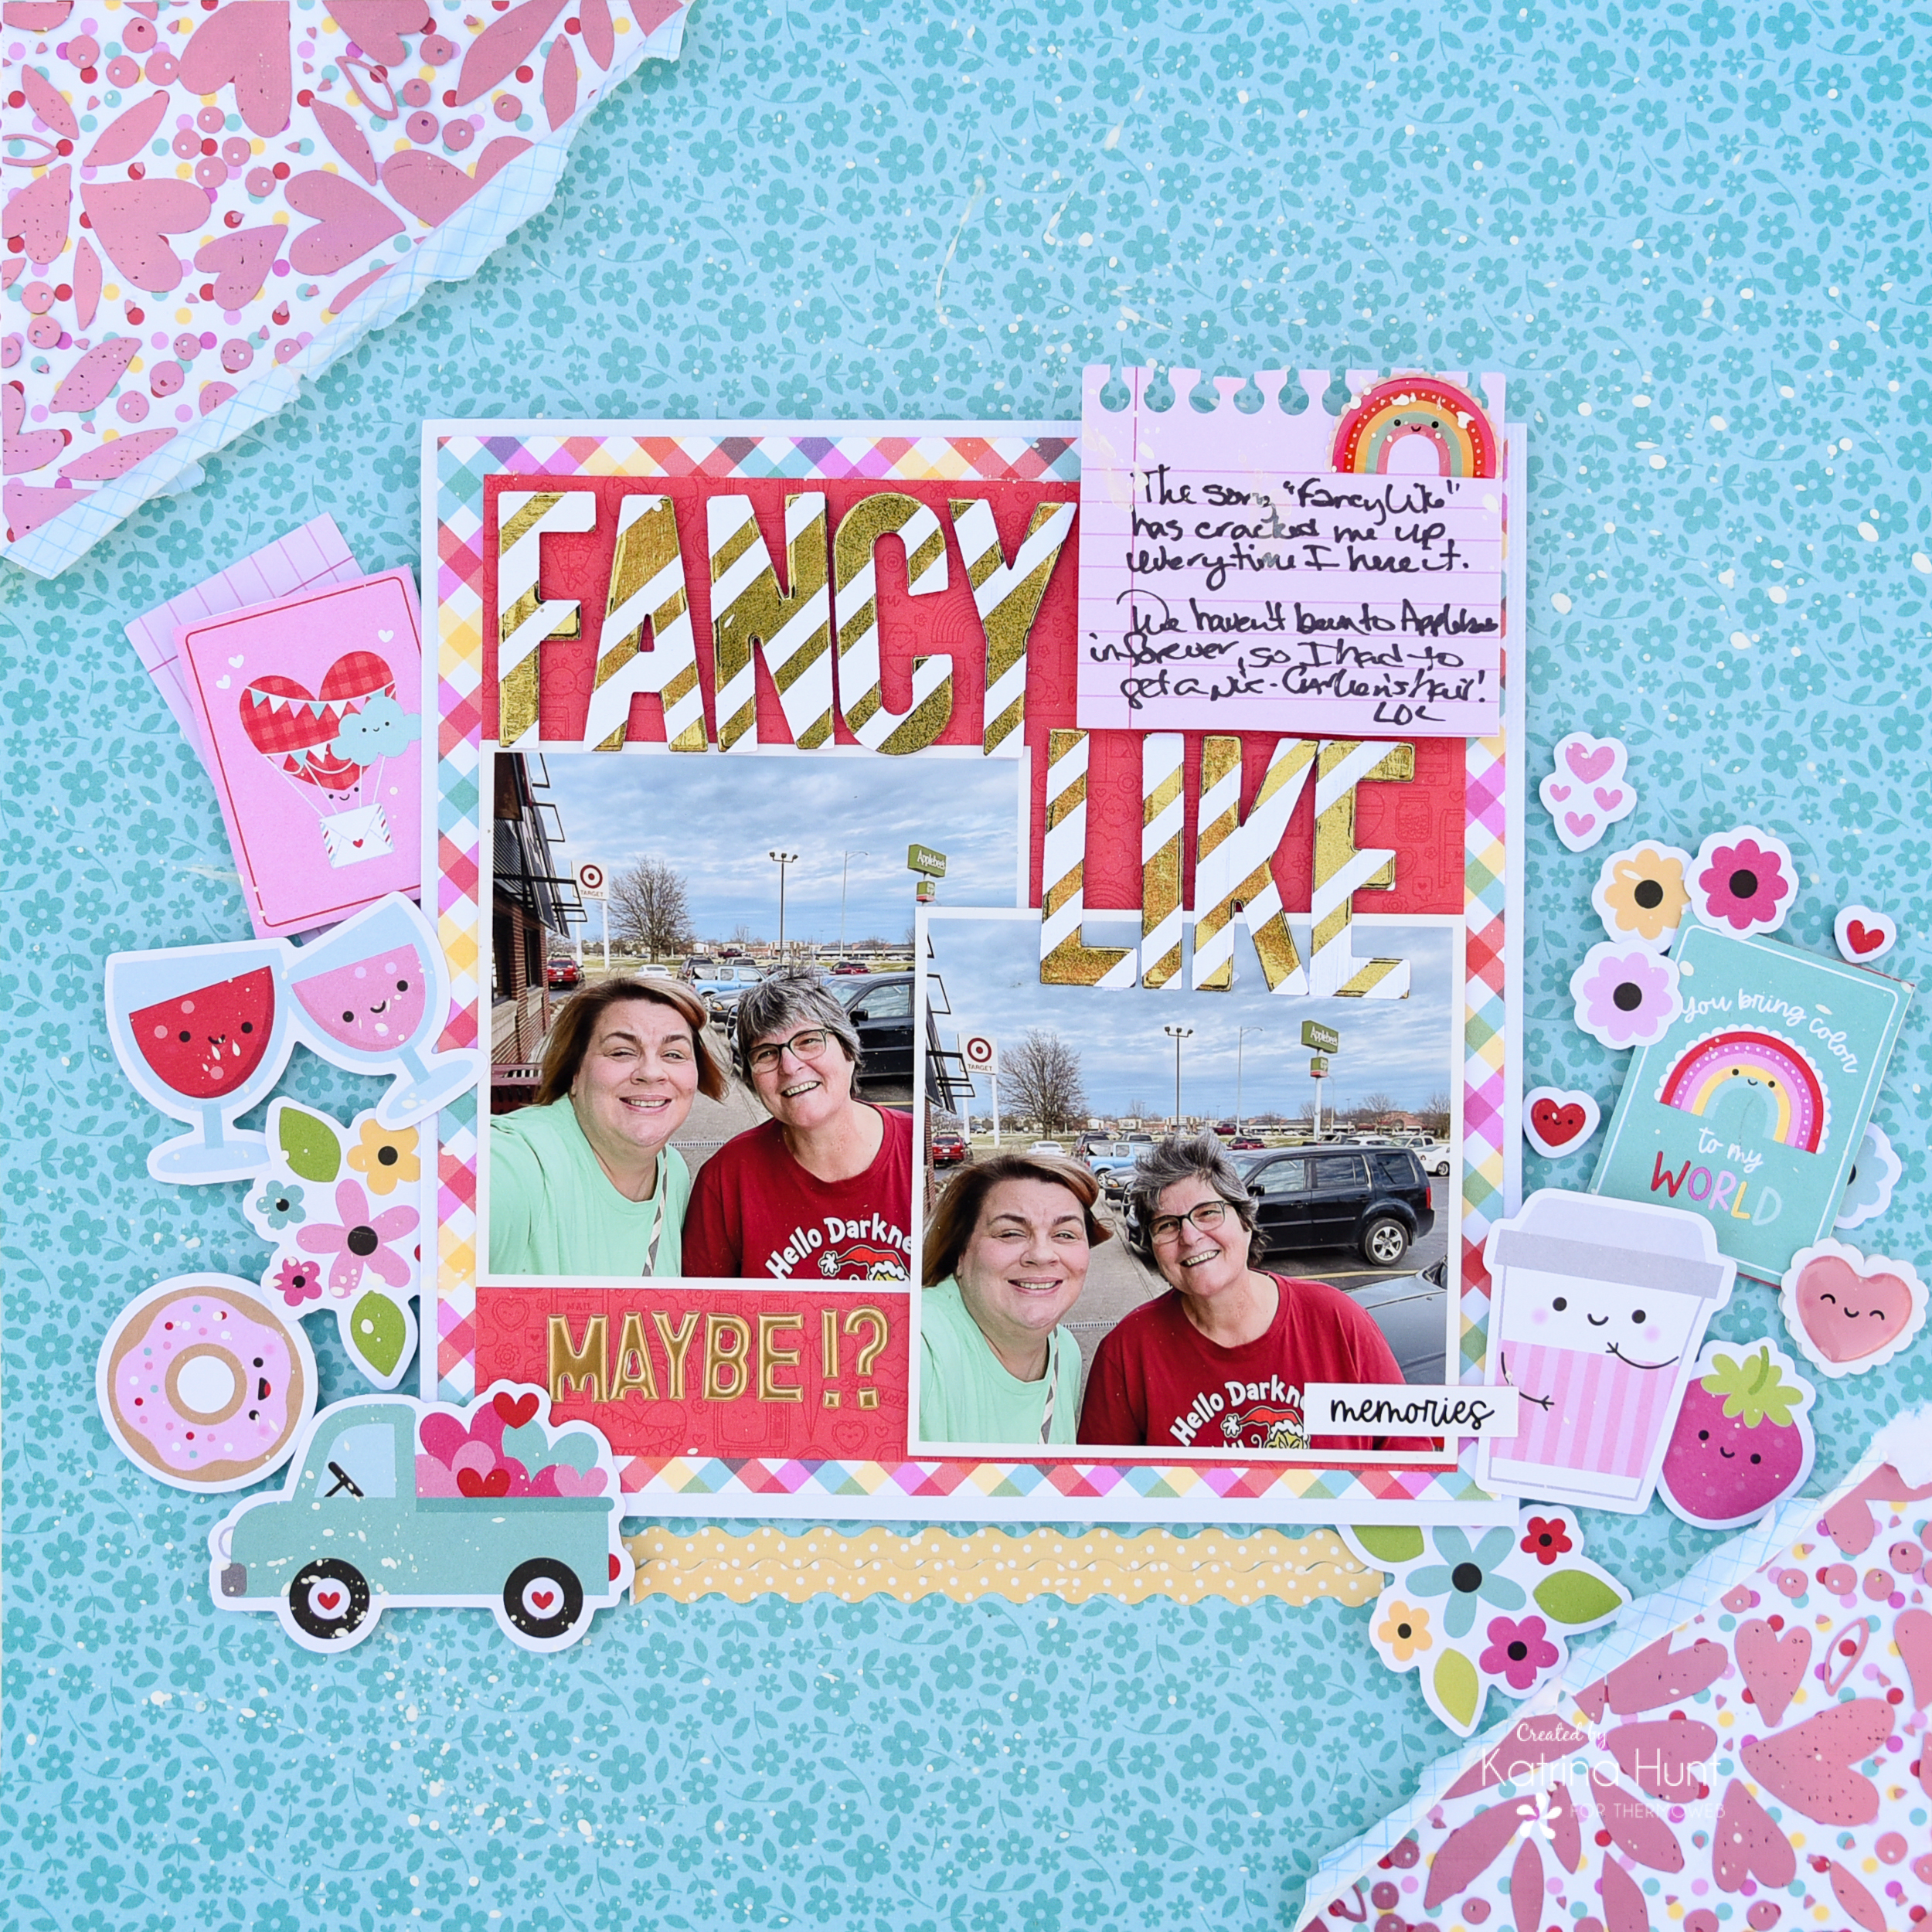
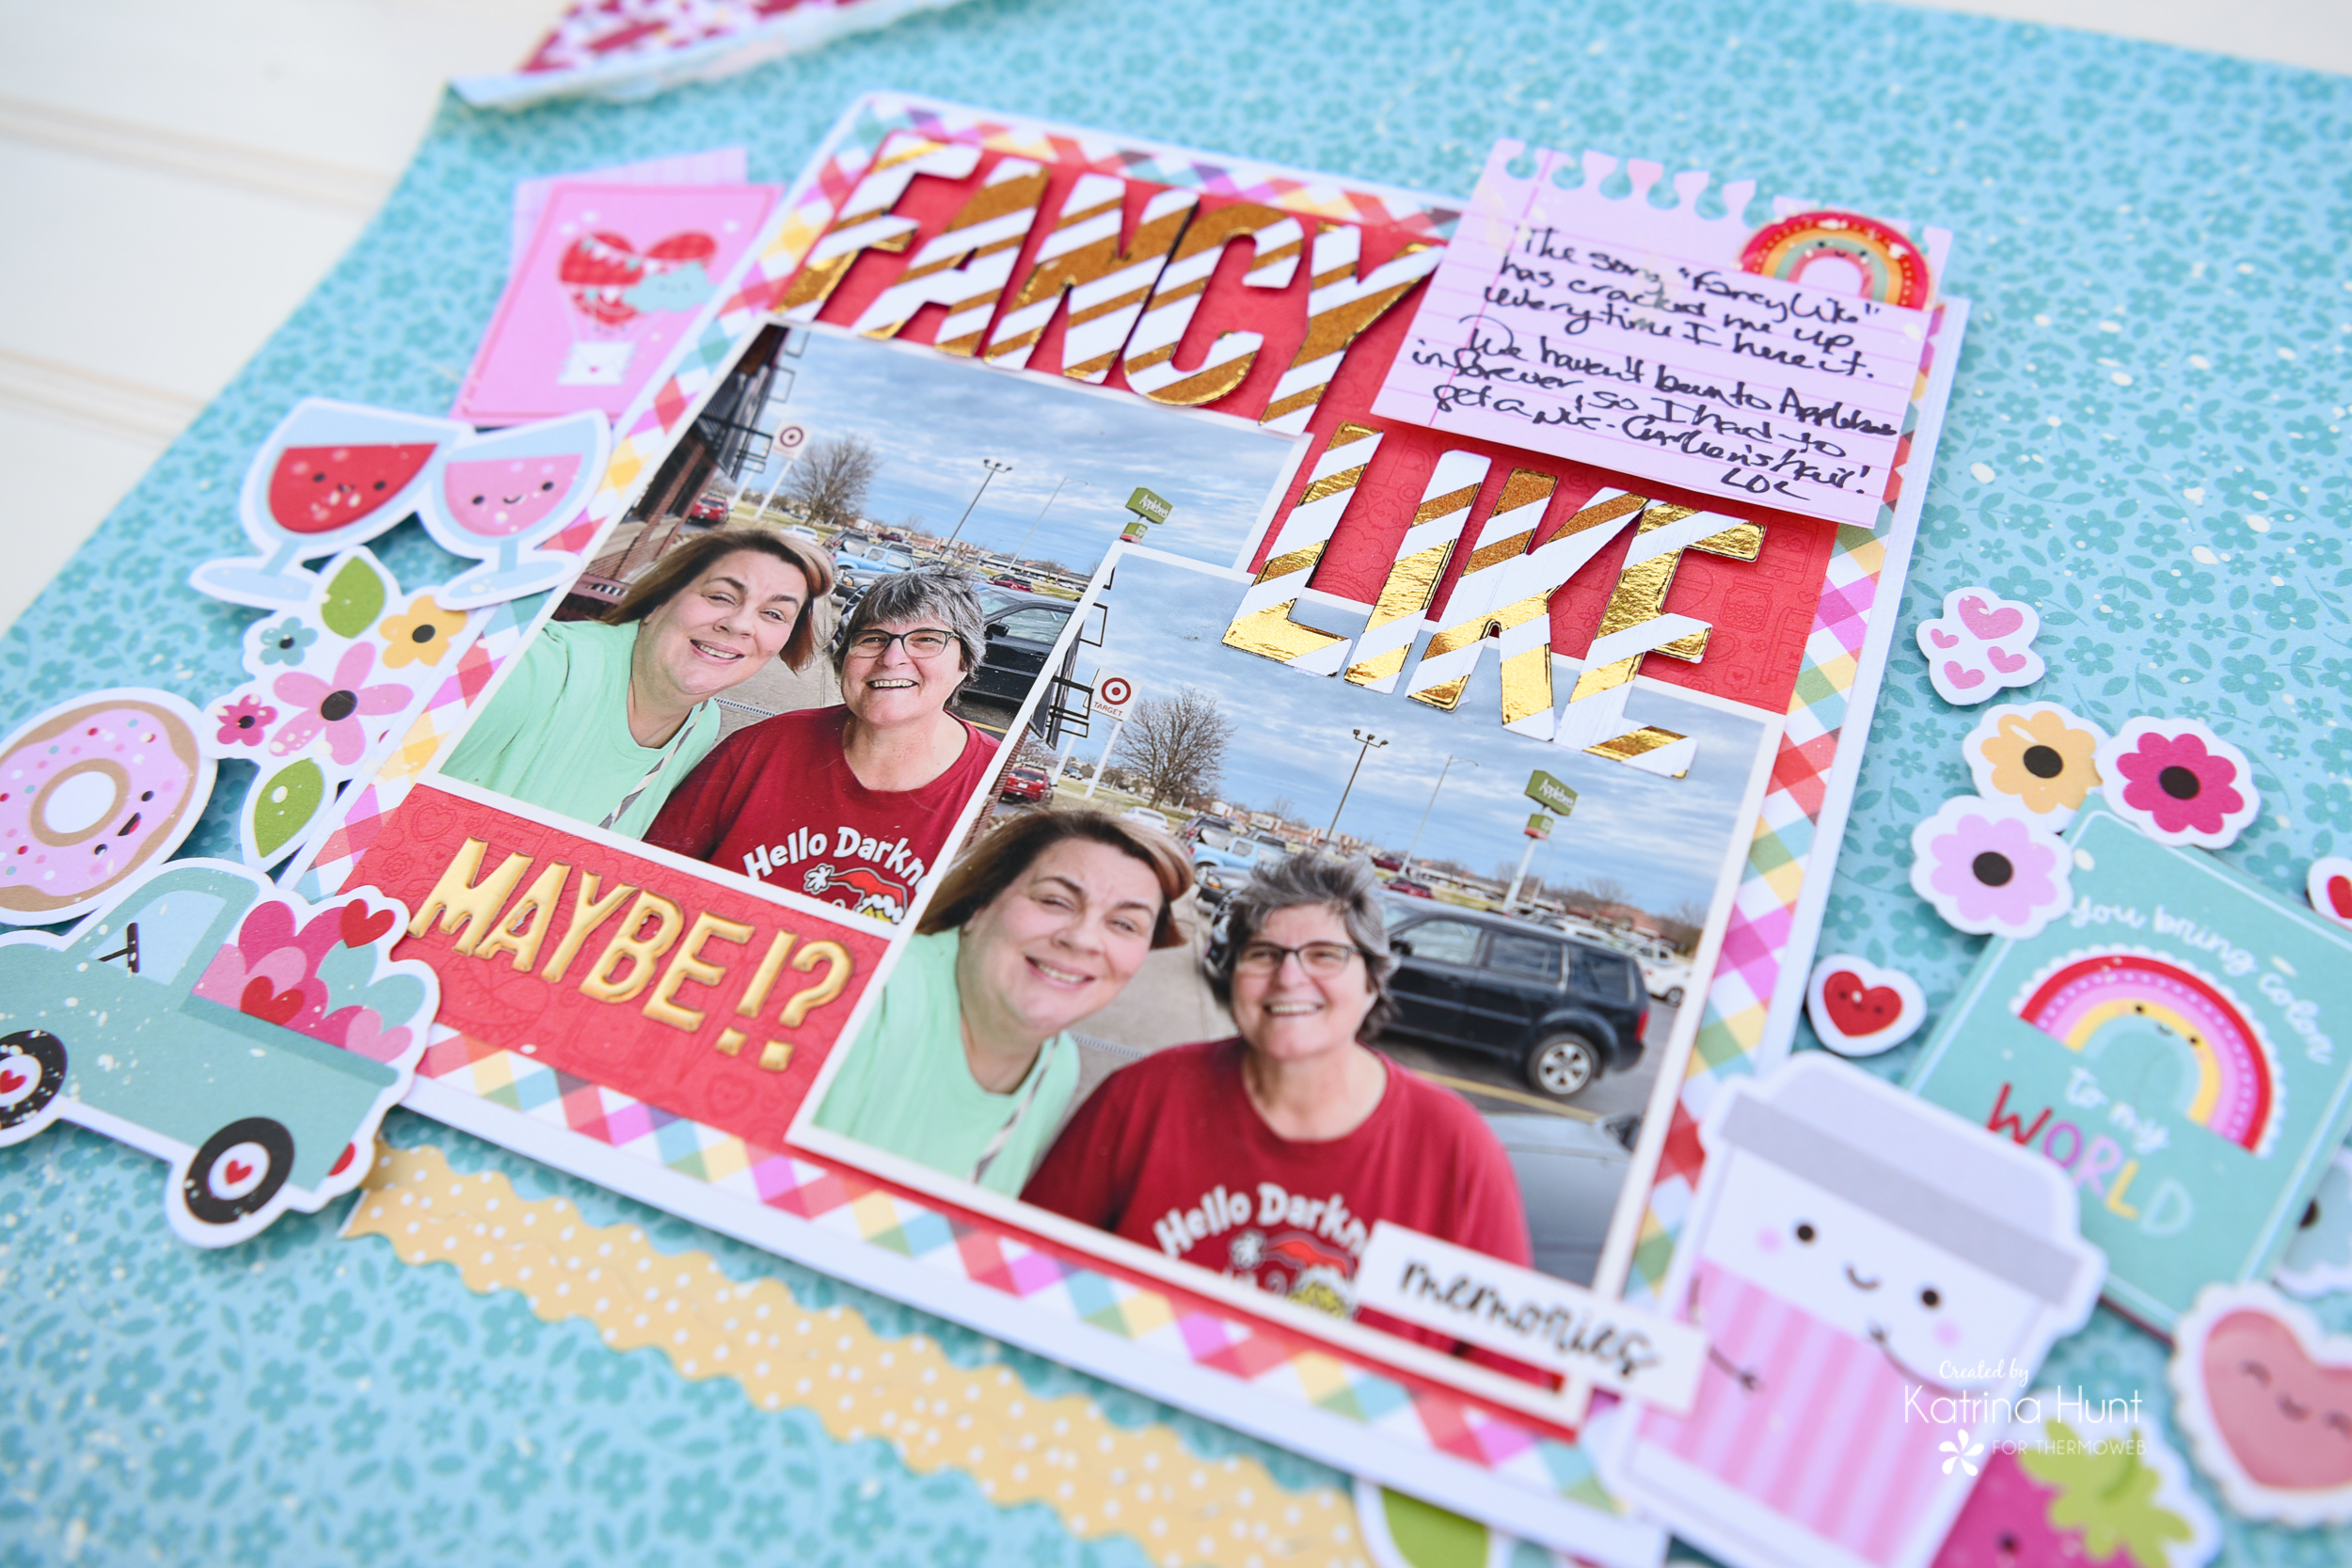
First of all, the story behind the title. That song “Fancy Like” cracks me up and I had no idea when I took these pictures outside Applebee’s that Carleen’s hair did what it did until after we got home. So of course, a moment that definitely needed to be scrapped!
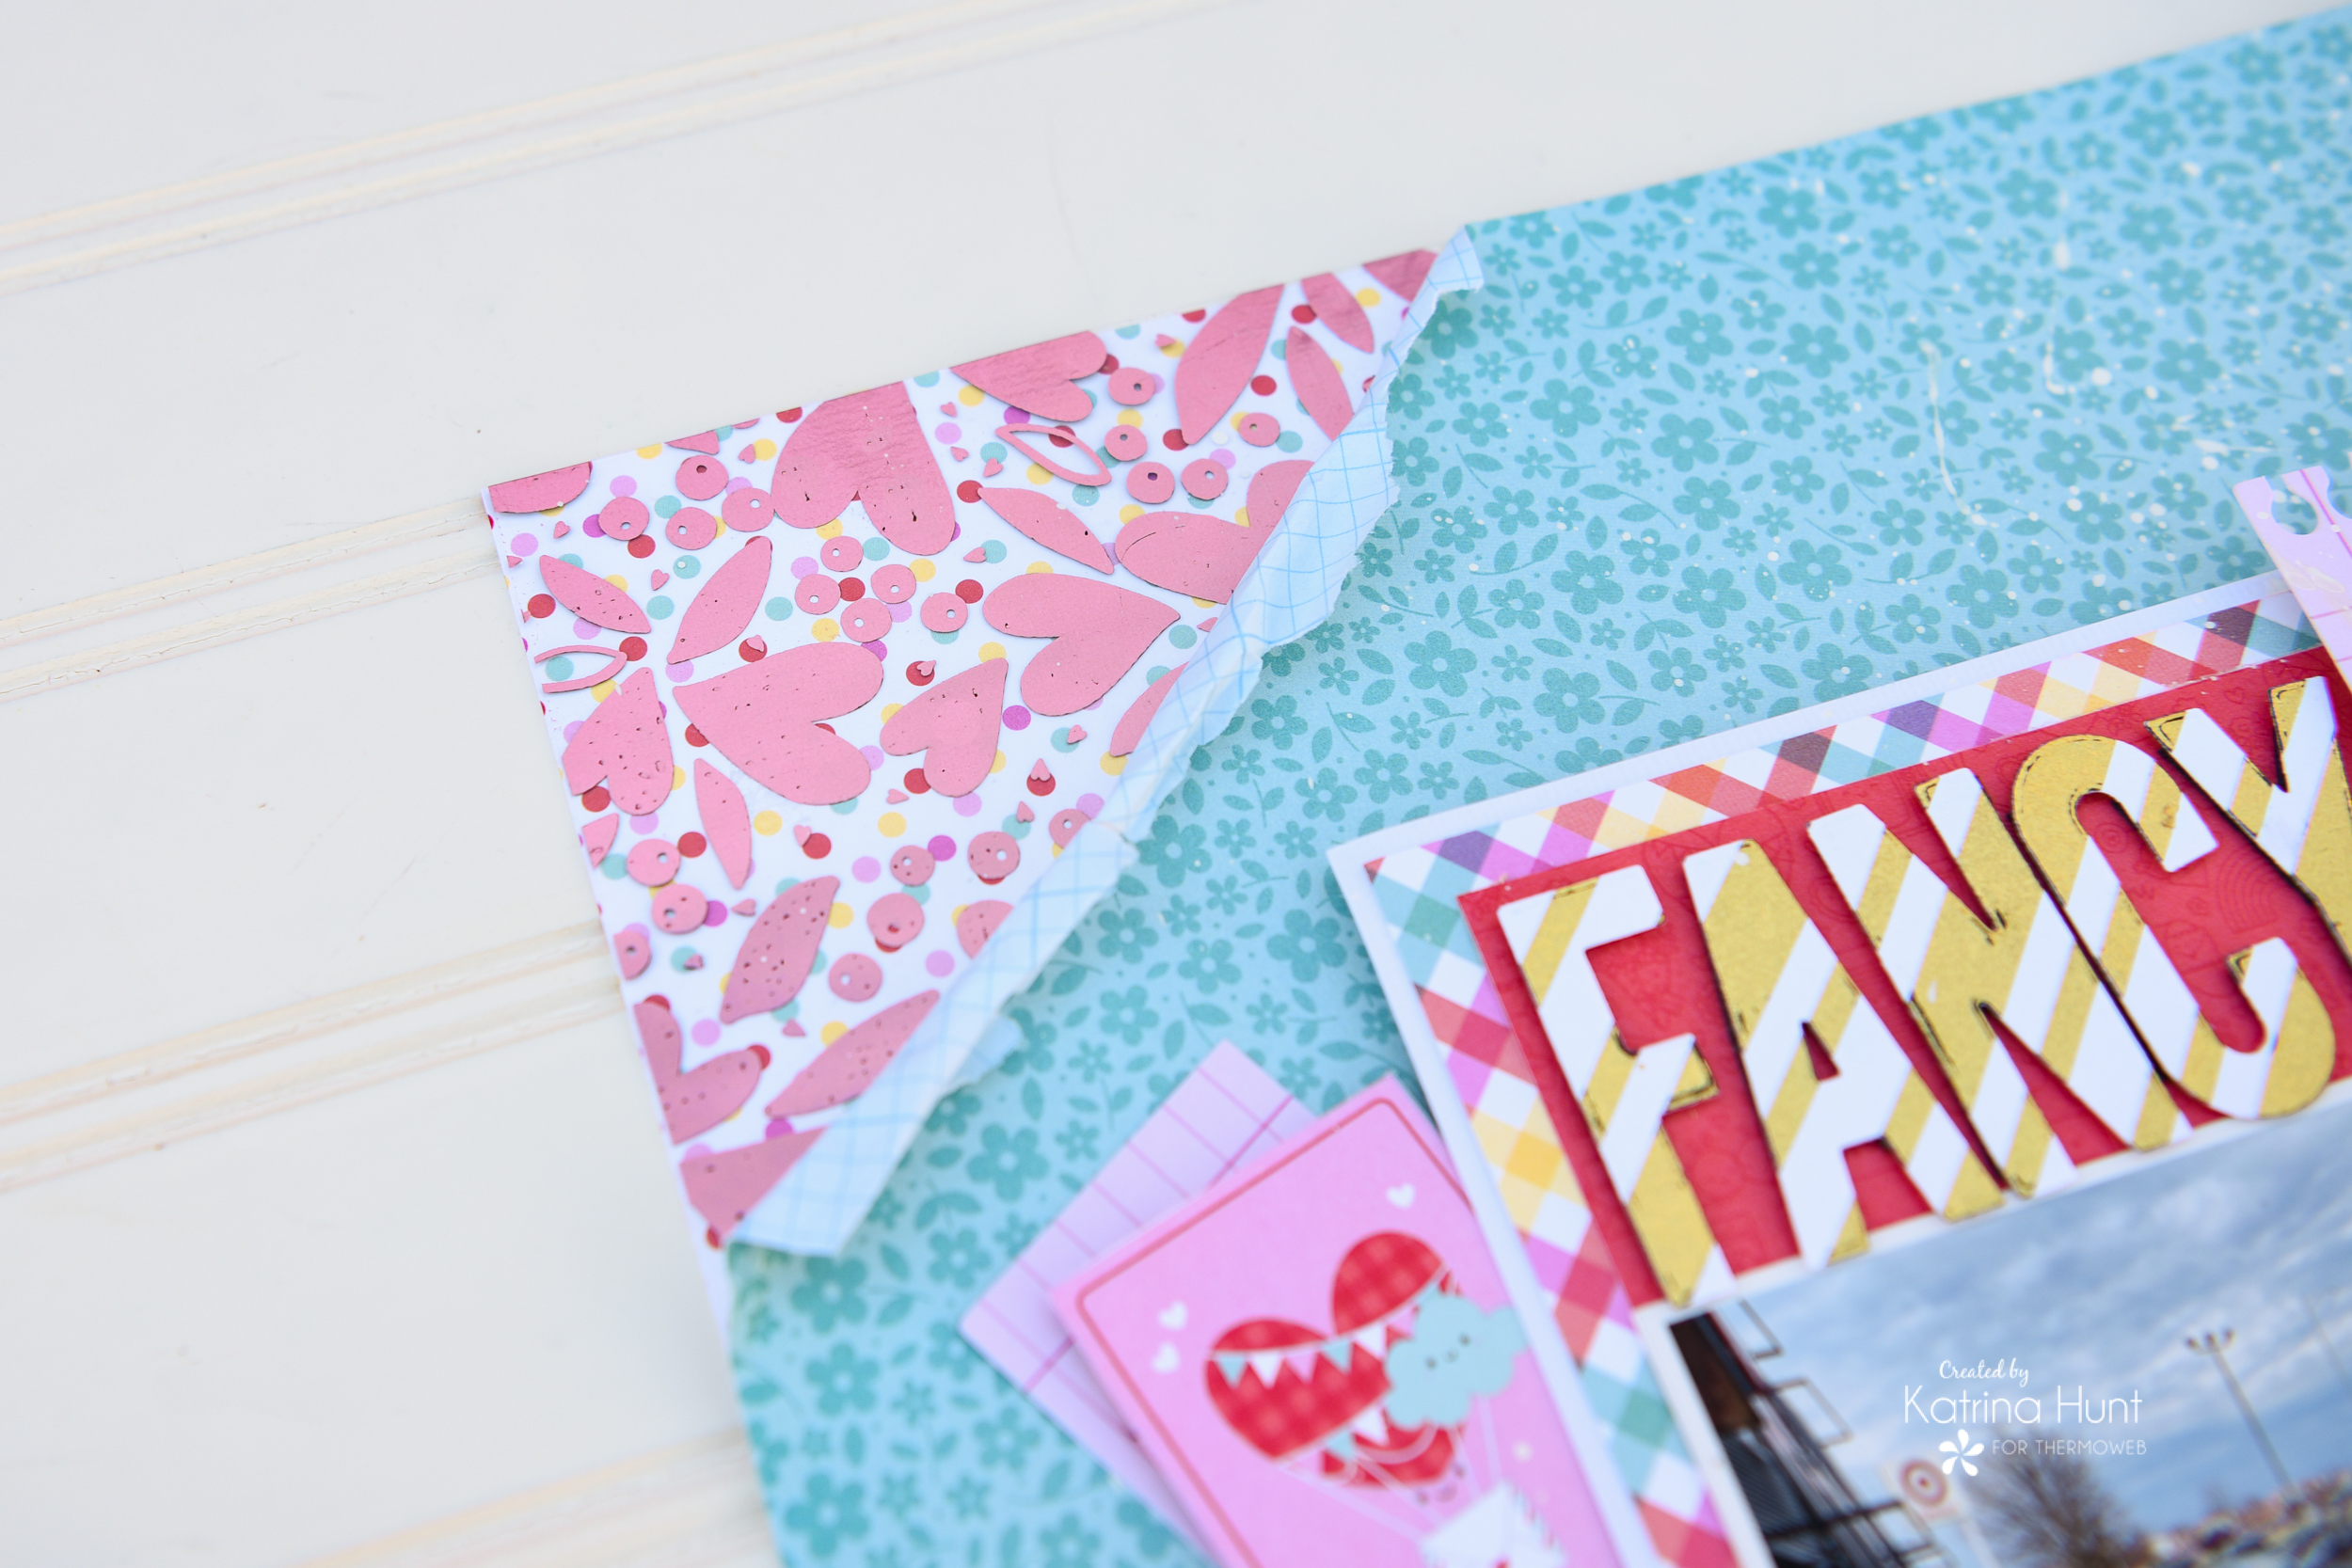
I started with a sketch from Paper Issues to get the ball rolling about design. The sketch called for opposite corners to be the same, but different than the background. The Deco Foil Toner Sheets in Love Blooms were PERFECT for this. Now, I used the clear ones, but toyed with the idea of using the white card front ones.
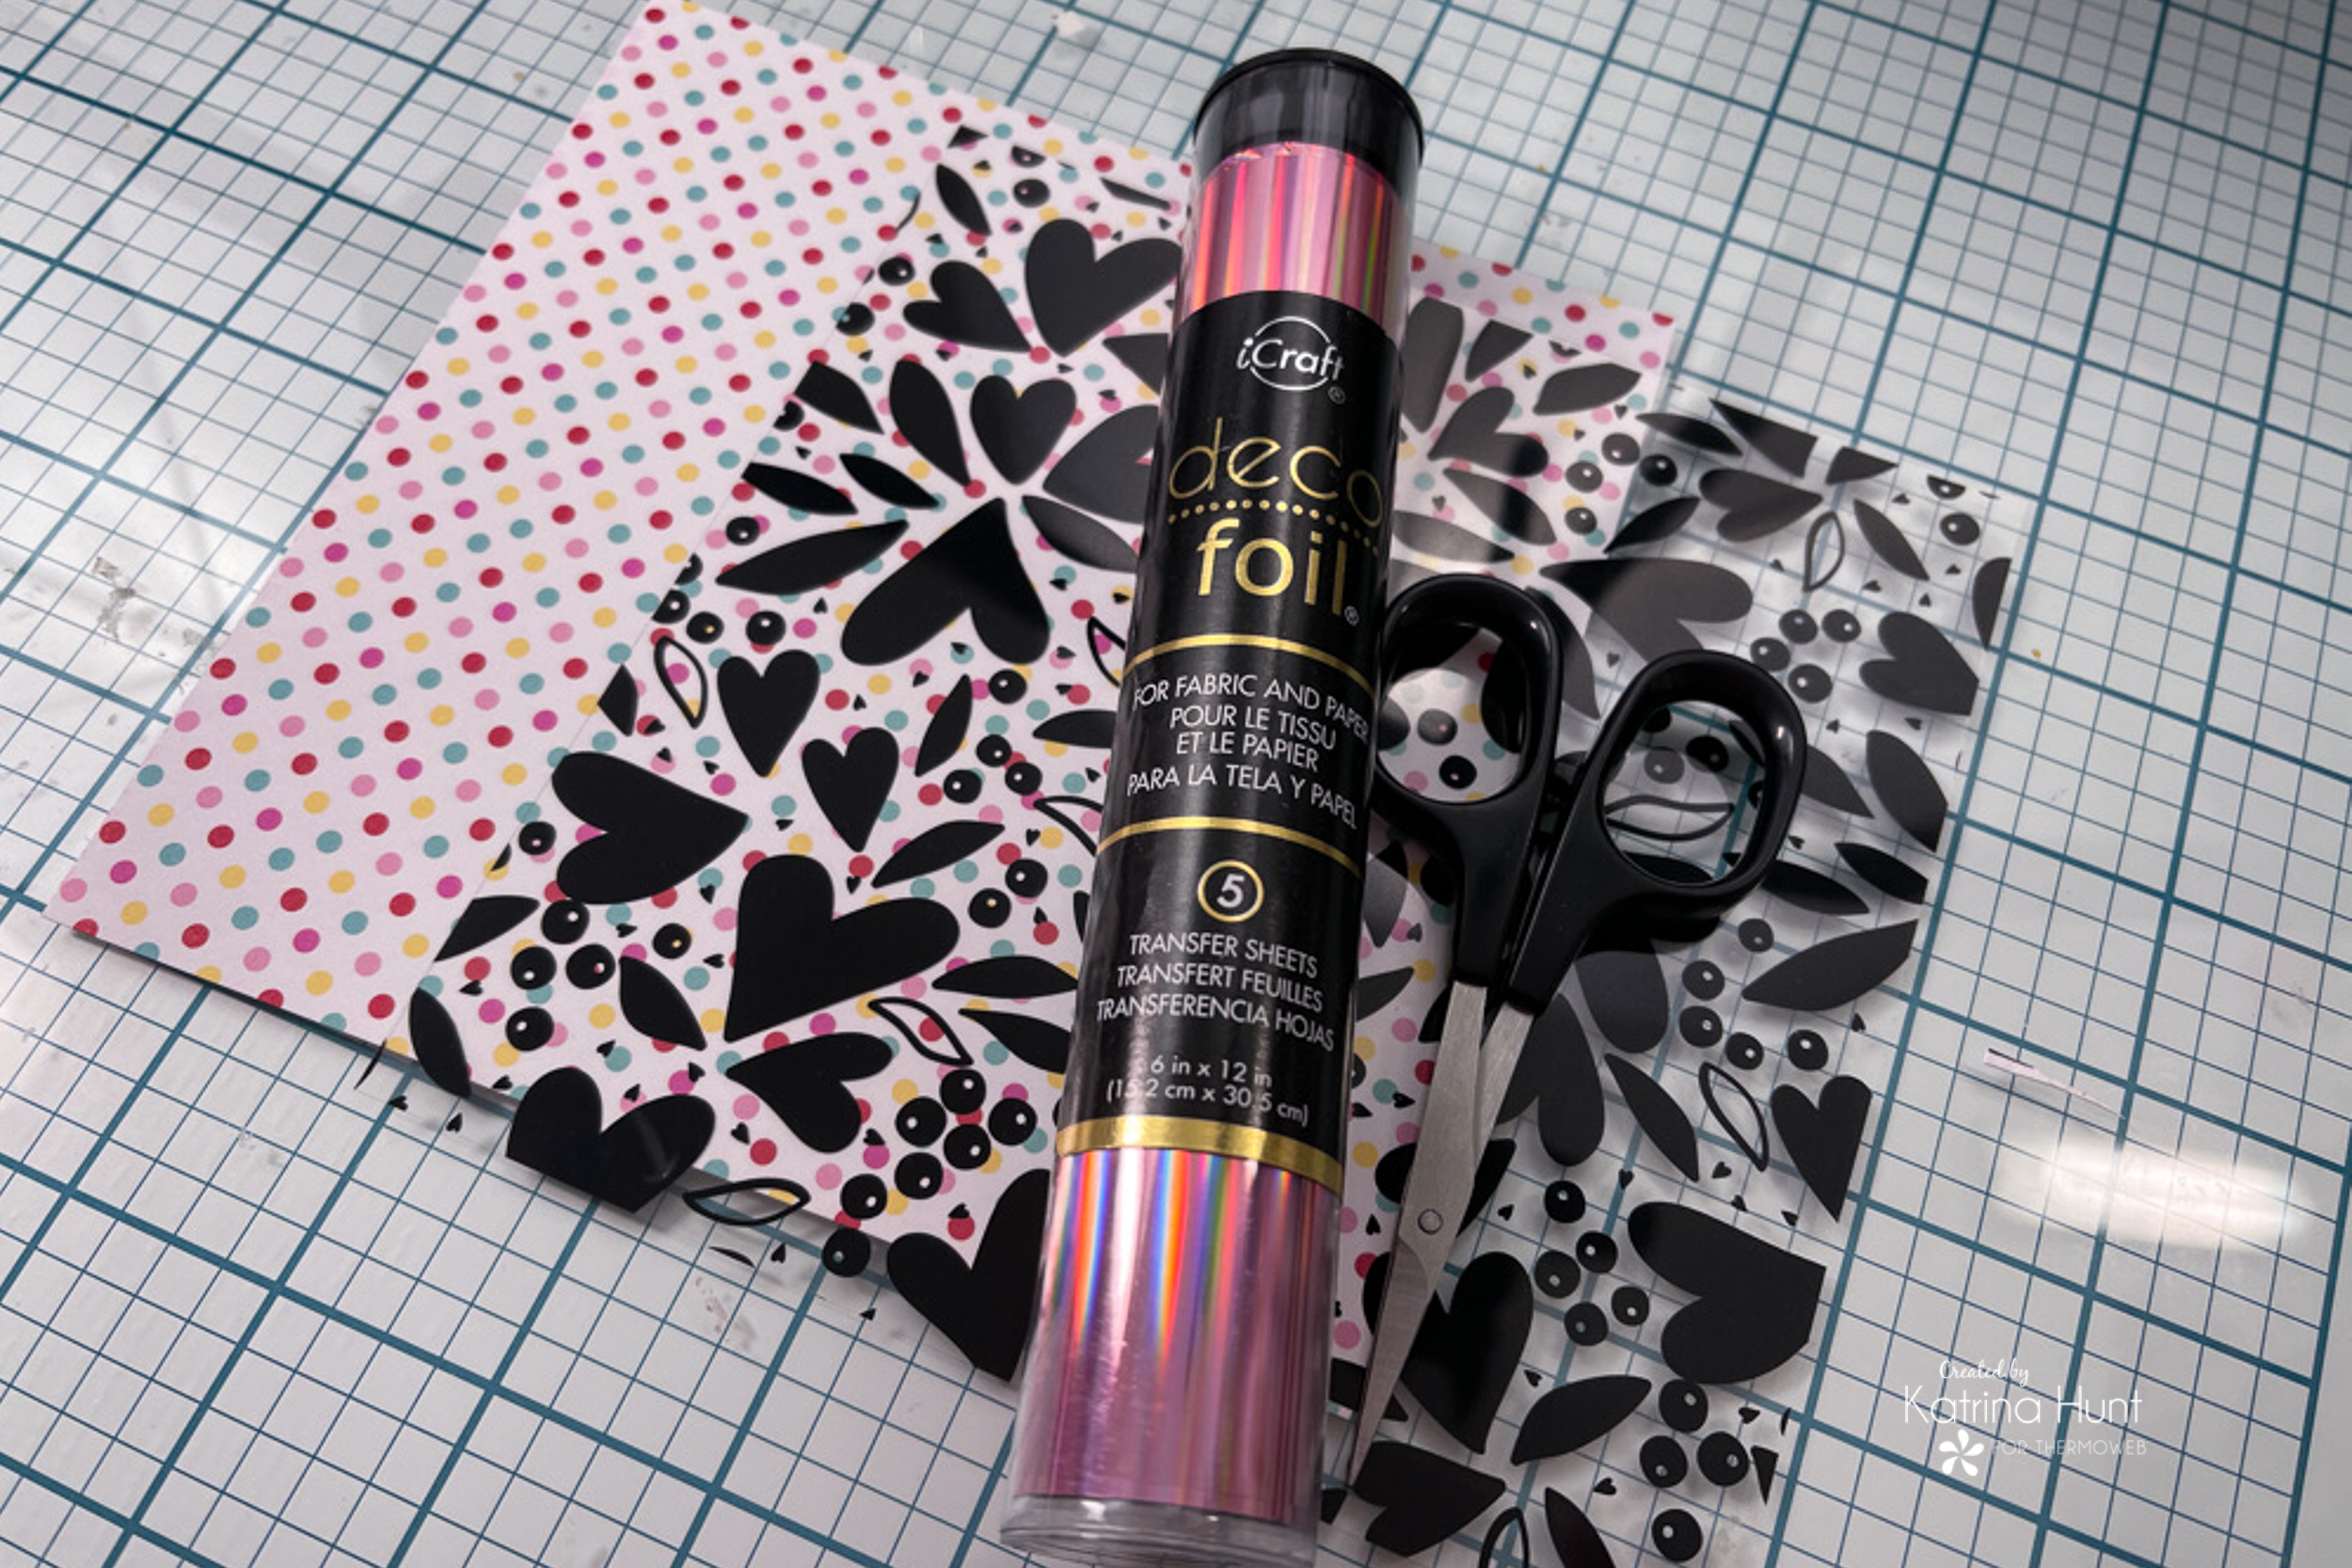
To begin, I trimmed my sheet down to 6×6 inches before foiling with the Enchanted Rose Foil. This not only saves foil usage but also saves the rest of the toner sheet! I placed the toner side down onto the silver backside of the foil and ran it thru my heat machine.
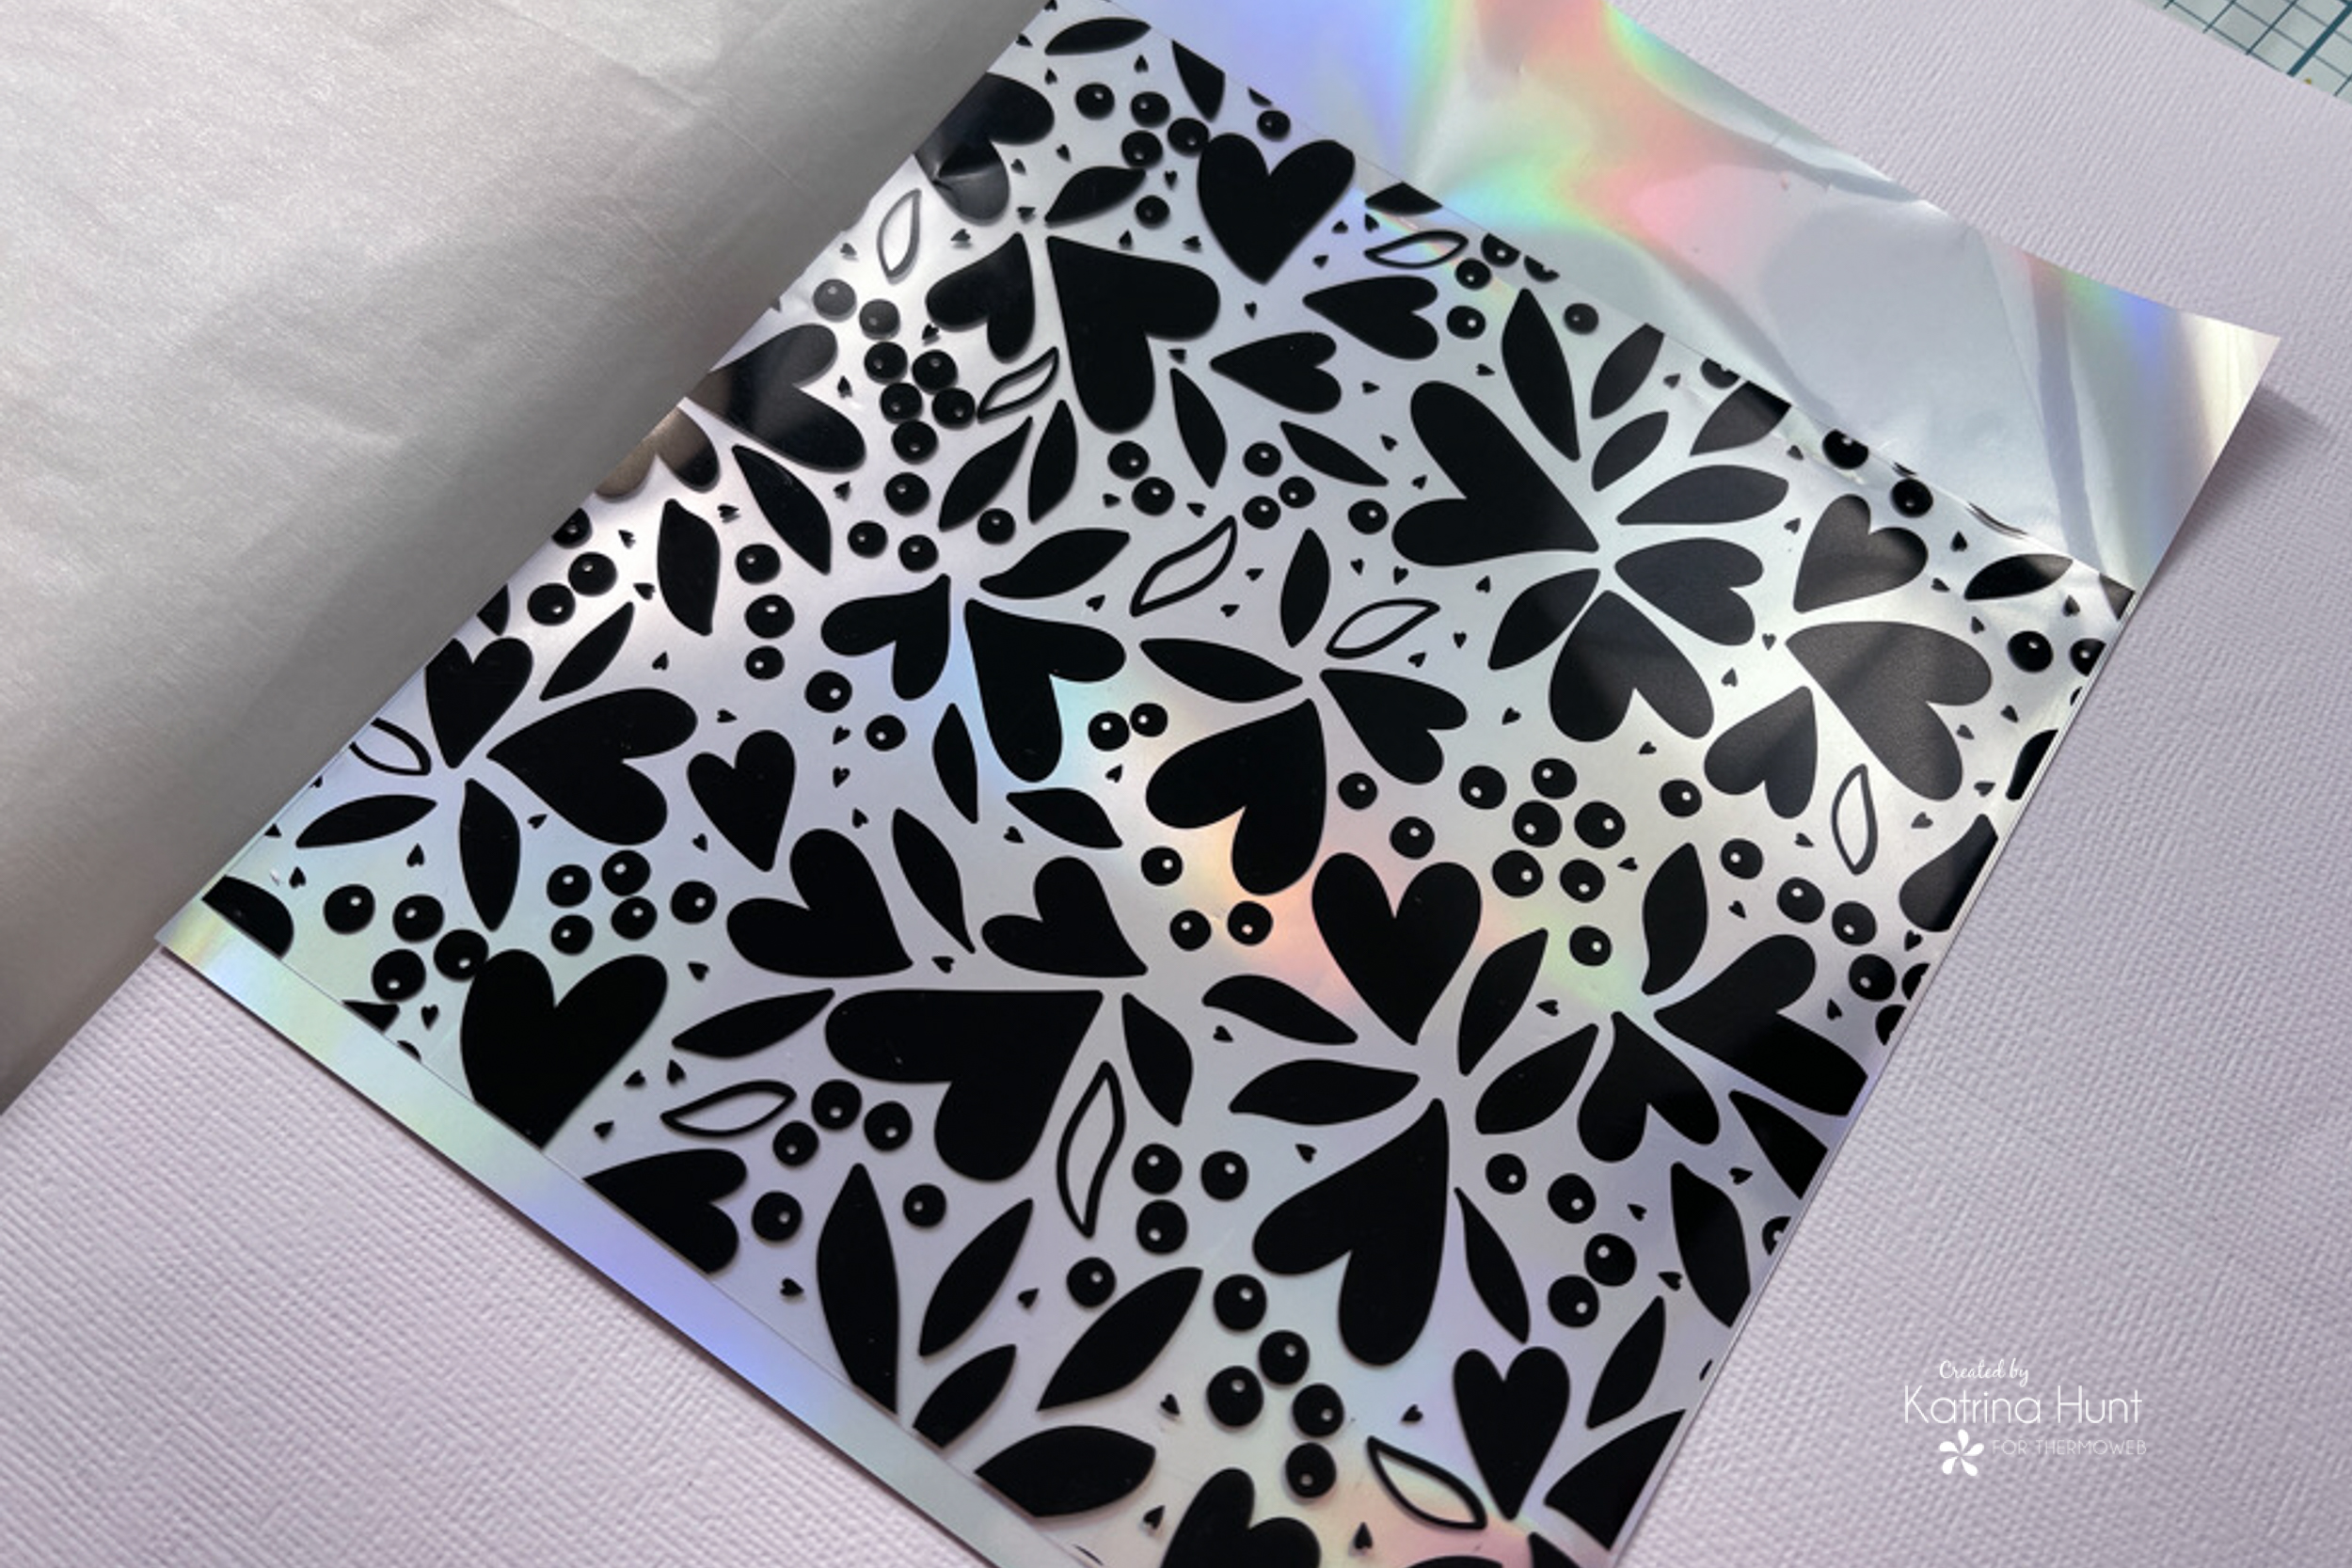
After my piece was foiled, I adhered it with the Memory Runner XL to the 6×6 piece of pattern paper from the collection. I like how the dots show thru the toner sheet.
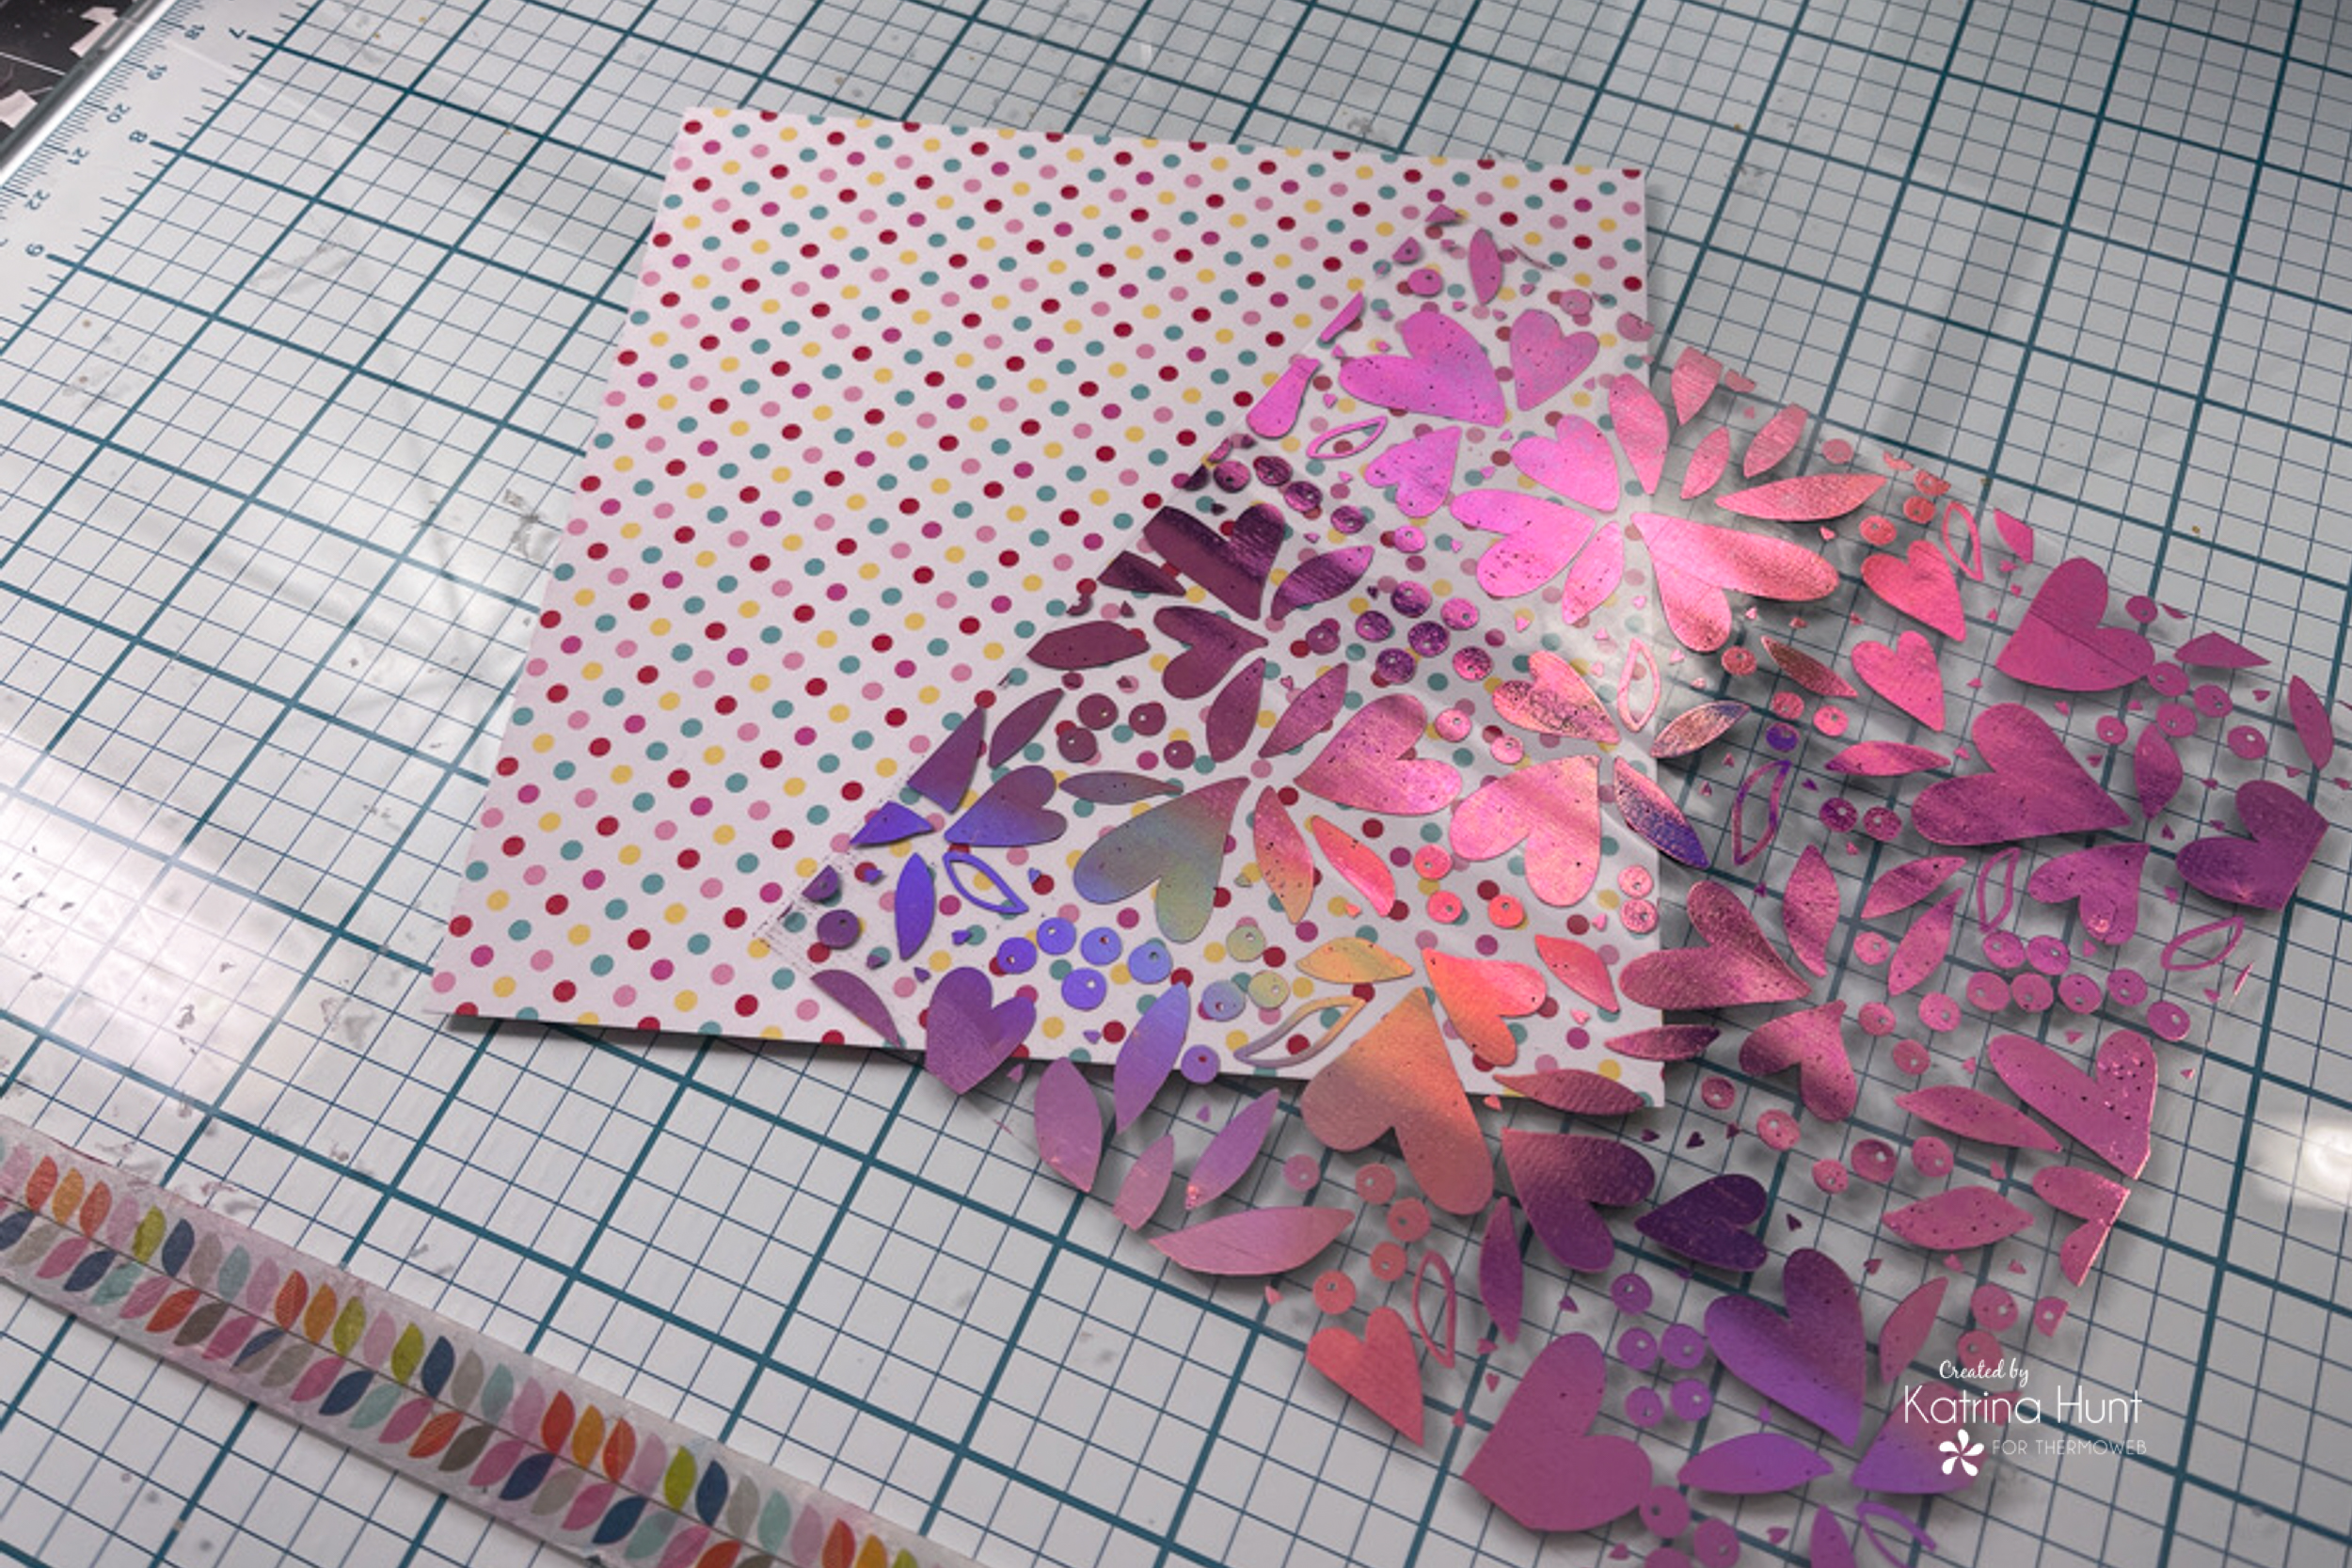
Creating the Corners
Once I had the two pieces adhered together, I trimmed diagonally to get two equal triangles to use for my corners!
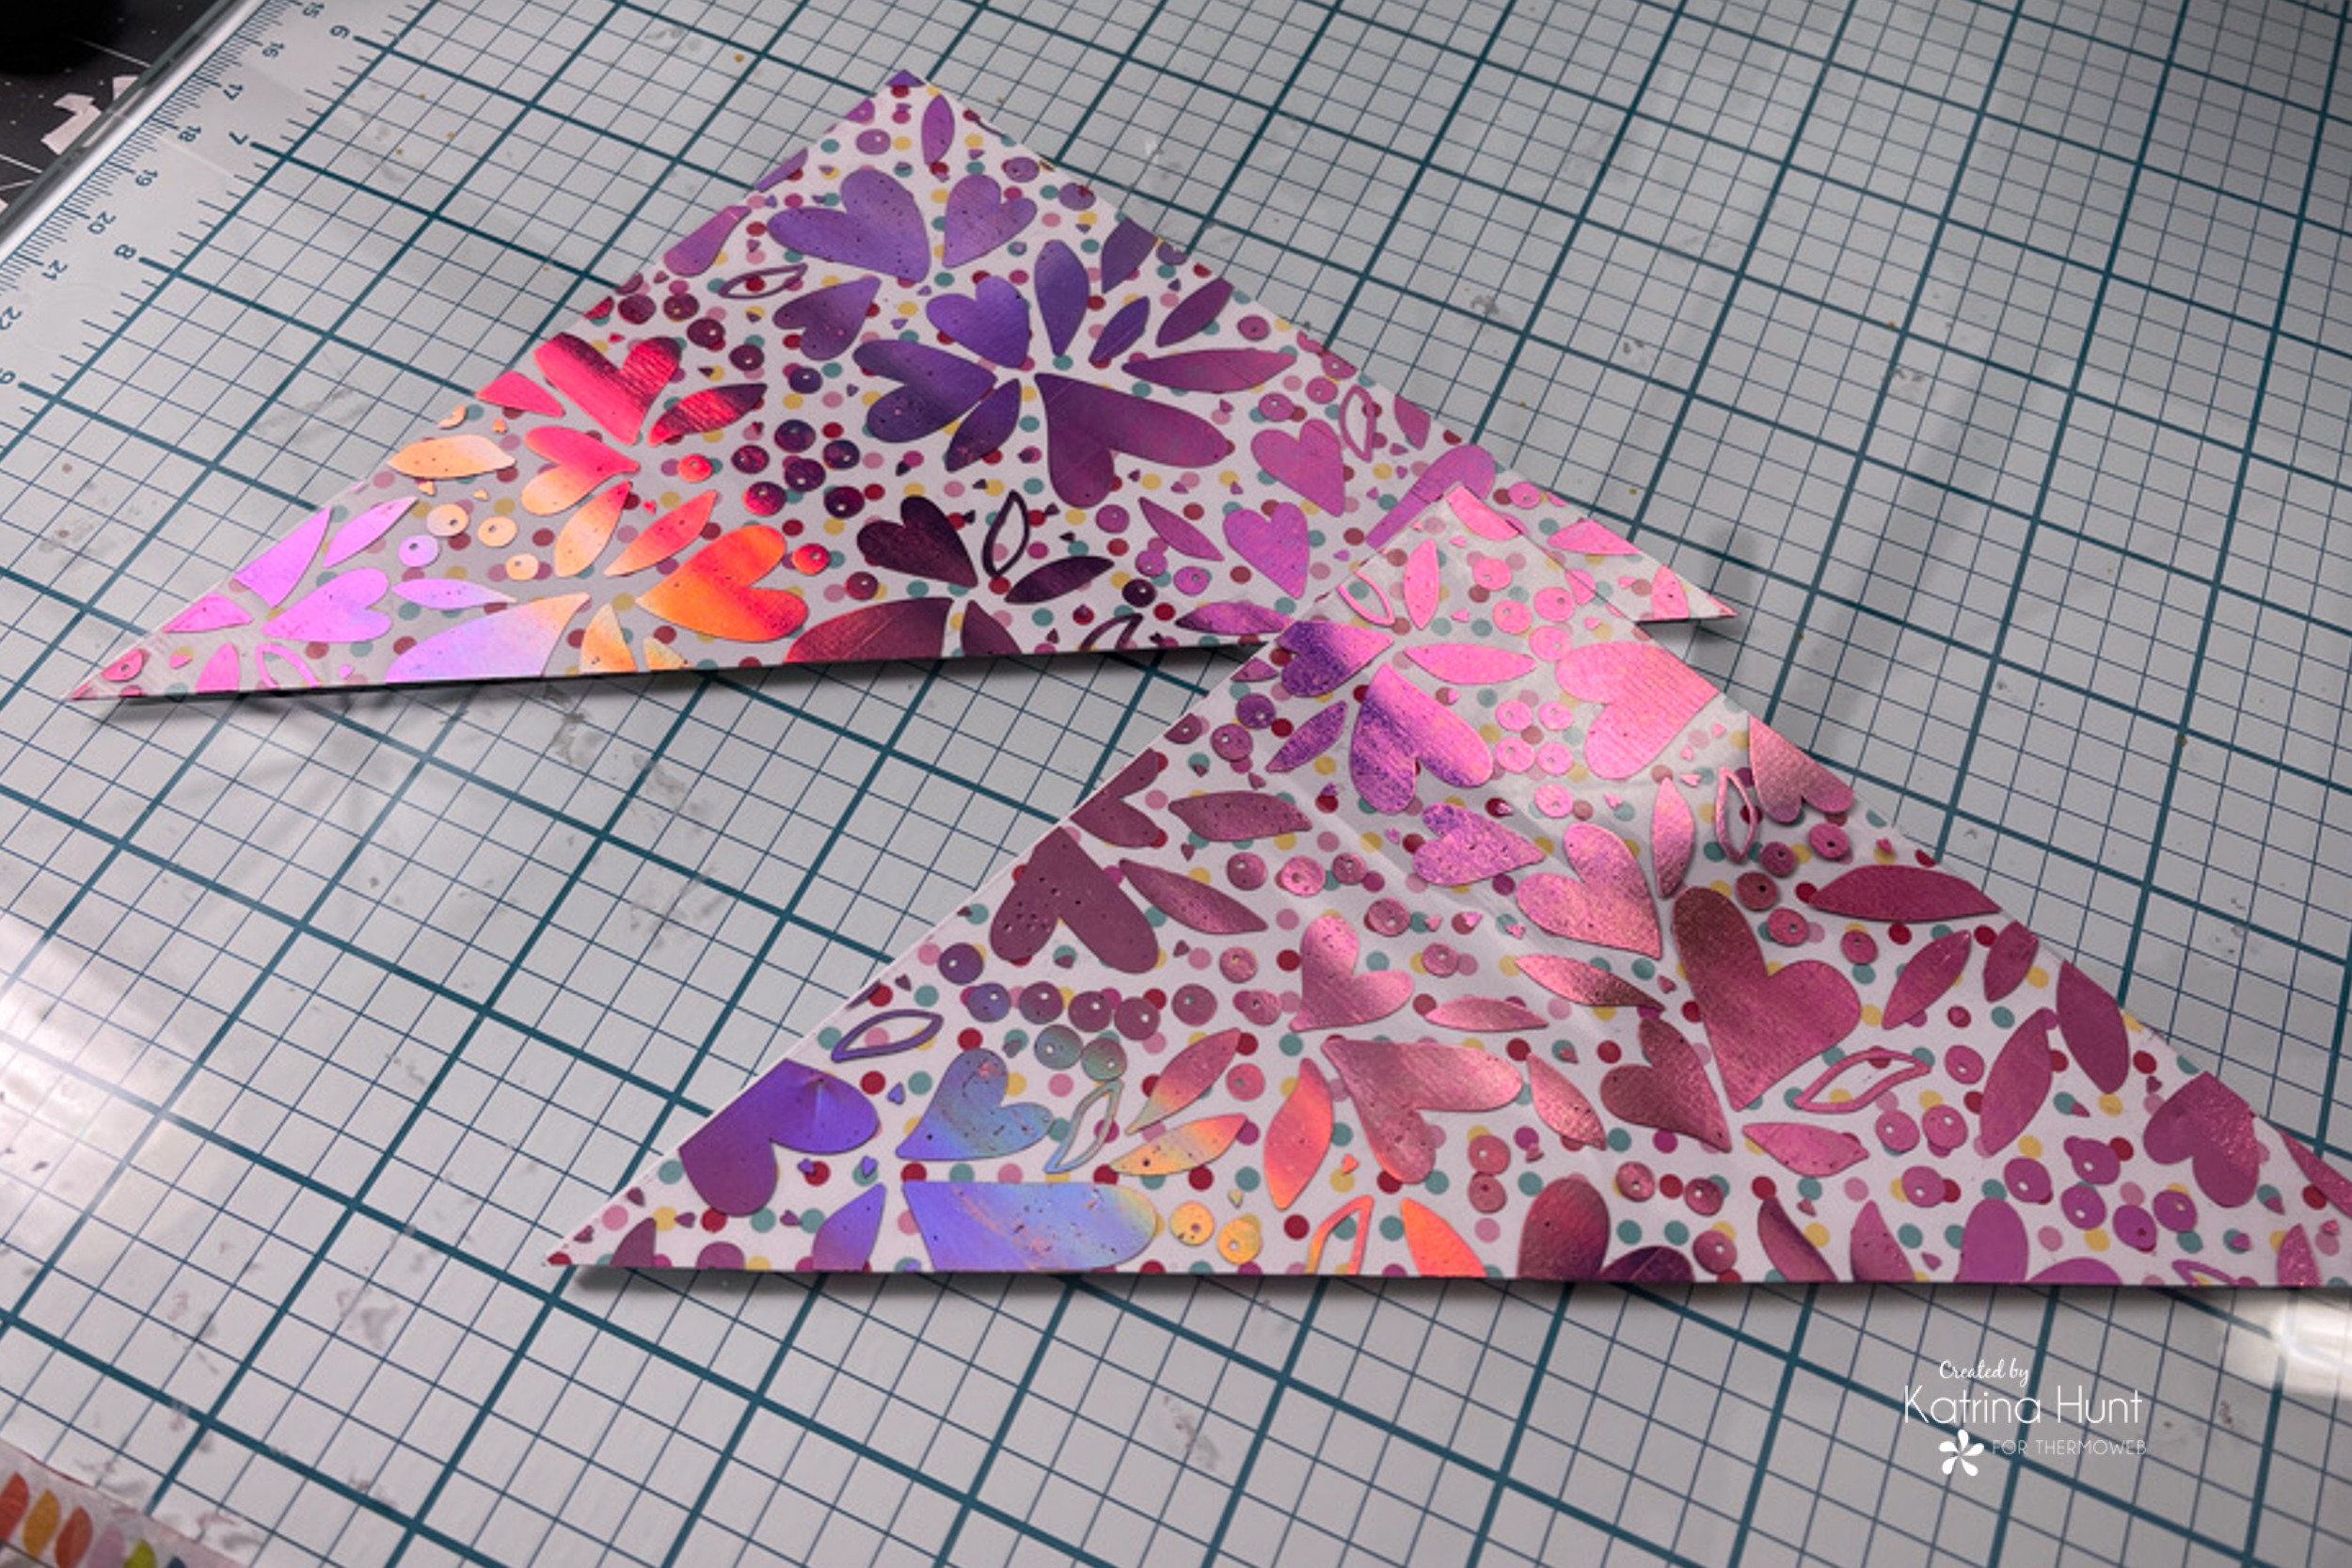 Next, I wanted to be able to “tear and roll” my paper back, so I ran a strip of the Memory Runner XL along the bottom of the triangle to attached to the back of my 12×12 pattern paper that I was using for my background. By doing this, there was no adhesive on the area that would show once my corner was fixed.
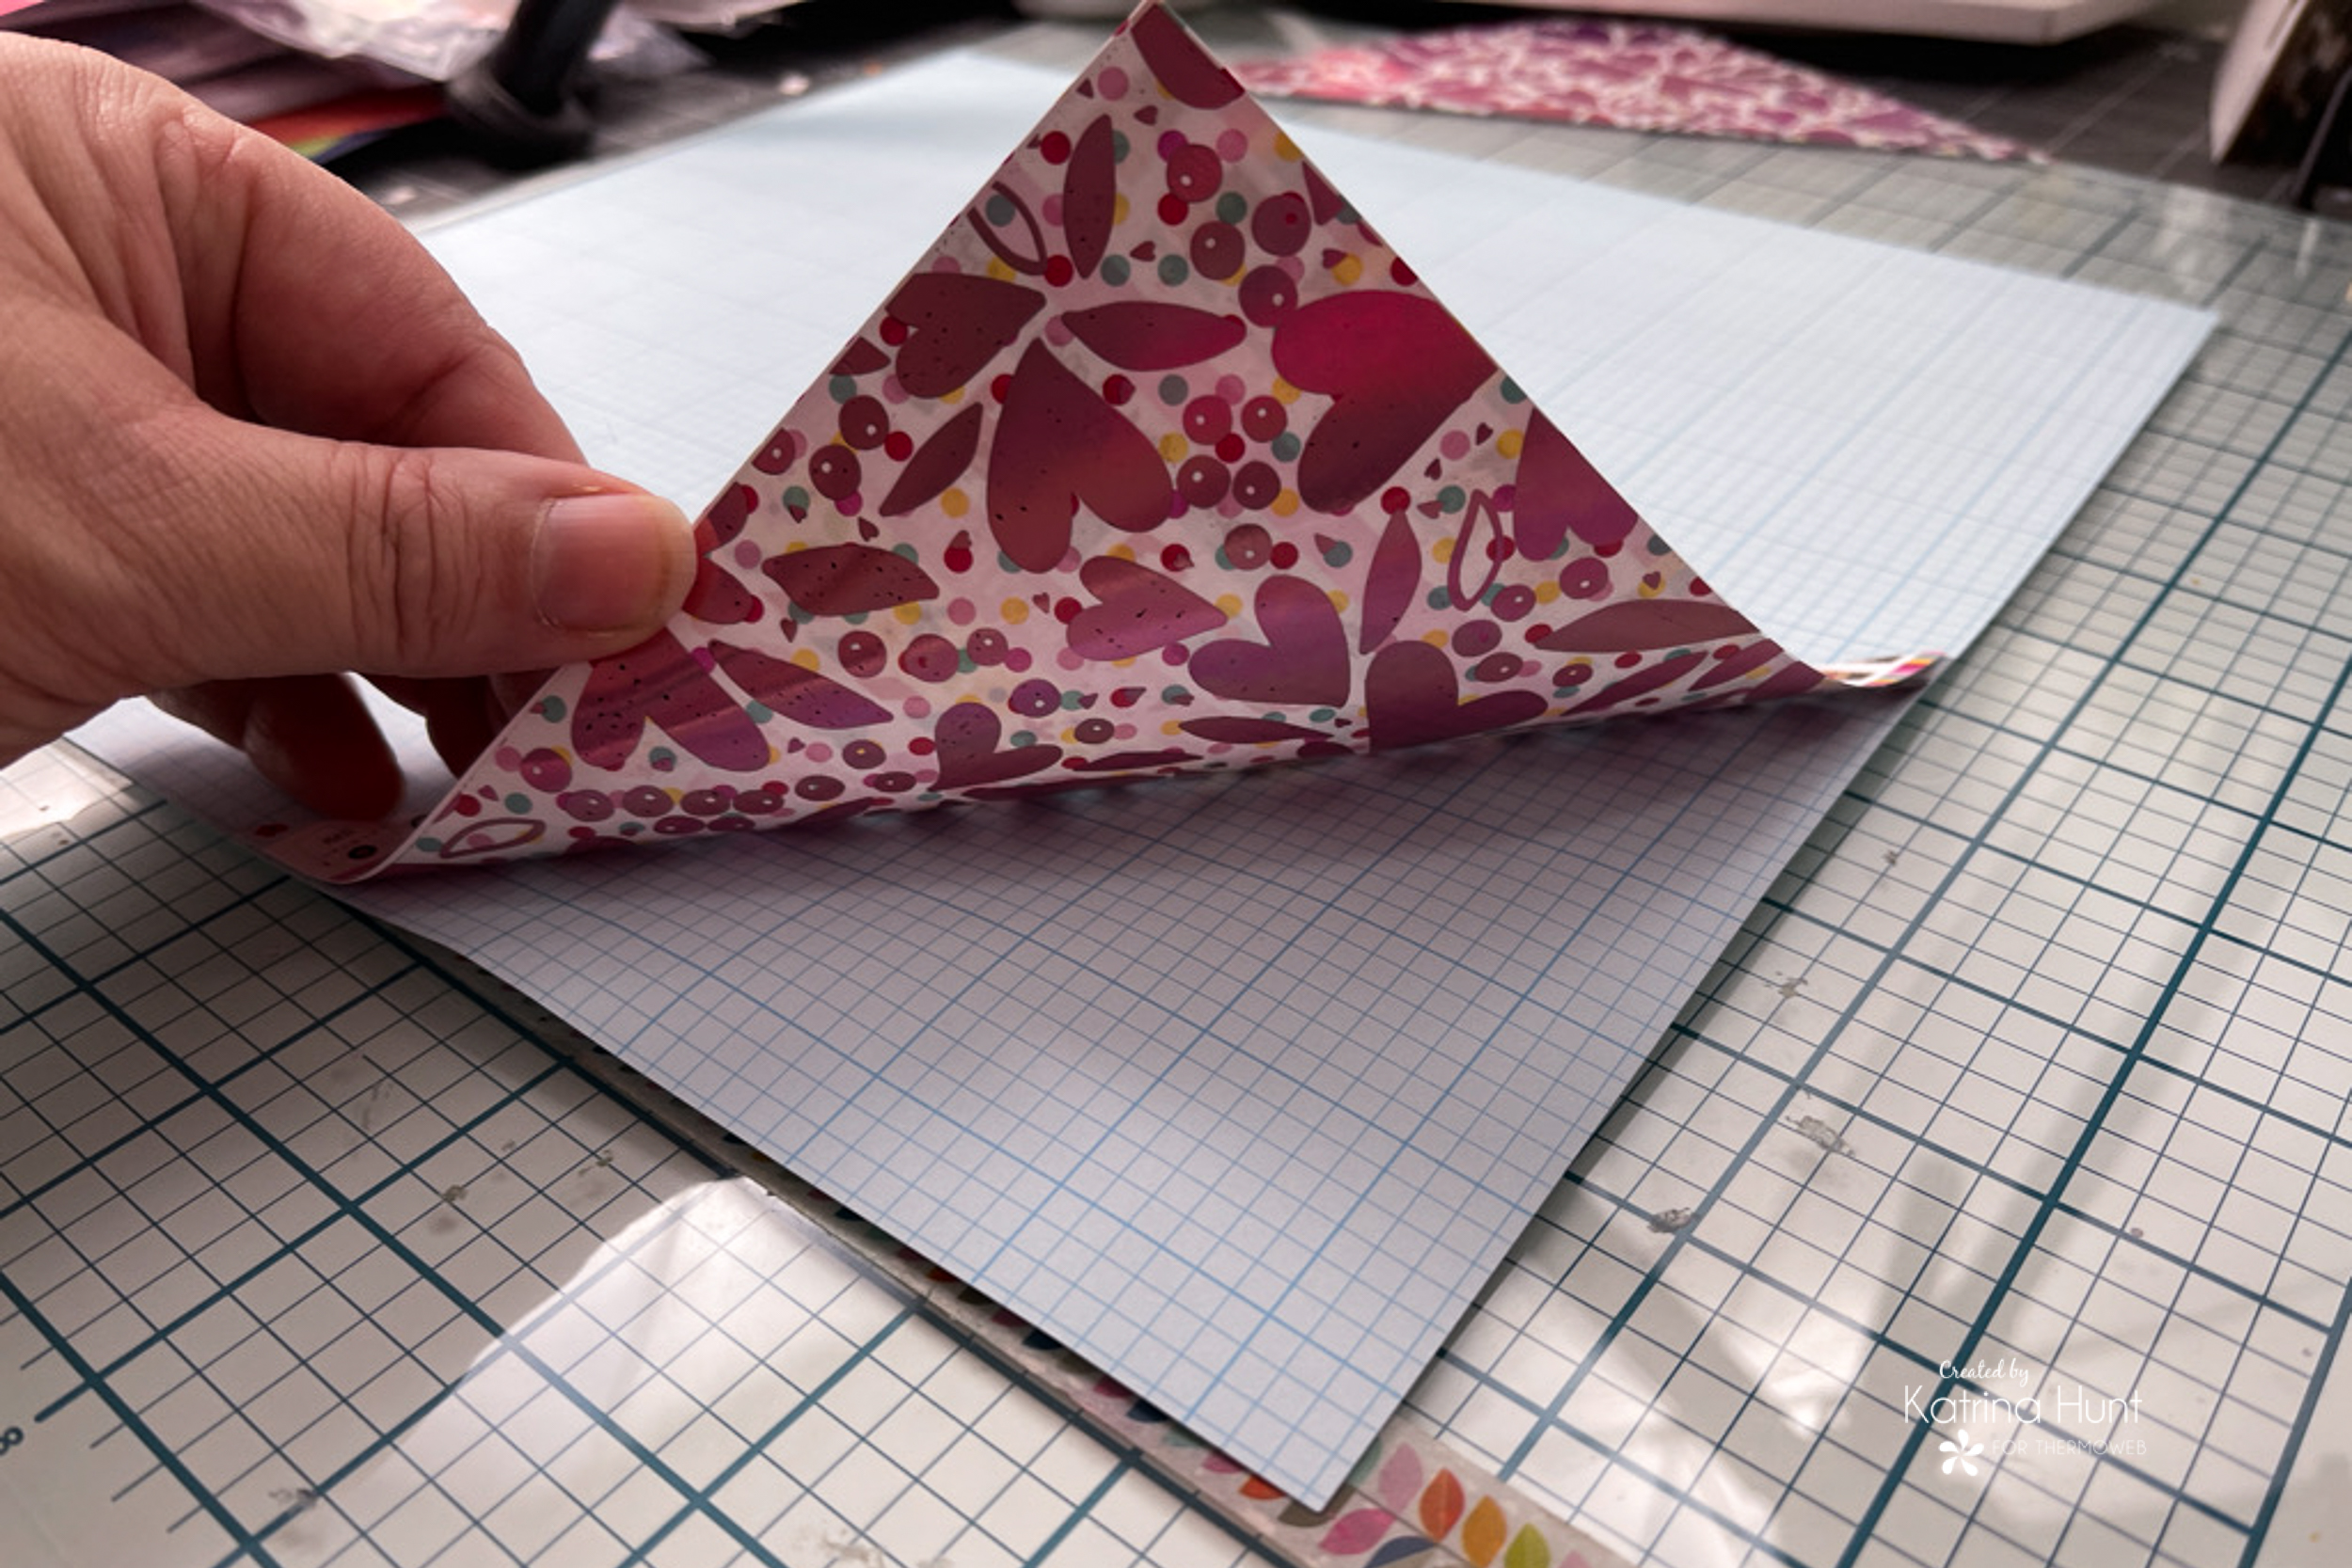
I carefully tore the paper back and off. I rolled a little of the paper back to give it some fun dimension and interest.
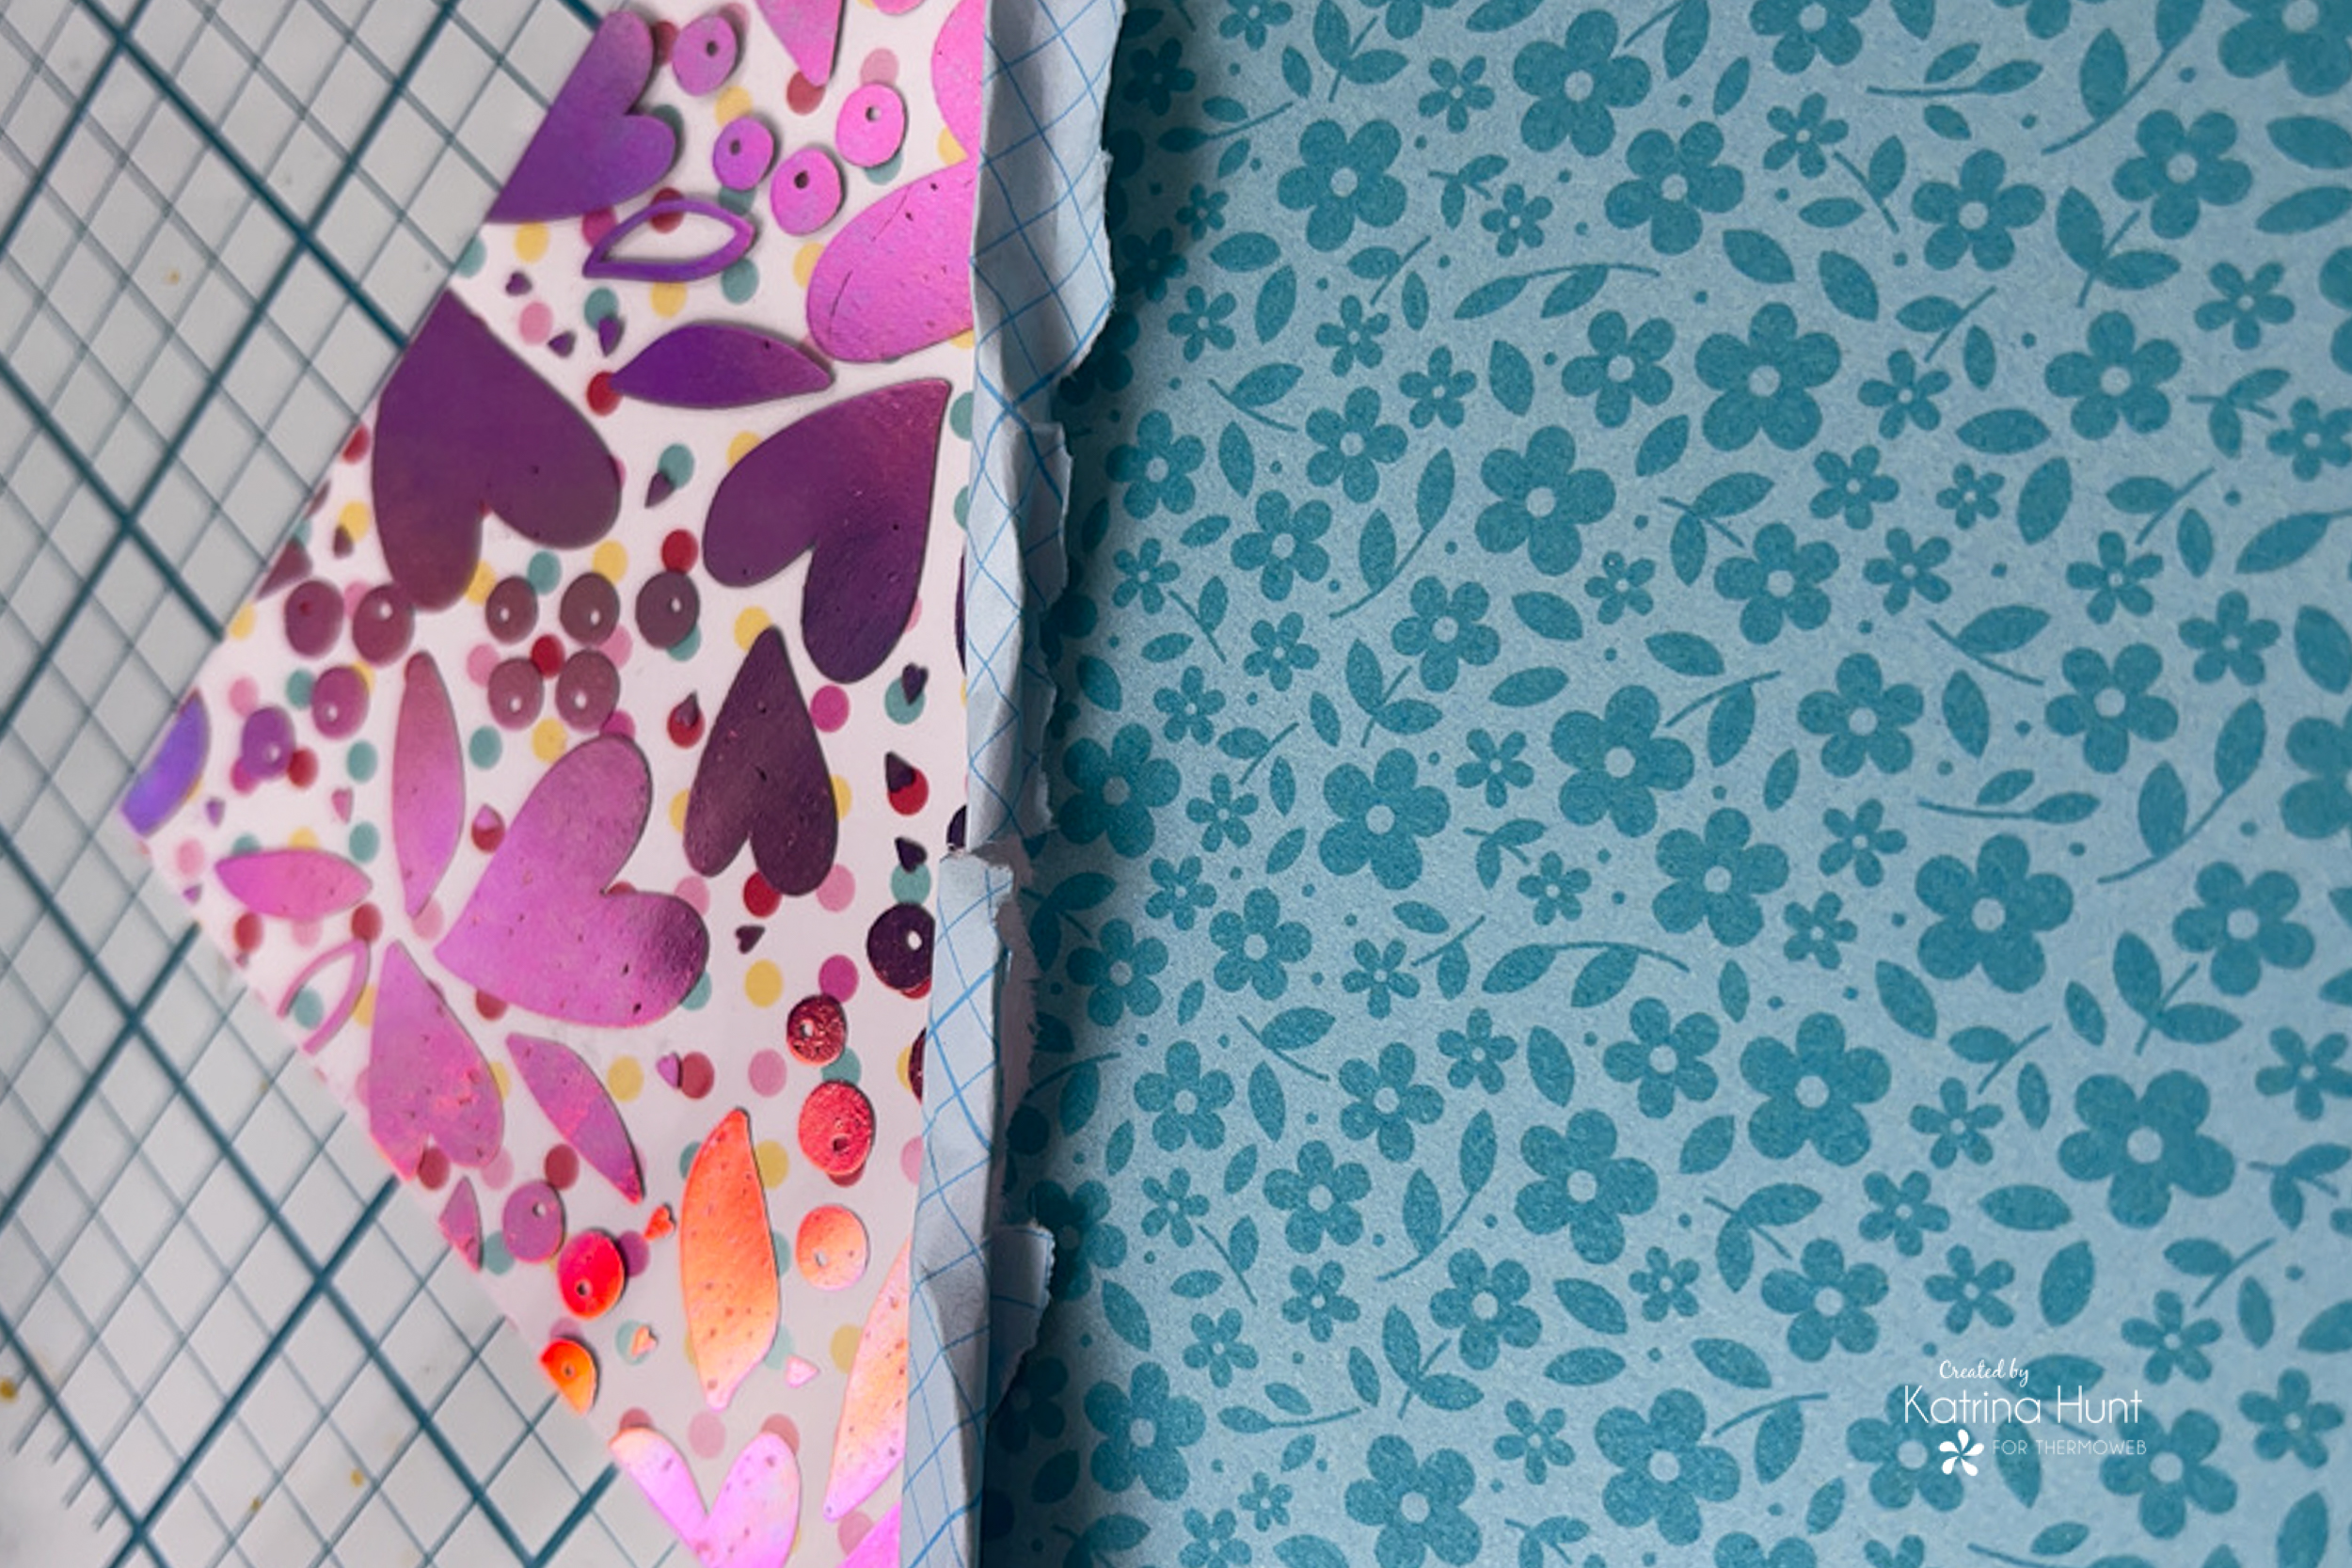
Don’t you just love how this looks? And it would work with ANY of the toner sheets, you would just have to adjust how big your corner area was!
Die Cutting and Foiling the Alphas
After getting the corners completed, I went to work on the title letters. I used the Candy Stripes Card Front Toner Sheet and the Unity Gold Glitter Deco Foil, along with Jane Alpha dies from Elle’s Studio
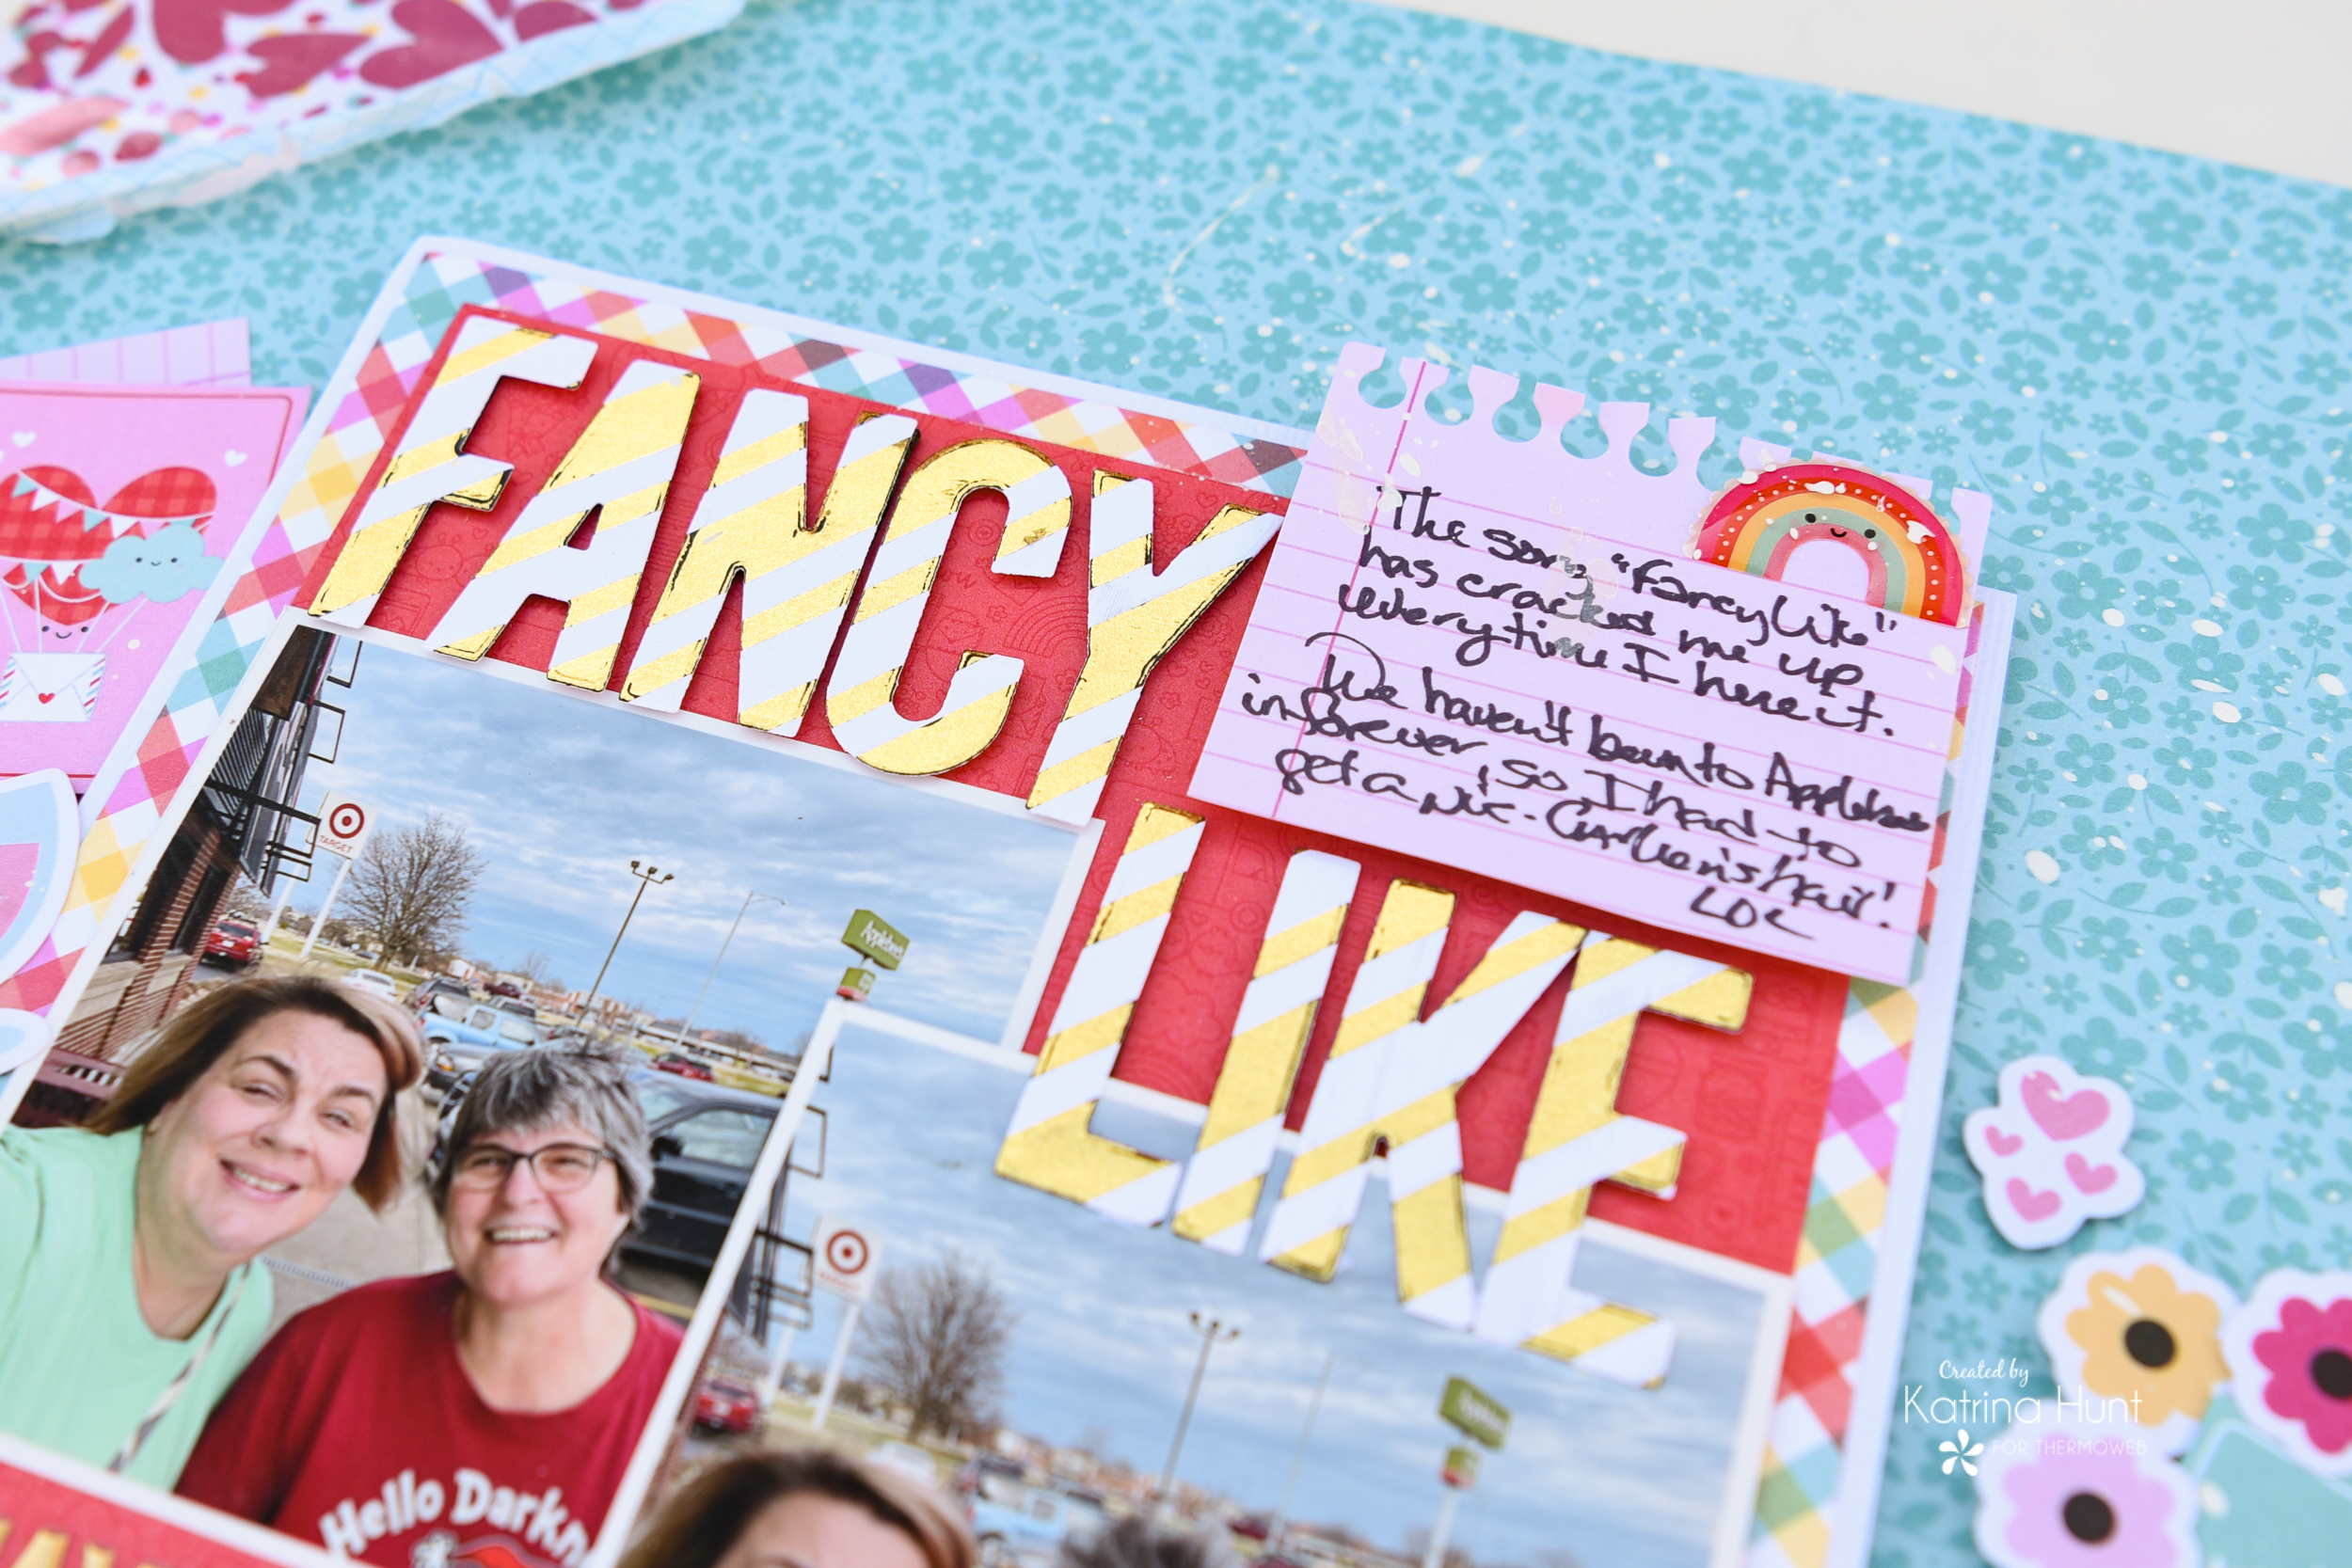
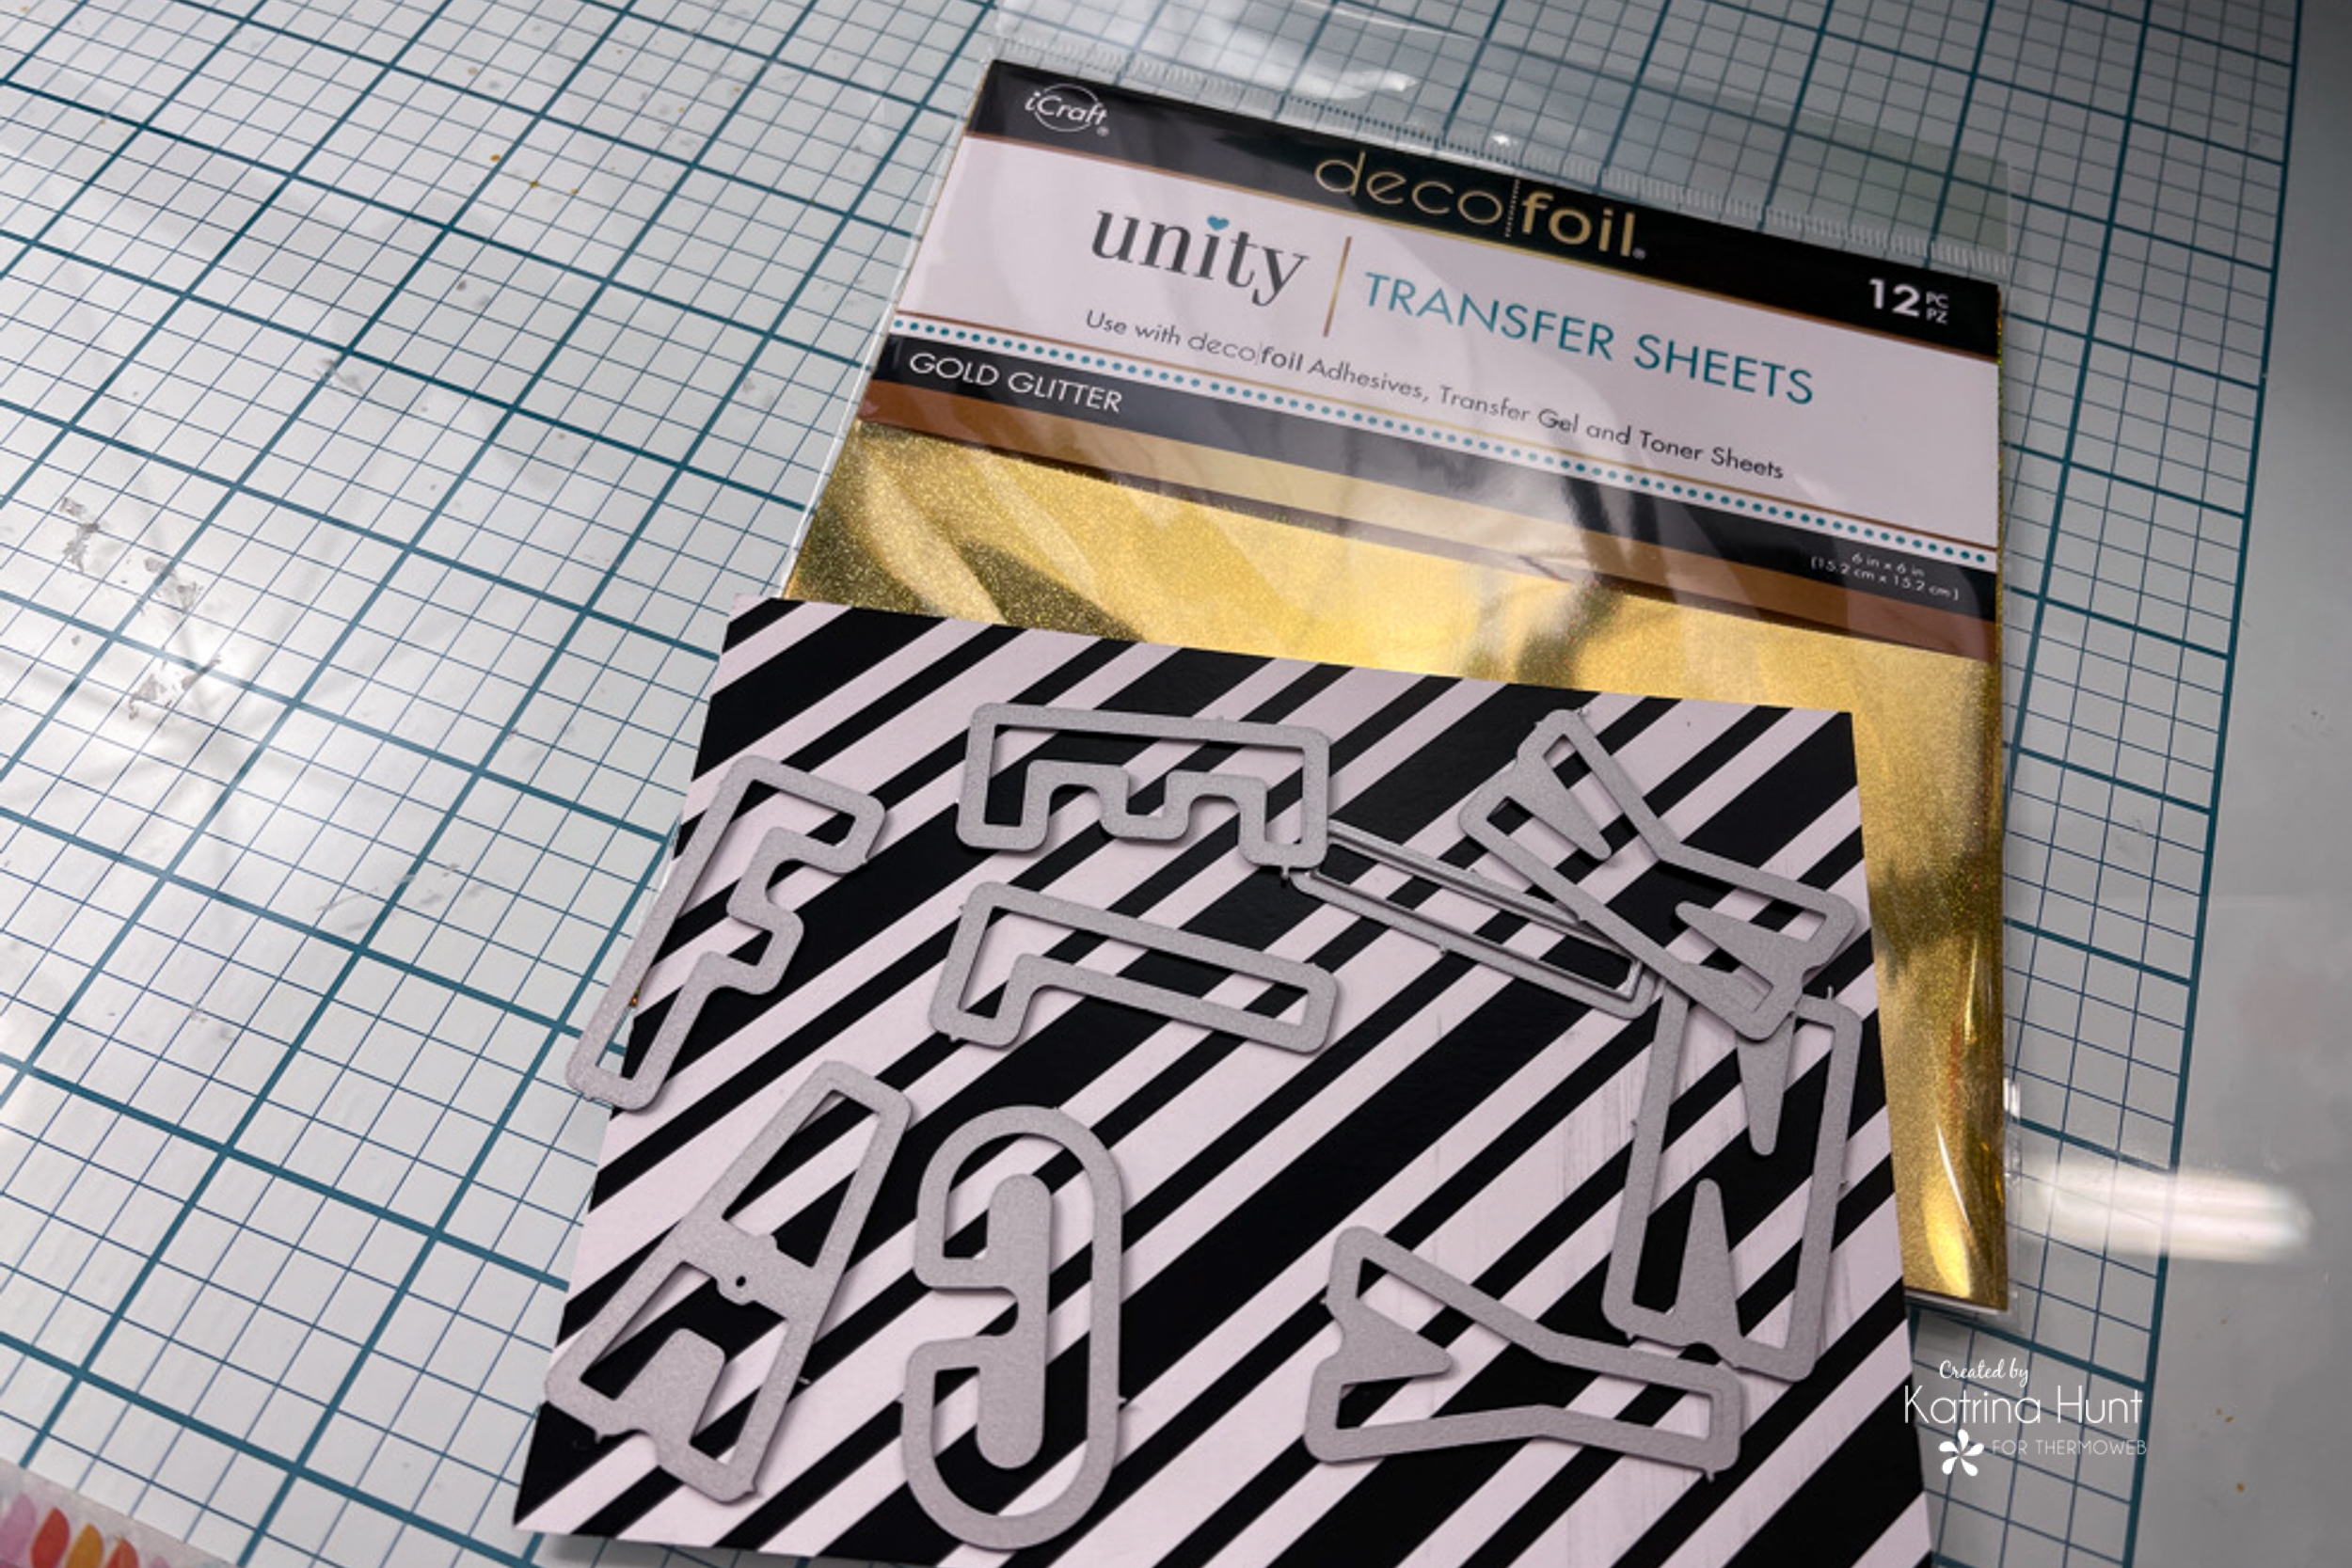
I forgot to take a step-out photo, but carefully lined up the letters for each word and held them in place with tape. This step let me keep the letters lined up, along with the stripes on the toner sheet for each word, making them look like the stripes met all across the word. I did die cut the letters before foiling.
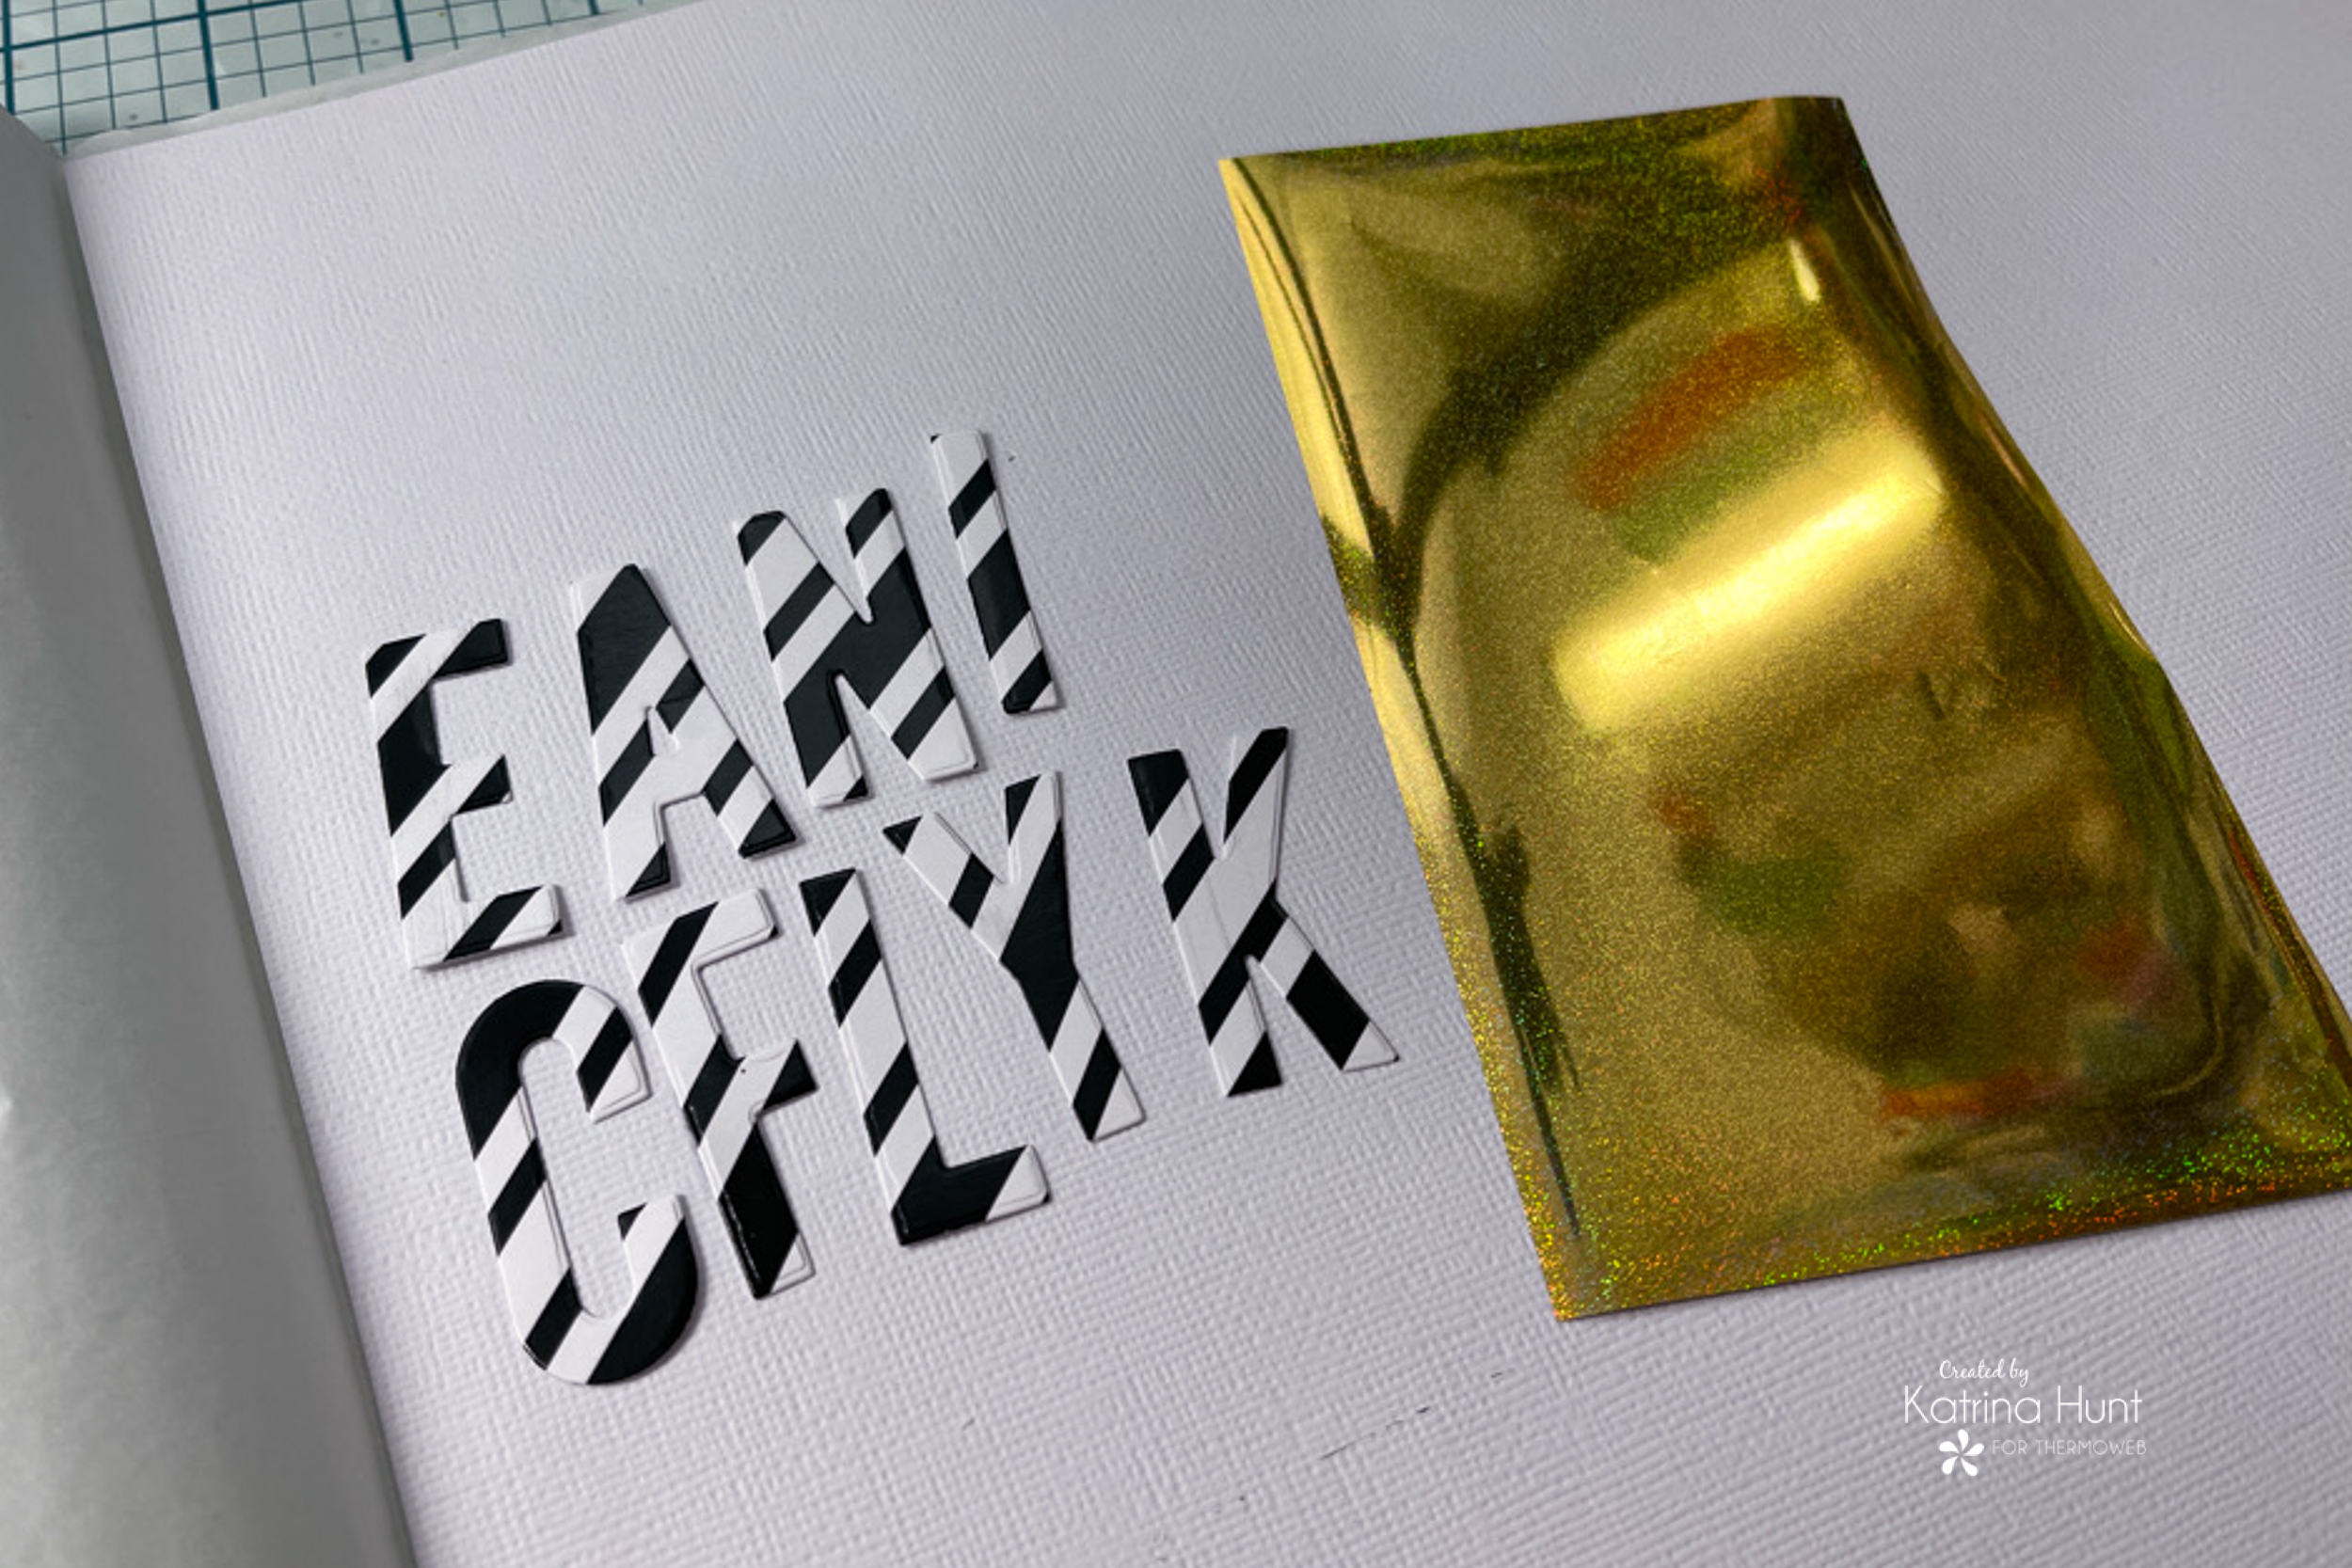
Once the letters are foiled, use some tape to hold them in place again to apply the Gina K Foam Tape in Black on the back of them. Those little scissors are PERFECT to cut foam tape! Peel all the protective covering from the foam and then place the letters down before removing the tape. This will keep your letters lined up nicely. 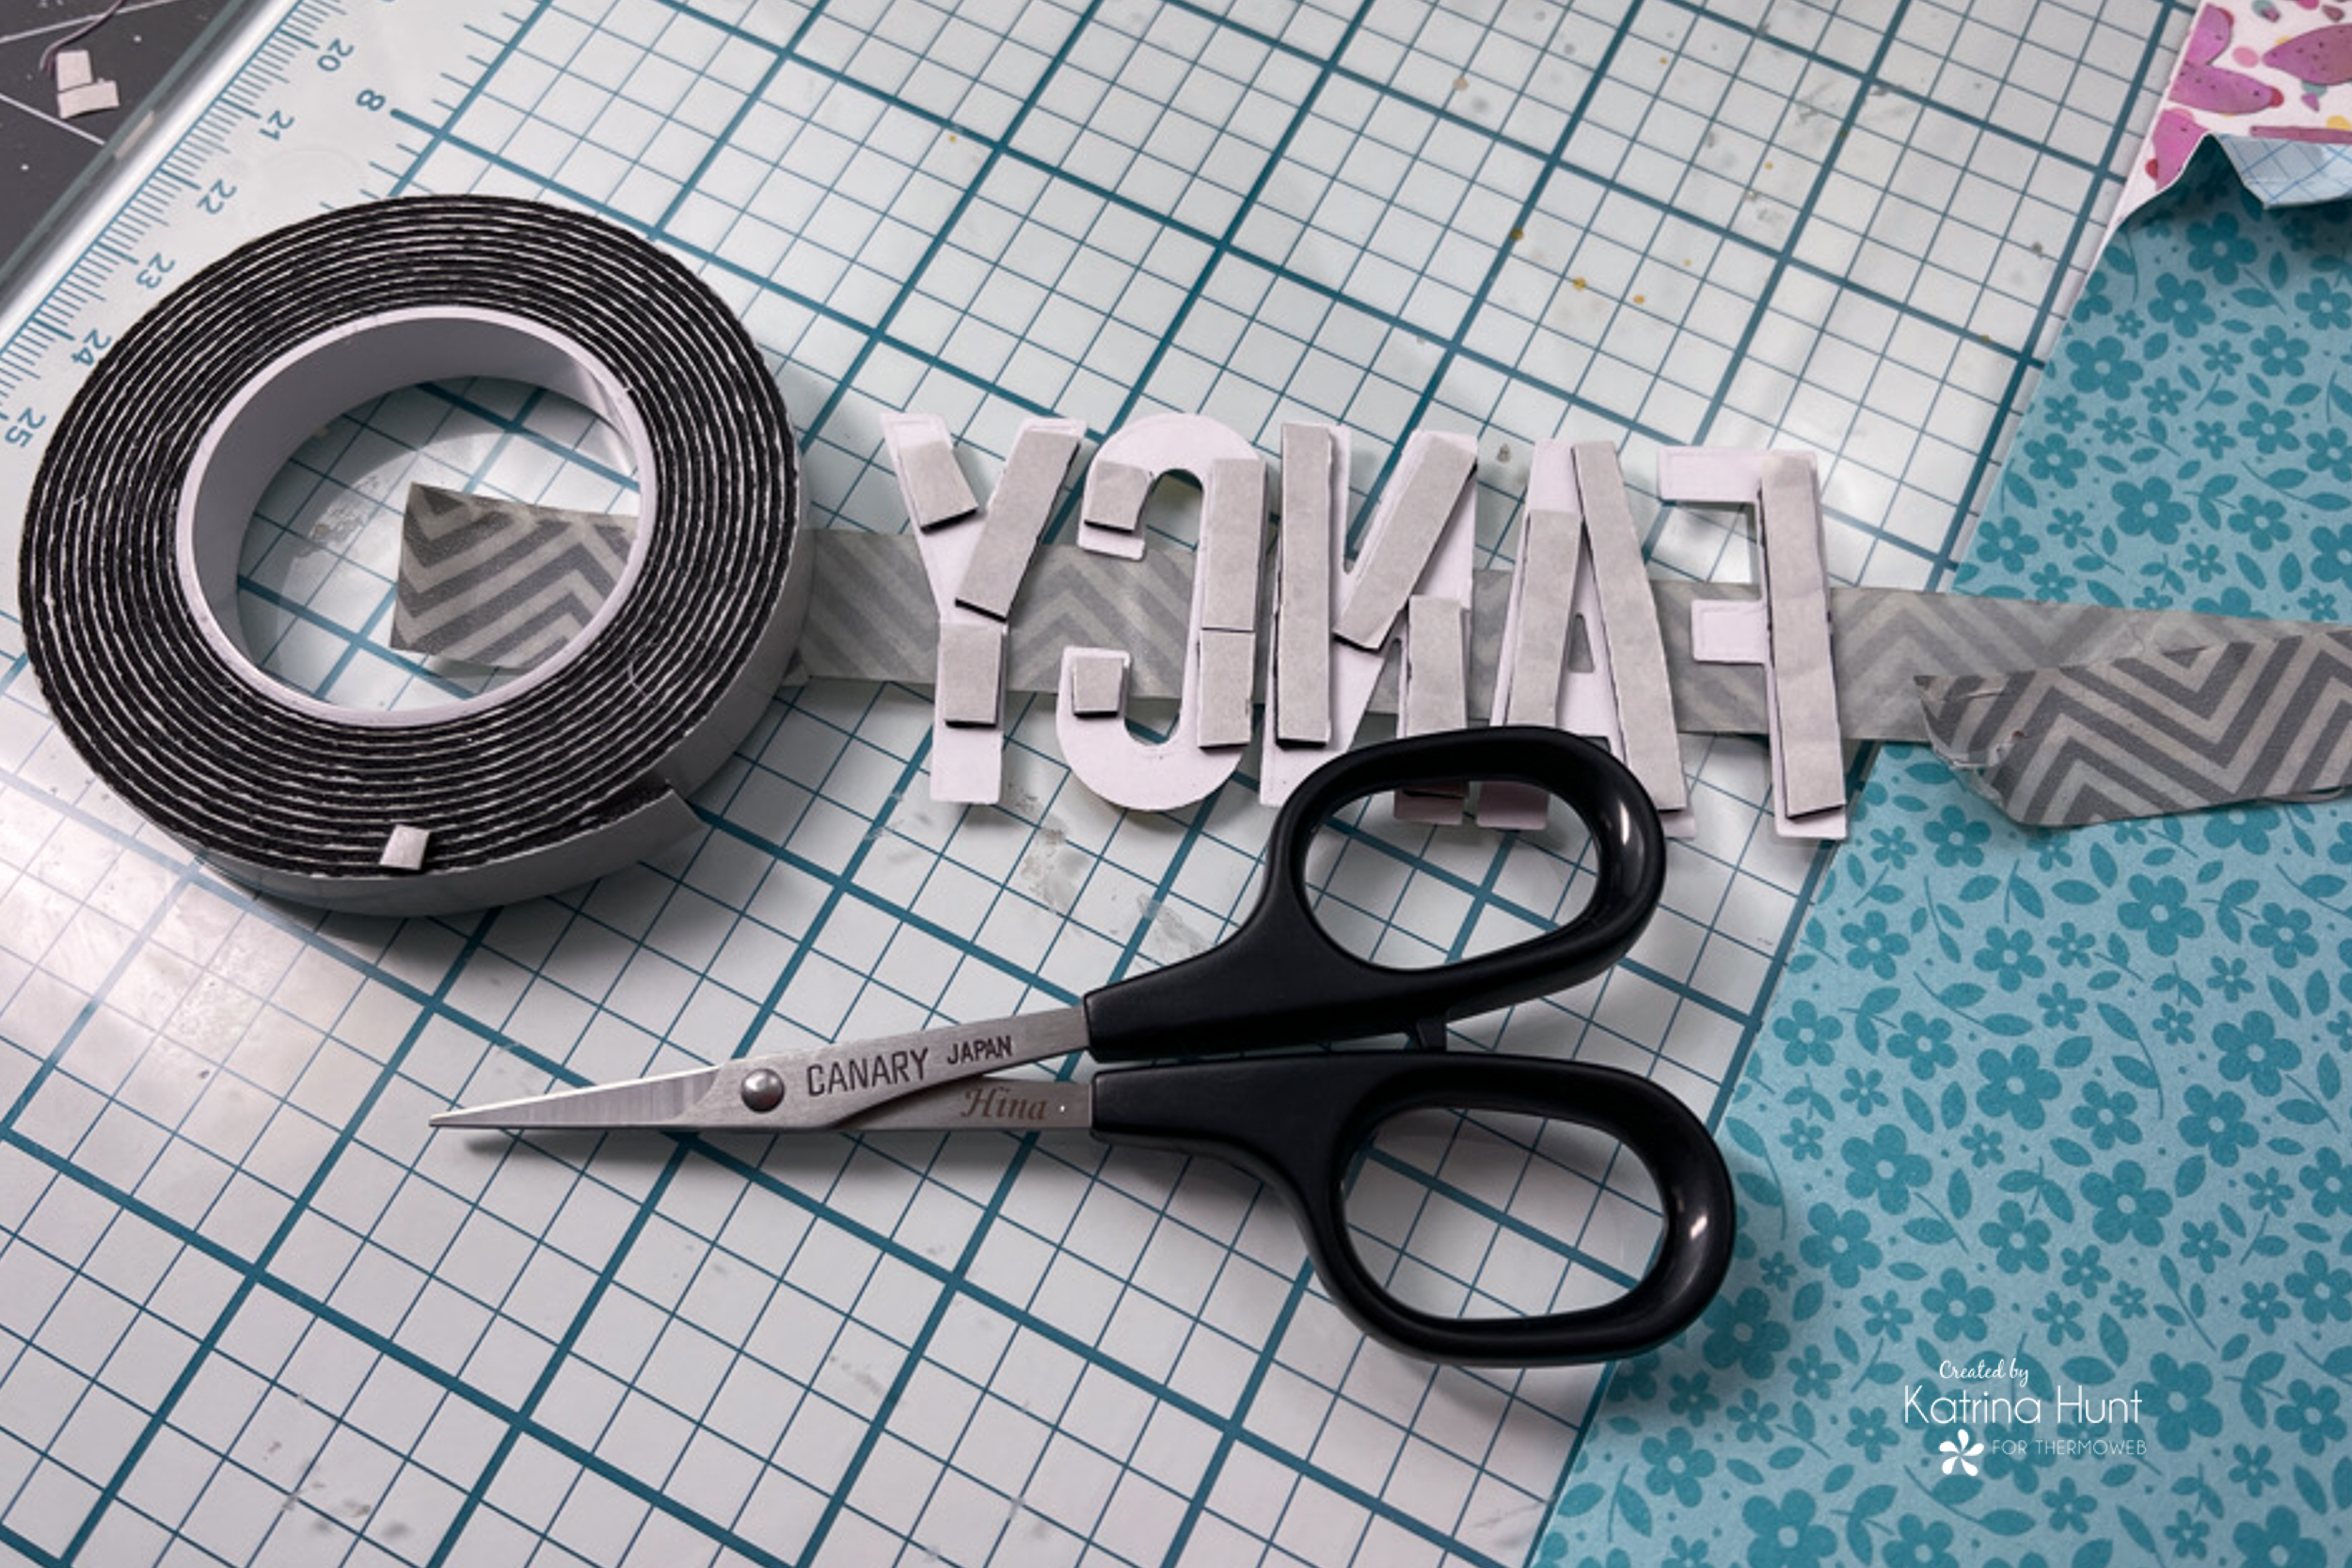
Finishing Details
To finish up, I wanted to create a fun scene around my picture area. I did start with the middle area (of course!) and using my Memory Runner XL, along with foam tape created a square center focal point.
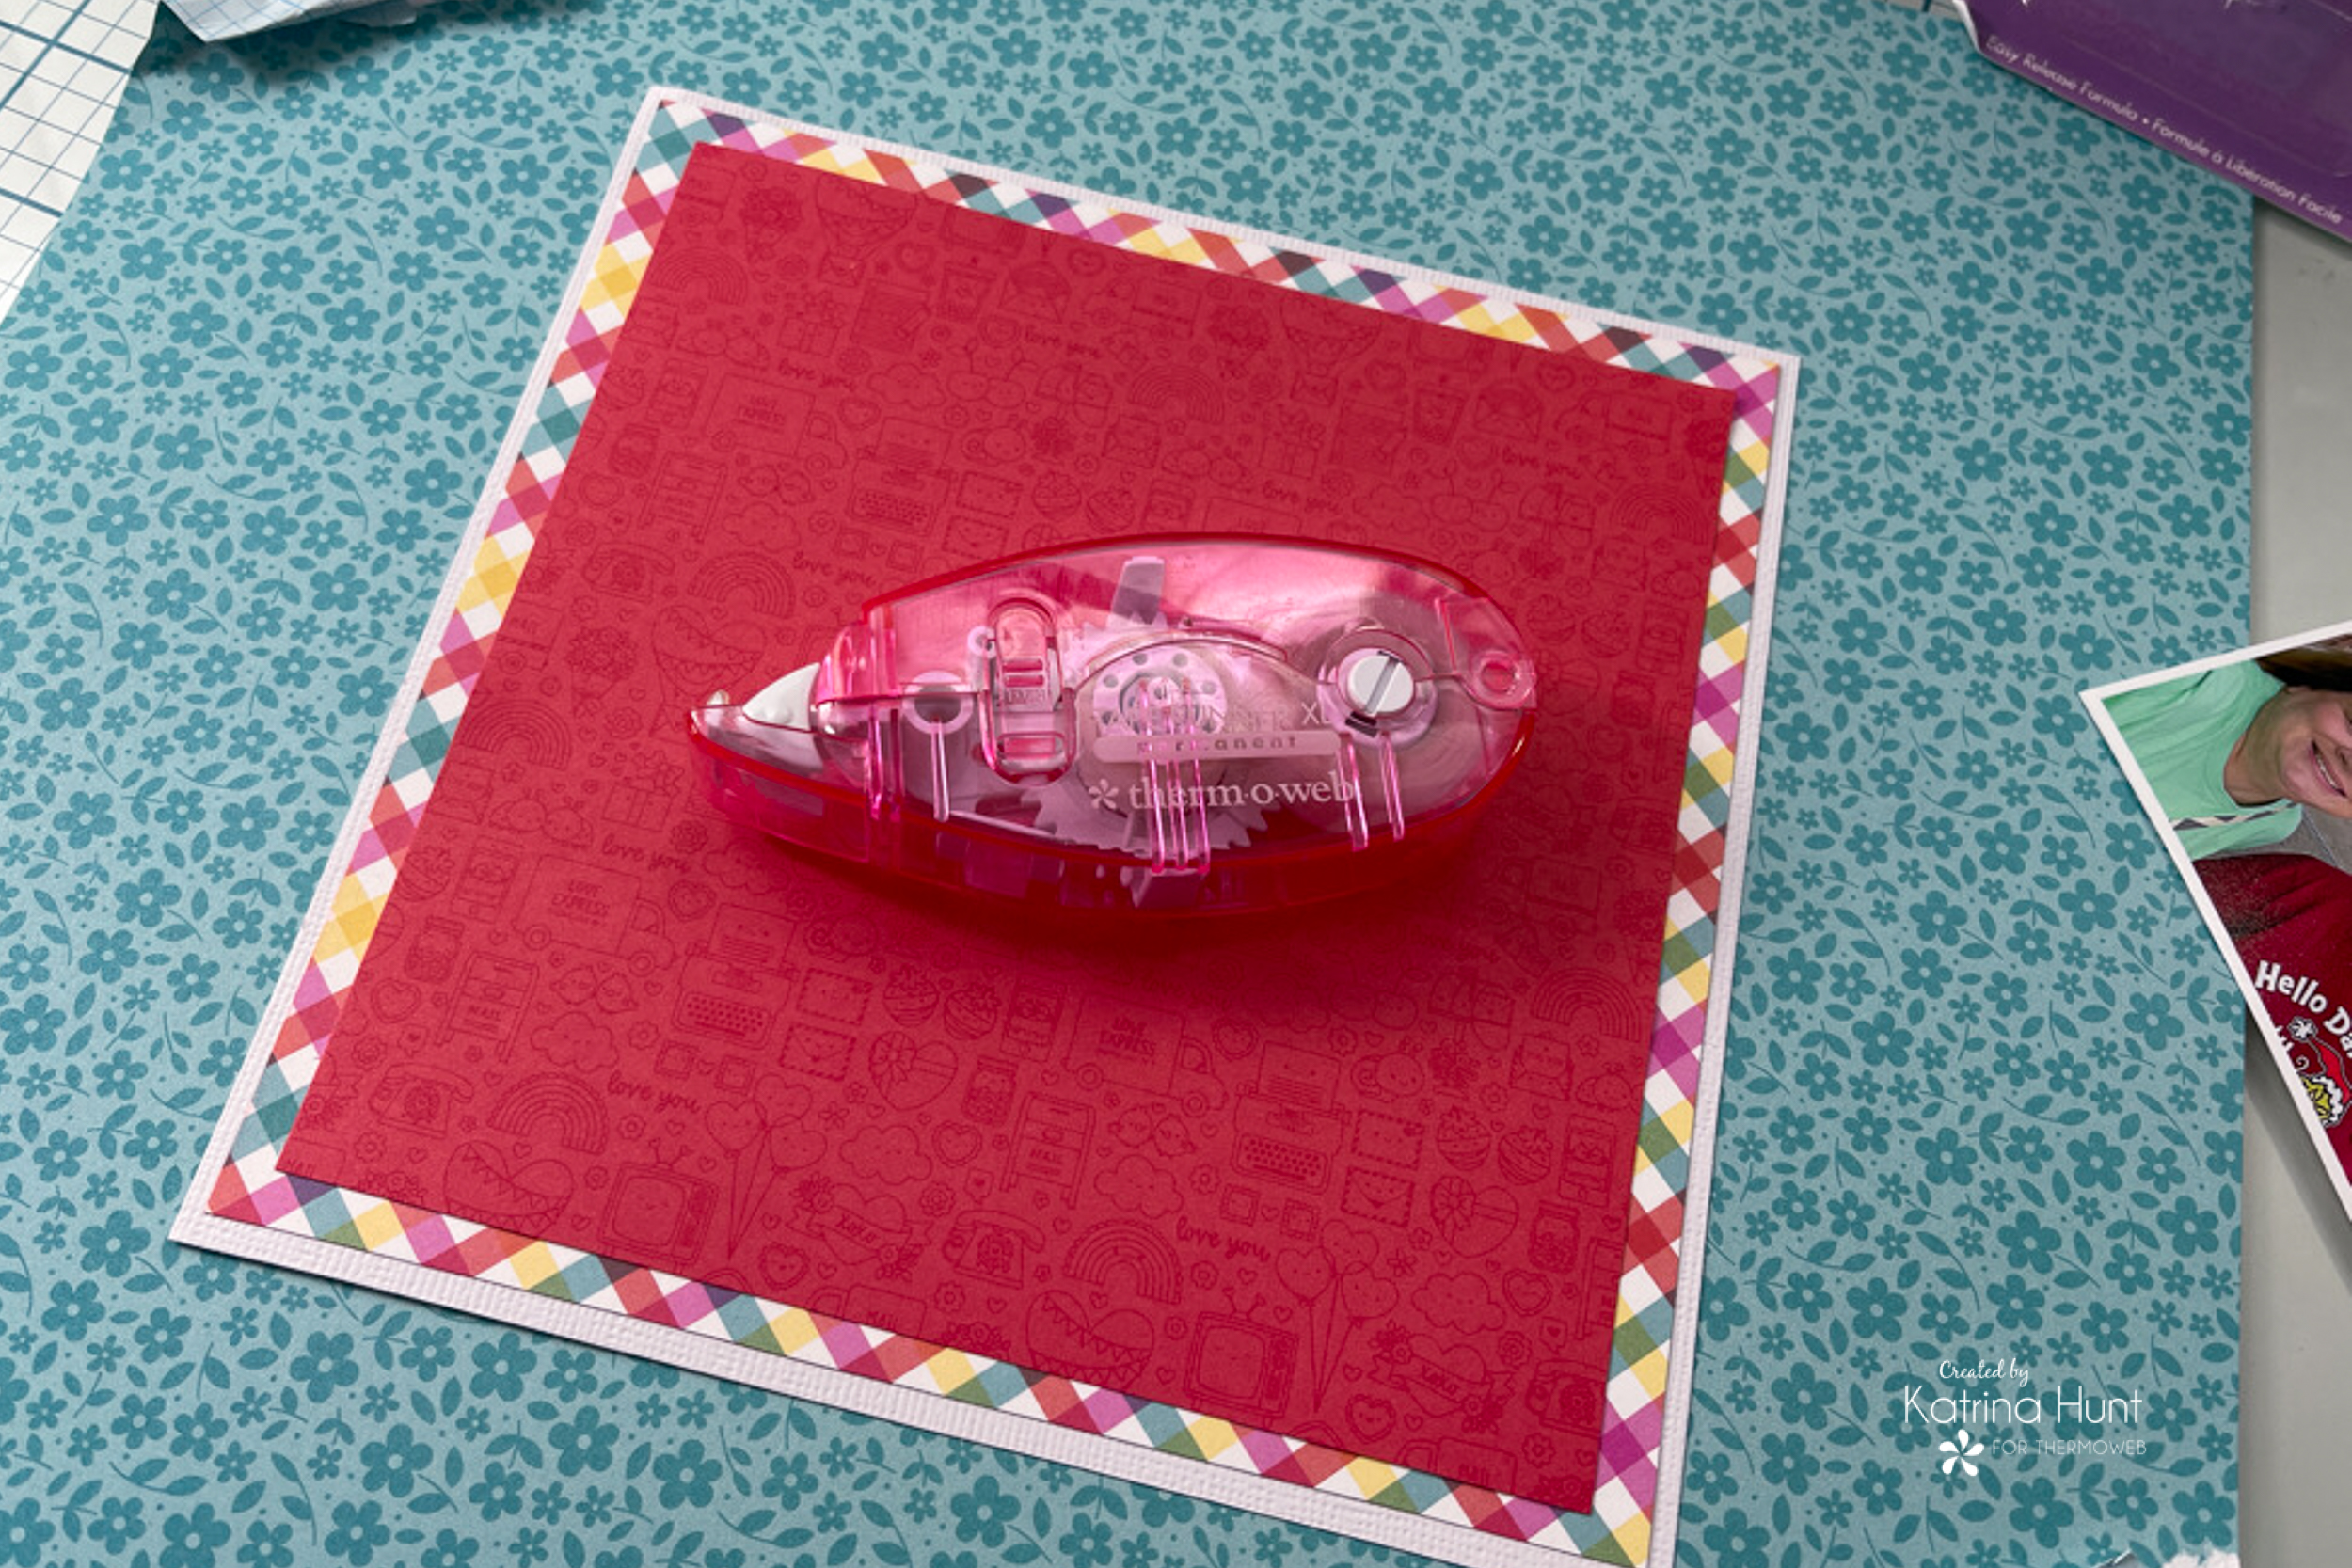
Once that focal point was created, I added embellishments from the collection around the edges and bottom. I used various foam tapes and squares to create the little scene. At the very last, I covered the center area where the pictures were and then splashed watered down white acrylic paint all around the background. I even got some on the foiled areas and I like how it looks!
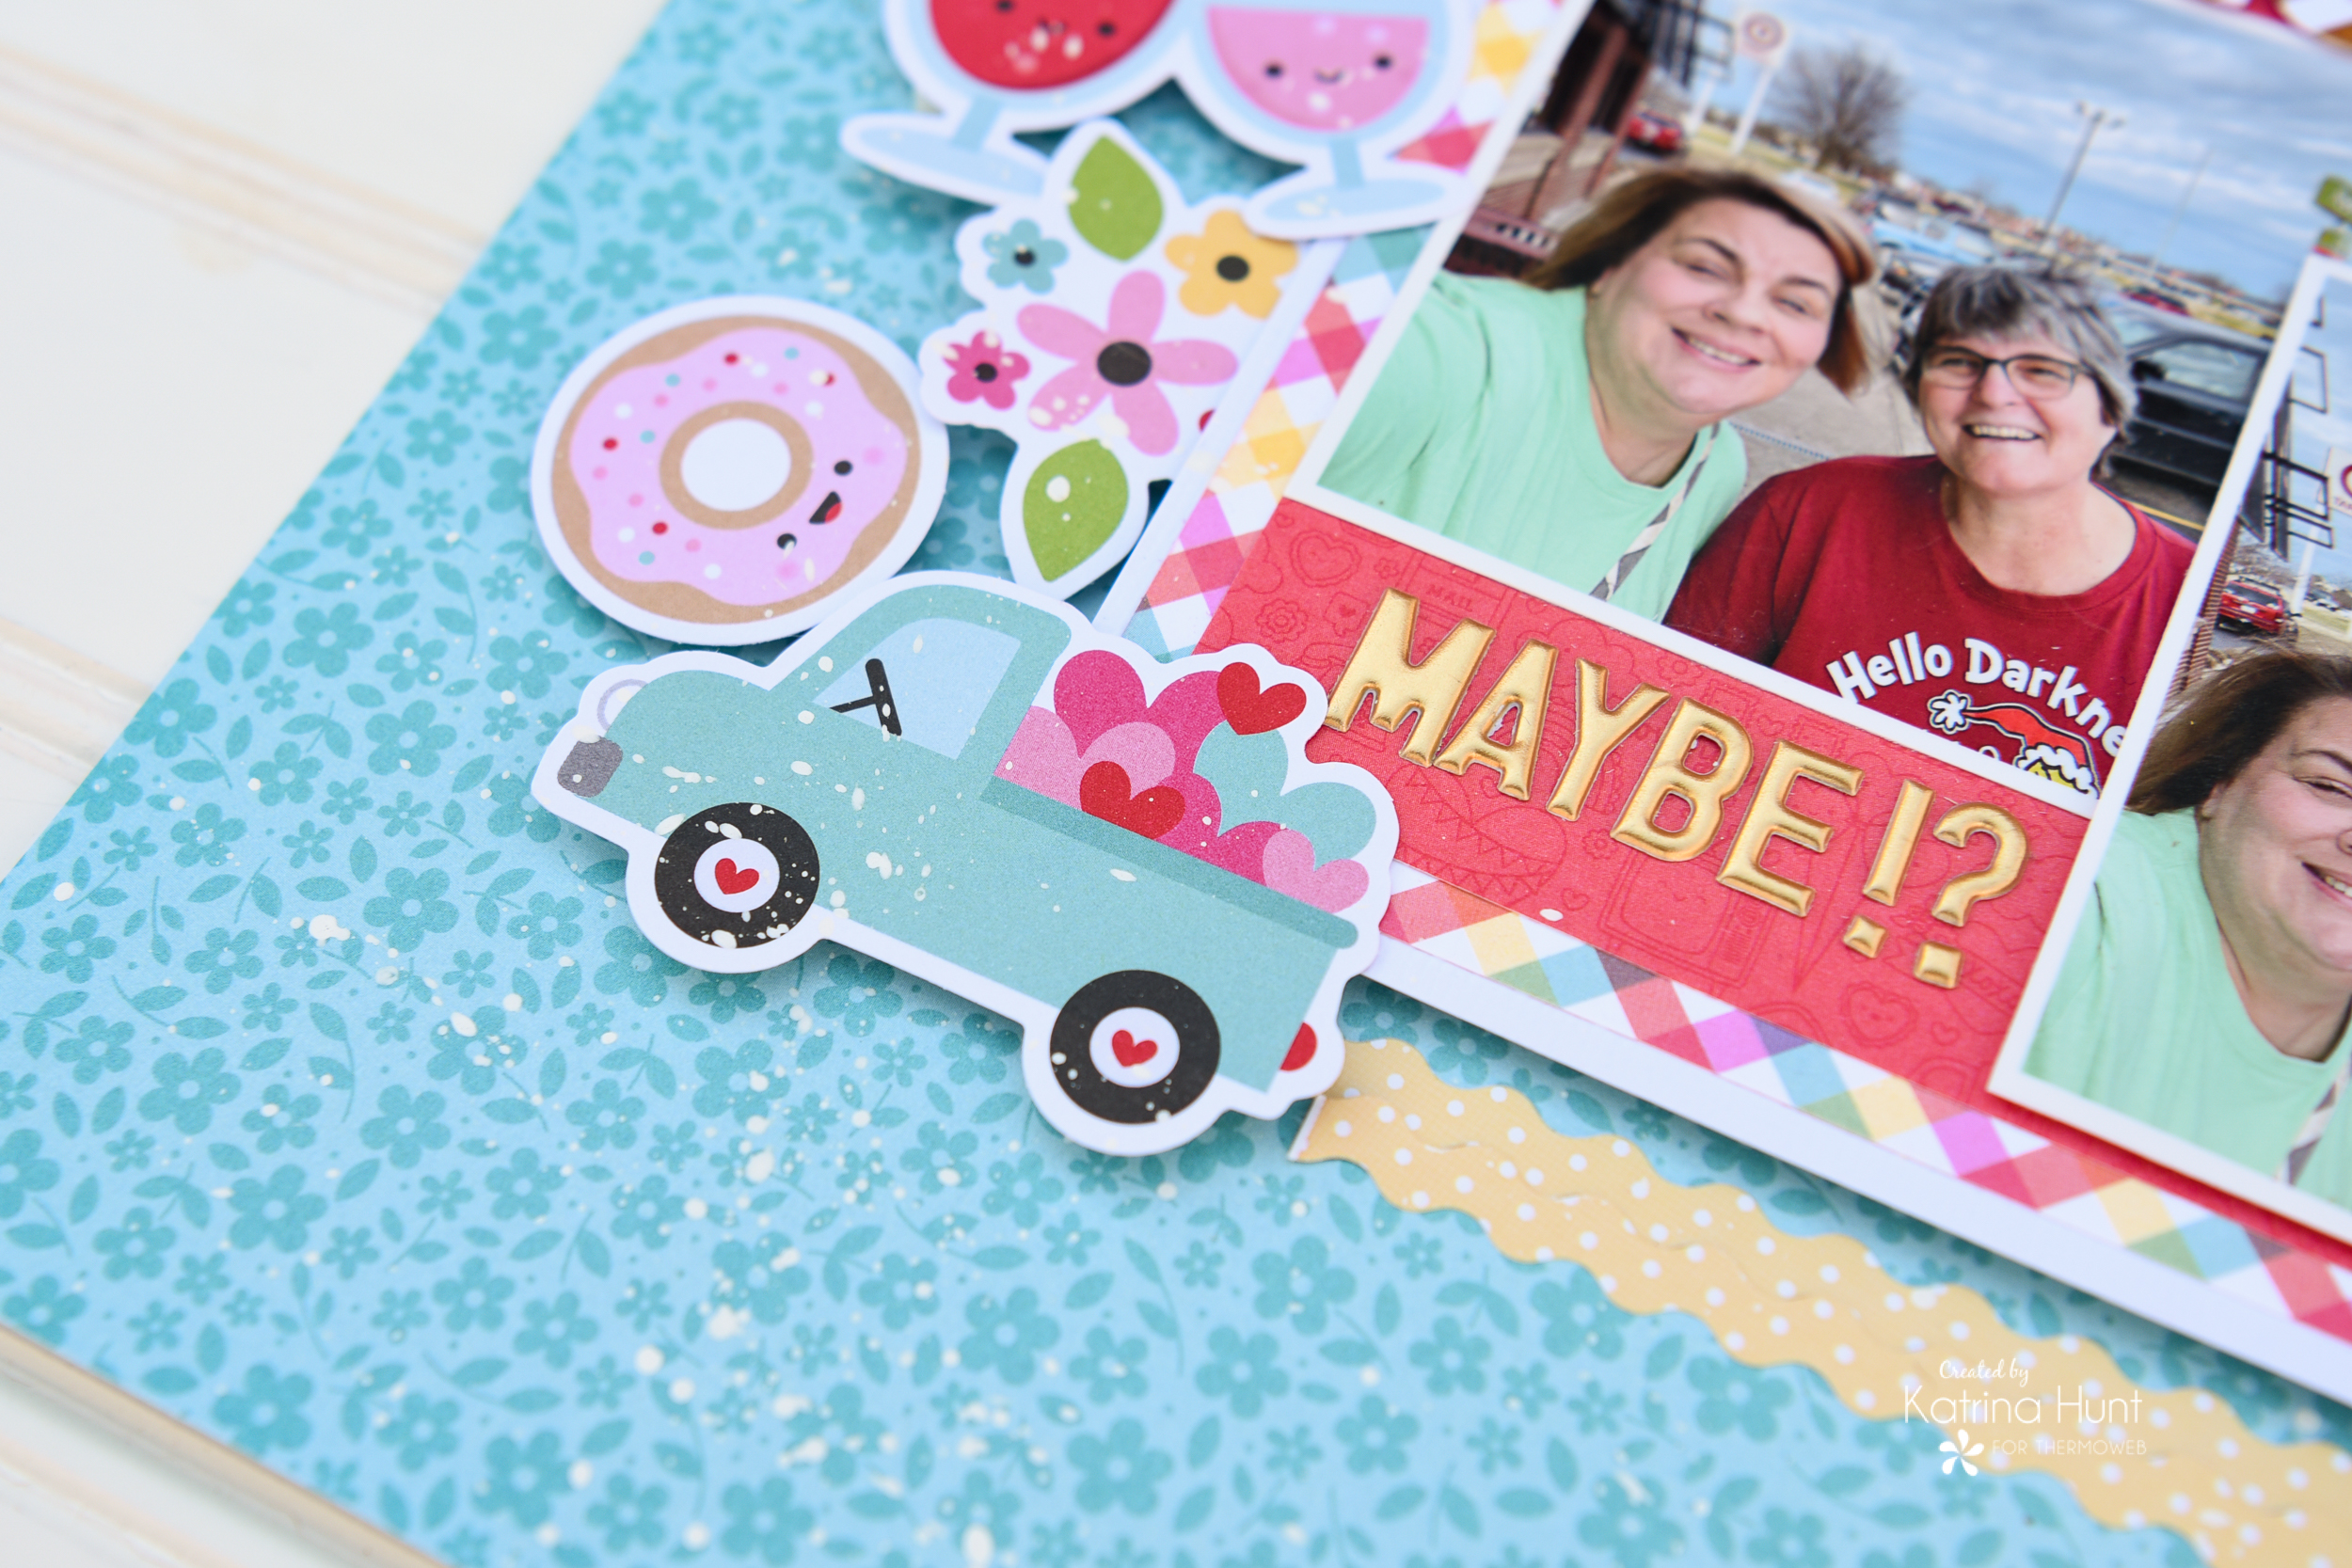
I just love the peekaboo look with the toner sheets, and I WILL be doing that again soon. I think the kraft toner sheets would look amazing with a fall-type layout!!! Don’t forget to shop the SALE HERE!!! Have a wonderful day!!!
This post contains affiliate links. For more information, see our disclosure HERE.

Be sure to join us tomorrow for a new Live with Luynnea! She’ll be sharing some helpful tips on how to work with the negative pieces of foil. Join Lynnea on the ThermOWeb YouTube Channel tomorrow (Wednesday 26th) at 11am CT/ 12 pm EST for all the fun!

[…] Visit the Therm O Web blog for all the details. […]