We’re very excited about this week…it’s the first time we’ve teamed up with our friends at The Rabbit Hole Designs!
And you may be new to them as well because they are a newer company in our crafting community! If so…here’s a little bit about them: The Rabbit Hole Designs, a small company from Southern California, started in 2018 by real-life crafty friends Heather Ferguson and MaryAnn Samuelson. Heather and MaryAnn strive to bring products that are fun and creative with a dash of quirky and sassy to the crafting community. Rabbit Hole Designs products are proudly made in the USA using the highest quality photopolymer for stamps, Industry-leading 0.3mm thick, laser-cut mylar for stencils and Teflon coated 100% steel for dies.
We hope you’ll stop by The Rabbit Hole Designs website to see all the amazing and creative products they offer! And visit their blog for projects from their talented designers as well!
Kicking this off this week is Wendy Cuskey with a creative trio of Halloween cards we know you’re going to love!
Halloween Cards with The Rabbit Hole Designs
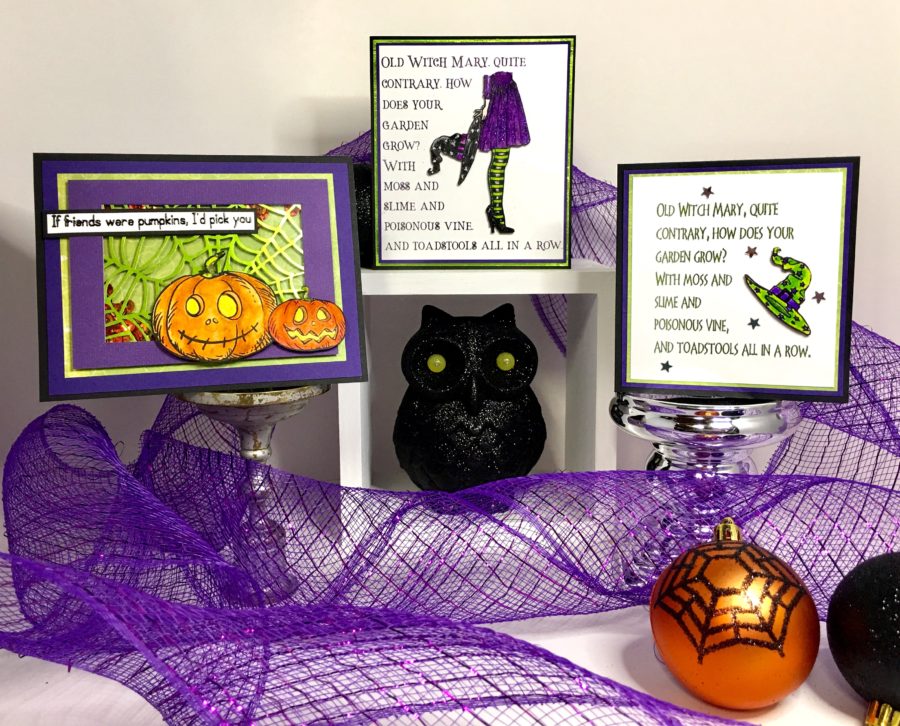
Hello and happy October Thermoweb friends! Today I’m sharing some fun Halloween cards. I choose my project title because in this post I will show you how to make two totally different cards using the same verse and the stamp (and of course there will be foil)! We will also create a fun shaker card and learn how to customize your shaker window. Make sure to read to the end to download the template for the verse.
Halloween Card Supplies
Deco Foil Transfer Sheets – Lime Green and Purple
Brutus Monroe Designer Toner Sheets – Webbed
Gina K. Designs Glitz Glitter Gel – Black and Wild Lilac
Deco Foil Metallix -White Pearl
iCraft Ultra Bond Liquid Adhesive
Rabbit Hole Designs Stamps – Hex Yeah and Pumpkin Friends
Other Supplies: Foiling machine, laserjet (toner) printer, cardstock, black ink pad, favorite medium to color images, scissors, sequins, heat tool, and embossing powder.
STEP ONE:
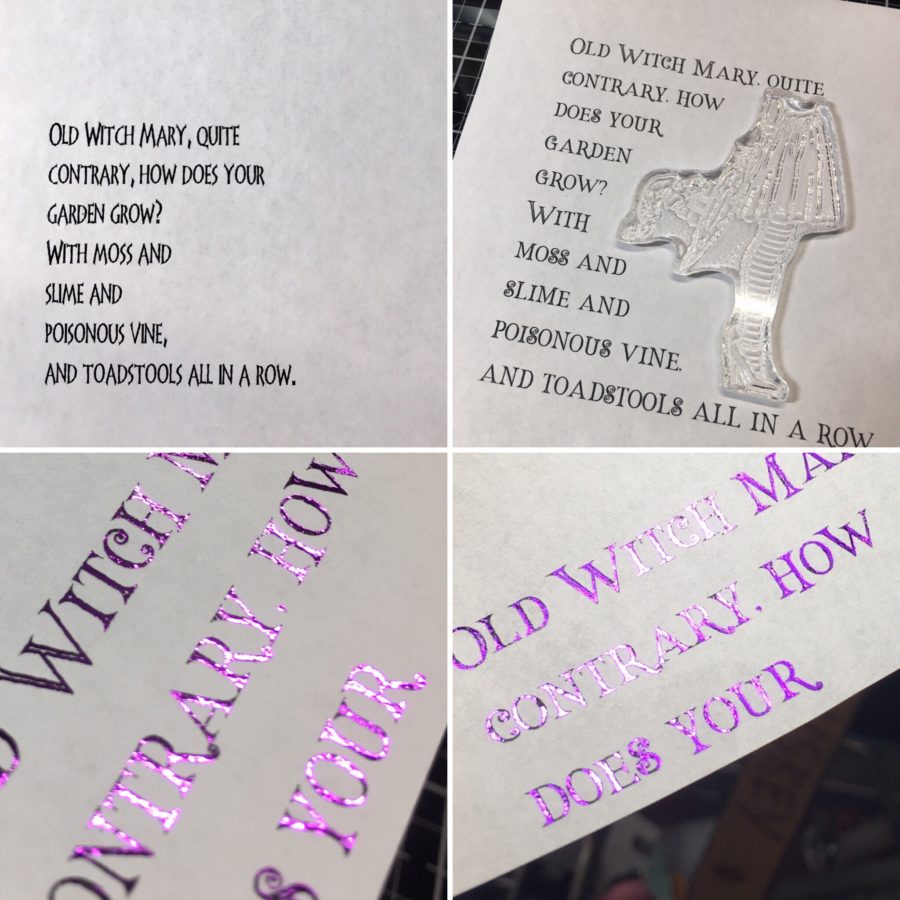
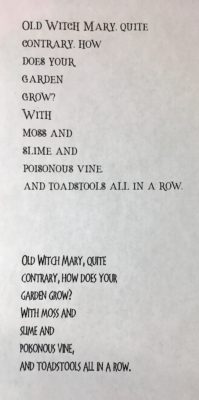
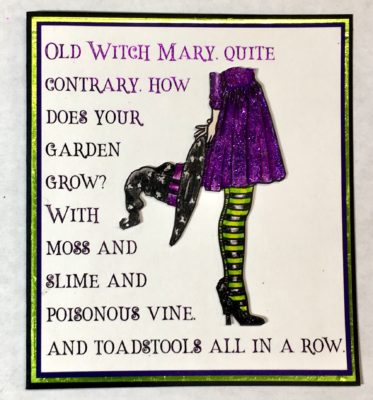
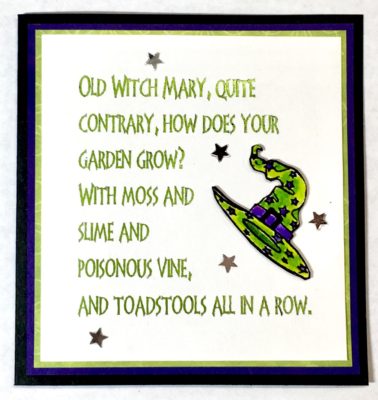
Choose a verse or quote for your card (or use the one I provided at the end of this post) and format it using Word, Photoshop or a similar program. Move the words around to create a “hole” where you want to place your image (see picture below). It took me two or three tries printing on plain copy paper and testing the spacing with my stamp before I printed on cardstock. Once your verse is printed on cardstock, add foil* to your verse to give it color and shine. For variety, create a second card using the same verse but a different font. Space the second one so that the “hole” for the image is smaller and will fit just the witch hat from the stamped image.
* To foil an image or text printed with a laser printer or copied on a toner copier, place a piece of Deco Foil Transfer Sheet, cut to size, dull side against the printed matter, place into a carrier or folded piece of copy paper and run through a foiling machine or heat laminator. I run mine through twice, flipping the carrier over and running upside down the second time. This ensures I always get a clean, crisp foiled image.
Hint: Make sure you choose your font before you format the verse as the font will determine spacing.
STEP TWO:
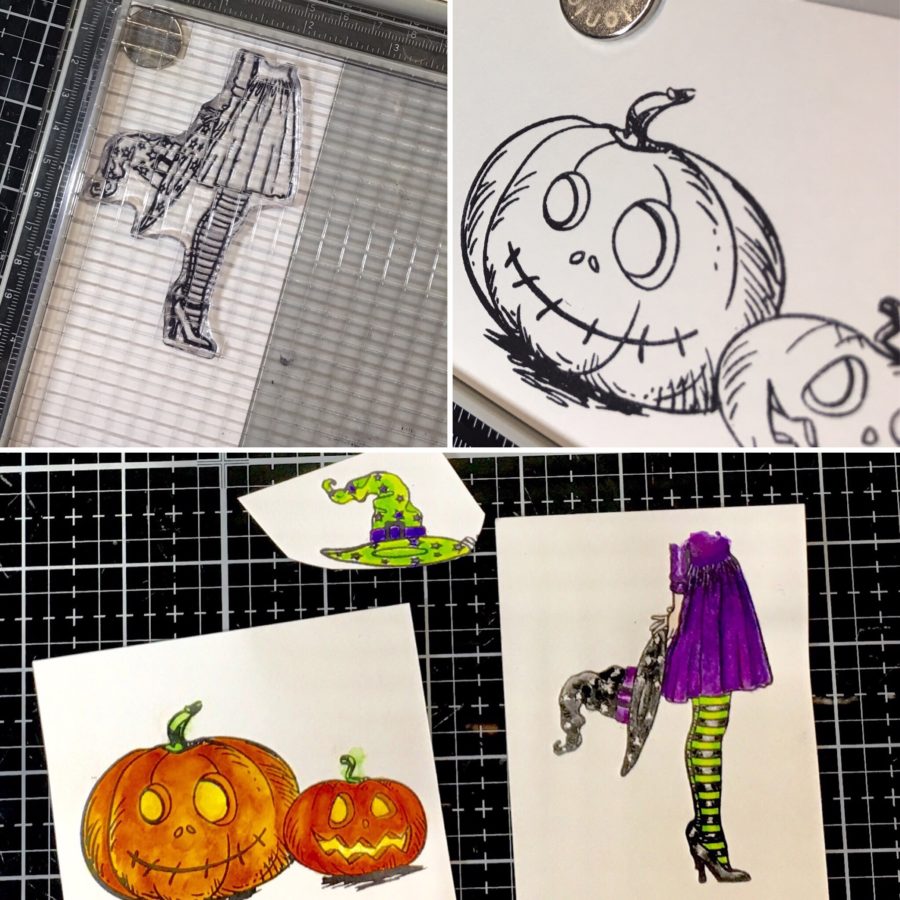
After stamping your images using black ink, color them using your favorite medium. I used a combination of watercolor paints and Distress Ink to paint my images.
Hint: I always stamp two to three of each image because I know I will mess up at least one. This way i never have to backtrack and start over; I simply use the extra stamped images. If I don’t mess up, the extra images go into my “card scraps” tin which holds odds and ends of leftover embellishments and images to create a quick card when I need one.
STEP THREE:
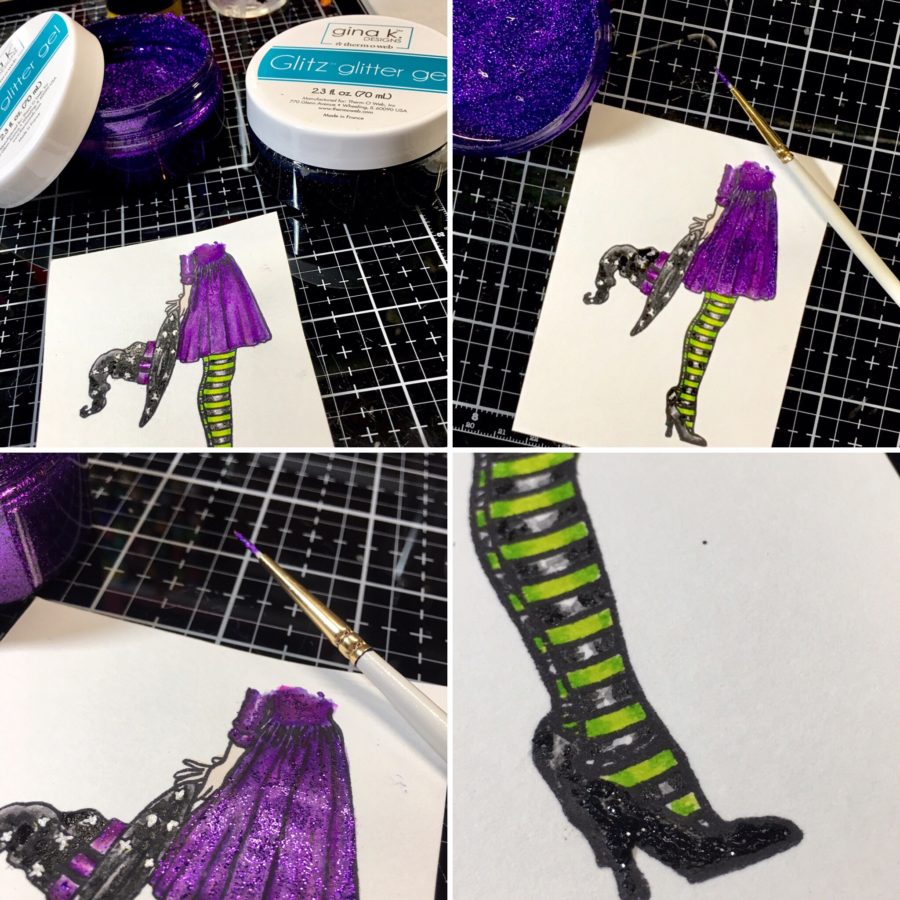
Once the images were dry of paint, I added a little Glitz Glimmer Gel to the Witch and hat and White Pearl Metallix to the Jack-o-lantern eyes and mouth. The Glitz Glimmer Gel which is usually applied with a Stencil Pal and pressed through a stencil is also quite easy to apply with a paintbrush. Use a fine tip brush to apply small amounts where you want a little extra Glitz and glam.
Hint: Note how well the Wild Lilac Glitz Glimmer Gel and the purple foil match on the finished card!
STEP FOUR:
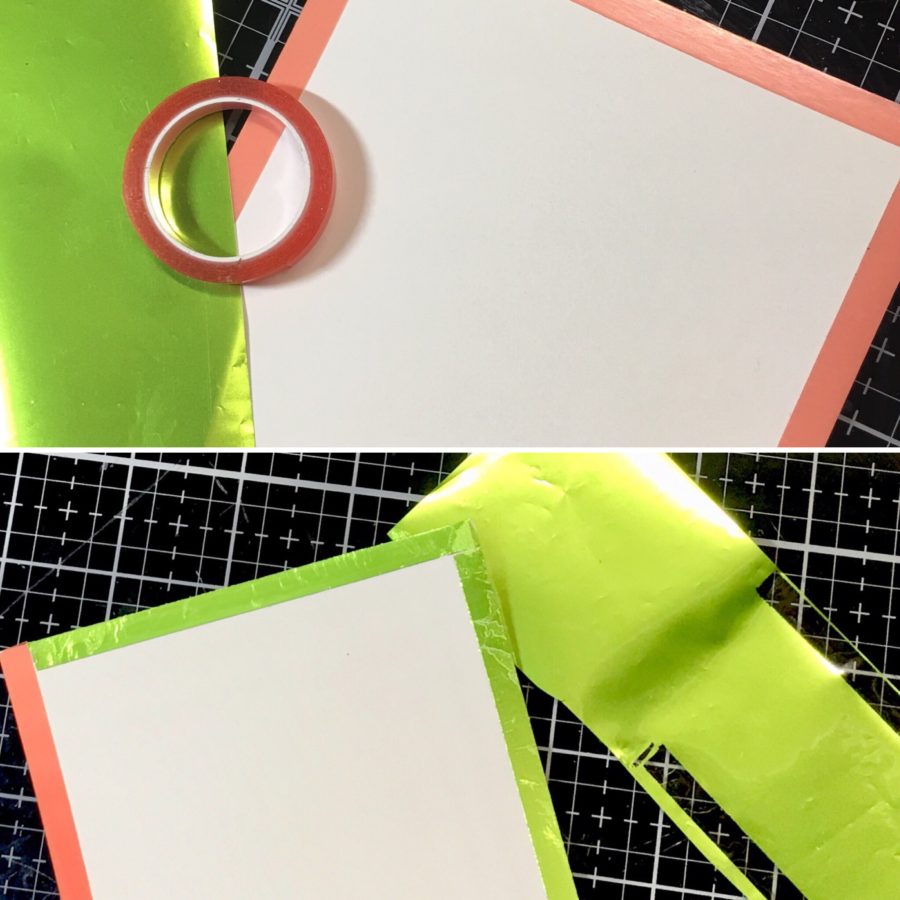
This is one of my favorite hacks. If you’re anything like me and you think you have one of everything but get really annoyed when you don’t have the perfect piece of paper for a specific project, create your own using foil! I needed a lime green mat for my card and wanted it to match exactly. I simply ran a line of Supertape around the edge of the paper and (after removing the release paper) pressed the dull side of the foil onto the tape and peeled off, leaving a beautiful, foiled edge.
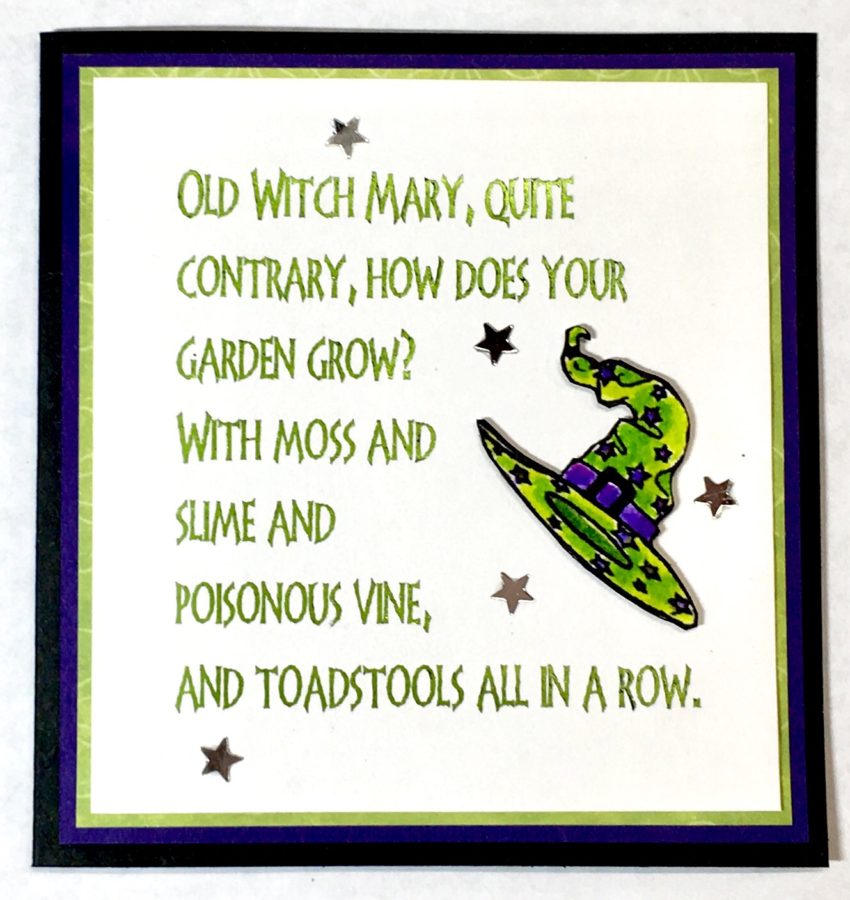
Once the images are completely dry of Glimmer Glitz Gel and Metallix, fussy cut them out. To make the most of the witch stamp, I cut out one in full and cut just the hat from the second image. If you look at the PDF at the bottom of this post, you can see that I typed the same verse twice but one is a larger font, leaving a large space for the witch and the other is a smaller font, leaving just enough space for the hat. Use Ultra Bond Liquid Adhesive or White Foam Adhesive to adhere images to the card front and layer onto a card base with coordinating cardstock (or foiled) mats.
Hint: To have a larger edge showing, simply use the 1/2″ Supertape.
STEP FIVE:
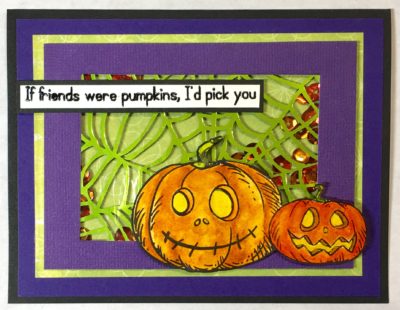
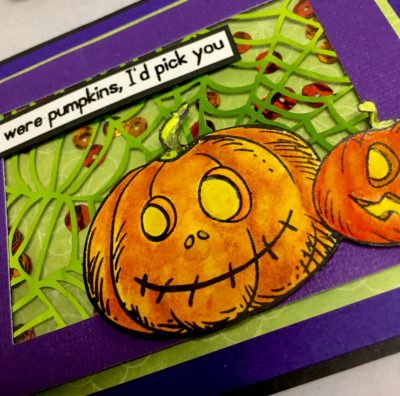
Create a shaker card using Brutus Monroe or Deco Foil Clear Designer Toner Sheets. There are a variety of designs to choose from and you can add any color foil to the design to create a custom window. I chose a Lime Green Foil spiderweb.
I won’t bore you with instructions to create a shaker card, but take a look at the finished card. The design on the window just adds that little something extra don’t you think?
Hint: You can customize further using Clear Designer Toner Sheets with no pattern to create your own design on the window.
Thank you for stopping by and allowing me to share my Halloween Cards! As always, I hope you find some inspiration or tidbit to take away with you.
Below you can download a pdf with the verse formatted in two ways using two different fonts. The top version fits the witch legs in the opening and the bottom version fits just the hat. It will print as an 8.5 x 11″ which can be trimmed down for use on cards.

Click here to download verse used in the above cards


Mary Holshouser
October 7, 2019 at 8:17 am (6 years ago)thanks for the fun ideas. The sentiments are
wonderful. Love the cute pumpkins. their
light-up eyes are great. thanks for sharing
txmlhl(at)yahoo(dot)com
Dee Earnshaw
October 7, 2019 at 9:18 am (6 years ago)awesome work – love the verse !!
Gina K stamp and stencil Autumn wishes is on my wish list – love the design images
Sharon Gullikson
October 7, 2019 at 4:21 pm (6 years ago)Petals and Wings is my favorite!
Meghan Kennihan
October 7, 2019 at 4:23 pm (6 years ago)I love Rabbit Hole! Great collaboration! Love the witches!
Sue D
October 7, 2019 at 4:52 pm (6 years ago)Cute and colorful for Halloween.
I like Autumn Wishes from Gina K
Janet Mack
October 7, 2019 at 6:29 pm (6 years ago)Can’t find it but it was a background stencil.
becca yahrling
October 7, 2019 at 6:36 pm (6 years ago)Love these fun projects and what an awesome quote!!!
I
Jeanne Beam
October 7, 2019 at 8:17 pm (6 years ago)Love the cards! Great sayings.
Thanks for sharing.
Denise Bryant
October 7, 2019 at 9:29 pm (6 years ago)Such fun Halloween ideas! Love The Rabbit Hole Designs! The jack o’ lanterns are adorable!
Holly Reifke
October 8, 2019 at 1:50 pm (6 years ago)The pumpkin card is my favorite, but the old witch Mary is a close second.