


 Hey friends! It’s Amanda from Twiddler’s Nook. I’m so excited that it’s dino week with Thermoweb! I absolutely love all things dinosaurs and even have a corner of my craft room dedicated to dino decor. It’s so much fun!
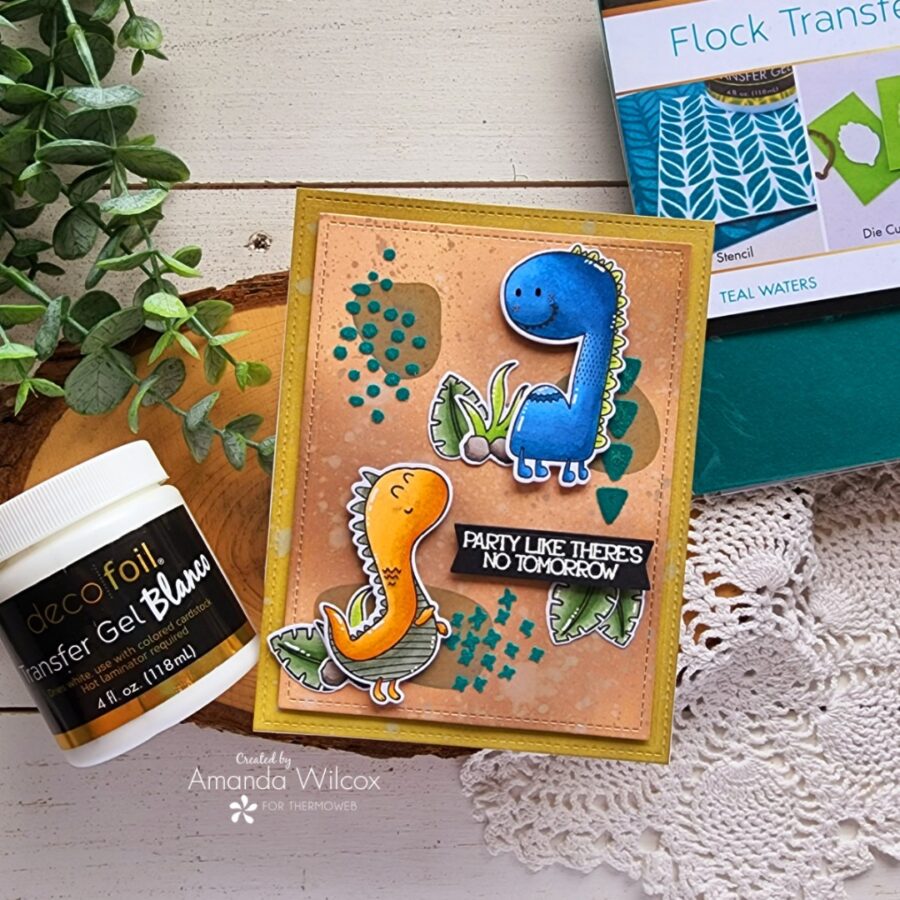
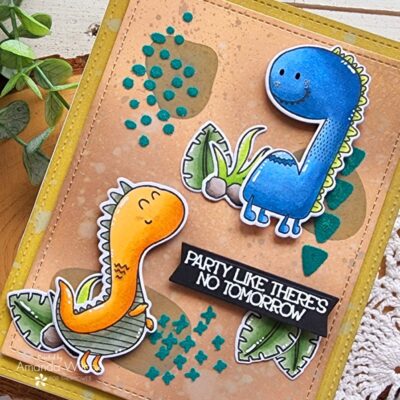
Today I have a fun card to share with you featuring some cute dinos from Photo Paper Play paired with Deco Foil flock and Deco Foil Transfer Gel Blanco to add awesome texture to your background.
Dino Party Card
Products used:
Transfer Gel Blanco
Deco Foil Flock – teal waters
Ultra Bond liquid glue pen
3D foam tape roll and squares
Craft & Carrier sheets
Photo Paper Play Dino Friends stamps and dies
Photo Paper Play Random Background Builder stencil
Pink & Main Large Sentiment Strip dies
Distress Oxide Ink – tea dye, gathered twigs, forest moss
Lawn Fawn Stitched Rectangles dies – large and small
Dino Party Card Tutorial
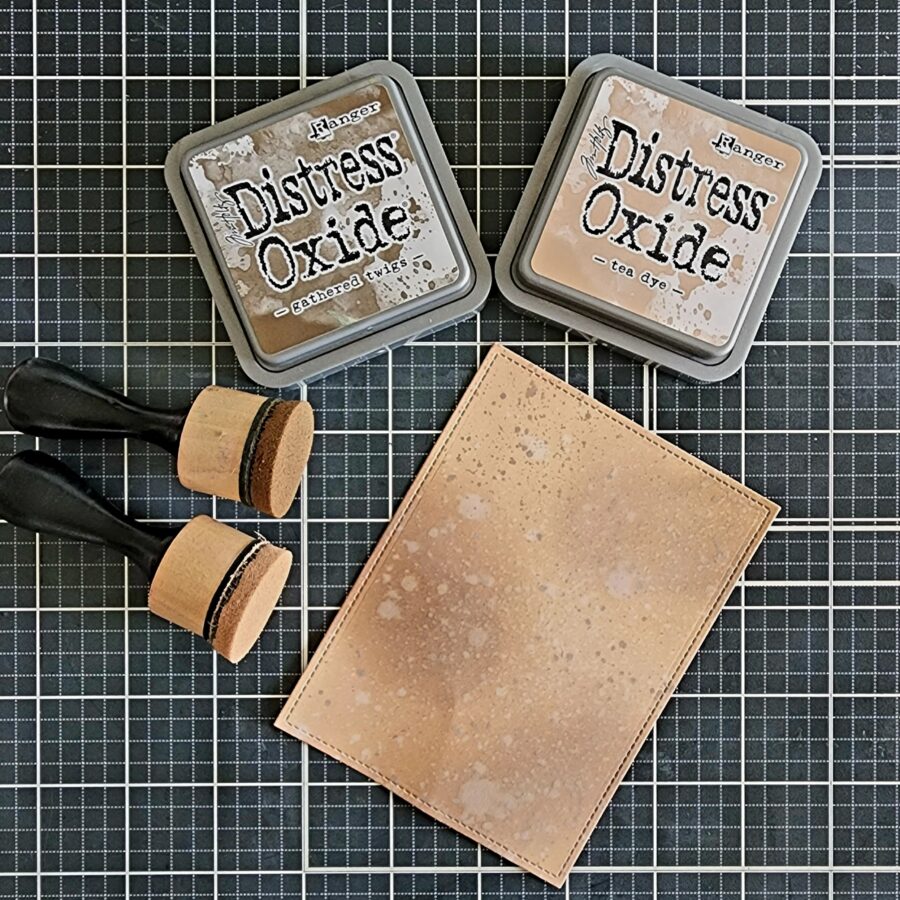
I started by cutting a couple of stitched rectangles from white cardstock and inking them up. The smaller one I used gathered twigs and tea dye distress oxide inks blotchy and random for some visual texture. Then I spritzed the panel with water and flicked gathered twigs ink on it.
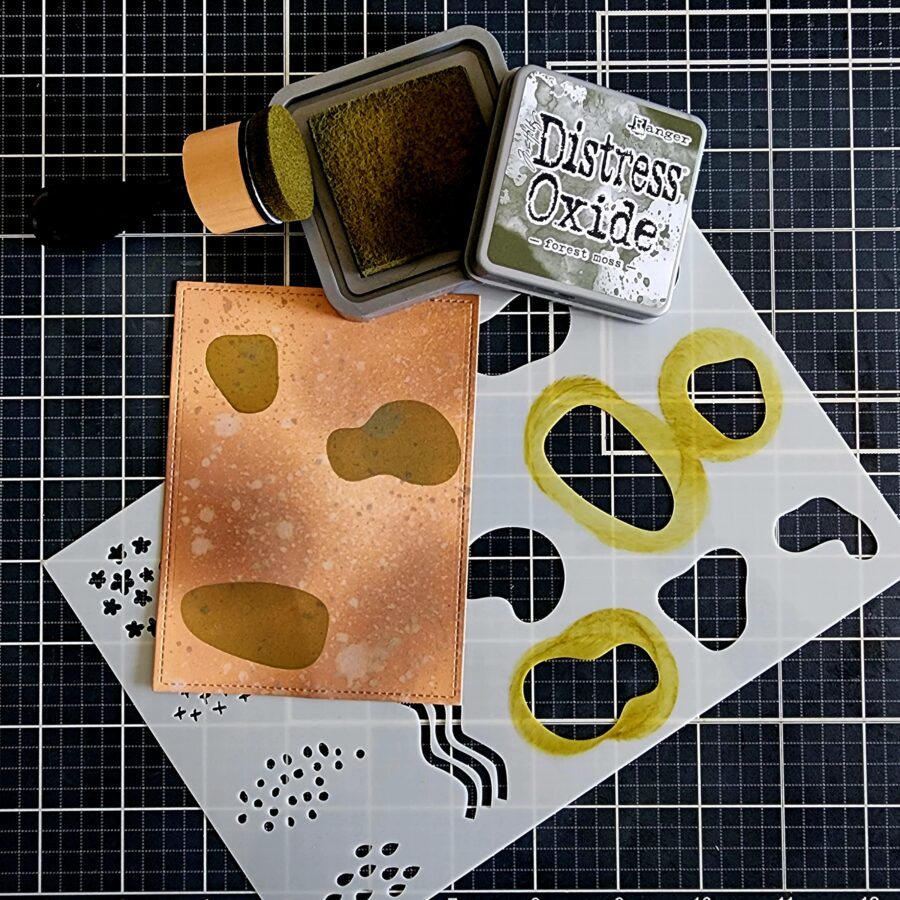
Then I used the Random Background Builder to ink a few blobs on my background with forest moss distress oxide ink. I am really loving these abstract-type stencils to create with. They are so fun and imperfect is the best which relieves stress when crafting even more.
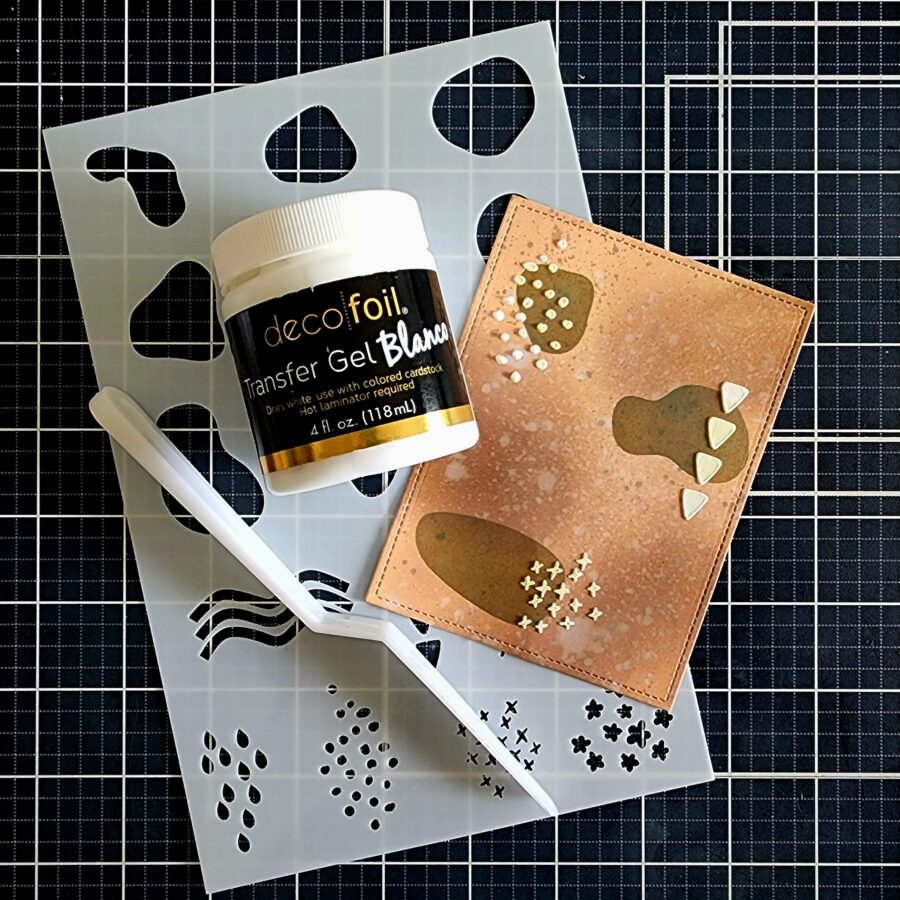
Then I chose a few textures from the other side of the stencil and carefully spread transfer gel Blanco through each section one at a time. I rotated my paper to keep the stencil out of the gel one after the other. It was actually pretty easy with a little planning on which order to do them in. Then I set the panel aside to dry and cleaned my stencil off.
*Tip* I did use the palette knife only for this project because the stencil pal was too big. Small surface area = small spreading tool. It was helpful.TooltipText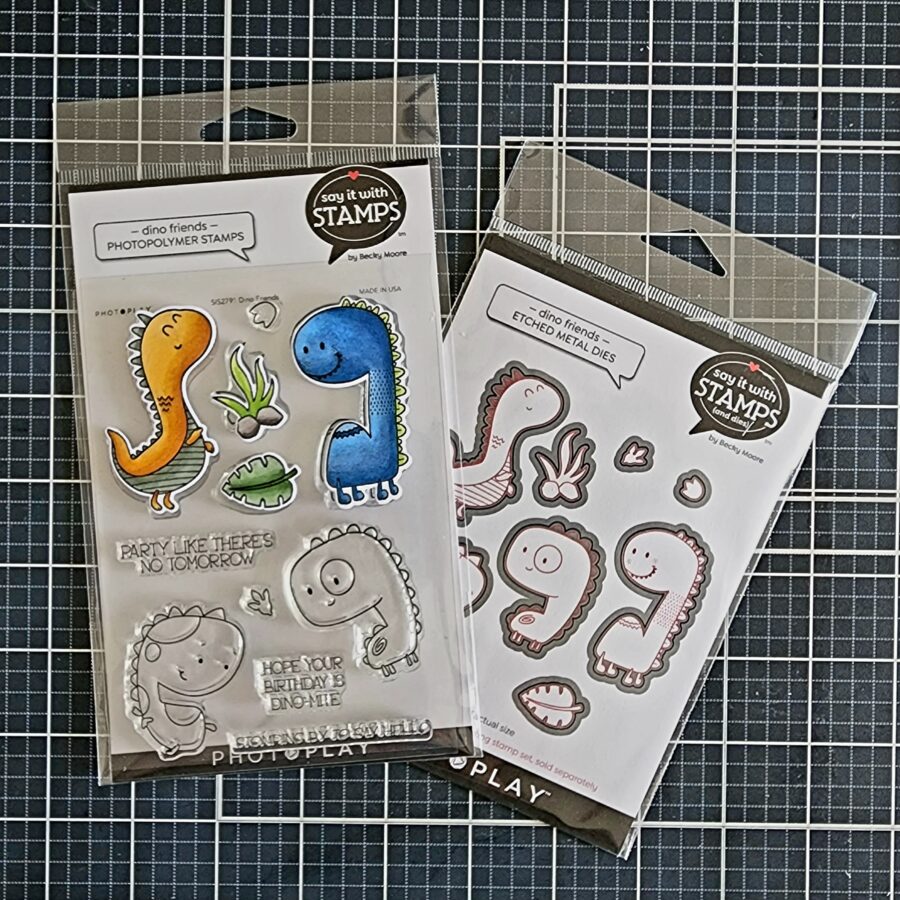
Since there was such a small amount of transfer gel to dry, I turned my laminator on now and then chose some images from Dino Friends. I stamped them out and colored them with Copic markers. Then used the coordinating dies to cut them out and set them aside to get some fun flocking done!

To keep with the muted tones and color scheme I had going, I used teal waters deco foil flock transfer for today’s project. I trimmed a strip off one square and cut that into sections to match my areas that needed flocking. I placed the panel in a craft & carrier sheet and ran it through my laminator. Isn’t this background so cool!?!
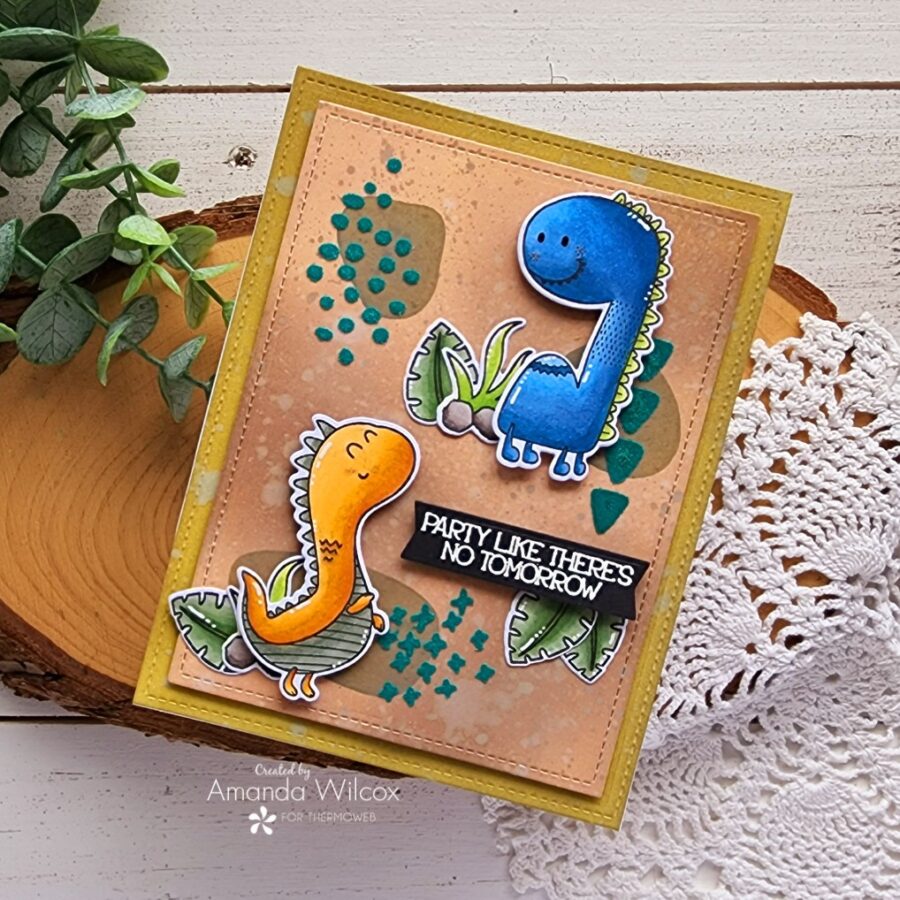
Last, I took the larger stitched rectangle and inked the edges with the same forest moss distress oxide ink. It’s lighter on this panel because it doesn’t have the brown base that the first panel does but I like the look it gives.
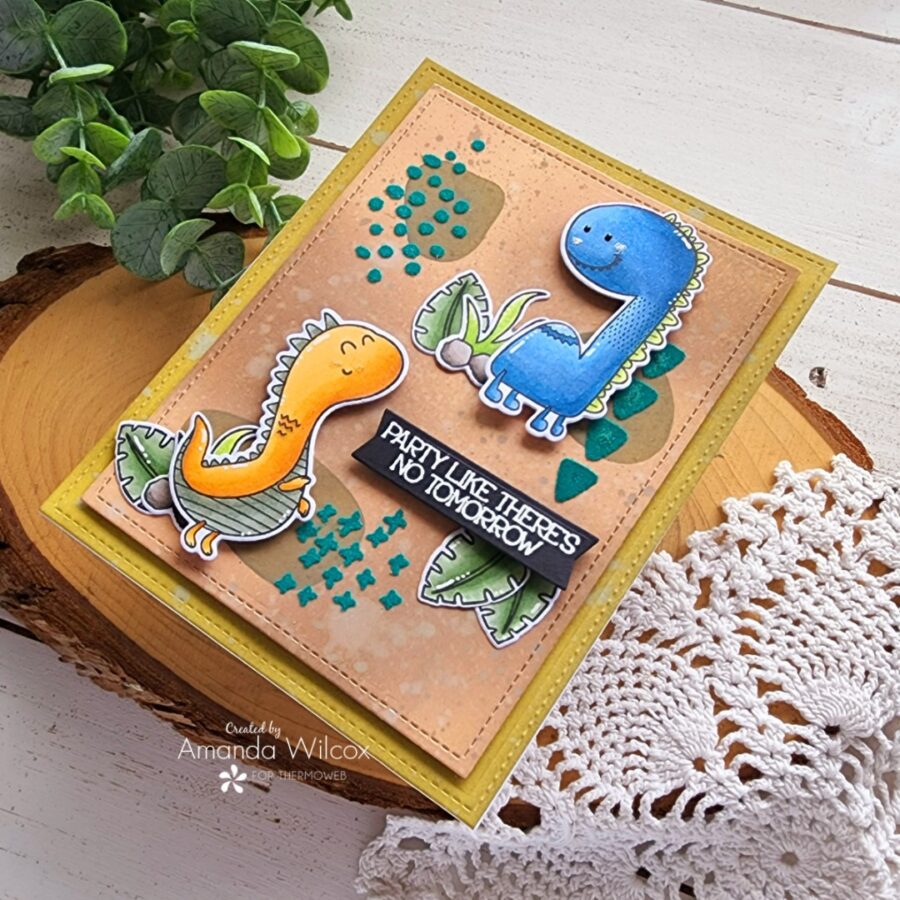
I used my UltraBond liquid glue pen to adhere the large rectangle to a white card base and popped the flocked panel up with foam tape. Then I added images with a combination of foam squares and liquid glue.
For my sentiment, I stamped and heat embossed it in white and cut it out with a banner die. I added it with foam squares plus a couple of extra leaves I had colored and cut out too. I think this pulls the sentiment into the design really well.
Finally, for finishing touches I just added black glaze pen to the blue dino’s eyes and then white gel pen accents to all of the images. I think this card turned out so stinking cute! Don’t you?!?
I hope you enjoyed this project today and found some inspiration to create something fun to share with someone.
I appreciate you sharing your time with me. Have a fabulous day!
Be sure to join us Wednesday night, July 13th for a Live with Katrina Hunt in our Therm O Web Facebook Group. We’ll be live at 7pm CT and hope you’ll join us. Can’t make it? No worry you can watch the replay! Just click the link to join the fun!
