
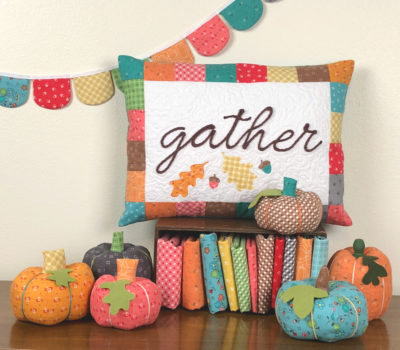
 Hello there friends! It’s Amy Chappell here again to share with you a super fun, super simple project! Today we are going to take your creativity to a whole other dimension- a Third dimension! The Gather word on this pillow is simply yarn glued to the surface of the fabric with Fabric Fuse Quick Dry Fabric Adhesive! Crazy right? It gives so much texture and dimension to this project, it’s amazing! I’m going to share with you some tips, as well as the directions for this specific pillow if you decide you want to make this exact project yourself! Are you ready??
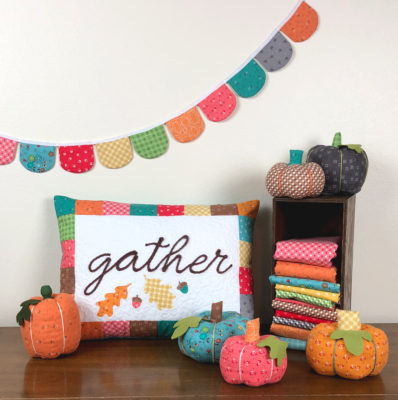
Dimensional Fall Word Art Pillow
Fall Pillow Supplies:
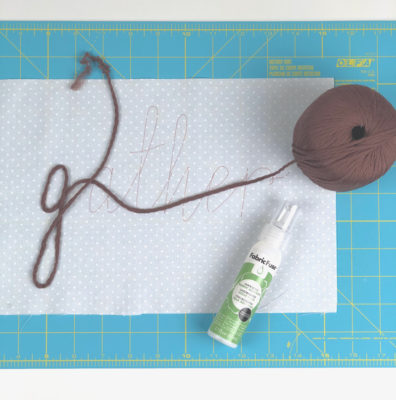
Fabric Fuse Quick Dry Fabric Adhesive
Background fabric
yarn or other fiber of choice
*If you want to make the pillow as I did, you will also need scraps of fabric for the border, leaves, and acorns, HeatnBond Lite- for leaves and acorns, fabric for the pillow back, Stitch n Sew sew-in fleece and Spray n Bond basting adhesive. I am using Autumn Love fabric by Lori Holt for Riley Blake Designs. This pattern makes a 12″ X 16″ pillow cover, you will also need stuffing or a pillow form.
While I LOVE how this pillow tuned out, this technique would also be so fun on banners, table runners and so many other projects!
Dimensional Fall Word Art Pillow Tips:
To get started you will need to print out your pattern. You can find the free pattern here: gather pillow pattern
Cut your background to the desired size (for the pillow- that is 8 1/2″ X 12 1/2″) center your pattern behind your background fabric (you may need to use a lightbox. If your fabric is too dark to see through, you will need to use an alternate method to transfer your pattern)
Trace your word with the Fabric Fuse Adhesive and lay your yarn on top.
*TIPS:
- start at the beginning of your word, this project works best with fonts that connect the letters.
- make sure to trim off any frayed edges on your yarn before you begin
- only put glue on a portion of the letter at a time, then place your yarn before adding more glue
- use a thin line of glue, pull the line of glue, don’t try to “push” the glue, it will make globs
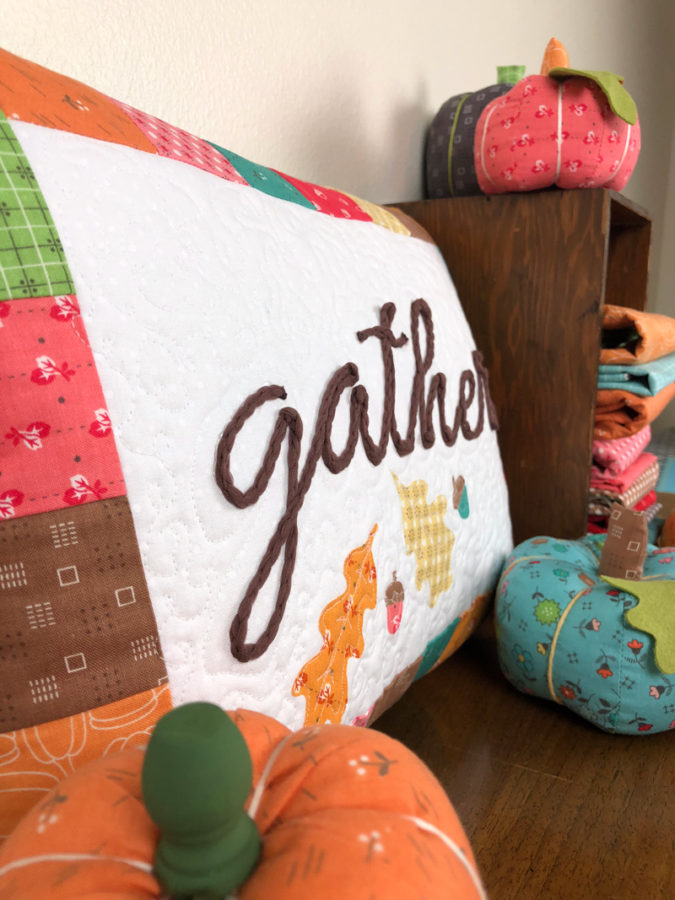
- When you come to places where the yarn doubles back on itself (like on the letter g) pinch the crease in the yarn to give that turn a bit more definition.
- go back and add a tiny bit more glue to any cut ends of yarn, make sure to get all the fibers in the glue to seal the edge, use a toothpick or small tool to help you get all of the fibers
Allow the glue to dry for 4-6 hours.
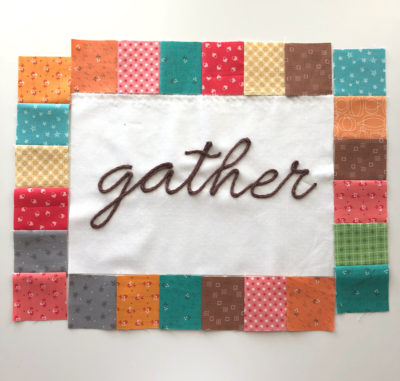
To make this pillow: (seam allowances are all 1/4″) cut 24- 2 1/2″ squares of fabric and sew them into 4 groups of 6. Sew one group to the top of your background fabric and one to the bottom. Press the borders away from the center (the seam allowance should be pressed toward the border) Sew the last 2 groups onto the sides. Again press borders away from the center, with seam allowance toward the border. Embellish as desired. I have included the templates for the oak leaves and acorns on the pattern- trace them onto heat n bond lite and following the package directions fuse to fabric scraps, then cut out the shapes and fuse them to the pillow front. Quilt as desired using StitchnSew Sew-in fleece and SpraynBond basting spray. Create a pillow back using your favorite method and you are done!
I hope you start adding dimension to all your projects now! I know I’m already trying to figure out what else I can glue yarn too! For more project ideas, follow me on Instagram or hop over to my blog: Ameroonie Designs! See you soon! xoxo
3 Comments on Dimensional Fall Word Art Pillow
2Pingbacks & Trackbacks on Dimensional Fall Word Art Pillow
-
[…] might remember the Gather pillow from last year, you can find the template and pattern here. The fabric pumpkins are a free tutorial on my blog here. But, if you want to make the hoop- stay […]
-
[…] I first showed you how to make these pumpkins in this post from last year using the Cricut Maker. But, I wanted those of you who don’t have the Maker to be able to make some too- so today’s post will include a printable pattern you can use to make two different sizes of pumpkins with two different stem options. (The tutorial for the Gather Pillow can be found on the ThermO Web blog here.) […]
BrendaLea Abbott
November 14, 2018 at 8:51 am (6 years ago)Really cute pillow and great insructions.