It’s that time again, when I freshen up my living space with some new throw pillows. I love Christmas and decorating for the holiday season, but I sometimes like to draw my inspiration from the not so traditional, something beyond the red and green decor we see in most stores. For this project, I was inspired by nature and the first real snowfall of the season. Keep reading to find out more about how I came up with my color palette.

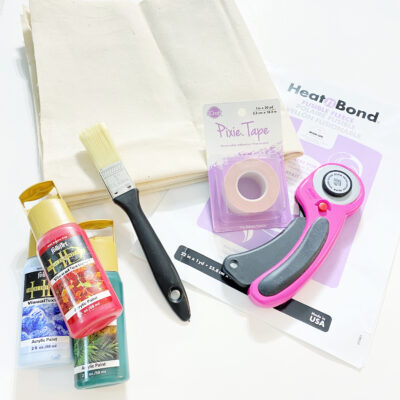
SUPPLIES:
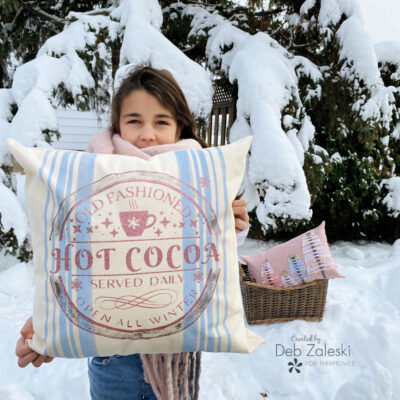
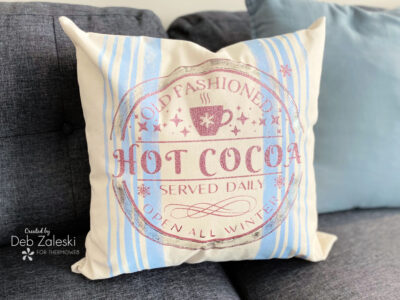
Hot Cocoa Pillow (18″ x 18″)
- 1 yard of HeatnBond Fusible Fleece
- Thread
- 1/2 yard of natural cotton fabric
- Pixie Tape
- Deco Foil Liquid Adhesive
- Deco Foil Transfer Foil Sheets (I used Pewter for my project)
- Fabric paint (I used sky blue)
- Heat transfer vinyl (I used pink glitter vinyl)
- Download HOT COCOA – cut file
- Pillow form, 18″ x 18″
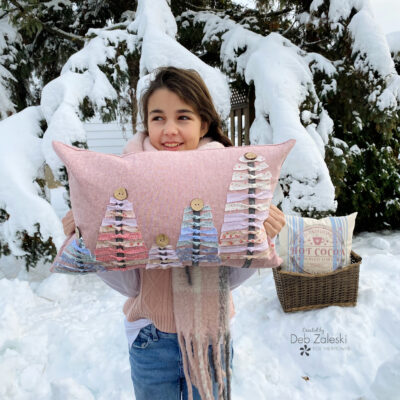
Trees Pillow (20″ x 13″) & Tree Ornament
- 1 yard of HeatnBond Fusible Fleece
- Thread
- 1/2 yard of pink cotton/linen blend fabric
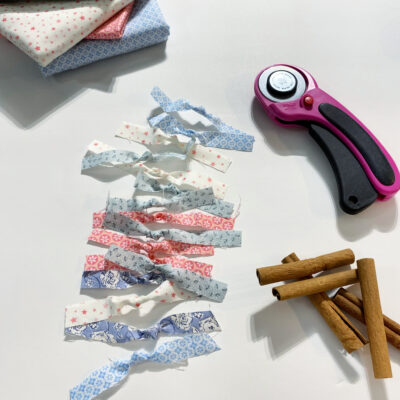
- Various quilter’s weight cotton print fabric scraps, as small as 1/2″ x 6″
- Buttons or other embellishments
- Small amounts of HeatnBond Lite Sewable Iron-On Adhesive
- HeatnBond Fabric Fuse Liquid Adhesive (for ornament)
- SpraynBond Fabric Stiffener Spray (for ornament)
- Cinamon sticks or small twigs (for ornament)
- Twine (about 12″ per ornament)
- Pillow form, 20″ x 13″
TOOLS:
- Oliso Project Iron & ironing board
- Sewing machine
- Scissors
- Rotary cutter and self-healing mat
- Ruler
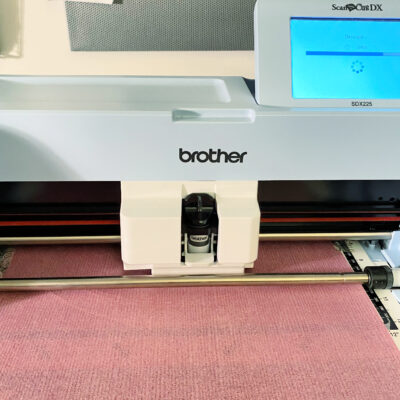
- Cutting machine, such as a Brother ScanNCut
GETTING STARTED:
HOT COCOA PILLOW
1. Download the HOT COCOA – cut file I’ve created for this project. In the files, you’ll find the PNG, SVG and PDF for the HOT COCOA design. This file is not for resale, so please direct your friends to this blog post so they can get their own copy of the file, it’s free!
2. Cut two 19″ cotton fabric squares for the front and back of the pillow. Apply the HeatnBond Fusible Fleece to the wrong side of each piece of fabric.
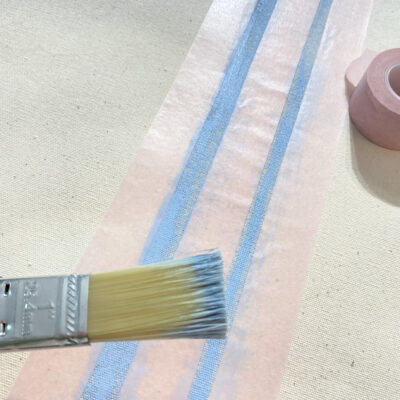
3. Tape off the stripes on the pillow front, or both the front and back if desired, using Pixie Tape and a ruler.
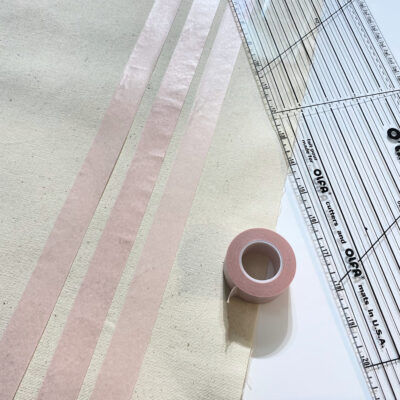
4. Paint the stripes using a fabric paint. Let the paint dry completely before removing the Pixie Tape. You can add more stripes if desired to create your own unique look. The stripes do not have to be perfect; you can make them look a little more worn-out or vintage, too.
5. While the paint is drying, load the cut file into your cutting machine. Make sure to mirror image your cut file; you don’t want your letters to be backward on your throw pillow.
6. Cut your design from heat transfer vinyl (HTV) and weed out your design. I was able to reposition the snowflake from the cup to another spot on my pillow, and you can do the same! Following manufacturer’s instructions, apply the HTV design to the pillow front.
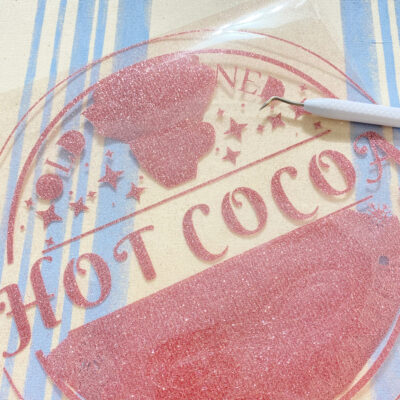
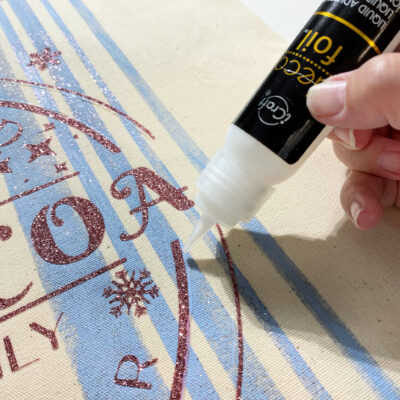
7. I decided to add a little Deco Foil accent to my design. I started with a very thin defined line around the inner circle and let that dry, Then, I added the Deco Foil Transfer Sheet in Pewter, just pressing the foil down onto the dried glue. Next, I added more Deco Foil Liquid Adhesive with a paint brush to get a very thin layer of glue around the entire circle border area. I let it dry and then pressed down the Pewter Deco Foil again, resulting in a brushed look on my fabric.

8. Place both the pillow front and back with right sides together and sew along the perimeter, leaving an opening to turn your work right side out and to insert the pillow form. Close the opening using a tight ladder stitch.
TREES PILLOW
1. Cut two 20″ x 13″ pink fabric rectangles for the front and back of the pillow. Apply the HeatnBond Fusible Fleece to the wrong side of each piece of fabric.

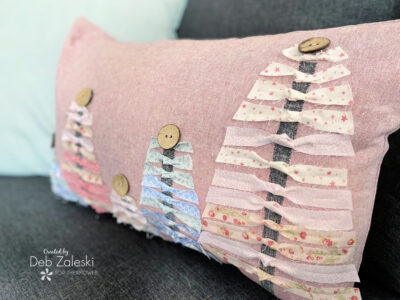
2. Apply HeatnBond Lite to the back of a larger dark fabric scrap for the tree trunks. Using a ruler and rotary cutter, cut 1/2″ strips of the desired lengths. My longest tree trunk is about 10″ long, and I have five trees in all for my pillow, but there’s no wrong or right answer. Make as many or as few tree trunks as you wish, especially if you decide you want to make a different size pillow than the size I suggest.
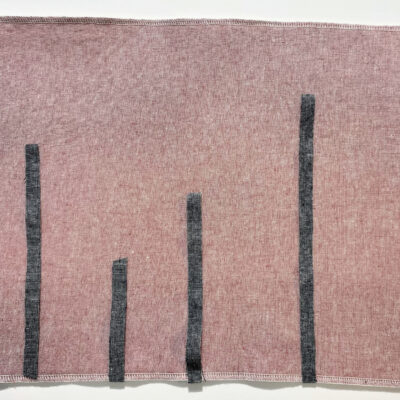
3. When satisfied with the position of the tree trunks, using a medium iron without steam, apply the trucks to the front of the pillow.
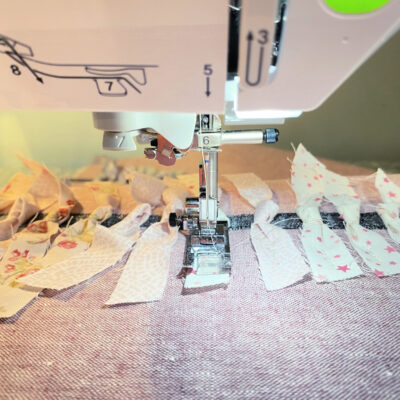
4. Cut the “branches” out using a ruler and a rotary cutter, cutting 1/2″ strips of various cotton prints. Arrange them as desired to have them all the same, or create an ombré effect by arranging them with color families. Fold the strip in half lengthwise and mark the center on the wrong side of the fabric. Place the strip with the print side down on the “tree trunk” and sew a few stitches across the width of the strip. Repeat this approximately every 1/2″ until you have most of the tree trunk covered. Tie knots with the fabric prints facing out.
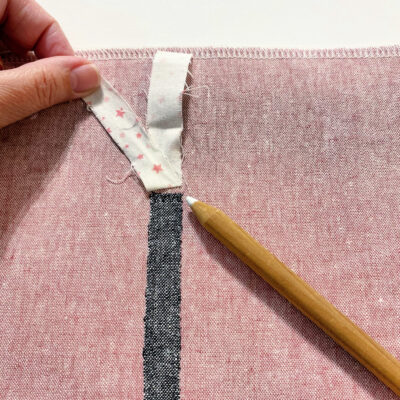
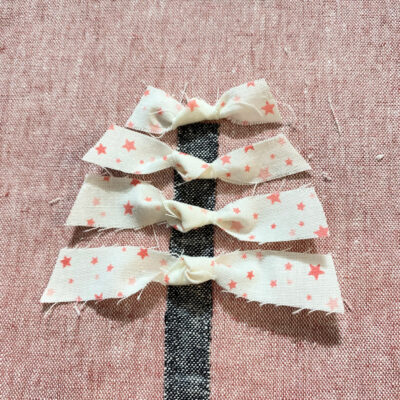
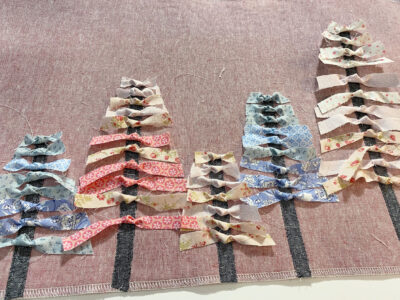
5.You will need to trim the “branches” to form the tree shape. Starting with a backstitch, sew the branches into place from the center out towards the ends of the branch. Once again, backstitch so your stitching doesn’t come undone.
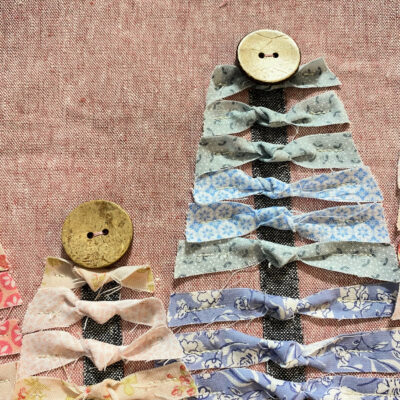
6. Add buttons or other embellishments, if desired. I found these coconut buttons in my stash and thought they made the perfect tree topper.
7. Place both the pillow front and back with right sides together and sew along the perimeter, leaving an opening to turn your work right side out and to insert the pillow form. Close the opening using a tight ladder stitch.
ORNAMENT:
1. For the ornament, cut strips of fabric 1/2″ wide by about 6″ long or less. Tie a simple knot in the middle of each strip.
2. Use HeatnBond Fabric Fuse Liquid Adhesive to glue the strips onto the cinnamon stick trunk. Once dry, you can trim the fabric strips to give shape to your tree.
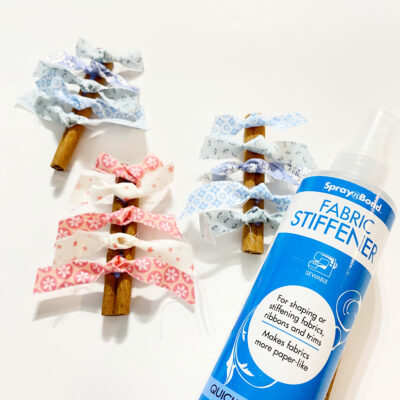
3. Spray the little trees with SpraynBond Fabric Stiffener and position the fabric branches how you want them to dry. I suggest letting them dry overnight. There will still be movement to the fabric, but they will feel more like paper and have more dimension.
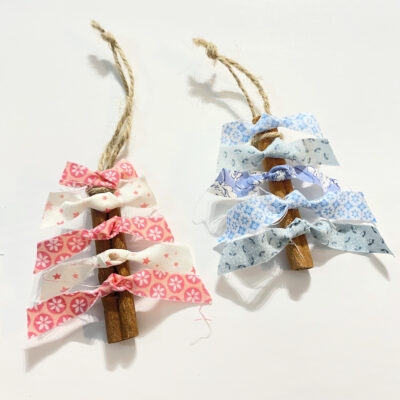
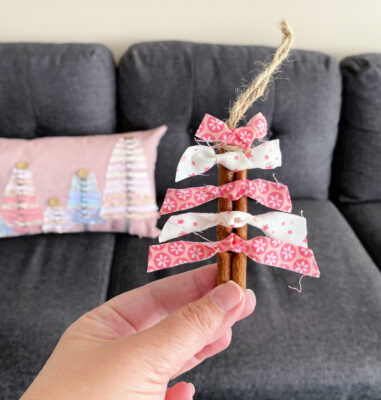
4. Add a twine loop to the top of the tree for a hanger. Wrap the twine just below the top fabric strip and tie a knot at the back. You can glue it into place with the Fabric Fuse, so it stands straight when you hang it on the tree.
And there you have it, the view that inspired the color palette for these cozy winter pillows. Doesn’t it take your breath away?!