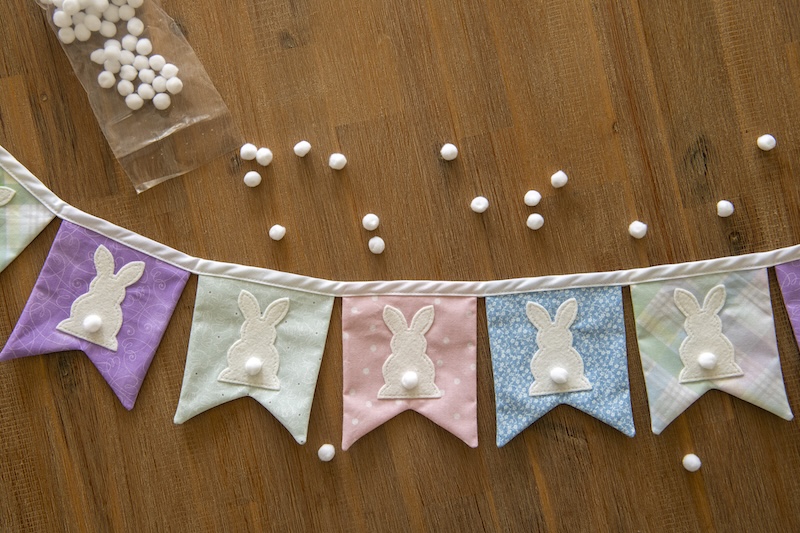
I love this sweet bunny banner with fun fluffy tails. It’s a pretty quick sew and one I make over and over again. Easter is one of my favorite holidays so any excuse to buy more holiday fabrics and I’m in. To estimate how much to purchase of the required 100% cotton fabric it depends on how many fabrics you’ll like in your banner. If you want all the flags to be of the same fabric you just need ½ a yard. If using two or more fabrics you’ll need 1/5 yard of each fabric.
Supplies:
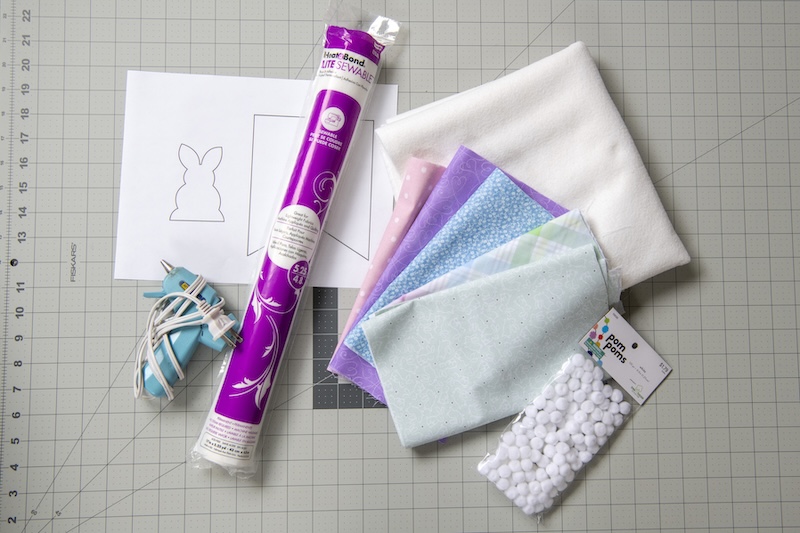
- Pattern (DOWNLOAD HERE)
- 100% cotton fabric (see paragraph above for amount)
- Pack of ¼” double fold bias tape (forgot to photograph it!)
- Heat n’ Bond Lite Iron-On Adhesive
- White wool felt
- Pack of 0.5” pompoms
- Glue gun/glue sticks
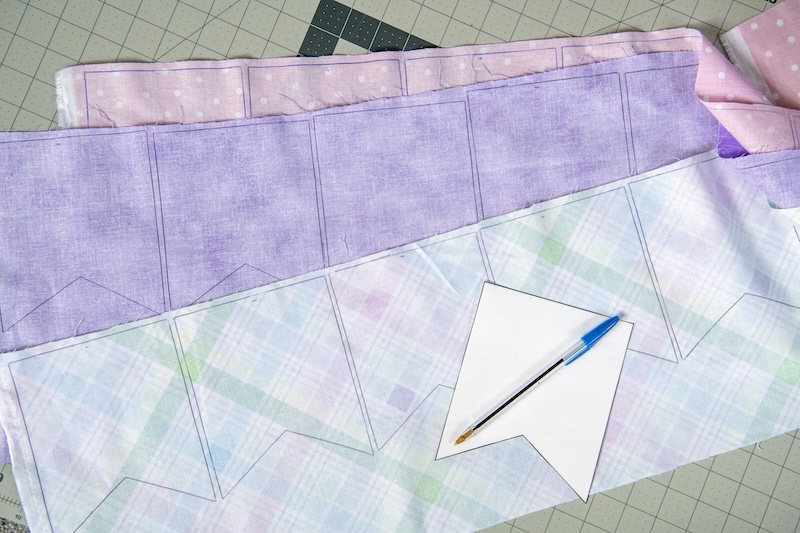
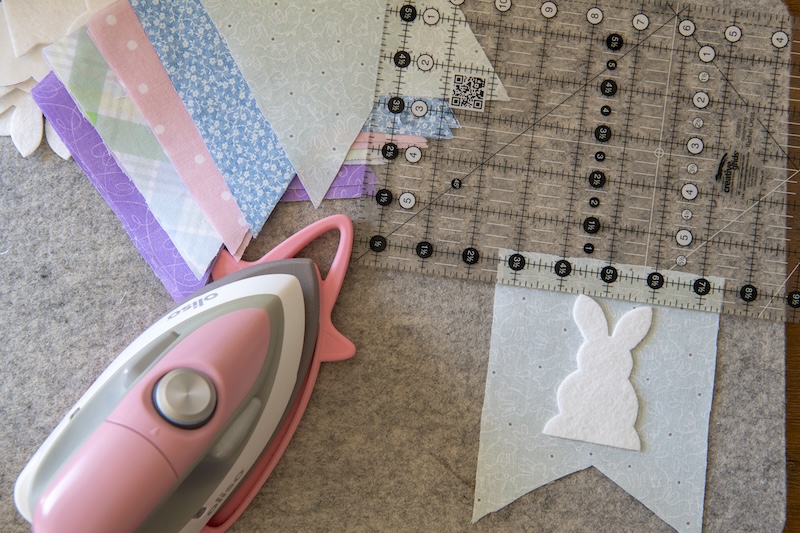
Cut out your pattern and iron your cotton fabrics. Trace the flag pattern onto the back of your cotton fabric(s). I make my bunny banners 8 flags long. You need a front and back for each flag so you’ll need to trace 16 in total. Cut them out.
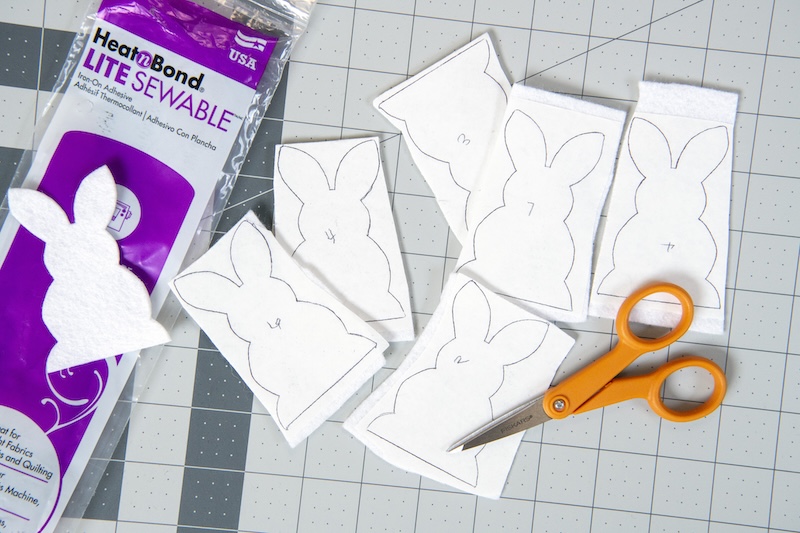
Take your Heat n’ Bond Lite, your wool felt, and your bunny pattern. Trace eight bunnies on the smooth side of your Heat N’ Bond Lite. Next iron the traced bunnies on to the back of your wool felt. Use a barrier fabric between the iron and the wool felt. Cut each bunny out.
Alright, next we need to iron our bunnies onto the banner flags. First I like to lay out my flags in the order I want them on the banner. Make sure to keep the front and back of each banner flag together. On the front flag (right side up) use a ruler to measure down 3 ⁄ 4 ” and then center a bunny with its ears touching the ruler at the top. Once in place use a barrier cloth and iron to adhere the bunny to the fabric. Repeat with the remaining top banner flags.
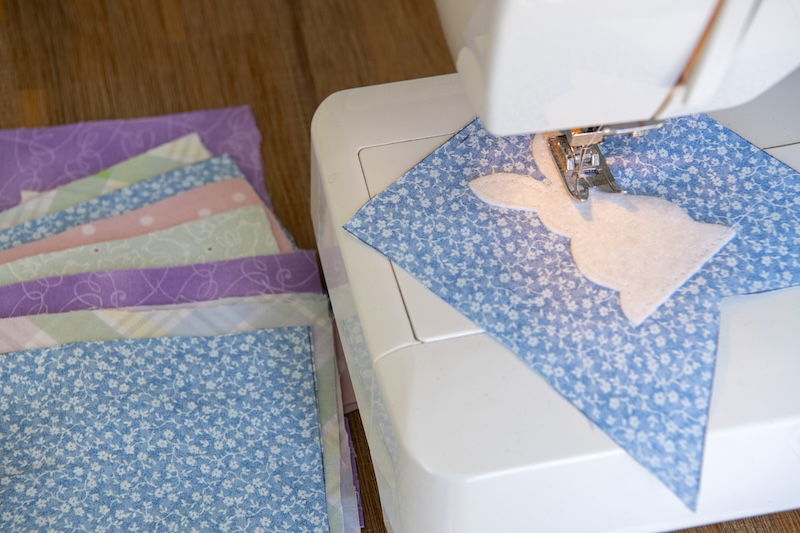
Sew around the perimeter of each bunny. Instead of backstitching pull the threads to the back and tie them off.

Pin your flag fronts to the backs, right sides together. Sew around the banner flags using a ⅛” seam allowance. I know that’s a small seam allowance but since I made this pattern for my own personal use years ago that’s what I went with. It makes it easy to turn the flags and not have to chop down the seam allowance to do so. Sew around the perimeter leaving the top edge open. Turn and press.
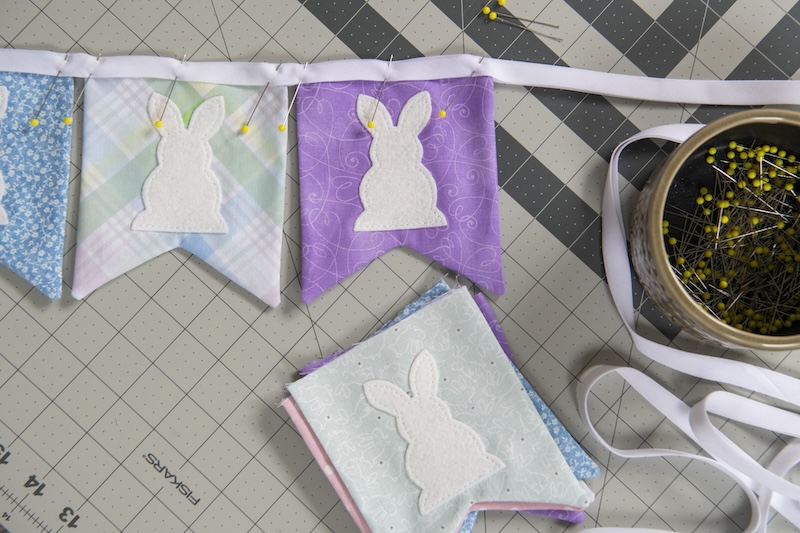
Take your bias tape and your flags. I leave 18 inches of the bias tape for the tie on each side. Measure in 18 inches and place your first flag by slipping it in between the bias and pin. Repeat with the other flags leaving approximately ¼-inch between each flag. Once all the flags are in place measure another 18 inches and cut off the excess bias. Take to your sewing machine and top stitch along the bottom edge of the bias tape from one end to the other.
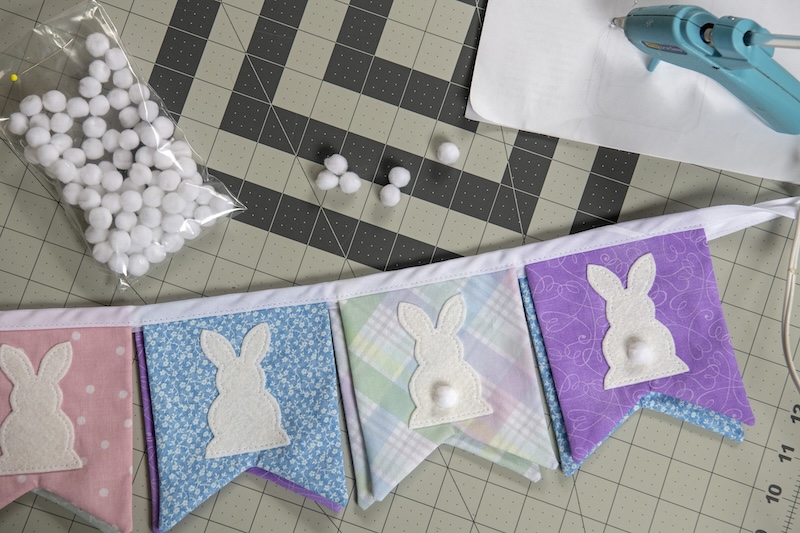
Lastly we need to add the pom pom tails. Using a glue pun use a small dot of glue on each pompom and place on your bunnies for the tail. Once they are all in place you are finished!
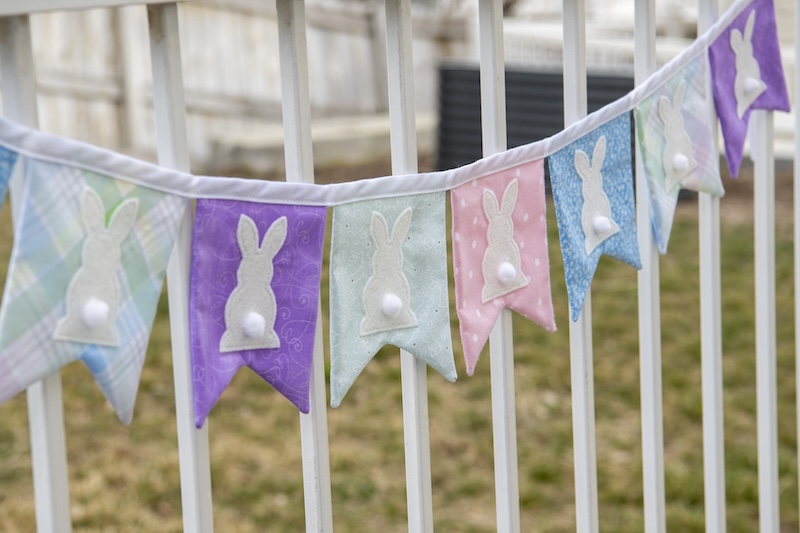
String it up and admire it. Hope you love your bunny banner as much as I do. Those tails just make it. Thanks for joining in and sewing along with me!