Bitty Goody Basket featuring HeatnBond
Greetings friends! It’s Belinda Karls-Nace from Blue Ribbon Designs, here today with a brand new project tutorial featuring an assortment of my favorite Therm O Web products. Today, I am excited to share my “Bitty Goody Basket” with you.
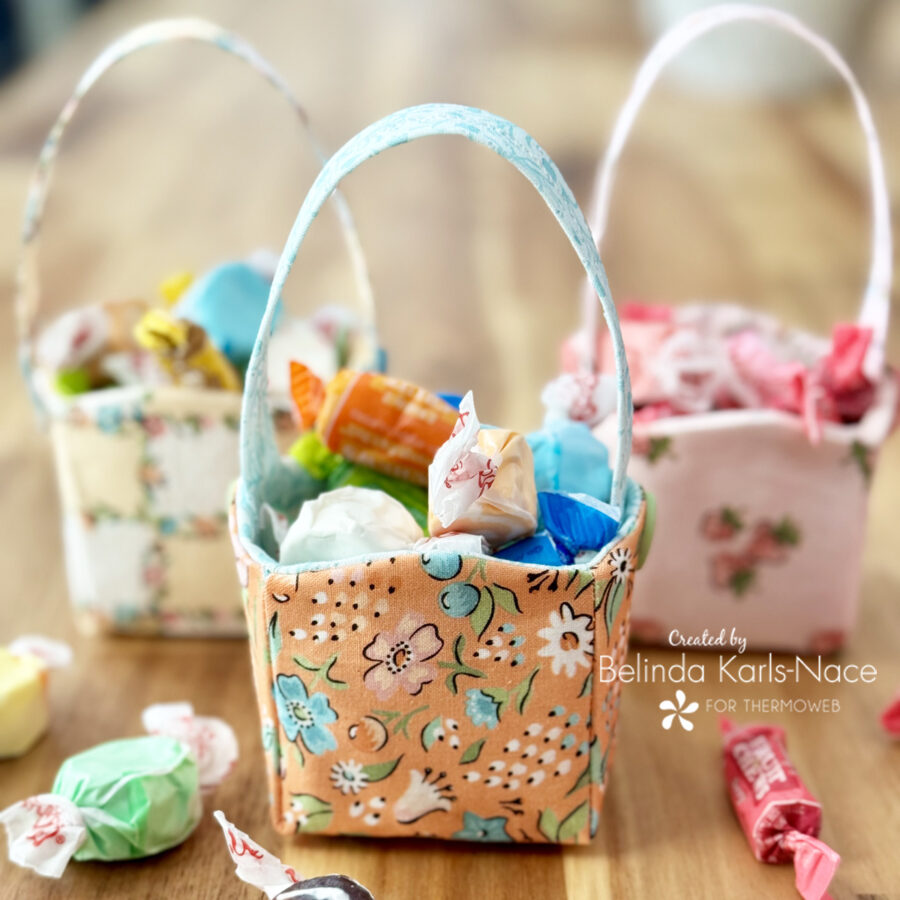
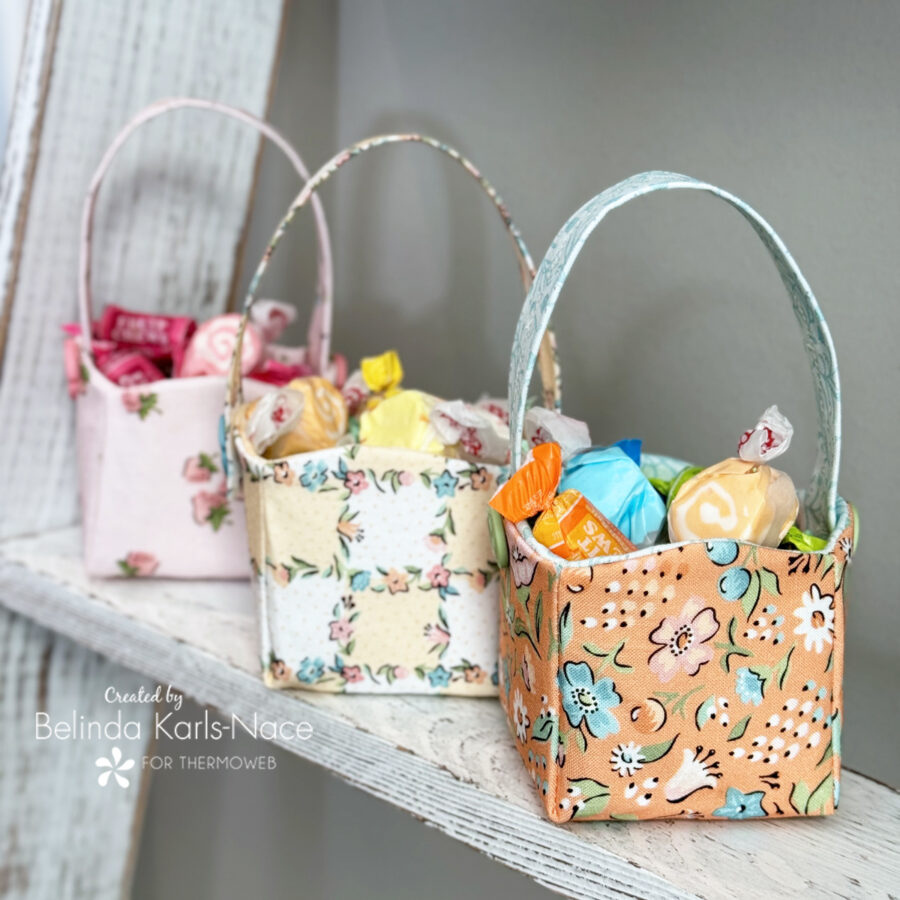
With Easter arriving early this year, I thought it would be fun to work on a springtime project this month. These easy to make bitty baskets are perfect for little treats, an Easter egg, or tiny treasures. With minimal supplies, you can create several of these in an afternoon. If you are thinking ahead, these would be perfect for May baskets or to use as a gift for a teacher or friend. You could also use one as a little mending basket with needles, tiny scissors, and spools of thread. I will warn you; these can be addicting – once you see how easy this project is, you will want to make more than one.
Let’s get started! Simply gather the materials/supplies listed below, then download the pattern with the PDF template.
*NOTE*: This tutorial requires basic sewing knowledge. If you need additional assistance, search the Internet, or look at a basic sewing book to learn the fundamentals.
 What you need:
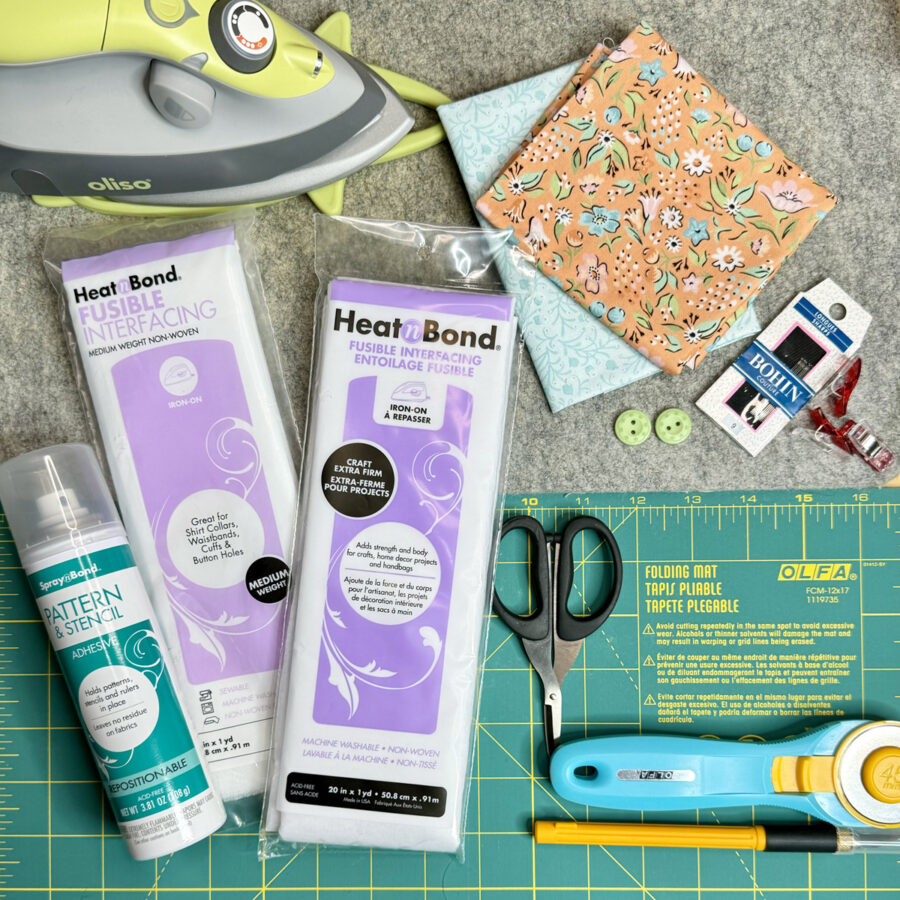
- HeatnBond Craft Extra Firm Non-Woven Fusible Interfacing
- 1 – 8½” x 8½”
- 1 – ⅞” x 9”
- HeatnBond Medium Weight Non-Woven Fusible Interfacing
- 1 – 8½” x 8½”
- SpraynBond Pattern & Stencil Spray
- Cotton Fabrics: model uses Garden Party by Sheri McCulley for Poppie Cotton – I encourage you to use fabric in your stash or scrap bin.
- 1 – 8½” square – outer fabric (model uses orange floral)
- 1 – 8½” square – lining fabric (model uses light blue floral)
- 1 – 2” x 9” strip – basket handle (model uses light blue floral)
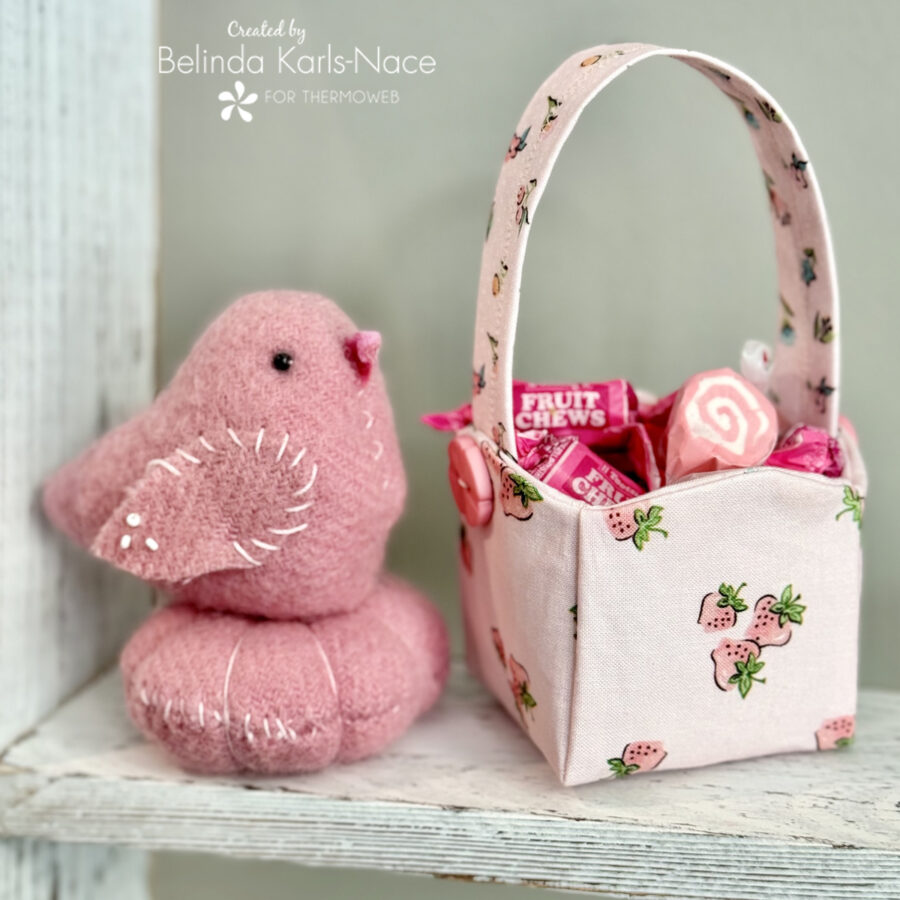
- Two coordinating buttons (model uses ⅝” round)
- Hand sewing needle and thread
- Oliso Iron
- Olfa Cutting Tools (cutting mat, rotary cutter)
- Sewing Machine
- Basic Sewing Supplies/Tools (small sharp scissors, rulers, sewing thread, pencil, pins, etc.)
How to make a Bitty Goody Basket
2½” W x 5½” H x 2½” D (includes 3” Handle Drop)
1. Download and print the Bitty Goody Basket PDF.
Bitty Goody Basket – A Project for the Therm O Web Blog
Print actual size – do NOT “fit to page” or “shrink to fit.”
Print both pages on regular printer paper.
2. Prepare Basket Fabrics
A. Center and fuse the 8½” x 8½” piece of HeatnBond Craft Extra Firm Non-Woven Fusible Interfacing to the wrong side of the 8½” x 8½” fabric square for the outside of the basket, following the package instructions.
- Pre-heat iron to high heat (cotton setting), no steam.
- Place the rough side of the interfacing onto the back (wrong side) of the fabric.
- Cover with a light, dry pressing cloth. Press and hold the iron with medium pressure for 10-15 seconds. Repeat by lifting the iron to a new area and pressing, overlapping slightly, until entire surface is bonded.
- Allow it to cool.

B. Center and fuse the 8½” x 8½” piece of HeatnBond Medium Weight Non-Woven Fusible Interfacing to the wrong side of the 8½” x 8½” fabric square for the lining of the basket, following the package instructions.
- Pre-heat iron to high heat (cotton setting), no steam.
- Place the rough side of the interfacing onto the back (wrong side) of the fabric.
- Cover with a light, dry pressing cloth. Press and hold the iron with medium pressure for 10-15 seconds. Repeat by lifting the iron to a new area and pressing, overlapping slightly, until entire surface is bonded.
- Allow it to cool.
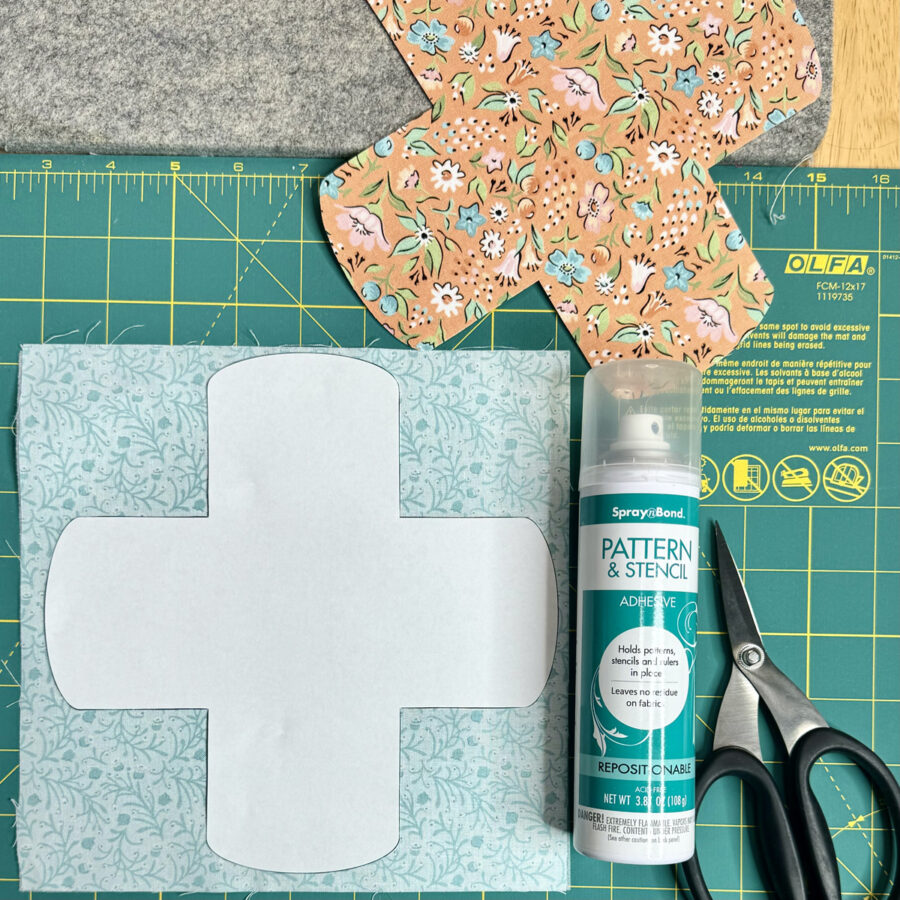
C. Using the paper template, cut one template shape from the outer fabric with interfacing and one template shape from the lining fabric with interfacing. Use SpraynBond Pattern & Stencil Spray to hold template in place, following the instructions on the can.
- Protect your workspace.
- Shake can well. Hold can upright, 12 inches from the paper template. Press nozzle and apply adhesive using a sweeping motion to lightly cover the template.
- Let dry one minute then press template to fabric.
- The same template can be used multiple times.
- Before storing, hold the can upside down and press for a short burst to clear the nozzle.
3. Create Basket
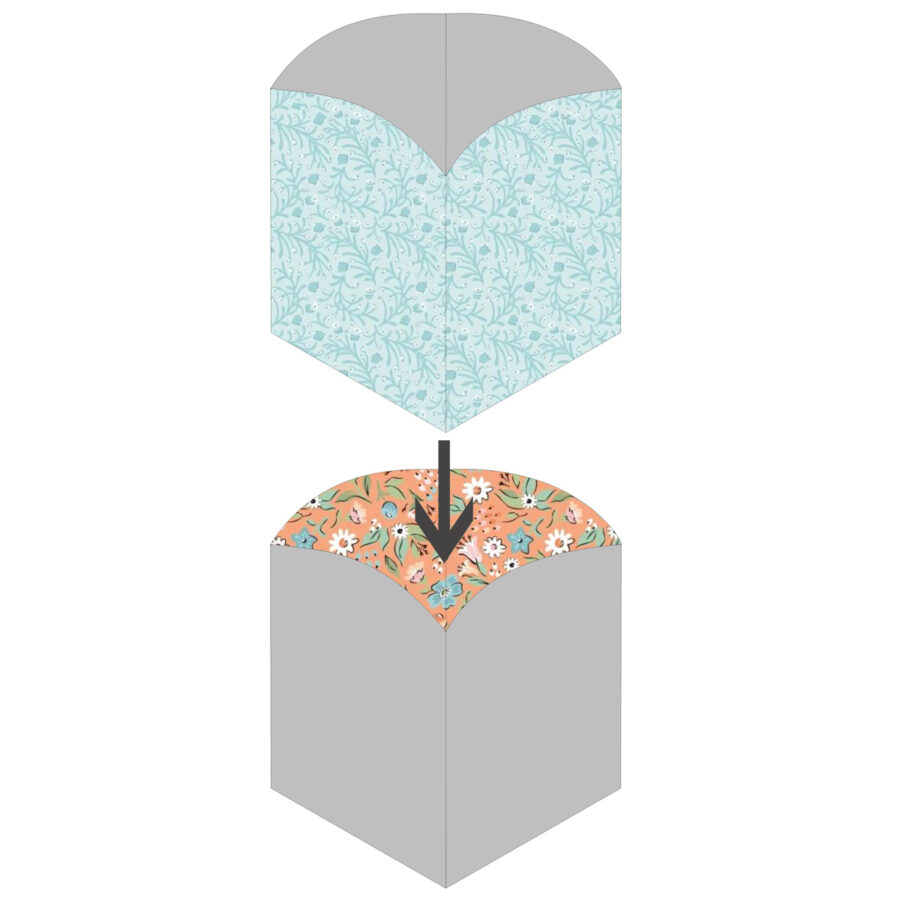
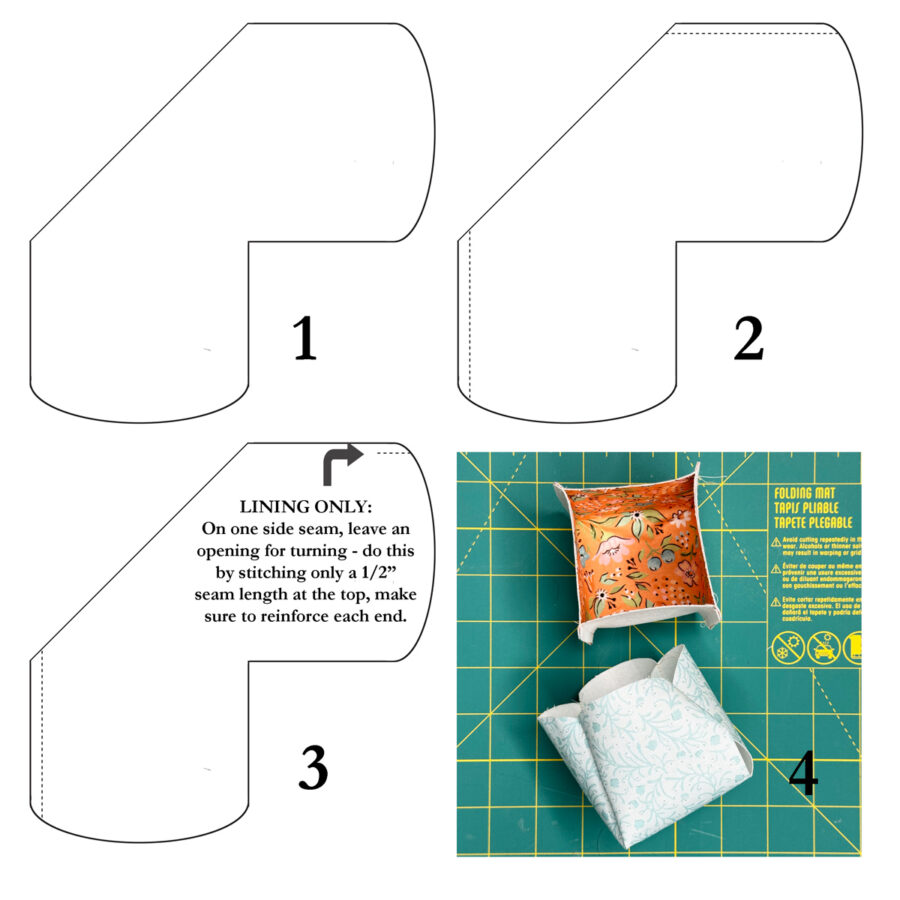 A. Fold the outer fabric on the diagonal, ride sides together, using the diagram as a reference (1).
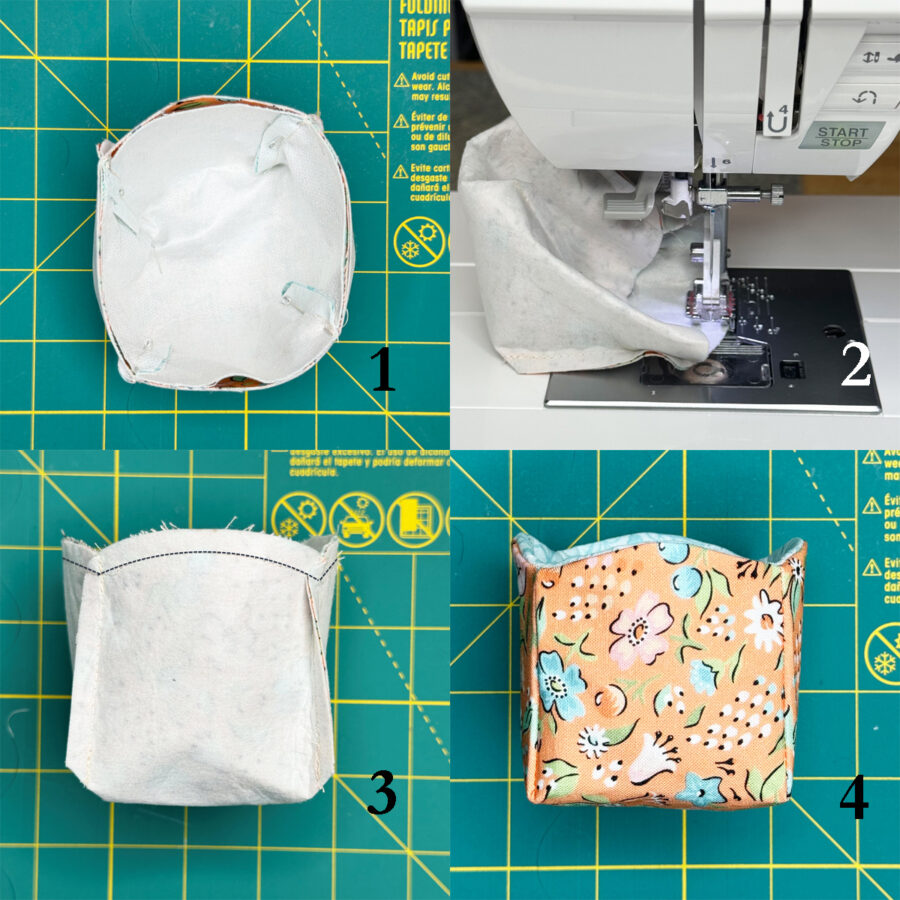
B. Pin and sew the top and left sides together using a ¼” seam allowance, using the diagram as a reference (2).
C. Match, pin, and sew the opposite sides, forming an open cube. Do not turn right side out. Diagram 4.
D. Repeat steps A – C with the lining fabric, with one exception; for one side only, leave an opening for turning. Do this by sewing only a ½” seam length at the top end of the basket. Reinforce stitches. Use the diagram as a reference (3). Turn the lining right side out. Diagram 4.
E. Place the lining basket inside the outer basket, right sides together.
F. Line up the side seams and top edges. Pin in place. Diagram 1.
G. Sew around the entire perimeter of the top of the basket with a ¼” seam allowance. This can be a bit tight/bulky with the small size. Take your time. Diagrams 2 and 3.
H. Using the opening for turning in the lining, turn right side out. Push lining inside of the basket. Line up edges and press. Sew up opening by hand or machine. Diagram 4.
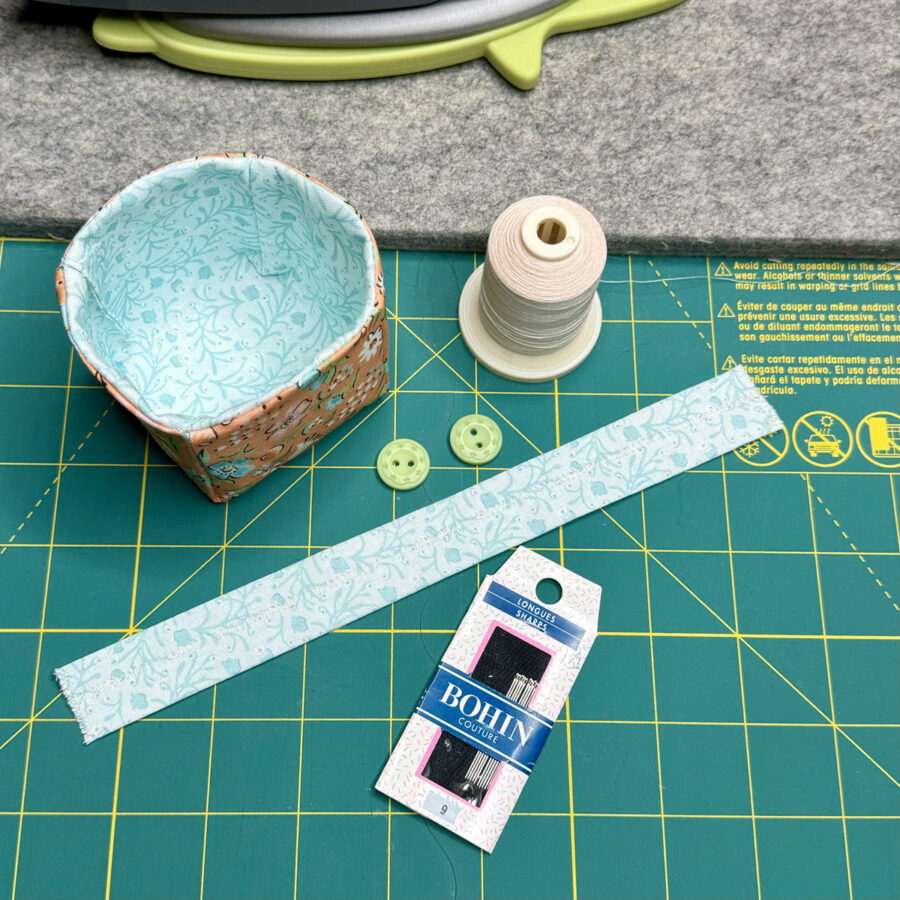
4. Create and Attach Handle
A. Press the length of the 2” x 9” fabric in ½” on each side to the center, creating a strip that is 1” x 9”.
B. Place the ⅞” x 9 strip of HeatnBond Craft Extra Firm Non-Woven Fusible Interfacing inside the folds of the fabric, non-fusible side towards the 1” width and ½” folded sides on top of the fusible side. Fuse in place using the package instructions (see step 2 – A).
C. Optional: Using a small zig zag stitch on your sewing machine and thread that matches your handle fabric, stitch both ends of the handle and the length of the handle (down the center covering the raw edges).
D. Attach the handle using a button and a hand sewing needle and thread. You may choose to put the ends of your handle inside the basket or on the outside of the basket. For the model, I put the handle approximately 1” inside the basket, and sewed through the button, the basket, and the handle. Repeating on the opposite side.
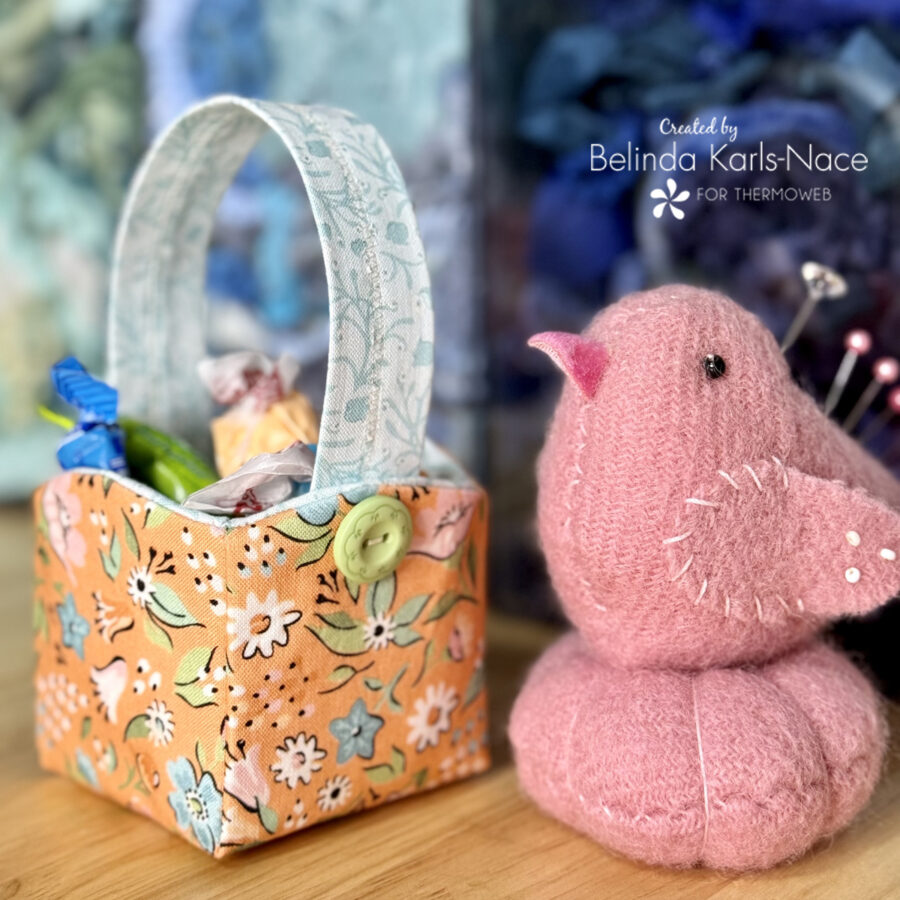
Your Bitty Goody Basket is complete. The HeatnBond Craft Extra Firm Non-Woven Fusible Interfacing will give the basket and handle good structure without making it too stiff. Fill it with treats and/or treasures to gift or display.
 Thank you for joining me today for my Therm O Web blog tutorial. I hope this post inspires you to create a Bitty Goody Basket (or ten!), using fabrics and materials you have on hand. To see more of my projects and patterns, stop by my blog, website, and/or Instagram – I would love to visit with you and see what you create!