Hello and welcome to Mix It Up Monday, Deb Riddell here with you today to share a frightfully fun Halloween decoration featuring Rebekah Meier Designs Mixed Media line, Deco Foil and Fancy Foils by Gina K. Designs. We’ll mix things up to inspire you with some fun and maybe a little creepy, Zombie Halloween Decor!
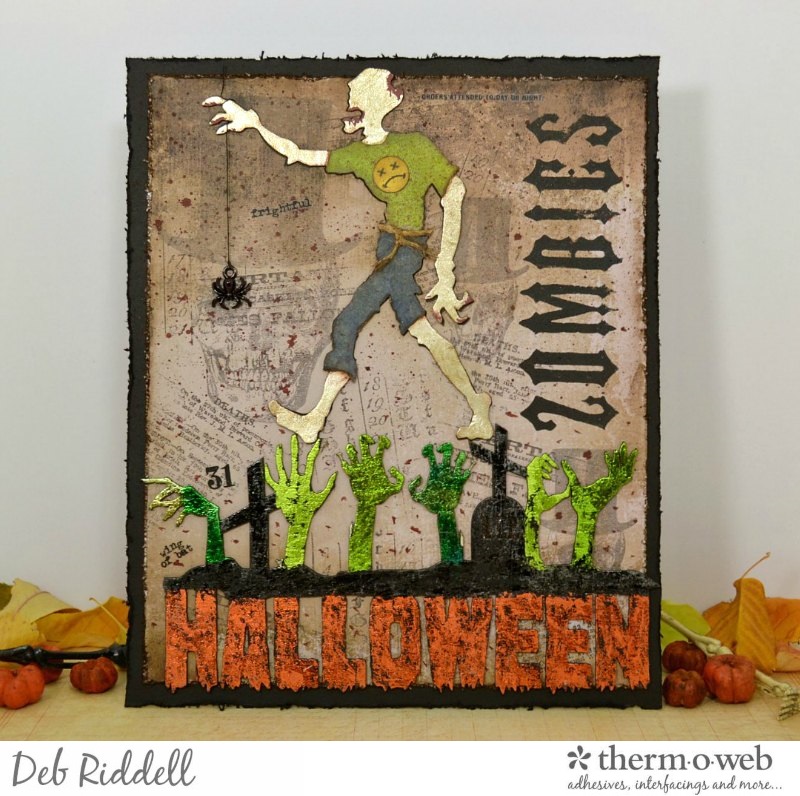
Zombie Halloween Decoration
Therm O Web Supplies Used:
Rebekah Meier Designs Mixed Media Art Paper 9″ x 12″ (4 sheets per pack)
Rebekah Meier Designs Mixed Media Foam Sheets 9″ x 12″ (2 sheets per pack)
Rebekah Meier Designs Mixed Media Medium Jar 4 fl oz
Rebekah Meier Designs Transfer Foil 6″ x 6″ (12 sheets per pack) • Antique Pearl (Satin)
Gina K. Designs Fancy Foils™ 6″ x 8″ • Sweet Mango
Deco Foil™ Adhesive Pen .34floz
Deco Foil™ Transfer Sheets • Emerald Watercolor
Deco Foil™ Transfer Sheets • Black
Deco Foil™ Transfer Sheets • Spring Green
Deco Foil™ Transfer Sheets • Lime (Satin)
Deco Foil™ Transfer Sheets • Silver
Memory Tape Runner XL™
Other supplies:
Halloween Header chipboard – Southern Ridge Trading Company
Lost Zombie die – Sizzix
Distress Oxide Ink; Distress Stain; Distress Paint; Distress Archival Ink; Black Soot Alcohol Ink – Ranger Ink
Gothic Foam Stamps; Wicked Spider Charm; Curiosities Remnant Rubs; Materialize Paper Stash – Tim Holtz/Advantus
Undertaker stamp set; Regions Beyond stamp set – Stampers Anonymous
Miscellaneous – twine, black cardstock, black thread, scissors, paper trimmer, black acrylic paint, paint brush, die cutting machine
A Zombie Halloween Instructions:
Paint the Halloween Header chipboard piece with black acrylic paint.
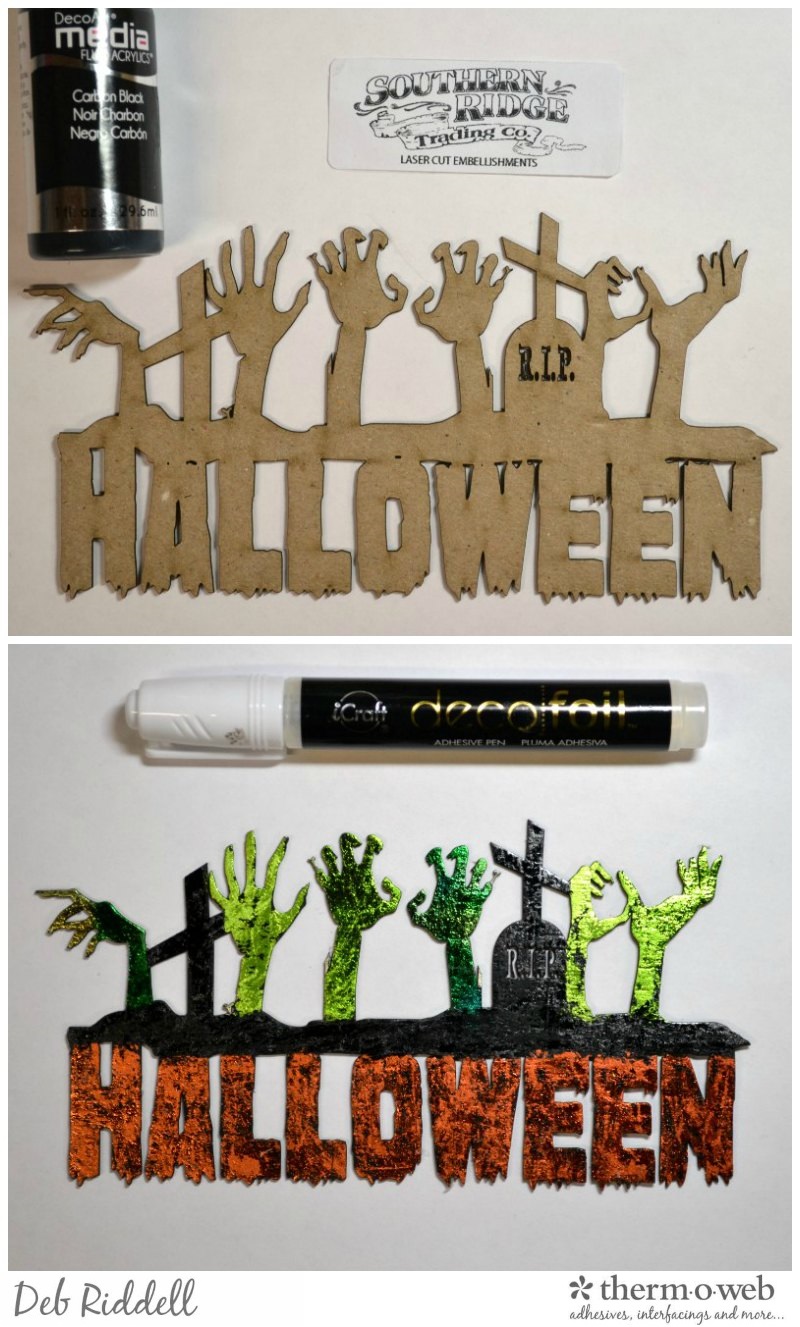
Add adhesive to the painted chipboard piece with the Deco Foil Adhesive Pen, ‘coloring’ each segment separately. Apply Gina K. Designs Sweet Mango Fancy Foil to the word Halloween, apply Black Deco Foil to the dirt and grave markers and then apply Emerald Watercolor, Lime and Spring Green Deco Foil to the zombie hands, alternating the colours. Apply a little piece of Silver Deco Foil behind the RIP on the right grave marker.
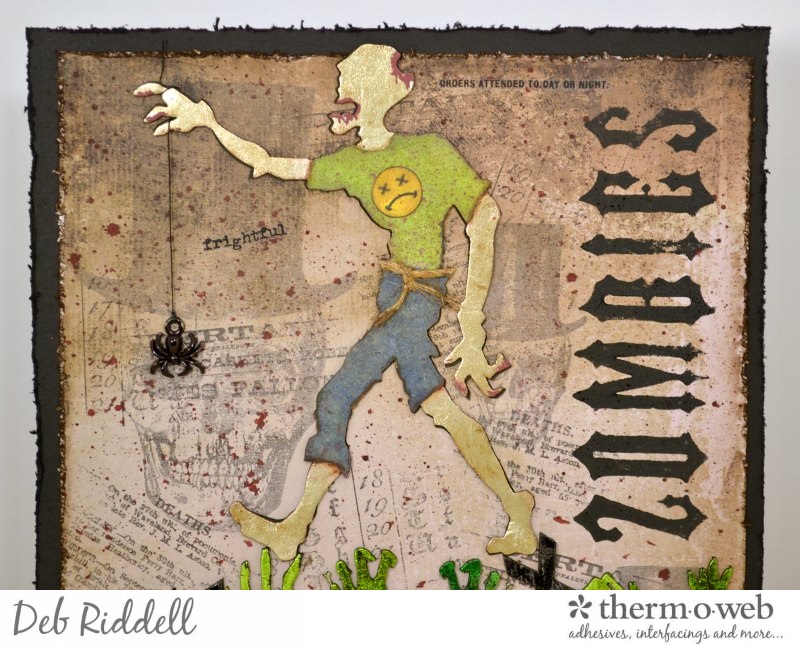
Die cut the Lost Zombie from Rebekah Meier Designs Mixed Media Foam Sheet, remove the top piece of backing paper and adhere Antique Pearl Mixed Media Transfer Foil over the entire zombie die cut. Die cut another zombie from black cardstock, remove the backing paper from the foiled zombie and adhere the two together, offsetting the die cuts slightly so you get a bit of a shadow line.
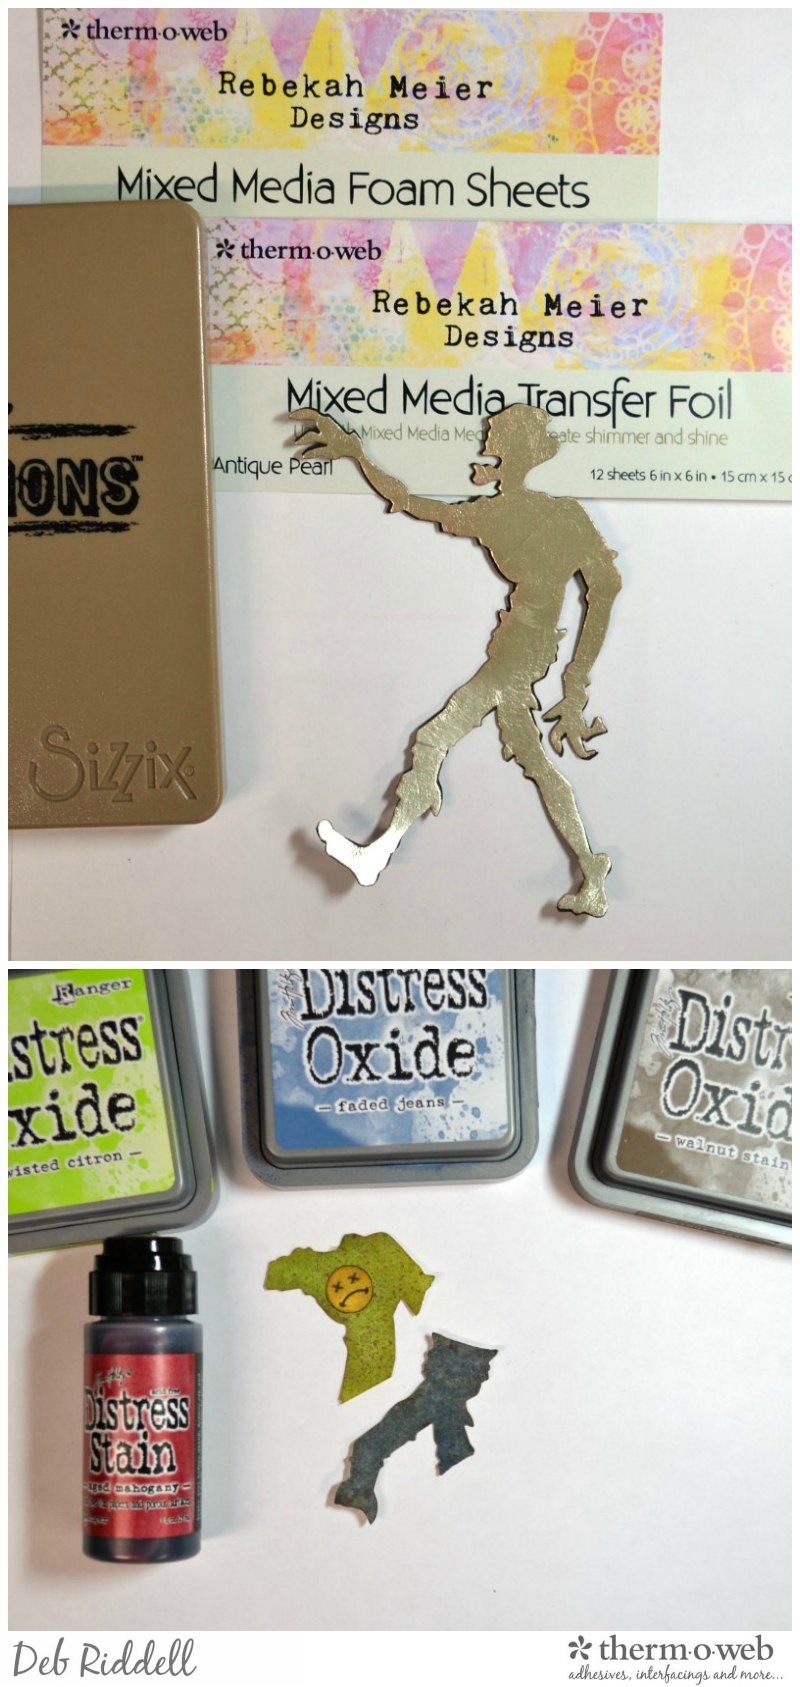
Colour a couple of small pieces of Rebekah Meier Designs Mixed Media Art Paper with Distress Oxide Ink for the zombies clothes. Use Faded Jeans and Walnut Stain for the pants and Twisted Citron and Walnut Stain for the shirt. Flick a bit of diluted Aged Mahogany Distress Stain onto the inked art paper for a bit of ‘blood spatter’, bwa-ha-ha-ha!
Die cut the zombies pants and then die cut the shirt with the Lost Zombie die. I found this fun dead smiley face image online, resized and printed it out on copy paper and added it to my zombie’s shirt! Remove the backing paper from the mixed media art paper clothes and apply them to your foiled zombie.
Cut a piece of Halloween scrapbook paper to about 6 1/2″ x 8″, tatter the edges with your scissors and adhere it to a piece of black cardstock cut to about 7″ x 8 1/2″ with your iCraft Memory XL tape runner. Randomly stamp Halloween images onto the scrapbook paper (Undertaker and Regions Beyond stamps were used here) and then stamp the word ‘zombies’ vertically down the right side (Gothic Foam Stamps were used here).
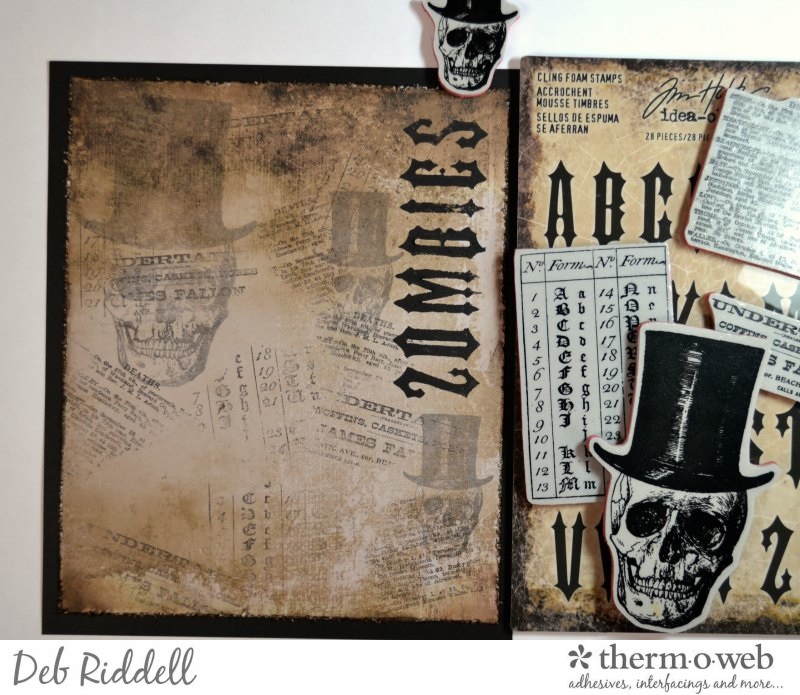
Adhere the foiled Halloween Header chipboard piece to the bottom edge of the prepared panel with Rebekah Meier Designs Mixed Media Medium. Add a few Halloween Remnant Rubs here and there on your panel.
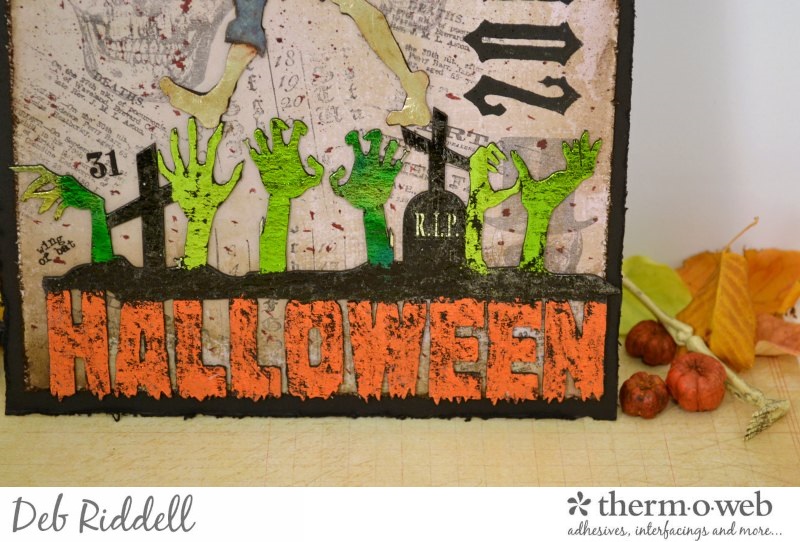
Colour a Wicked spider charm with Black Soot alcohol ink and tie it to your zombies outstretched hand with a piece of black thread. Cut a piece of twine and glue it around your zombies waist (you wouldn’t want his pants to fall down!). Adhere your zombie over top of the foiled Halloween Header with Rebekah Meier Designs Mixed Media Medium. Add a few more Halloween Remnant Rubs if desired, add some ‘blood’ to your zombies mouth, head and hands with Aged Mahogany Distress Paint and then mask off the zombie and foiled header and spatter some more Aged Mahogany Distress Stain all over the panel.
And that’s it, your Zombie Halloween decoration is done!
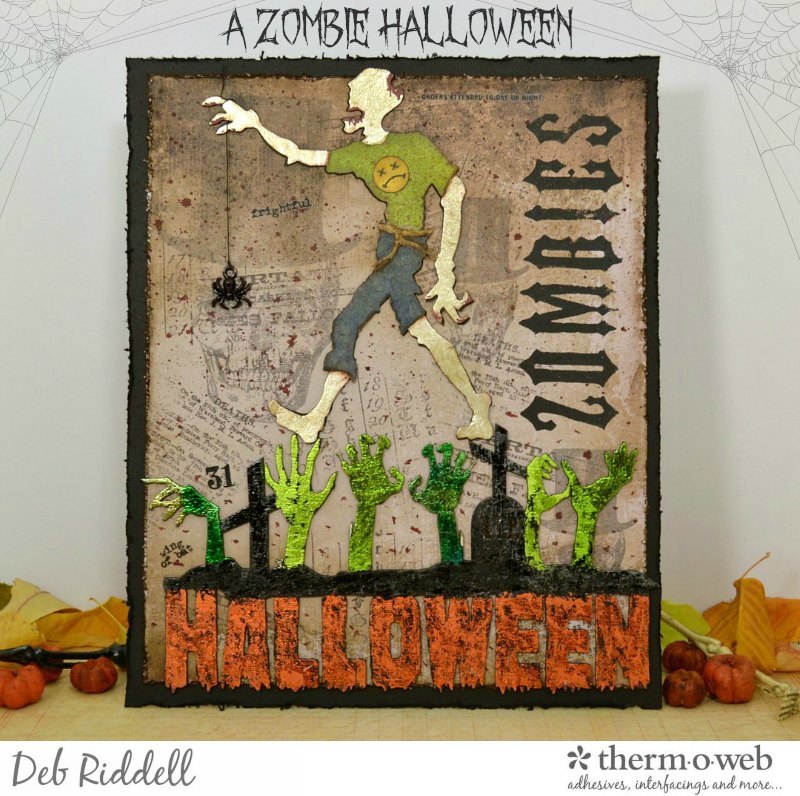
I hope that you’ve enjoyed seeing how it came together and that you’ve been inspired to make some frightfully fun Halloween decorations of your own with Rebekah Meier Designs and Deco Foil. You still have a few days left before All Hallows Eve so get your haunt on and happy creating!
Deb xo
Save

margessw
October 23, 2017 at 8:53 am (8 years ago)This is a fun Halloween decoration !
Deb Riddell
October 23, 2017 at 12:07 pm (8 years ago)Thank you so much Marjorie! Deb xo