


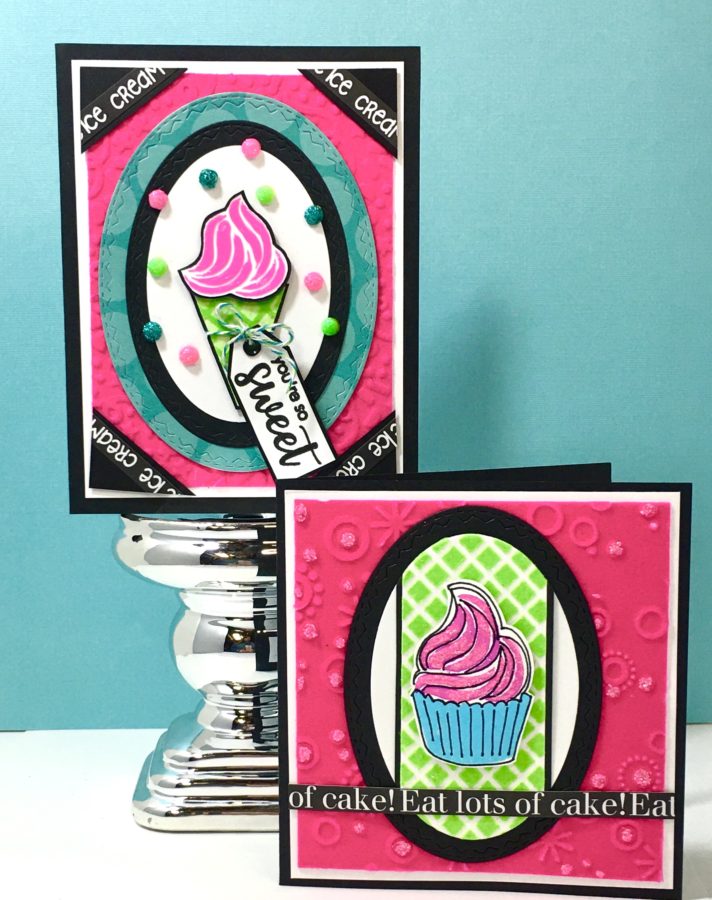
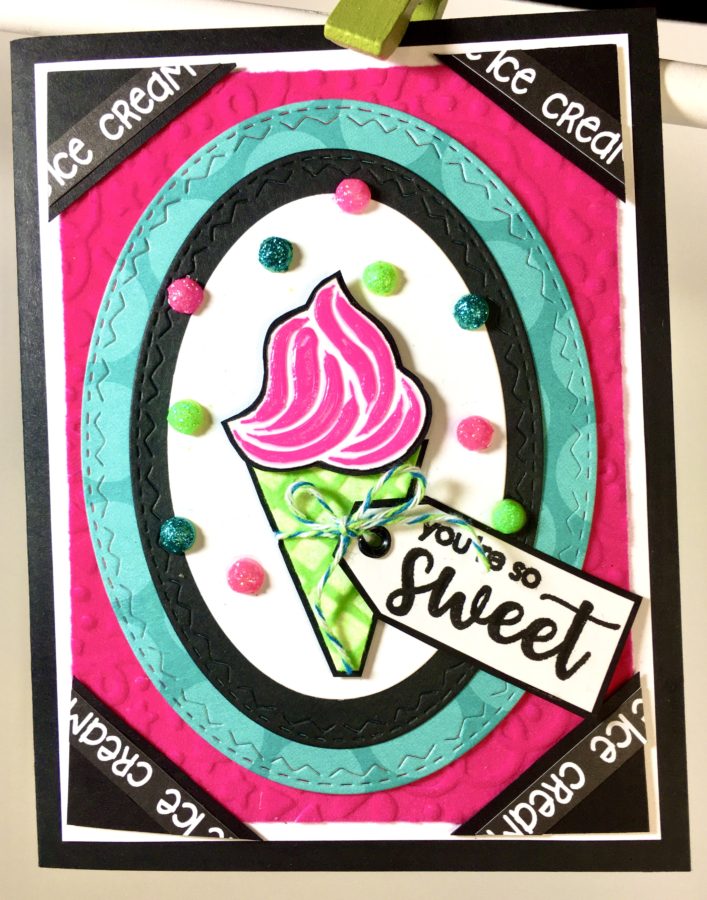
YOU’RE SO SWEET CARD
Card Supplies:
a href=”https://www.thermowebonline.com/c/new-products_gina-k-designs_new-releases”>Rina K. Designs StampNStencil Set – Sweet Stuff – Coming Soon!
Rina K. Designs Glitz Glitter Gel – Poppin’ Pink, Loud Lime and Turquoise Sea – Coming Soon!
Rina K. Designs Electro-Pop Neon Enamel – Poppin’ Pinks – Coming Soon!
Rina K. Designs Electro-Pop Neon Flock Transfer Sheets – Loud Lime and Poppin’ Pink – Coming Soon!
Deco Foil Transfer Gel Duo
iCraft UltraBond Liquid Adhesive
Deco Foil White Foam Adhesive
Deco Foil Stencil Pal
Other Supplies: Cardstock, Rina K. Designs Electro-Pop Neon Ink, baker’s twine, oval dies, flat back pearls, paintbrush, and scissors.
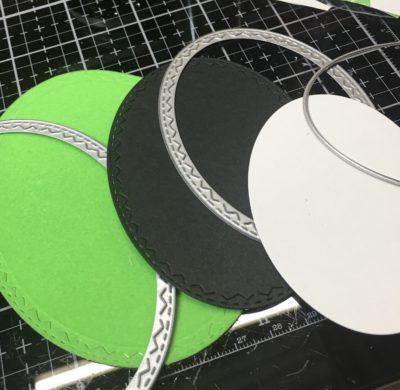
STEP ONE:
To begin, create a card base and die-cut cardstock ovals from three different colors (the smallest oval should be white).
Hint: Mix and match your die sets to get just the right sizes.
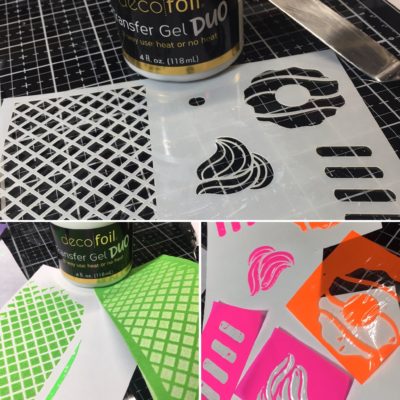
STEP TWO:
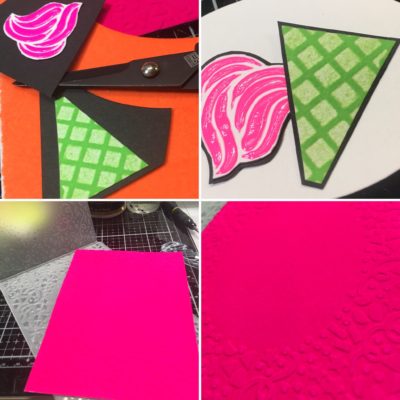
Using the new Deco Foil Transfer Gel Duo, a StampNStencil Detail Stencil and a Deco Foil Stencil Pal, spread Transfer Gel Duo (lattice and ice cream patterns) onto white cardstock and allow to set-up. Once the stenciled patterns are set-up, do the following:
Lattice: Place a piece of Loud Lime Flock Transfer Sheet (fuzzy side down) over the gel and then place it into a folded piece of copy paper and run through your foiling machine. Once it comes out of the machine, pull the Flock Transfer Sheet from the gel which will leave you with both the positive and negative lattice pieces for use in projects. We will be using the negative piece for this project.
Ice Cream: As with the lattice, place a piece of Enamel Transfer Sheet (dull side down) over the gel and run through your foiling machine inside a folded piece of copy paper. After it comes out of the machine, pull the Enamel Transfer Sheet from the gel, leaving you with a beautiful glossy ice cream swirl.
Hint: The new Transfer Gel Duo can be used with heat or without.
STEP THREE:
Trim around the ice cream swirl and back it with black cardstock. Next, the cardstock slightly larger than the ice cream swirl to create a border. Trim the negative space lattice into an ice cream cone shape and add a black cardstock border as you did with the ice cream swirl.
To create the embossed background, run the Flock Transfer Sheet through your die-cut machine in an embossing folder to give you a beautiful velvety pattern. Next, trim the embossed flock to size and layer onto your card base with the die-cut ovals. Add your ice cream cone to the center of the white oval using Adhesive Foam Sheet.
Hint: Use the ice cream cone stamped image as a pattern as to size.
STEP FOUR:
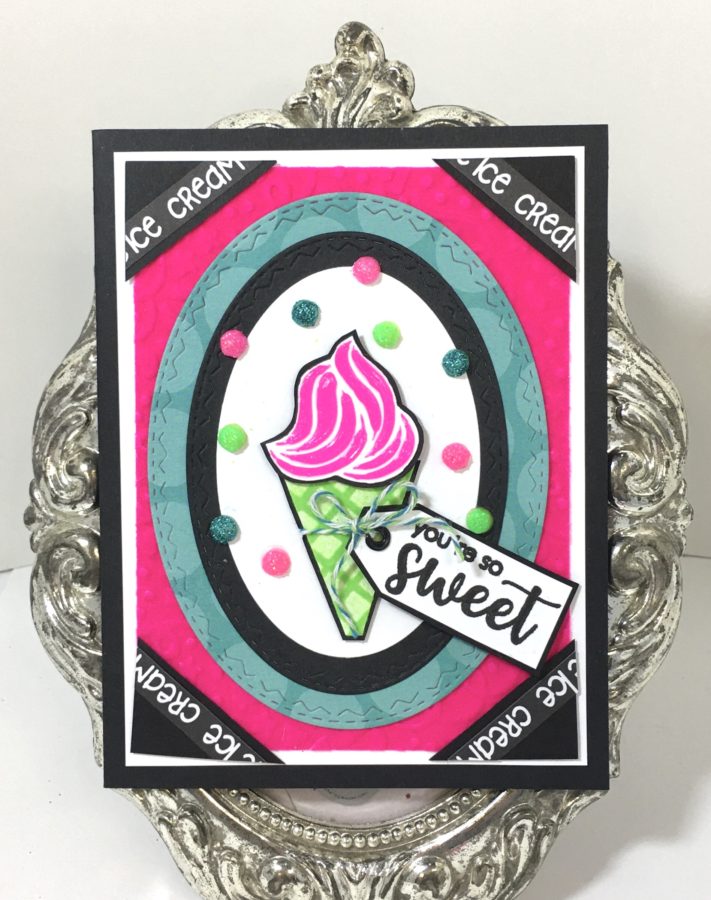
Use Rina K. Designs Electro-Pop Neon Inks to color some flat back pearls. Glue the colorful pearls around the ice cream cone image. Next, use your paintbrush to add Glitz Glitter Gel over the colored pearls for a bit of sparkle.
Hint: Mix a little ink and alcohol on a slick surface to paint onto the pearls. This allows you to add Glitz Glitter Gel without worrying about color coverage.

STEP FIVE:
Stamp a sentiment and cut it into a tag shape. Finish your card by tying the tag to the ice cream cone.
Hint: When you adhere to the ice cream cone to the white oval, use two pieces of white adhesive foam sheet so you can leave a space in the middle. This will allow you room to thread the baker’s twine and attach your tag.
Thank you for stopping by and allowing me to share my project with you!
Wendy