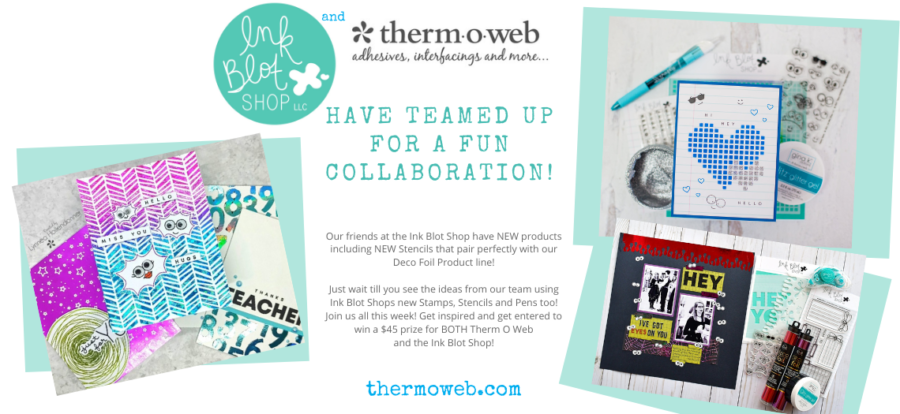
HELLO CRAFTY FRIENDS!!
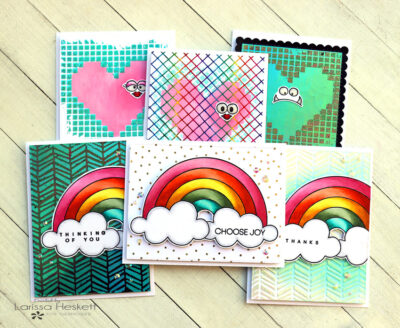
Larissa here today to show you 6 different Cards using a combination of Deco Foil Products!! We’re collaborating with the Ink Blot Shop this Week and I LOVE being able to Mix and Match ALL of the different Products to create UNIQUE Cards, special for ANY Occasion!!
Let’s get Started!!
Deco Foil Cards with Ink Blot Shop
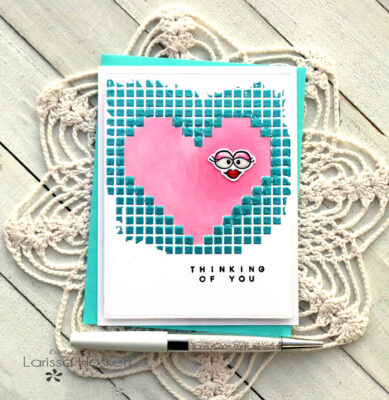
For my 1st Card, I’m using several Ink Blot Shop Products along with some Pixie Spray, Deco Foil Transfer Gel Duo and Deco Foil!!
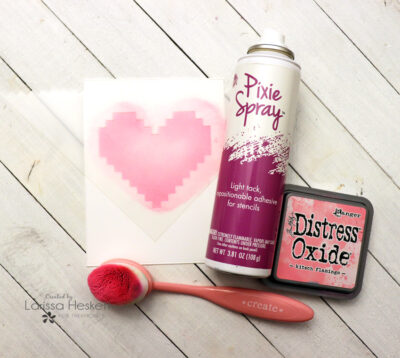
I started by Spraying the backside of all of the Ink Blot Shop Pixel Grid with Pixel Grid Masks Stencil Set!! Then I Placed the Large Pixel Heart Stencil over the Card Panel and pressed it firmly into place!! Then I inked with Kitsch Flamingo Distress Oxide Ink!!
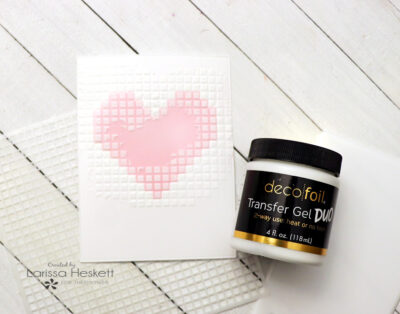
Next, I placed the Large Heart Pixel Mask over the Inked Pixel Heart and pressed it firmly into place!! Then I placed the Pixel Stencil over the Card Panel pressing it into place and applied some Deco Foil Transfer Gel Duo over the Stencil using a Stencil Pal!! I removed the Pixel Stencil and then removed the Large Pixel Heart Mask!! Then I set the Panel aside to Dry completely!!
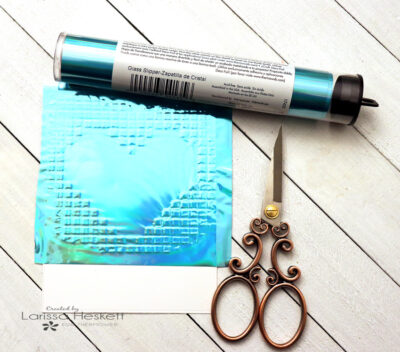
Once the Gel was Dried completely I cut a piece of Glass Slipper Deco Foil large enough to cover the Stenciled Design and ran it through the Laminating Machine!!
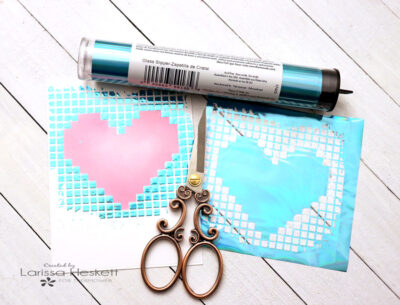
Then I removed the Negative Foil and SWOON!! I LOVE the way this turned out!!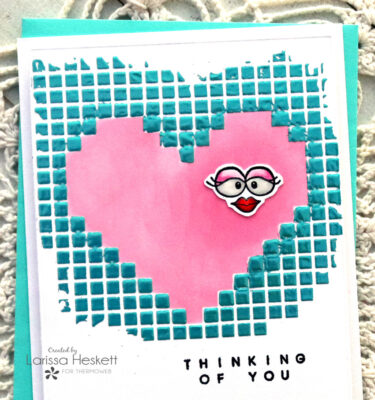
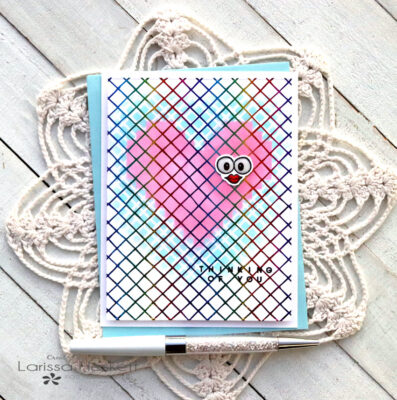
For my 2nd Card, I’m using a Laura Kelly Toner Sheet and Foiling it with my FAVORITE Rainbow Foil and showing you how to Ink over it to create a very UNIQUE Card!!
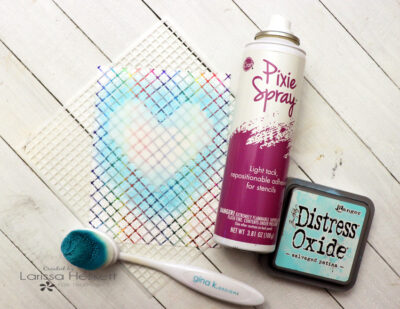
I started by Foiling the Laura Kelly Toner Sheet in Dauntless Diamonds with Rainbow Deco Foil!! Then I placed the Ink Blot Shop Large Hear Pixel Mask over the Card Panel and pressed it firmly into Place!! Then I placed the Pixel Stencil over the Large Heart Pixel Mask and Card Panel and pressed it firmly into place and Inked over it using some Salvaged Patina Distress Oxide Ink!! Then I removed the Stencil and Mask!!
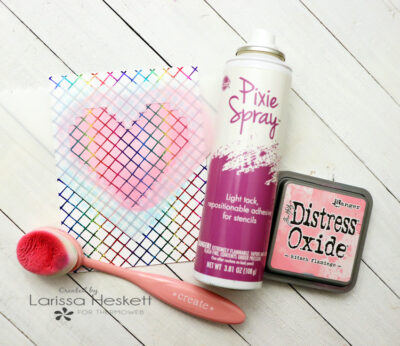
Next, I lined the Large Pixel Heart Stencil over the Inked background and pressed it firmly into place!! Then I inked it with Kitsch Flamingo Distress Oxide Ink!!
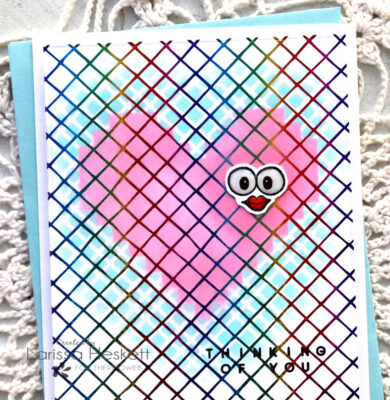
I Stamped and Embossed the Sentiment from the Ink Blot Shop Spaced Out Greetings Stamp Set along with a Face from the Funny Faces Stamp Set!! I Colored the Face with Copic Markers and then added some Glossy Accents to the Image for some Dimension and Shine and Fussy Cut it out!! Then adhered it to the Heart with some Ultra Bond Adhesive!!
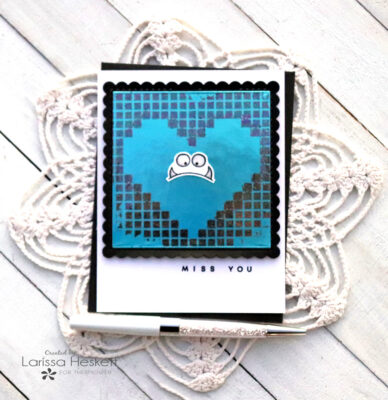
For my 3rd Card, I’m using the Negative Foil Piece from the Large Pixel Heart in the first Card!! I LOVE that you can create SEVERAL Cards when you use the Deco Foil Transfer Gel Duo with a Stencil!! The possibilities are ENDLESS!!
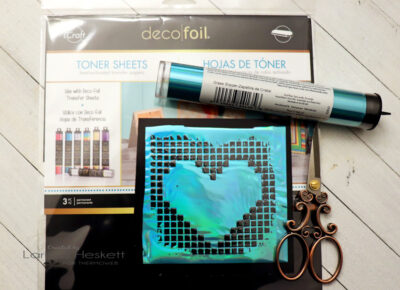
I Started by placing the Negative Foil over a piece of Deco Foil Toner Sheet and ran it through my Laminating Machine!!
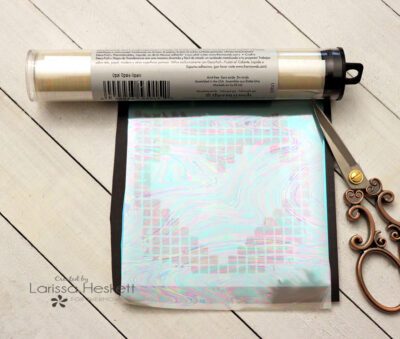
Then I Cut a Piece of Opal Deco Foil and placed it over the Deco Foil Toner Sheet!! Then I ran it through my Laminating Machine!!
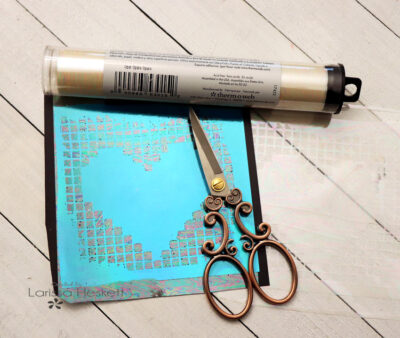
I removed the Negative Foil Sheet and SWOON!! I LOVE the way that this turned out!! You can keep repeating the Process using different Deco Foils until you get tired of creating the Design!!
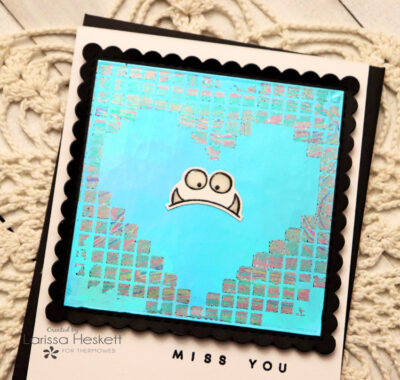
I Die Cut a Newton’s Nook Designs Scalloped Square Frame and adhered the Foiled Panel to the center of the Frame using Ultra Bond Adhesive!! Then I stamped and Embossed the Sentiment and adhered to the Scalloped Panel using some Foam Tape!!
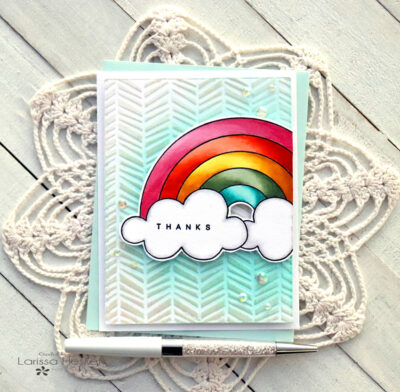
For my 4th Card, I’m using another Ink Blot Shop Stencil along with some Deco Foil Transfer Gel Duo!!
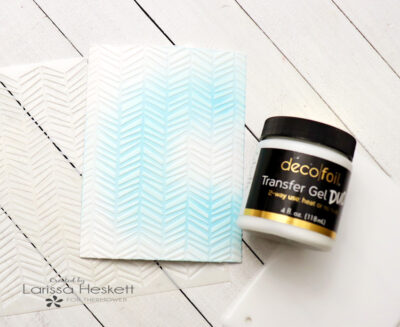
I Started by Inking the Card Panel with some Salvaged Patina Distress Oxide Ink and then I adhered the Ink Blot Shop Wild Hatch Herringbone Stencil over the Card Panel and pressed it firmly into place after I sprayed the entire back of the Stencil with Pixie Spray!! Then I applied some Deco Foil Transfer Gel Duo using a Stencil Pal!!
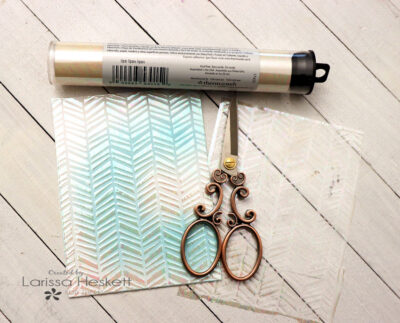
I cut a piece of Opal Deco Foil large enough to cover the Card Panel and then ran it through my Laminating Machine!! SAVE that Negative Piece of Foil as we’ll use it to create another Card!!
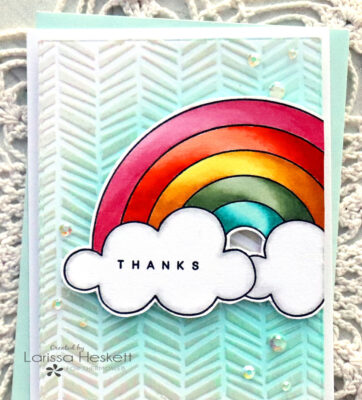
I Stamped and Embossed the Giant Rainbow Image a Colored it with Copic Markers!!
Pink: R81, R83 & R85 Orange: YR00, YR18 & YR68 Yellow: Y11, Y15 & YR23
Green: YG61, YG63 & YG67 Turquoise: BG10, BG45 & BG45
Then Fussy Cut the Image out and adhere it to the Card Panel using Foam Tape after Stamping and Embossing the Sentiment onto the Cloud!! I adhered to the Fairy Rocks Rhinestones using Zots Adhesive Dots!!
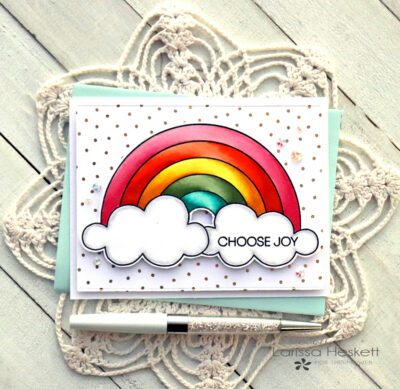
For my 5th Card, I’m using a Laura Kelly Toner Sheet and Fancy Foil to create a Glittering Background Panel!!
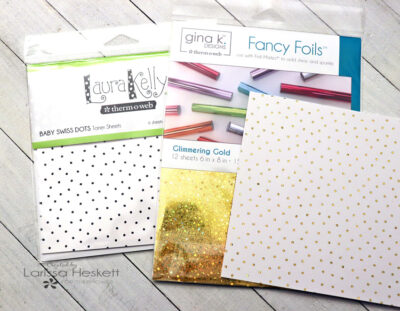
I Foiled a Laura Kelly Toner Sheet in Baby Swiss Dots and Foiled it with Glimmering Gold Fancy Foil!!
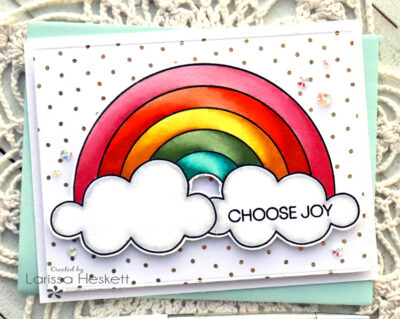
I Stamped and Embossed the Giant Rainbow Image a Colored it with Copic Markers!!
Pink: R81, R83 & R85 Orange: YR00, YR18 & YR68 Yellow: Y11, Y15 & YR23
Green: YG61, YG63 & YG67 Turquoise: BG10, BG45 & BG45
Then Fussy Cut the Image out and adhered it to the Card Panel using Foam Tape after Stamping and Embossing the Sentiment onto the Cloud!! I adhered the Fairy Rocks Rhinestones using Zots Adhesive Dots!!
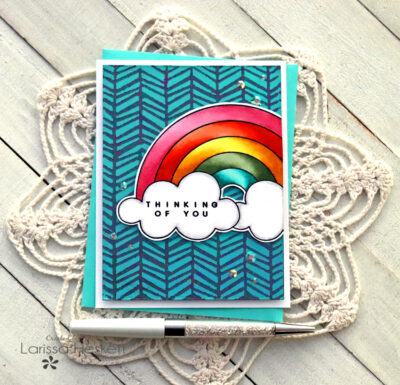
For my 6th Card I’m using the Negative Foil from the 4th Card to create an AWESOME Double Foiled Background!!
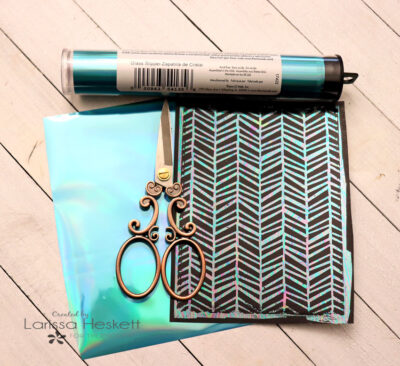
I cut a piece of Deco Foil Toner Sheet and placed the Negative Foil piece on top and ran it through my Laminating Machine!! Then I removed the Film and Cut a Piece of Glass Slipper Deco Foil Large enough to cover the Toner Sheet and ran it through the Laminating Machine!!
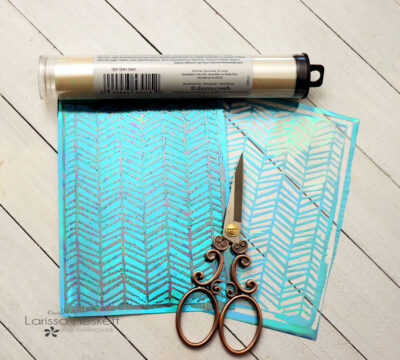
SWOON!! I LOVE the Two-Toned Foiled Background!! If You want to repeat the process you can continue it by using the Negative Foil onto Toner Sheets and by simply changing out the Colors of Deco Foil each one will be completely UNIQUE!!
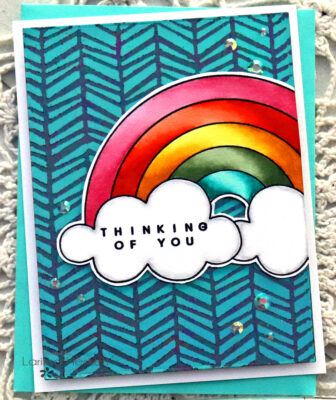
I Stamped and Embossed the Giant Rainbow Image a Colored it with Copic Markers!!
Pink: R81, R83 & R85 Orange: YR00, YR18 & YR68 Yellow: Y11, Y15 & YR23
Green: YG61, YG63 & YG67 Turquoise: BG10, BG45 & BG45
Then Fussy Cut the Image out and adhered it to the Card Panel using Foam Tape after Stamping and Embossing the Sentiment onto the Cloud!! I adhered the Fairy Rocks Rhinestones using Zots Adhesive Dots!!
Products Used:
Therm O Web:
Deco Foil in Glass Slipper, Opal & Rainbow
Deco Foil Transfer Gel Duo
Deco Foil Toner Sheets
Gina K. Designs Fancy Foil in Glimmering Gold
Laura Kelly Toner Sheets in Daunting Diamonds and Baby Swiss Dots
Stencil Pal
Pixie Spray
Zots Bling Adhesive Dots
Ultra Bond Adhesive
Foam Tape
Other:
Ink Blot Shop Funny Face Stamp Set
Ink Blot Shop Spaced Out Greetings Stamp Set
Ink Blot Shop Pixel Grid with Pixel Grid Masks Stencil Set
Ink Blot Shop Wild Hatch Herringbone Stencil
Ink Blot Shop Giant Rainbow Stamp Set
Distress Oxide Inks
Trinity Stamps Fairy Rocks Rhinestones
Copic Markers
NND Scalloped Square Die
Glossy Accents
WoW Embossing Powder
Glitter Pen
So there you have it 6 UNIQUE Cards using a combination of Deco Foil Products and Ink Blot Shop Products!! I hope I’ve INSPIRED You on some ways to combine Products in different ways and to use your Negative Foil Pieces to make as many Cards as your heart Desires!!
THANKS SO MUCH for stopping by today and make sure to VISIT ALL Week for LOTS of AMAZING Inspiration!! If you create something please share it with us on Social Media using the hashtags #decofoil #thermoweb #ginakdesigns #laurakelly as we LOVE to see what you create!!
THANKS for your SWEET comments too!! They mean a lot!!
I hope you have a FABULOUS WEEK!!
Larissa Heskett

Let’s Talk Giveaway!!!!
We’re happy to share that we’re offering two chances to win a $45 Gift Card! One to shop with Therm O Web and one to shop with the Ink Blot Shop! Just follow the entry software to get yourself entered to win! We’ll pick two random winners at the end of this week.

