


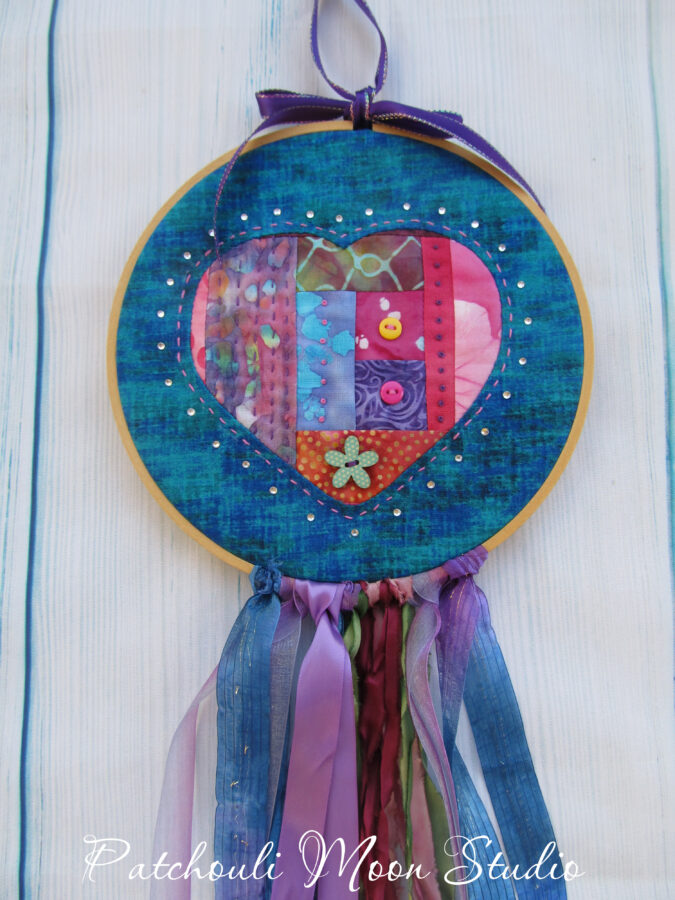
 Do you want to make a different kind of Valentine this year? How about making a Valentine Heart Dream Catcher?
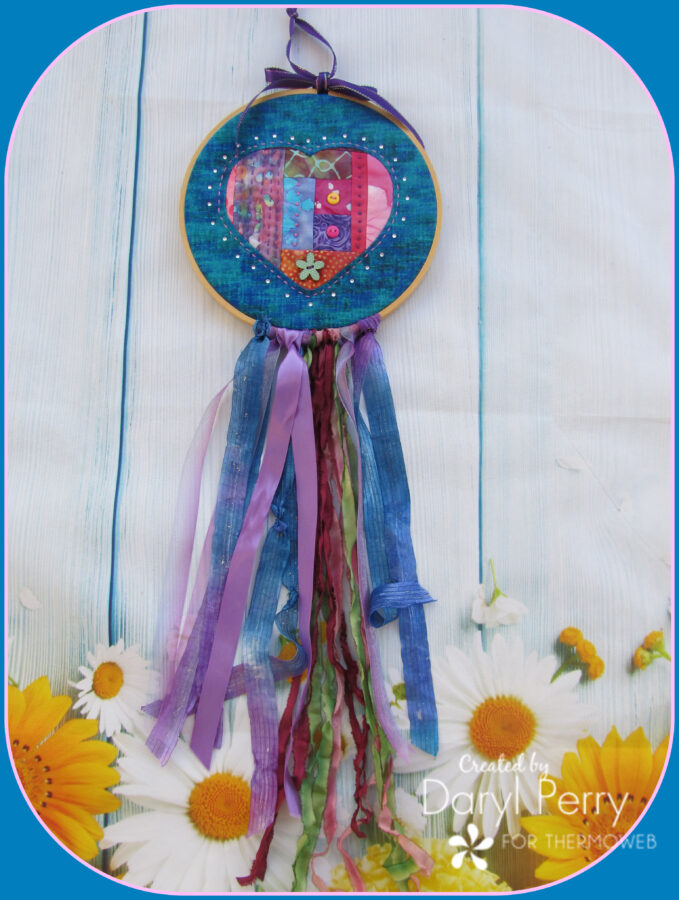
This heart is a reverse appliqué technique and the scrappy piecing is a great way to use up small bits of fabric. Choose a size embroidery hoop that you want to use to make this Dream Catcher. While not a traditional Dream Catcher, this embroidery hoop art has the feeling of a Dream Catcher.
Valentine Quilted Heart Dream Catcher
Let’s get started!
Material List for making the Valentine Dream Catcher:
- Scraps of fabric in colors of your choice (I used pinks & purples)
- Fabric over layer cut 6″ larger than the hoop size you use (I used blue fabric)
- Backing fabric or felt, also cut 6″ larger than your hoop size
- Ribbon in assorted colors and lengths 10-12 pieces, cut 24″ and longer (wait to cut!). use satin, silk, grosgrain or whatever ribbon you desire.
- One wooden embroidery hoop in size you desire
- Applique heart in size that will fit the embroidery hoop you have (tip: search Clipart online for heart shapes)
- Fabric glue, such as Fabric Fuse Liquid Adhesive
- Spray-n-Bond basting adhesive
- StitchnSew Sew-in Fleece High Loft
- Heat-n-Bond Lite iron-on adhesive
- StitchnSew Woven Sew-in Extra Firm Interfacing
- Hand embroidery thread (and hand embroidery needle)
- Embellishments of your choice (I used hot fix crystals & buttons)
- Sewing thread to match the fabric scraps you use for piecing and thread to match the outer layer fabric
- Sewing machine, pins, fabric pen or pencil
- Iron
- Determine what length ribbon looks pleasing to by holding up a length of ribbon on the bottom of the hoop. If you like the length you help up, then double that length and then cut it. So for example, if you dangle a 12″ length and like that length, then cut 24″. Only cut one ribbon to start to make sure that you like it.
- Fold the ribbon in half and place the loop end at the bottom of the hoop (be sure it is the hoop with the metal tightener at the top), and pull the remainder of the ribbon through the loop of the ribbon so it is over the wooden hoop and tighten in place. Stand back and see if you like the length of the ribbon before cutting more lengths of ribbon.
- If you like the length or if you want to cut a few longer or shorter, then cut the remaining lengths of ribbon to the lengths you like, making sure you double the finished length as mentioned above in step1. Loop on all the ribbons that you want to use on the hoop and place the shorter lengths to the outer edge or wherever you prefer them.
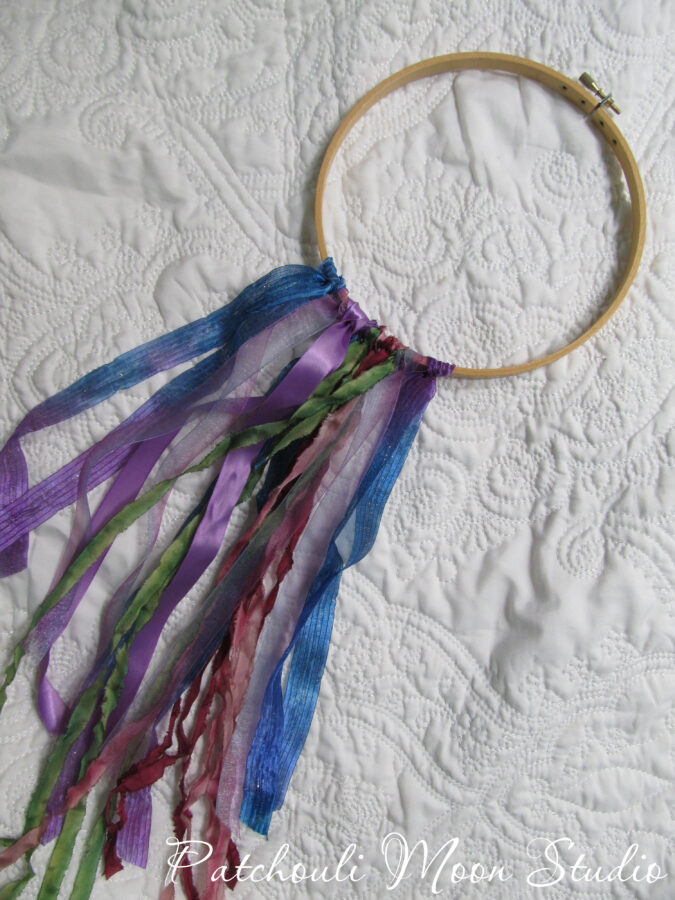
Loop various lengths of ribbon to the outer hoop at the bottom.
Step 2:
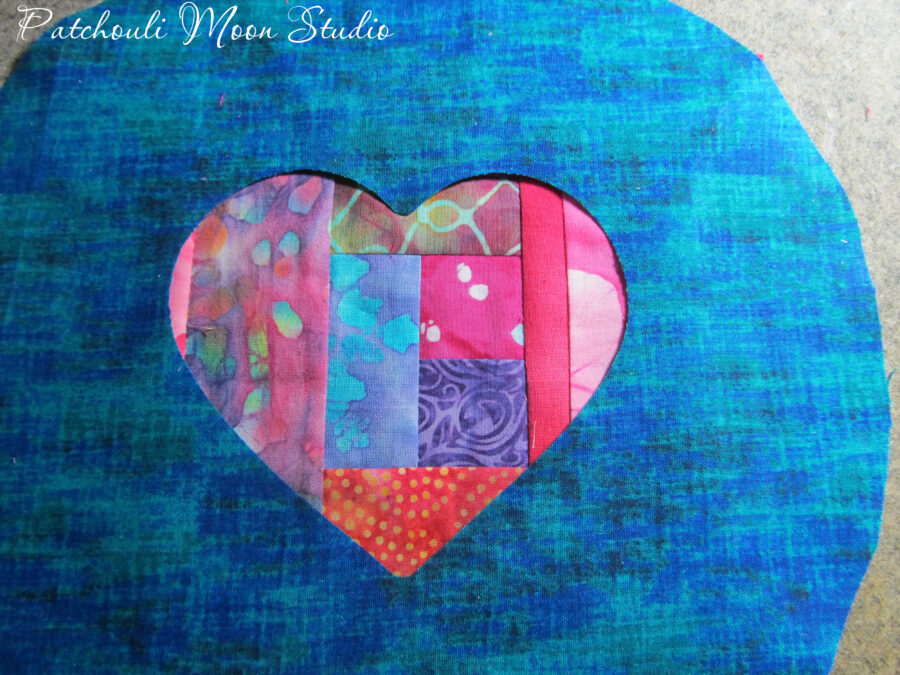
- Next, you will gather your scraps of fabric and sew a scrappy piece that is larger than the heart shape you will use, making the sewn scrappy piece at least 2-inches larger than the heart shape you want to use. Go here to a free tutorial on how to sew your scrappy piece.
- Cut a round or square piece of fabric that is 3″ wider than your hoop all the way around. For example, if your hoop measures 4″ across cut your square fabric 10″ x 10″. You can keep it square and trim in a later step, or if you have a round template or plate, you can round off the 4 corners now. It doesn’t have to be perfect looking as the edges won’t show.
- To make sure that you cut your heart shape in the center of your overlayer of fabric, first fold in half and then in half again to find the center. Make a small snip on the folded in the center of the fabric.
- Place your heart template centered over the center snip in your overlayer of fabric. Trace around the heart using your fabric pen or pencil. Using scissors start cutting out the heart shape only, starting where the center snip is, and carefully cutting out on the lines only.
- Take your outer layer with the heart shape cut out and center it over your scrappy pieced section.
Outer fabric with heart cut out is centered over the pieced under layer. - Then pin all around the heart, making sure you are pinning through the scrappy underlayer. Appliqué pins work really well here if you have them.
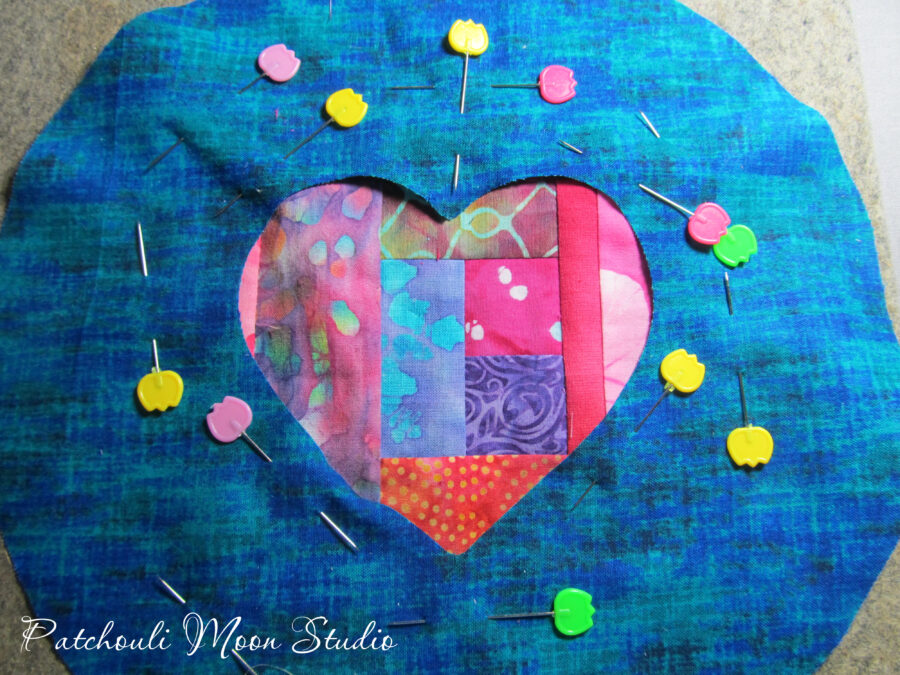
Pin all around to hold the fabric pieces in place. Using appliqué pins work best if you have them. - Now you will needle turn appliqué by turning under the outer fabric layer and taking tiny invisible stitches to sew the outer layer to the scrappy layer. This is reverse appliqué since you are turning under the outer layer to stitch. Using reverse appliqué it is so much easier to sew concave curves, rather than sewing convex curves in regular needle turn appliqué. You use your needle to scoop and fold under the raw edge of the outer layer and take tiny stitches so they don’t show. The only snip you will need to make is at the very bottom of the heart where it looks like a “V”. The snip there helps with turning under the edges of the outer layer, but the curves will naturally turn without any snips at all. Be sure to match your thread color to the outer layer of fabric. Here is a tutorial if you need one.
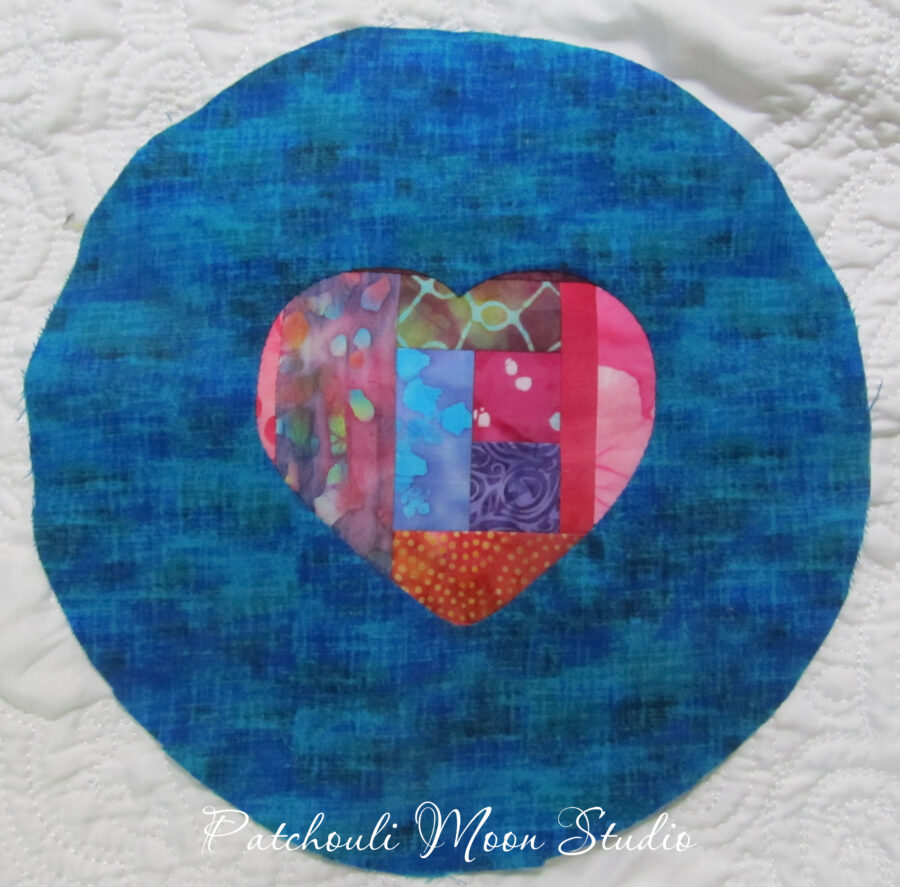
Needle Turn stitching completed. - If desired, you can flip the piece over and trim the excess scrappy layer all around, leaving 1/2″ seam allowance. This is optional.

This is what the backside of the piece looks like. 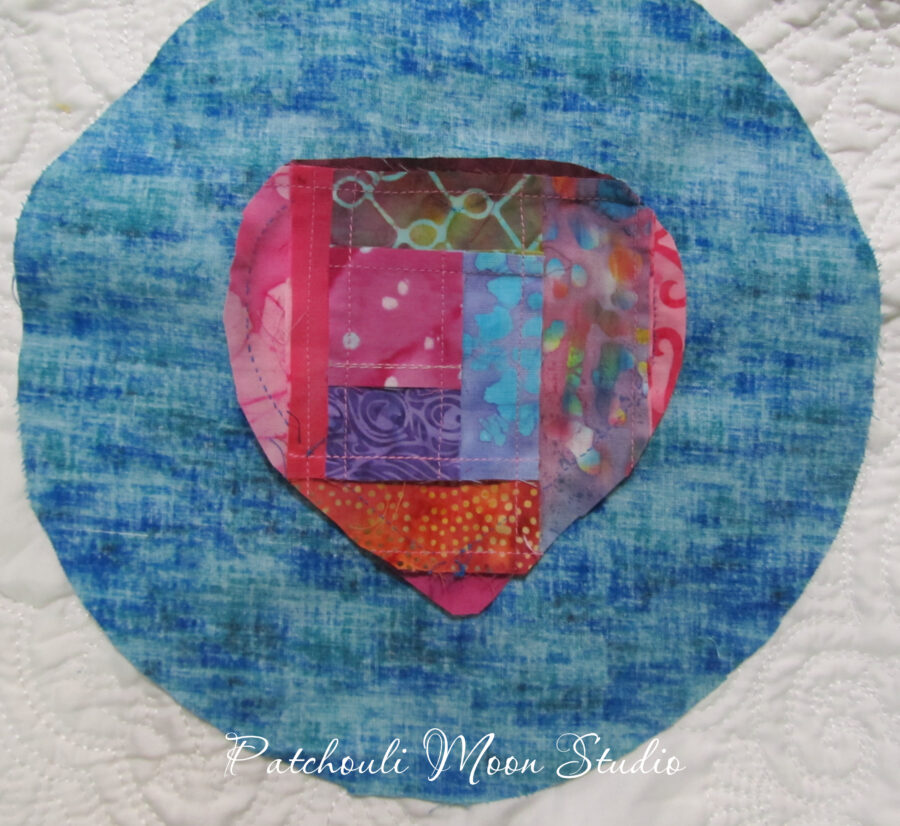
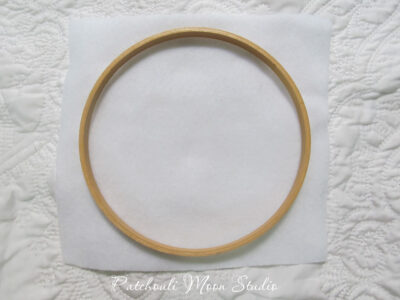
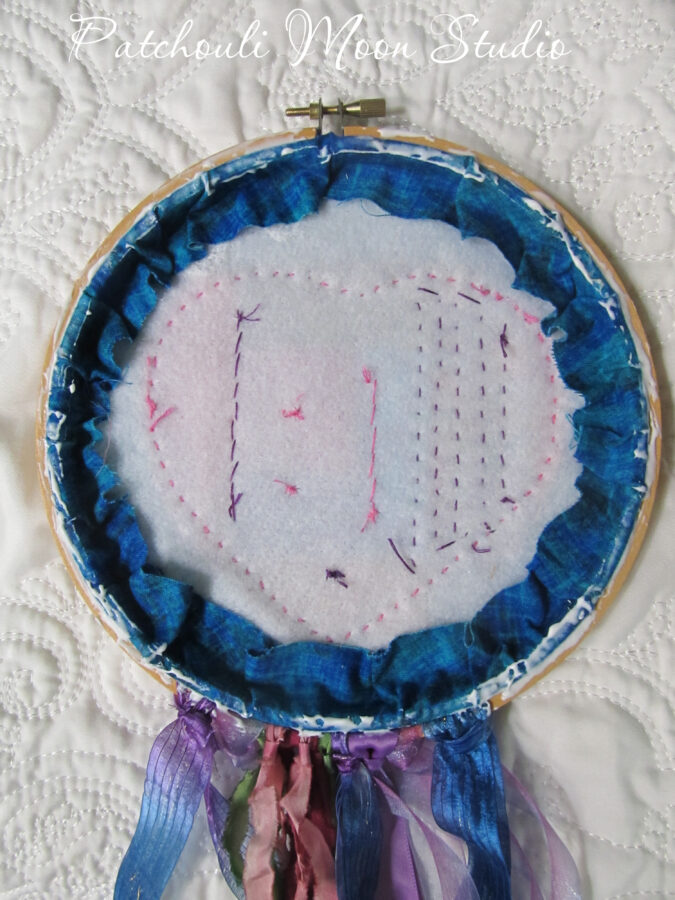
Here I trimmed down the excess fabric 1/2″ all around. Step 6:- Take the other part of the embroidery hoop that is all wood (no metal on it) and place it on top of the fleece.
- Draw around the outer side of the hoop with your marking pen. Then cut on the line you drew.
- Use SpraynBond and spray onto one side of the fleece and bond it to the center of the wrong side of the heart piece, following the instructions on the can of SpraynBond.
- Take your backing fabric and fuse HeatnBond Lite on the wrong side of the backing fabric. Peel off the paper and place the StitchnSew Sew-in Heavy Weight Interfacing on over the wrong side of the backing fabric and with your iron, fuse the interfacing to the backing fabric, following the instructions on the HeatnBond lite.
- Again, take the hoop that does not have the metal screw and place it on top of the interfacing side of the backing that you just fused together and trace around the outer edge of the hoop with your marking pen or pencil. Cut out the circle on the line and then set this piece aside until later.
Trace around the outer edge of the hoop with a marking pen onto the fleece. 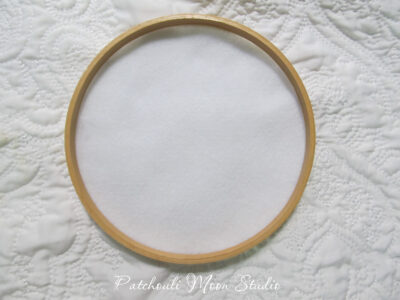
Cut out the fleece on the line. 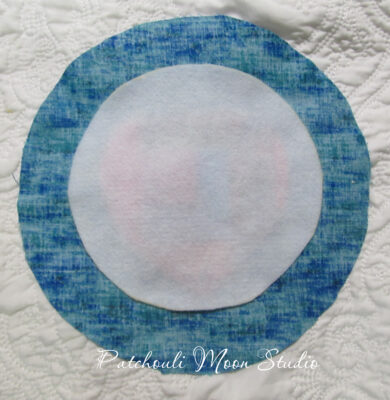
Center the fleece onto the back side of the heart piece. 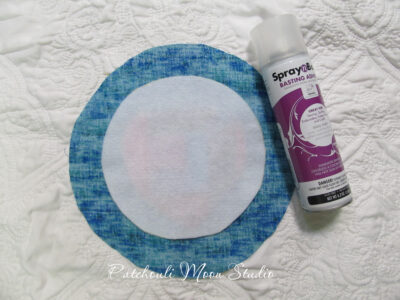
Follow instructions on SpraynBond and spray baste the fleece to the wrong side of the heart piece. Step 7:- Now comes the fun part! You can use your embroidery floss and divide it into 2-3 strands and embellish your heart as you desire. Or use another thread. I used 3 strands of floss and quilted a running stitch around the heart.
- I also added French knots using 2 strands of floss and did some more running stitches on the heart. I added hotfix crystals around the heart and sewed on a few buttons. Let your imagination run wild and embellish however you want to, using the embellishments of your choice.
- When you are satisfied with the look, move on to Step 8.
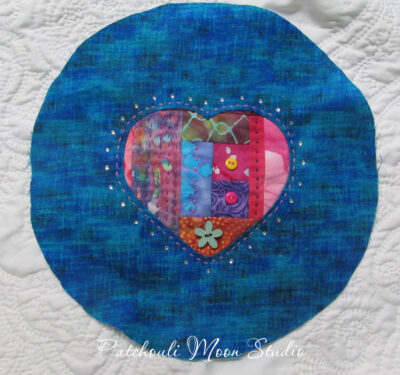
Stitch and add embellishments as desired. 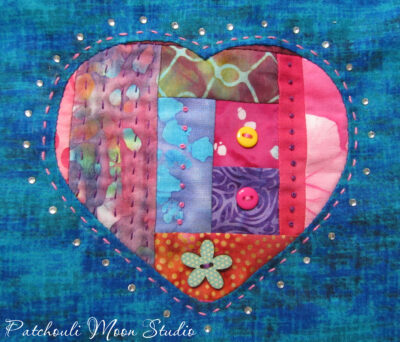
A closer look at the stitching and embellishments I added. Step 8:- Now you are going to put the two hoops together, centering the heart and having the tightening screw at the top. First, loosen the screw a bit and then put the outer hoop over the inner hoop, making sure the heart is centered nicely, and then tighten the screw as tight as you can get it.
- Fold the excess fabric to the back. You may need to trim some of the fabric if it’s too long. You want the fabric to fit about like in the photo below.
- Lift up the fabric and run some fabric glue around the inner part of the wood and then push the fabric into the glue all around to keep the fabric from lifting up.
- Next, run some fabric glue all around the top of the hoop as you see in the photo below.
- Retrieve the backing fabric that has been cut into a circle with the heavyweight interfacing fused onto the backing fabric and place the backing fabric on top of the glue with the backing fabric facing up so you see it and the interfacing placed face down against the glue.
- Gently press the backing fabric onto the glue all around. Let the glue dry. You may need to trim any excess backing fabric that might overhang, but wait until the glue has thoroughly dried before trimming anything.
- Once the glue has dried, flip the piece over the right side up, and using a sharp pair of scissors, trim any excess fabric as close as you can to the hoop.
- If you have a label you want to add to the back, once the backing fabric glue has dried, you can glue a label onto the back too.
- To hang the piece, tie a ribbon around the screw at the top and knot ribbon close the screw and again make a knot joining the two ribbon ends together at the top, forming a loop to hang the Dream Catcher by. You can also add another ribbon and create a bow at the base of the screw tightener too if you desire.
Backside, excess fabric glued in place around inside of hoop and glue all around where you place the backing fabric. 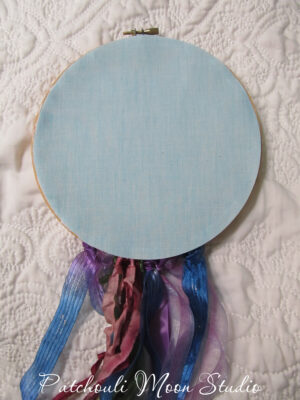
Backing fabric glued in place. 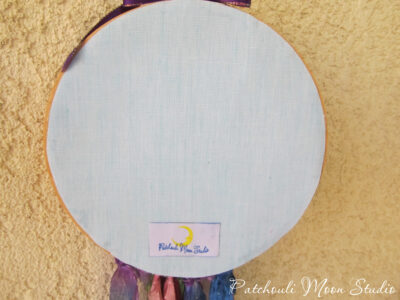
If desired, you can glue a label in place on the backing. Admire your Valentine Heart Dream Catcher!
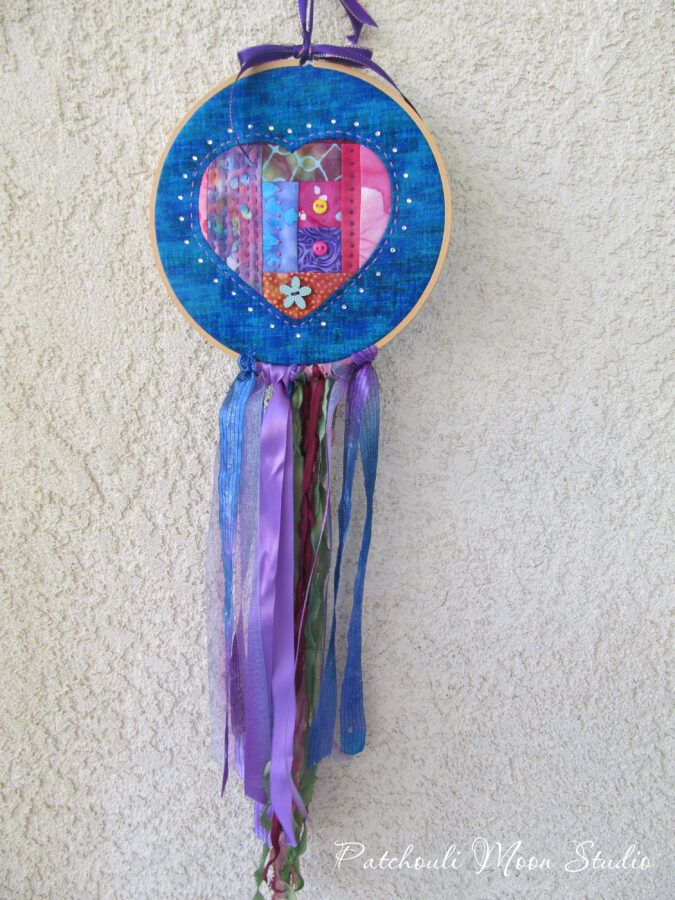
All finished! Admire your work. 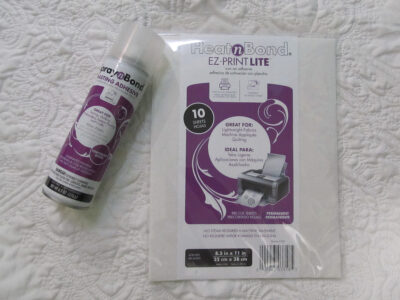
I used StitchnSew sew-in fleece high loft and StitchnSew sew-in heavyweight interfacing.
also used Spray-n-Bond basting adhesive & Heat-n-Bond Lite iron-on adhesive.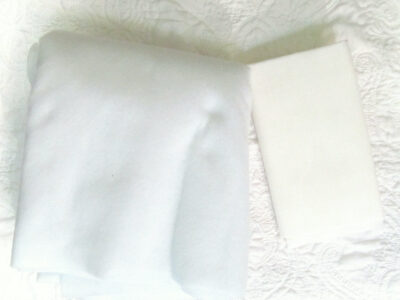
Pat
December 30, 2021 at 5:23 pm (2 years ago)Beautiful! Thank you, Daryl ❤️
Daryl
December 31, 2021 at 8:51 am (2 years ago)Thank you Pat and you are very welcome. If you make a Heart Dream Catcher, I would love to see your version.
kaholly
January 4, 2022 at 7:02 am (2 years ago)Great tutorial! I need to make two and I’m so excited to get started! Thank you so much!
Daryl Perry
January 4, 2022 at 7:45 am (2 years ago)Thank you so much Karen. So glad you like my Dream Catcher Tutorial. Looking forward to seeing your versions.