


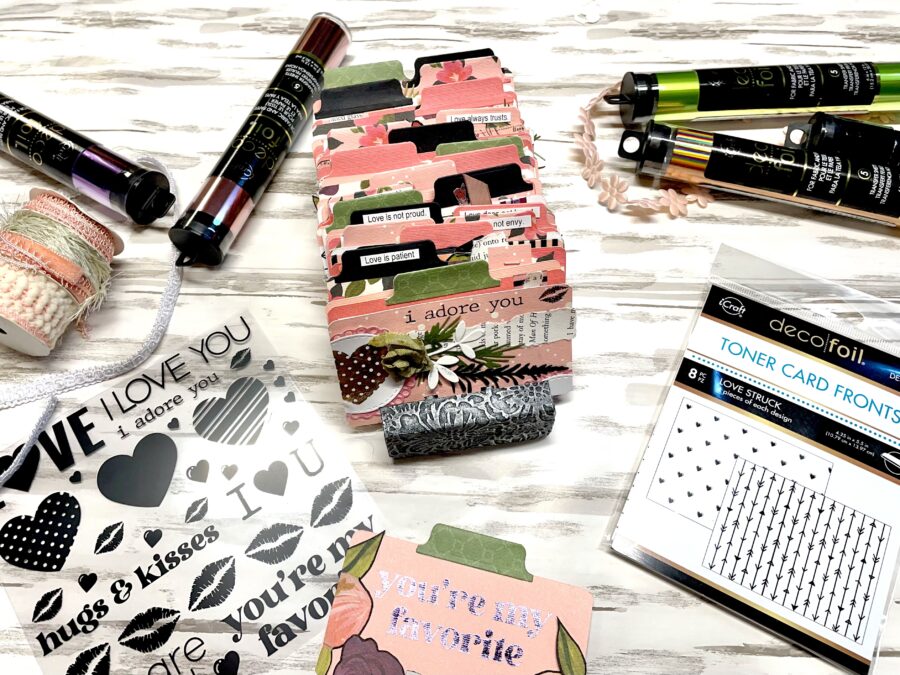
 Hello crafty friends! I can’t tell you how excited I am to share this project. I had so much fun creating this Valentine’s Rolodex junk journal and I LOVE (pun intended) the way it came out.
I’m not sure what made me decide to go Rolodex style on this. I don’t have a Rolodex die. I didn’t have a Rolodex stand and I didn’t have a bunch of old Rolodex cards lying around. Well, that didn’t stop me. Follow along as I McGyver a Rolodex stand, create a Rolodex SVG, apply foil using Adhesive Transfers and then go to town decorating my Rolodex junk journal. Grab some hot coffee or tea (this one is a little longer project) and let’s get started!
Valentine Junk Journal Rolodex with Adhesive Transfers
Make sure you stick it out to the very end for a video flip-through!
Junk Journal Rolodex

Junk Journal Supplies:
iCraft Deco Foil Transfer Sheets – Peach Princess, Lilly Pad, Enchanted Rose, Black and Lilac
iCraft Ultra Bond Liquid Adhesive
iCraft Double-Sided Adhesive Foam Tape
Eileen Hull Easy Cut Adhesive Sheets
Other Supplies: scrap wood or hobby pieces, wood dowels, a single Rolodex card, cardstock, patterned paper, dies and die-cutting machine, scissors, mini stapler, ribbon, hot glue, hole punch, drill and book papers
Rolodex Junk Journal Step One:
To begin this project, you will need to determine your rolodex size. I determined mine by the size of the wood dowels I had on hand (you will see those in the next step). What I used for wood dowels are the extra large BBQ or s’mores skewers sold at the dollar store. They are thick enough to work well but you can still cut with heavy scissors or wire cutters.
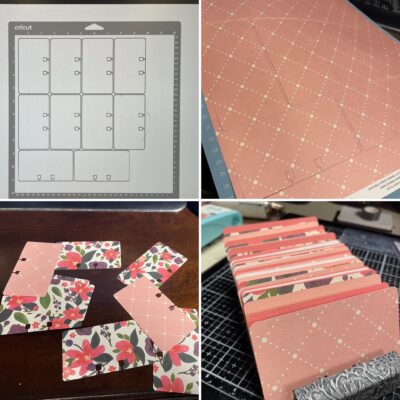
Let’s create a template. I had one, lone Rolodex card that I was able to find at home and I knew I needed to make my cards a little larger because it didn’t slide easily on the dowel. Scan your rolodex card into the computer, and upload to Illustrator and trace it. You can also create your SVG in design space, but I am fairly new to it and had better luck in Illustrator. Fit as many as you can onto a 12×12 page and then save it as an SVG.
Next. upload to design space or whatever software you use for electronic cutting (see hint below if no cutting device), size (I enlarged mine slightly) and cut. Cut out of double-sided, patterned cardstock and use both sides for more variety in your cards.
Hint: If you do not have an electronic cutter, simply trace a Rolodex card onto your patterned paper and cut out with scissors. You can download a picture of a rolodex card and print (adjust size percentage on your printer interface) to use as a template.
Rolodex Junk Journal Step Two:
For the next step, we’ll set the cards aside and create our Rolodex base.
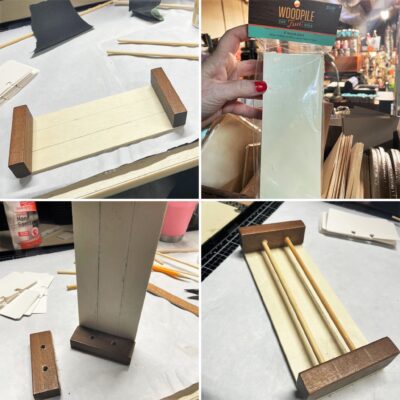
I don’t know about you, but I love when I can create something out of stuff I have sitting around my studio. For the base, you need a rectangular piece of wood (I had a Woodpile piece, but you could also layer cardboard and paper mache over it if you don’t have any thin craft wood.
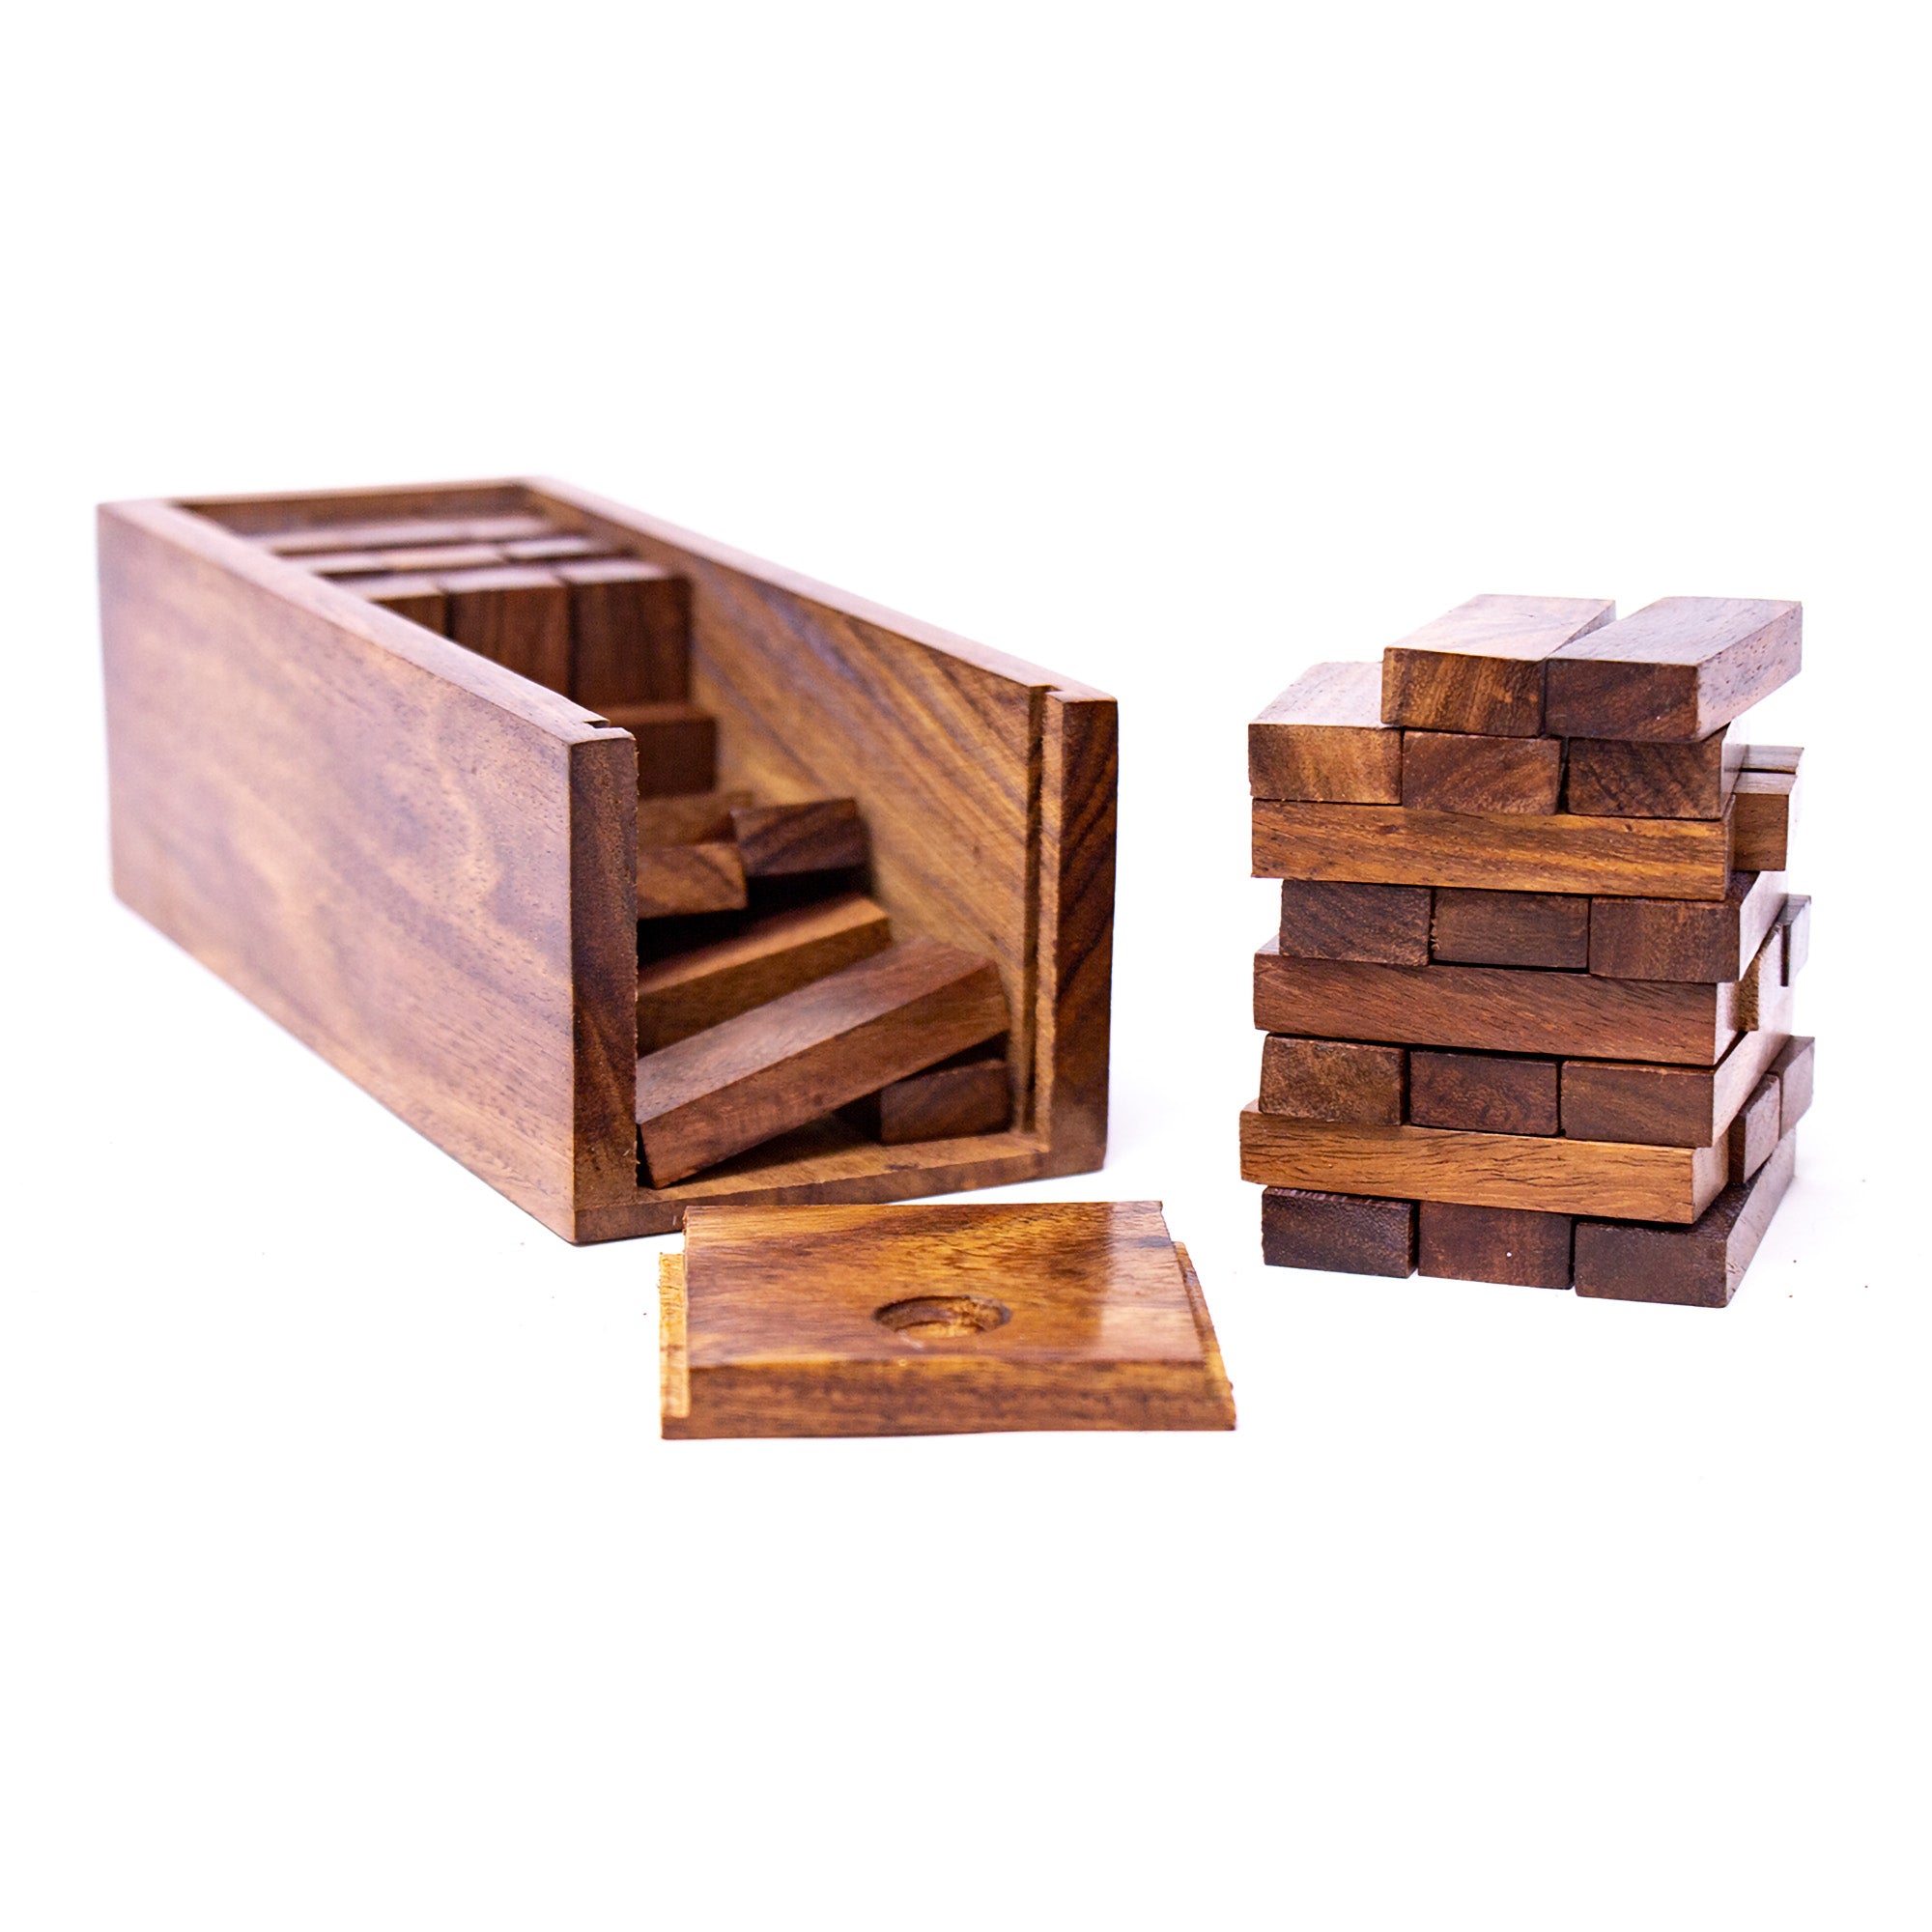
Next, you will need two end pieces. A couple of years ago I found some fancy Jenga blocks in wooden boxes at a discount store. I loved the wooden boxes so I bought several. Now I have a bunch of unused blocks . . . end pieces!
Because this was a prototype and I had to figure out how I wanted it to go together, I did mine a little backward (I glued the end pieces on and had to tear one off). This is how I would do it if I was starting over:
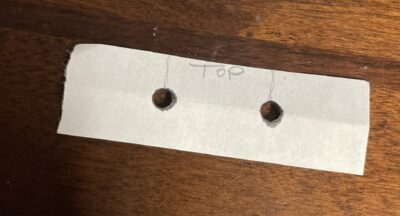
Cut a piece of paper the size of the end piece. Lay your two dowels down and place your Rolodex card on them to determine spacing. Slide the card to the end of the dowels and hold it in place while you mark the two spots on your piece of paper. Now, fold the paper lengthwise to determine the center line. Use a hole punch to punch where the marks meet the center line. Use this to mark the two end pieces and drill holes the size of your dowels halfway through (don’t drill all the way through because the outside won’t be as pretty.
I was too lazy to get out the electric drill so I used a hand-crank craft drill.
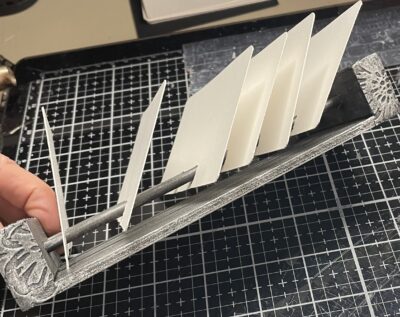
Construction:
Next, using both Ultra Bond Liquid Adhesive and hot glue (the hot glue will hold the piece in place while the Ultra Bond becomes permanent), adhere ONE end piece to the rectangle base. Do not adhere to both ends like I did.
Once the end piece is secured, glue your dowel rods (cut to size) into the holes using the same process (Ultra Bond and hot glue).
Continue by adhering the other end piece to the dowel rods and then to the rectangle base, using the same procedure. Voila! You have a Rolodex base.
Hint: If you do not have a drill, consider the paper mache method mentioned above. You can then create your holes with a craft knife.
Rolodex Junk Journal Step Three:
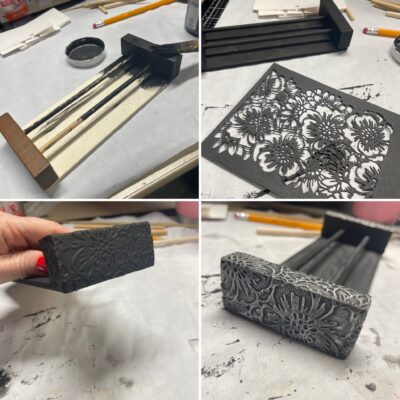
Now comes the fun part of the base . . . decorating. There are so many options here. I decided to paint this one black (I plan to make a bunch more of these for my Etsy shop) and then collage die-cuts onto it for some fun texture. Give it another coat of paint (I used chalk paint) and then dry brush a contrasting color over top to highlight the die-cuts. Silver worked great for me.
This came out so much better than I expected ** insert happy dance here ** .
Hint: If you do not have a similar intricate die, try an embossing folder instead. If you do not have any sort of die-cutting system, use stickers. Placing different-sized flower stickers over the base and then painting it would give a similar result if not as intricate.
Rolodex Junk Journal Step Four:
The fun part continues . . .
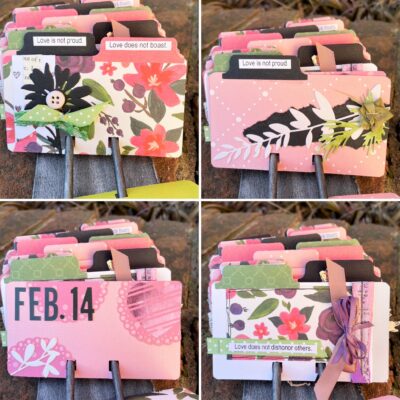
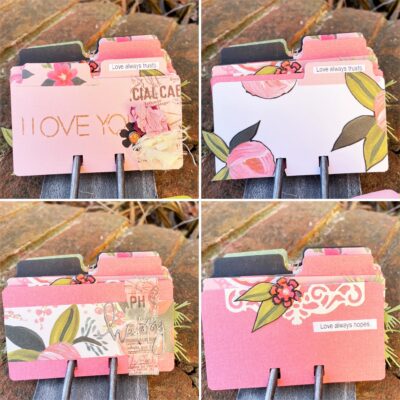
Place your rolodex cards in the order you want them so that patterns and colors are spaced as desired. I used both sides of my patterned cardstock and then pulled in some solids that coordinated.
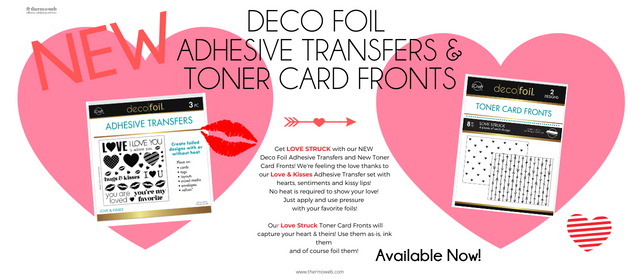
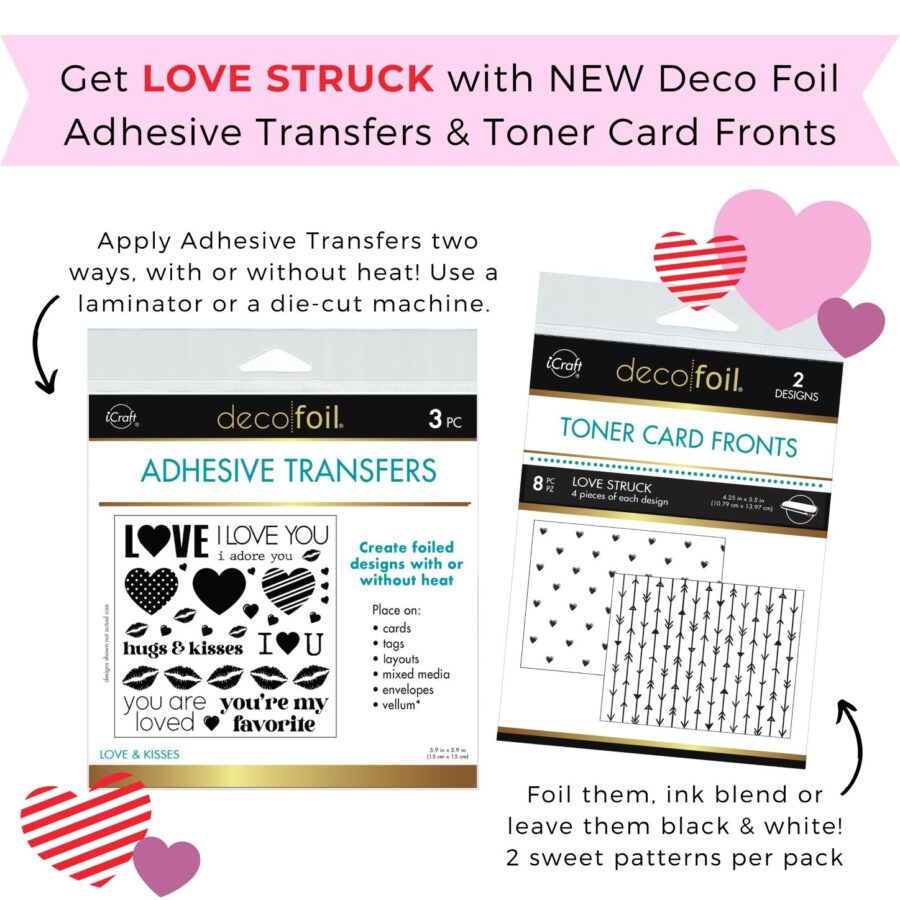
Because I knew I wanted to space my foil accents throughout my “journal,” I added all my foil first. These adhesive transfers are a game changer, allowing you to add foil directly to your project (not printing and attaching) exactly where you want it. And, the new love-themed set is perfect for Valentine’s, wedding or anniversary projects. Add foil directly to the rolodex card or to die-cut embellishments.
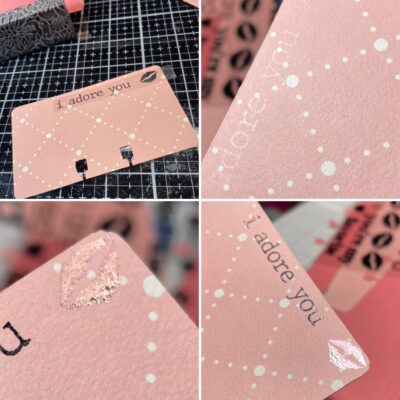
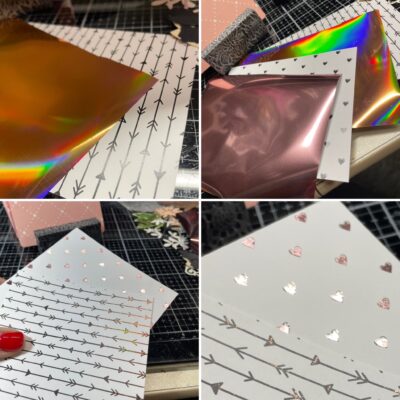
Let’s talk procedure. To use the adhesive transfers, cut apart the piece you want to use, peel off the backing and place the printed piece exactly where you want your foil accent. Don’t move it around, but burnish it, making sure all of the adhesive transfers to the paper. Remove the backing sheet, leaving the adhesive.
Next, place your foil transfer sheet (dull side down) over the adhesive and burnish again. Gently peel away the release paper and marvel at the shine. There are several samples below. Note that the adhesive is clear and the black ink peels away with the backing.
Hint: A Stencil Pal is the perfect tool for burnishing both the adhesive transfer and the foil.

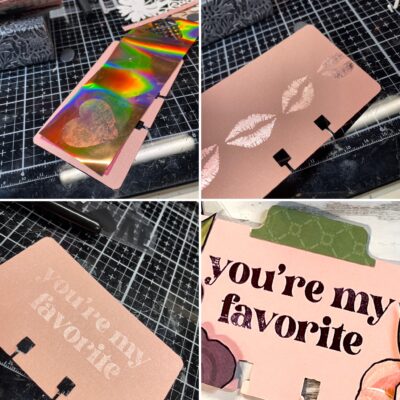
Use Toner Card Card Fronts as another way to add foil accents.
Rolodex Junk Journal Step Five:
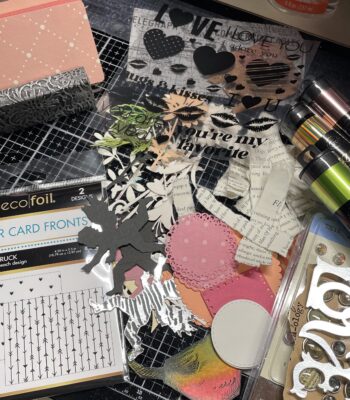
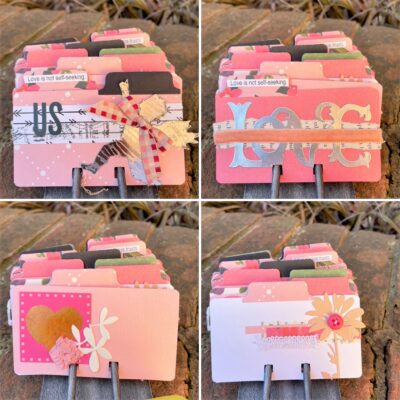
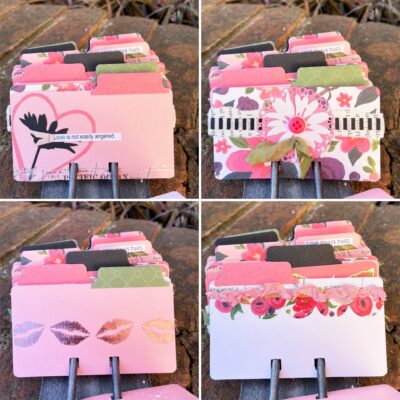
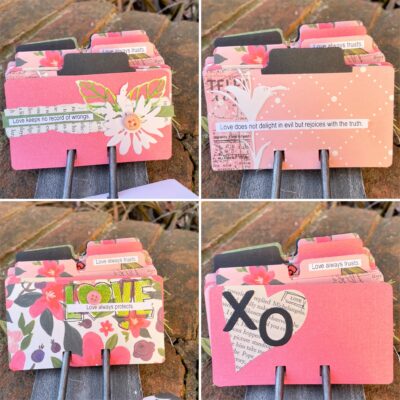
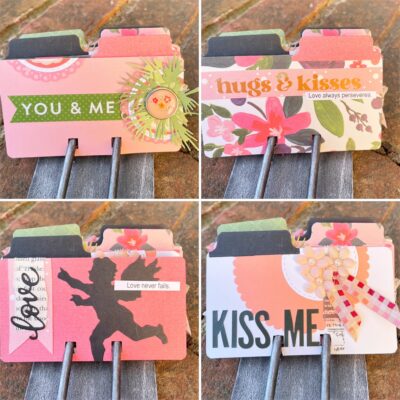
Okay, folks, this is where you go to town embellishing your “journal.” Prior to beginning this project, I gathered my supplies which included torn book pages, die-cuts, ribbon, lace, stickers, brad and buttons. I like to die-cut pieces before I start so that I have a pile to choose from when I’m in create mode. That way, I only have to stop and die-cut if there is a piece I decided I just have to have that is not already cut. Any pieces I don’t use go into the left-over bin for another project.
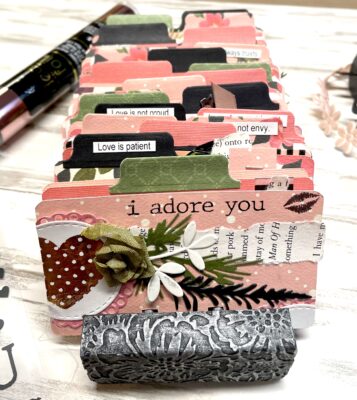
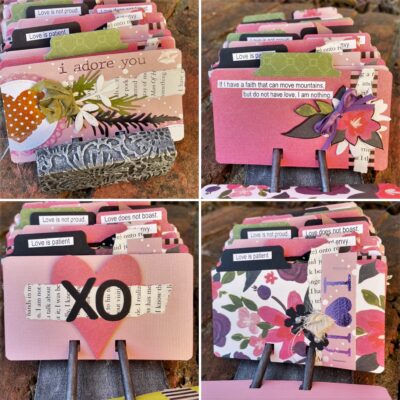
Use the scraps from your Rolodex cards to die-cut coordinating index tabs. Some folded ribbon makes a great little flower (see first card).
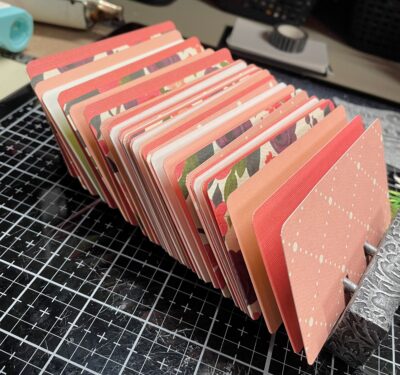
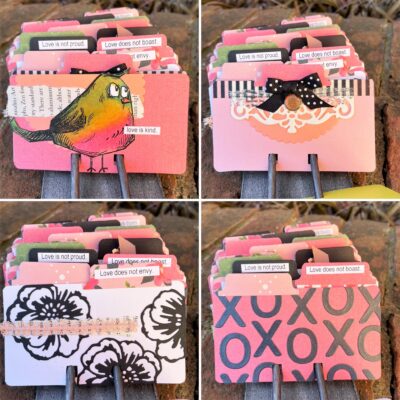
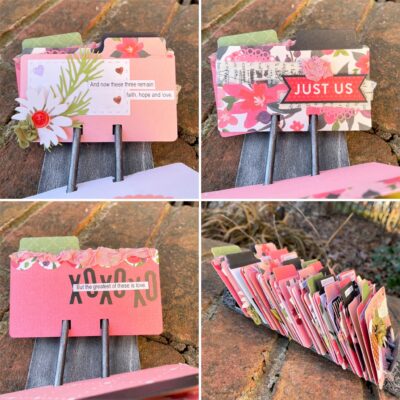
To completely fill up my base, I used 35 cards. Most of the cards are completely embellished on the front (a few have space for journaling or tiny photos) but the backs are left blank to use as your journal.
Check out all of the pages below and check out the video flip through at the end.
Hint: Add text in the form of a poem, book quote or scripture for a continuous theme throughout your project. I used parts of 1st Corinthians 13 for this journal. Simply print your text, cut it apart and place it on the cards or index tabs.
Thanks for sticking it out friends. I hope you enjoyed this tutorial and that you will try adding some Adhesive Transfers to your next project.
 No matter how you use our Adhesive Transfers and Toner Card Fronts we know one thing…you’ll be in L O V E! Be sure to join us all this week for new project tutorials featuring these new releases!
You’ll find more of our “Love is in the Air” themed products to help you send your love out to your favorite people here on our website! You’ll find Adhesive Transfers, Toner Fronts, Glitz Glitter Gel, Foils and more! So don’t miss taking a look at this LOVELY collection!
And speaking of things we know you’ll love… giveaways! After all who doesn’t want to win a gift card to shop on our website? We do! Just follow the steps below to enter to win a $40 Gift Card to shop on our website!