


 It’s a little snowy today on the blog with some foiled snowflakes two ways! Hi hi, it’s Katrina from Paper, Scissors, Glue and Hybrid Too here today on the blog. I have some shiny snowflakes to share with you in a layout with the NEW Deco Foil Hot Foil!
HOT Foil Snowflakes with Deco Foil
Therm O Web Supplies Used
NEW Deco Foil HOT Foil – POOL BLUE
NEW Deco Foil HOT Foil – SAPPHIRE BLUE
Ultra Bond Pixie Tape
Memory Runner XL
Memory Runner XL Refill
NEW 3D FOAM TAPE ROLL 1/16
NEW 3D FOAM TAPE ROLL 1/8
iCraft 3D Foam Squares Pack
Other Supplies Used
Simple Stories-Feeling Frosty Collection
Lawn Fawn Hot Foil Plate – Snowflake Background
PinkFresh Studio Solid Hot Foil Plate
Glimmer System from Spellbinders
White Cardstock
Border Punch
Foiling Two Ways
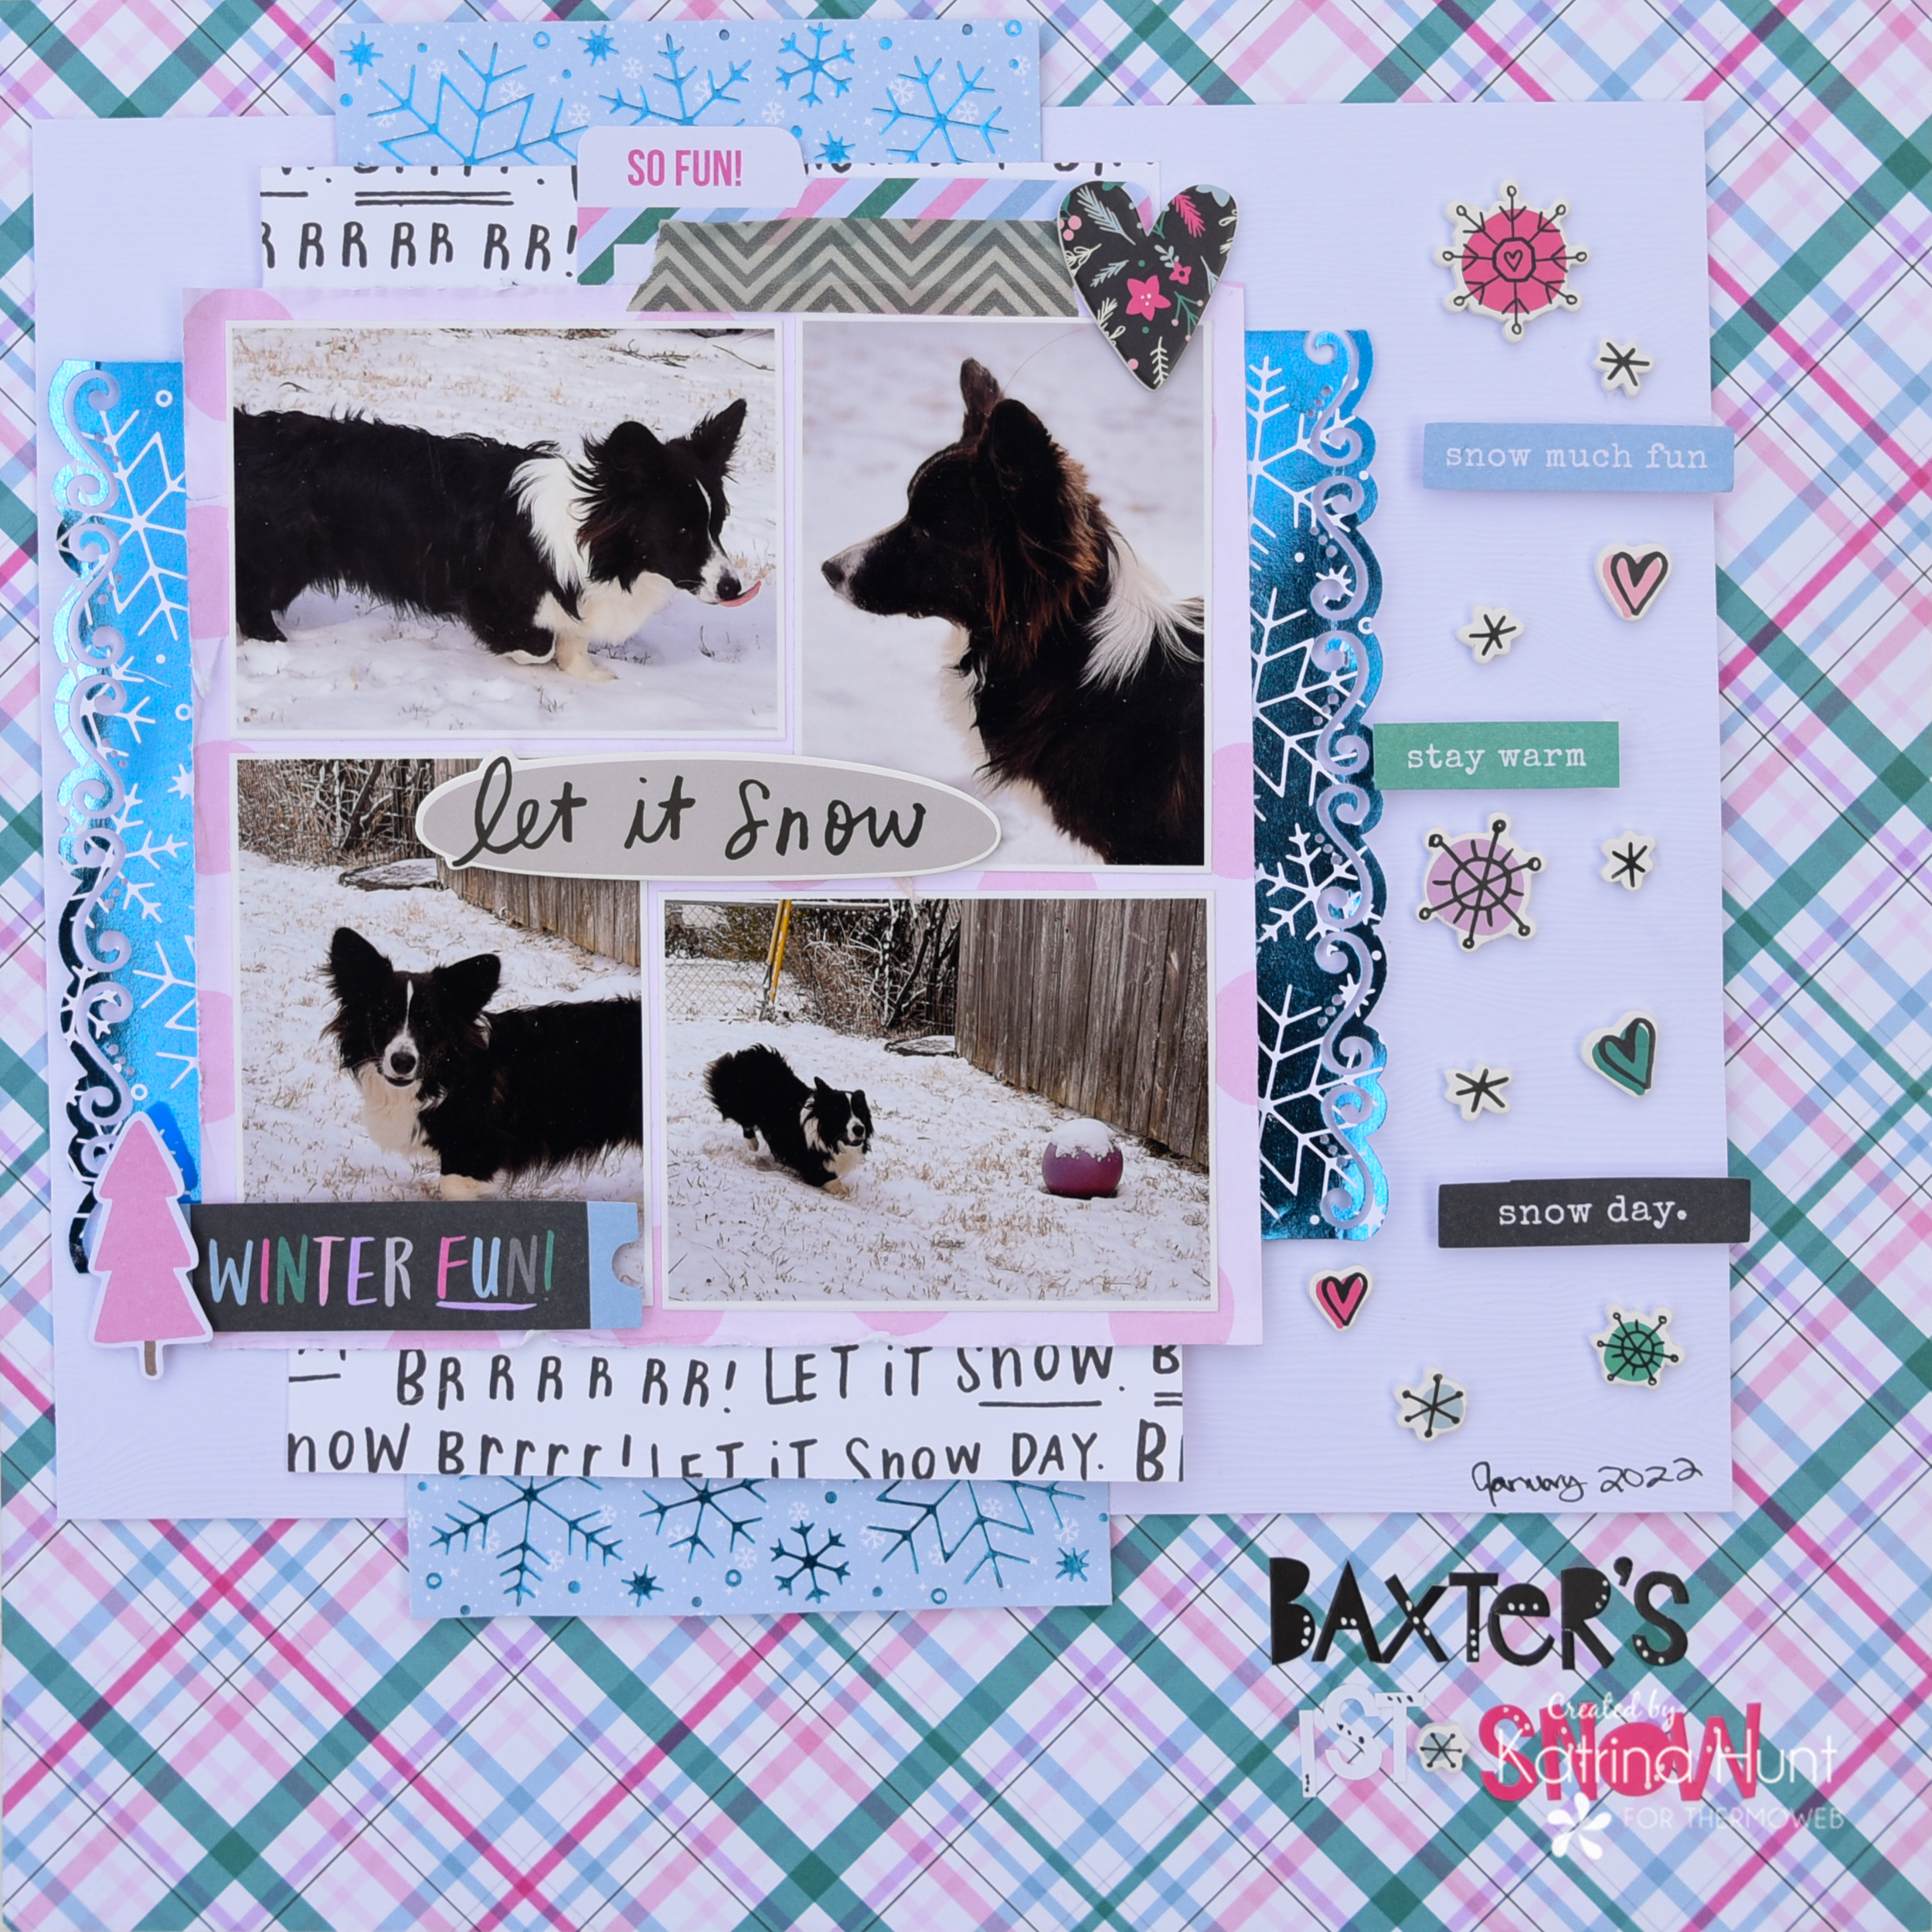
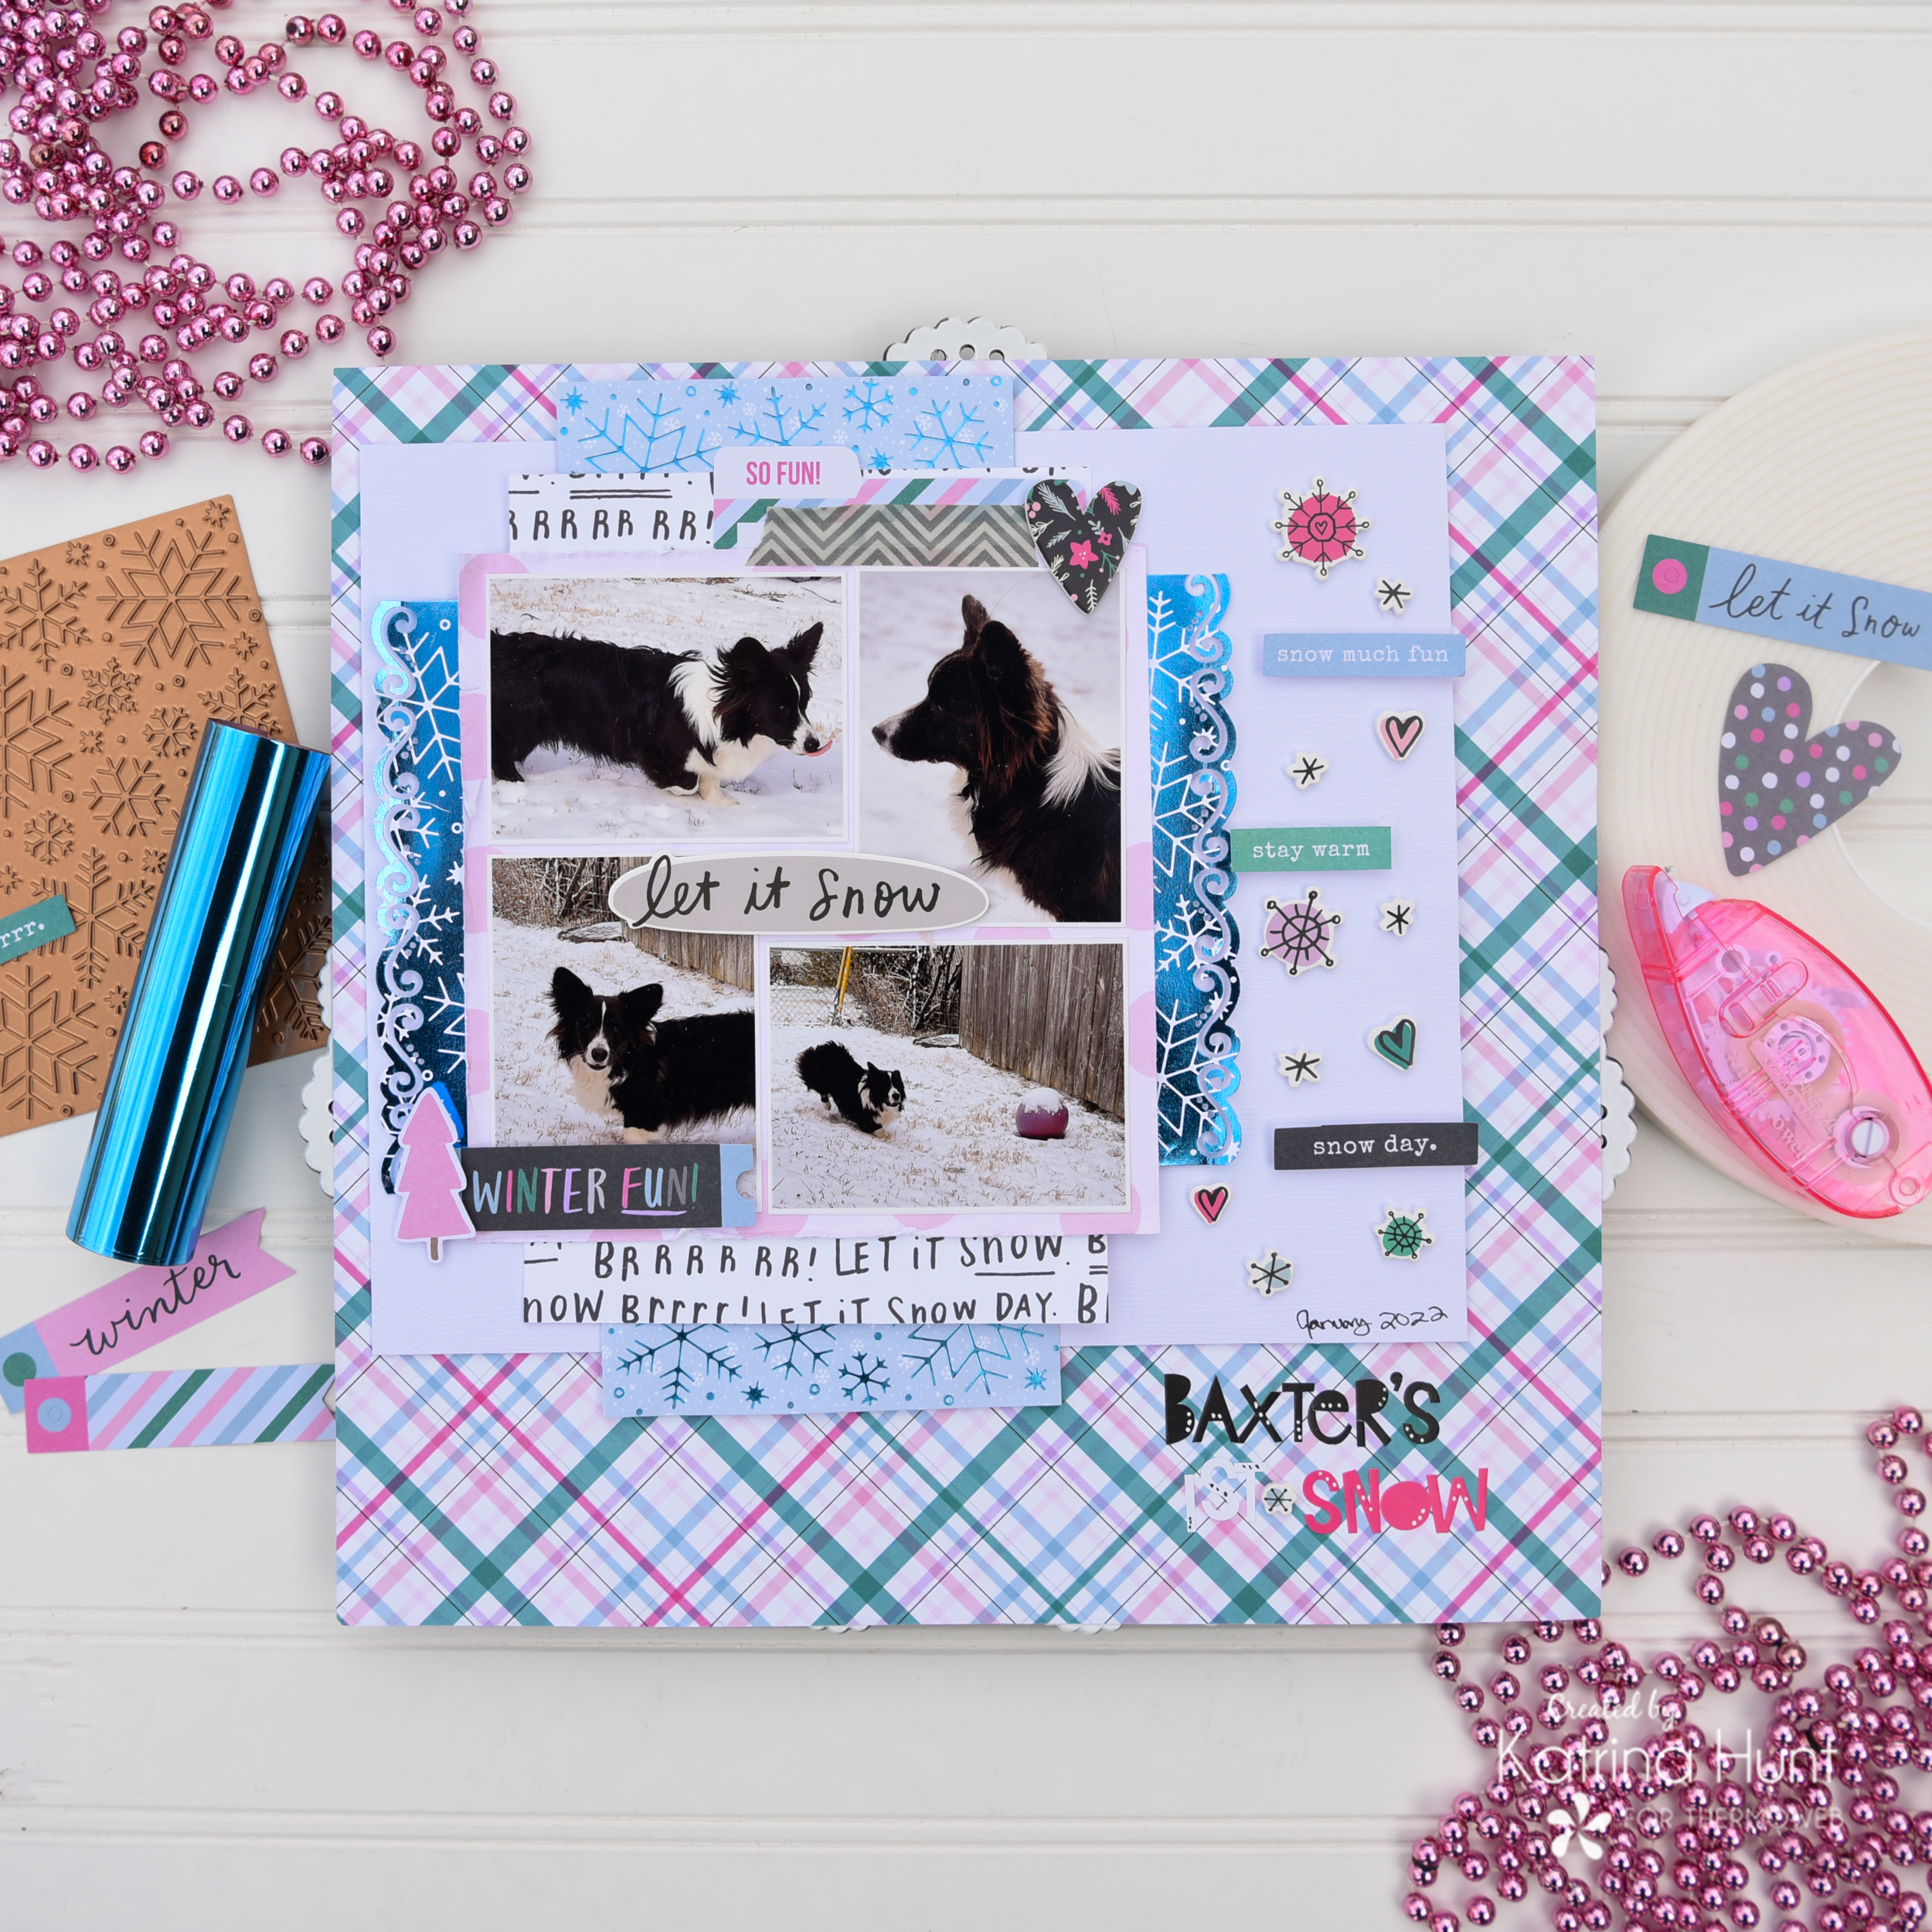
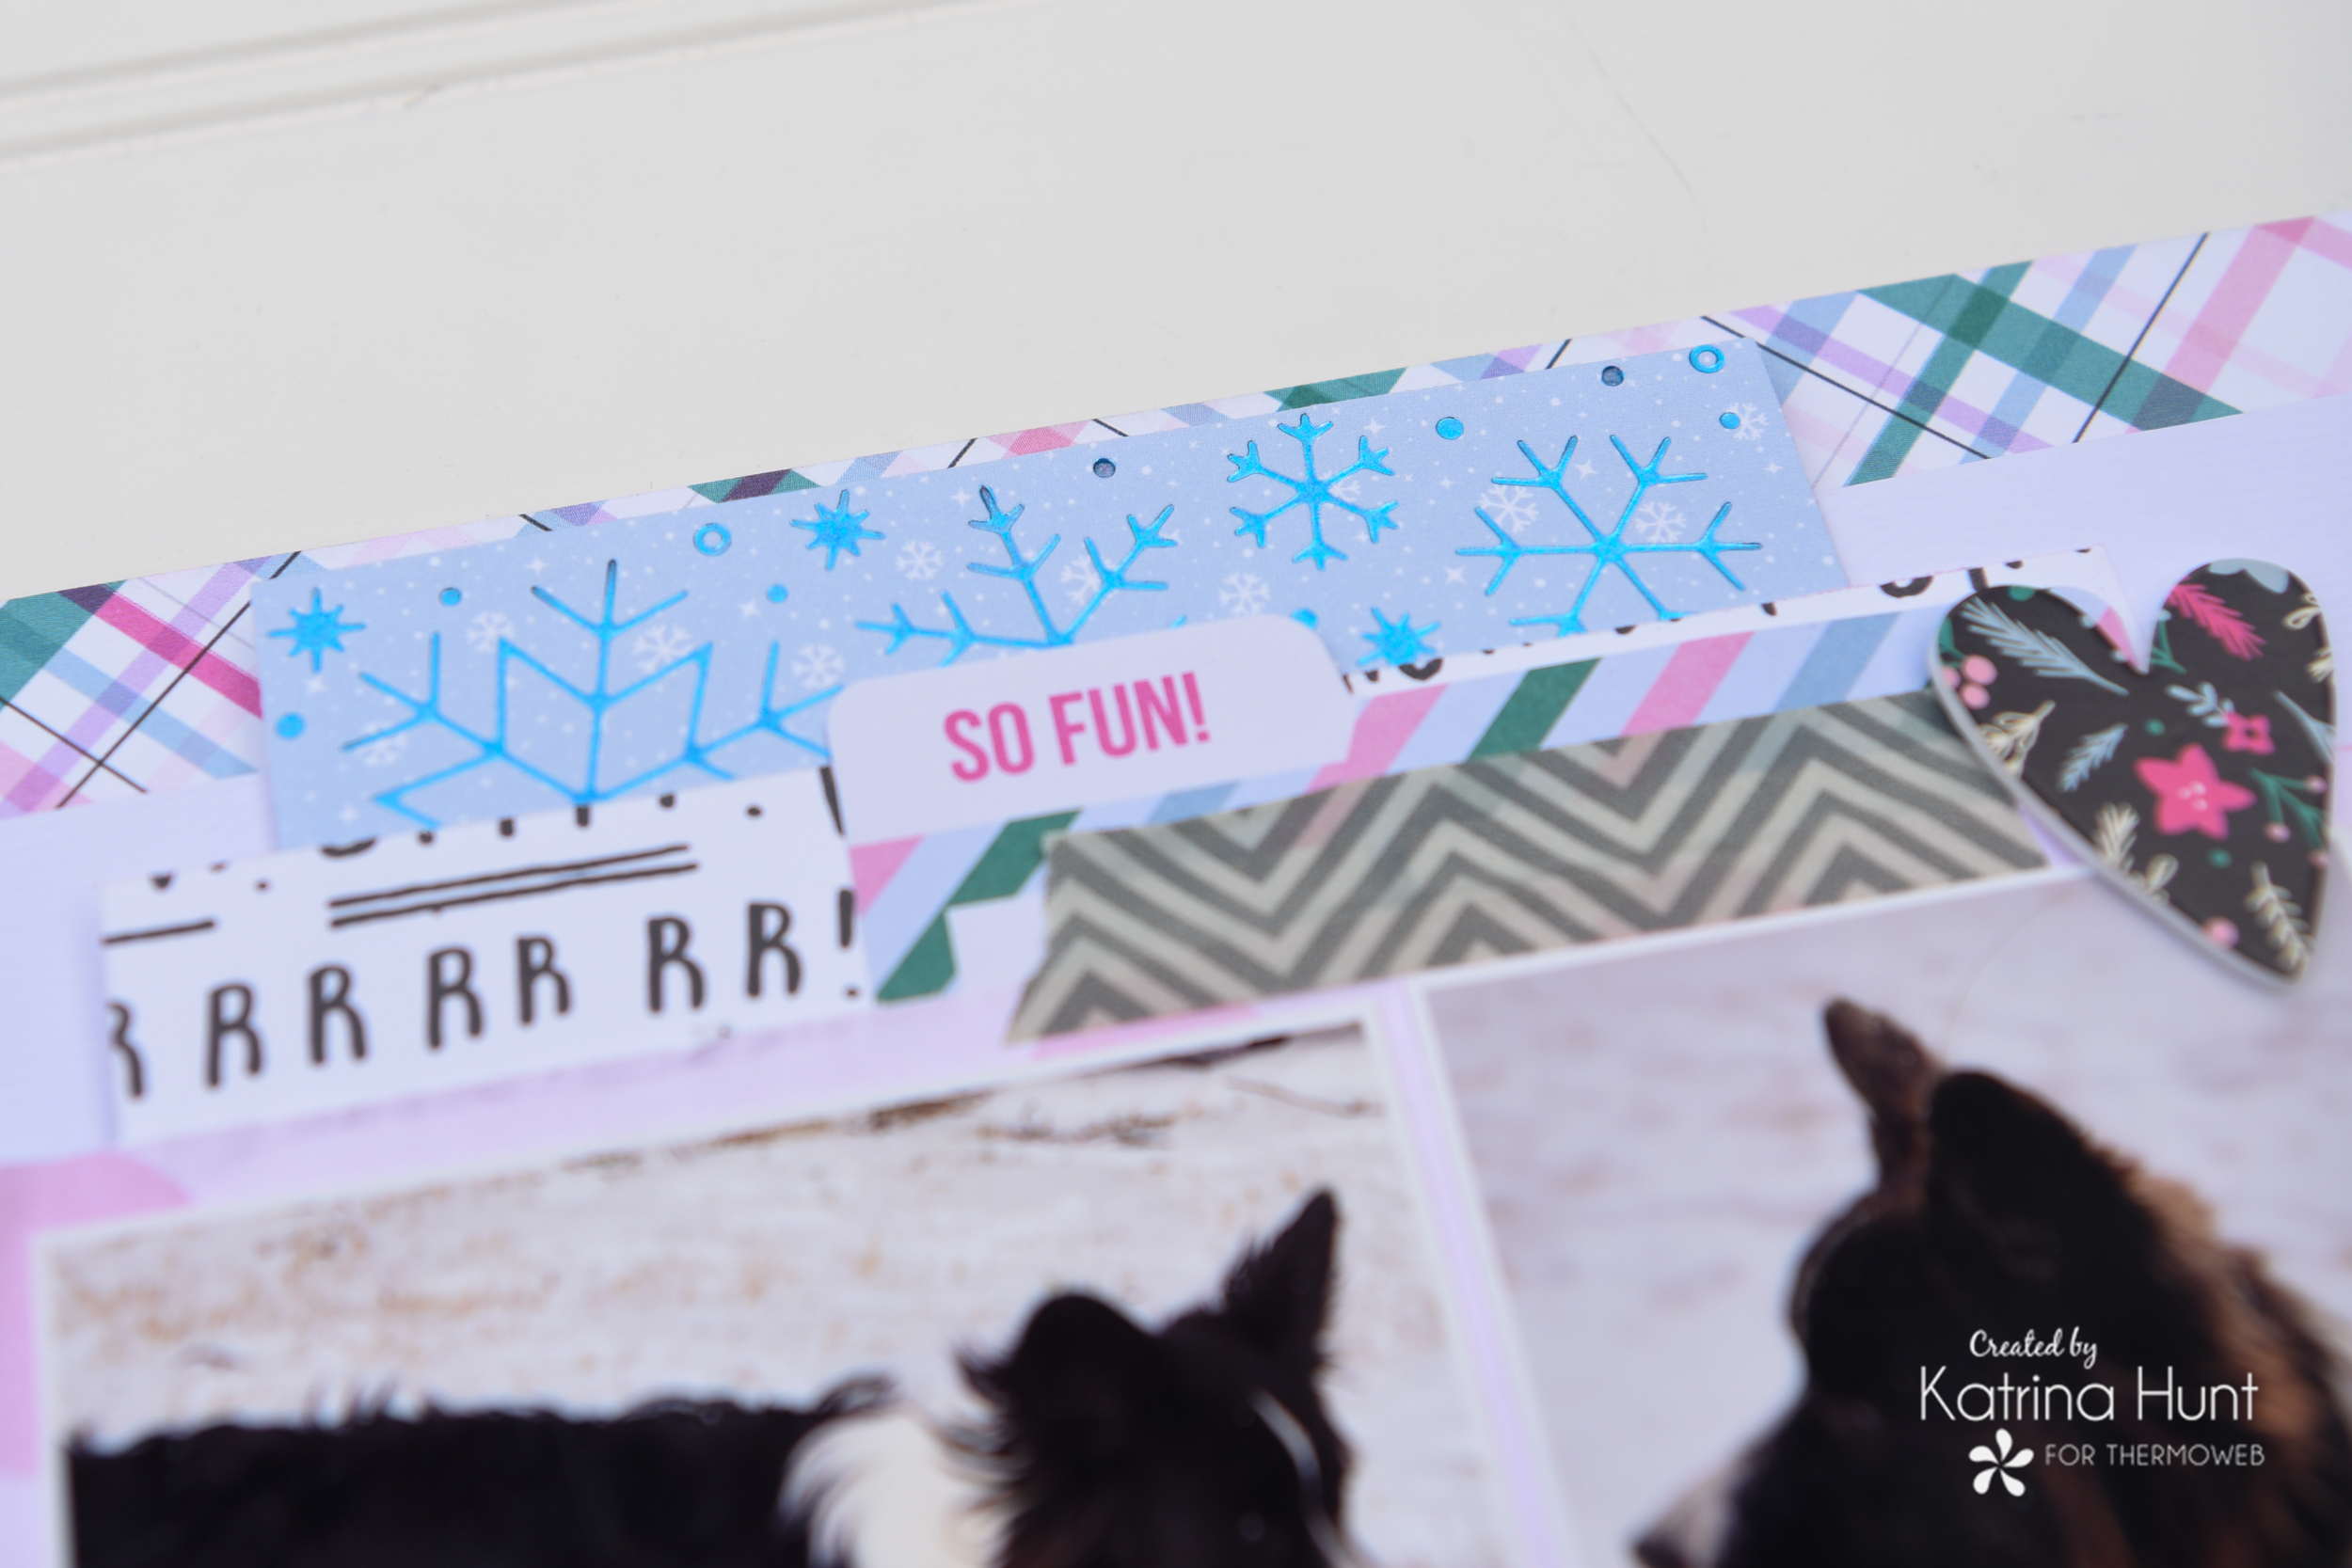
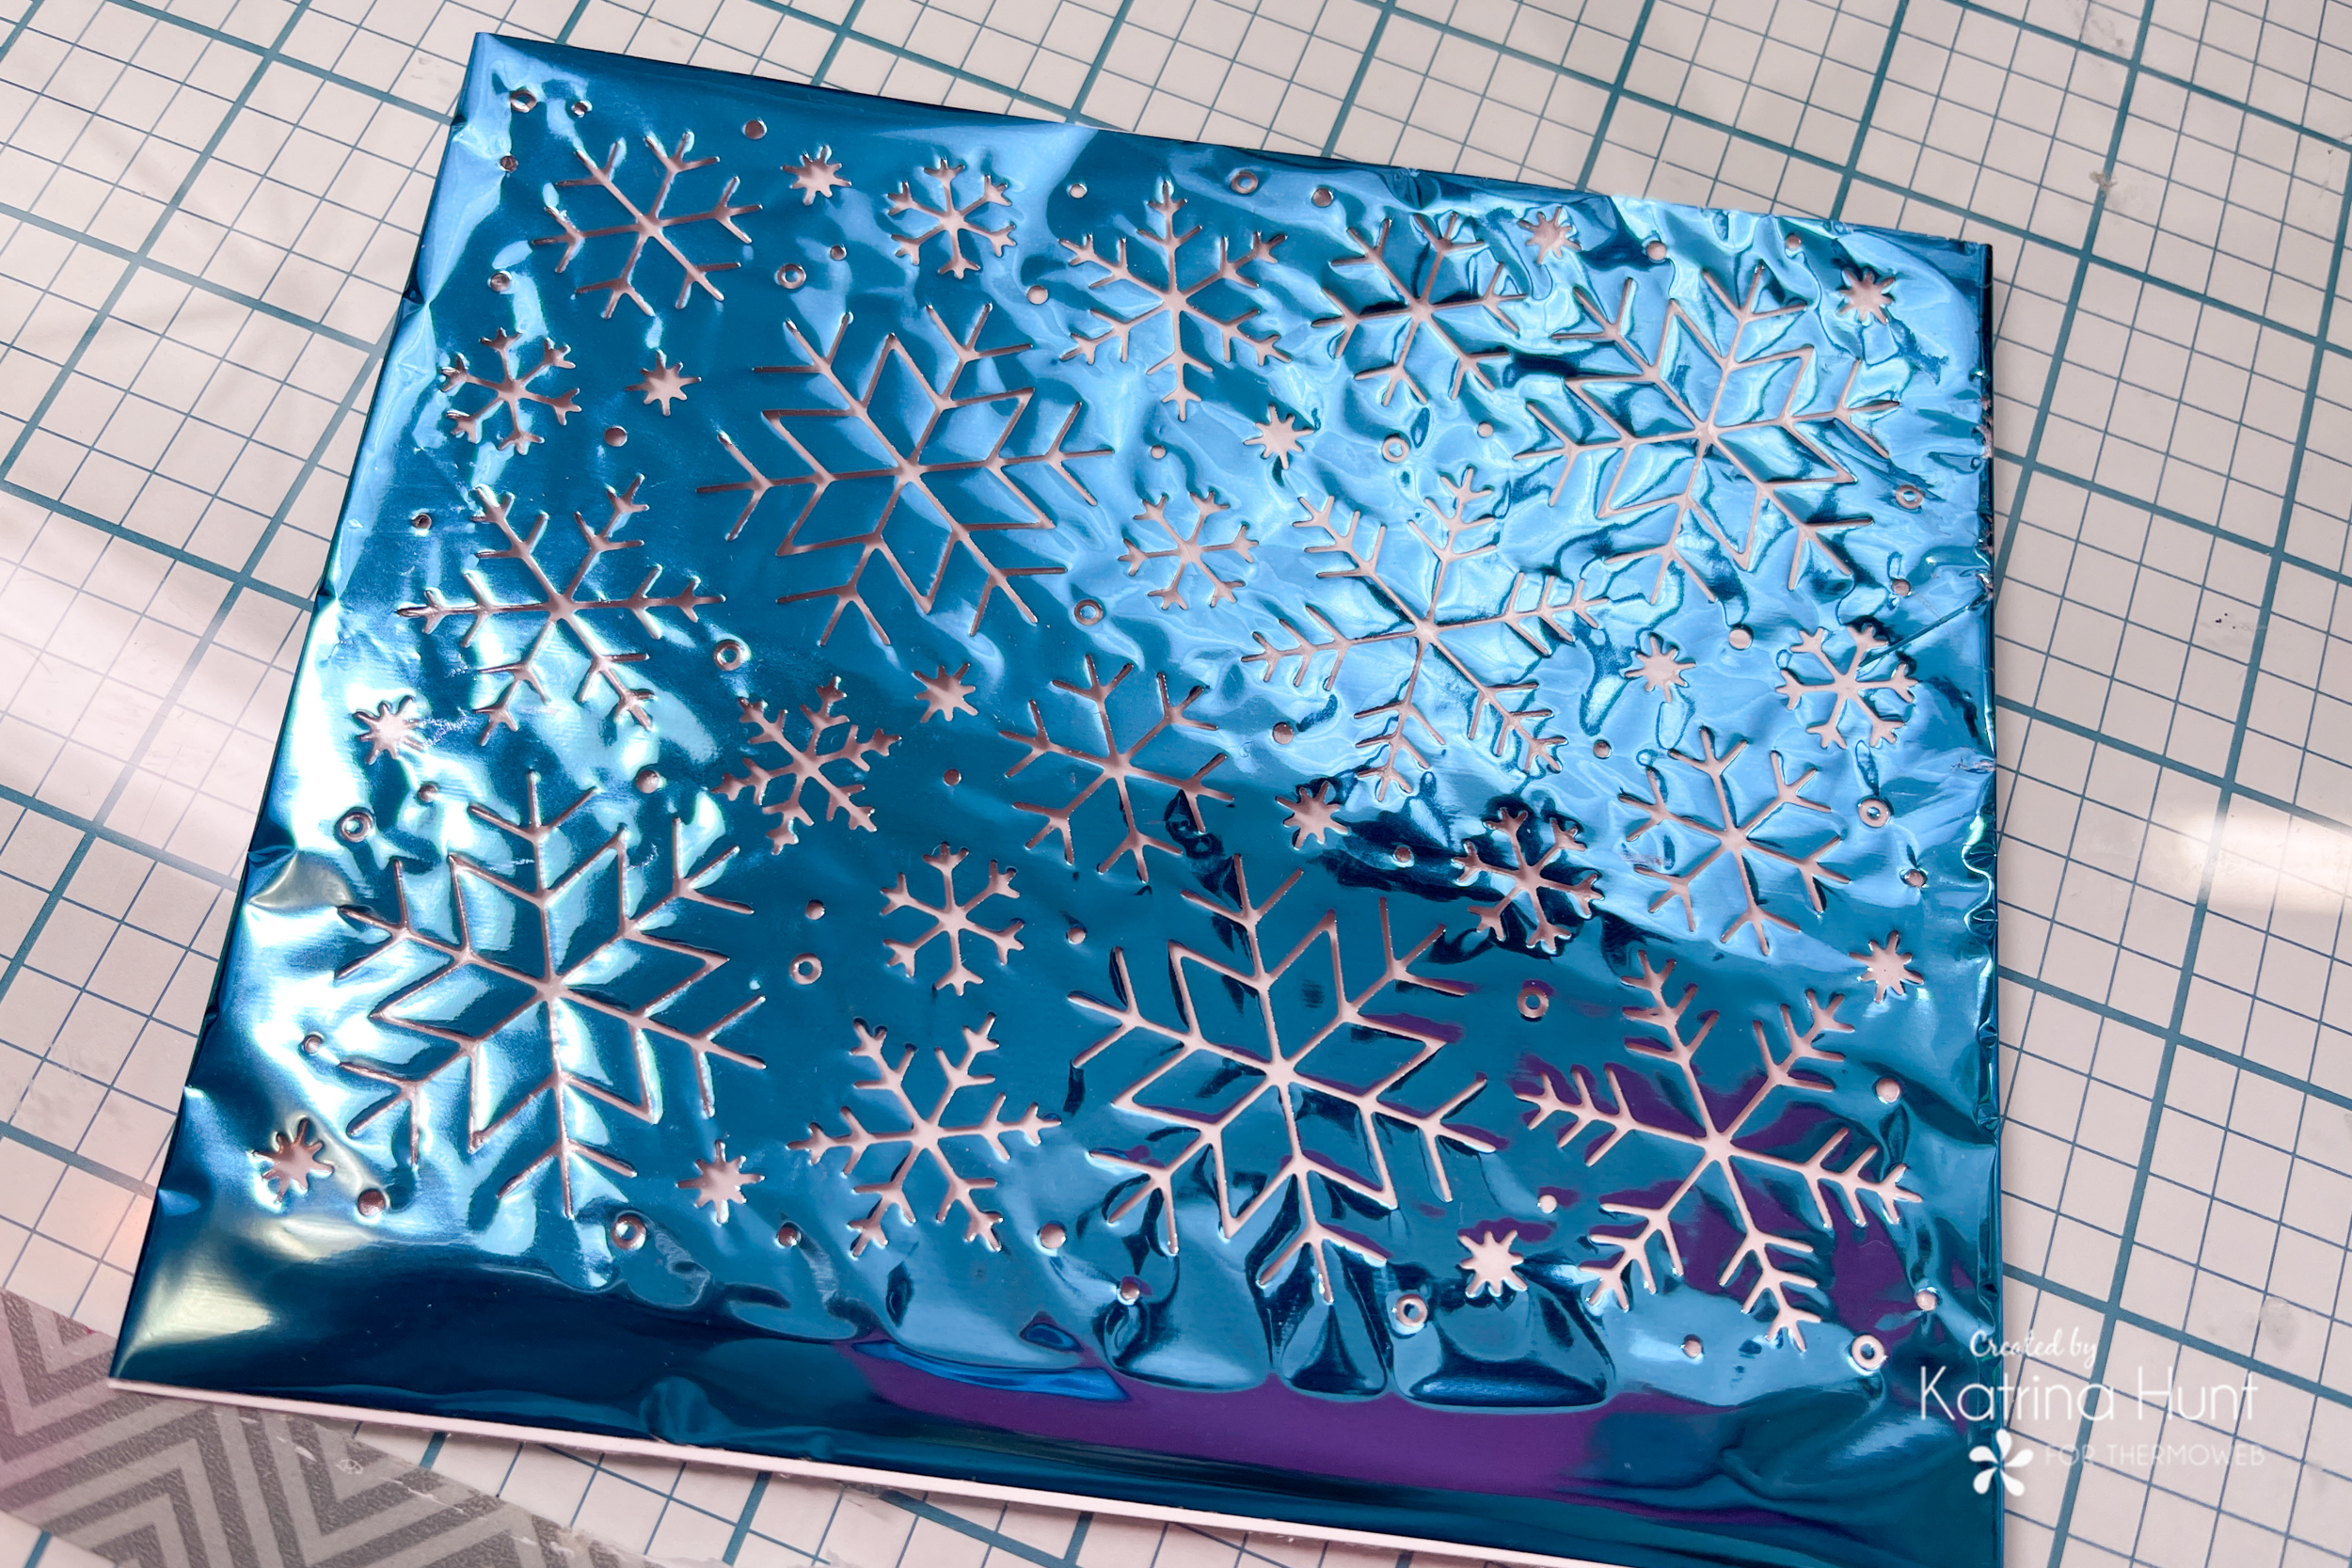
This layout started with me wanting to use some foiled snowflakes. Originally I had planned on single snowflakes around my page. Then I decided I would try to foil the snowflake background hot foil plate from Lawn Fawn on some pattern paper. People THIS WORKS!!! Don’t think you just have to foil on plain white cardstock, shake it up!
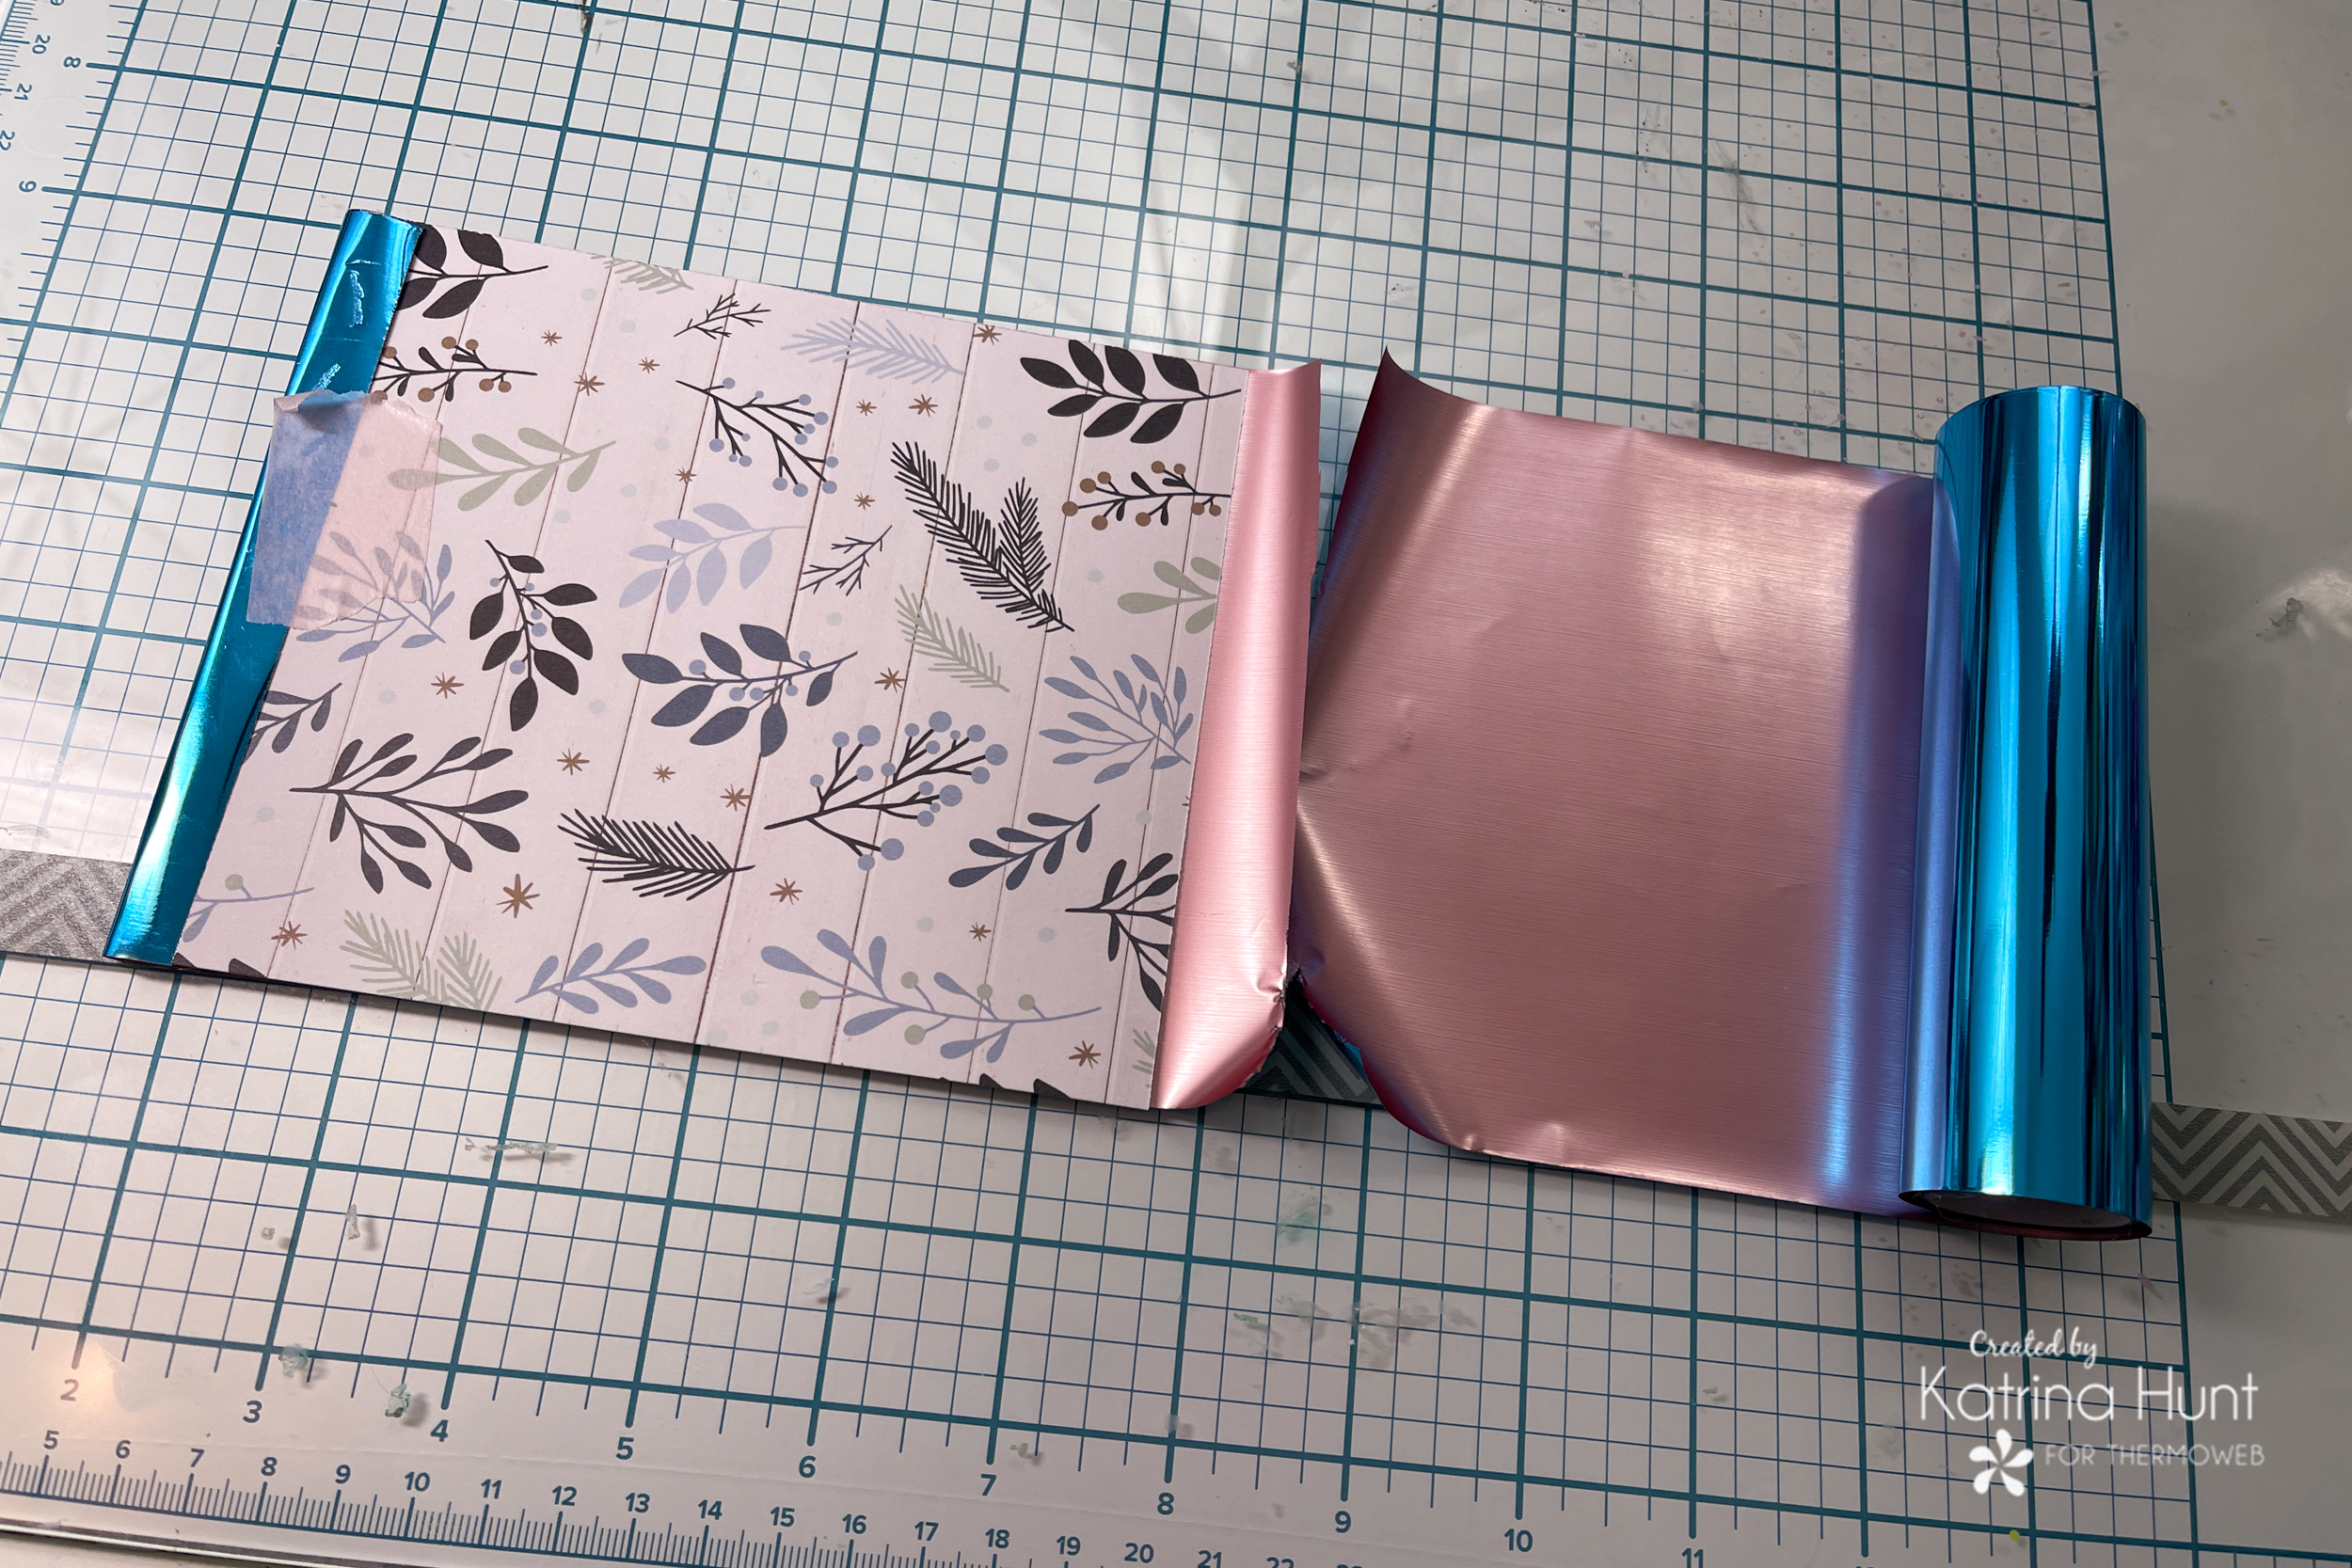
I cut my hot foil piece a little longer than my pattern paper. Using Pixie Tape on the back to hold the foil piece taunt and in place on my piece of pattern paper. Once my hot foil plate was heated I laid my foil taped paper pretty foil side down and then ran it thru my die-cutting machine.

LOOK at those snowflakes on the snowflaked patterned paper!! How fun is that?!!
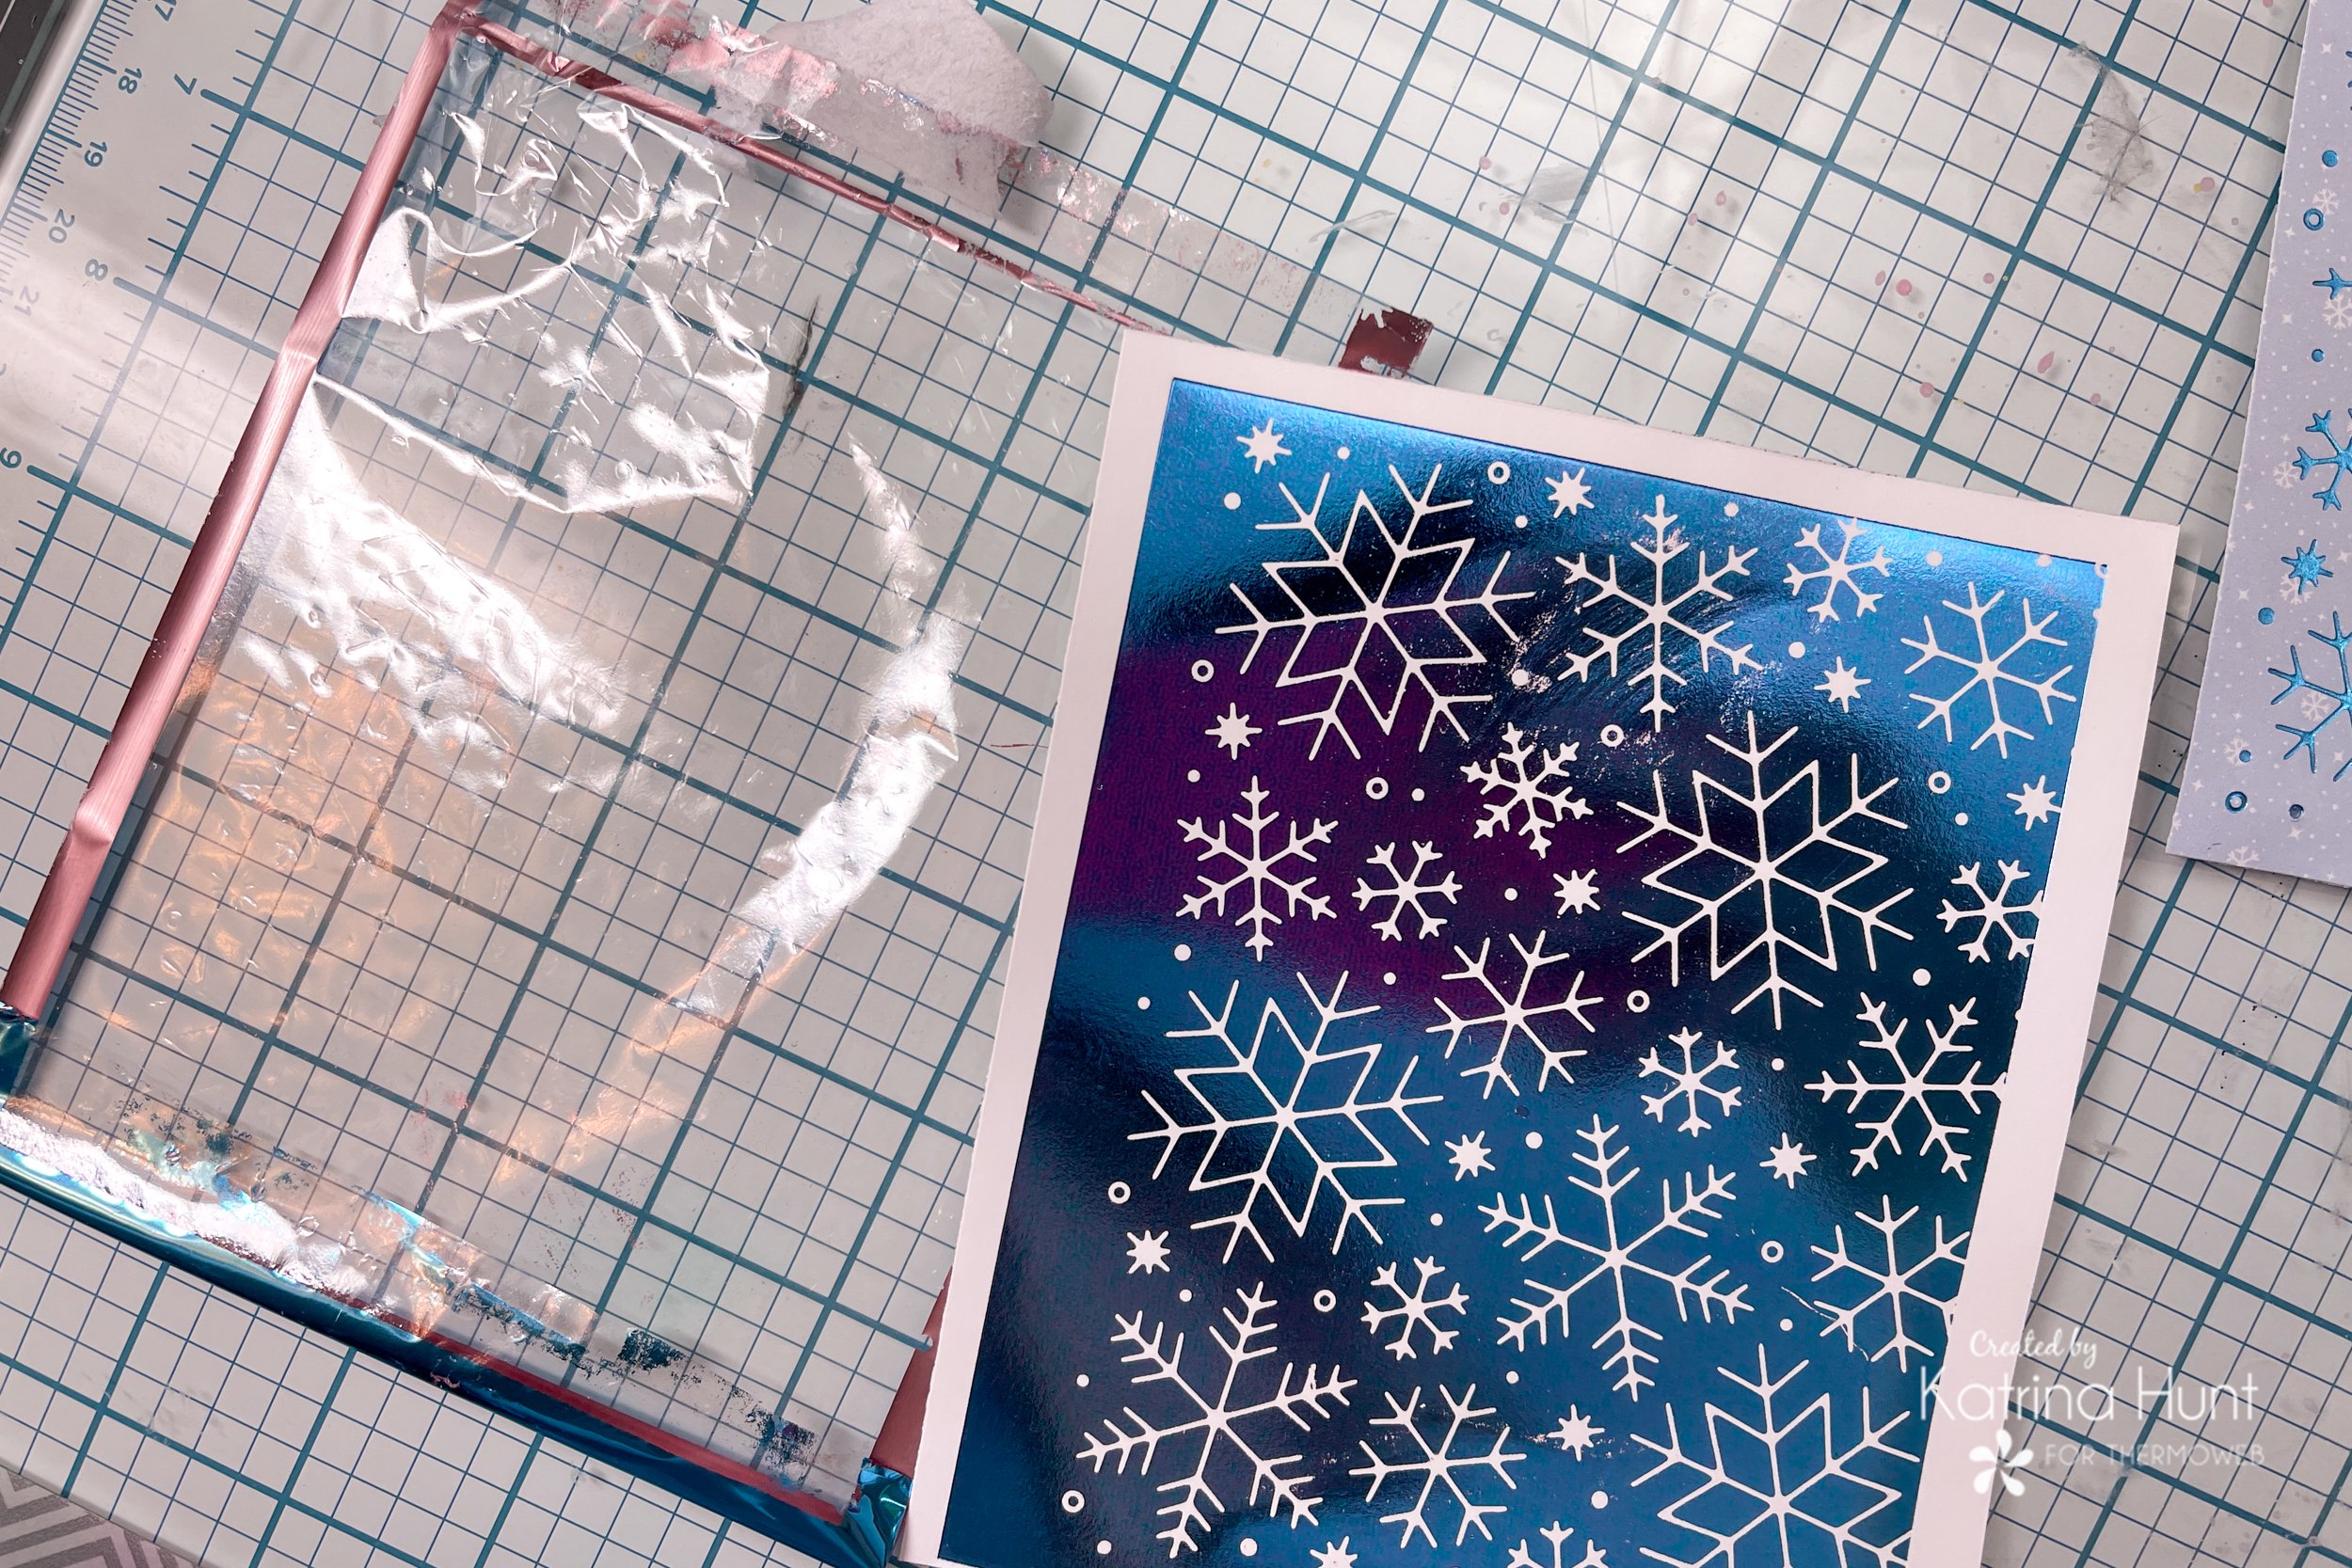
The picture below is before I pulled the foil away from the pattern paper. This left me with a negative piece of foil with lots of foil left on it (sorry pic did not turn out!)

I cut a piece of white cardstock to size and then applied the same technique from above by taping the foil to the paper to keep it in place. This time I used the solid hot foil plate from Pinkfresh. Below is my piece before heating and running thru my die-cutting machine.
Once I removed the foil carrier I trimmed and evened up my piece of foiled paper. If you are into hot foil or thinking about it GET a solid hot foil plate as one of your first purchases. This stretches your foil usage, but also there are so many things you can do, die cut, layer, etc! It’s worth the investment!
Below you can see the two pieces that I foiled. How much fun is that?! Both pieces, I cut in half and used them as layers behind my picture center. I border-punched the solid foiled piece with a border punch I had.
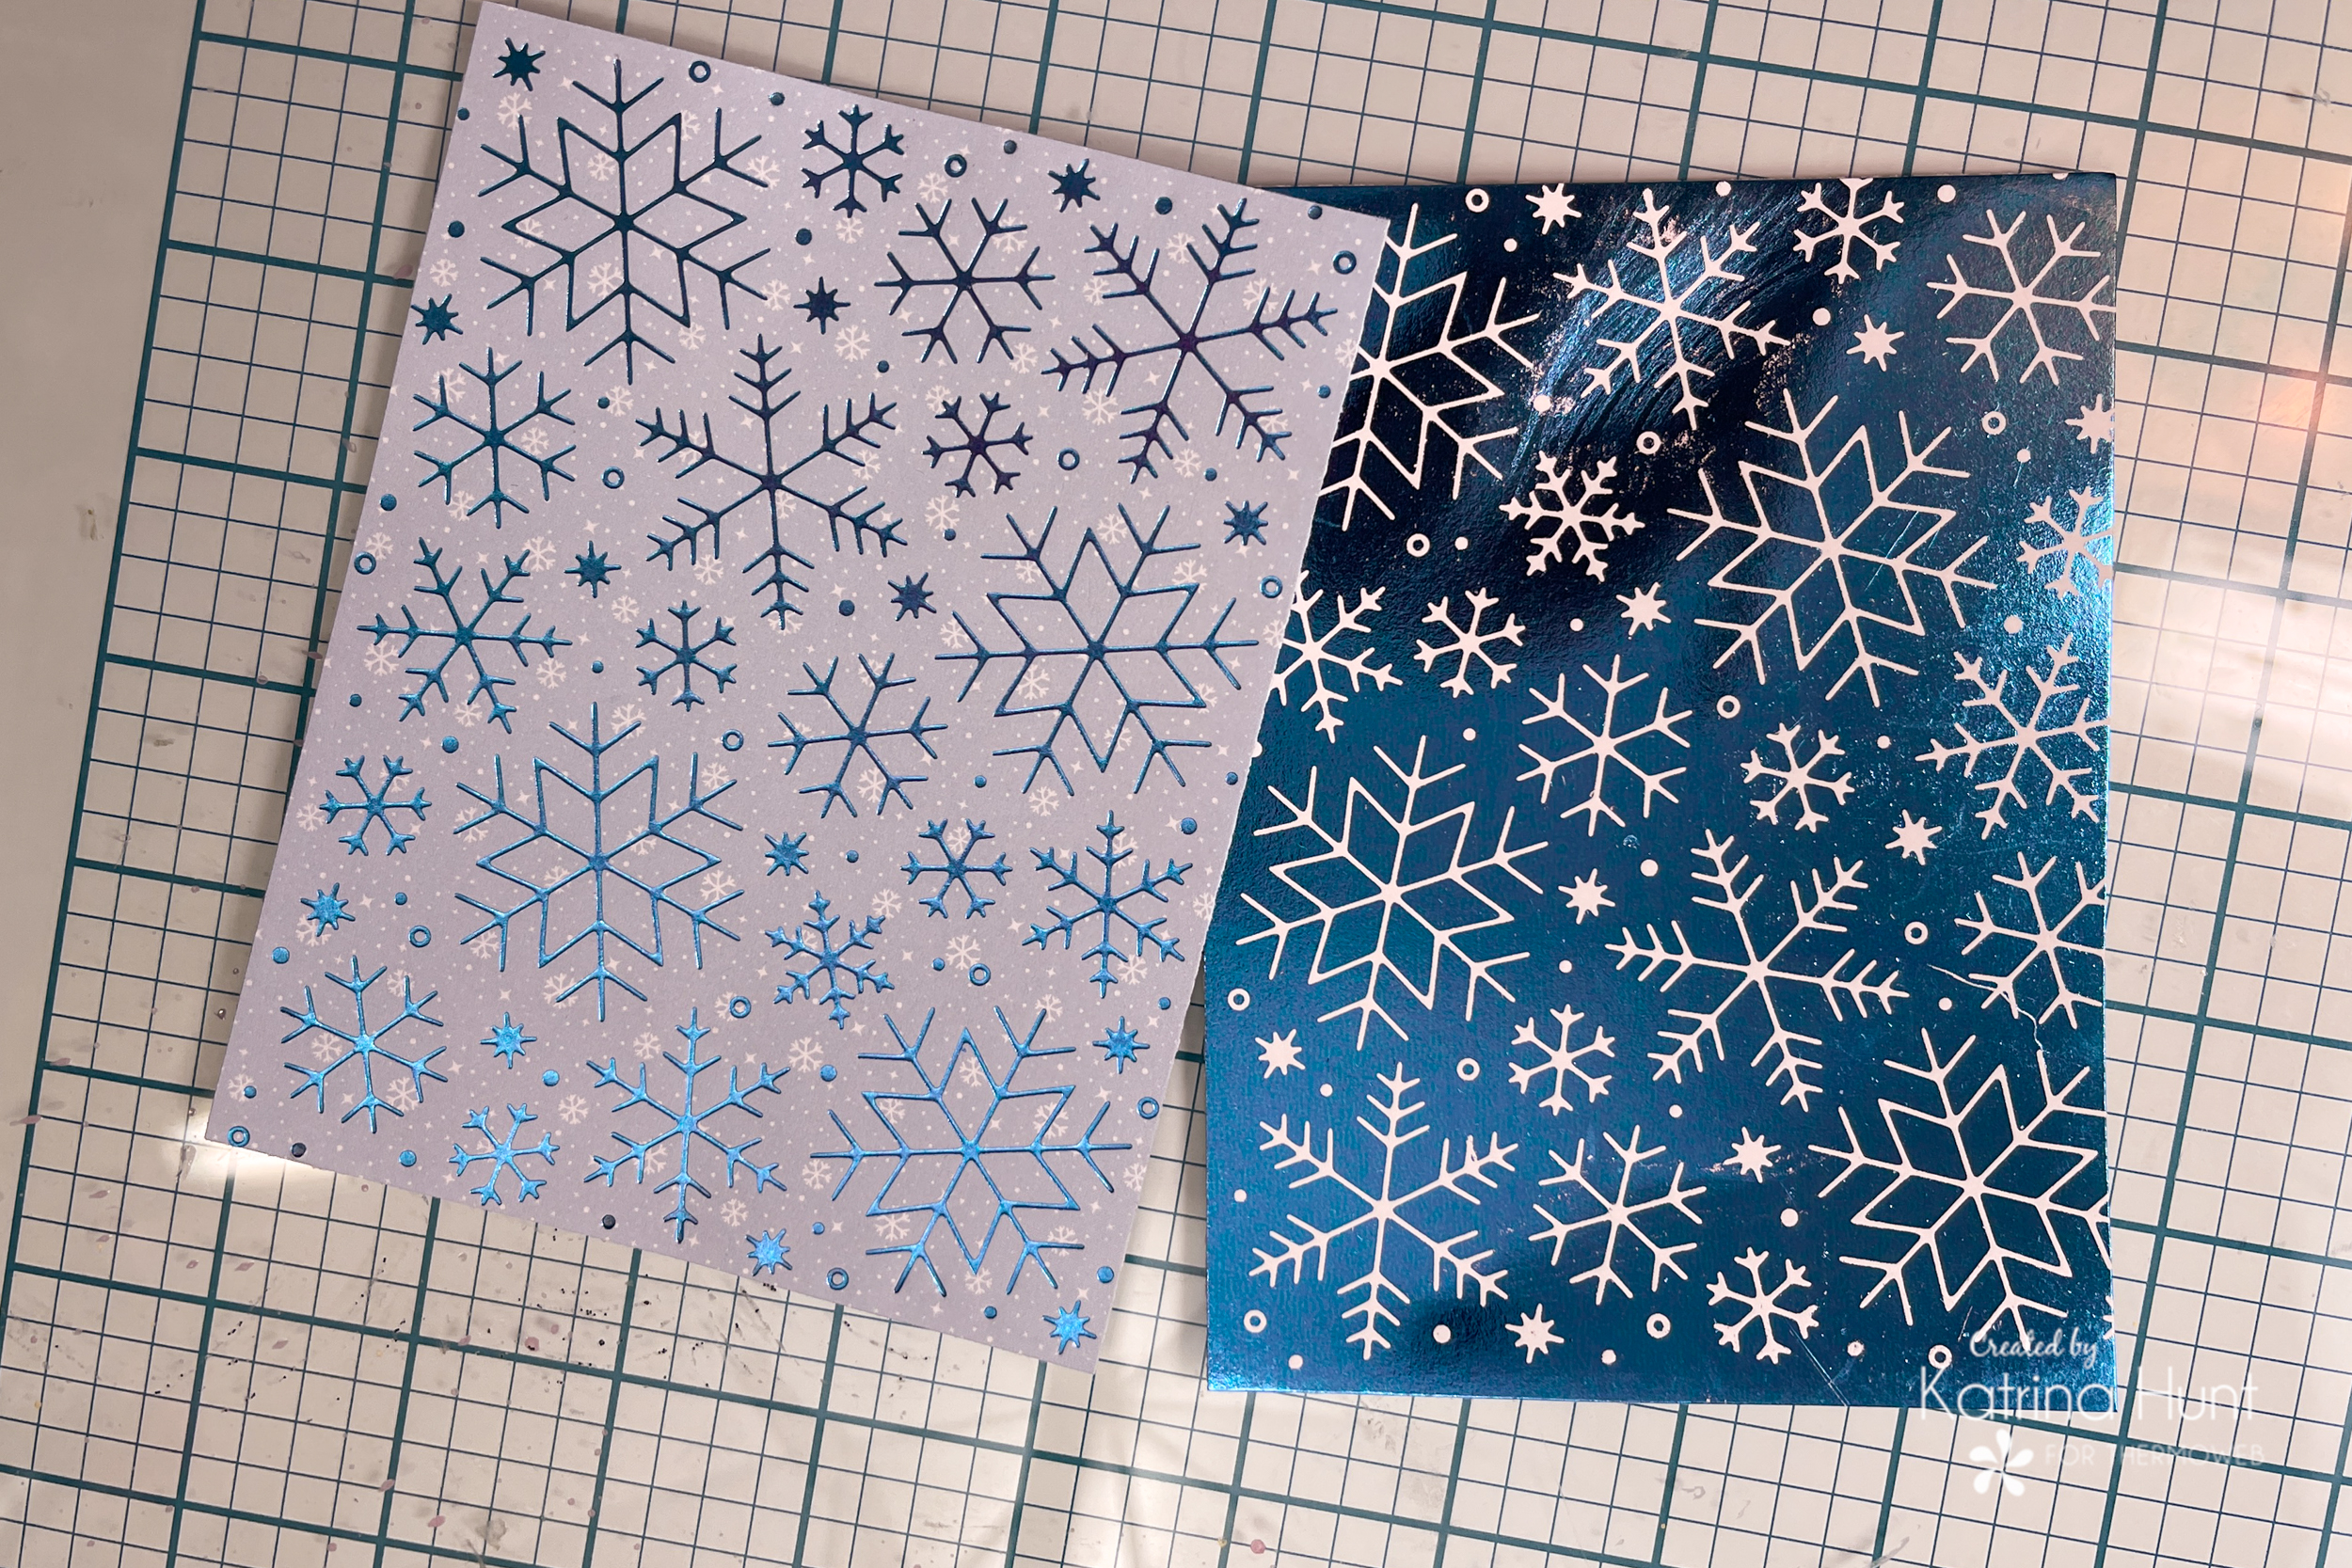
The punch reminded me of snow swirls!
Putting The Layout Together

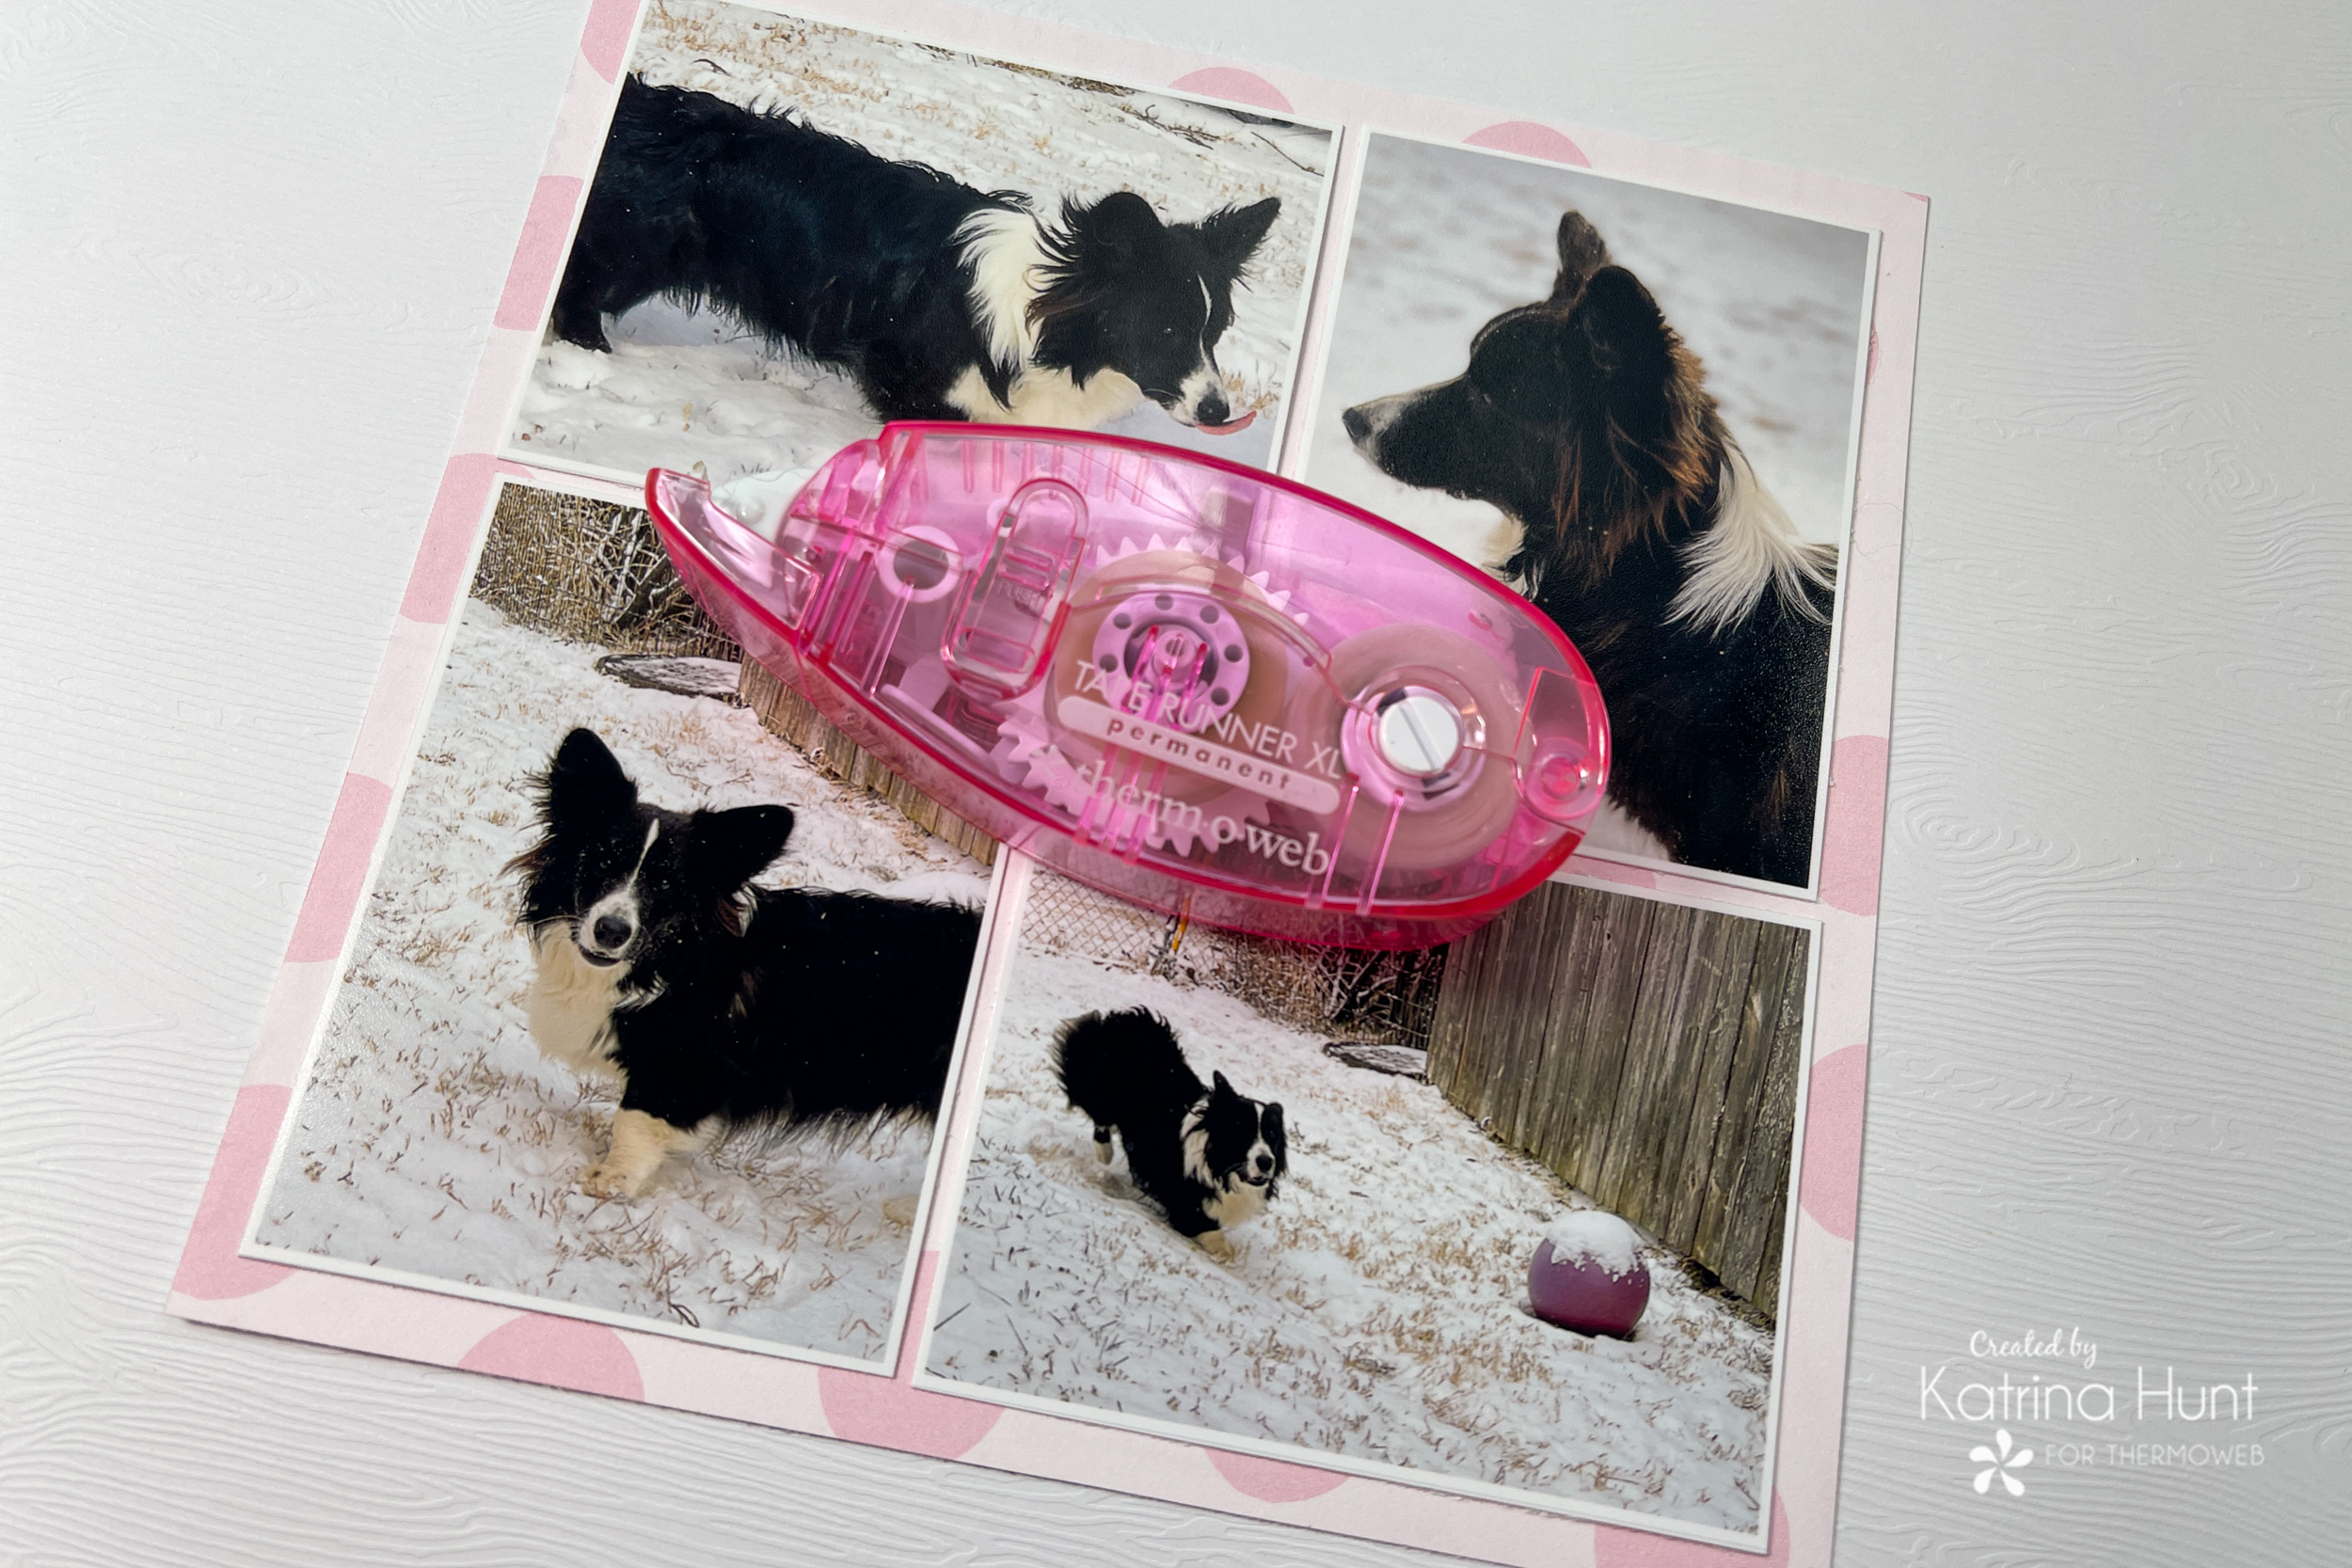
I adhered all of my layout with either my Memory Runner XL……….or my roll of Foam Tape!
or my roll of Foam Tape!
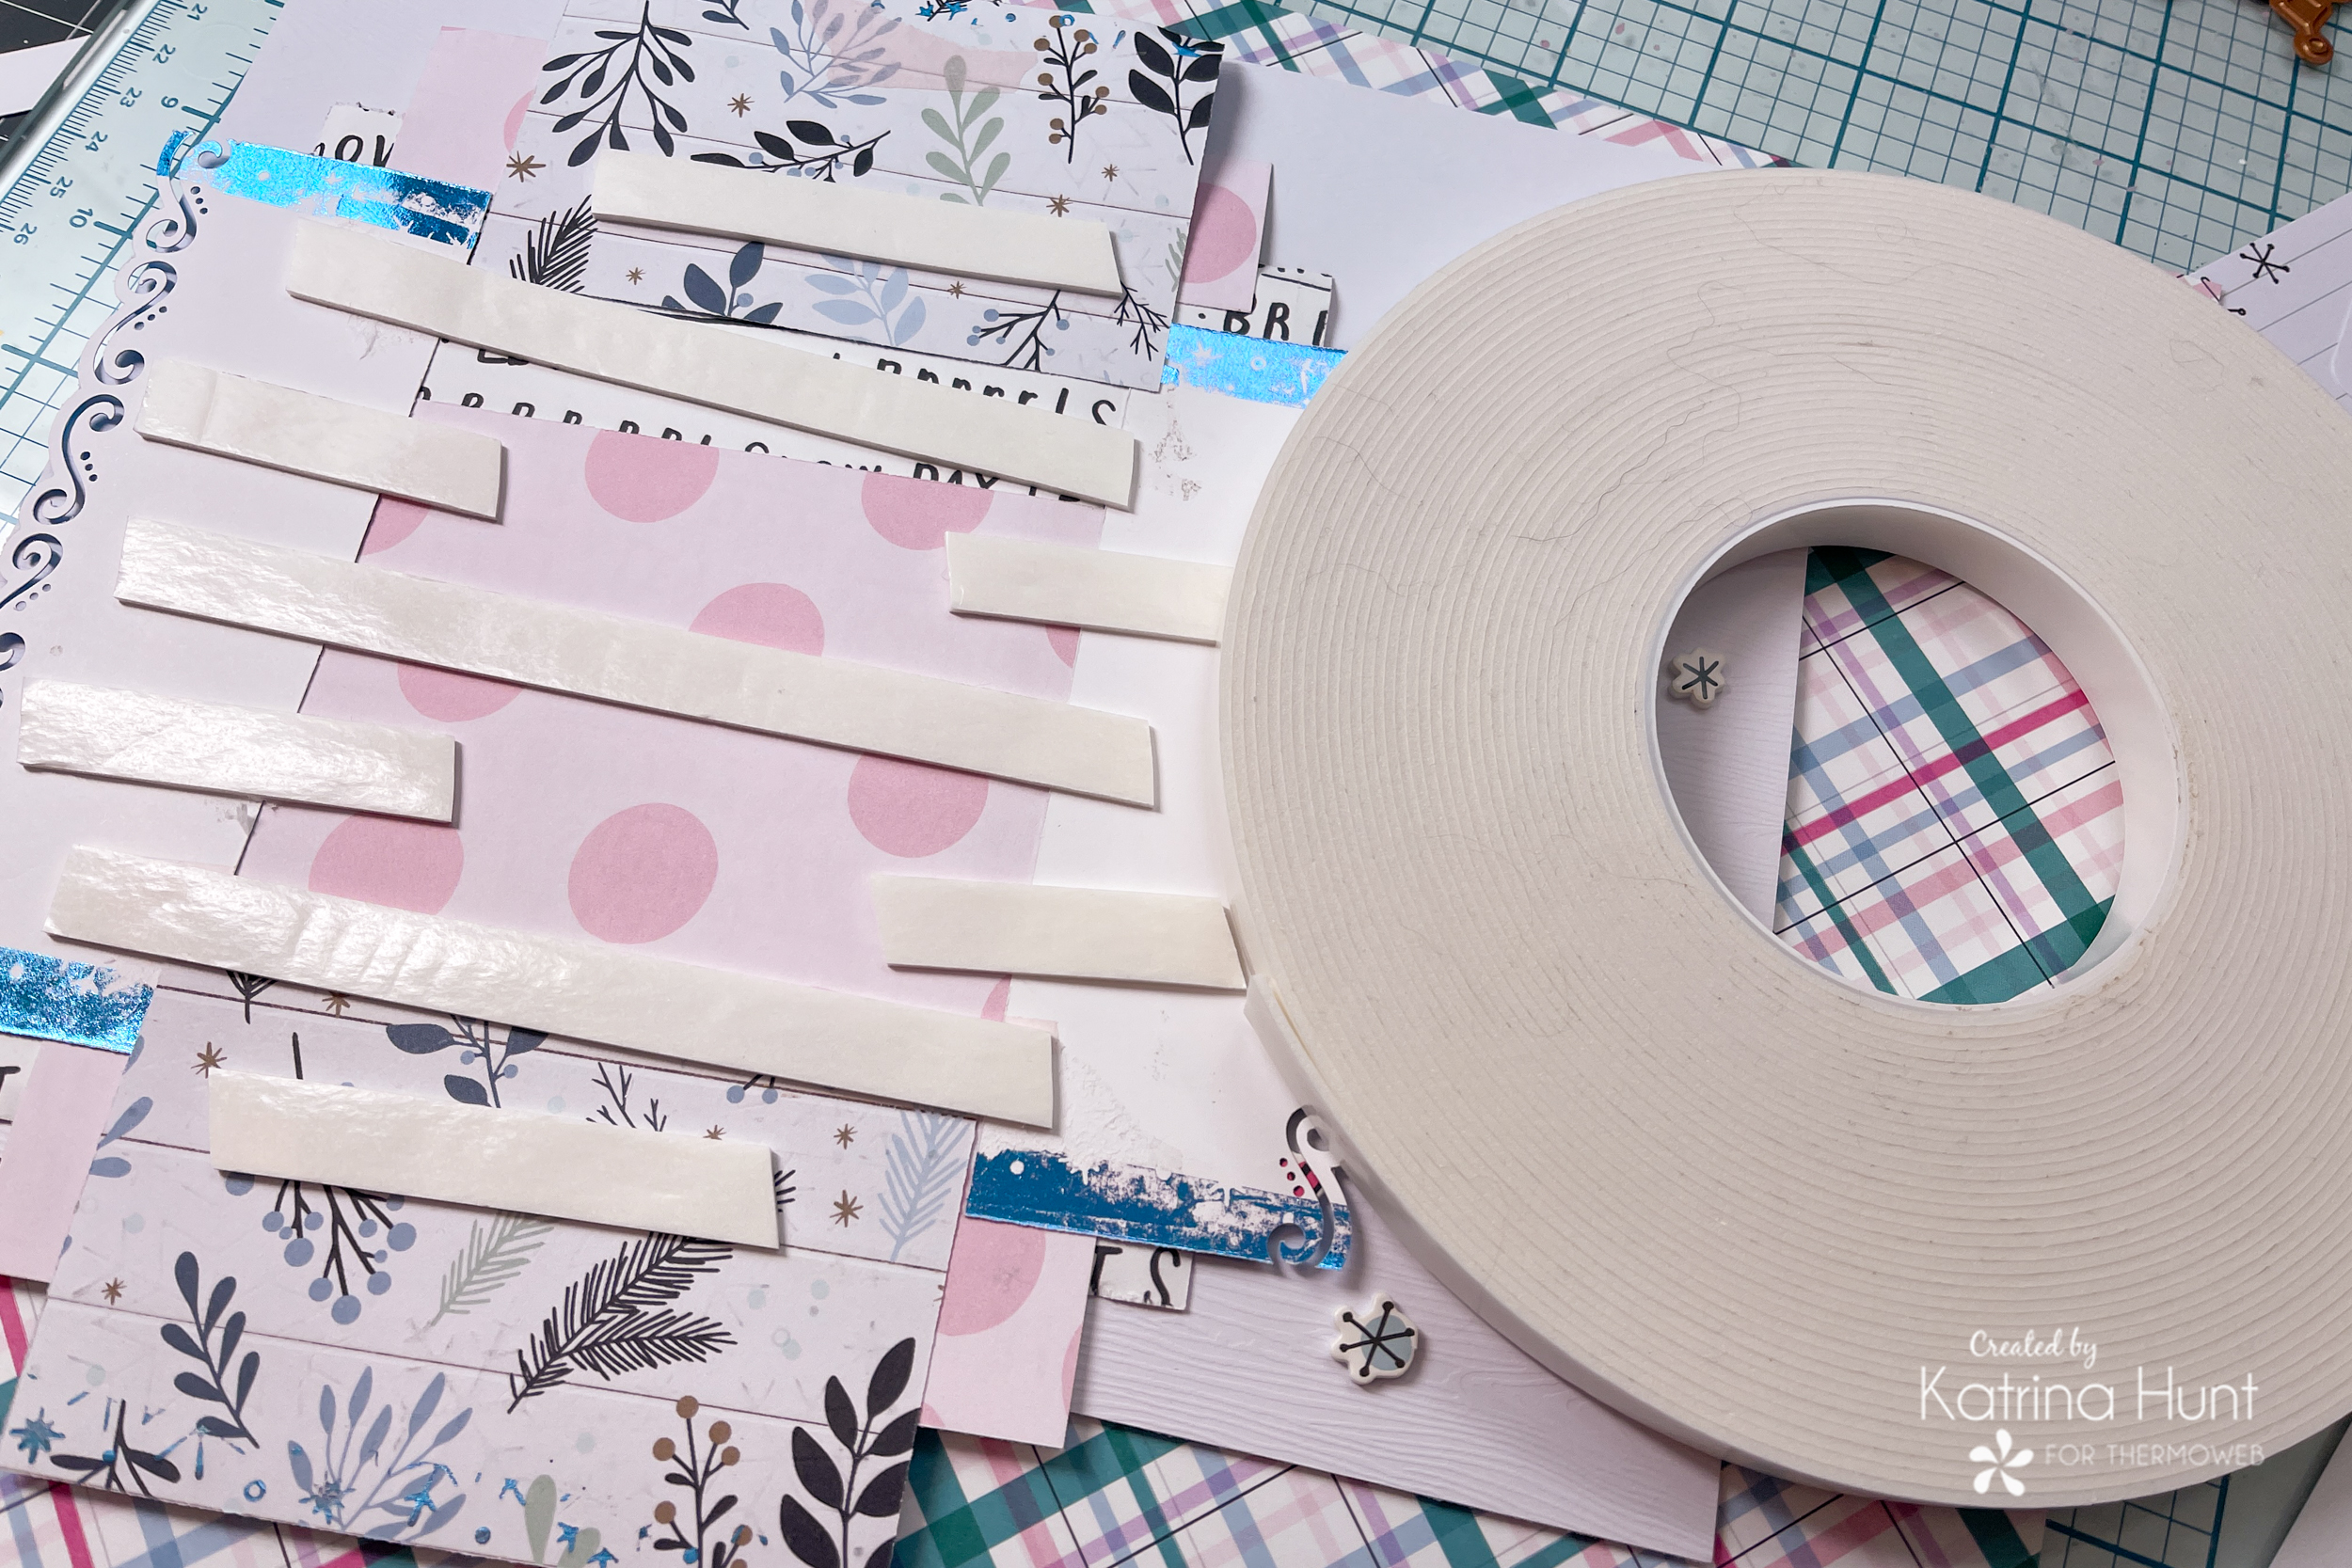
I love how the Foam Tape adds dimension and gives a pop factor to the center area where my pictures are!

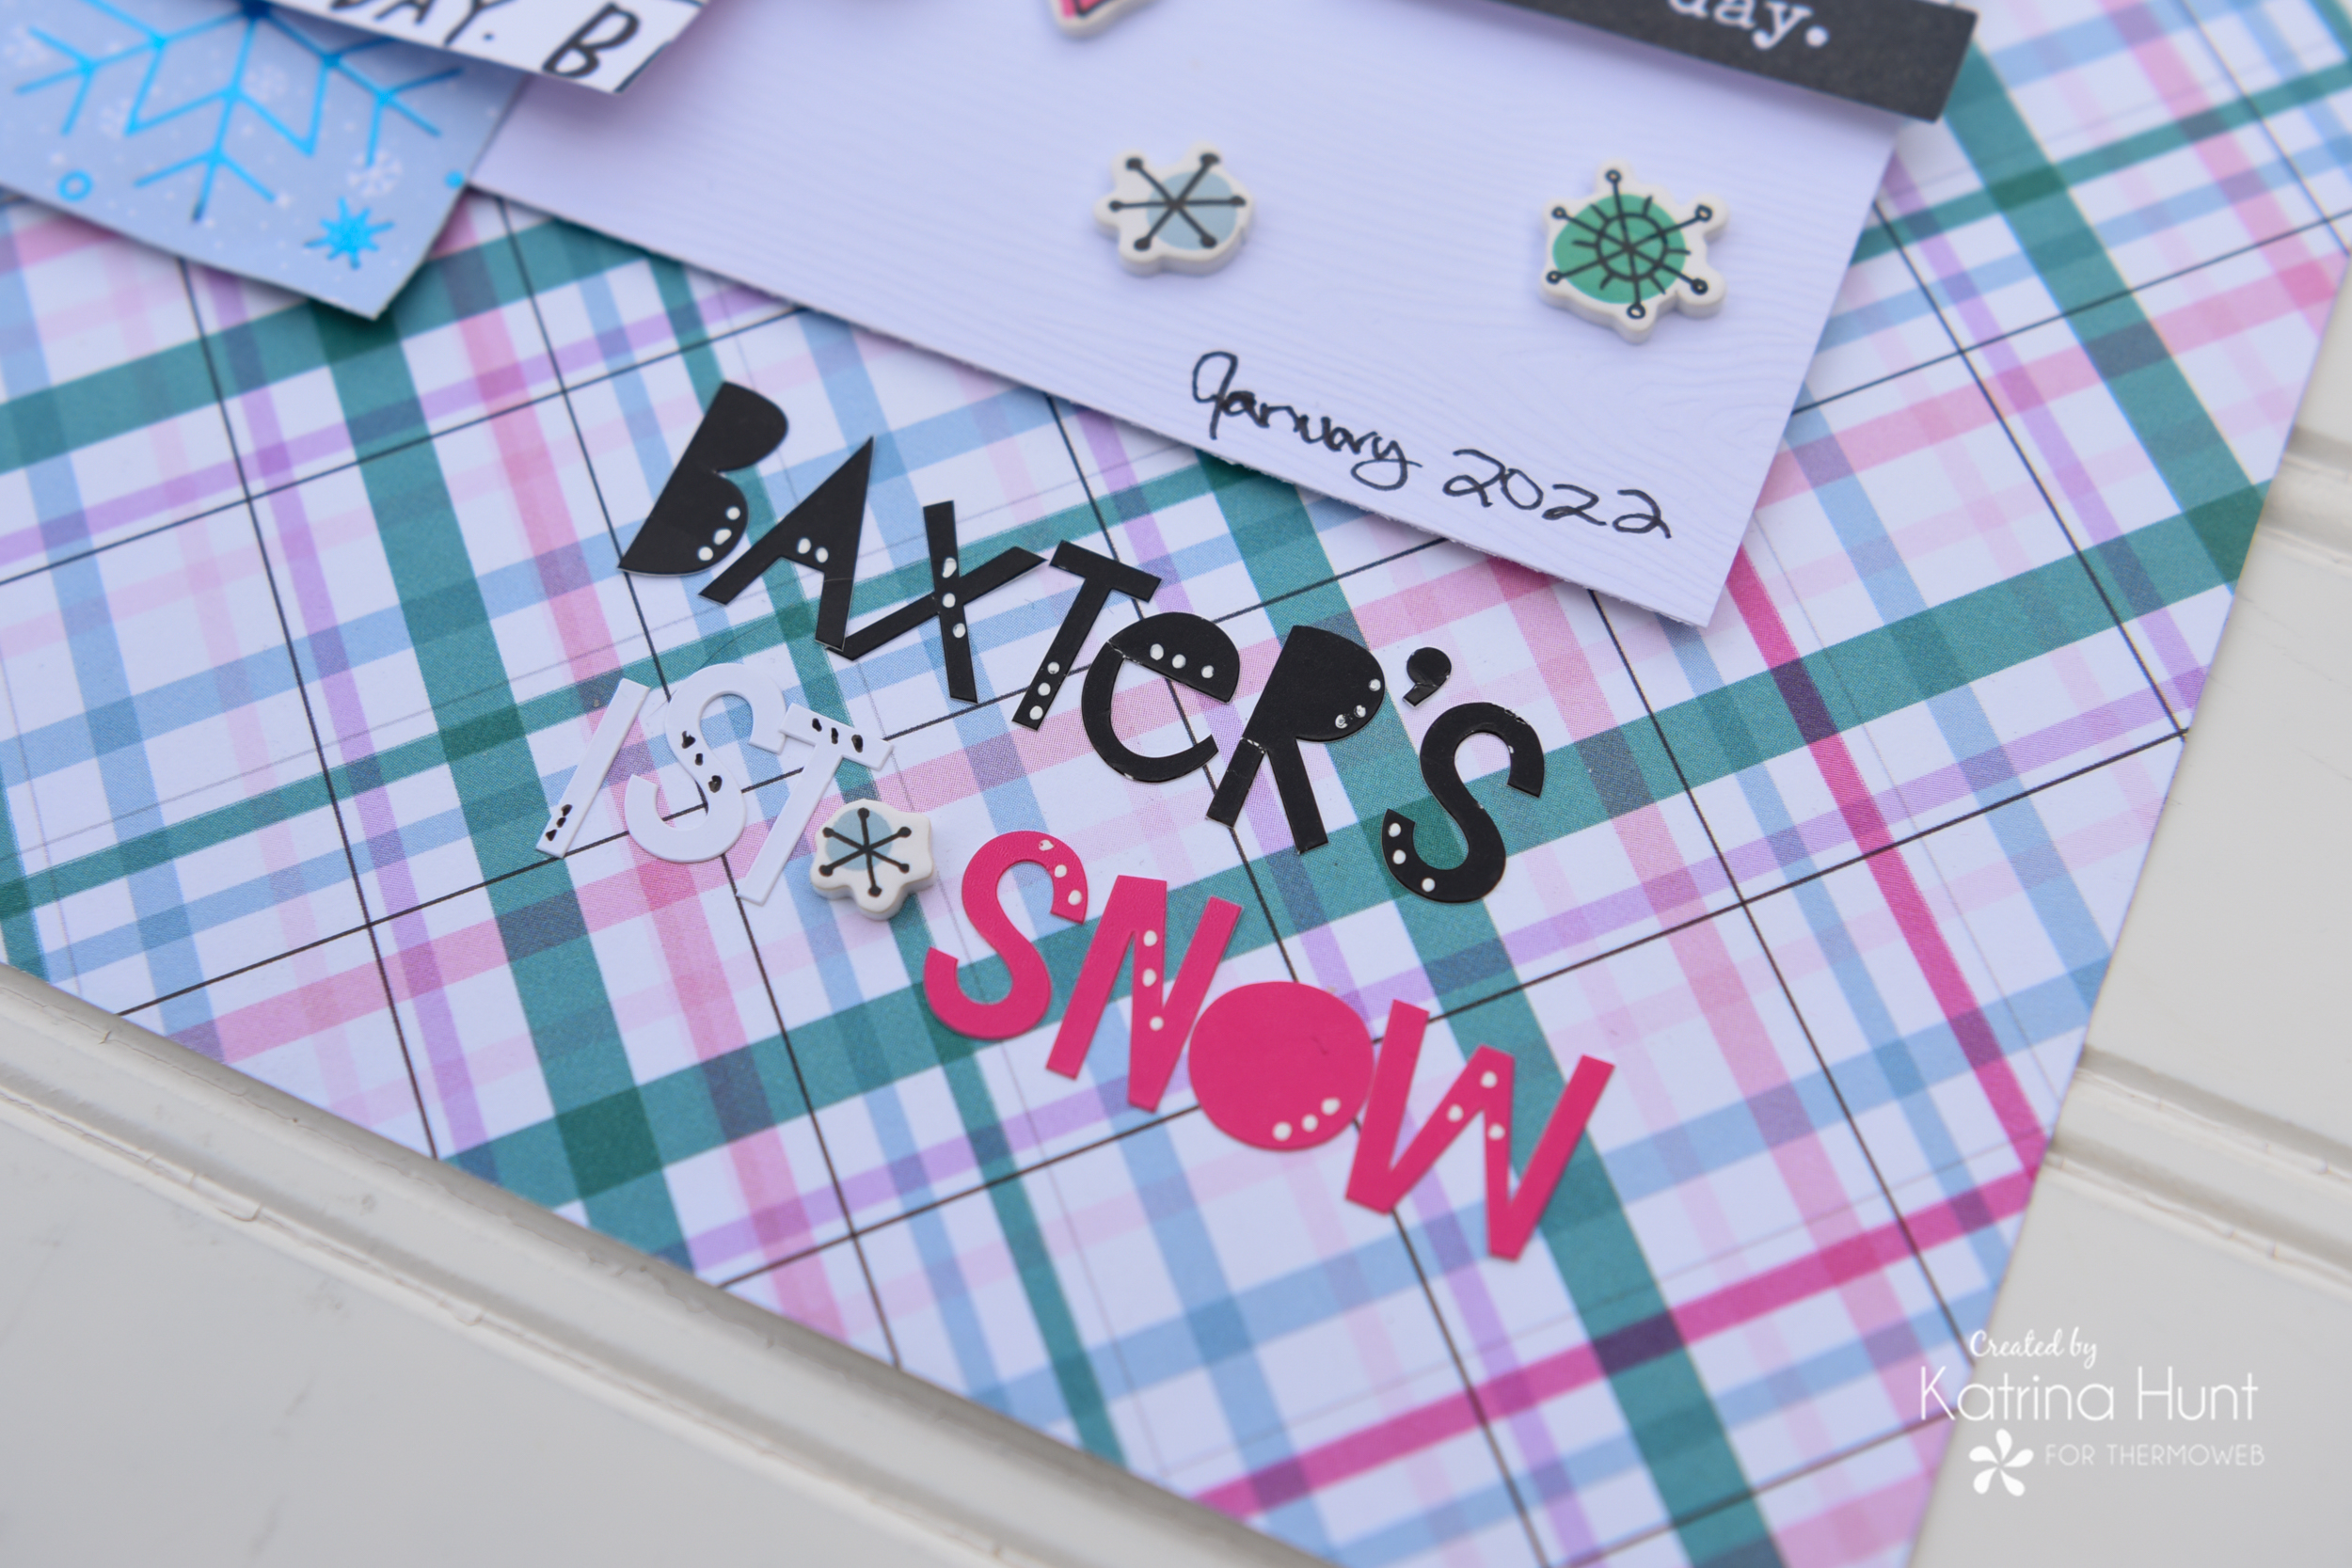
And what a fun way to document Baxter’s first snow! I added some embellishments, and then my title area. I always like to add a little extra to letter stickers to make the special. Here I just used a white gel pen and a sharpie for the black dots..
And that’s all from me today!!!! Make sure to document those cold temps that just happened over the past week!! Happy Holidays!