


Welcome everyone! This is Amanda from Twiddler’s Nook today with a fun technique to get two-for-one cards out of your toner card fronts. You can change little things to make them look different or create the exact same card assembly-line style to get more done faster if you need to also!
Deco Foil Valentine Cards
Products used:
Love Blooms Toner Card Fronts
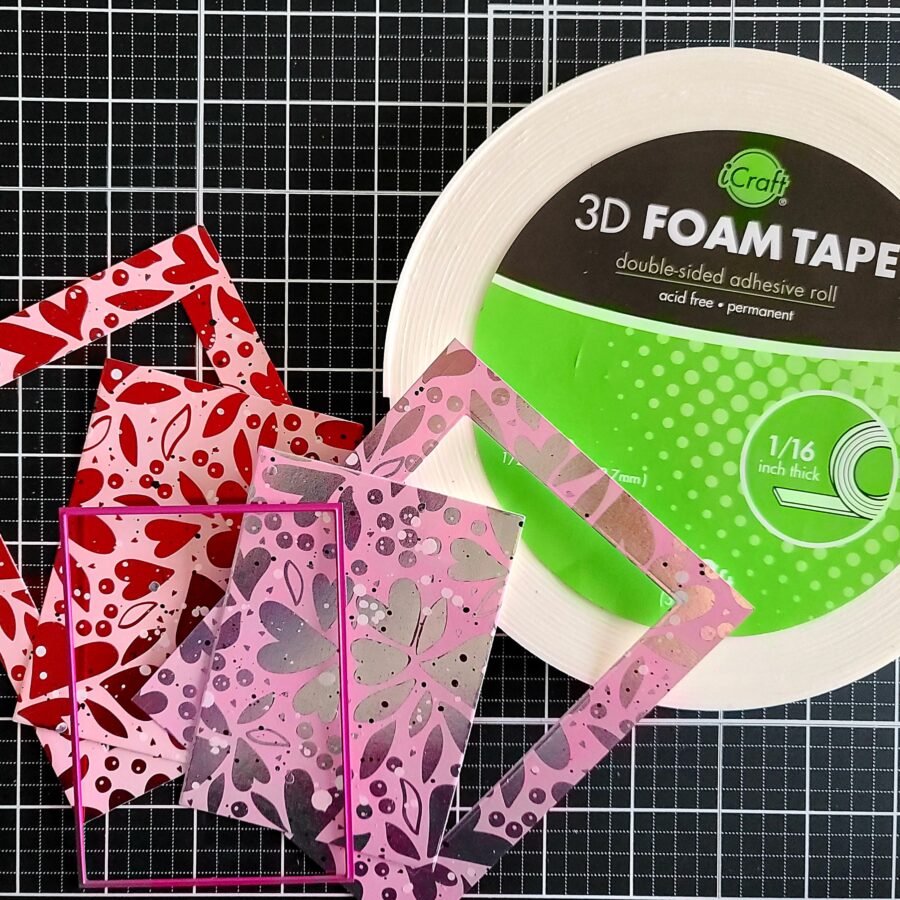
Deco Foil – silver and red
Glitz Glitter Gel – white
Ultrabond liquid glue pen
3D Foam Tape
Pink & Main Layered Rectangle A2 dies
Lawn Fawn Giant XOXO die
Lawn Fawn Scent With Love Add-on stamps
Distress Oxide – kitsch flamingo and spun sugar
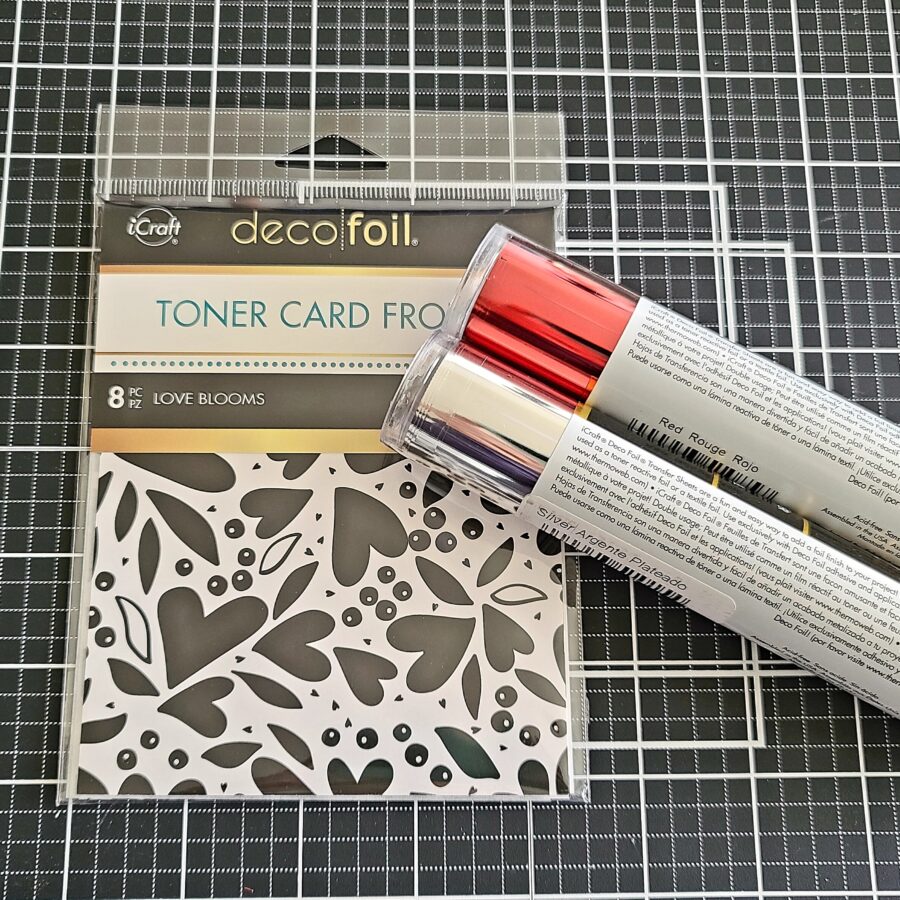
Okay, to get started I heated up my laminator while I dug through my stash and chose toner card fronts – Love Blooms today – and the color deco foil transfer sheets I wanted to use – red and silver. Once it was heated up I foiled one card front in each foil color.
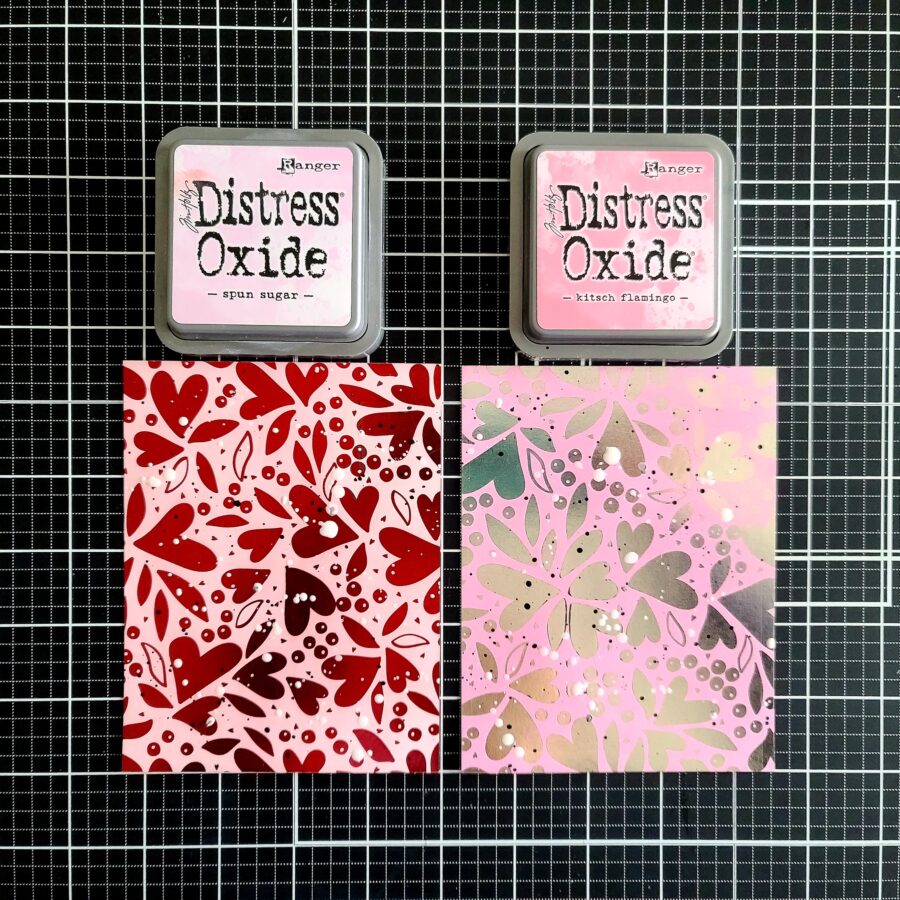
Once they were foiled I inked up the red one with spun sugar distress oxide ink and the silver one with kitsch flamingo. I splattered both with white and black acrylic paint for fun texture and set them aside to dry.
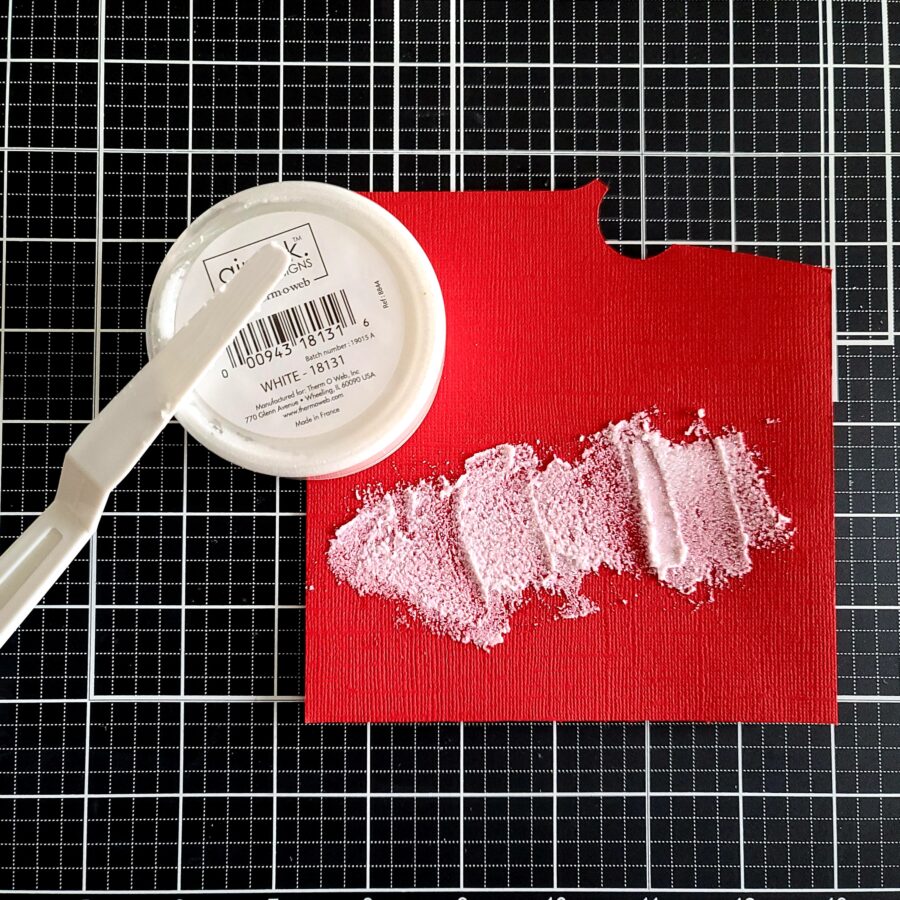
If you saw my bee card a couple weeks ago, I did this technique then and I may be hooked so here it is again. I smeared white glitz glitter gel across a scrap of red cardstock. Just a thin layer and did it messy on purpose. I set it aside to dry while I die cut the giant XOXO from white cardstock 6 times and glued them together in 2 sets of 3 each with my Ultra Bond liquid glue pen.
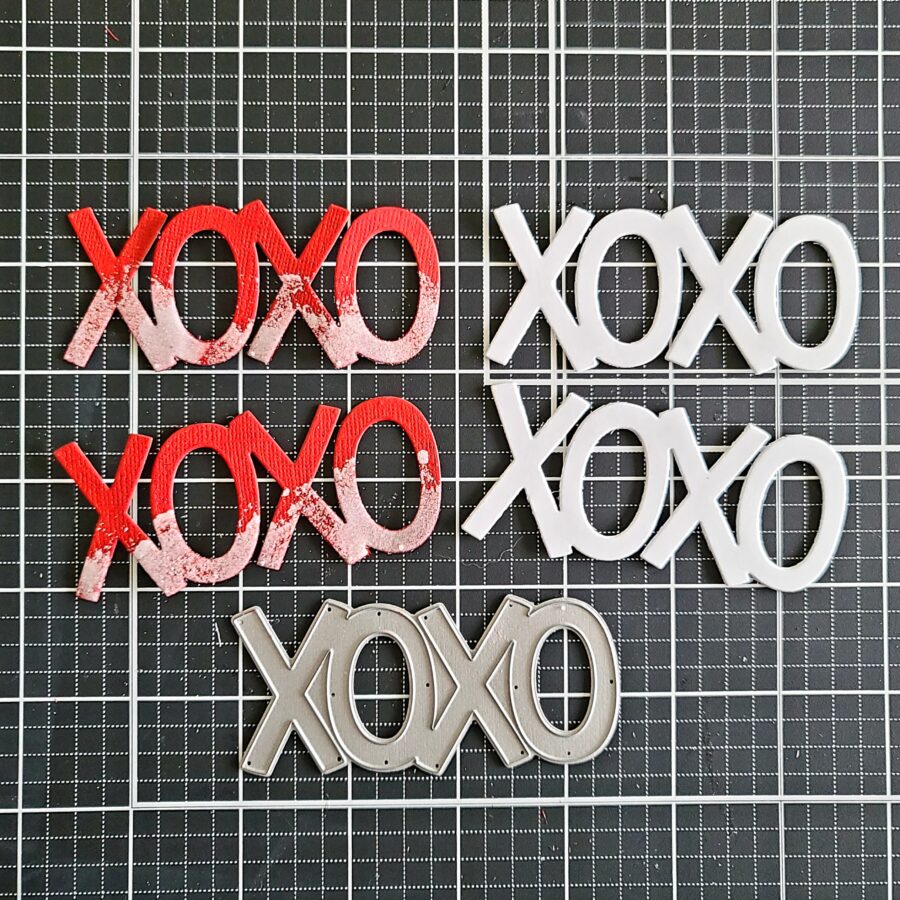
Once the glitz gel was dry, I arranged my die to cut half glitz and half plain cardstock two times. Then I adhered these to the white stacked die cuts I had ready to go. This gives the sentiment some thickness to stand out from the background.
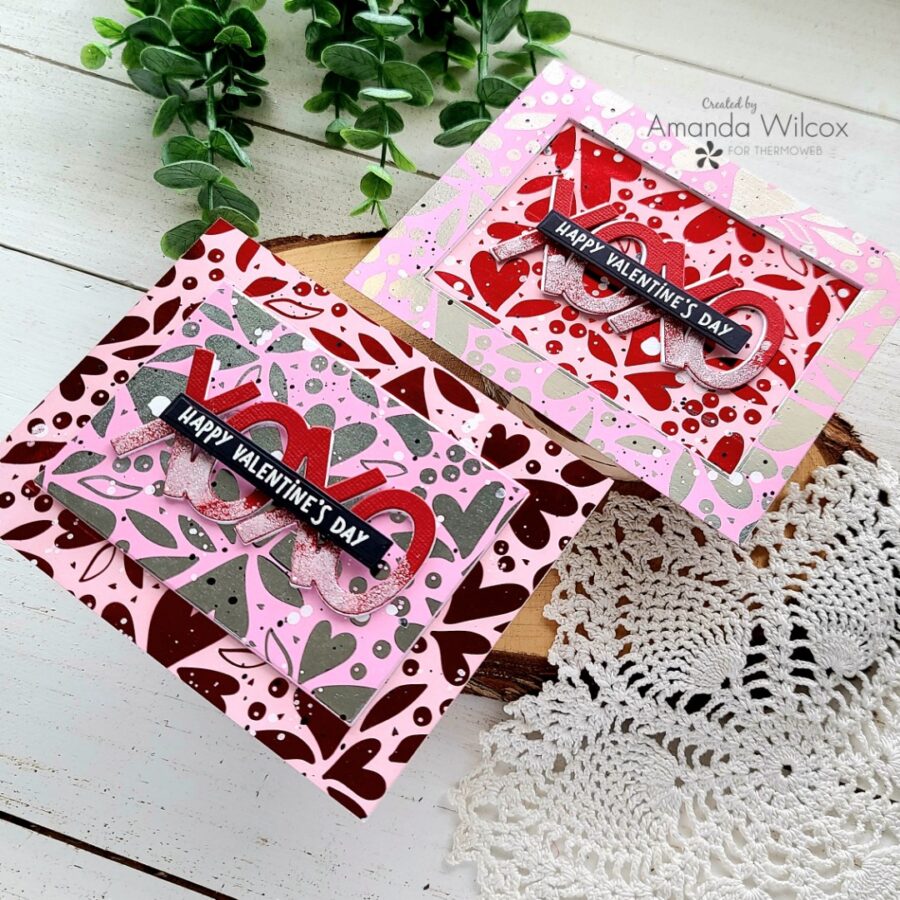
With my paint dry now, I used a Pink & Main layered rectangle die to cut a rectangle out of the center of both panels. I added foam tape to the back of both silver foiled pieces because I wanted to try different looks on both cards today.

For the first card, I added the popped-up silver foil frame to a white card base and then used my liquid glue pen to adhere the red rectangle in the center. I glued down the XOXO and added a heat embossed sentiment strip over the top of that.
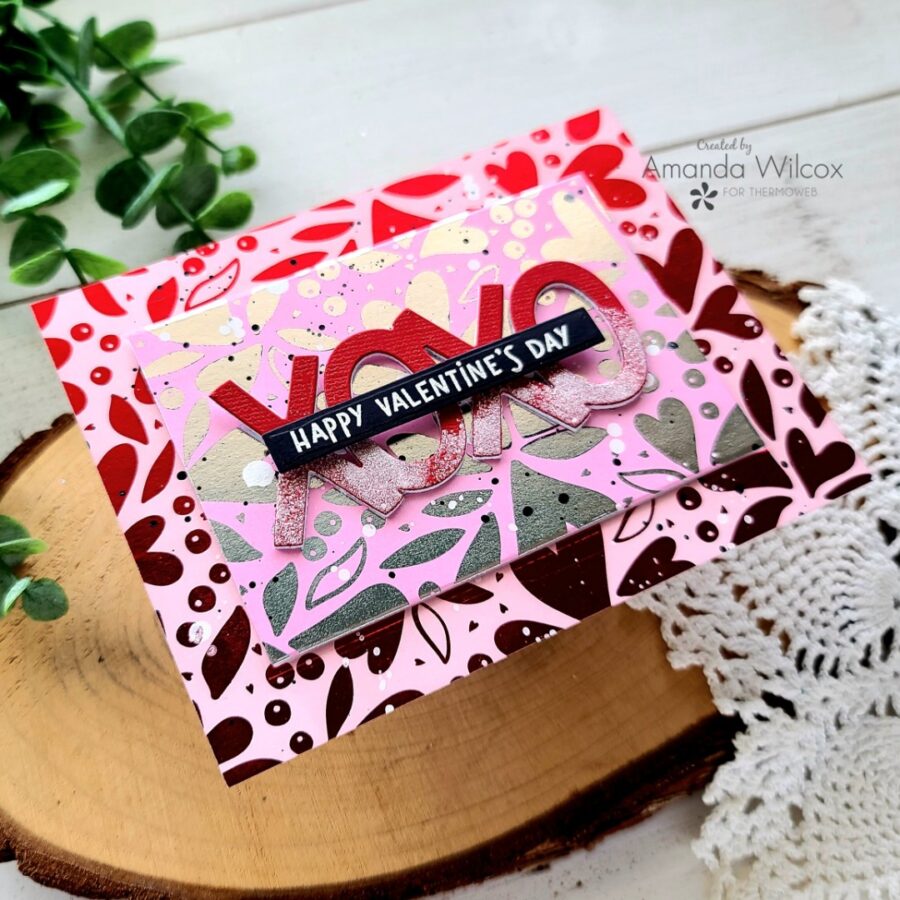
For the other card, I adhered the red frame to the card base with liquid glue and popped the silver center up. I adhered to the XOXO and the same sentiment strip to the center again.
Aren’t these cards so much fun!?! I absolutely love Valentine crafting and sending a lot of Valentines out so creating a design I can make a lot of at once is nice. Especially something so fun and blingy like these!
Remember, there are a ton of toner card fronts on sale right now so it’s the perfect time to stock up before they’re gone!
I appreciate you sharing your time with me. Have a fabulous day!
This post contains affiliate links. For more information, see our disclosure HERE.