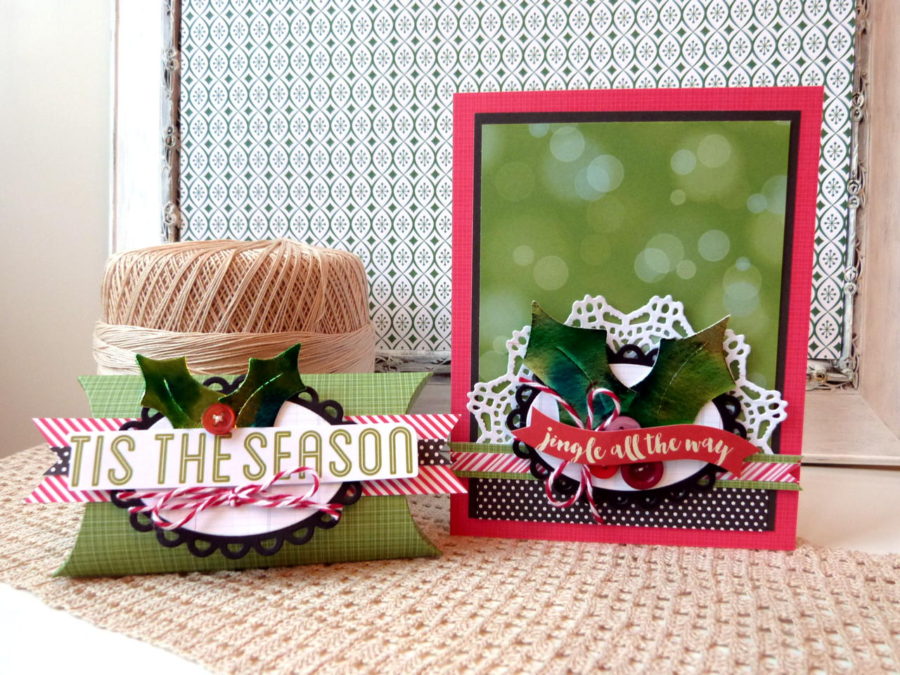
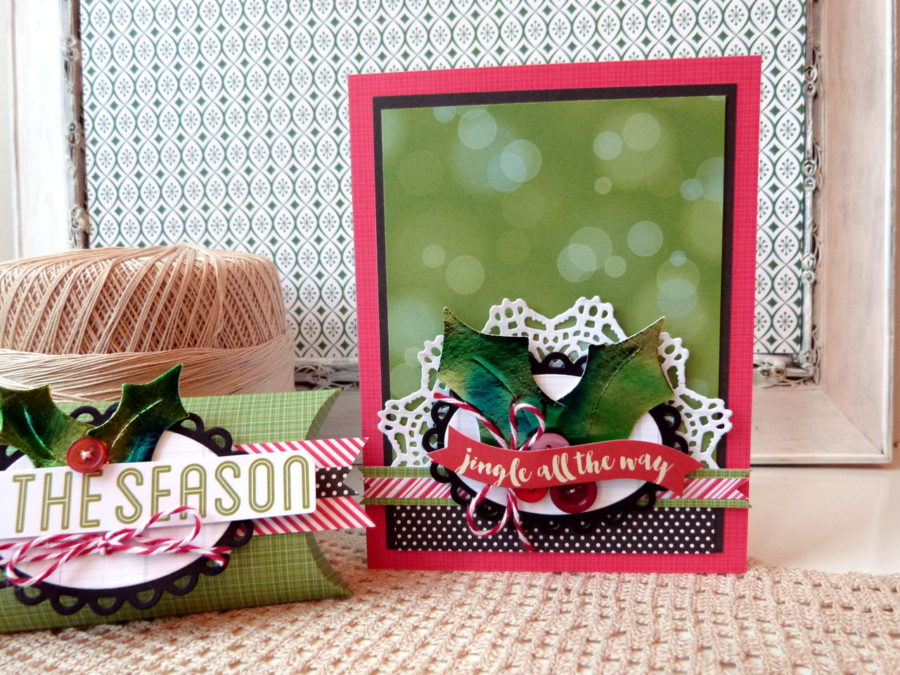
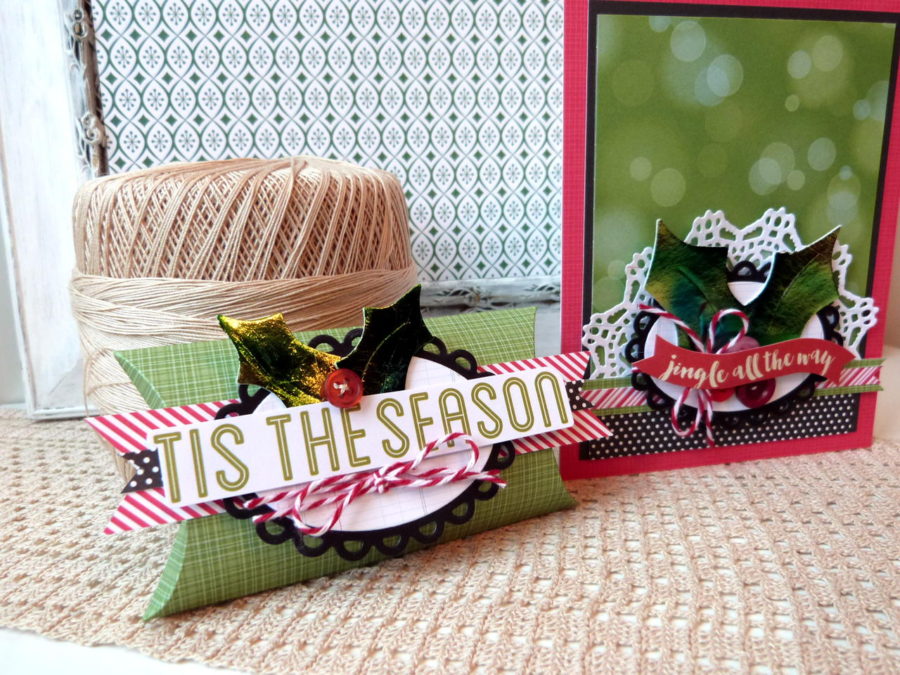
It’s never too soon to start thinking about the holidays! As the weather turns cooler it’s the perfect time to plan ahead and Designer Audrey Pettit has created this beautiful holiday gift set with our Deco Foil™ that simply sines!
Let Audrey walk you through how you can recreate this holiday gift set!

Tis the Season Deco Foil Holiday Gift Set by Audrey Pettit
Project Supplies:
Cardstock: Ranger
Patterned Paper: Lawn Fawn
Die Cuts: Simple Stories
Dies: Sizzix
PaperTrey Ink
Therm O Web Deco Foil™ Transfer Sheets – Emerald Watercolor
Therm O Web Deco Foil™ White Foam Adhesive Sheets
Zots Adhesive Dots
Memory Tape Runner XL
Buttons: Foofala
Twine: The Twinery
Project Instructions:
Jingle All the Way Card:
Create a 4.25” x 5.5” card base from white cardstock, with the opening to the right. Cover the card base with red solid patterned paper.
Trim a 3.75” x 5” piece of black cardstock. Adhere to the center of the card base.

Trim a 3.5” x 4.75” piece of green bokeh patterned paper. Adhere to the center of the black cardstock. Trim a 3.5” x .5” piece of black and white polka dot patterned paper. Adhere to the bottom of the green bokeh patterned paper.
Die cut a doily from white grid patterned paper. Cut the doily in half, and adhere half to the green paper, along the seam where the two papers meet.
Cut a .5” strip of green patterned paper and a .25” strip of red candy stripe patterned paper. Trim the ends of both into a V-notch. Adhere over the seam where the two bottom papers meet.
Die cut a scalloped oval from black cardstock. Die cut an oval from white grid patterned paper. Adhere the two, and then adhere both to the center of the doily.
Die cut two holly leaves from iCraft Deco Foil™ Double-Sided White Adhesive Foam. Peel off the top protective layer from the foam, and cover the exposed adhesive with Emerald Watercolor Deco Foil™ Transfer Sheet (colored side up and silver/dull side down).
Gently rub over the foil with the tip of your finger, and then peel off the foil transfer sheet. Peel off the back liner from the foam, and adhere the two holly leaves to the center of the oval.

Adhere three red buttons to the base of the holly leaves for berries with Zots™ Adhesive Dots.
Tie a small bow from red baker’s twine, and adhere the bow to the buttons.
Adhere a die cut sentiment banner to the top of the buttons with Memory Tape Runner XL.
Tis the Season Pillow Box:
Die cut pillow box from solid green patterned paper. Adhere box as directed.
Cut a 1” strip of candy stripe patterned paper and a .25” strip of black and white polka dotted patterned paper. Cut the ends into a V-notch. Adhere strips across the center of the pillow box.
Die cut a scalloped oval from black cardstock. Die cut an oval from white grid patterned paper. Adhere the two together, and then adhere the ovals to the center of the paper strips.
Die cut two smaller holly leaves from the white adhesive foam. Following the same steps as above, apply Emerald Watercolor Deco Foil™ transfer sheet to the die cuts. Adhere the leaves to the top of the oval.

Adhere sentiment strip on top of the leaves.
Adhere one red button to the top of the sentiment strip.
Tie a small bow from red baker’s twine, and adhere the bow to the bottom of the oval, below the sentiment.
Be sure to join us tomorrow here on the blog for World Card Making Day!

