


 Hey friends! It’s Amanda from Twiddler’s Nook joining you today for the fun with Newton’s Nook! I’m super excited to have 2 totally different cards to share featuring some deco foil and flock! These products are both so different and so much fun to use! Let’s have a look at the cards and the products I used today.
Foil and Flock Cards with Newton’s Nook Designs

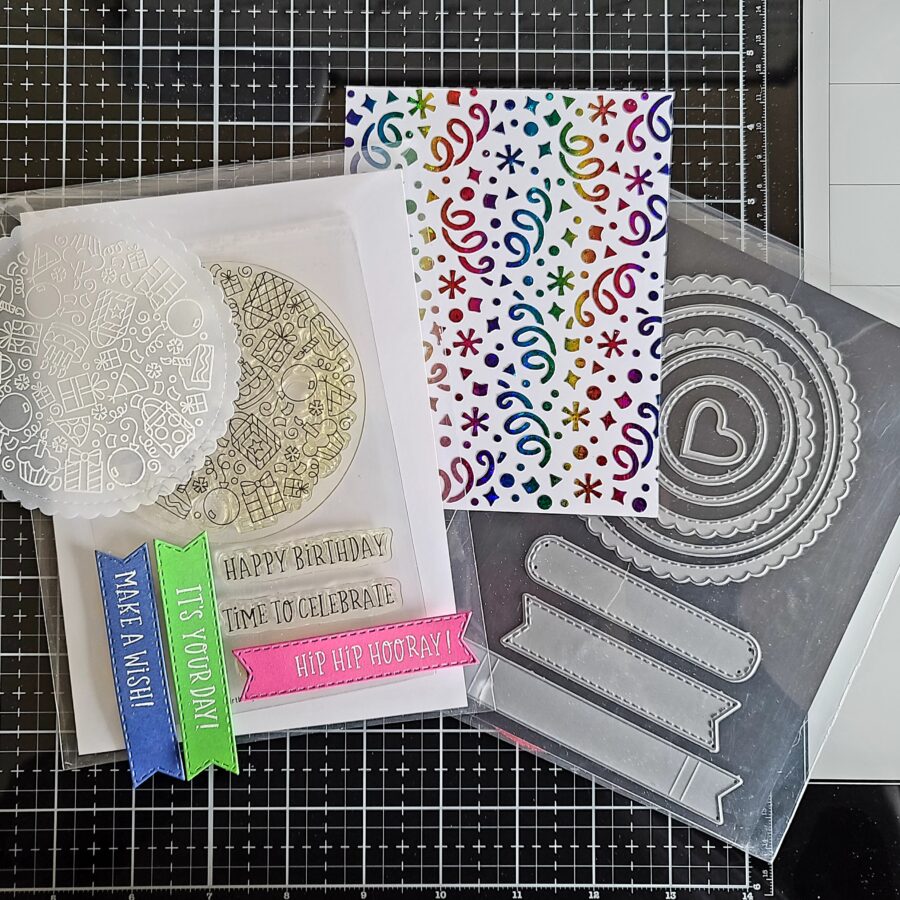
Products used on both cards today:
Deco Foil Transfer Gel Blanco
Deco Foil/Brutus Monroe Rainglow Transfer Sheets
Deco Foil Flock Tuscan Gold
iCraft tape runner
iCraft Ultra Bond liquid adhesive
Foam squares
Stencil Pal
Newton’s Nook Confetti stencil
Newton’s Nook Tree Rings stencil
Newton’s Nook Newton’s Picnic stamps and dies
Newton’s Nook Speech Bubbles dies
Newton’s Nook Banner Trio dies
Newton’s Nook Birthday Roundabout stamps
Newton’s Nook Circle Frames
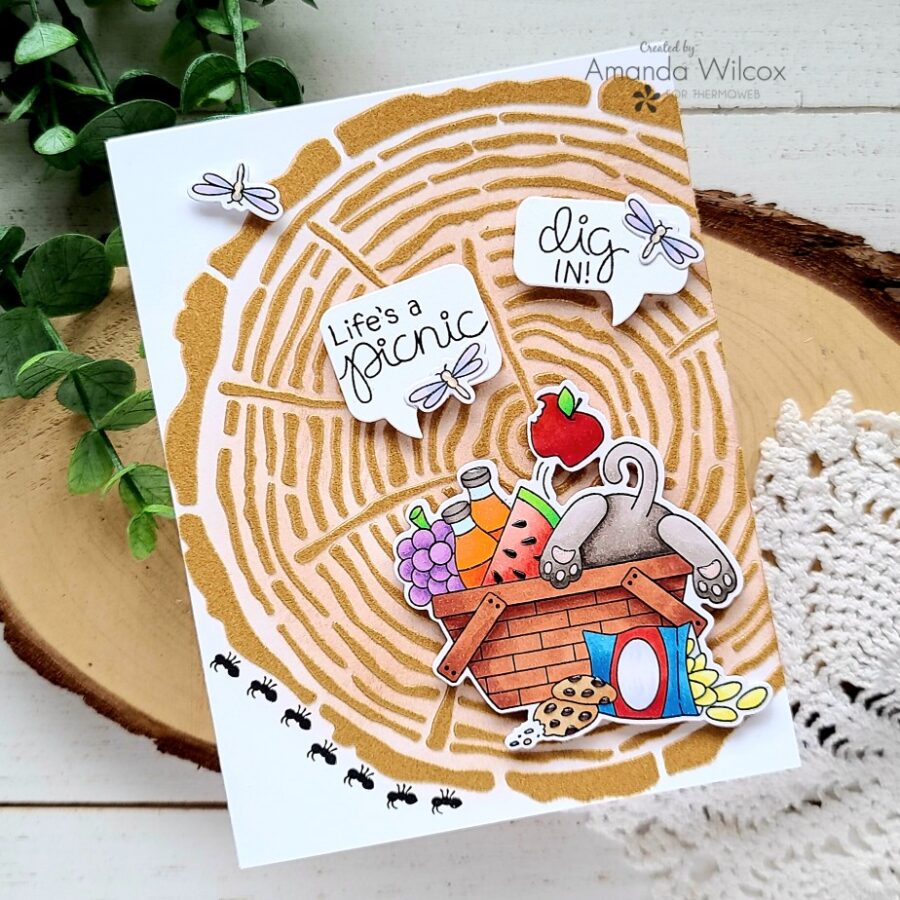
Let’s start with the fun Newton’s Picnic card and getting inky before we get messy with stencils.
Apply the Deco Foil Transfer Gel Blanco through the Stencil
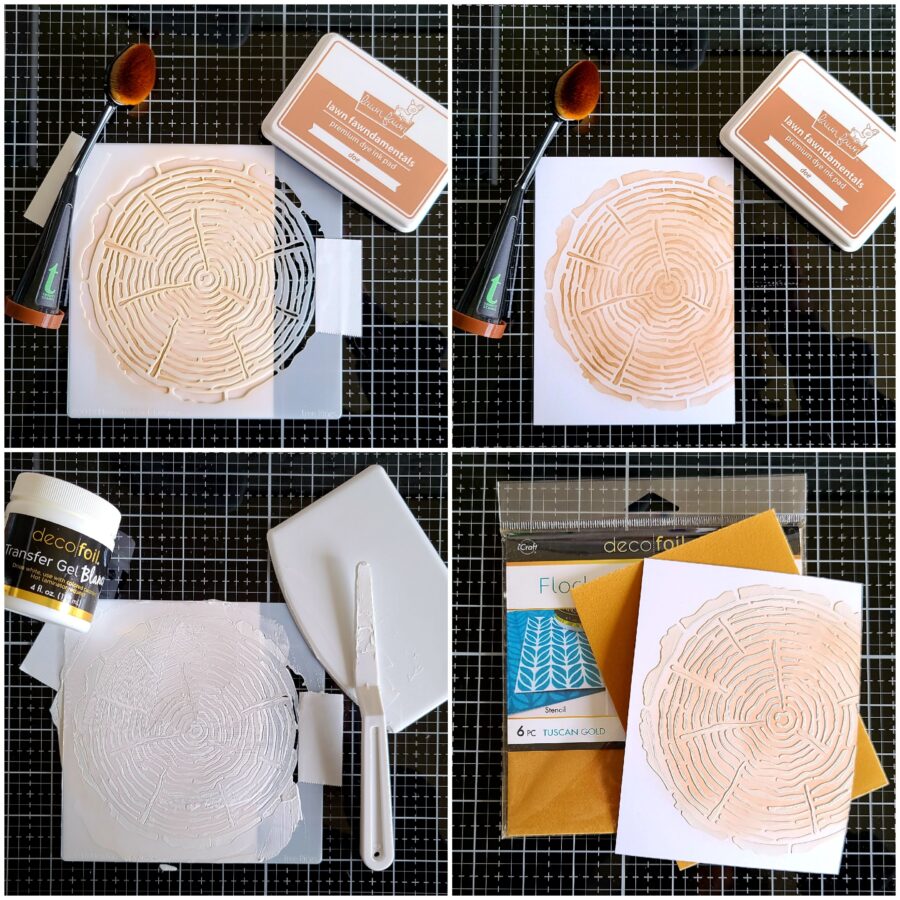
This was a pretty quick little process, but I took photos to help make it simple. I taped the tree rings stencil in place, inked it up with brown ink. Then removed the stencil and inked it up more, filling in the white space. Next, I replaced the stencil and added transfer gel Blanco. Once that was dry, I ran it through the laminator with Tuscan gold Deco Foil Flock.
On another note, I almost always stencil on an oversized piece of cardstock so I can choose which way to trim it down in the end. So once I flocked this piece, I trimmed it down to 5.5×4.25 inches as well.
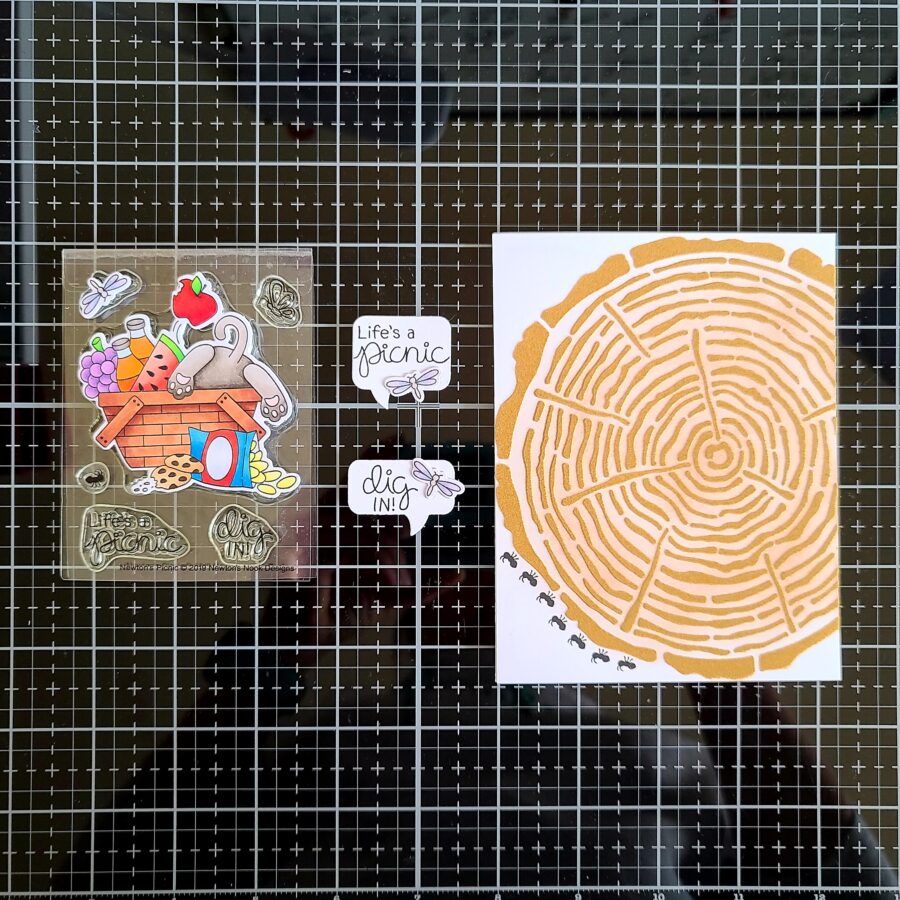
I stamped and colored the images from Newton’s Picnic and used the coordinating dies to cut them out. I also stamped the sentiments on speech bubbles I had cut out with the Speech Bubble dies. Then, I took the little ant image from the set and repeatedly stamped him along the bottom left part of the tree ring too! So cute!
I added foam squares to the back of all my images and popped them in place next. Using liquid glue, I adhered the whole panel to a white card base and then moved on to fun finishing touches!
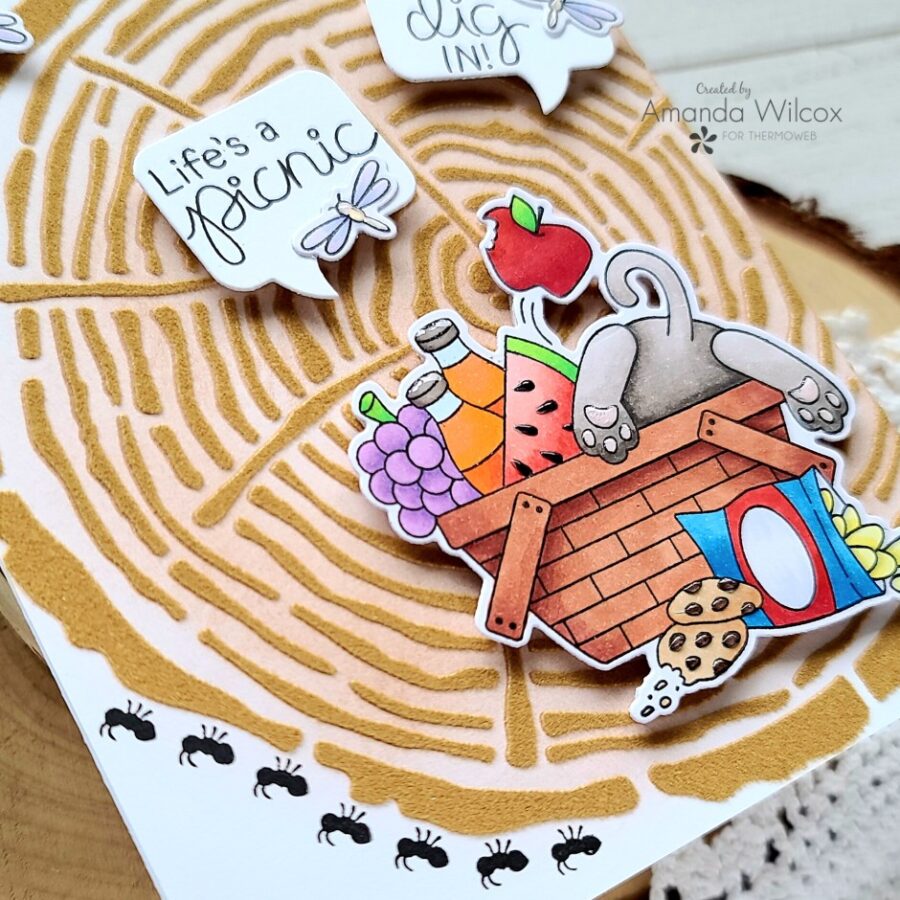
For those, I added glossy accents to little details like the chocolate chips, watermelon seeds, dragonfly bodies, and most importantly, Newton’s toe beans!
Next up, some fun with transfer gel and gorgeous Rainglow foil!!!
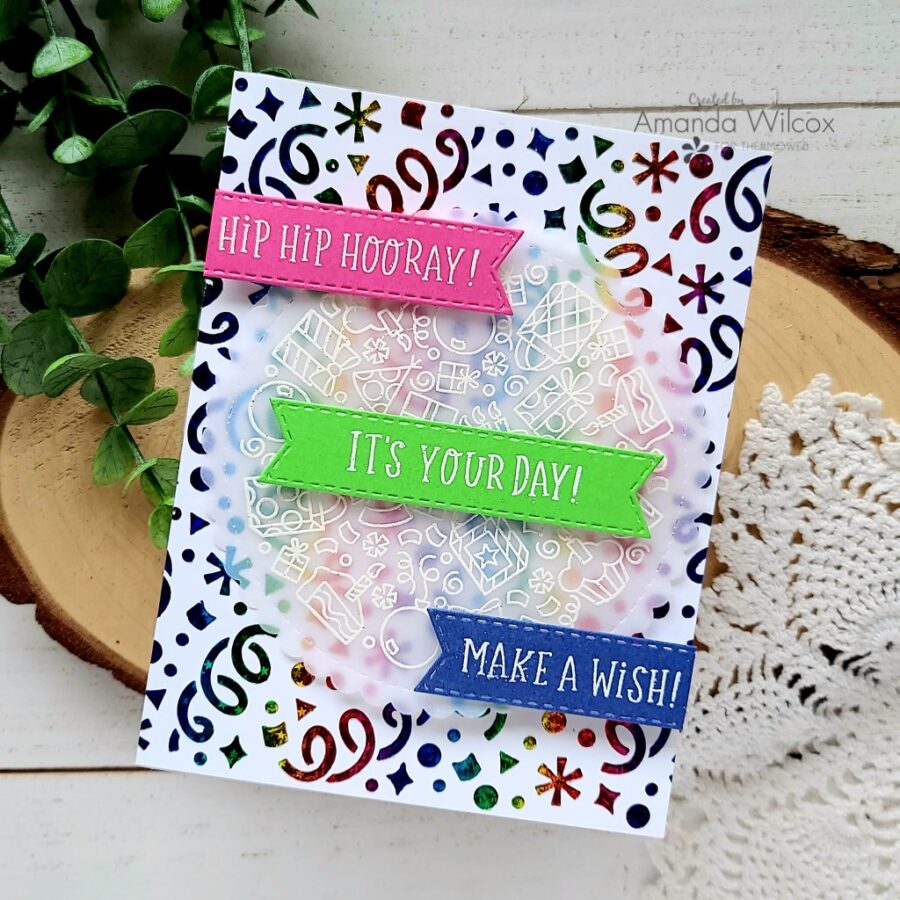
I love this foil and thought it was just perfect for a birthday card! Let’s get messy!!! (Again…)
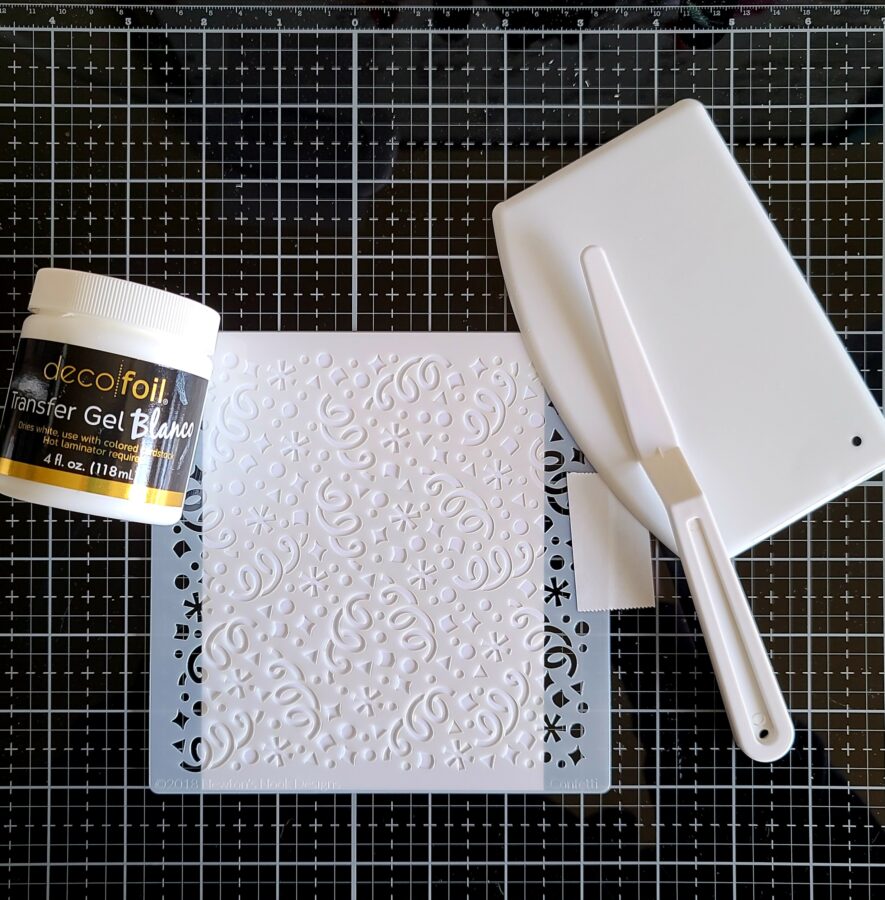
Apply Deco Foil Blanco Transfer Gel through the Stencil
I used Deco Foil Transfer Gel Blanco on my confetti stencil over a white cardstock panel and set it aside to dry.
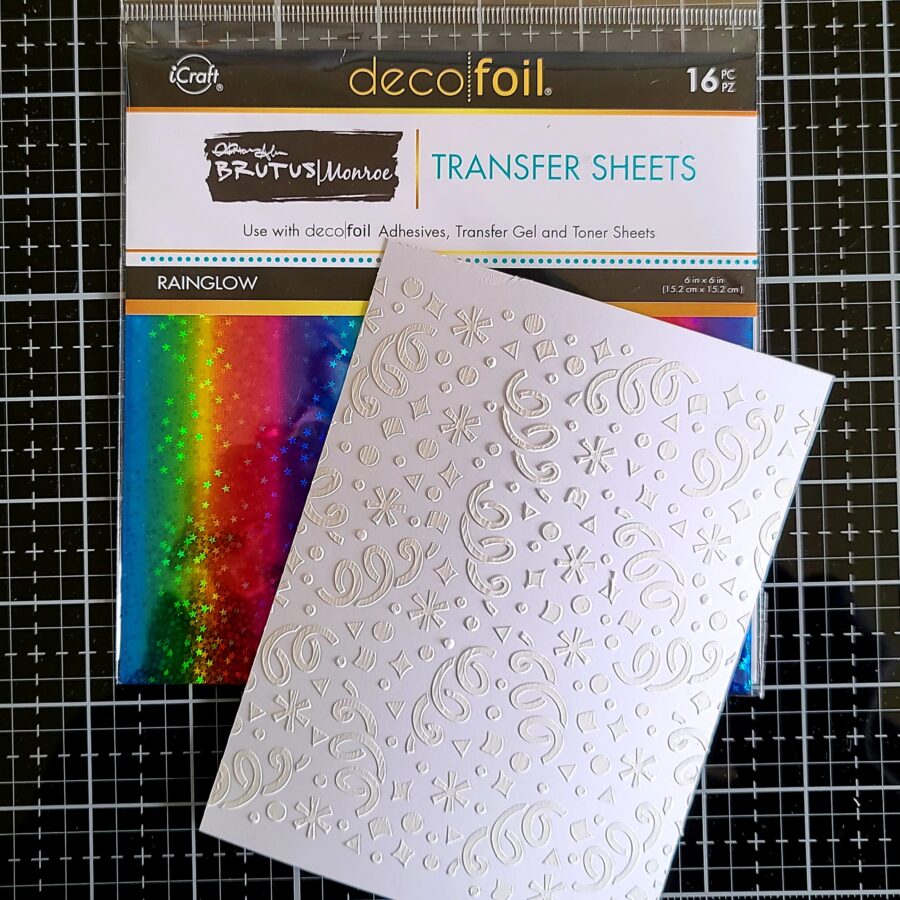
Once that was dry, I ran it through my laminator with the Rainglow foil. I went back and forth between having the rainbow-striped vertical or horizontal but my daughter was firm that they needed to be vertical. Lol. I’m always happy when someone helps me make those important decisions. 😉
Once that was foiled, I trimmed the panel down to 5.5×4.25 inches. I die cut a scalloped circle from vellum, stamped and heat embossed the birthday roundabout image on it. Then I chose three sentiments I thought went together well, die-cut banners for each one and heat embossed those last.
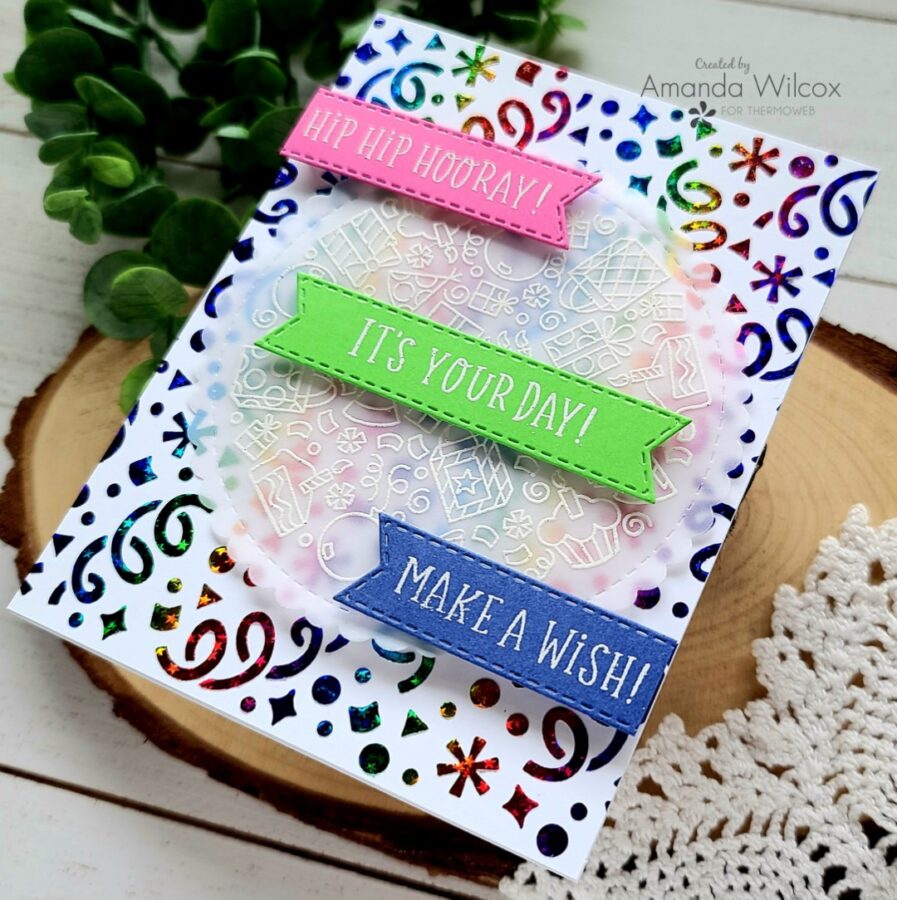
For assembly, I started by adding foam squares to the back of the sentiment banners. I placed the middle one first. Then lined up the top and bottom ones equidistant from the center. Next, I added another layer of foam squares behind those and placed the circle and banners on my foiled panel. This gives dimension between the vellum and foiling but also between the banners and vellum too. ‘
Next, I used liquid glue to adhered my panel to a white card base, and then to finish this card I trimmed off the excess pink and blue banner tails that were hanging over the edge.
I hope you find a little inspiration to create something wonderful. I appreciate you sharing your time with me. Have a fabulous day! This post contains affiliate links. For more information, see our disclosure HERE.
Thanks so much for stopping by today! Don’t forget to use hashtags #decofoil and #thermoweb so we can find your projects and give them some love!
Don’t Miss Our Giveaway!

There are more amazing projects today over on the Newton’s Nook Designs blog so pop over there for more inspiration!
Denise Bryant
April 29, 2021 at 12:40 pm (3 years ago)Really cute cards! Fun details and adorable stamp and stencil designs! Love the pretty foils too!
Patricia Wilson
April 30, 2021 at 6:18 am (3 years ago)Cute cards, really like the one with the picnic basket. So adorable.