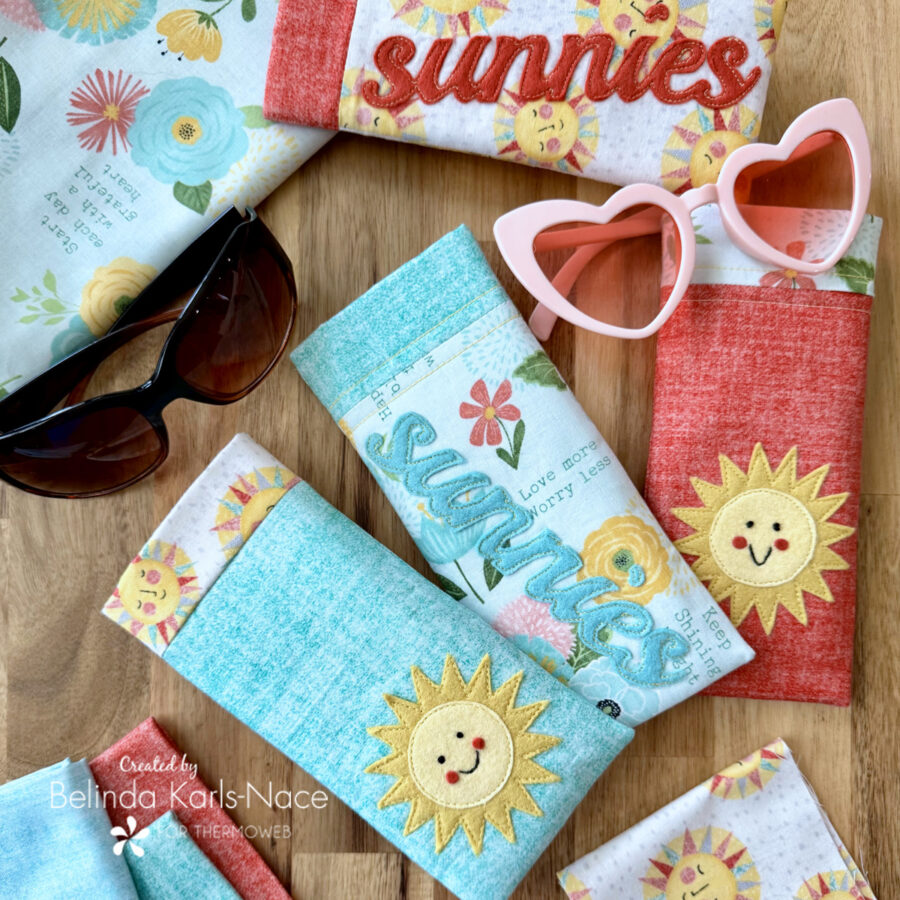
Sunny Sunglass Case featuring HeatnBond
Greetings, friends! It’s Belinda from Blue Ribbon Designs, here with a brand new project tutorial featuring an assortment of my favorite HeatnBond products. Today, I am excited to share my “Sunny Sunglass Case” with you.
This month, I’m sharing a fun and practical DIY project: making your very own sunglass case. With sunny days and summer months just around the corner, there’s no better time to ensure your favorite shades are stylishly protected. Whether you’re a seasoned sewist or a beginner, this tutorial will walk you through each step to create a pretty and protective case for your sunnies.
Let’s get started! Simply gather your materials, download the pattern with PDF templates, and unleash your creativity – let’s get started on crafting something uniquely yours!
*NOTE*: This tutorial requires basic sewing/appliqué knowledge. If you need additional assistance, search/visit the Internet, or look at a basic appliqué quilting book to learn the fundamentals.

What you need (for one sunglass case):
- HeatnBond Lite EZ-Print Iron-On Adhesive Sheet, 8.5 in x 11 in
- 1 Sheet
- HeatnBond Fusible Fleece
- 1 – 3½” x 14½”
- HeatnBond Fabric Fuse Liquid Adhesive (Case with SUN Applique Only)
- Cotton Fabrics: Scraps/Small Pieces work great!
(Model uses prints from the Keep Shining Bright Collection by Anne Rowan for Wilmington Prints and Chambray Tonals from Connecting Threads.)- 2 – 4” W x 6¾” H (Outer Case Fabric)
- 2 – 4” W x 8¾” H (Lining/Accent Fabric)
- Wool Blend Felt from Benzie Design
-
- FOR SUN
- 3½” x 3½” Ochre (Sun Rays)
- 2” x 2” Butter (Sun Center)
- 1” x 1” Strawberry (Cheeks)
- FOR “SUNNIES”
- 6½” x 1½” Strawberry or Swan
- FOR SUN
-
- Sulky 12 Wt. Cotton Petite Thread
- Black 712-1005 (Sun Face)
- Hand Embroidery Needle
- Oliso Iron
- Olfa Cutting Tools (cutting mat, rotary cutter)
- Sewing Machine
- Basic Sewing Supplies/Tools (small sharp scissors, wonder clips or pins, sewing thread, pencil)
How to make a Sunny Sunglass Case
3½” W x 7¼” H
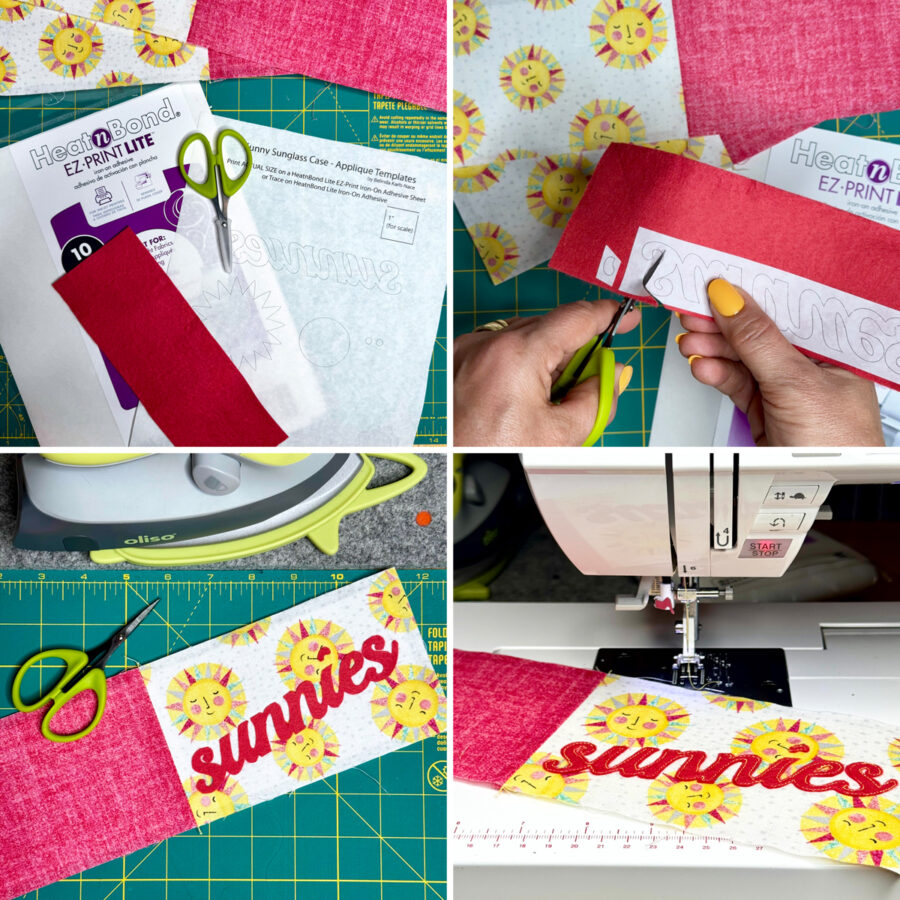
1. Download and print the Sunny Sunglass Case PDF.
Sunny Sunglass Case – A Project for the Therm O Web Blog
Print actual size – do NOT “fit to page” or “shrink to fit.”
- Print page 1 (cover/layout) on regular printer paper.
- Print page 2 (appliqué shapes) on HeatnBond Lite EZ-Print Iron-On Adhesive (no tracing necessary).
2. Prepare sunglass case fabrics.
- Lay out, pin and sew one 4” W x 6¾” H outer case fabric to one 4” W x 8¾” H Lining/accent fabric. Sew the 4” side, yielding a combined piece that is 4” W x 15” H. If your fabric is directional, watch your placement.
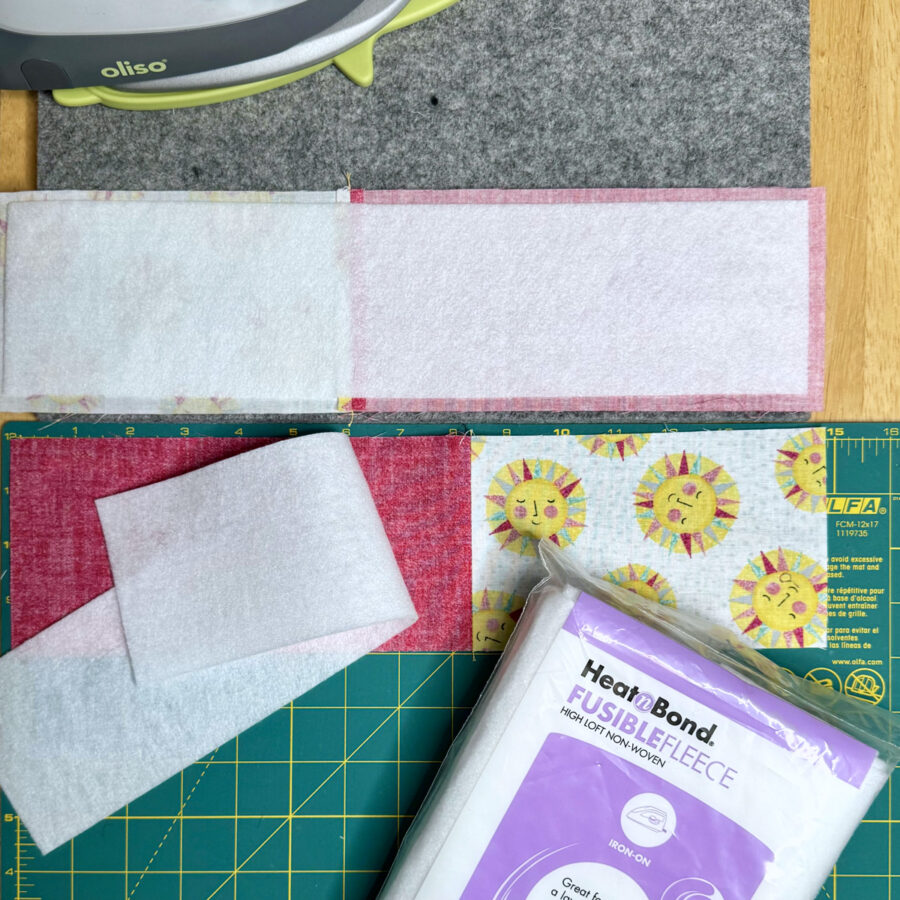
- Center and fuse the 3½” x 14½” piece of HeatnBond Fusible Fleece to the wrong side of the 4” x 15” combined fabric, following the package instructions. The slightly smaller piece will keep bulk out of the seam allowance when assembling the case.
- Pre-heat iron to a cotton/high setting, no steam.
- Place the rough side of the Fusible Fleece on the wrong side of the fabric.
- Cover with a lightweight, dry pressing cloth.
- Press and hold iron with medium pressure for 10-15 seconds. Repeat by lifting iron to new area, slightly overlapping previous area until the entire surface is bonded.
- Allow it to cool.
- Make TWO combined units. Top stitch on either side of the seam line, if desired.

3. Create the appliqué.
- Choose the SUN or the SUNNIES case and use appropriate applique template(s).
- Loosely cut out the appliqué templates printed on HeatnBond Lite EZ-Print Iron-On Adhesive and apply to the back of coordinating wool blend felts following the package instructions. Note for the SUN cheeks, I used a hole punch to cut the tiny circles – use scissors and the templates provided, if desired (no HeatnBond Lite is needed for the cheeks).
- Loosely cut out all shapes, leaving the paper in place.
- Pre-heat iron to medium heat, no steam.
- Place loosely cut apart template(s) on the wrong side of wool blend felt (printed paper, smooth side, should be face up).
- Place and hold the iron on the paper for 2-3 seconds. Repeat, overlapping slightly, until the entire surface is bonded.
- Allow it to cool.
- Cut or trim the pieces on the solid lines printed on the paper to create the desired shapes. Leave paper in place until ready to fuse in place.
4. Apply the appliqué.
- Fuse the SUN (sun rays and center circle) or the SUNNIES shape(s) in place, on one combined fabric unit, on the outer case fabric side. Make sure to leave at least a ¼” seam allowance around the entire shape(s) for assembly. Use the image provided on the pattern for placement.
- Pre-heat iron to medium heat, no steam.
- Peel off paper.
- Center/arrange shape(s), adhesive side down on top of the outer case fabric side of one combined fabric unit.
- Press and hold iron for six seconds on each section, overlapping slightly, until the pieces are bonded.
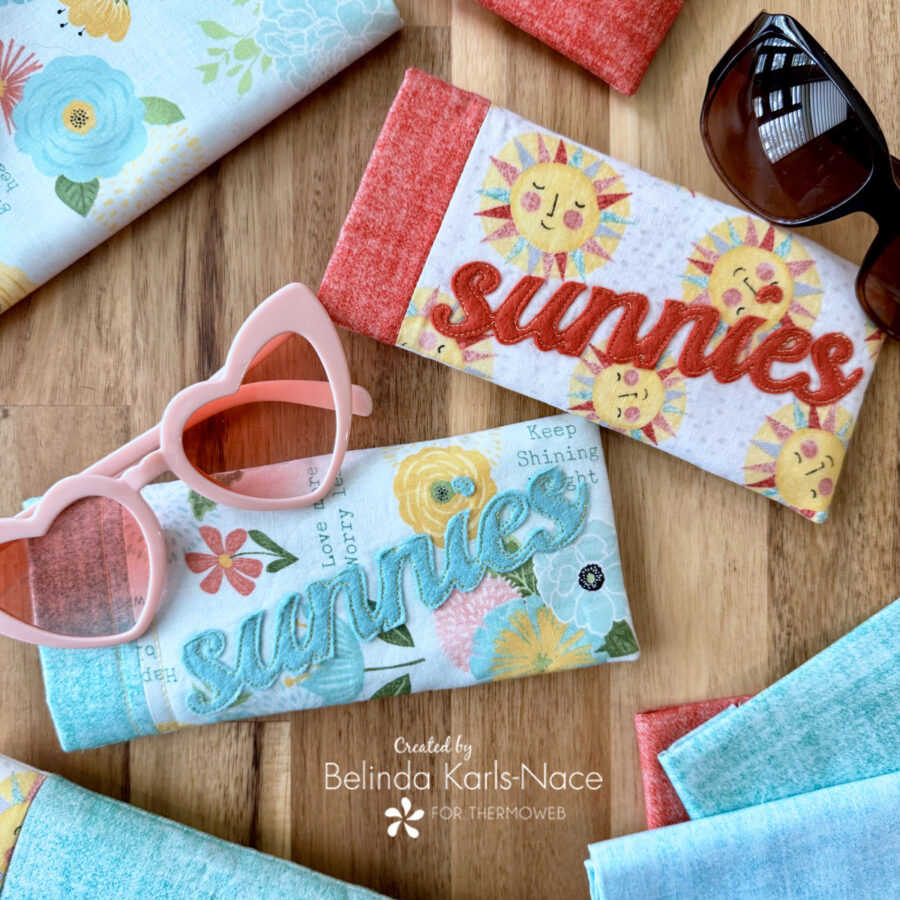
- Using your favorite appliqué stitch (machine or hand) and sewing thread, sew the shape(s) in place. I chose to use a machine straight stitch – I used a coordinating yellow for the sun rays and center circle. For the “sunnies,” I used a contrasting color of thread. The fusible fleece will stabilize the unit nicely for sewing.
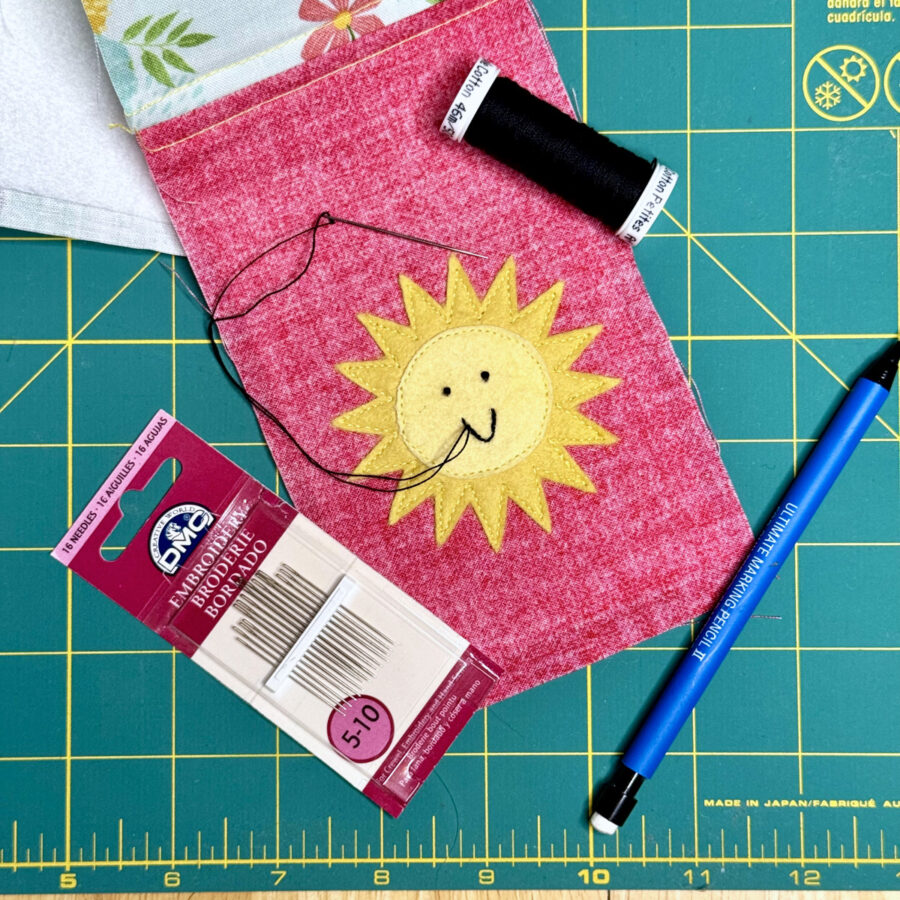
- For the SUN templates:
- Use a pencil to lightly draw the eyes and mouth.
- Use an embroidery needle and Black Sulky 12 Wt. Cotton Petite Thread or embroidery floss to stitch the eyes and mouth. I used French Knots for the eyes and a Back Stitch for the mouth.
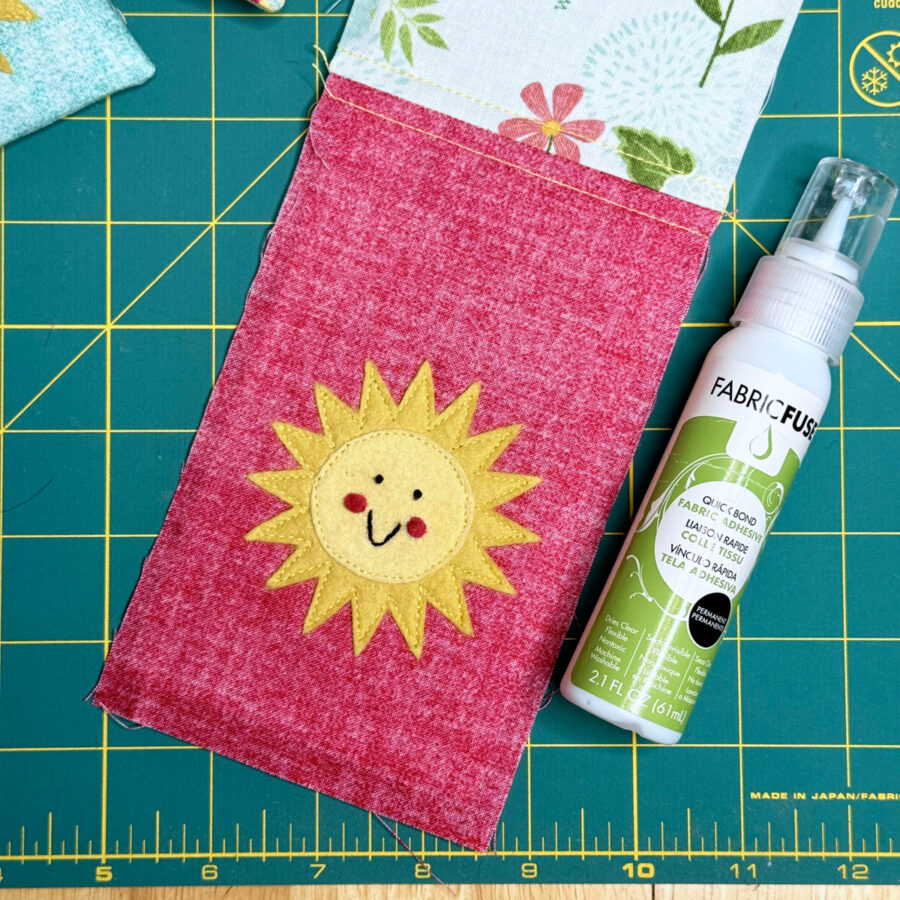
- Attach the cheeks with HeatnBond Fabric Fuse Liquid Adhesive.
- Apply a light dot of glue to either side of the mouth.
- Press the wool blend felt “cheeks” into place with light pressure. A pair of tweezers can assist you with the tiny pieces.
- If needed hold or secure in place until glue is set.
- For best results, let dry 4-6 hours.
5. Assemble the sunglass case.
- Place the two combined units right sides together, lining up the seams between the outer case fabric and the lining/accent fabric. Pin or clip. Sew around the perimeter with a ¼” seam allowance, leaving an approximate 3” opening in the lining side for turning.
- Clip corners and turn right side out through opening. Push out corners and press well.
- Sew the opening that was left for turning closed.
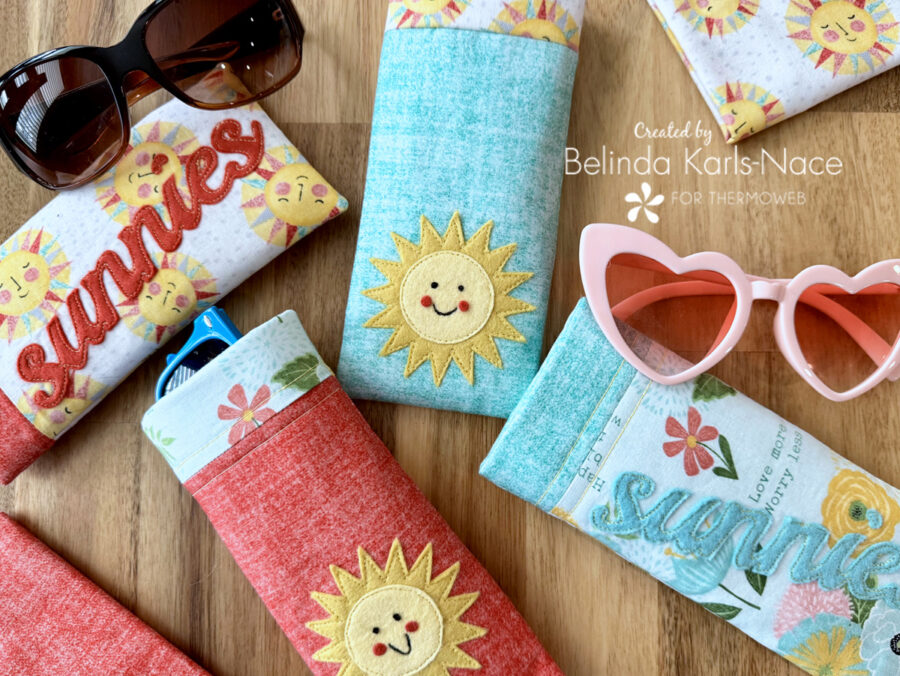
- Gently press the lining fabric into the outer case fabric, leaving about an inch of the lining fabric visible as an accent.
- Press Well.

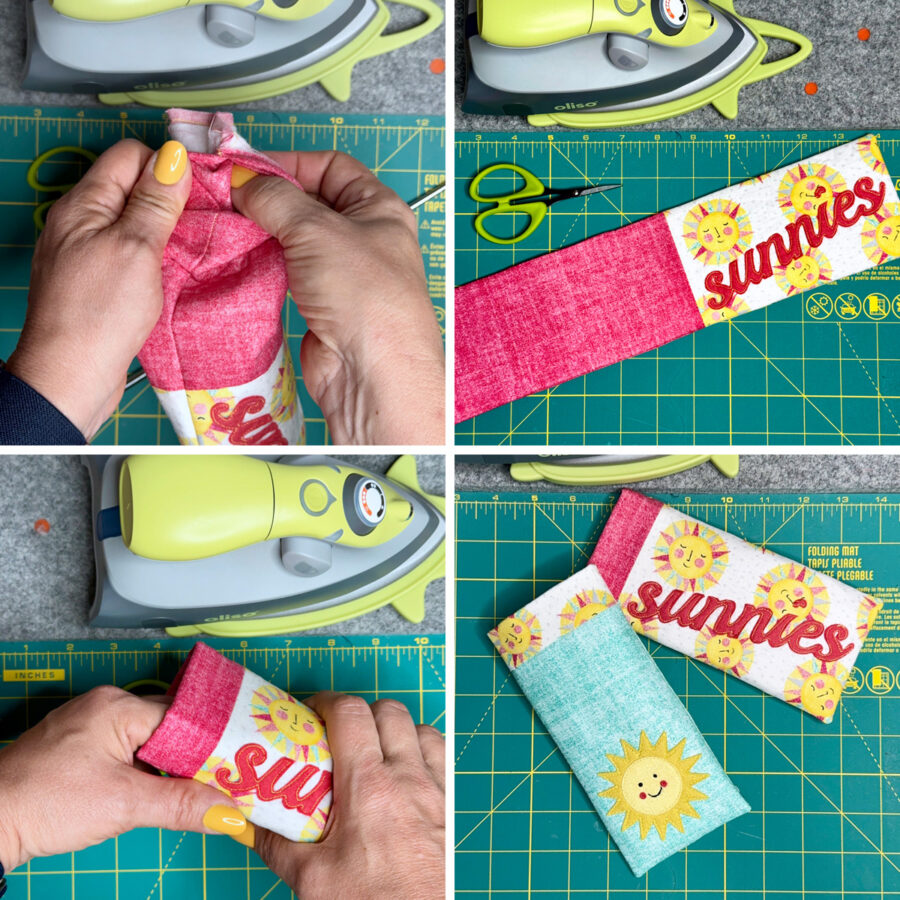

Your Sunny Sunglass Case is now complete! This stylish sleeve will protect your favorite sunglasses and is uniquely your own. These easily adaptable cases make great gifts and can be personalized for any recipient.
Thank you for joining me today for my Therm O Web blog tutorial. I hope this post inspires you to create a sunglass case, using your favorite fabrics and materials you have on hand. To see more of my projects and patterns, stop by my blog, website, and/or Instagram – I would love to visit with you and see what you create!