


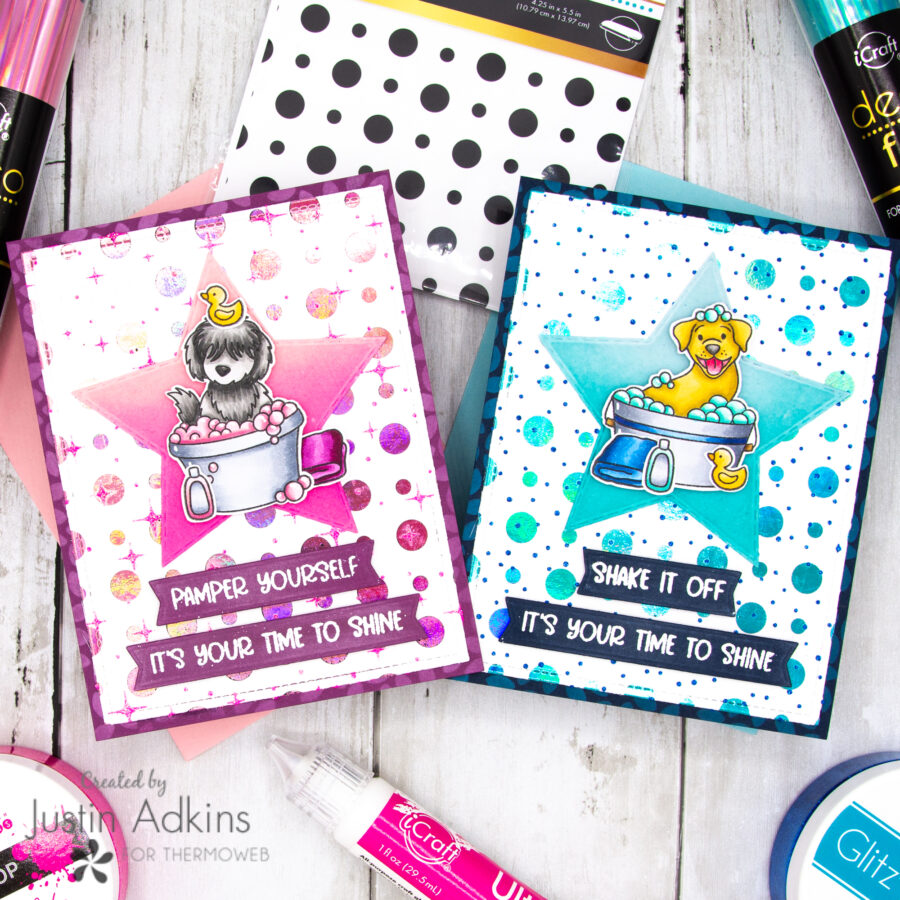
Hello friends! Justin here, and today I am showing off a pair of cards using toner sheets that include one of my favorite things ever… DOGS! I used the Rub-a-dub Doggies set by Miss Ink Stamps, along with a couple of their stencils, to bring these puppers to life! Let’s get started!
Sudsy Doggy Cards with Deco Foil Toner Sheets
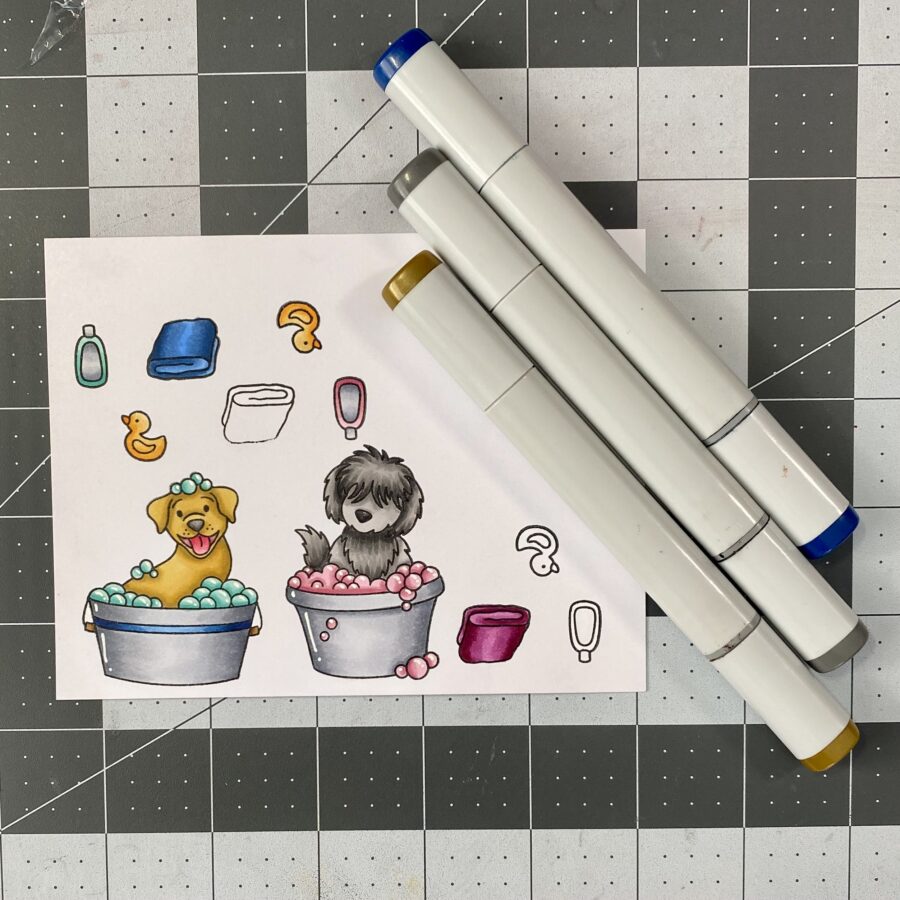
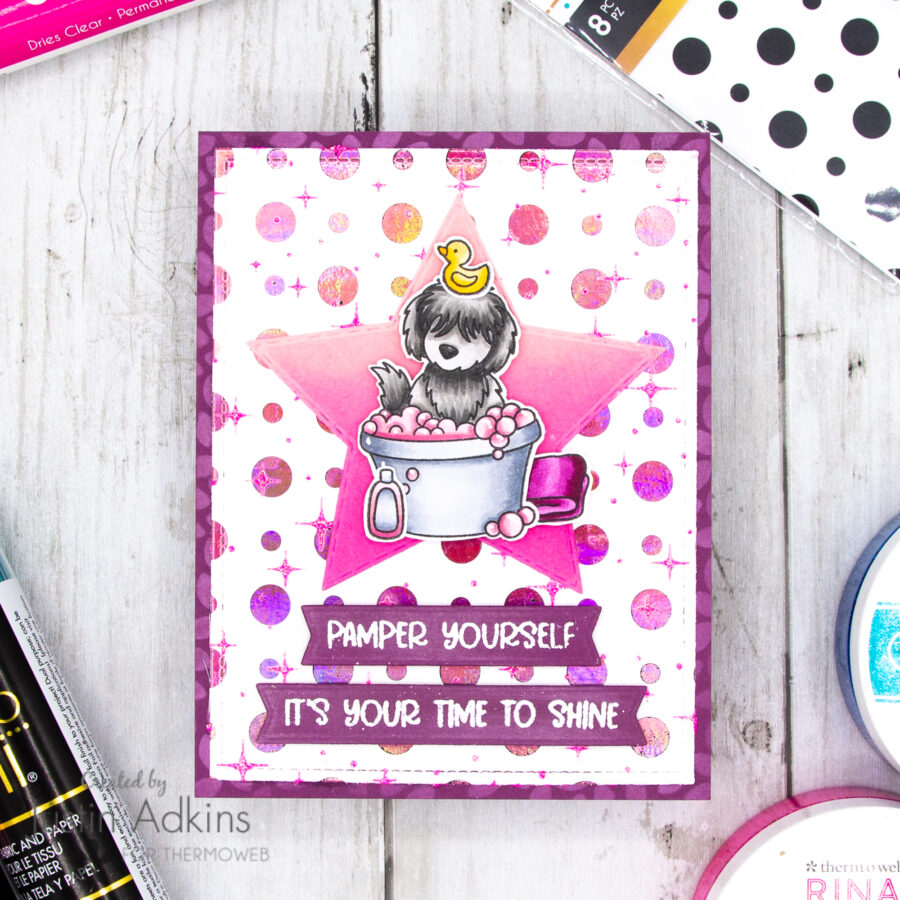
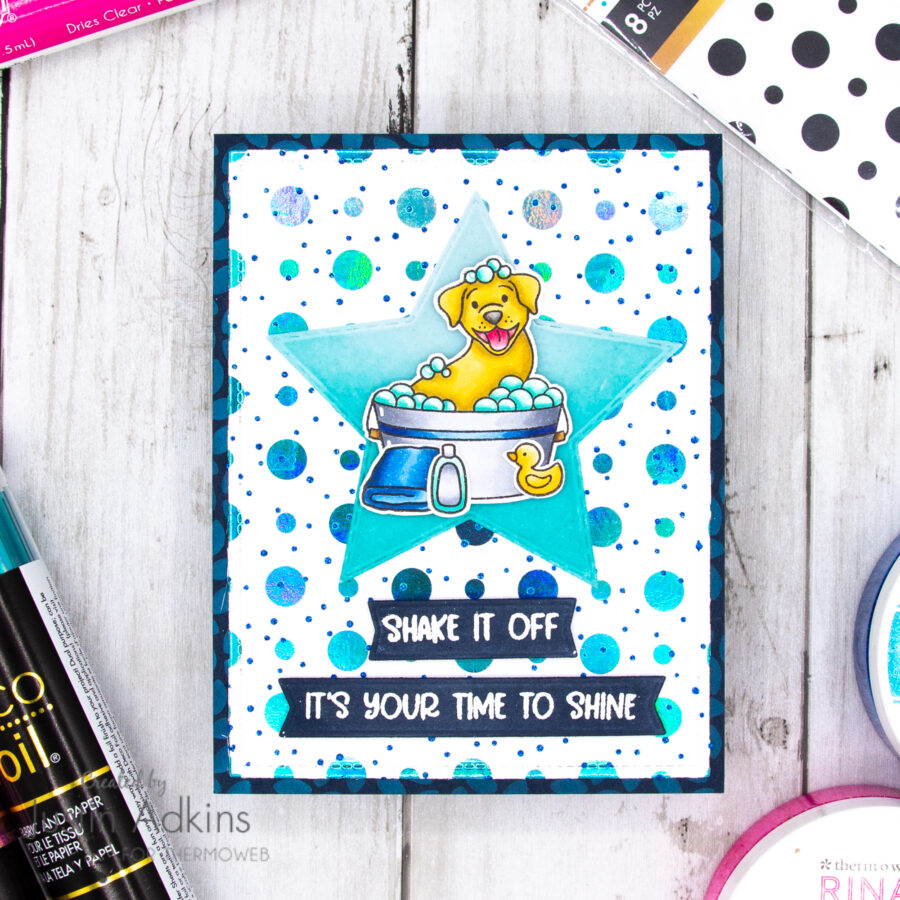
First, using the Rub-a-dub Doggies set, I colored up a handful of images with Copic Markers. I fussy cut them out and set them aside.
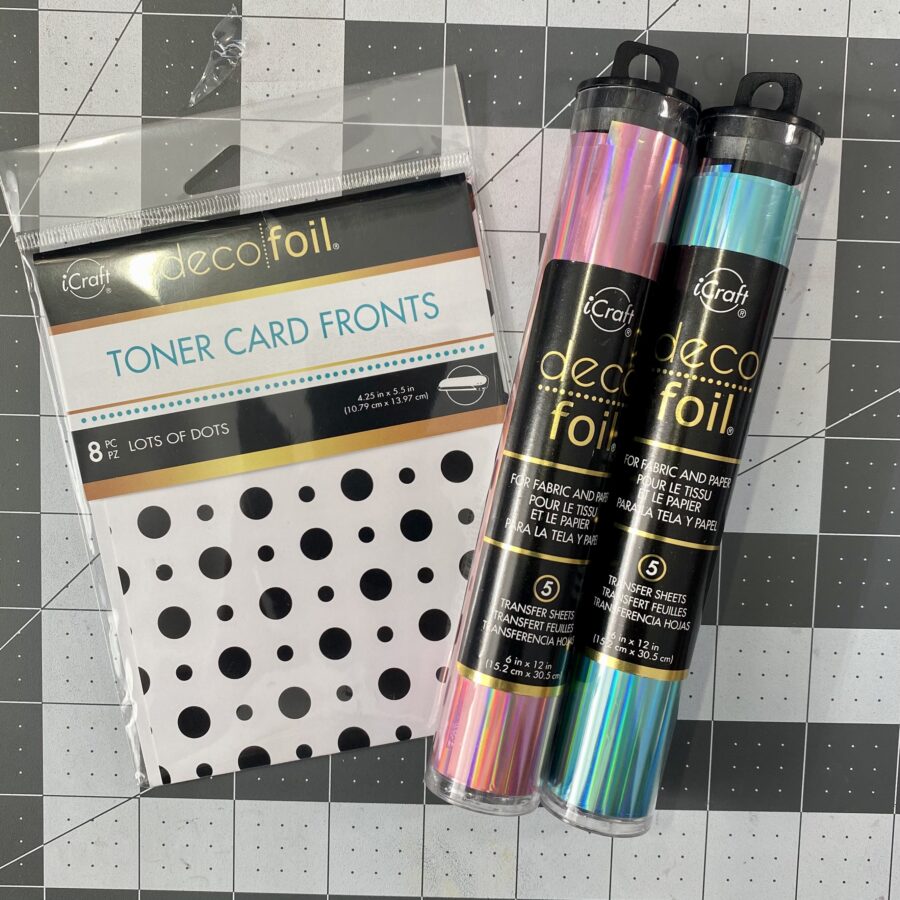
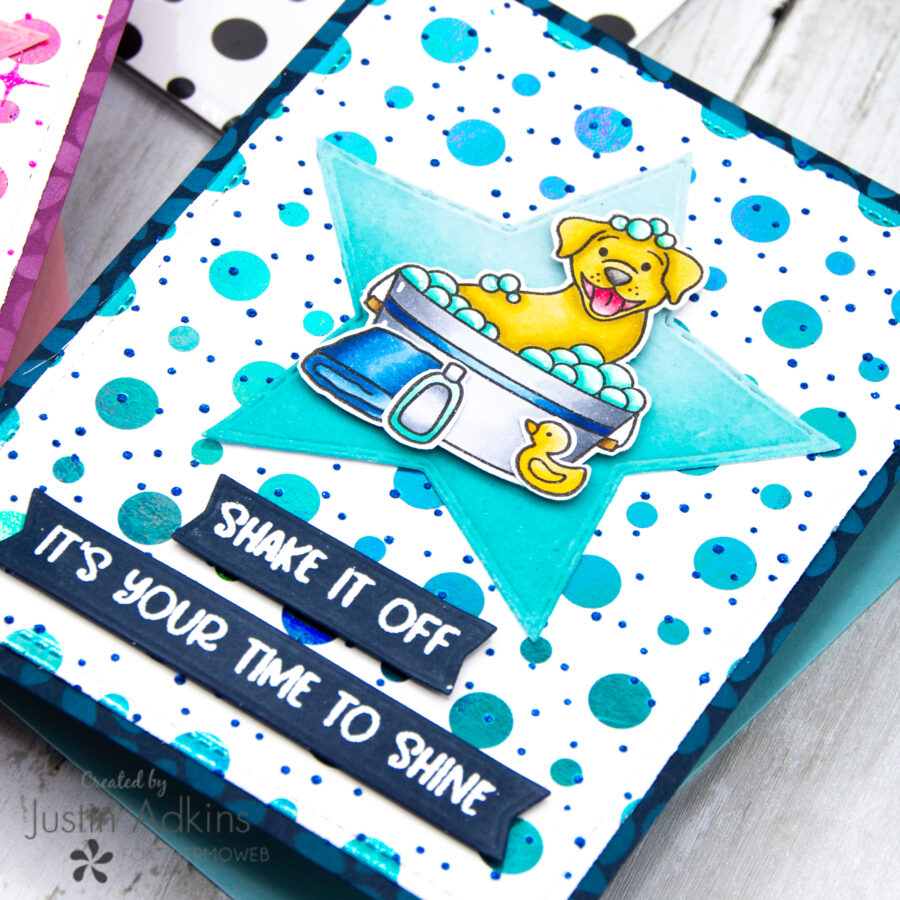
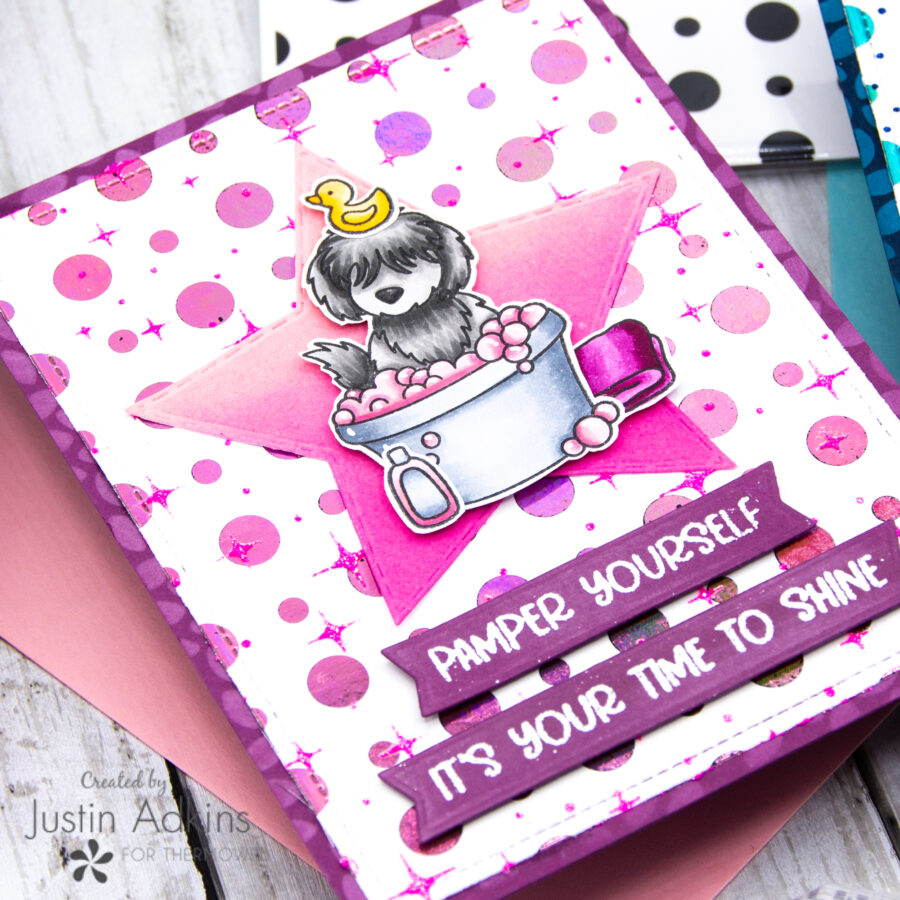
I wanted my background to look like bubbles, so I decided on using the Lots of Dots Toner Card Fronts to get that effect! Using my laminator, I ran 2 Lots of Dots card fronts through, one with Enchanted Rose Deco Foil and one with Glass Slipper Deco Foil.
Tip: I recommend keeping a clean microfiber cloth in your craft space when starting to foil your toner sheets. Wipe off the backside of foil and the front side of your toner sheets with the microfiber towel before running through your laminator, as this reduces any oil/residue left from your hands that could affect the foil transfer.
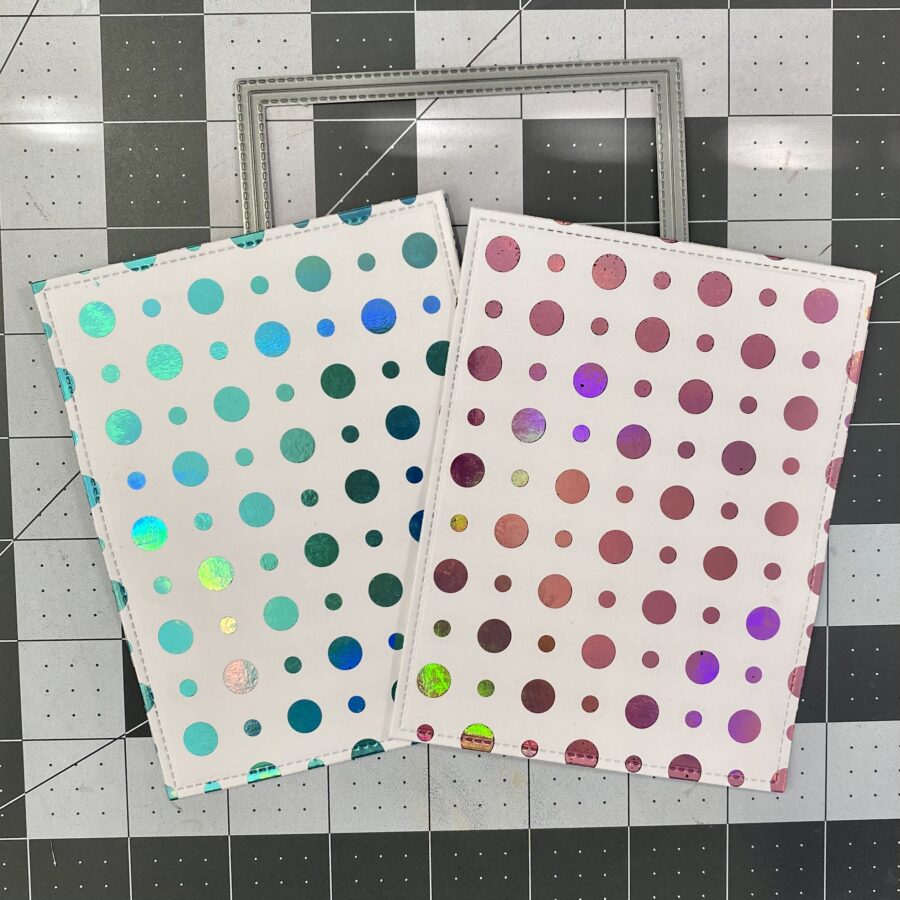
Once my Lots of Dots Toner Card Fronts were foiled, I ran both of them through my Die Cutting Machine with a stitched rectangle die to make them just slightly smaller than A2-sized.
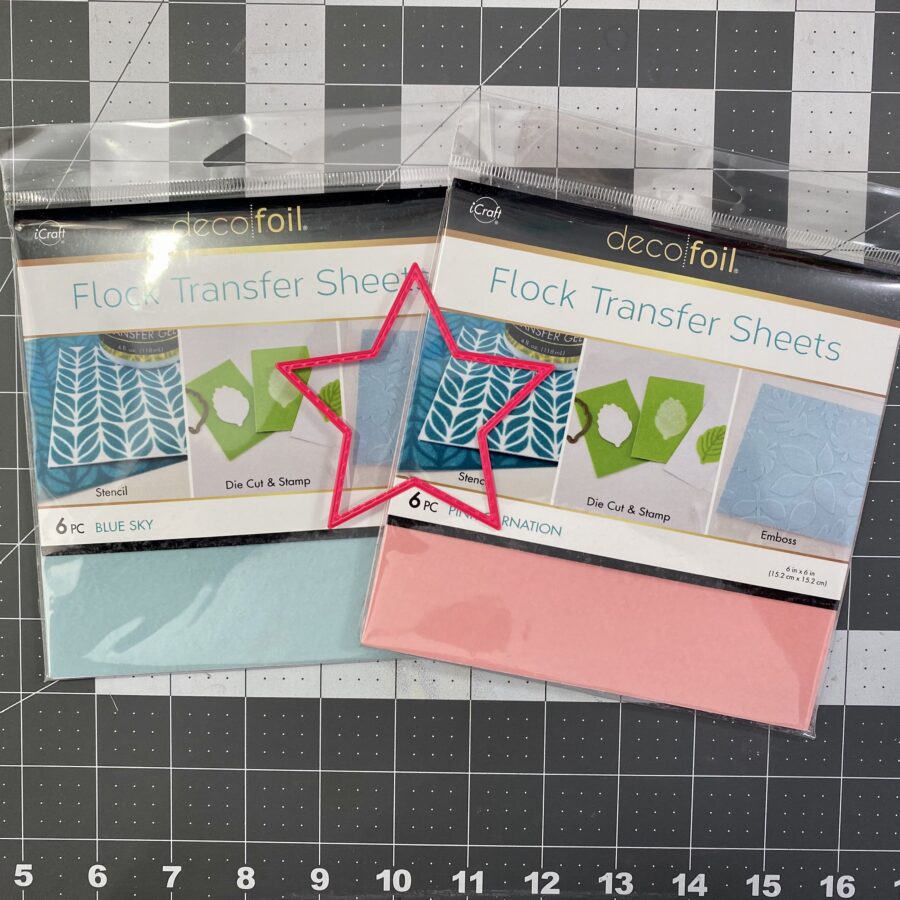
Next, using a Stitched Star Die from my stash, I die cut out a star from 2 different Deco Foil Flock Transfer Sheet colors: Blue Sky and Pink Carnation.

Using Picked Raspberry & Peacock Feather Distress Inks, I ink blended the flock stars from the bottom towards the top to create an ombré effect.
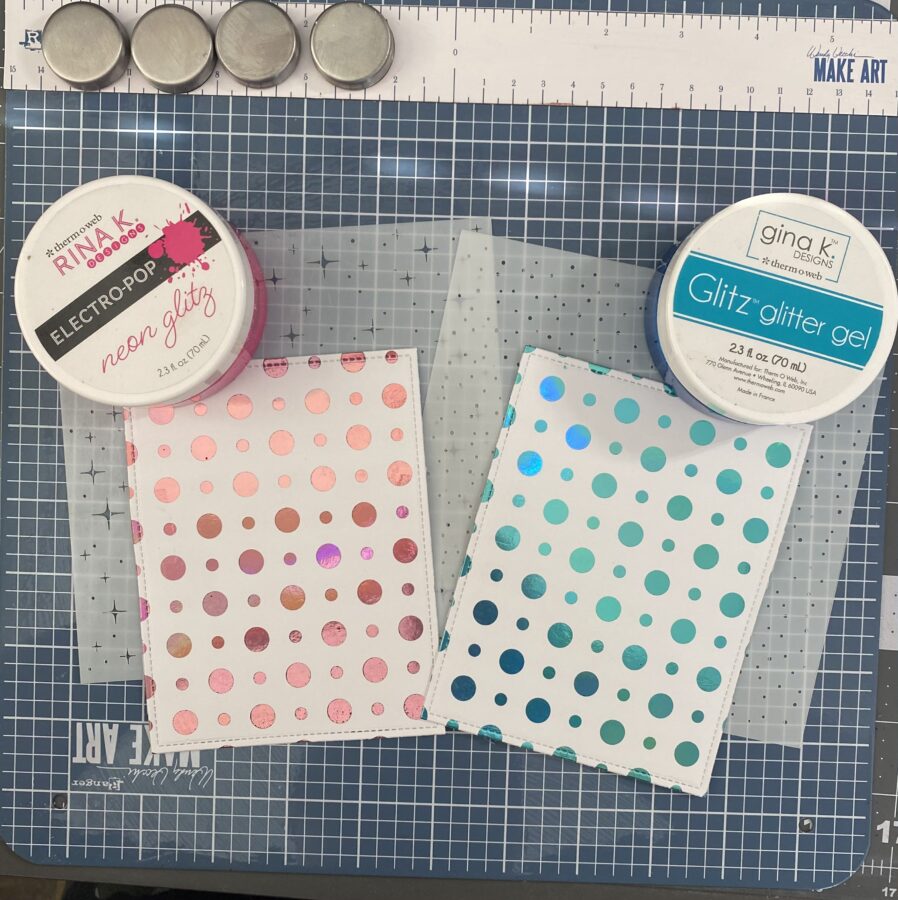
I wanted to do a little bit of glitz over my panels as well. For my Enchanted Rose Lots of Dots Card Front, I used the Sparkles Stencil by Miss Ink Stamps with the Rina K Designs Electro Pop Neon Glitz in Poppin’ Pink. For my Glass Slipper Lots of Dots Card Front, I used the Tiny Snowfall Stencil by Miss Ink Stamps with Gina K. Designs Glitz Glitter Gel in Brilliant Blue. I used my Stencil Pal to apply the glitz gels entirely to my cards. After removing the stencil, I set each panel aside to dry entirely and washed my stencils immediately.
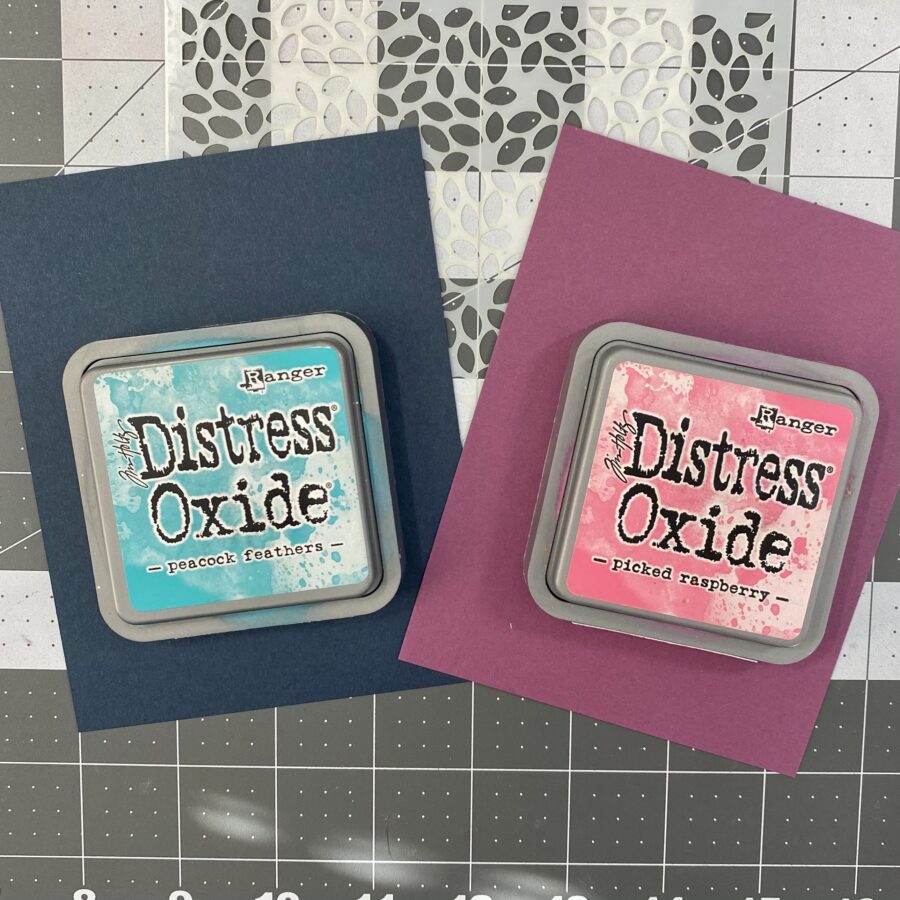
I wanted to make my own patterned paper for my background frame panels. Using colored cardstock, I blended up my panels with Peacock Feathers Distress Oxide Ink (on my navy cardstock) and Picked Raspberry Distress Oxide Ink (on my punch cardstock) over the Leafy Green stencil by Miss Ink Stamps.
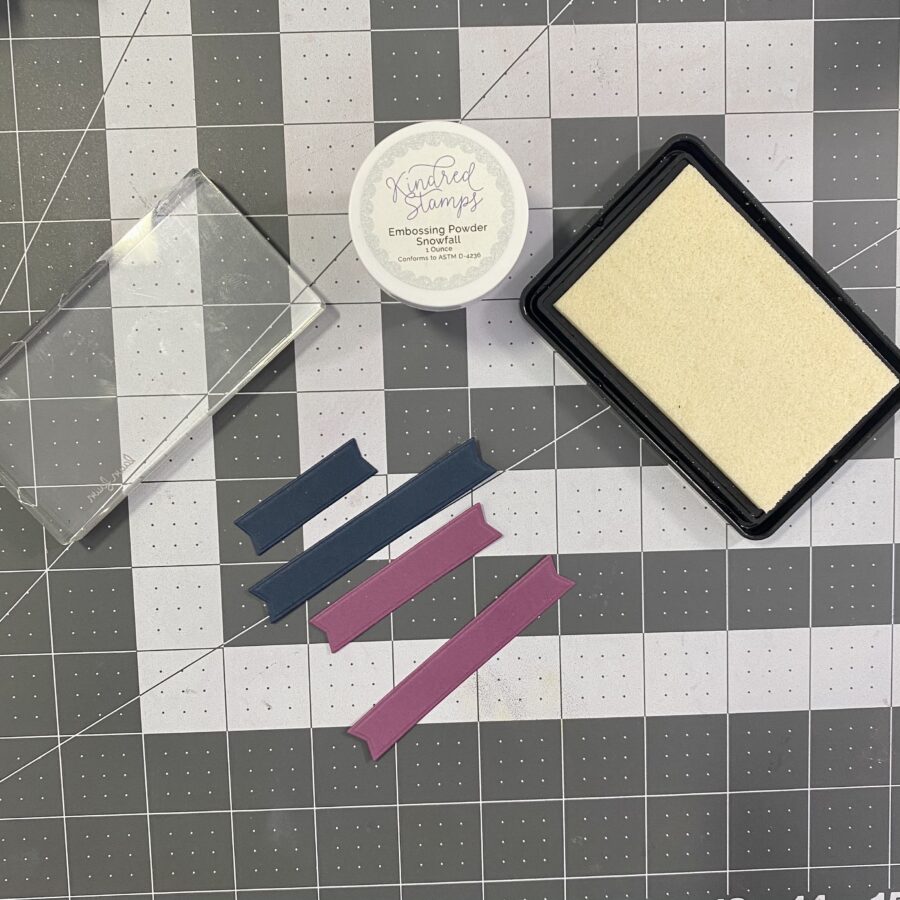
Next, I die cut a few sentiment strips out, and heat embossed my sentiments using Snowfall embossing powders. I have 2 different sentiments that I use for each card!
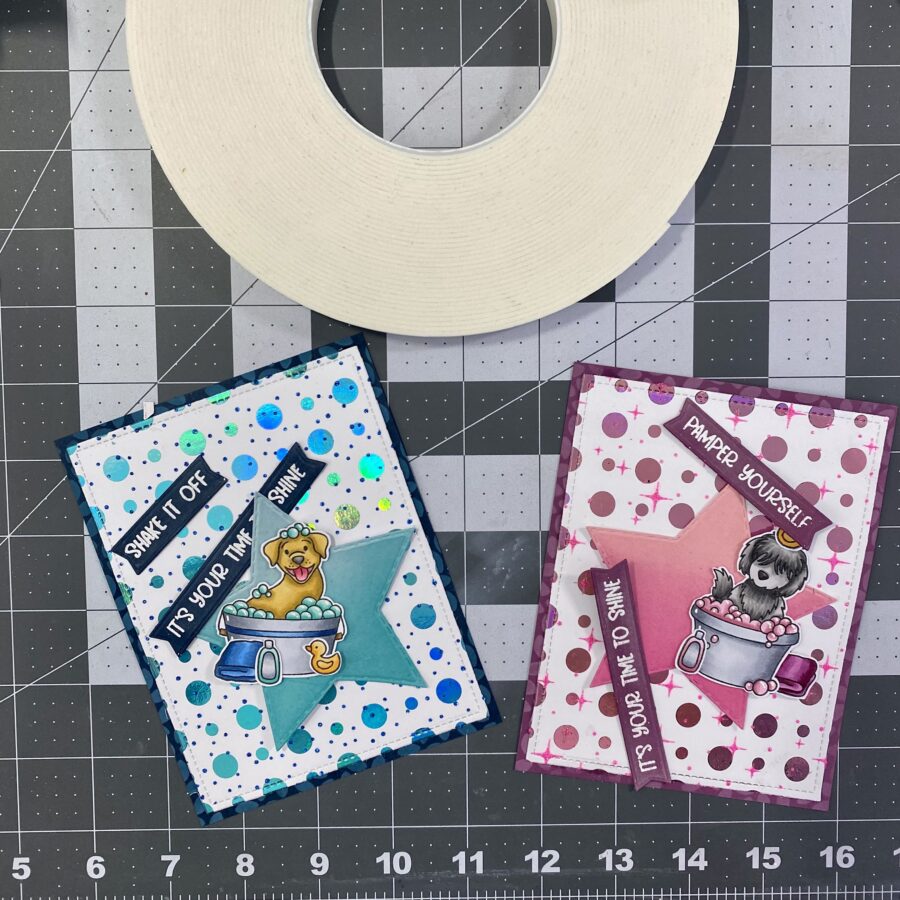
After adhering my Lots of Dots Foiled Card Fronts onto my cardstock using my UltraBond Permanent Liquid Adhesive, I adhered the rest of the pieces to my cards using 1/16″ iCraft 3D Foam Tape in white. And my projects were complete! Here are a few more photos of the final products!
I also have a list of all the products used to help bring this card together!
Toner Card Front- Lots of Dots
Deco Foil Transfer Sheets- Glass Slipper
Deco Foil Transfer Sheets- Enchanted Rose
Deco Foil Flock Transfer Sheets- Blue Sky
Deco Foil Flock Transfer Sheets- Pink Carnation
Rina K Designs Electro Pop Neon Glitz Gel- Poppin’ Pink
Gina K Designs Glitter Glitz Gel- Brilliant Blue
Stencil Pal
iCraft 3D Foam Jumbo Tape Roll (White, 1/16″)
UltraBond Permanent Liquid Adhesive
Copic Markers
Rub-a-dub Doggies Stamp Set by Miss Ink Stamps
Sparkles Stencil by Miss Ink Stamps
Tiny Snowfall Stencil by Miss Ink Stamps
Leafy Green Stencil by Miss Ink Stamps
Outside In Stitched Rectangle Stackables by Lawn Fawn
Stitched Star Dies by Pink & Main
Large Sentiment Strip Dies by Pink & Main
Snowfall Embossing Powder by Kindred Stamps
Embossing Ink Pad by Kindred Stamps
Colored Cardstock
Distress Ink: Picked Raspberry & Peacock Feathers
Distress Oxide Ink: Picked Raspberry & Peacock Feathers
Thank you so much for stopping by the Therm O Web blog today! I hope these projects leave you inspired to breathe some new life into your favorite stamp sets by pairing them with some perfect Toner Card Front backgrounds!
For more crafty inspiration, please check me out on Instagram and on my own personal blog!
Until next time! Happy Crafting!
Justin
This post contains affiliate links. For more information, see our disclosure HERE.
Maria
January 28, 2022 at 7:26 pm (2 years ago)Love the cute doggie cards and the Valentine’s