 Good morning everyone! It’s Kim Lapacek from Persimon Dreams. I know you haven’t heard from me in a while and I apologize for that. My family owns and operates an apple orchard so our fall season is absolutely crazy. But, we closed for the season just a few days ago and I’m ready to get back to sewing and creating projects to share with you!
Strip Trees and Snowflakes Place Mat (or Wall Hanging)
Per my typical style, there’s not a specific pattern for this quilt but I’ll share with you all the things you need to know so you can make one yourself.
Project Supplies
- Strip Tree Tutorial on Craftsy
- Fabric needed as shared in the Strip Tree Tutorial – I used fabric from the “Botany” collection by Kelly Ventura for Windham Fabrics.
- Snowflake Pillow Templates on Craftsy
- iCraft® Deco Foil™Deco Foil Hot Melt Adhesive
- Pressing Sheet
- Deco Foil Transfer Sheets – Silver Stars, Iridescent, and Lapis Watercolor
- Pen
Strip Trees and Snowflakes Place Mat Process
Start with your main fabric. I started with an 18″ x 20″ piece but you’ll see that I cut it down later on because the ratio wasn’t quite right. Remember that you can always go smaller but it’s much harder to go bigger!
Print out the snowflake Templates from the craftsy pattern. You won’t need the word page – just the snowflake page. I used two pages of snowflakes and traced the snowflakes onto iCraft® Deco Foil™Hot Melt Adhesive.  Cut out around the snowflakes. I’m not going to lie – this is a bit tedious but it’s so worth it! I did my cutting when we had some friends over so I chatted and cut. It worked out great!
Place the flakes in spots that look pleasing to you. Cover with an Pressing Sheet and press as indicated on the hot melt packaging. Now let cool. Go and sew another small project quick so you let it cool long enough. Now, once you’ve truly let it cool, peel the white paper off.
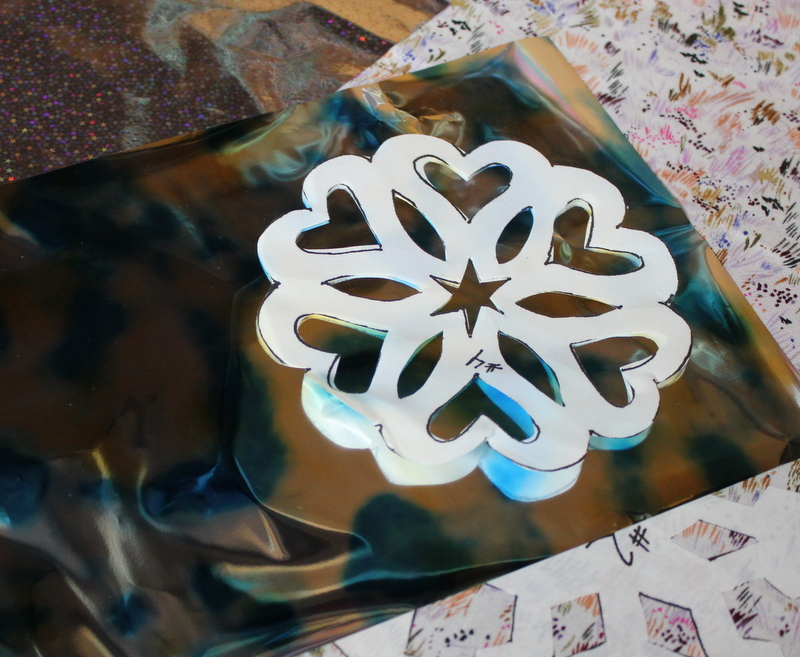
My trick for cutting the correct size foil is to take the white paper I peeled off and put it on the deco foil sheet.
I then cut the sheet to the size I need and I’m not wasting a whole bunch by just placing it on the project.
Place the properly sized decofoil sheet colorful side up and cover with a Pressing Sheet. Press with a hot iron. Once again, let thoroughly cool before you peel the decofoil off. If you think you’ve waited long enough wait a few minutes longer. I promise if you are patient this will look amazing!
Next follow the instructions as shown in the “Strip Tree Tutorial” with the only exception being that you decorated the background with deco foil snowflakes first. You may want a tree or two to overlap a snowflake. You’re going to want to protect your snowflake from too much heat so I used two sheets of used deco foil to cover the edges by the tree. I covered with Pressing Sheet to adhere the tree shape down the used deco foil sheets did their job.
It didn’t take long before I had a fun winter scene forming!
 I continued to follow the instructions on the Strip Tree Tutorial to create even more pizazz to my little forest!
When I put this up on my design wall the proportions seemed a bit off so I decided to trim it down just a tad (about 4″ from the top making it now a 14″ x 20″ piece).
 And just like that I feel like this looks so much better! Now I just have to layer some batting and back, quilt it a bit and bind and I’ll have a fun, seasonal table mat for my kitchen! I hope you enjoyed watching my process and stay tuned for what I have in store next!
It’s Cyber Monday and that means our sale is wrapping up today!
Take advantage of our BIGGEST sale of the year and save 40% off your favorite products! PLUS receive FREE SHIPPING on all orders OVER $40 after coupon applied.
Use Code: THANKS18
To shop and save! Click the image to shop NOW!


[…] even used the left over bits from the Strip Trees and Snowflake Place Mat I made a few weeks ago as the background for one of my Tomte’s. It was […]