


![]()
Hello crafty friends! Today I am here to share my Spring Journal, highlighting the new Gina K. Designs Deco Foil Transfers along with Deco Foil Transfer Sheets. Scroll down to see this amazing new product.
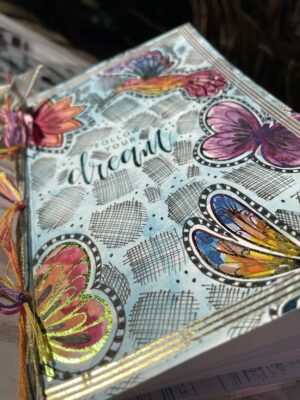
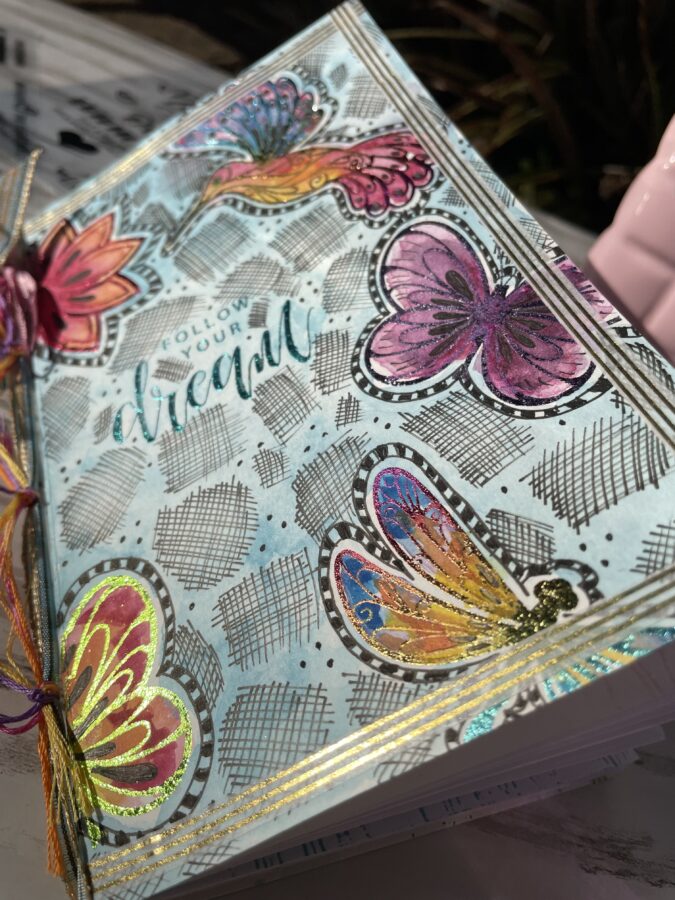
Spring Journal with Gina K. Designs for Deco Foil Adhesive Transfers

Spring Journal with Deco Foil Transfers and Deco Foil Transfer Sheets
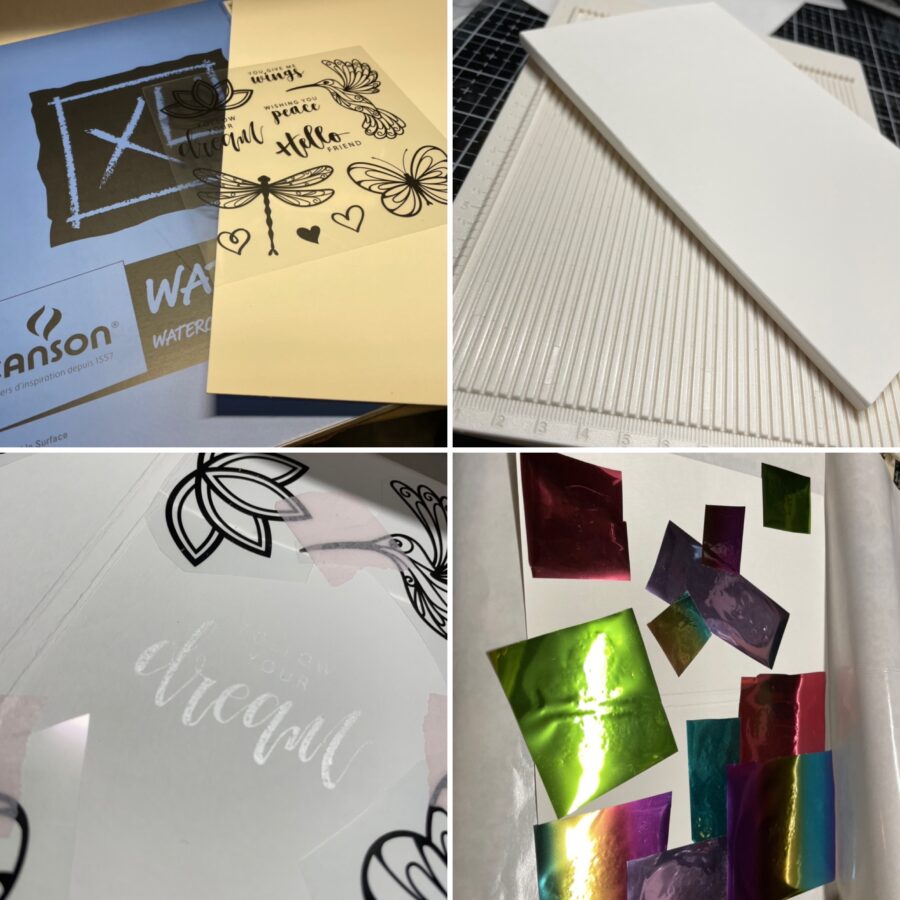
Journal Supplies:
Gina K. Designs Foil Adhesive Transfers
iCraft Deco Foil Transfer Sheets
PeelnStick Double-Sided Adhesive Sheets
iCraft Deco Foil Carrier Sheets (coming soon!)
Other Supplies: watercolor paper and paints, cardstock, fine tip black felt pen, foiling machine or laminator, scoreboard (optional), bone folder or creasing tool, mini stapler and ribbons/twine.
Spring Journal Step One:
Start by trimming your watercolor paper to the size you want for your cover. Using a scoreboard and bone folder, crease your cover to leave a gusset (spine) of the desired size. Mine is 1/4″ wide.
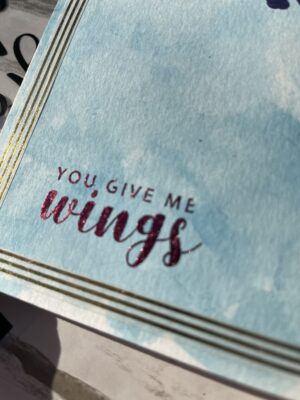
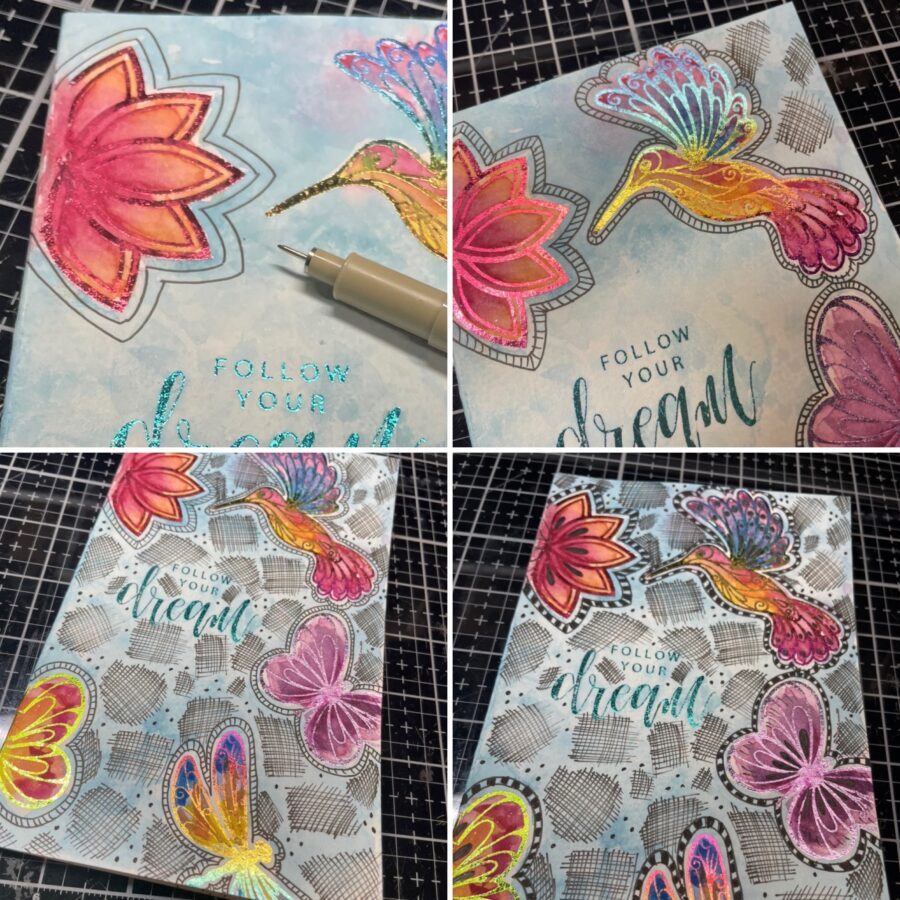
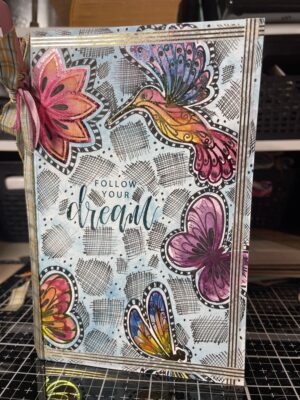
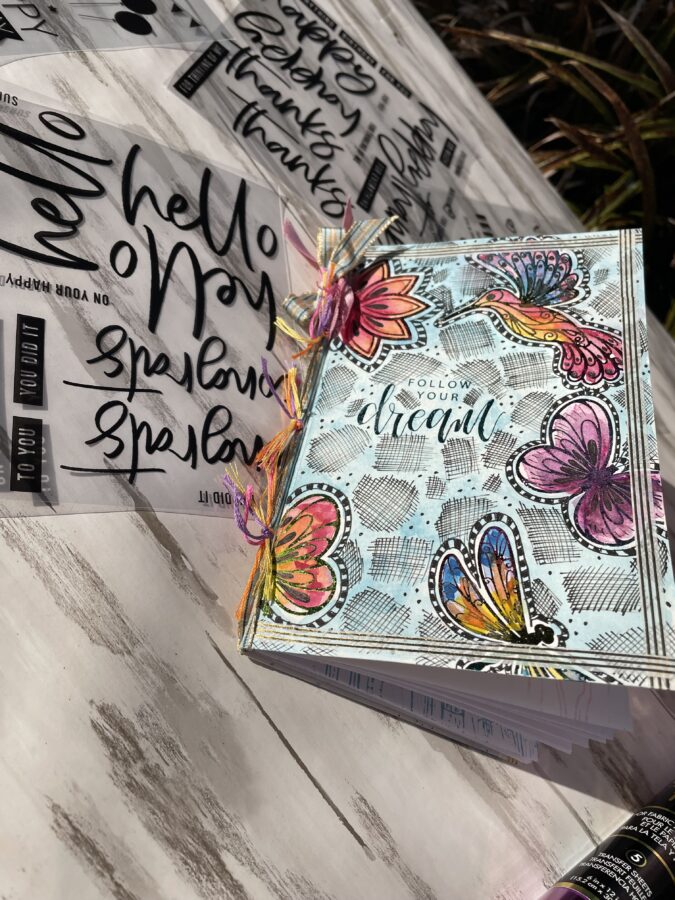
Choose the images you want to use from the Gina K. Designs Deco Foil Adhesive Transfers and trim around them. Carefully peel the backing off of the Transfer image and place it so that the text or picture is right side up (the sticky side is on the opposite side of the printed image). Place the images wherever you want them on your cover. I used just a bit iCraft Pixie Tape to hold my images in place.
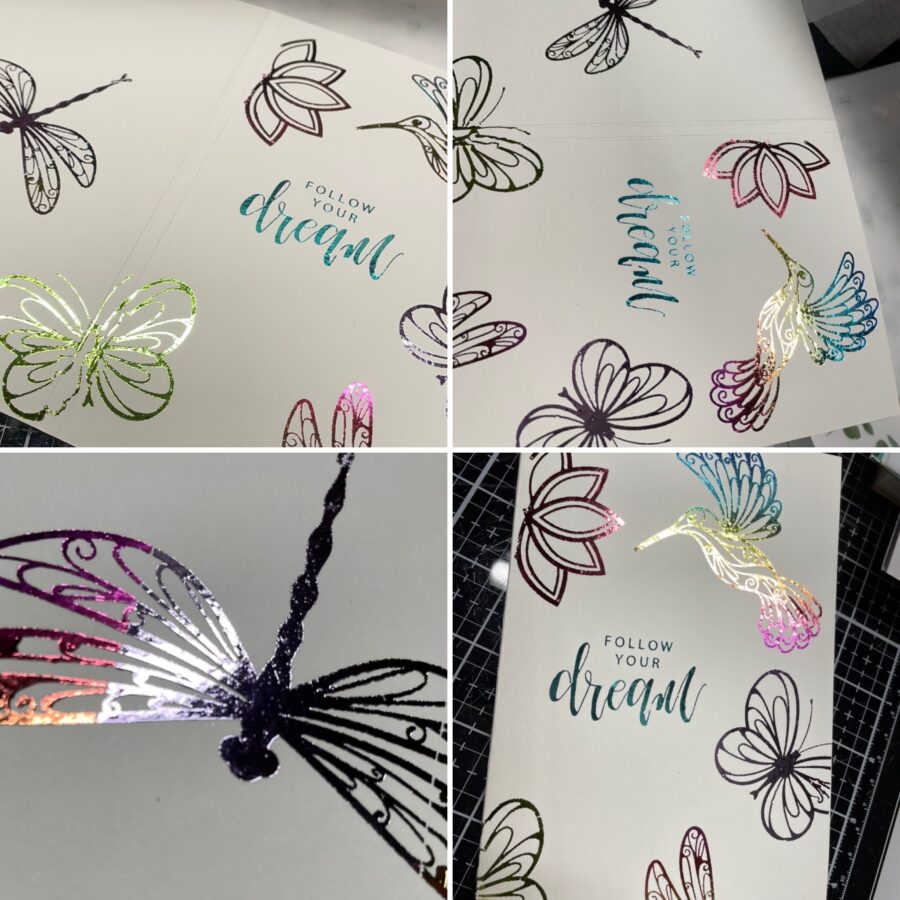
Next, place the cover with the images secured, into a new iCraft Deco Foil Carrier Sheet (coming soon!) and run it through your laminator or foiling machine as if you were foiling it. The carrier sheets added the perfect thickness for my machine so that I didn’t need a shim.
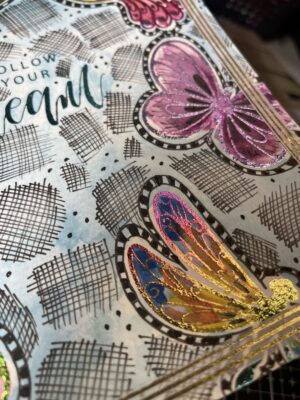
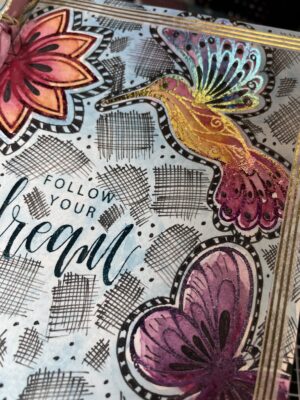
Lastly, peel away the printed acetate, leaving an adhesive image (see the picture below) and place your Foil Transfer Sheets on top of the images. I used several different colors of foil (including the new Mystic Rainbow) and pieced them over the images. Run the cover through your machine in a carrier sheet just as you did with the transfers.
The result is beautiful! I tried to photograph from different angles as the foil is really hard to photograph in such a way that it captures all of the color and shine.
Hint: I determined my cover size by folding a piece of letter-sized paper in half and trimming a bit off the top of the folded paper. This was my interior size so my cover needed to be about 1/8″ larger on each side to give a 1/16″ all-around border. If you want a 1/4″ gusset like I did, make sure to add that to your measurement.
Spring Journal Step Two:
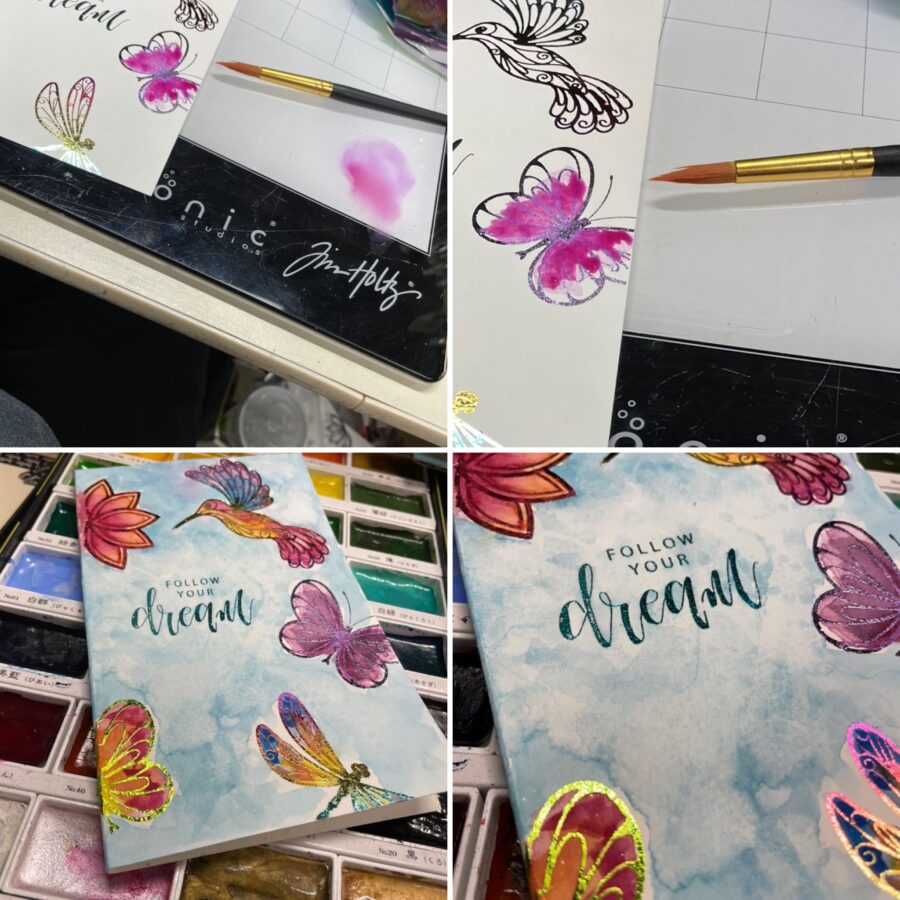
For this next step watercolor paint both your images and the background. Once the paint is completely dry, use a lint-free cloth to gently wipe the surface which will remove any paint residue from the slick foil surfaces.
Hint: If you don’t have watercolor paints, use ink pens to color instead. Or if you have water-based markers, scribble on a non-stick surface and add water. Voila, instant watercolor paints!
Spring Journal Step Three:
Although the watercolor was pretty, I felt as if my cover was a little disconnected. The foiled images were pretty but they were just random images all over the cover (clearly I was playing with a new product and not thinking much about composition). I needed a way to make the images work together and bring some cohesion to my cover.
I decided to try adding both a tangle border around each image and hatch marks over the rest of the front cover. This is not something I’ve done before and truth be told, if I was starting over I might stop after the border. I can’t decide. What do you think? Leave a comment and let me know.
Hint: If you want to do the extra step of sealing your cover, you won’t need to use an expensive fine line pen, just use a regular fine tip felt pen. If you do want to seal your work, the Distress Micro Glaze by Ranger works really well without adding moisture to smear your water-based products.
Spring Journal Step Four:
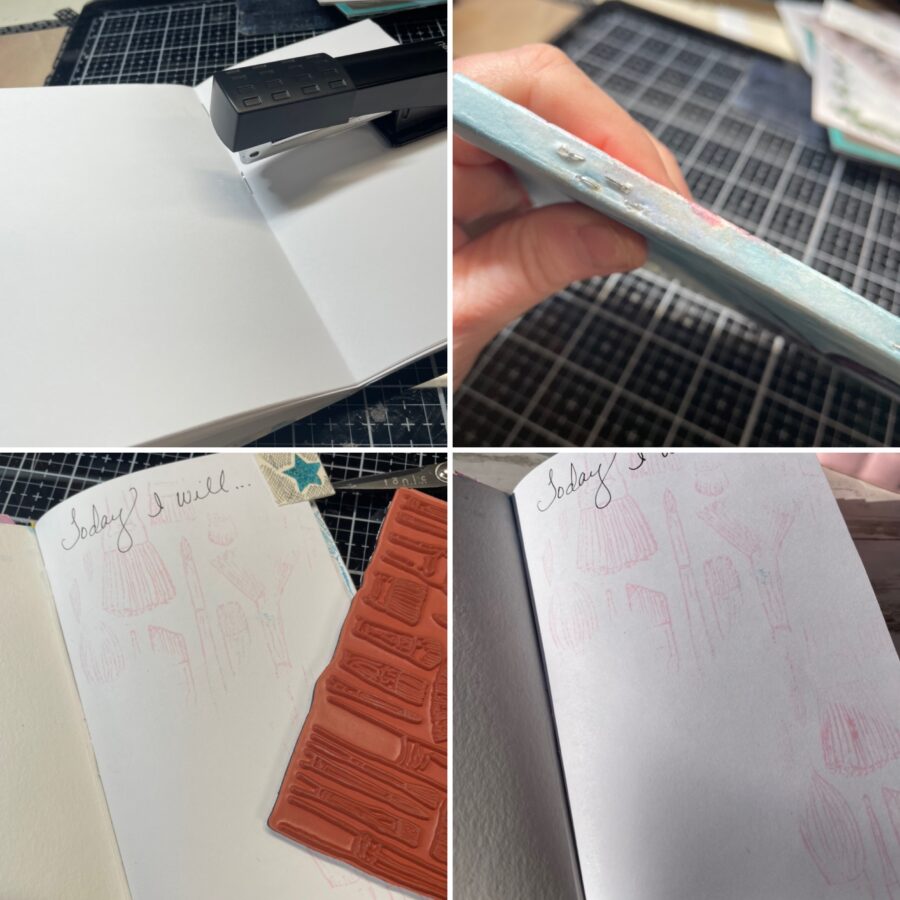
In this step, we will add two signatures to the journal. If you sized your cover the way I did, you can just use copy paper or lightweight cardstock to create signatures or interior pages. Just fold your pages in half and trim off the excess. Divide your pages in half and secure them inside your cover.
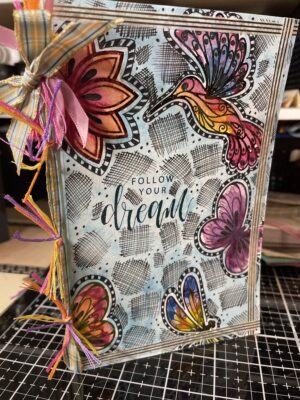
To secure your pages inside you have many options. You can simply tie some ribbon or twine through the center of the signature and tie on the outside, you can sew them in like a traditional junk journal, or you can use a long reach stapler like I did. Because we have two signatures, it’s a little more tricky but still easily done. Make sure you hold your first signature towards the back of the cover spine and open it slowly so as not to move it. Staple in three places.
Repeat this process with the second signature but hold it towards the front of the cover spine to staple.
Use some ribbon to embellish and hide your staples. I wanted to bring a little more of the rainbow colors used on the cover so I added some colorful twine along the ribbon on the spine.
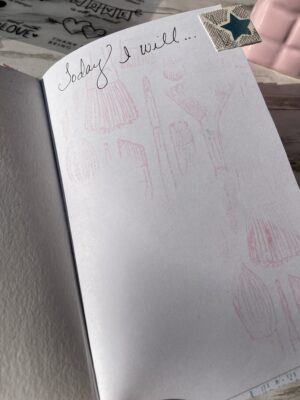
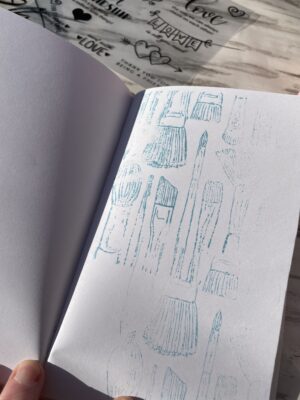
Lastly, use a favorite stamp on the inside pages. I used distress ink stamped with a light hand so that I can still write over it. The Unity Stamps Paint the Day background stamp in mine.
Hint: You can also use a regular stapler if you want to do a little extra work. You will need to place something firm that you can poke through (like cork or Styrofoam) under your journal and open the stapler completely like teachers do on a bulletin board. Press down as-if to staple and then flip over. Use a bone folder, or butter knife, or another hard object to fold over the two prongs in the way the stapler would do if used in the standard way.
EXTRA PHOTOS TO SHOW THE COLOR AND SHINE OF THE FOIL:
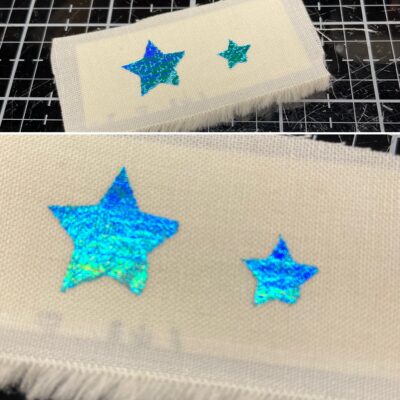
The blue stars image was created using the transfers on fabric that had been adhered to cardstock. This technique works best with the more dense images, but as you can see
Now we know it’s April Fool’s Day however this is not joke…we’re giving away a bonus chance for someone to win a $50 Gift Card!!
We want to first invite you to join in the Instagram Hop that we kicked off Wednesday! We think it’s the first time we’ve had a triple-team hop! That’s right…three teams… Gina K. Designs Team, Unity Stamp Co. Team, and our talented team here at Therm O Web! And don’t worry if you couldn’t join in then…you can still hop with us for a chance to win and some incredible inspiration too!
So get entered to win and then join the hop…join us anytime today, tomorrow…this weekend but do JOIN IN!