Hello crafty friends. I don’t know about you, but I am ready to throw out the snow and low temps and bring on spring! I thought that Simon Hurley’s background stamp was a perfect background for my springtime gnome. Make sure to follow along to the end to check out my St. Patrick’s Day Card as well. That card uses a Simon Hurley stencil for the background as well as the Gnome for the Holidays Kit with the Fall Add-On I used for the first card.
Spring Slimline Cards
Card Supplies:
iCraft Deco Foil Transfer Sheets – Mystic Rainbow, Gold and Silver
iCraft Ultra Bond Liquid Adhesive Pen
iCraft Double-Sided Adhesive Foam Tape
iCraft Easy-Tear Tape, 1/4 in x 25 yd
iCraft PeelnStick Craft Double-Sided Adhesive
Gina K. Designs Glitz Glitter Gel – Grass Green
Gina K Designs Gnome for the Holidays Fall Add-on Kit
Other Supplies: cardstock, paints, markers or colored pencils, dies and die-cutting system, ink, and printed sentiments.
Slimline Cards Step One
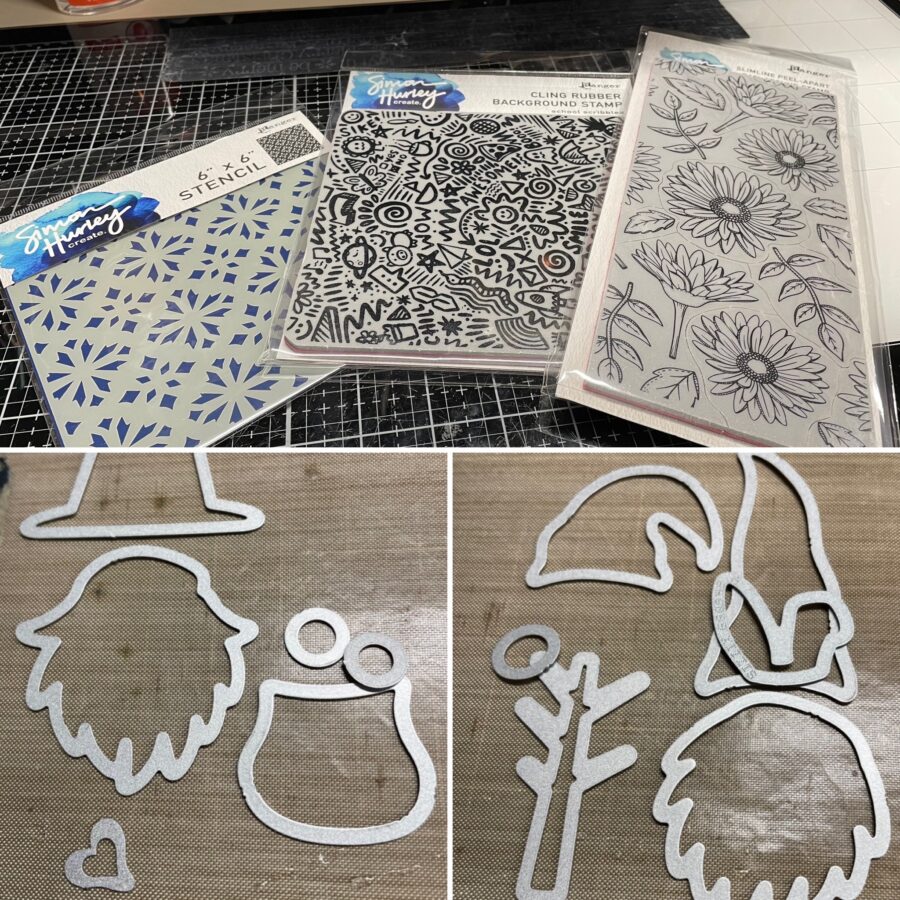
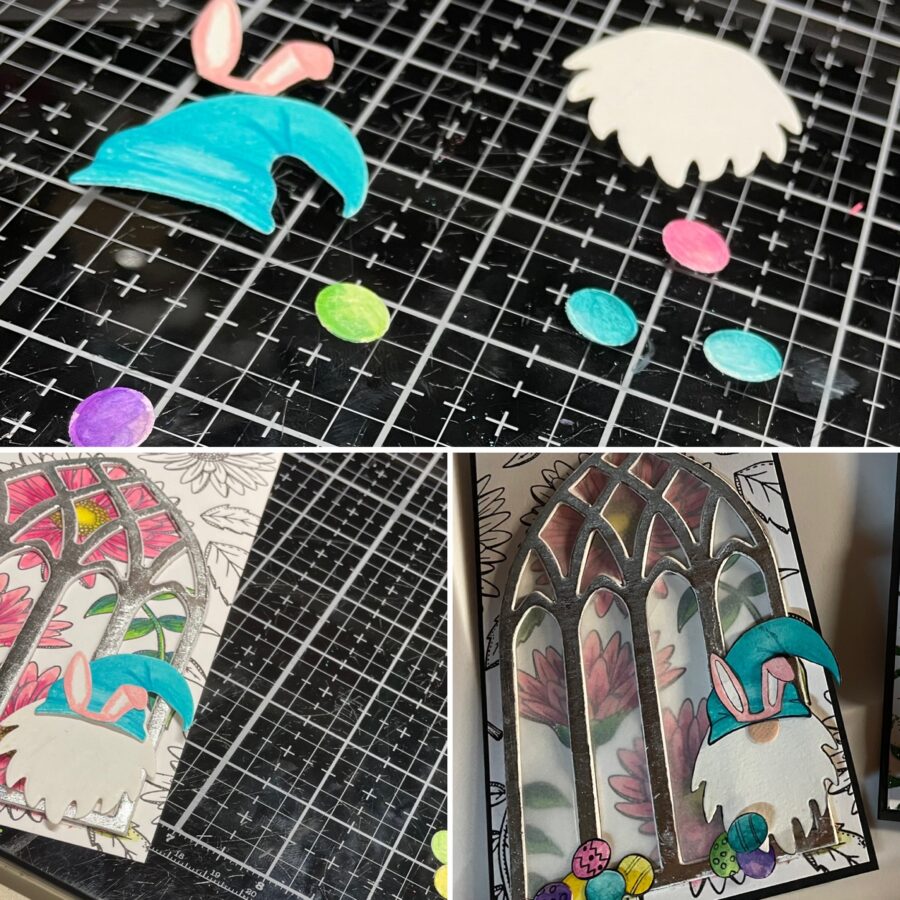
When I laid out my supplies, from the pile of dies this is what I saw. I looked at the pilgrim hat and saw a leprechaun and then the simple beard became a pot of gold. Once I had spring in my head, I knew I had to dig out some older dies and find my bunny ears! My intent was to add an easter egg tree using the tree trunk and the oval gnome nose, but I ran out of room on my card (* heavy sigh *).
Hint: If you don’t have a bunny ears die (I used the Tim Holtz Crazy Things Die Set), ears are easy to cut out with scissors.
Slimline Cards Step Two
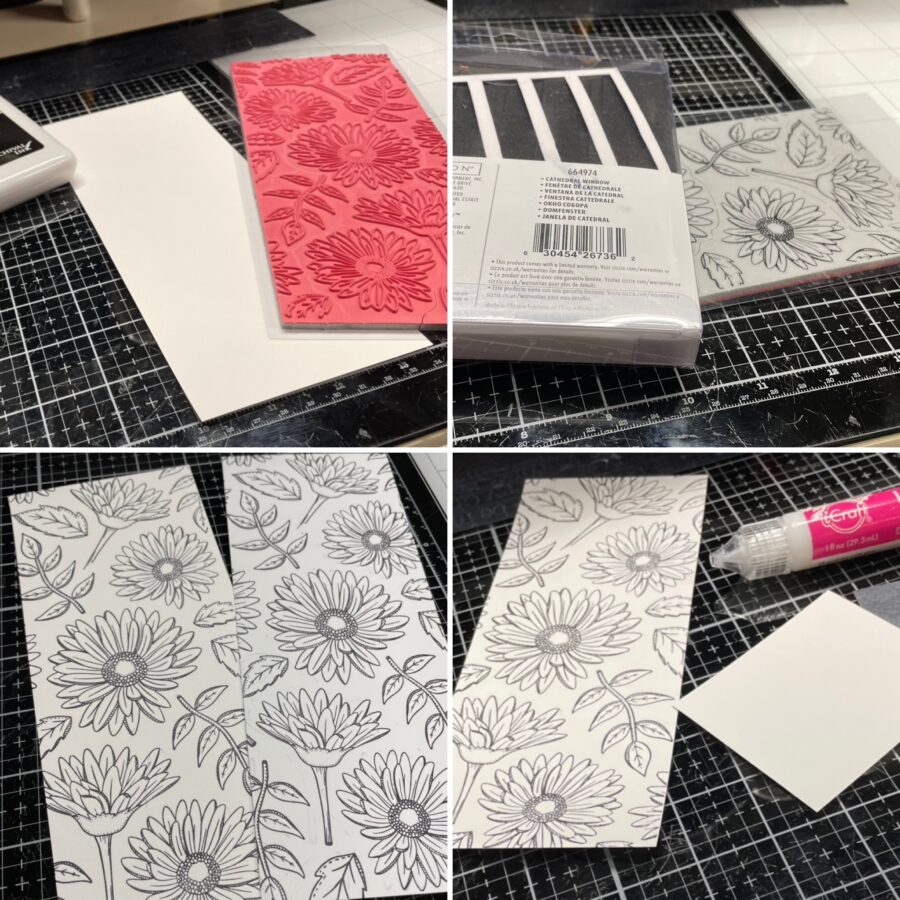
First, ink up your background stamp (I used the Simon Hurley Fresh Cut Flowers which I love, love, love). Gently lay your stamp over your card panel and use something flat to create an even pressure (I used a Bigz die) by moving it slowly over the surface.
Hint: A large brayer also provides good even pressure. I did find that using my hands gave an uneven inked image. You could also use a cutting pad as a stamp block but this stamp comes apart into pieces that you can use individually and I didn’t want to break it apart.
Slimline Cards Step Three
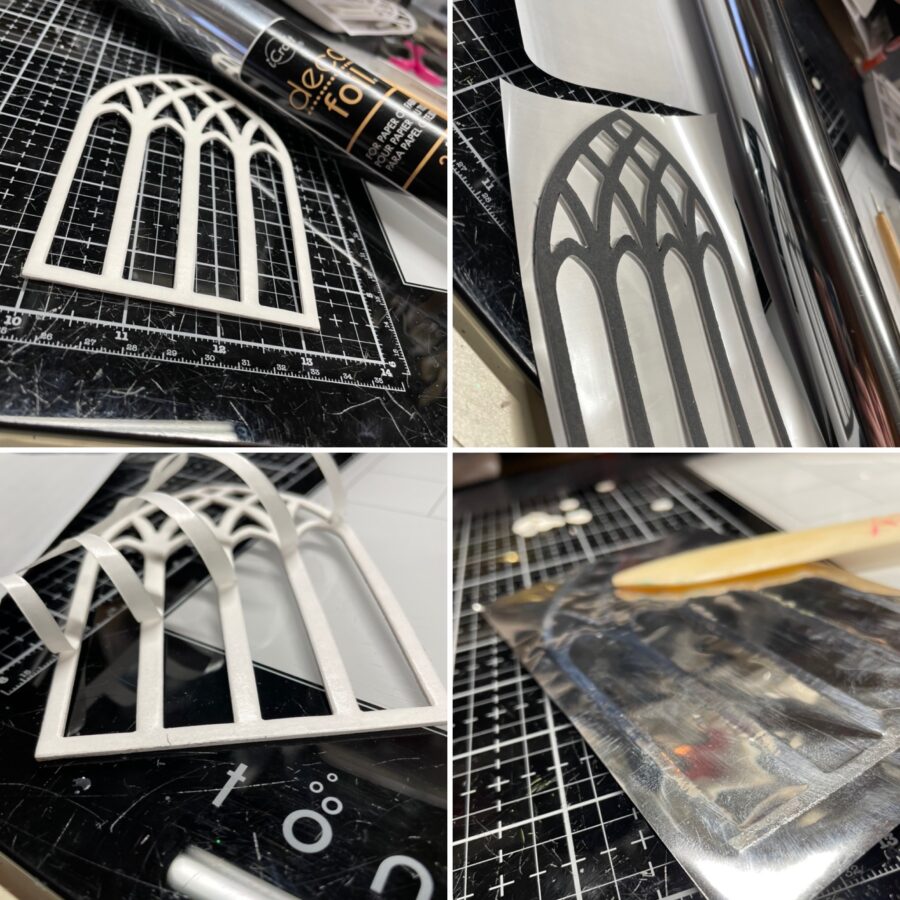
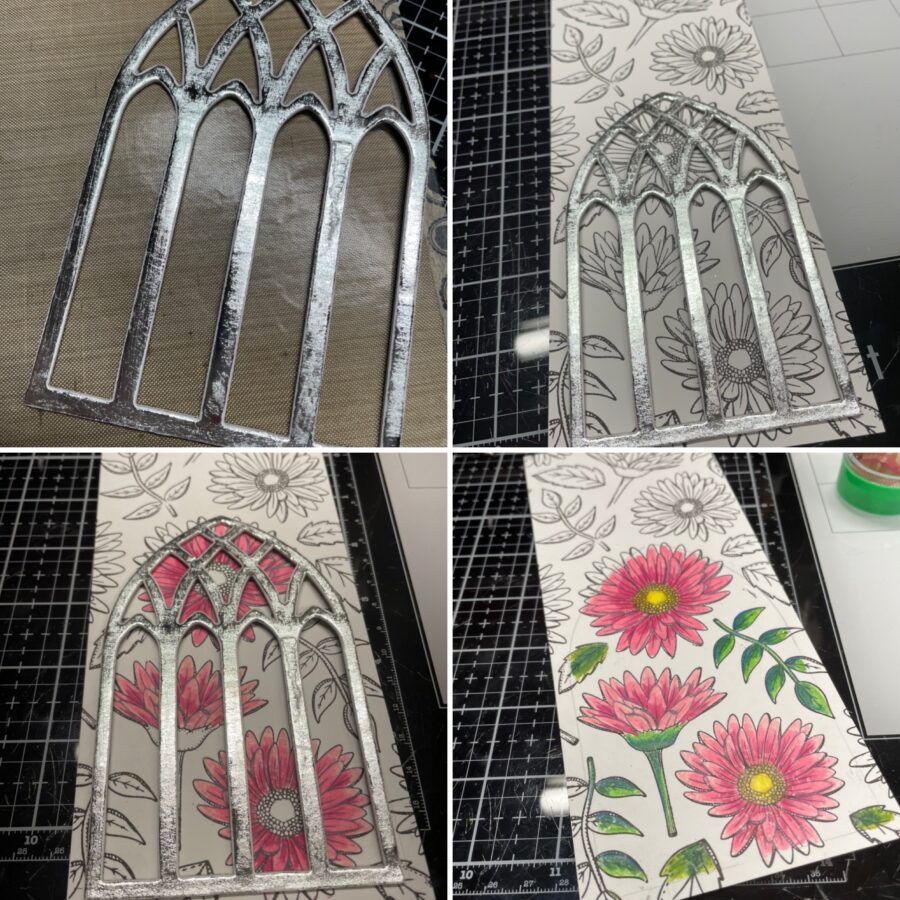
Set your card base aside for your ink to dry completely and grab your die-cut. I used a cathedral window die but any window die with panes would work just as well. I cut mine from chipboard for added dimension.
Press your die-cut onto a piece of PeelnStick adhesive sheet and peel off the release paper. Then press the sticky side onto the backside of your Foil Transfer Sheet. I used Silver. Silver is one of my staples. I use it so much, in fact, that I buy the 25′ rolls. I love not having to worry about how much I use because there is always more! You can get the rolls in Gold, Copper, Silver and Rose Gold.
Flip the die-cut over with the Foil Transfer Sheet still attached and burnish it well. A Score Pal would be perfect to apply even pressure all the way across the die-cut.
Next, carefully peel off the Foil Transfer Sheet and you will be left with a beautiful foiled window.
Hint: If you don’t have a window die, you can create your own window from strips of chipboard.
Slimline Cards Step Four
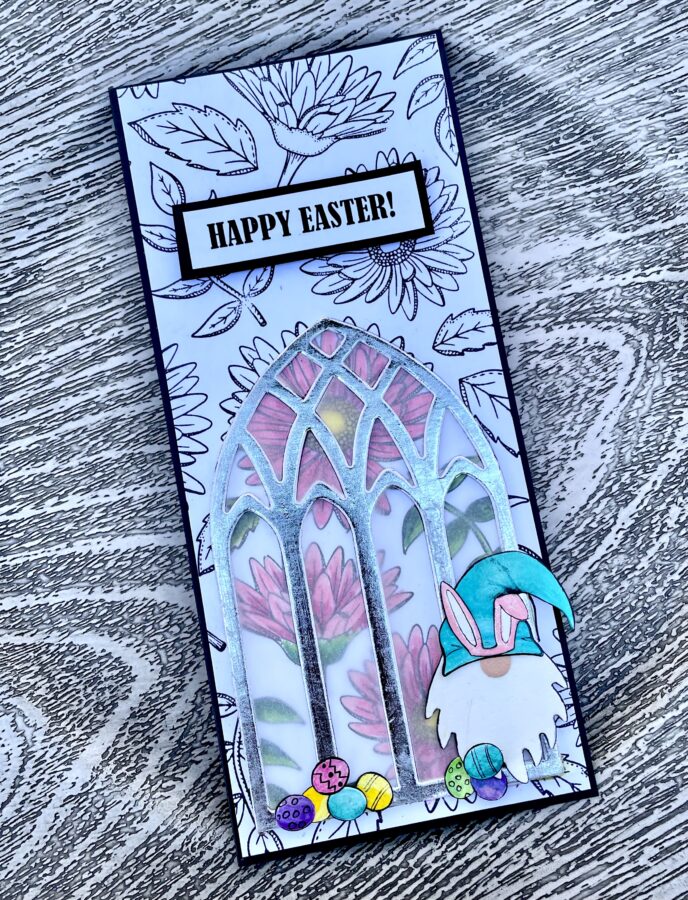
For this next step, you need to decide where you want your window to live on your card. Once you have it in place, trace softly around it with a pencil and remove the die-cut. I used my Prismacolor Pencils to color the stamped image only inside of the penciled shape. I loved the contrast of the black and white to color in the final project. At this point, you can adhere the window to the card panel over the colored area.
Hint: Watercolor would look really good for this step as well and you might not need the vellum we will add later to soften the color.
Slimline Cards Step Five
Lastly, die-cut your Gnome for the Holidays and bunny ears and adhere to the card panel. I decided the color was a little bright so I die-cut my window again from vellum and placed the drop-out pieces over the colored areas to soften it a bit.
Hint: If you are more careful than I was, you can use the tree trunk die from the Festive Fall Add-on Kit and the eggs to create an easter egg tree to stand next to your gnome. I wish I had planned mine out better. I will definitely be making some with the tree for Easter this year.
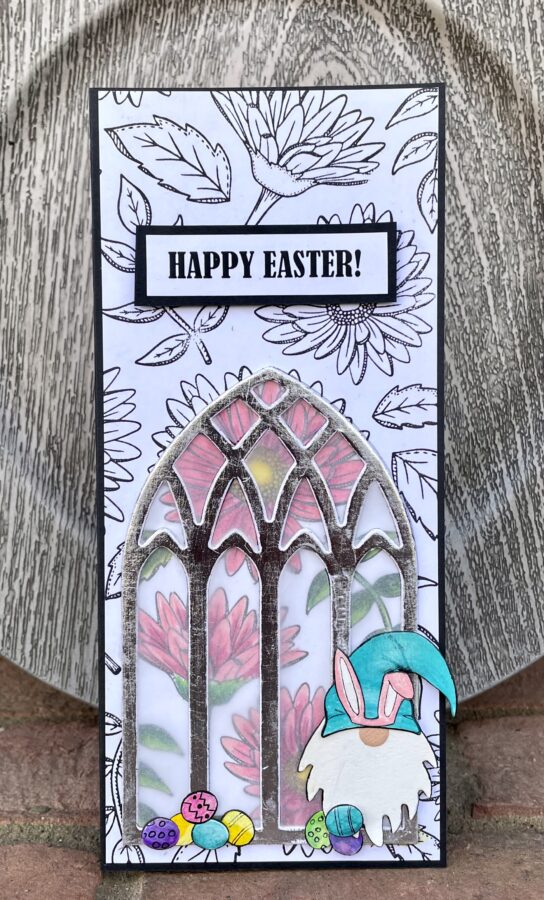
I love how this card came out and hope it inspires you to mix and match with your supplies to come up with some fun creative cards.
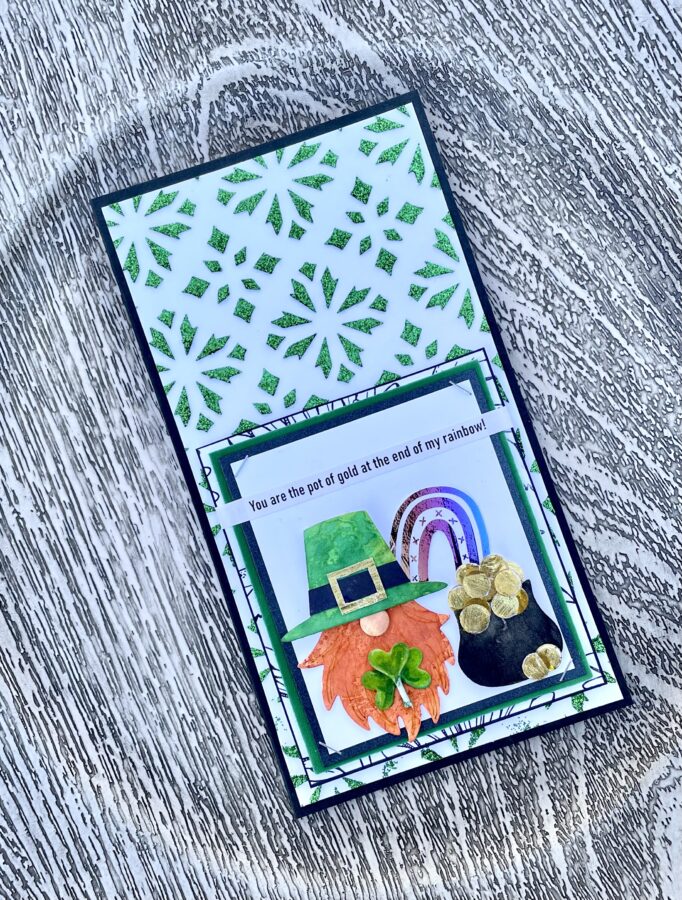
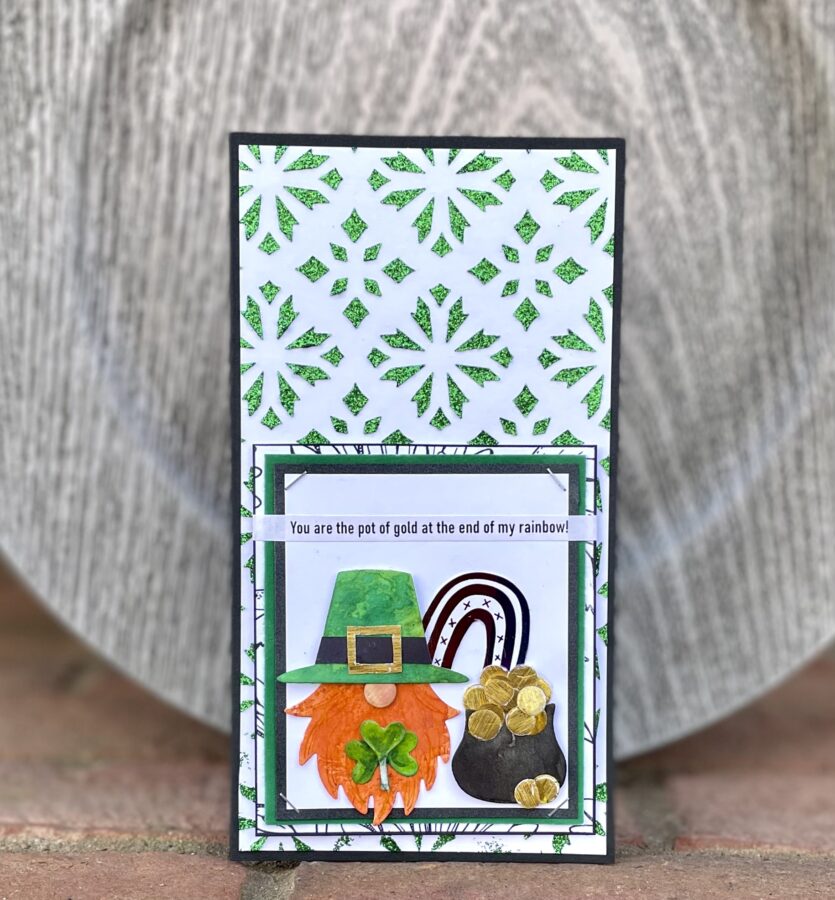
If you participated in the Instagram Hop on Tuesday, you may have already seen my Leprechaun Card which also features a Simon Hurley background (stencil) with Glitz Glitter Gel paired with the Festive Fall Add-on Kit, the Rainbows Toner Sheet Card Panel, and gold Foil Transfer Sheet. Ooops, I almost forgot my green mat is actually cut from an Emerald Flock Transfer Sheet for added dimension and texture. This card is full of texture.