


Hello and happy October. I’m so excited to share this project with you! Halloween projects are my favorite and Deco Foil Transfers Sheets are, hands-down, my favorite Therm-o-Web product. And, since they have so many fabulous products, that’s saying a lot.
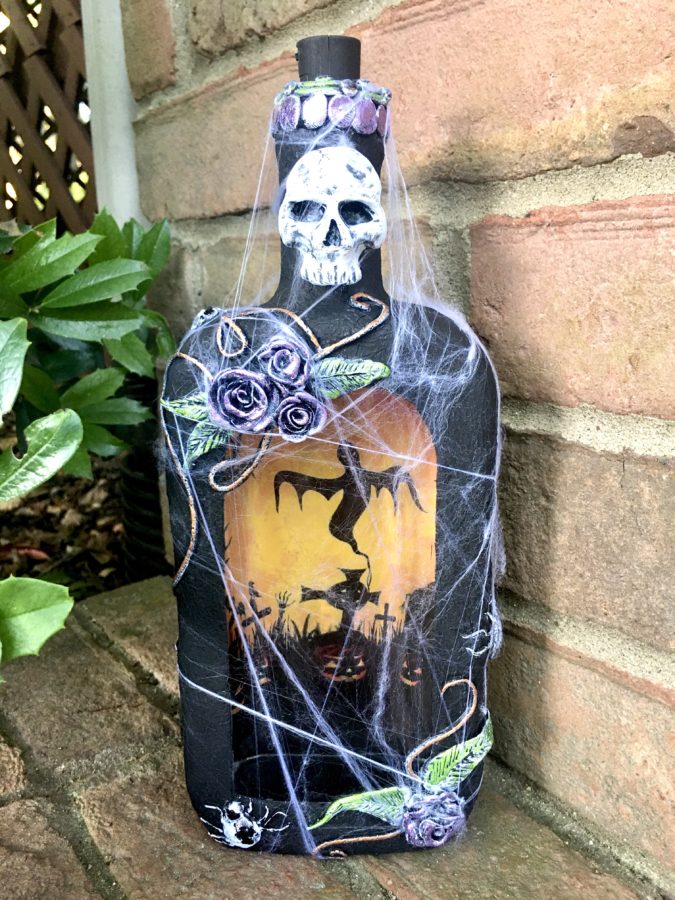
This time, I got to add Sculpey products to the mix and boy howdy did I have fun! I hope you have just as much fun learning how to create this light-up Spooky Sculpey Skeleton Bottle!
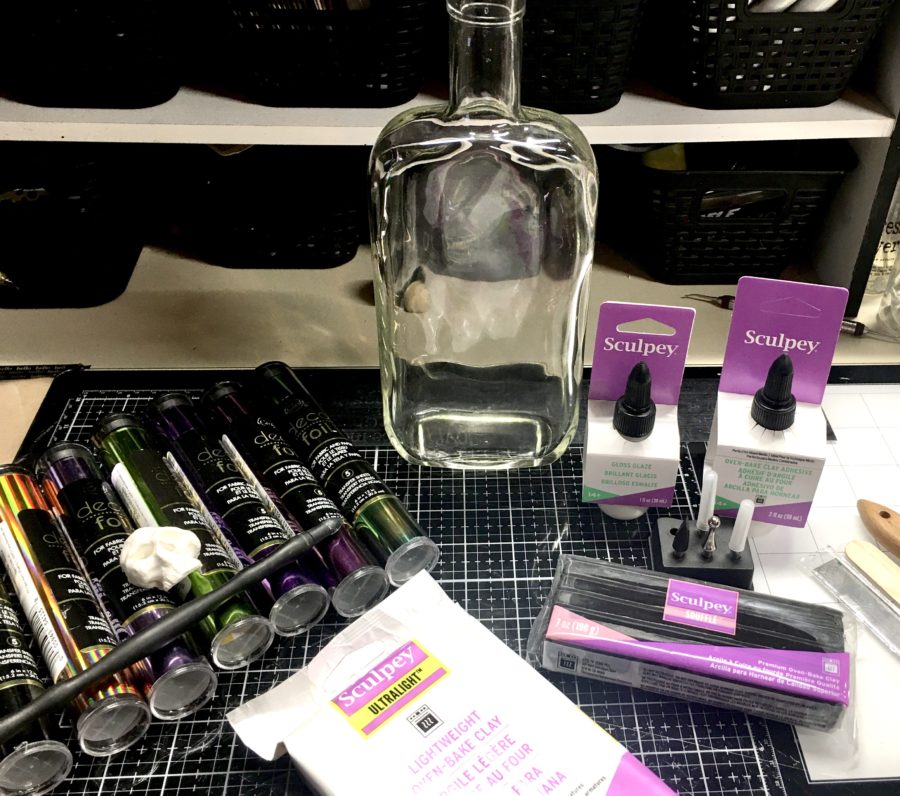
Spooky Sculpey Skeleton Bottle Supplies:
Deco Foil Transfer Sheets – Black, Peach Princess, Lily Pad and Price Periwinkle
iCraft Ultra Bond Liquid Adhesive
Other Supplies: Glass bottle, napkins, tissue paper or paper towels, paintbrush, paint, printed image, oven for baking clay, permanent marker, faux spider webs, and a bottle light.
STEP ONE:
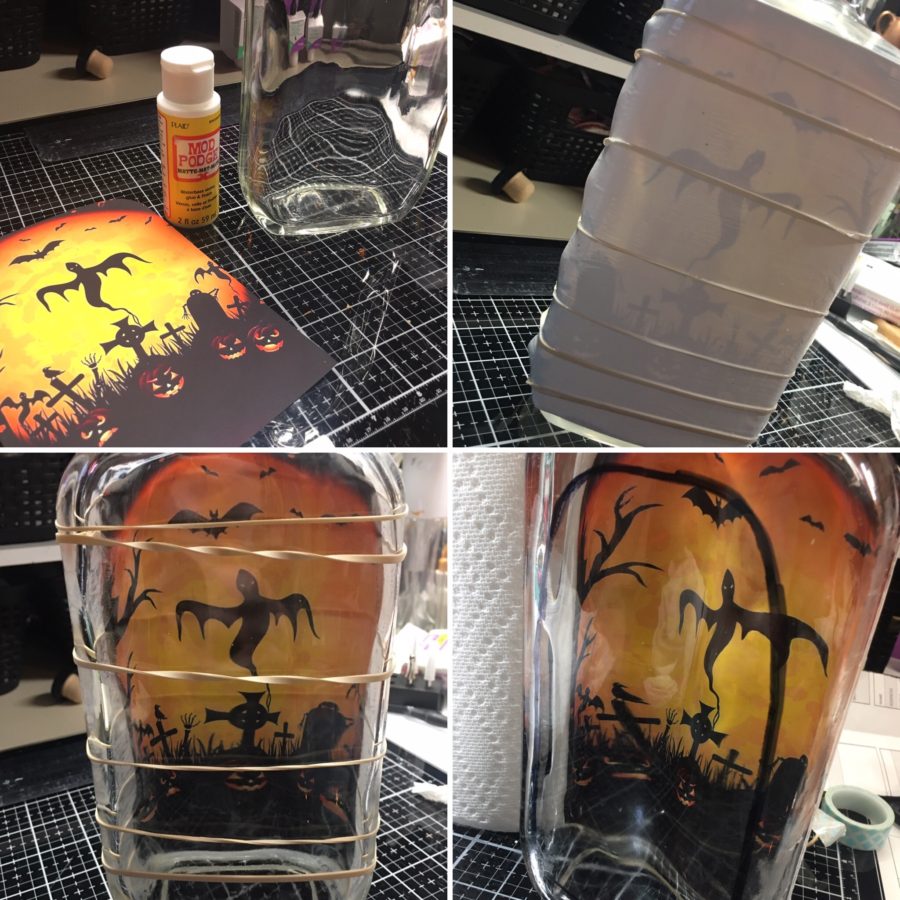
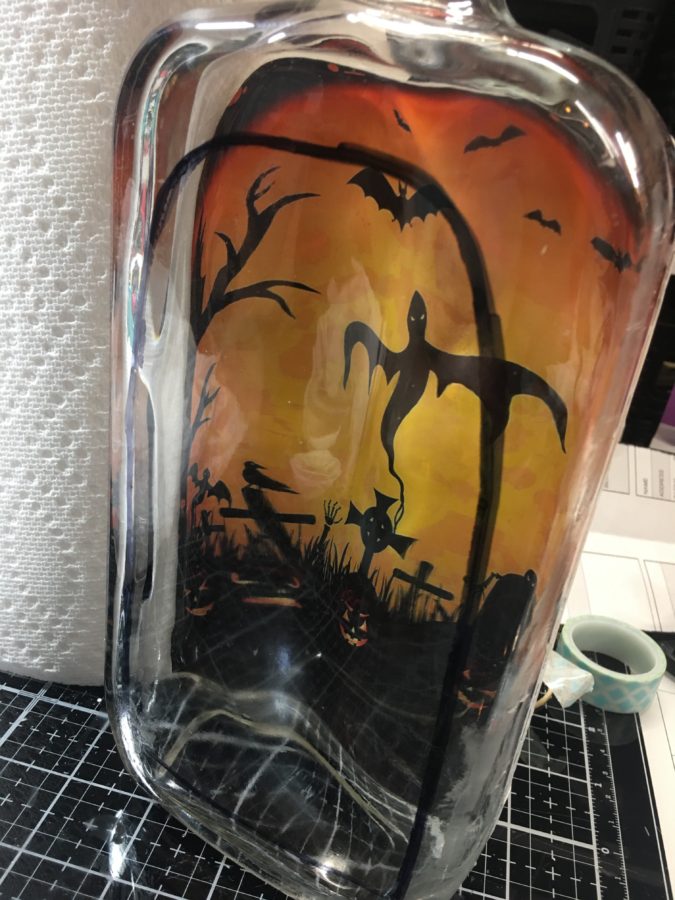
Start with a clean, empty, bottle. I like the flat bottle because it gives a nice surface on which to create your scene.
Google “Halloween images” and you will find several that are great for this project. Print the one you like best (I printed mine at 5×7) and coat the image with a thin layer of Mod Podge matte to protect the ink from running. Collage it to the back of the bottle (image facing the bottle) using watered-down Ultrabond Liquid Adhesive. I mixed approximately 1 part water to 2 parts Ultrabond. Coat the back of the image with the Ultrabond mixture as well.
Hint: I printed my images on a heavy matte photo paper and wrapped it around the sides of the bottle. I had to use rubber bands to hold it in place while the Ultrabond dried. In the end, I used purple tape all the way around the image to hold it down. The Ultrabond caused the tape to adhere more like masking tape, but it still came off easily.
STEP TWO:
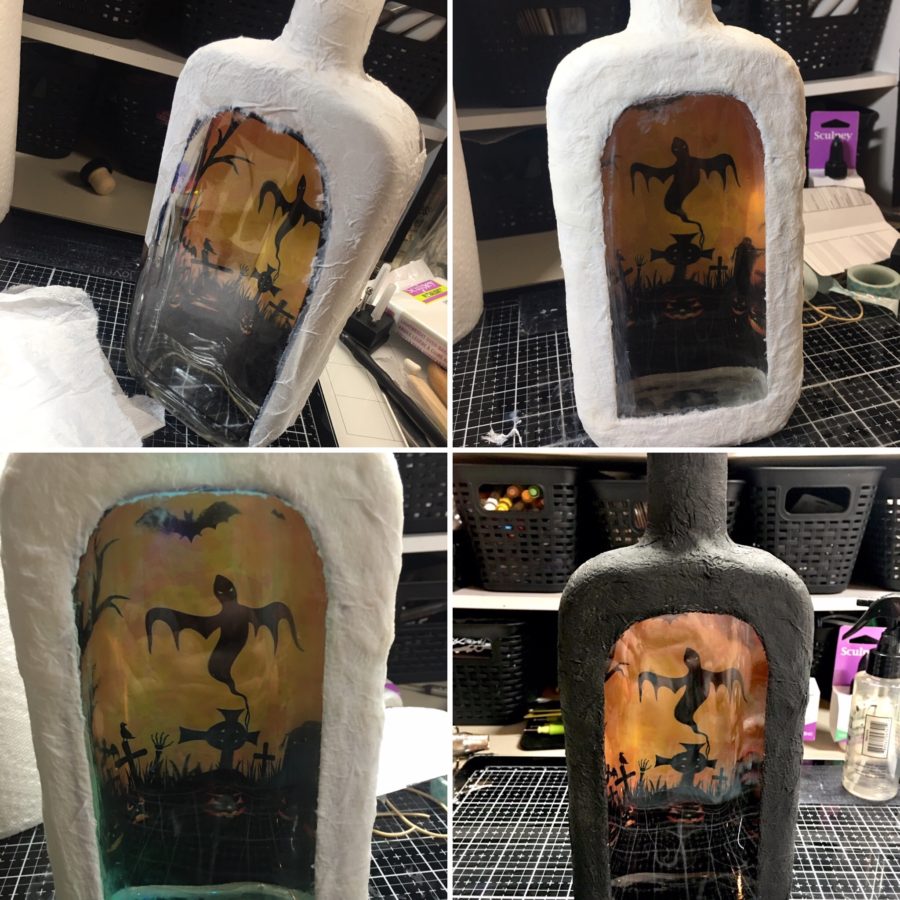
Use a permanent marker to draw your “window” on the front of your bottle. This will give you a guide when you are collaging over the bottle. Using tissue paper, paper towels or napkins, collage the entire bottle (except for the window area you have drawn). Use the same Ultra Bond Liquid Adhesive mixture to collage.
I do a lot of collaging with napkins and I keep the plain white layers. These layers are perfect for this project. Use the straight edges of the napkin for the window’s straight edges to keep it crisp and clean. Don’t worry though, you can go back with a craft knife later and clean it up.
Keep adding layers until you are able to completely hide the seam created by adhering your image (mine had a huge ridge along the sides so I had to add two thin napkin layers and one layer of paper towel to mask it).
Once it dries, you can move directly to the next step or you can give it a thin coat of paint, which is what I did.
Hint: Even though painting it at this point may seem like an unnecessary step, I found that having the dark background helped me decide where I wanted to add embellishments and allowed me to more easily balance the piece.
STEP THREE:
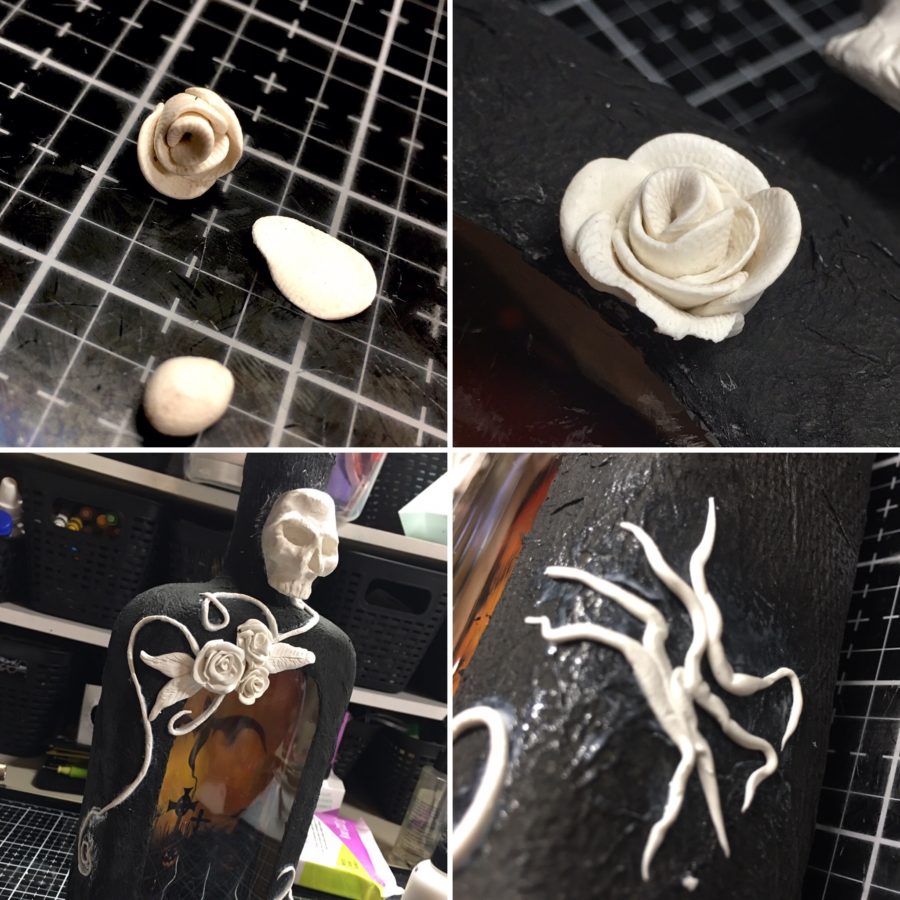
And now the fun begins! I played with several different types of Sculpey oven-baked clay. I sculpted the skull from Premo Sculpey clay before I started this project because I couldn’t wait to play with these products as soon as I got them. It’s been sitting for weeks, out in the open, without drying out. It still attached easily to the bottle using Sculpey Liquid Clay.
If you are interested in creating a similar skull, I found a video on Youtube and followed along. I will link that video at the end of this post in case you want to give it a go.
I played with both the lightweight clay which has the feel of air-dry clay and the souffle which I absolutely love. The texture and weight of this clay are great because you don’t have to work it the same way you do the Premo or other oven-bake clays. The clay is pliable but holds its shape when creating.
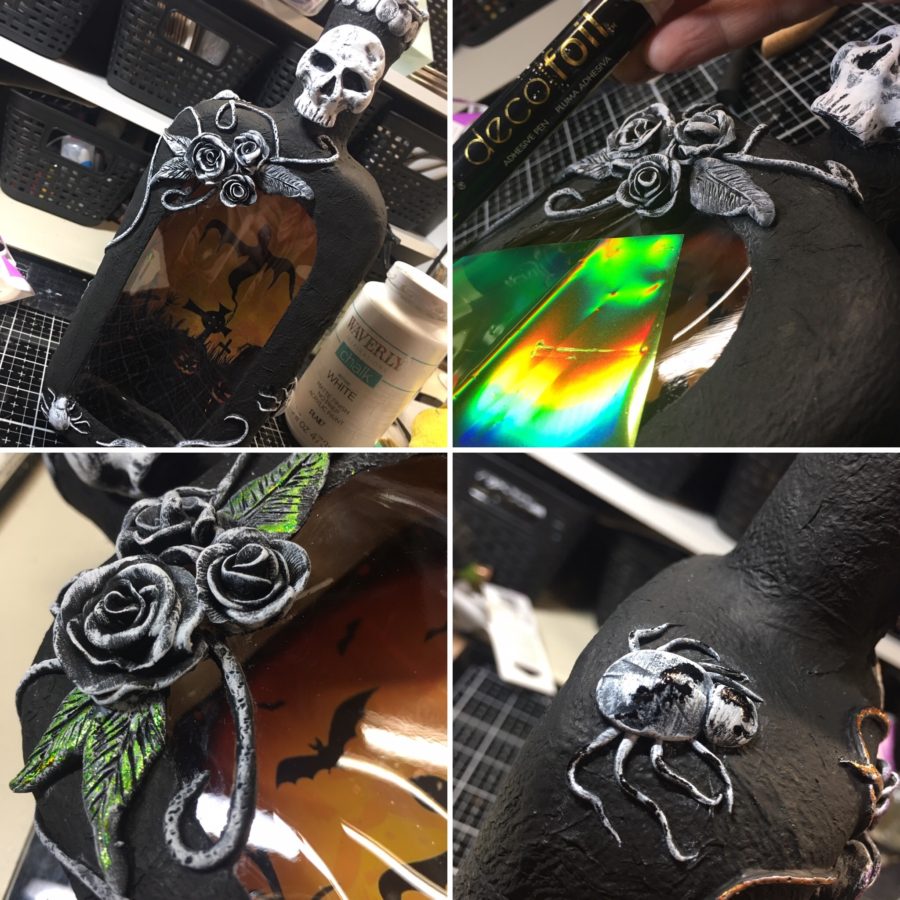
I have very little experience working with oven-baked clay but was able to easily create several roses by rolling small balls of clay and pressing the balls flat. Roll the first piece to create a bud and then simply add the other flat pieces around it until your rose is as full as you want it. You’ll find that the rose is a little taller than will look nice on your bottle. Use a clay blade or craft knife to cut the excess clay from the bottom of the rose, creating a flat bottom.
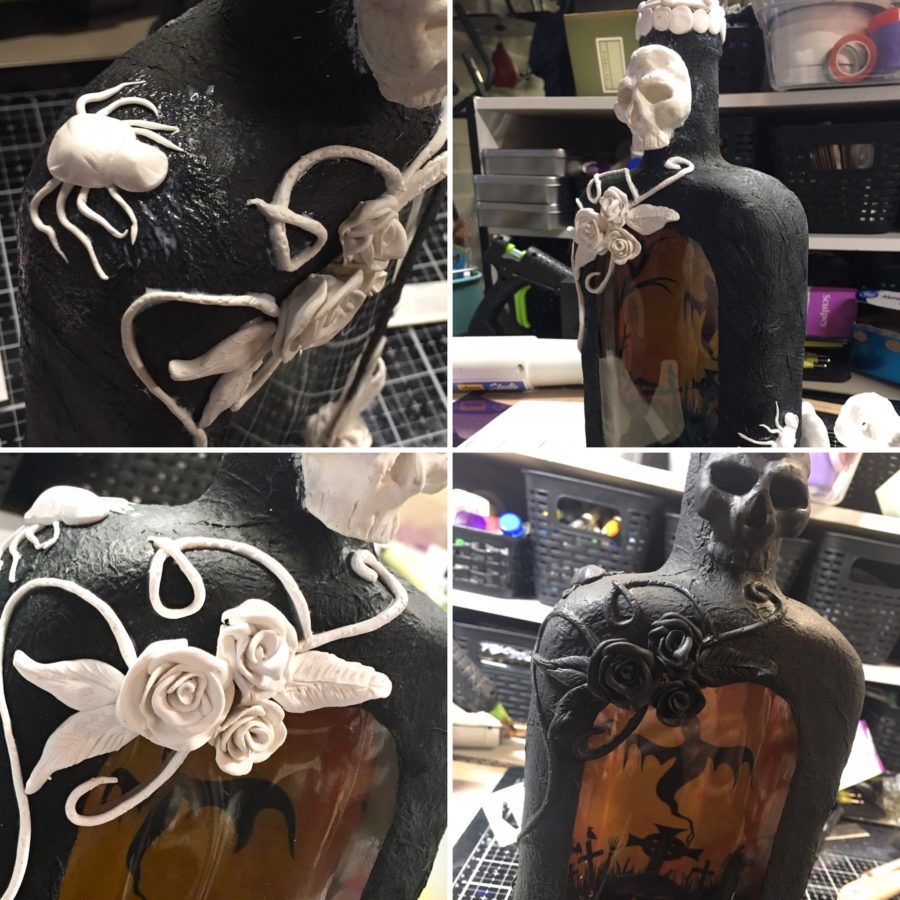
Use a drop of liquid clay to adhere to each rose to your bottle. Add leaves around the roses, adhering with liquid clay as well. To create the scrolls, roll snake shapes and apply them to the bottle. Create spider legs similar to the scrolls and lay them out next to each other as pictured. Roll an egg-shaped ball and press it to the middle of the legs to create a spider body.
If you don’t want to add roses, spiders or skulls, there are many tutorials on Youtube for clay creations.
Hint: It is easier to rub a bit of liquid clay over the whole area to adhere to the scroll shapes than to draw the shape and get the clay in exactly the right spot. There’s a little more room for error with this method.
STEP FOUR:
Once you have your bottle embellished as desired, bake your piece according to package instructions and paint. PLEASE NOTE: Ultrabond Liquid Adhesive has not been tested for baking and Therm-O-Web does not recommend it be used this way. I, however, did bake it. If you are not comfortable with this, you can use another collage medium recommended for baking.
I painted the entire surface with black chalk paint and then dry brushed white over the clay embellishments.
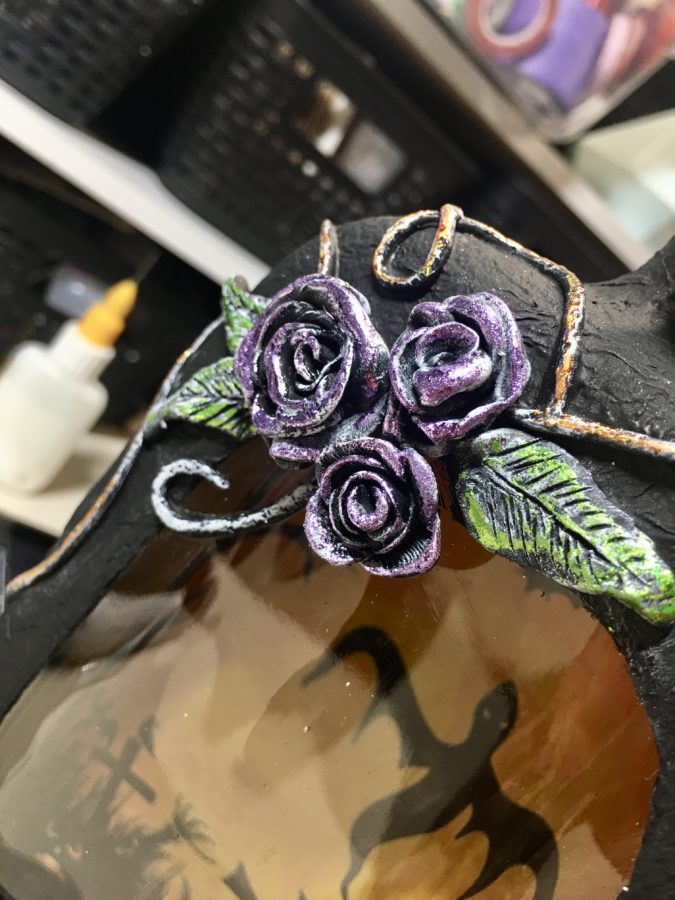
The bottle looks great as-is at this point, but to take it to the next level, break out your Deco Foil Adhesive Pen and the new Fairy Tale Foil Transfer Sheets to tint your clay embellishments.
I love how the Fairy Tale colors are soft while still providing a great pigmented color. I know I always say this when I use Foil Transfer Sheets, but photos just don’t do them justice! The result is even better in person. I used foil on all of the clay embellishments except the skull. On the spiders, I used black foil.
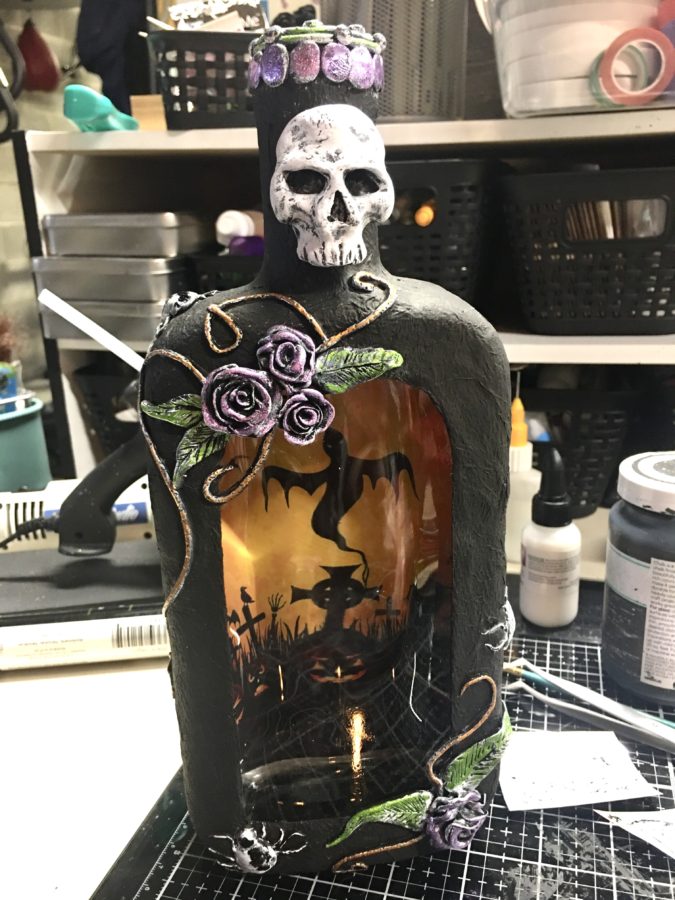
STEP FIVE:
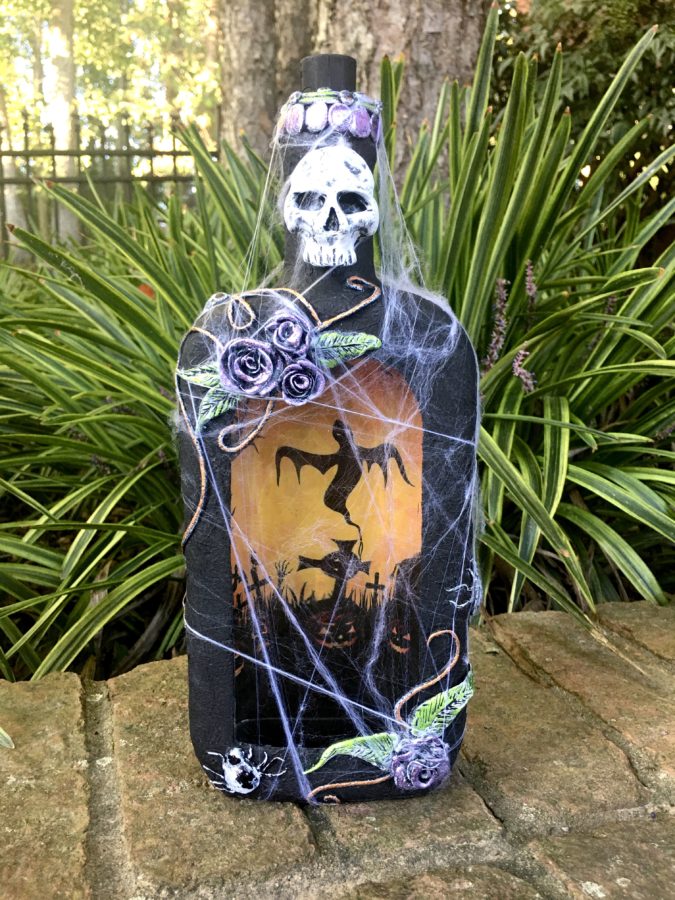
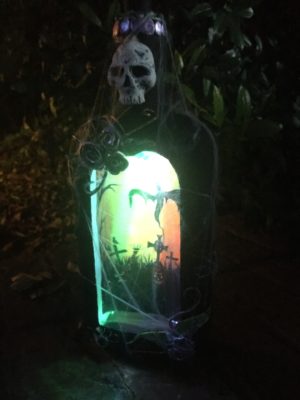
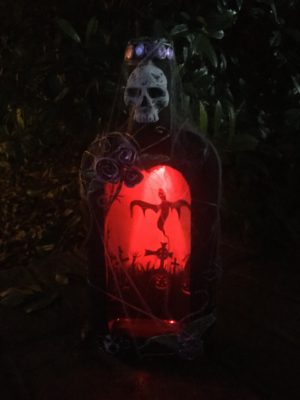
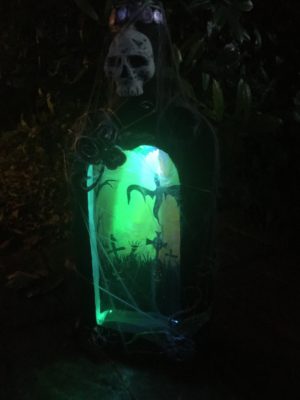
To finish off this project, add some faux spider webs and a color-changing bottle light (I got mine at a local dollar store).
I can’t wait to display my bottle with my Halloween décor!!

BONUS PROJECT:
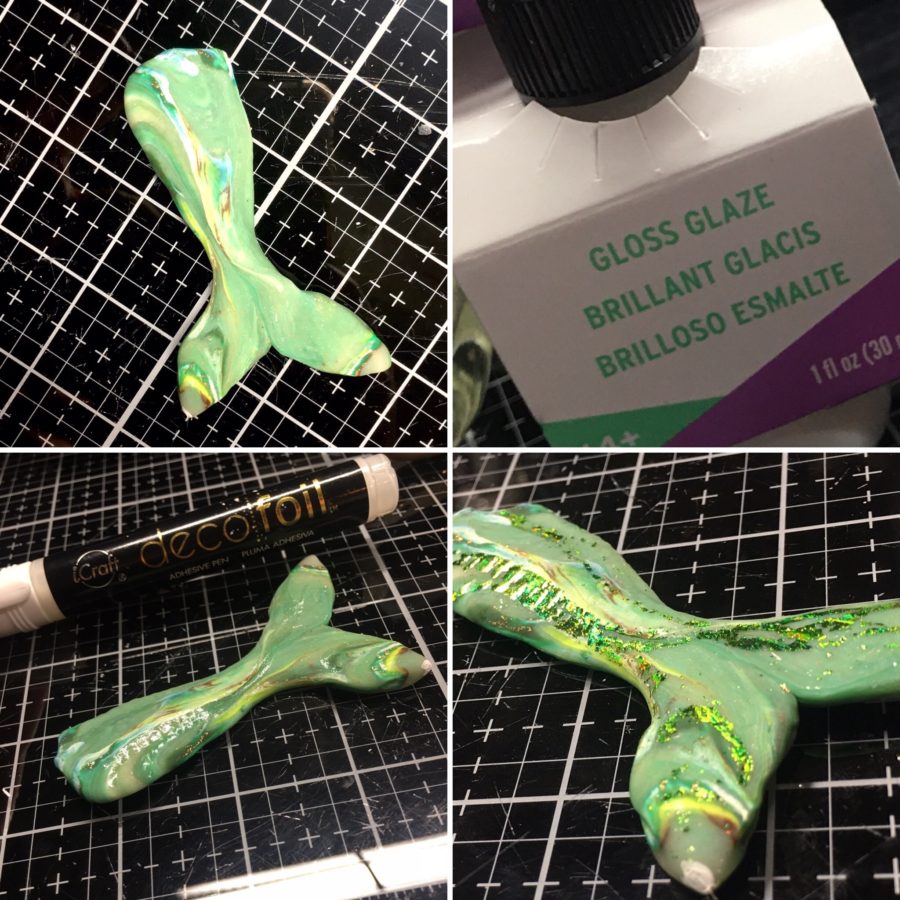
I had so much fun playing with clay and foil together, I created this fun mermaid tail I think will be great on the front of a summer junk journal. I mixed several colors of green clay with a bit of white and a bit of pearl and pressed it into a mermaid tail silicone mold. After baking according to package instructions, I used the Deco Foil Adhesive Pen and Lilly Pad Foil to add the beautiful green shimmer (I may even add some blues). I sealed the foil and added shine using the Sculpey Gloss Glaze.
I hope you enjoyed these projects and are inspired to use your foil with other products to create something new!
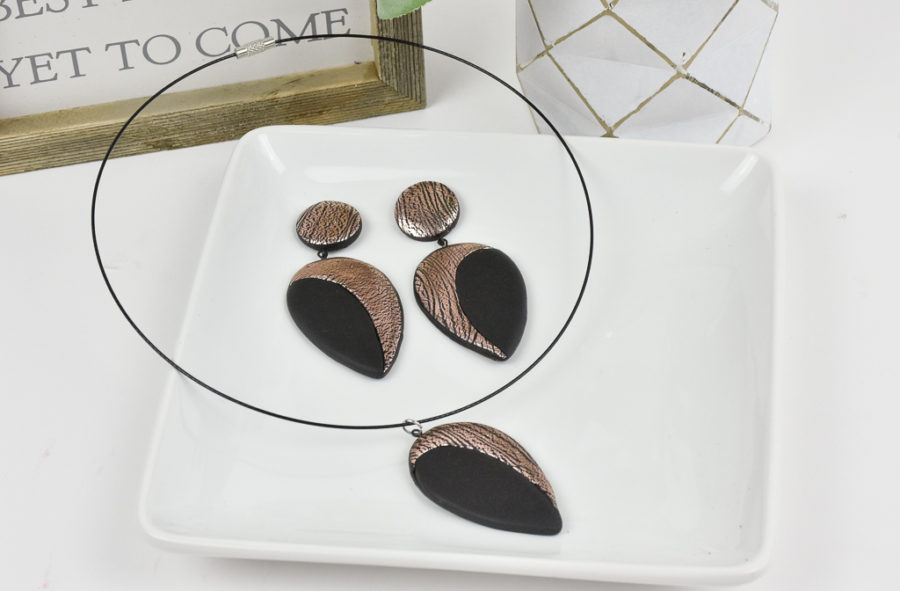
We hope you’ll take the time to visit our friends at Sculpey and learn more about these beautiful earrings made with our two companies’ products! You’ll find a tutorial at Sculpey on how these gorgeous earrings were made with our Foil!
And before you head over to see those…be sure to enter our giveaway! We’ve combined some of our favorite products into one amazing giveaway for you to enter to win! Just follow the steps to be entered to win!
Brenda @ Songbird Designs
October 12, 2020 at 1:43 pm (4 years ago)This is such a cool project! Thanks for sharing.
Dana M
October 13, 2020 at 4:38 pm (4 years ago)Wow, amazing project!!