Sparkle Bouquet Banner featuring HeatnBond
Greetings friends! It’s Belinda from Blue Ribbon Designs, here with a brand new project tutorial featuring a fun assortment of my favorite HeatnBond products. Today, I am excited to share my “Sparkle Bouquet Banner” with you.
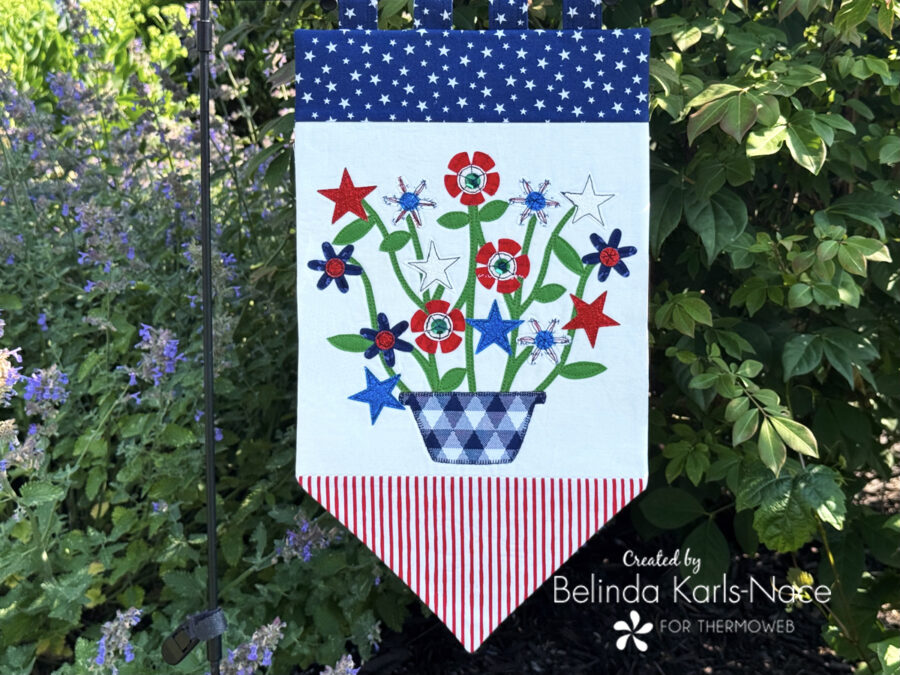
Let’s add a little sparkle to your summer! This Sparkle Bouquet Banner is a fun and festive way to bring patriotic vibes to your porch, garden, or backyard gatherings. With bold colors, playful florals, and a touch of shimmer, it’s the perfect DIY to celebrate the season. I used some of my favorite Therm O Web products to pull it all together—and I’ll walk you through each step so you can make one too!
Note: This tutorial assumes basic quilting knowledge. If you’re new to quilting or need a refresher on piecing or appliqué techniques, I recommend exploring beginner-friendly resources online or flipping through a basic quilting book to get comfortable with the fundamentals.
Let’s get started! Simply gather the materials/supplies listed below, then download the pattern with PDF templates and banner layout image.
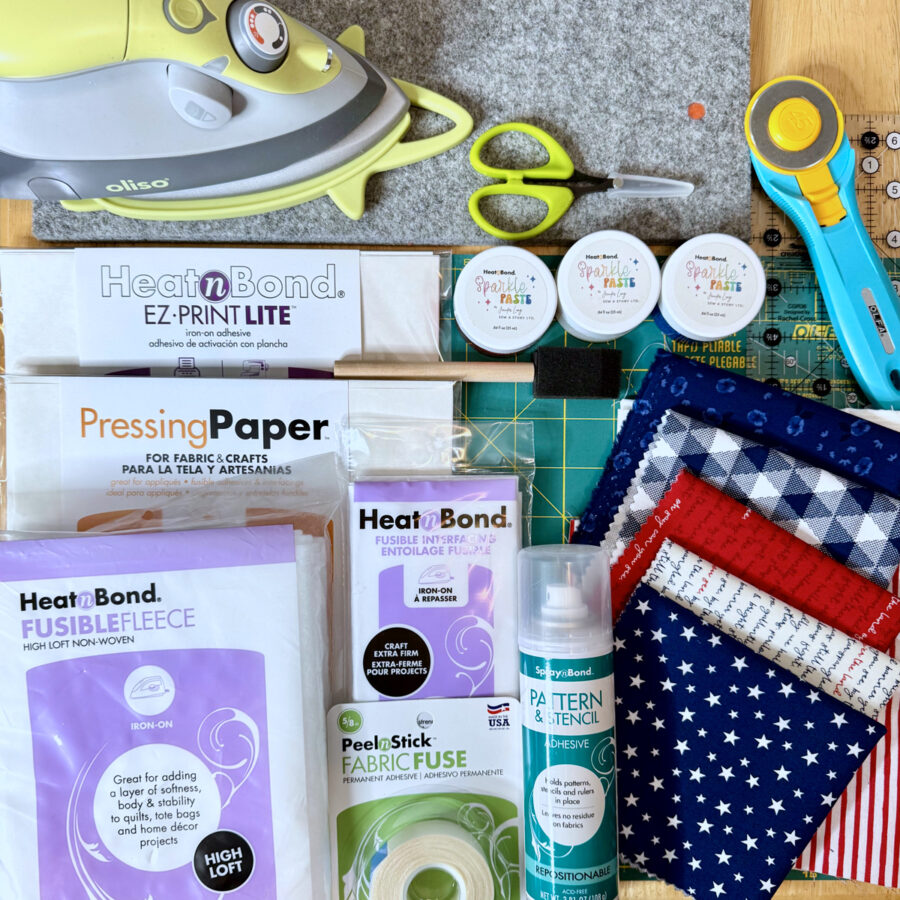
What you need:
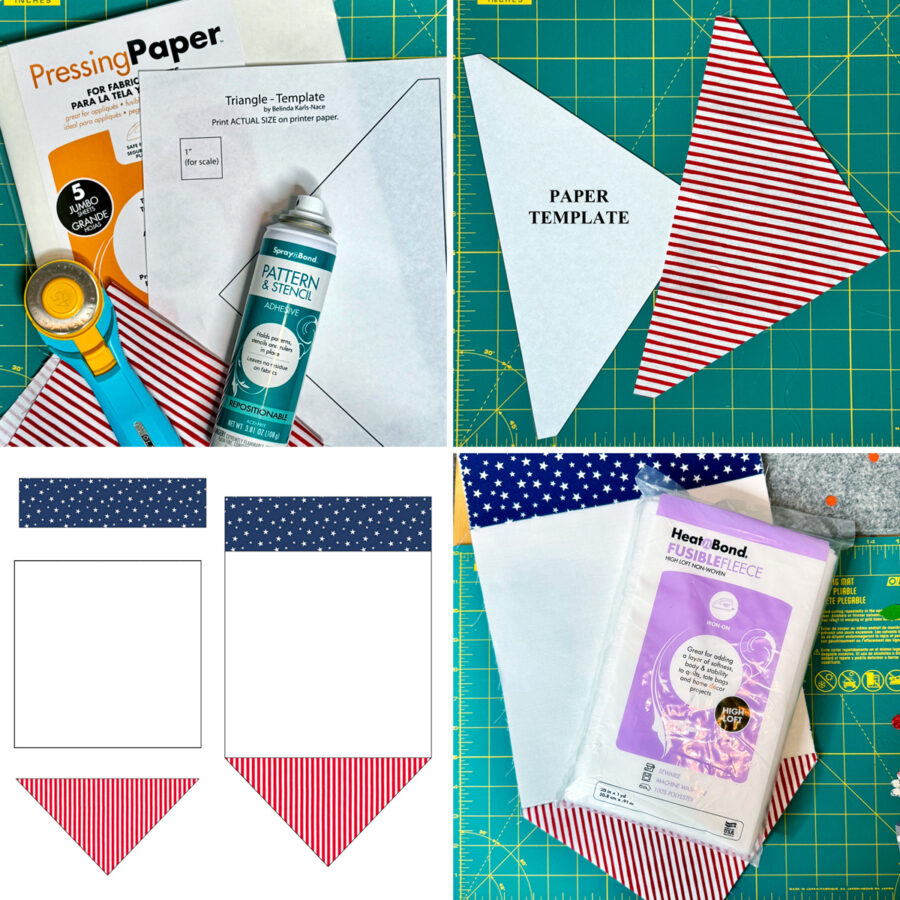
- HeatnBond Lite EZ-Print Iron-On Adhesive Sheet 10 pk, 8.5 in x 11 in
- 2 Sheets
- HeatnBond Fusible Fleece
- 1 – 10” x 17 ½”
- Pressing Paper Fabric and Craft Sheets
- 1 sheet
- HeatnBond Sparkle Paste by Jennifer Long Sew A Story
- Fire Truck
- Snowflake
- Royal Blue
- SpraynBond Pattern & Stencil Spray
- HeatnBond Craft Extra Firm Non-Woven Interfacing
- 1 – 10” x 17 ½”
- HeatnBond Fabric Fuse PeelnStick Fabric Adhesive Tape, 5/8 in
- Cotton Fabrics: Small pieces and scraps (the model uses two solids, Jailhouse Stripes in Waldo Red from Poppie Cotton, and an assortment of fabrics from the Land of Liberty Collection by My Mind’s Eye for Riley Blake – choose your favorite fabrics)
- Blue with Stars
- 1 – 10” x 3” (Banner Top)
- 4 – 4” x 3” (Tabs)
- White
- 1 – 10” x 10” (Banner Center/Background)
- 3 – 4” x 3” (Stars/Flower Centers – paint with Sparkle Paste)
- Red and White Stripe
- 1 – 10 ½” x 5 ½” Banner Bottom)
- Green
- 1 – 7” x 7” (Stems and Leaves)
- Blue and White Woven
- 1 – 4 ½” x 2 ½” (Flower Basket)
- Assorted Red, White and Blue
- 3 – 6” x 2” (Flower Blossoms)
- Backing
- 1 – 10” x 17 ½”
- Blue with Stars
- Optional – Small Buttons or 10mm Sequins (Flower Centers)
- Optional – Garden Flag Stand or Small Quilt Hanger
- Oliso Iron
- Olfa Cutting Tools (cutting mat, rotary cutter)
- Sewing Machine
- Basic Sewing Supplies/Tools (paintbrush or foam brush, small sharp scissors, pins and/or wonder clips, rulers, sewing thread, pencil, etc.)
How to Make a Sparkle Bouquet Banner (9 ½” x 17”)
Download and print the Sparkle Bouquet Banner PDF.
Sparkle Bouquet Banner – A Project for the Therm O Web Blog
Print actual size – do NOT “fit to page” or “shrink to fit.”
- Print pages 1 – 3 on regular printer paper.
- Print pages 4 – 5 on HeatnBond Lite EZ-Print Iron-On Adhesive Sheets (or trace shapes on HeatnBond Lite Iron-on Adhesive)
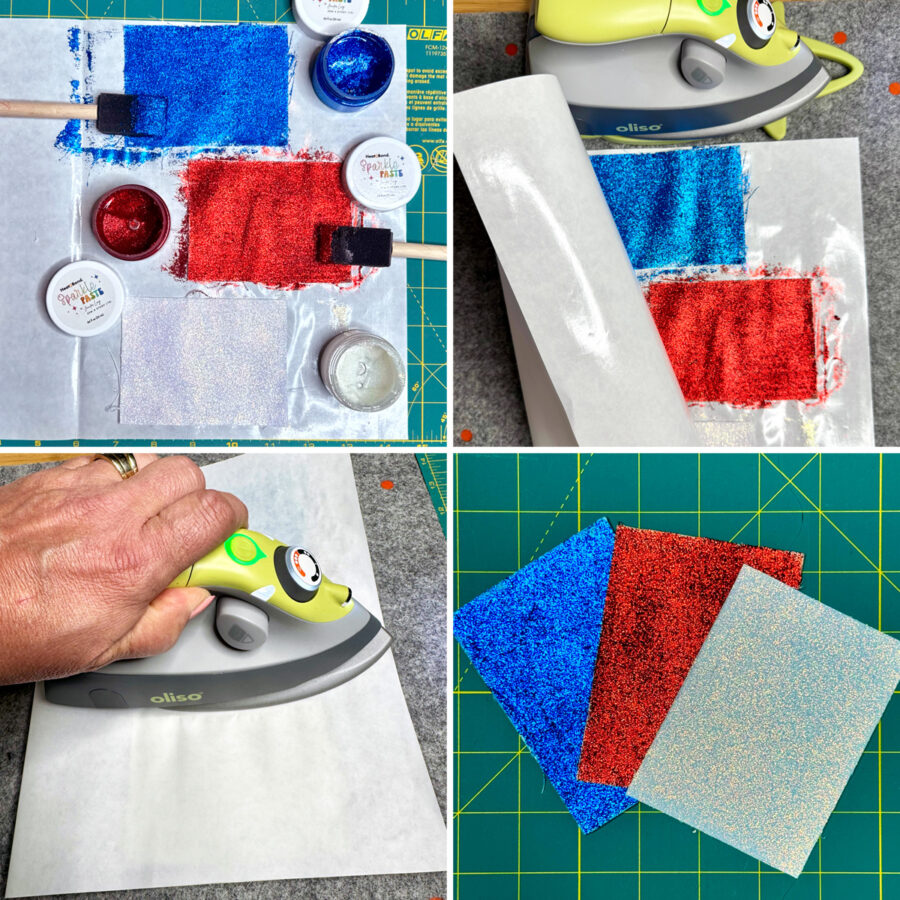
Prepare Sparkle Paste Fabrics
- Apply HeatnBond Sparkle Paste to three 4” x 3” pieces of white fabric; use Fire Truck for one, Snowflake for one, and Royal Blue for one. I used a small foam brush to apply. Play with the sparkle paste to get your desired results.
- Protect work surface with HeatnBond Pressing Paper. PRO TIP: Work on one side of the pressing paper – then cover with the other side when pressing.
- Apply the desired amount of Sparkle Paste to fabric with a brush or palette knife. Wash the tools immediately afterward in warm, soapy water.
- Let dry 1 hour.
- Preheat dry iron to cotton setting (high heat), no steam. Cover design with HeatnBond Pressing Paper and press with medium firm pressure for 60 seconds.
- Let Sparkle Paste cure for 24 hours. Sparkle Paste will now be permanent and machine washable.
- The durable glittery finish won’t flake off and will stand up to frequent use and handling.
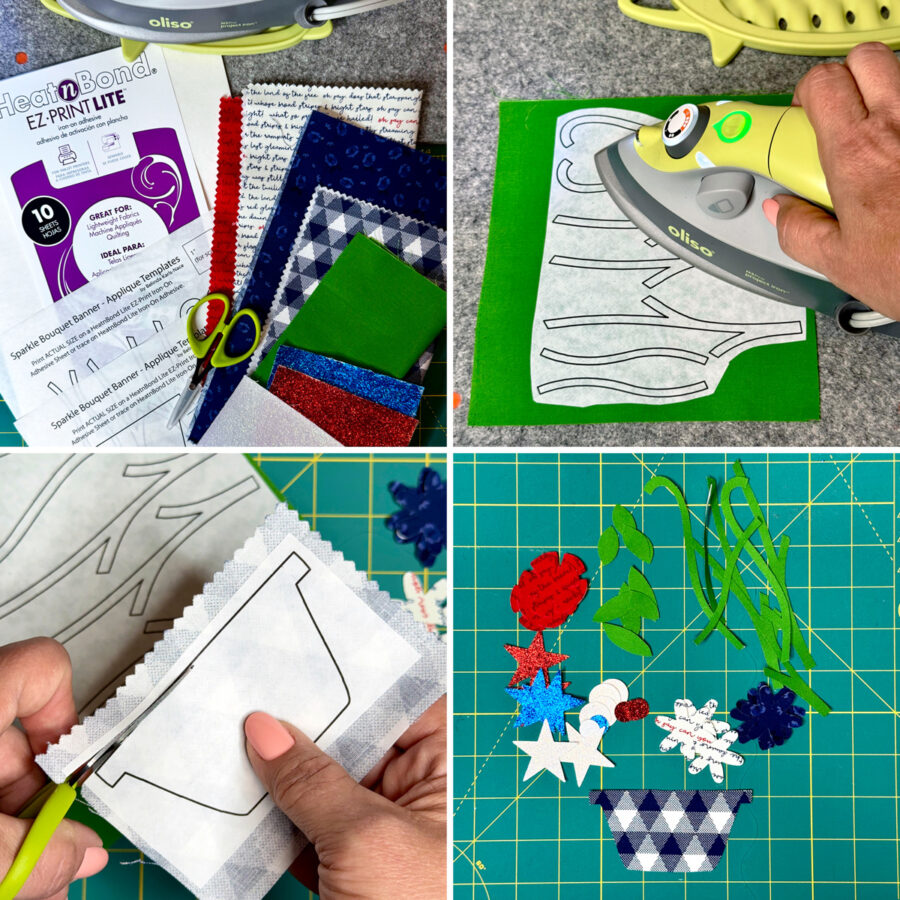
Prepare Appliqué Shapes
- Apply HeatnBond Lite Iron-On Adhesive to the back of coordinating fabrics (use the layout diagram on Page 2 of the pattern PDF to assist).
- Print or trace the applique shapes (pages 4 – 5 in the pattern PDF) on HeatnBond Lite Iron-on Adhesive.
- Pre-heat iron to medium heat, no steam.
- Place the printed/traced template shapes on the wrong side of fabrics (printed paper, smooth side, should be face up).
- Place and hold the iron on the paper for 2-3 seconds.
- Allow it to cool.
- Cut or trim the shapes on the printed/traced lines to create the desired shapes. Leave paper in place until ready to fuse in place.
Create Banner Top
- Cut out triangular template from the 10 ½” x 5 ½” piece of red and white striped fabric. Use SpraynBond Pattern & Stencil Spray to apply paper template for cutting.
- Shake can well. Hold can upright, 12 inches from pattern or stencil.
- Press spray pad button and apply a light coating of adhesive using a sweeping motion.
- Let dry 1 minute.
- Press pattern or stencil to fabric, repositioning as needed (this makes it easy to line up the stripes).
- Before storing can, hold upside down and press spray pad button for a short burst to clear nozzle
- Remove paper template from fabric and retain for assistance in trimming fusible fleece and backing unit.
- Assemble the top. Use a ¼” seam allowance. Press the seams open.
- Lay out, pin and sew the 10” x 3” blue star fabric strip to the top of the 10” x 10” white fabric square.
- Lay out, pin and sew the red and white striped triangle to the bottom of the 10” x 10” white fabric square.
- Apply 10” x 17½” piece of HeatnBond Fusible Fleece to the back of the combined banner top. Trim the fusible fleece to fit, use the triangle template from Step 1.
- Pre-heat iron to a medium setting, no steam.
- Place the rough side of the Fusible Fleece on the wrong side of the banner top unit.
- Cover with a lightweight, dry pressing cloth.
- Press and hold iron with medium pressure for 10-15 seconds. Repeat by lifting iron to new area, slightly overlapping previous area until the entire surface is bonded.
- Allow it to cool.
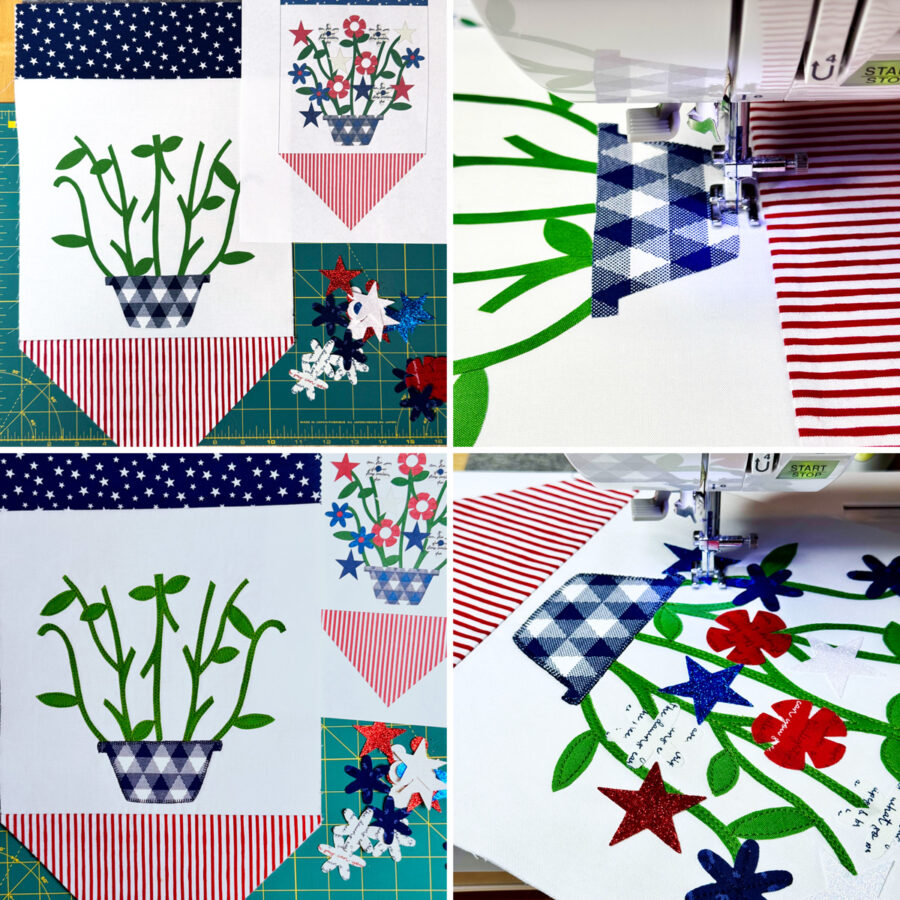
Apply the Appliqué
- Using the layout diagram provided on Page 2 of the pattern PDF, fuse the appliqué shapes in place. Attach shapes using your favorite machine appliqué stitches (the model used straight stitch and blanket stitch). For the easiest application, apply the stems, leaves, and basket first, followed by the stars, flowers and flower centers.
- Preheat iron to medium heat, No steam.
- Place template shapes, adhesive side down, on top of center banner section (white background). Press and hold iron for 6 seconds on each section until the entire piece is bonded.
- Hand or machine sew along edges.
- Optional: Add buttons or sequins to the centers of flowers, if desired. Model added sequins to the centers of the red flowers with the sparkle white centers to add additional shimmer.
Add Hanging Tabs
- Create hanging tabs.
- Fold a 4” x 3” piece of blue star fabric in half lengthwise to measure 2” x 3”. Press to get a center crease.
- Open fabric and press both outer edges to center crease.
- Fold in half on original crease to measure 1” x 3” with raw edged hidden inside.
- Top stitch ⅛” and a ¼” from each edge.
- Make four.
- Baste hanging tabs in place.
- Fold each tab in half and line up raw edges with the top of the combined banner unit.
- Evenly space tabs across the top. I measured in 1 ½” from the edge and placed one, then placed the tabs 1” apart.
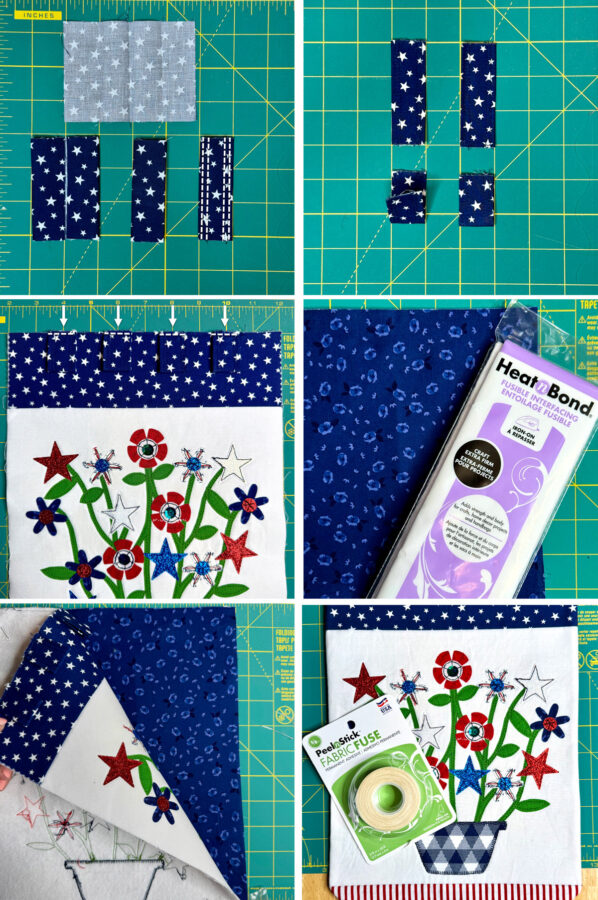
Finish the Banner
- Apply the 10” x 17 ½” piece of HeatnBond Craft Extra Firm Non-Woven Interfacing to the wrong side of the piece of 10” x 17 ½” backing fabric. Trim the backing unit to align with the banner top unit (use the paper triangle template, if needed).
- Pre-heat iron to a high setting, no steam.
- Place the rough side of the fusible interfacing against the wrong side of the backing fabric.
- Cover with a lightweight, dry pressing cloth.
- Press and hold iron with medium pressure for 10-15 seconds. Repeat by lifting iron to new area, slightly overlapping previous area until the entire surface is bonded.
- Allow it to cool.
- Place combined banner top unit and combined backing fabric right sides together and sew around the perimeter with a ¼” seam allowance, leaving an approximate 3” opening for turning.
- Clip corners and turn right side out through opening. Push out corners and press well.
- Sew the opening closed or use HeatnBond Fabric Fuse PeelnStick Fabric Adhesive Tape, 5/8 in, to seal the opening left for turning closed (no sew, no heat).
- Adhere the tape inside the opening along the edge.
- Peel off the paper liner.
- Press opening closed with firm pressure. Try using the rounded side of a metal spoon and press down with your thumb while applying heavy, consistent pressure. The harder you press, the better the bond. Repeat this step on the back side of the item.
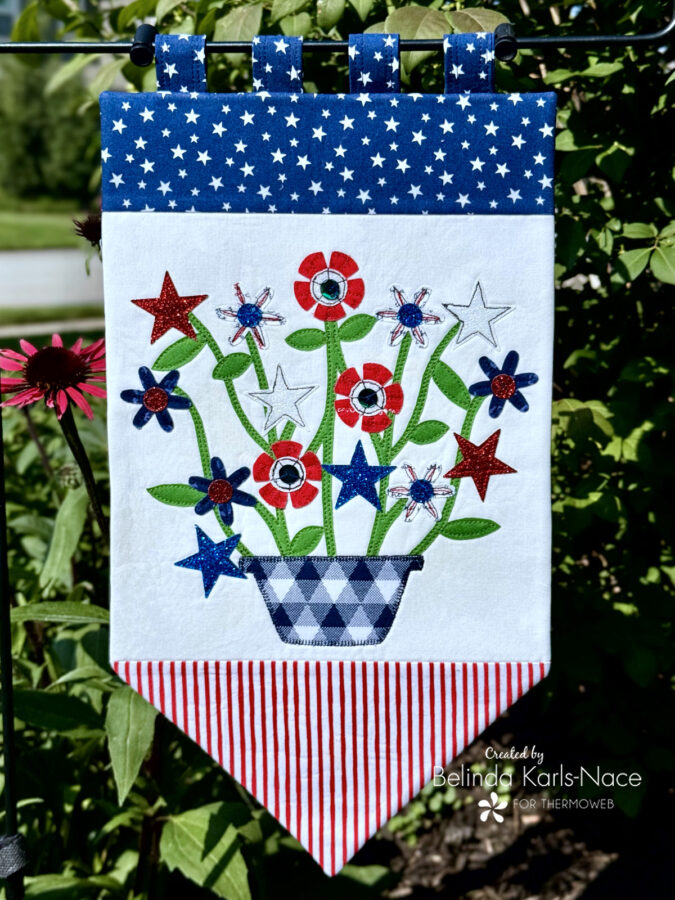

That’s a wrap!
And just like that, your Sparkle Bouquet Banner is ready to shine! Whether you hang it on a garden flag stand or a decorative wrought iron hanger, it’s sure to bring a pop of patriotic charm to your outdoor space. This banner makes a bright and happy seasonal display—perfect for summer celebrations or just adding a little handmade joy to your yard.
Thank you so much for joining me today for this Therm O Web blog tutorial! I hope this post inspires you to create your own Sparkle Bouquet Banner—it’s a great way to use up scrap fabrics and materials you already have on hand. If you’d like to see more of my projects and patterns, be sure to stop by my blog, website, or Instagram. I’d love to connect with you and see what you create—don’t forget to tag me so I can cheer you on!
