


 Hello and welcome!
It’s Julia from Inflorescence Designs! Everything is snowflakes and snowmen this week!
 When I think of falling snow, the word delicate comes to my mind. But for this tutorial, I wanted to make something edgy, modern and FUN!
Snowflake Door Decor with Deco Foil
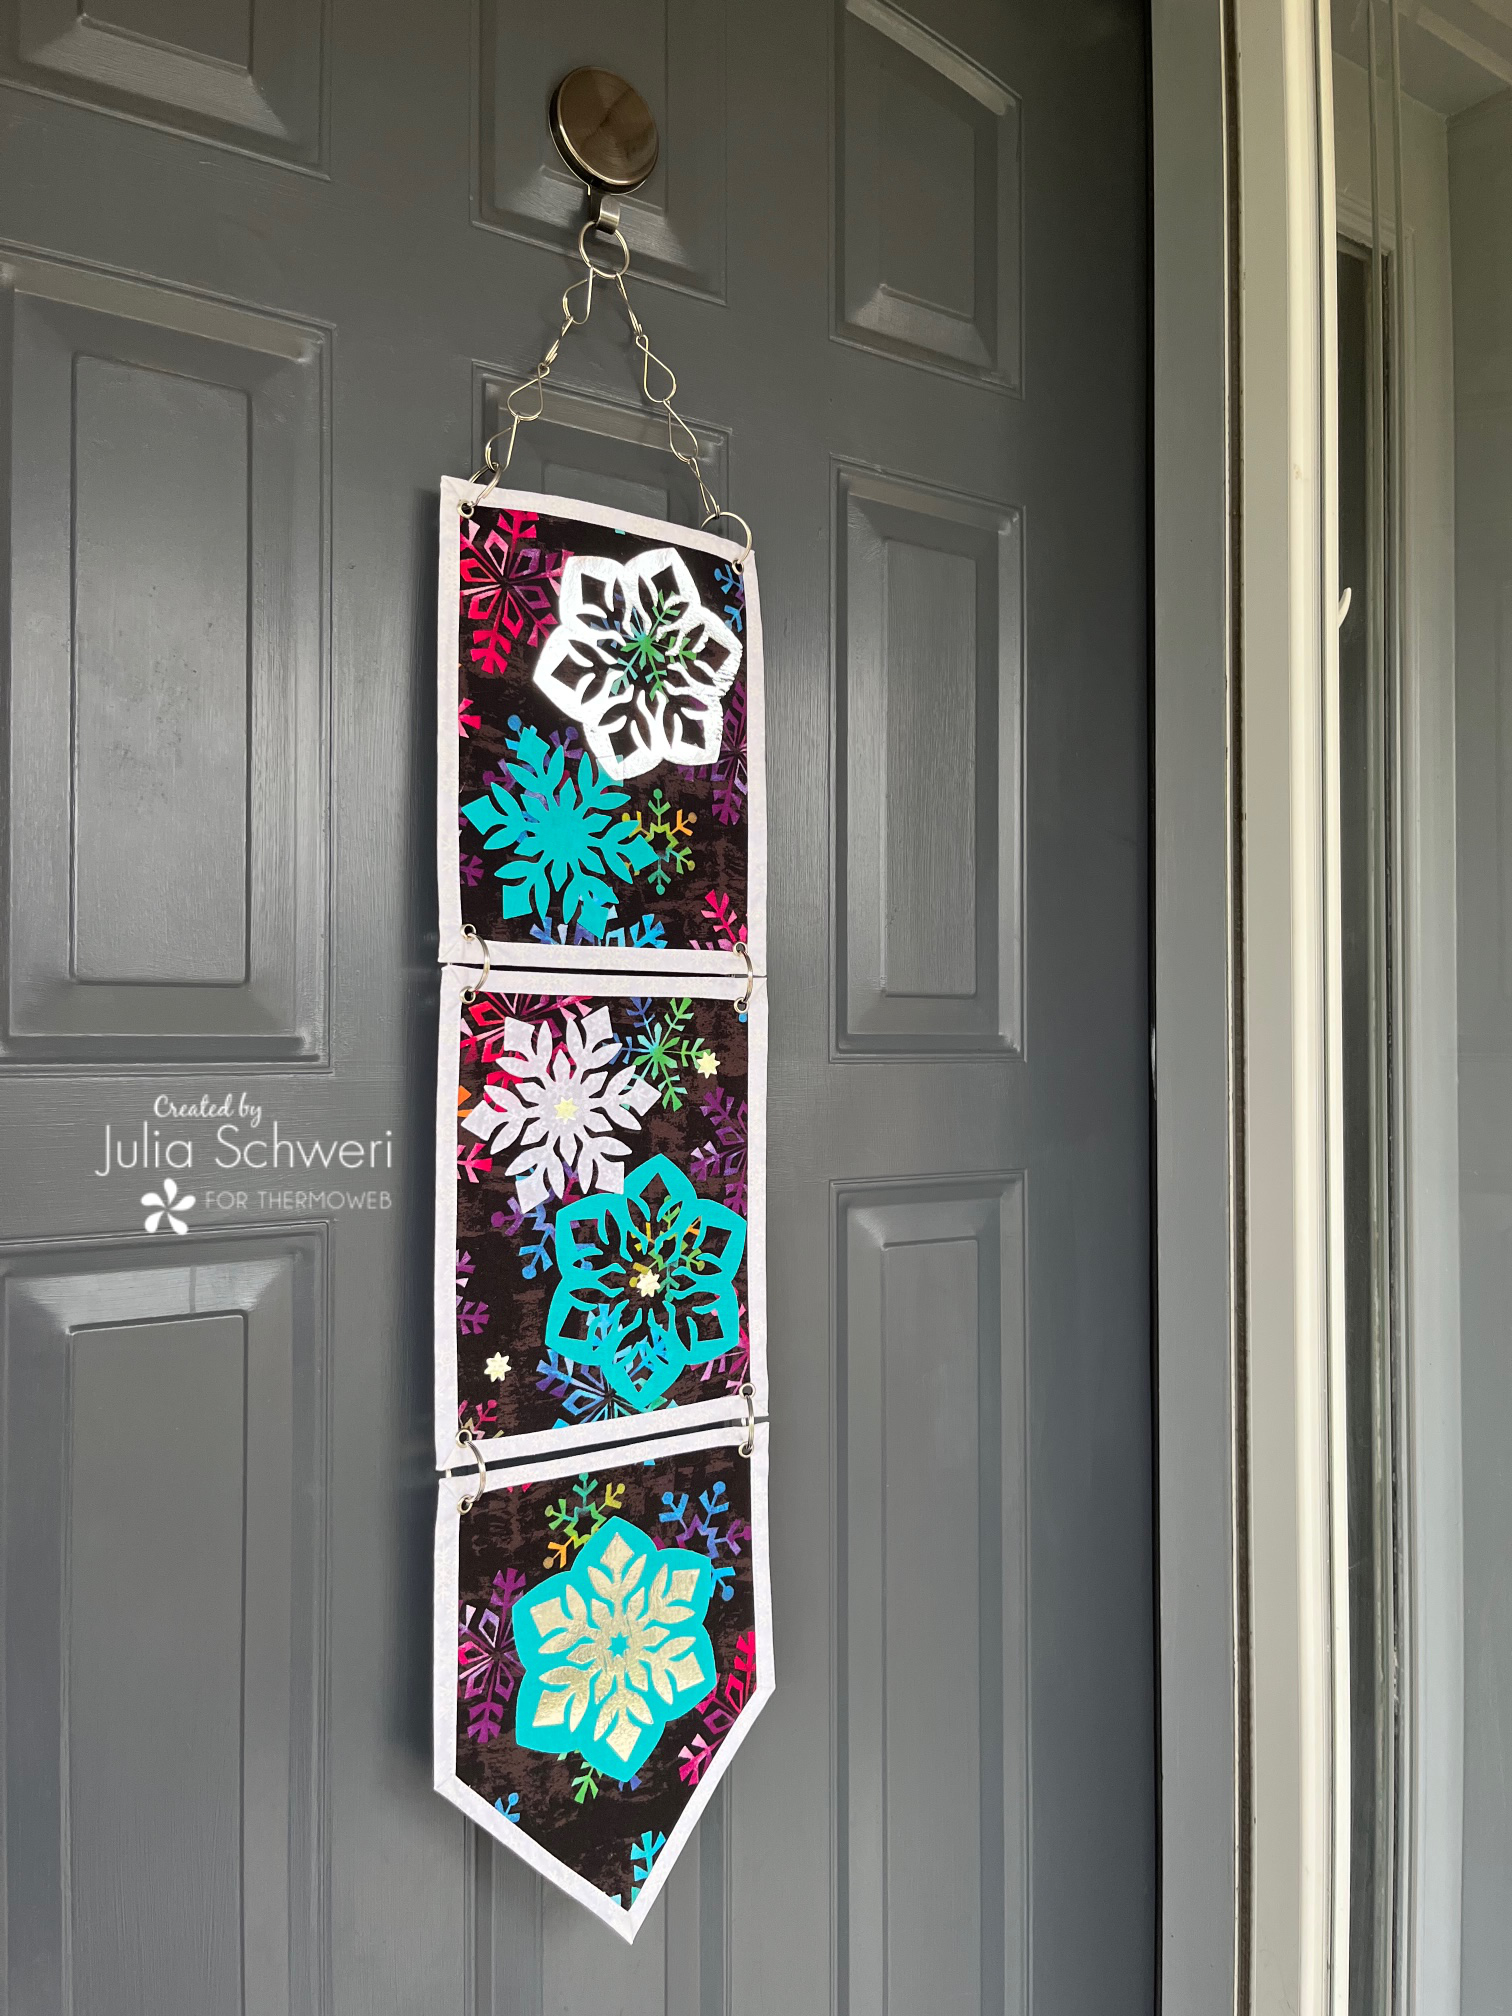
Beginner Sewing Pattern!
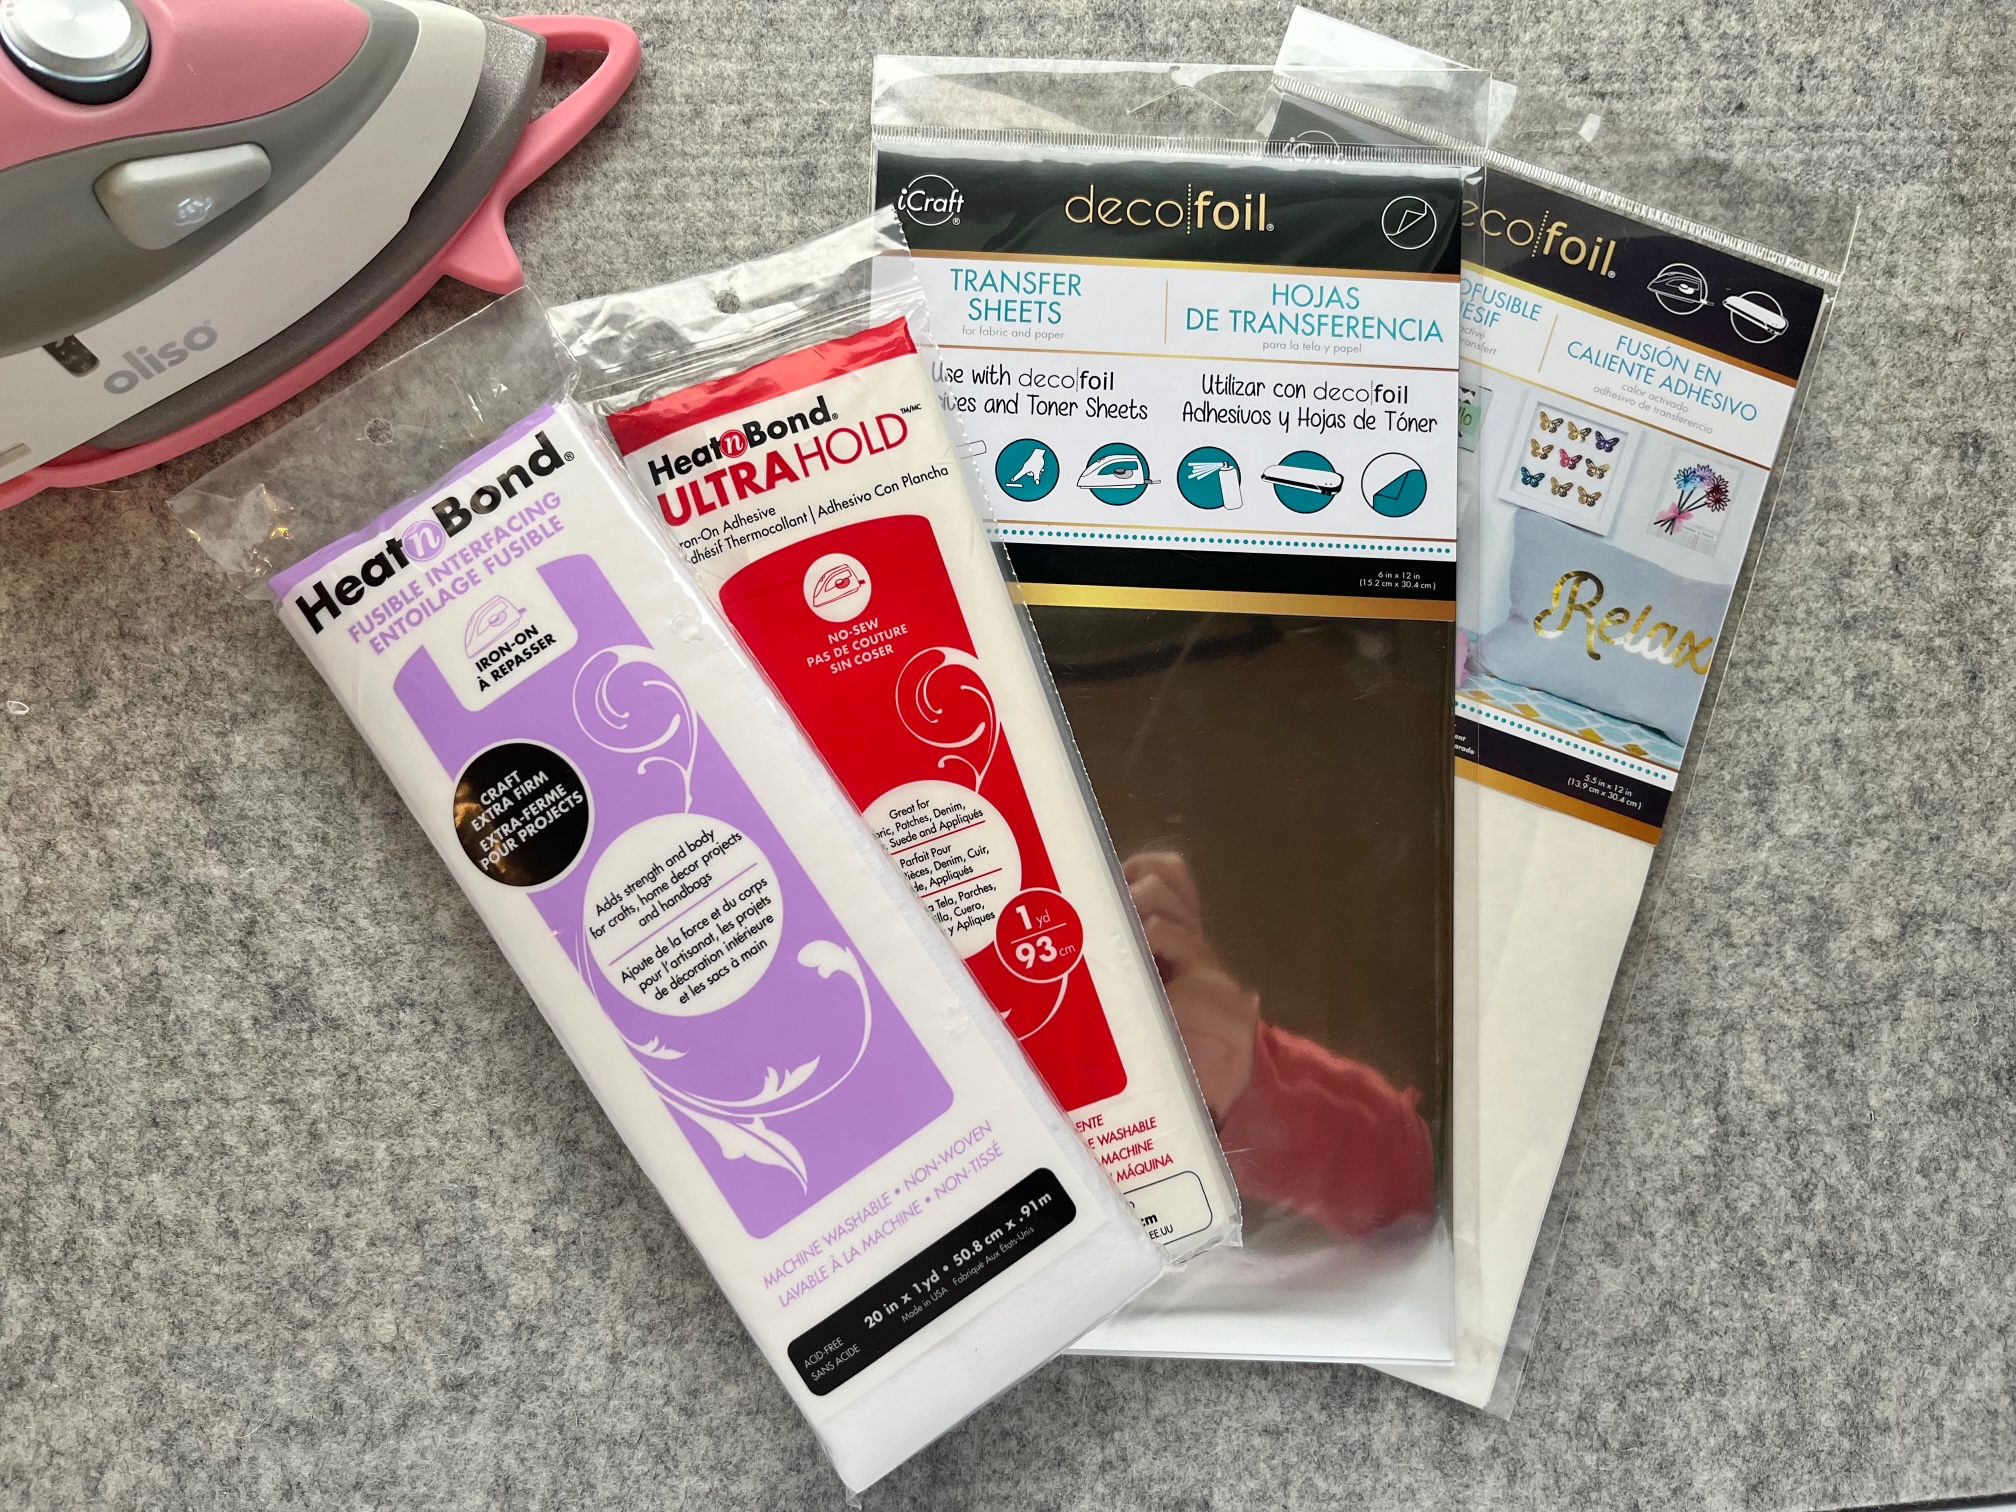
Supplies:
-
START BY DOWNLOADING THE FREE PDF PATTERN HERE!
- HeatnBond Ultra Hold
- HeatnBond Fusible Interfacing Craft Extra Firm (3) 8″ x 10″
- Deco Foil Hot Melt Fusible Adhesive
- Deco Foil Transfer Sheets Silver
- Additional Pressing Paper may be needed
- Crafter’s Edge Crossover II Machine
- Deco Snowflake Die
- Coordinating Cotton Fabric: Backing/Binding, Snowflakes and Background
- Backing: (3) 10″ x 12″
- Front Background (3) 8″ x 10″
- Snowflakes: Blue-6″ wide by 13″ long White: 6″ x 6 1/2″
- (10) 1/4″ grommets and necessary tools
- (7) 1 1/2″ split key rings
- (8) figure-eight split key rings (found at Joann’s in a multipack) OR more split key rings
- Hammer
- Awl and small scissors
- Basic sewing notions: sewing machine, clips, rotary cutter etc…
- Iron: I’m using the Oliso mini

Sewing Instructions:
Begin by…
Print off your FREE “Snowflake Door Decor” pattern located in the supplies list above. Cut out your fabric, fusible interfacing, and HeatnBond Ultra Hold.
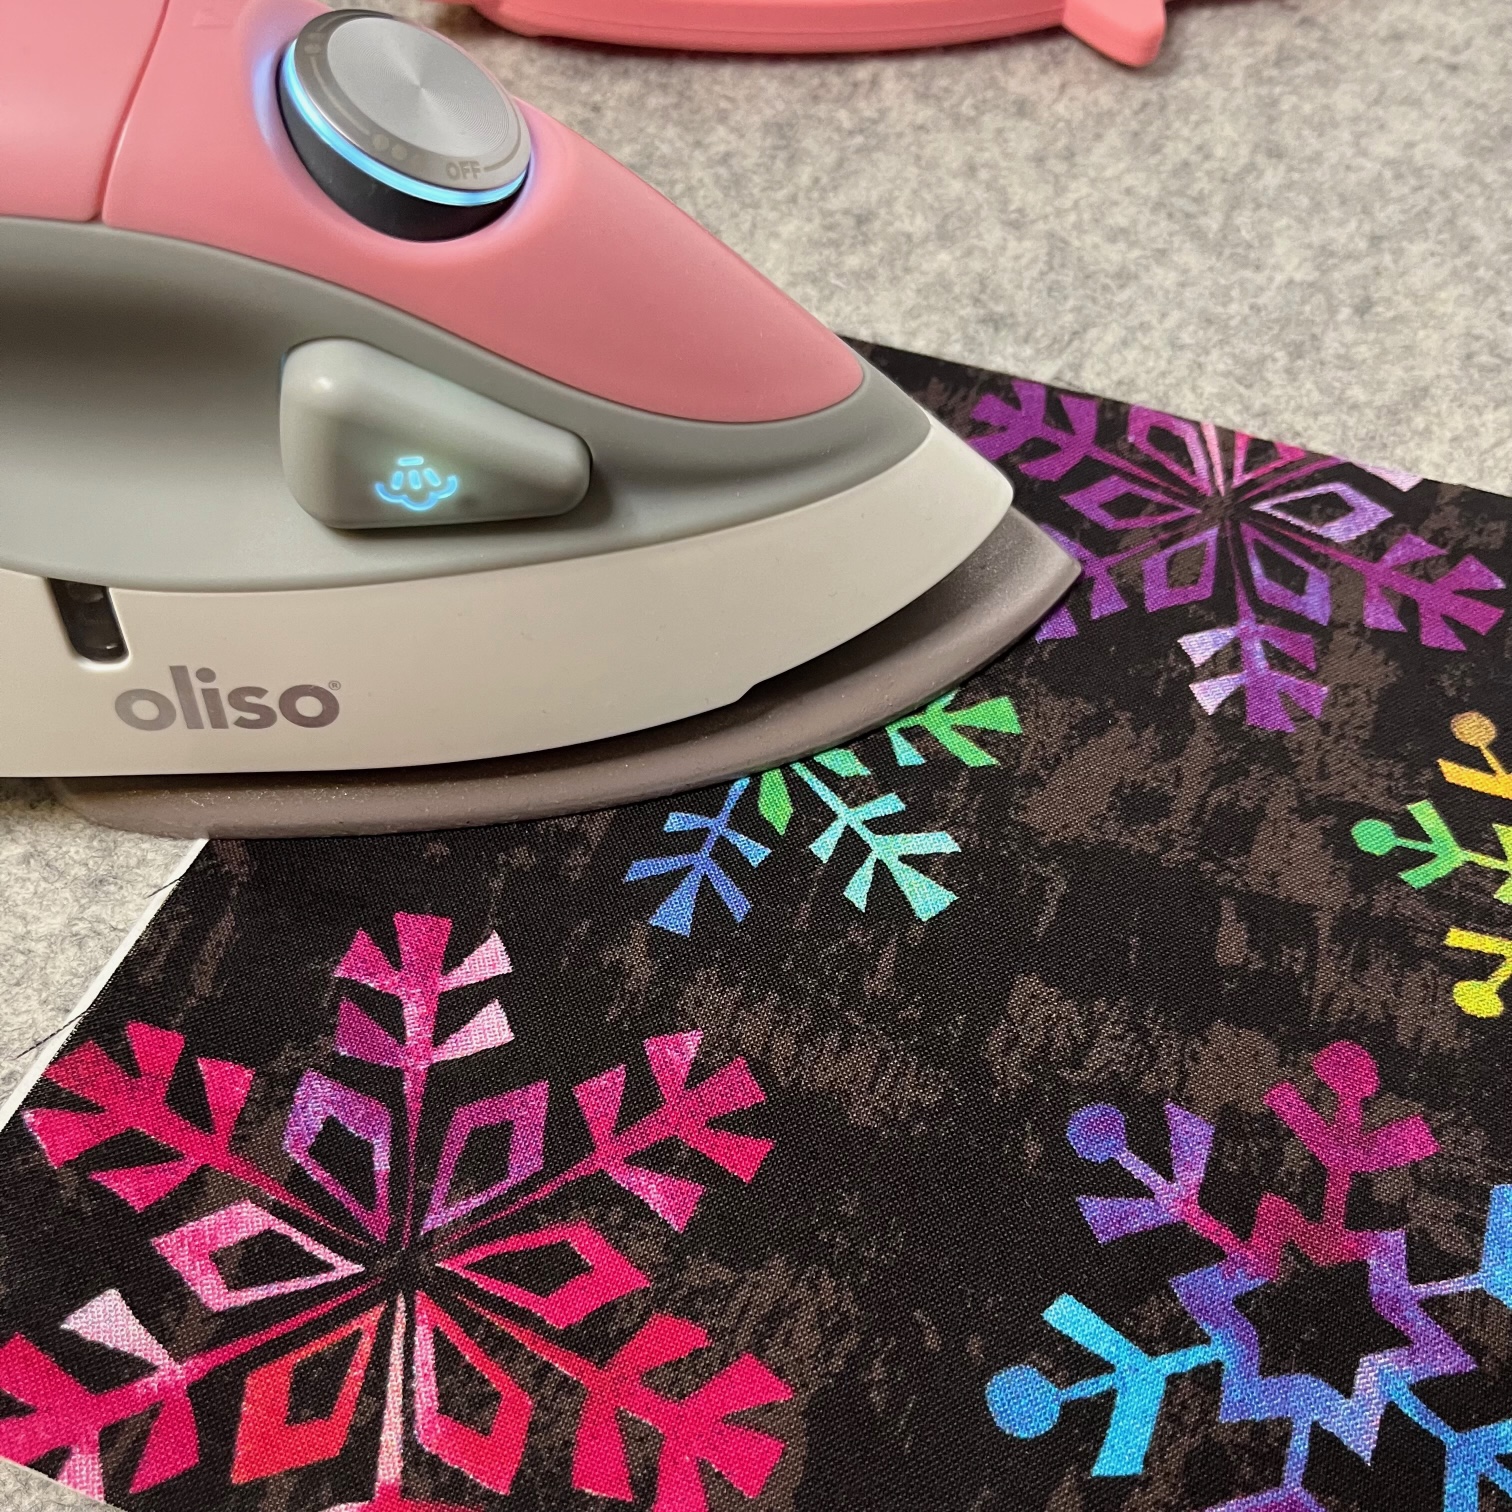
Fuse the HeatnBond craft firm interfacing to the front background fabric and fuse the HeatnBond Ultra Hold to the fabric chosen for your snowflakes.
Next…
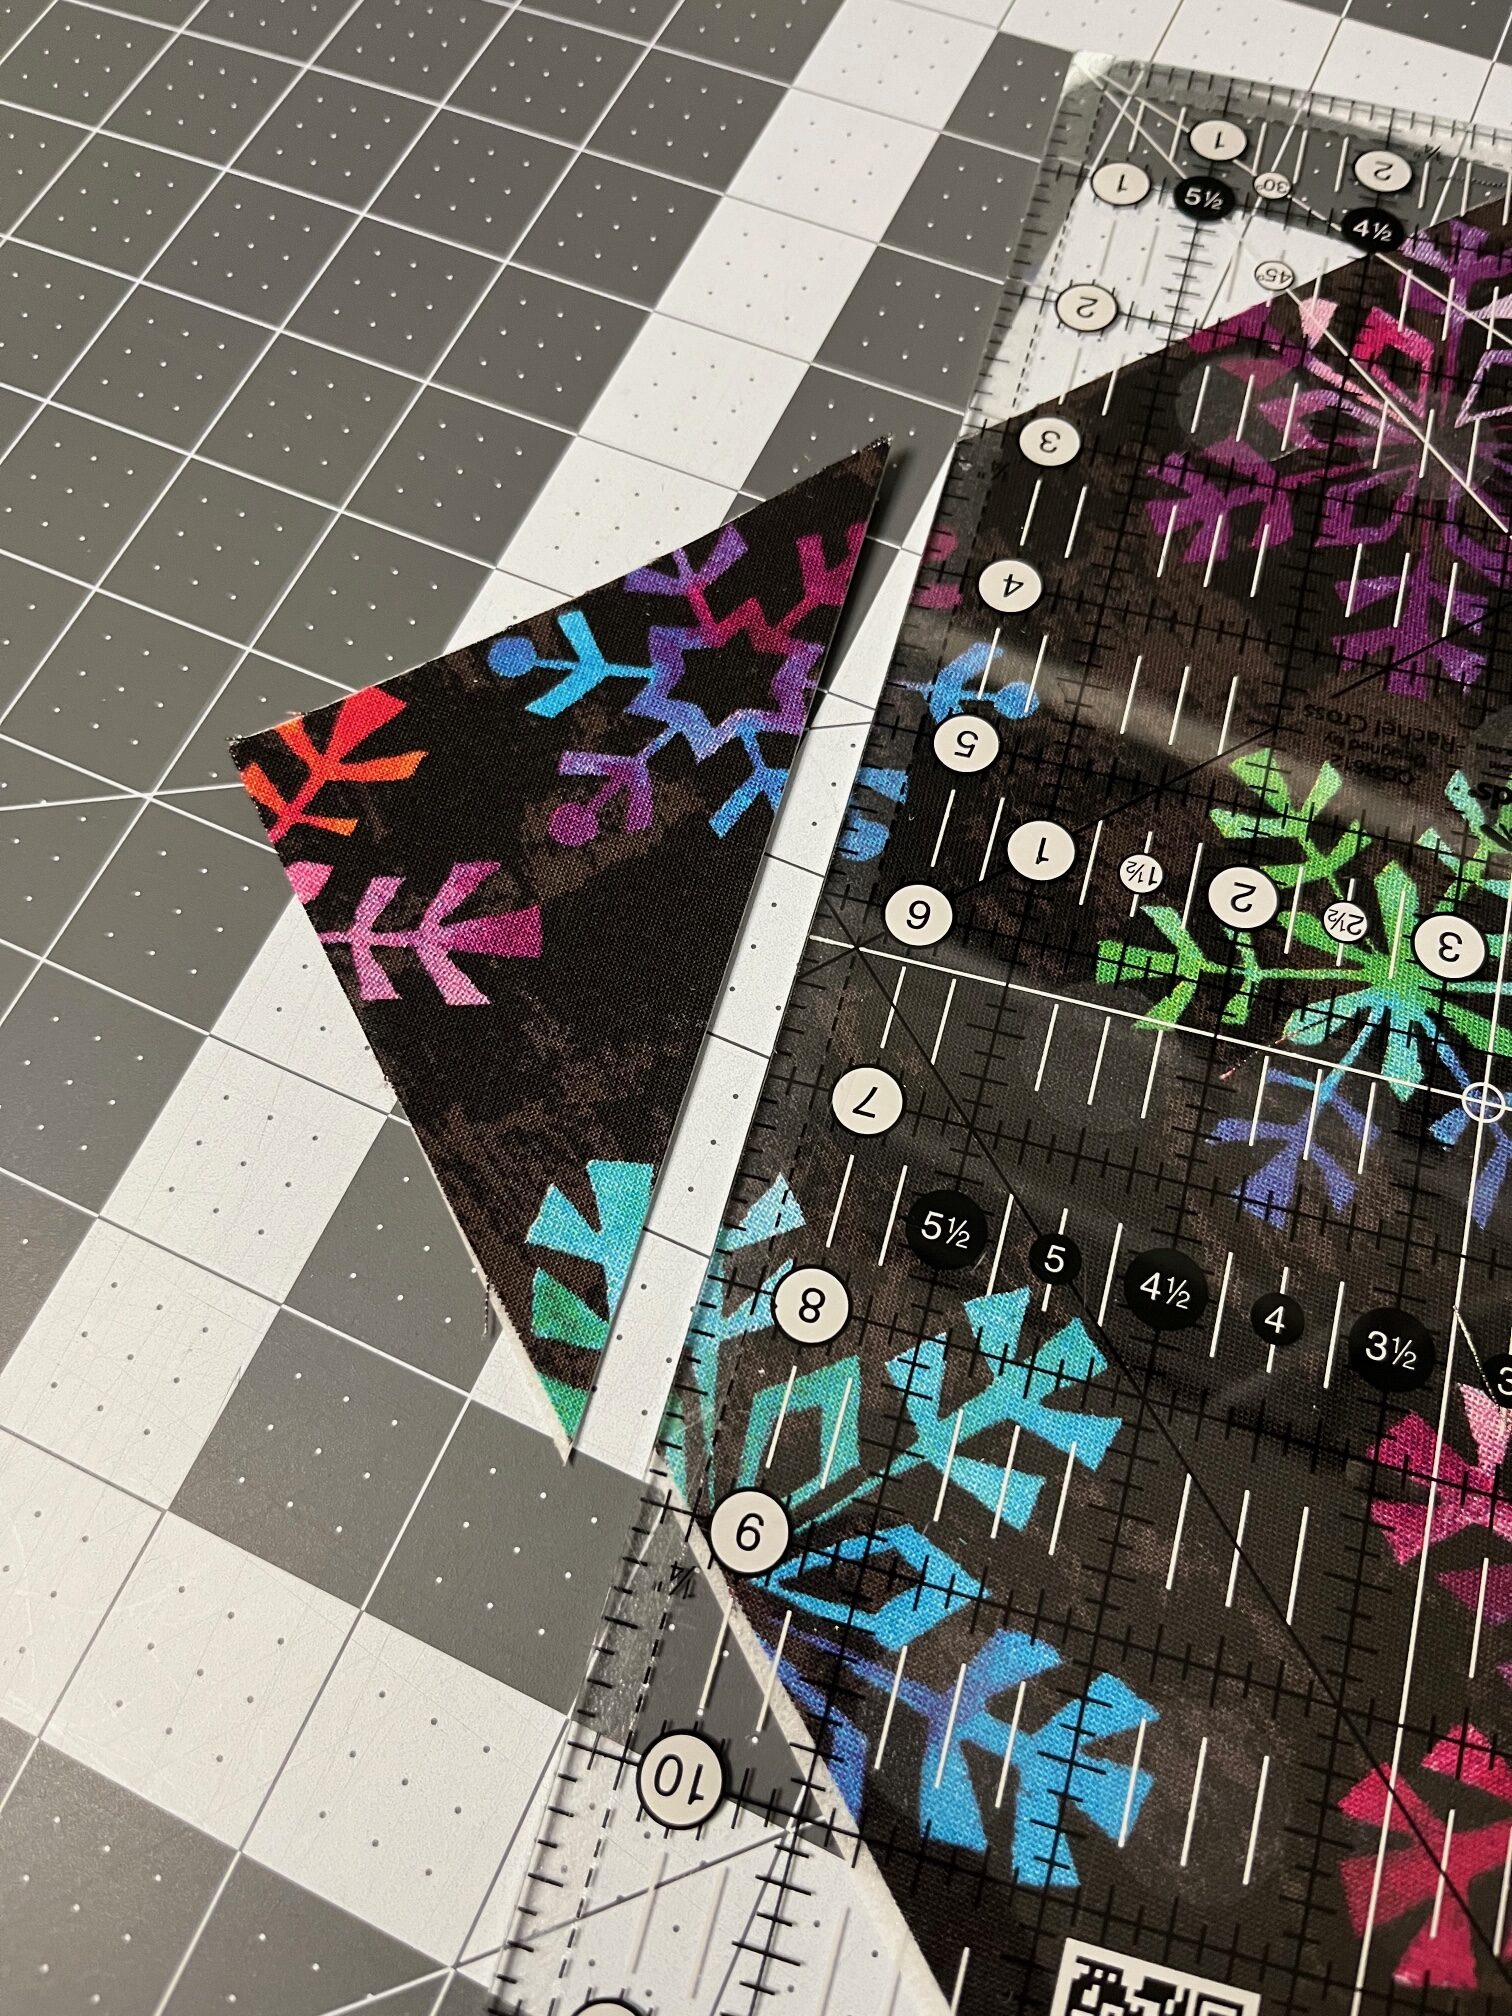
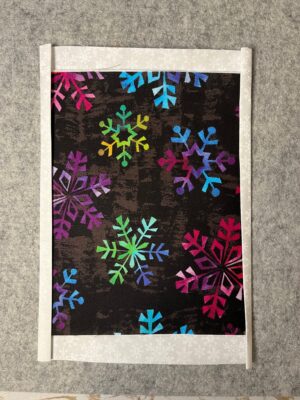
Trim the bottom panel piece. To do this, measure 4″ up on each side of the front background piece (long side) and 4″ over on the bottom edge (short side). Trim to create a point.
Repeat these steps with one of the white backing/binding rectangles but measure 5″ up from the bottom on both sides and 5″ over on the bottom edge.
Important Tip: For more detailed photo instructions, refer to the printable PDF pattern.
Next…
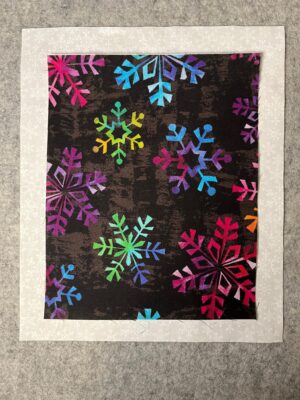
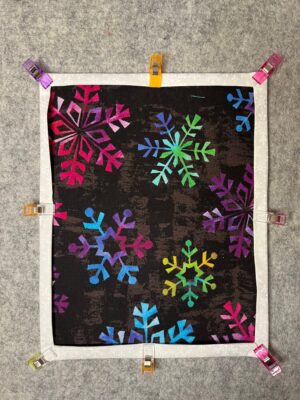
Layer the backing/binding rectangle and the front background fabric wrong sides together. Make sure the backing fabric extends evenly out around the front fabric piece.
Continue by folding over the backing fabric to where it meets the edge of the front fabric piece. Press to create a nice crisp hem. Fold over again and press. Do this for both long sides.
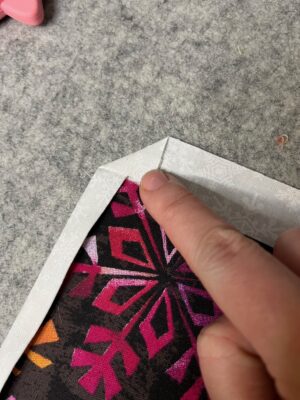
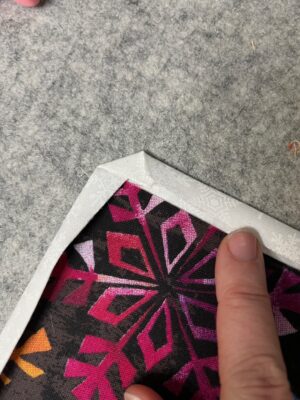
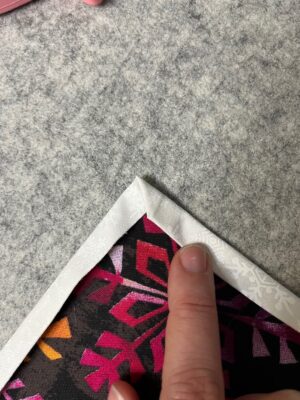
To create the mitered corners, follow the steps in the photos below: Begin by folding over the top corner to create a triangle. Press. Next, fold over the top backing fabric to where it almost meets the front fabric piece. Finally, fold over again and press well.
Continue…
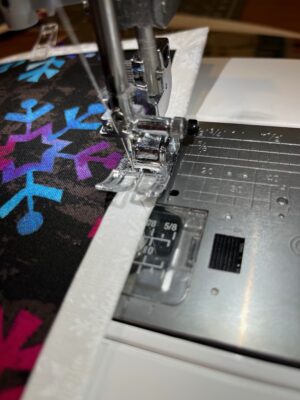
By topstitching the backing fabric to the front to create the look of binding. Do this to each of the three Snowflake Door Decor panels.
Important Tip: The pointed panel’s mitered corners are created the same way as the rectangle panels. The only difference is there are more corners to miter.
Deco Foil and HeatnBond Ultra Hold Instructions:
Begin by…
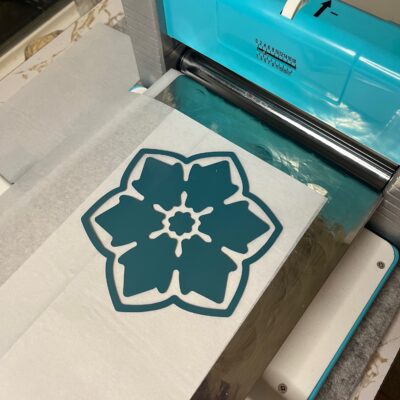
Cutting the snowflakes out of the fabric you fused using the HeatnBond Ultra Hold in the steps above.
For this project, I made the following snowflakes
- 1 blue whole outer snowflake
- 1 blue whole outer snowflake with 1 middle snowflake cut out
- 1 white center snowflake cut out
- 1 silver Deco Foil whole outer snowflake with 1 middle snowflake cut out as well as 1 tiny center star cut out. (see the photo below)
- 4 silver Deco Foil tiny center stars
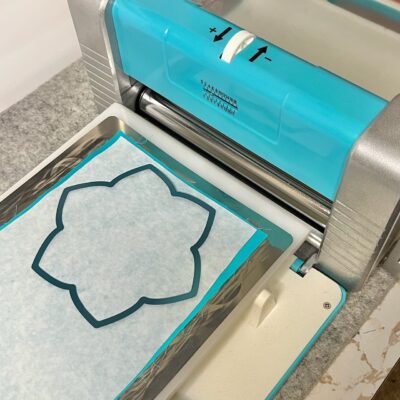
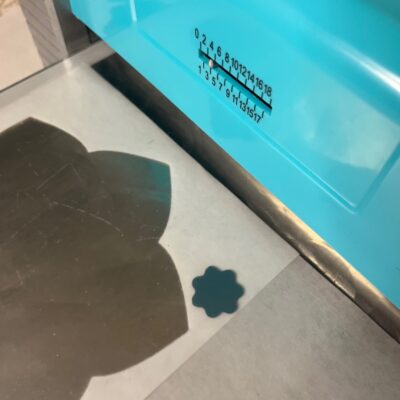
To create the silver Deco Foil snowflakes, begin by cutting out the Hot Melt adhesive. When cutting on the Crossover II place a sheet of pressing paper over the textured side of the adhesive before cutting.
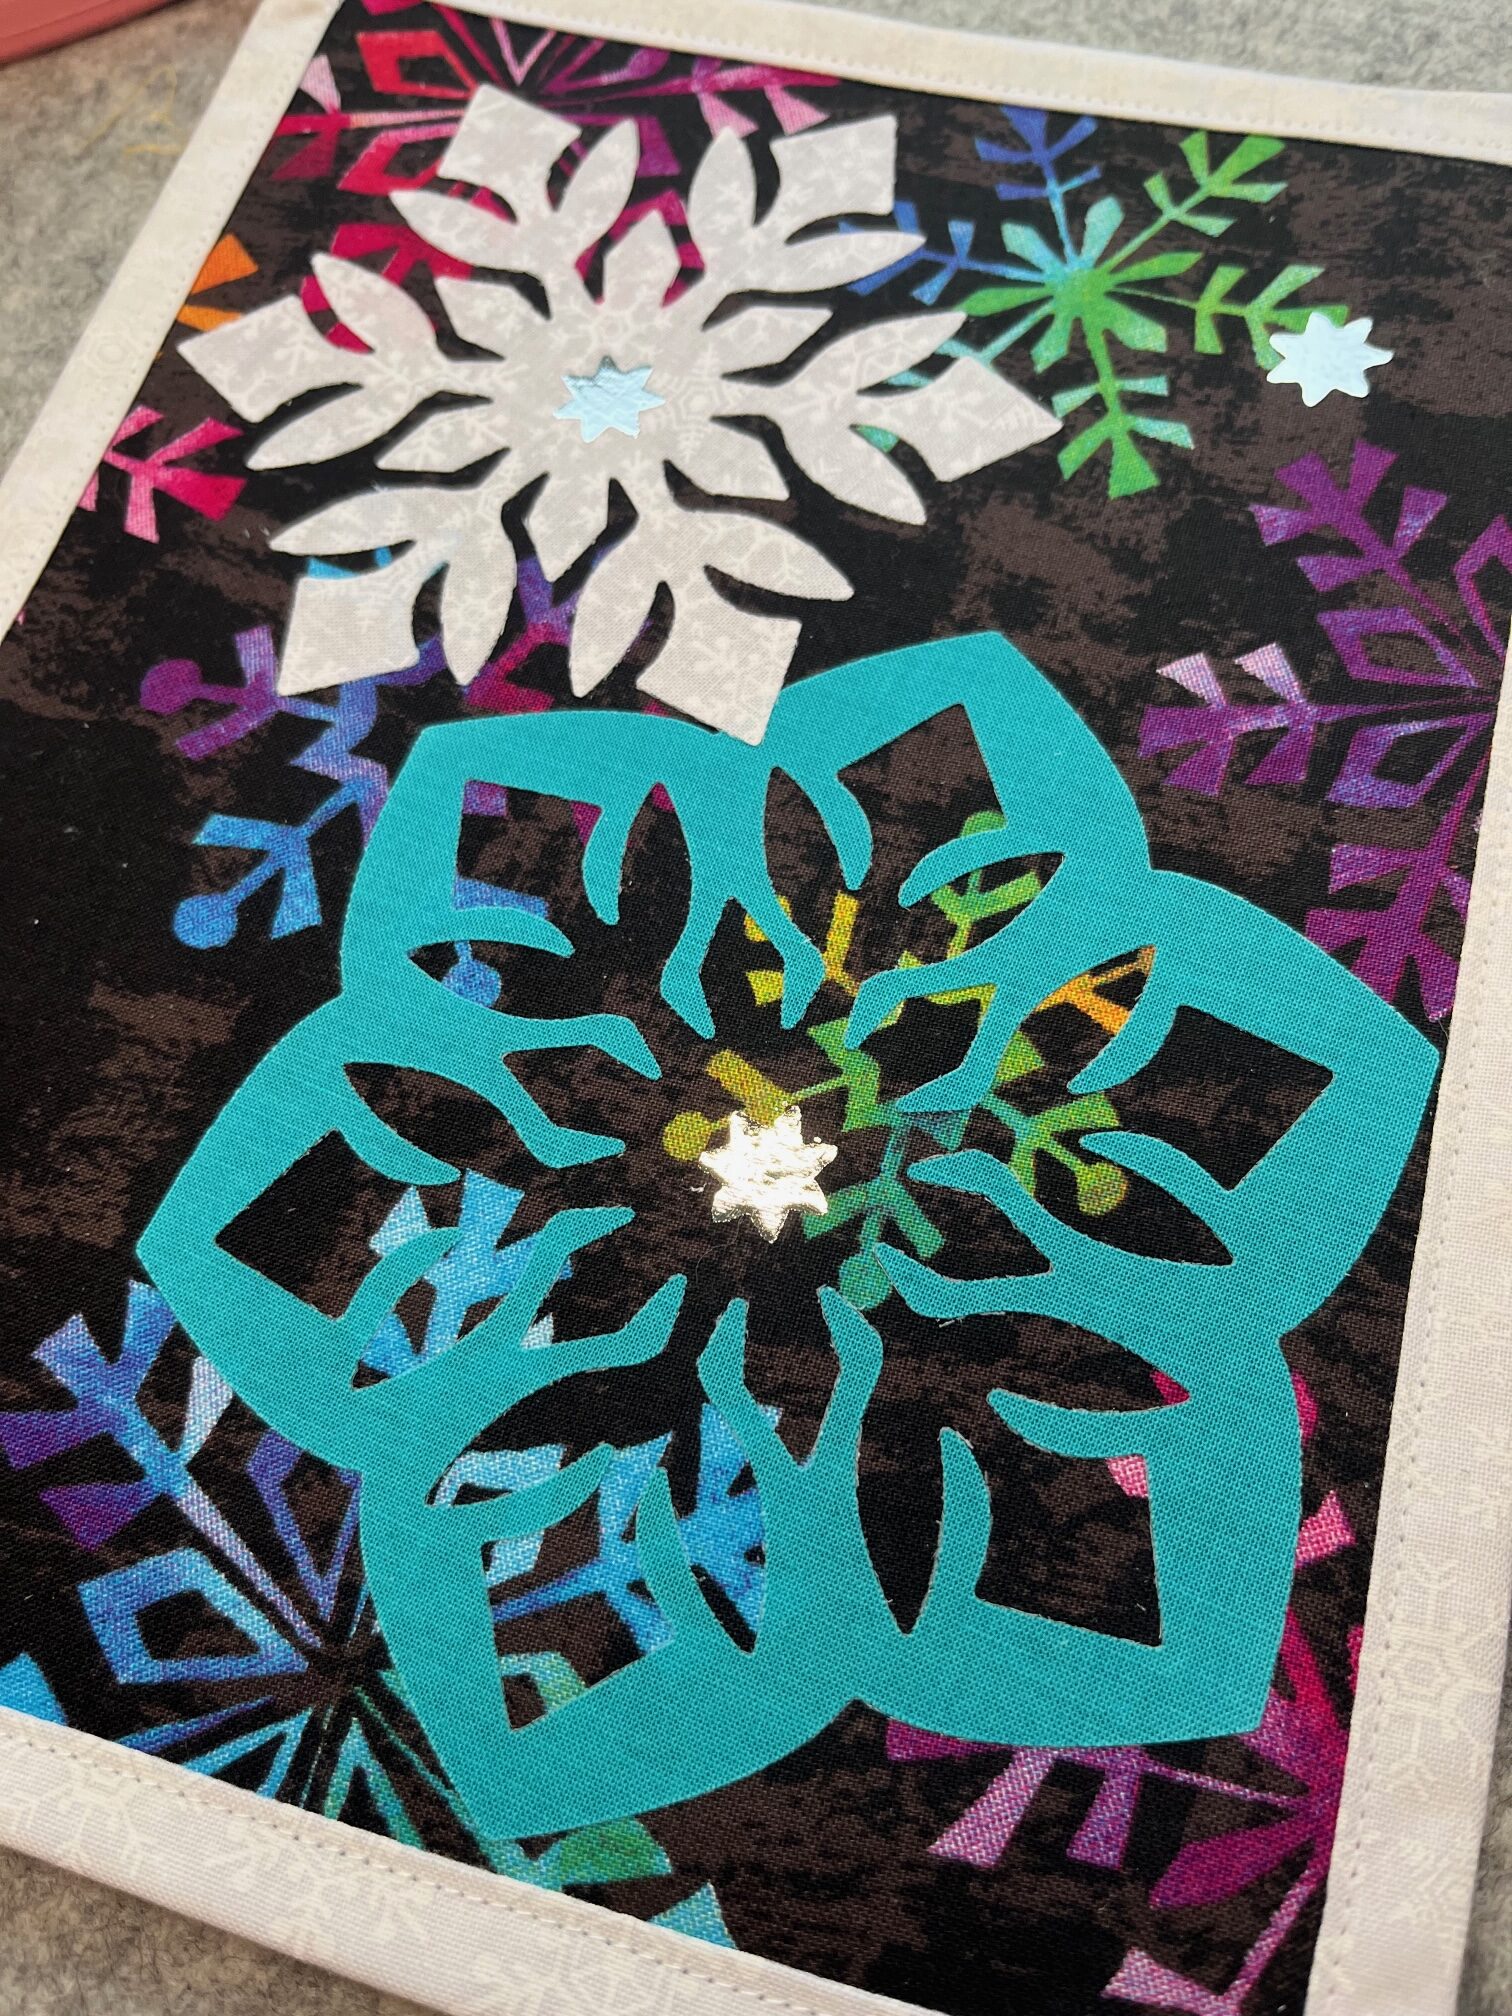
Once all the snowflakes have been cut out you can begin to bond them to your panels.
Bond the snowflakes according to the directions on each of the packages: Hot Melt Adhesive, Deco Foil, and HeatnBond Ultra Hold.
Important Tip: For more detailed photo instructions, including where to place each snowflake and how to step by step adhere the deco foil, refer to the printable PDF pattern.
Continue…
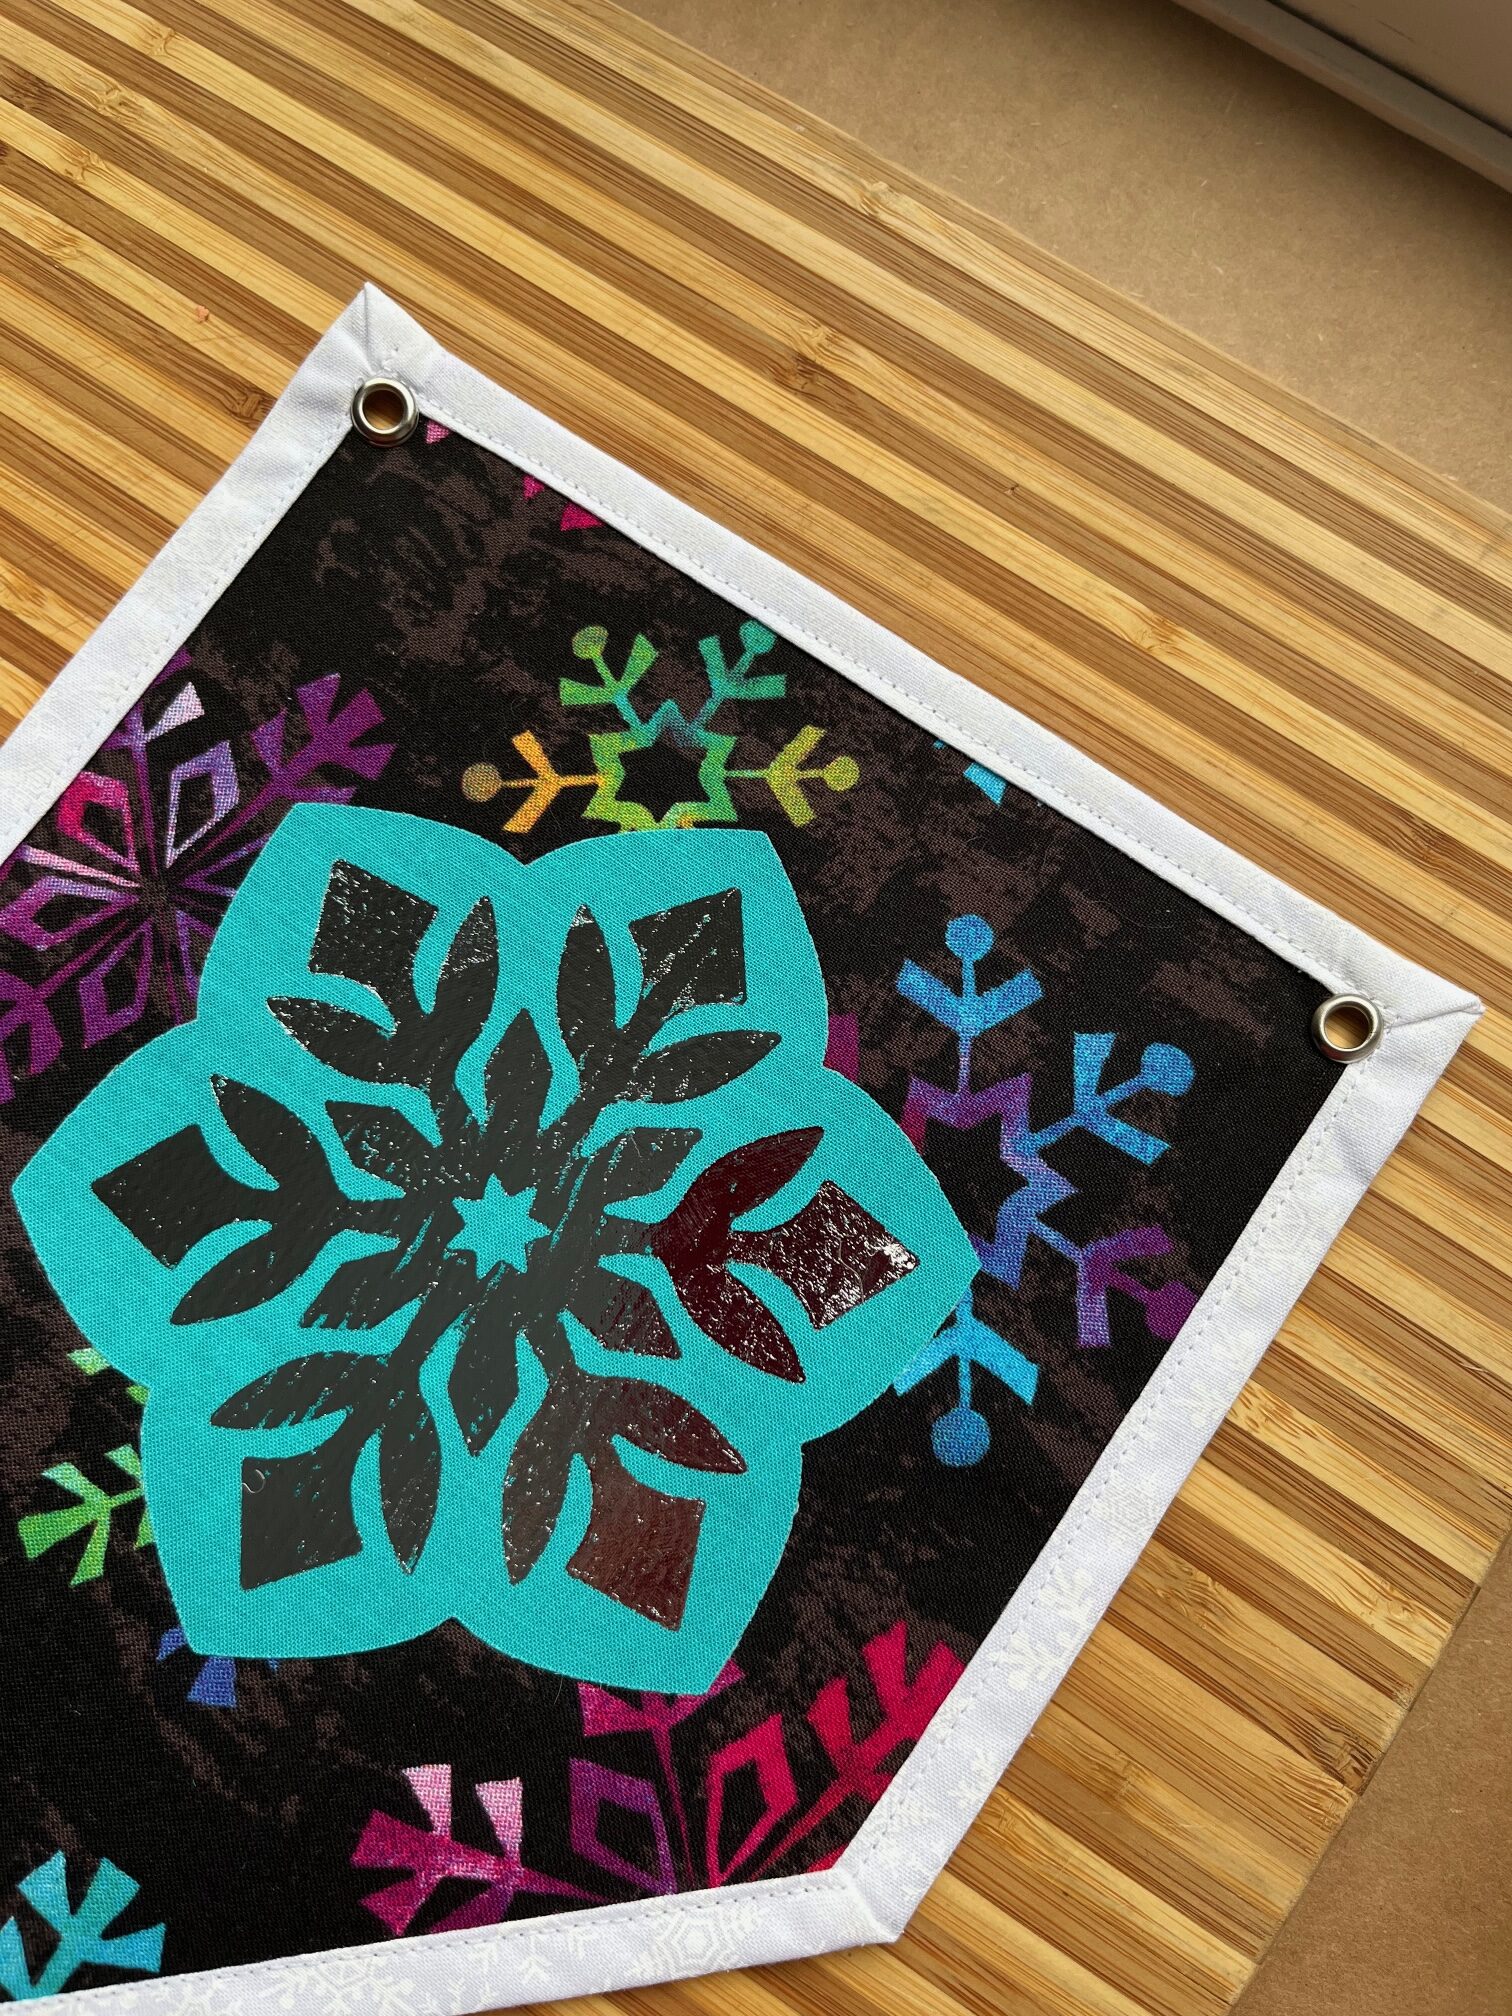
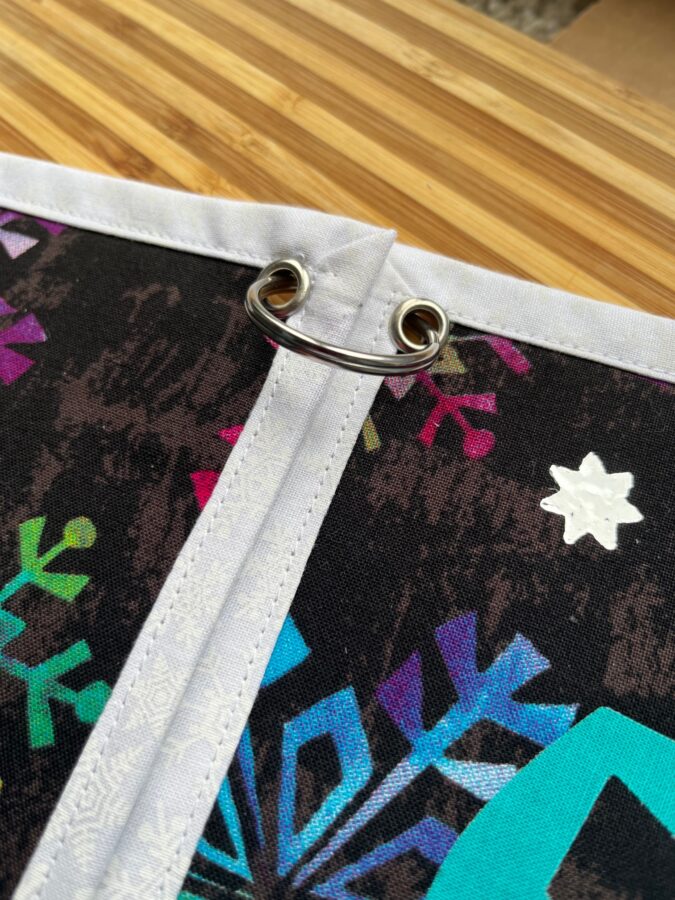
The Snowflake Door Decor by adding the 1/4″ grommets. The 2 rectangle panels each get 4 gromets and the pointed panel gets 2.
Finally…
Place the 1 1/2″ split key rings in place.
FINISHED!
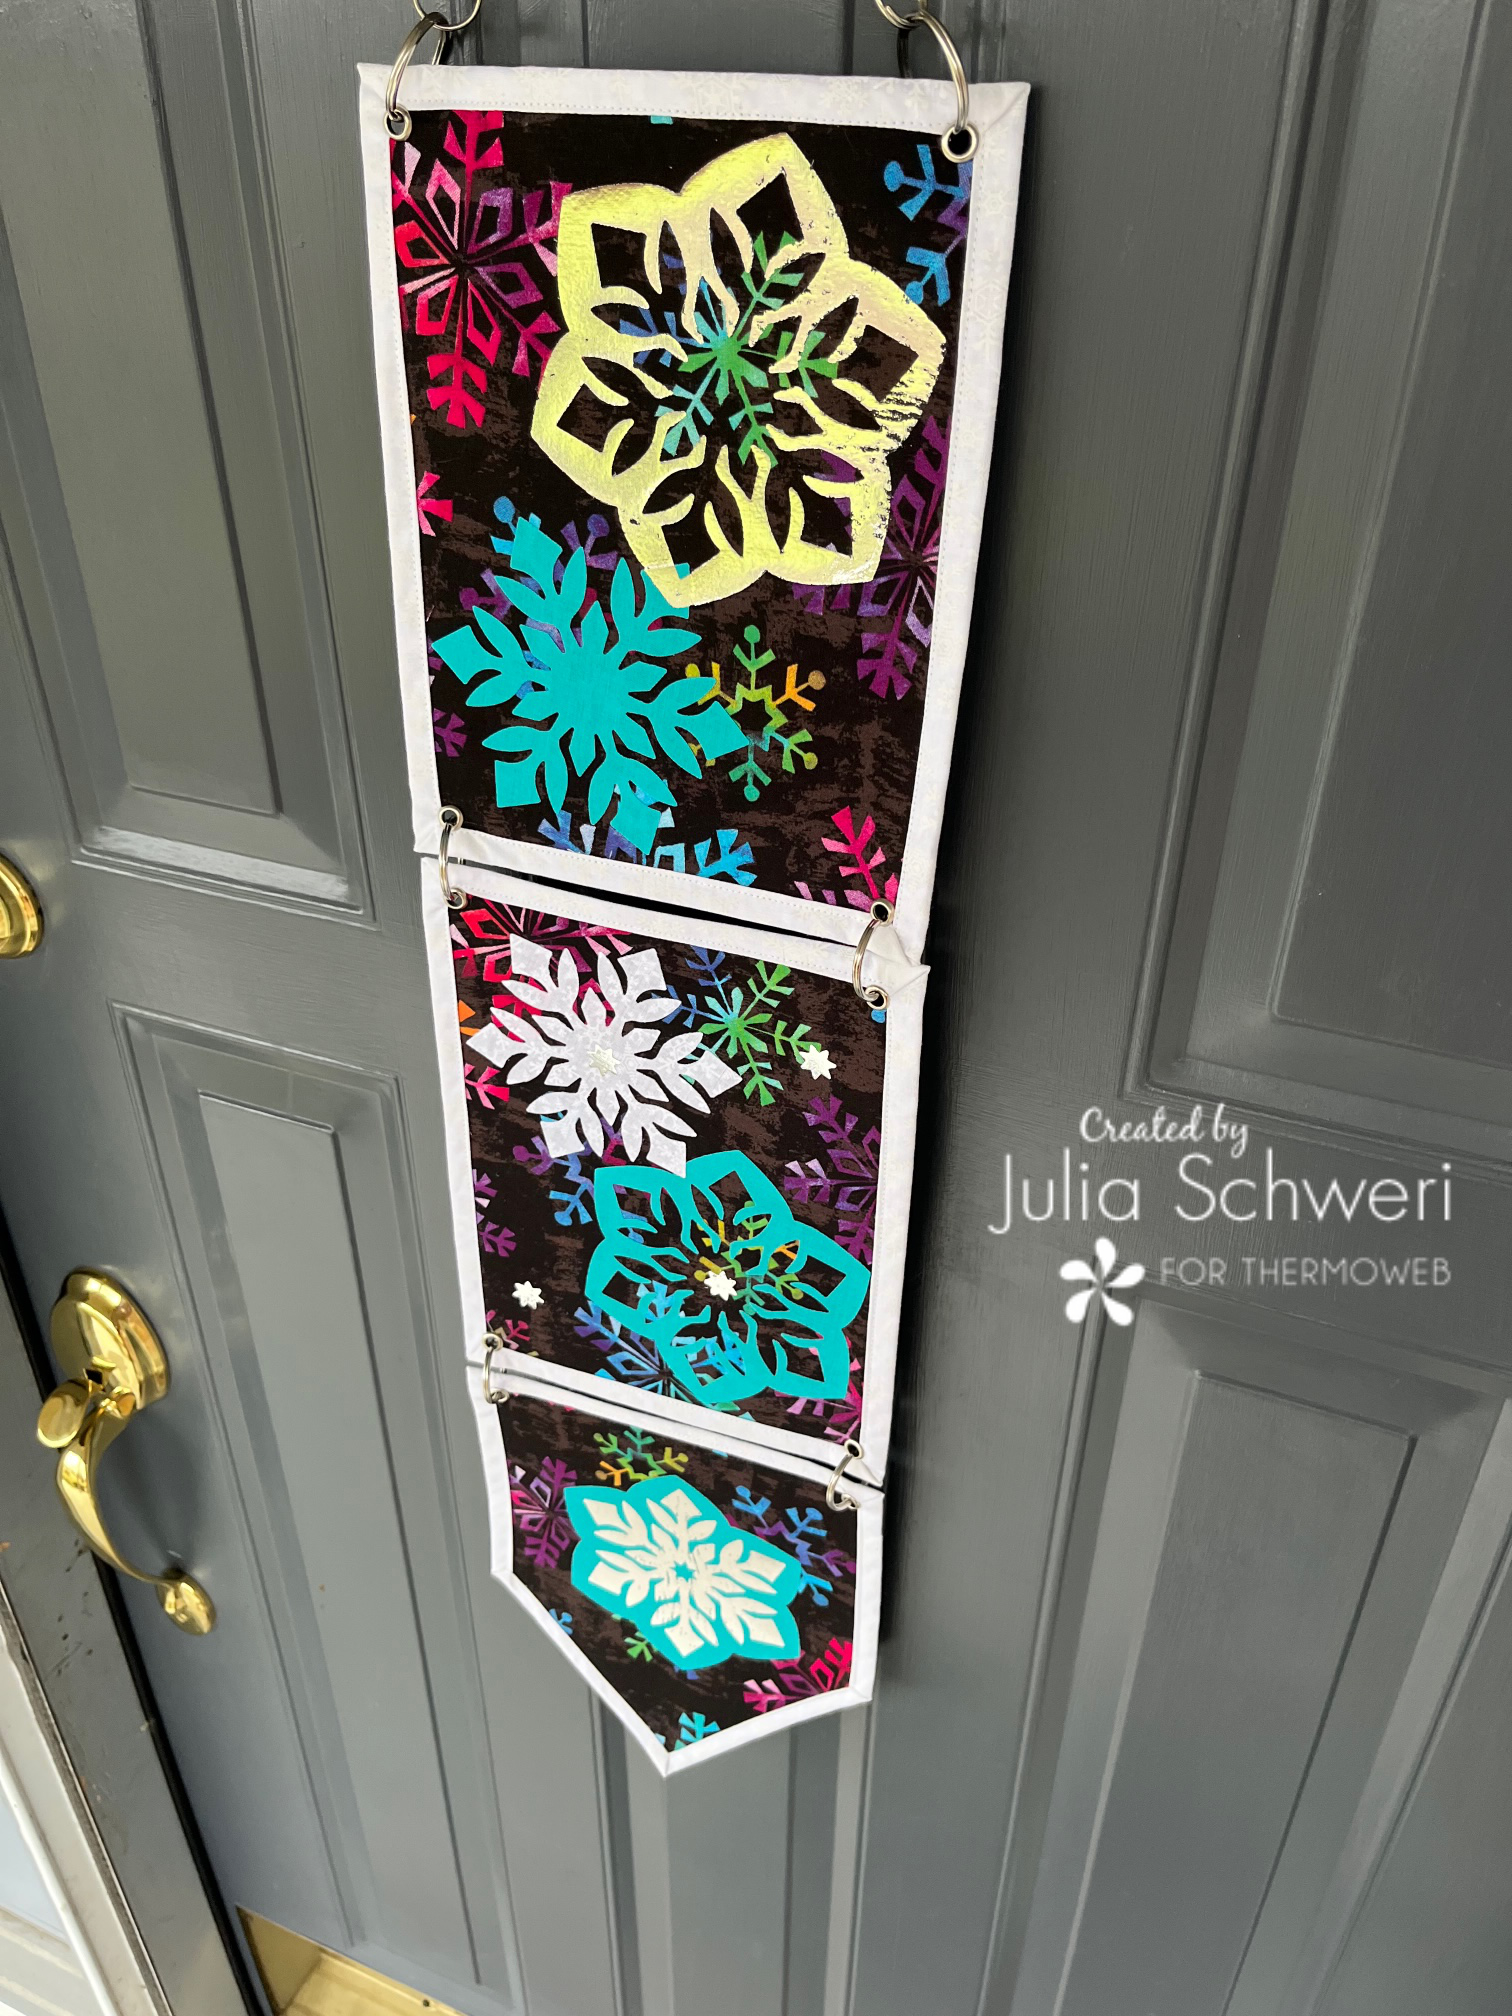
Thank you for following along with me today! I hope you enjoyed my “Snowflake Door Decor” tutorial. Come back soon to see what else will be starting to bloom with Inflorescence Designs!
This post contains affiliate links. For more information, see our disclosure HERE.
Brenda @ Songbird Designs
January 5, 2022 at 9:29 am (2 years ago)Very cute, Julia! I love the idea of using the rings to attach the blocks to each other!
Julia Schweri
January 5, 2022 at 9:37 am (2 years ago)Thank you, Brenda! The rings just felt right and went really well with the silver Deco Foil Adhesive.