


 Hello friends, this is Jennifer Long from, Bee Sew Inspired, fabric designer with Riley Blake Designs and a professional Doll and Quilt pattern designer.
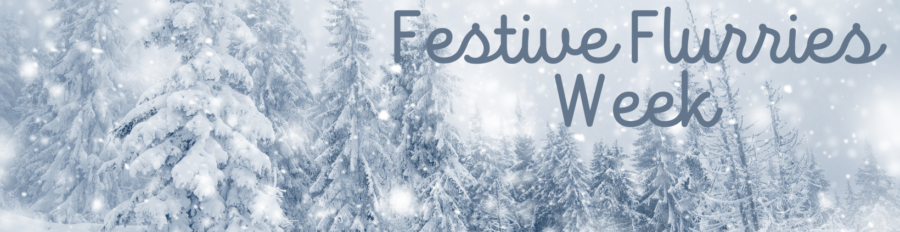
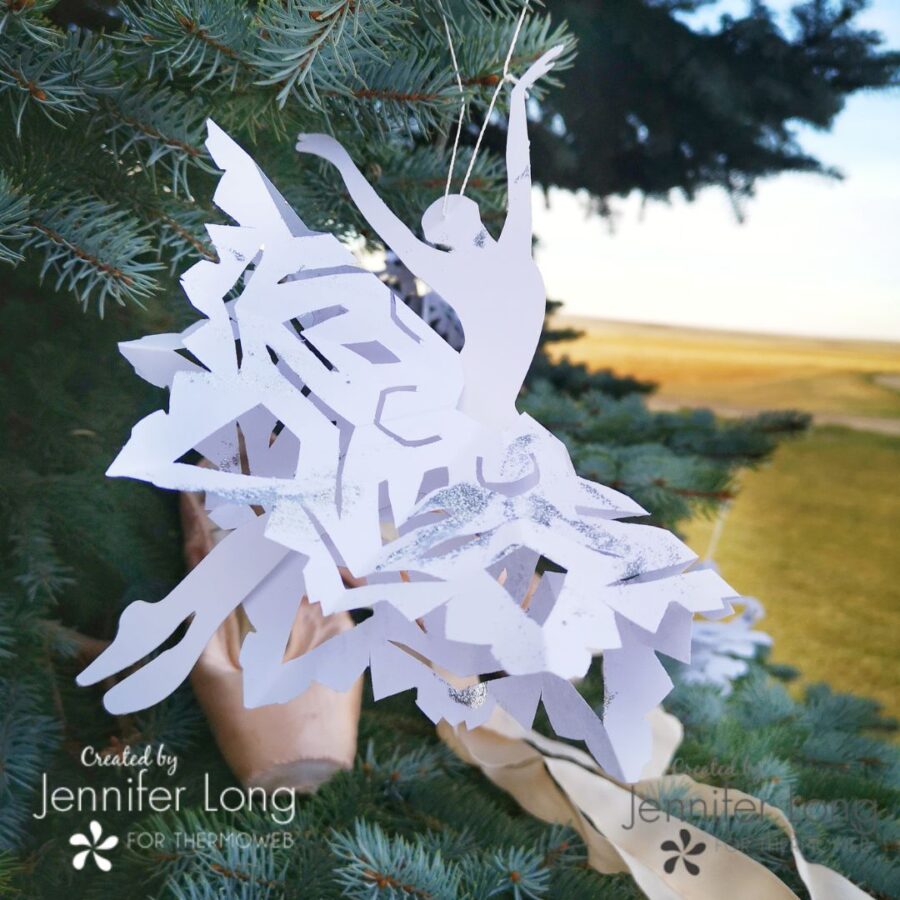
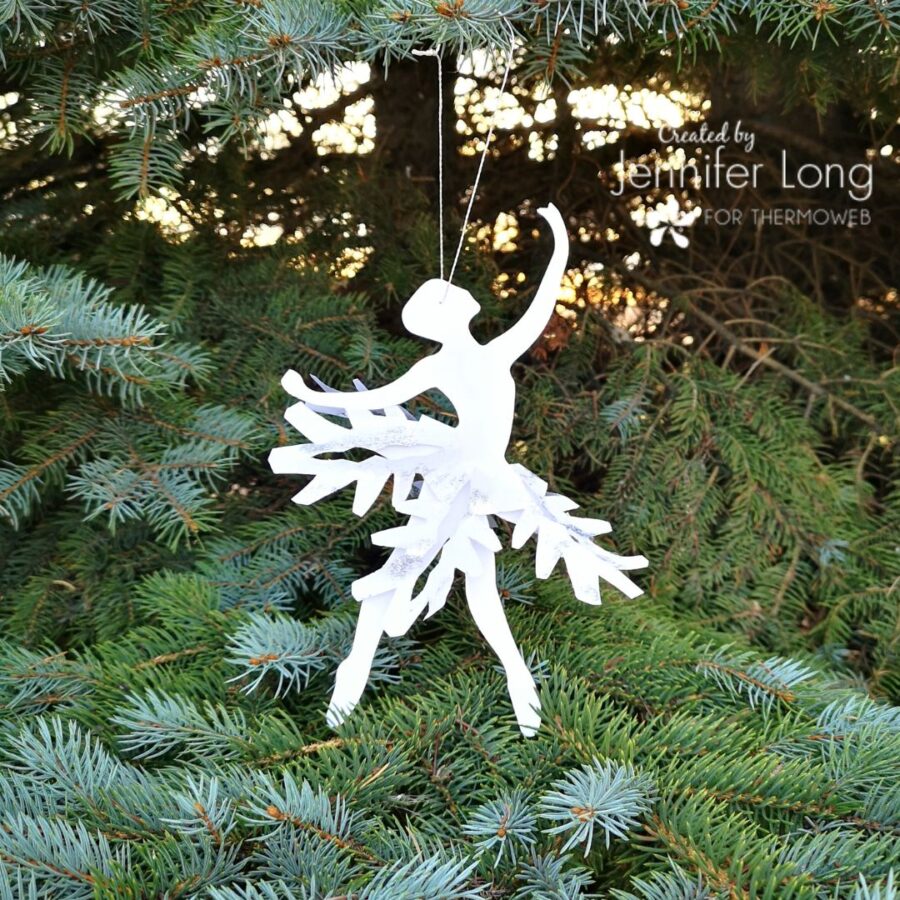
Snowflake Ballerina Ornaments
Are you ready to create a simple and magical, paper craft tutorial with me? If you don’t already know, I grew up training to be a ballet dancer in a professional ballet school. After graduation, I studied to be a professionally certified ballet teacher and then ran my own dance studio for 7 years before we had our first child!
I still teach a weekly dance class, but mostly, I just dream in motion! Whether you are a dancer, or not, everyone loves “dancing snowflakes!” Join me today for this SIMPLE craft tutorial that will have you shimmering through the season with glee!
Let’s get creative! Just gather the supplies below, then download the pattern. Don’t forget to share your project on social media using the hashtag #beesewinspired and tag @beesewinspired.
What You Need:
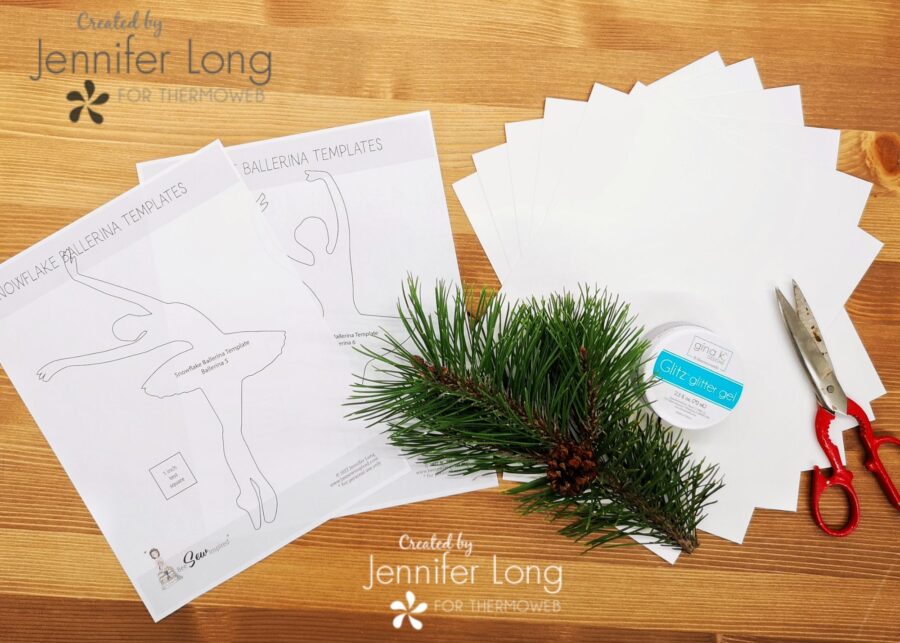
Tools
- Download the Snowflake Ballerina Pattern Template at http://www.beesewinspired.com/download-codes and use the code “SNOWFLAKEPDF”
- Download the Snowflake Ballerina SVG Cut Files at http://www.beesewinspired.com/download-codes and use the code “SNOWFLAKESVG”
-
Optional Cutting Machine such as Cricut
-
Scissors
Materials
-
Cardstock paper (for ballerina)
-
Regular weight white paper (for snowflake skirt)
Instructions:
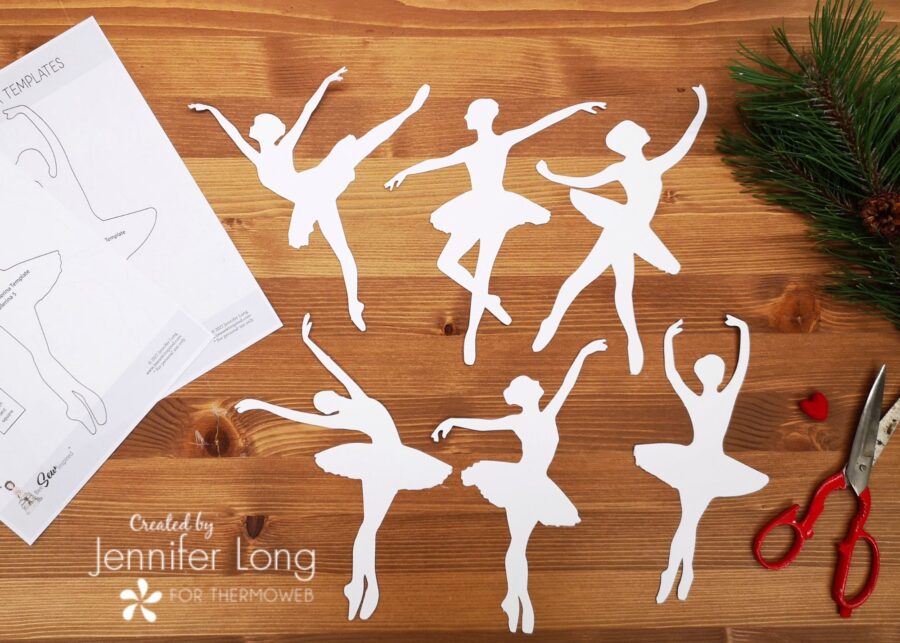
1. Download the Snowflake Ballerina Templates designed by Bee Sew Inspired. You can choose either the PDF Pattern to hand cut your shapes, or the SVG Cut File and follow the directions to have your Cricut Maker cut the shapes.
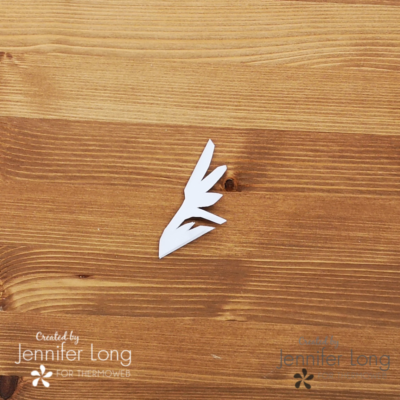
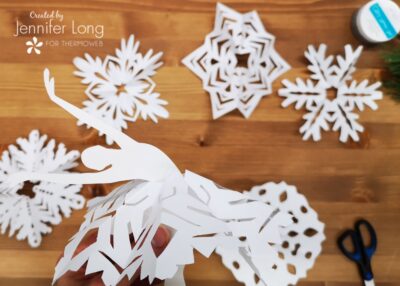
2. Cut out any or all of the (6) ballerina shapes provided in this tutorial. Set aside.
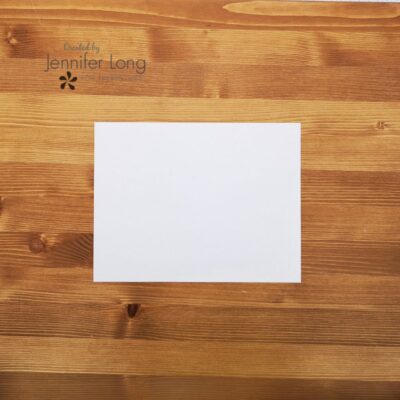
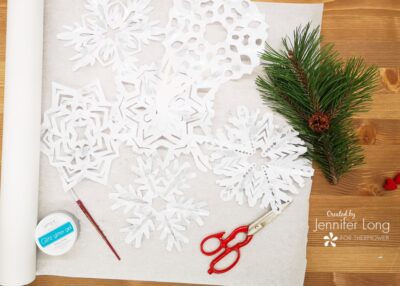
3. To make the snowflake skirt, we will need to have a perfect square. Use regular-weight white paper to give the ballerina’s skirt some drape.

4. Fold the paper as shown and cut the extra rectangle away. This will give you a perfect square!
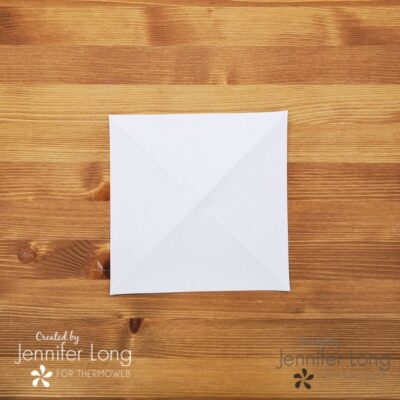
5. Next, open up the square paper and press a fold along the other diagonal as shown.

6. Fold the paper fully into all (4) corner triangles.
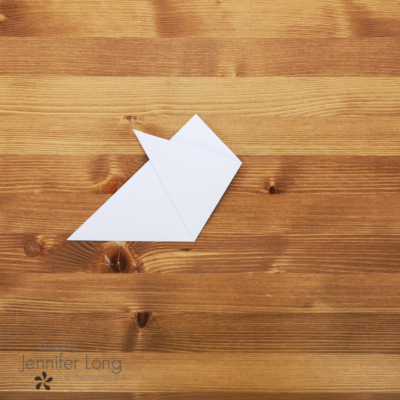
7. Fold the center tip of the triangle over the open bottom as shown.
8. Next fold the 2nd tip over as shown. You will end up with (3) points at the bottom.
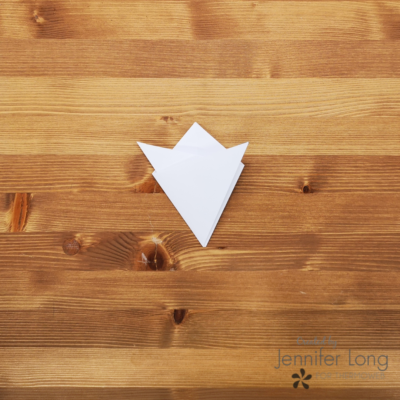
9. Fold them in half one more time to match the points.
10. Layout one of the snowflake skirt templates as shown (or be creative and begin cutting your snowflake skirt). Make sure to allow for a small opening at the top where the ballerina will fit through. Do NOT make this opening too large or the skirt will fall off the dancer.
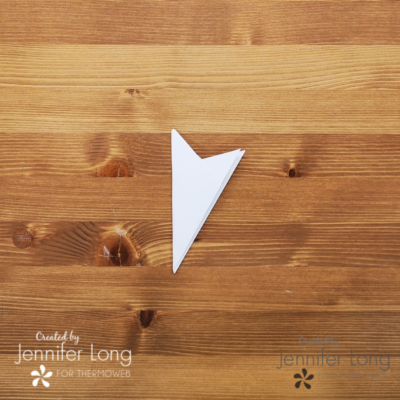
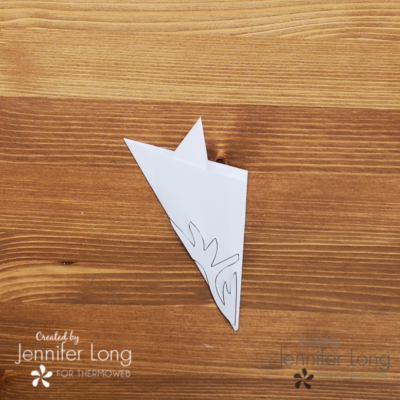
11. This is how your cut / folded snowflake will look.
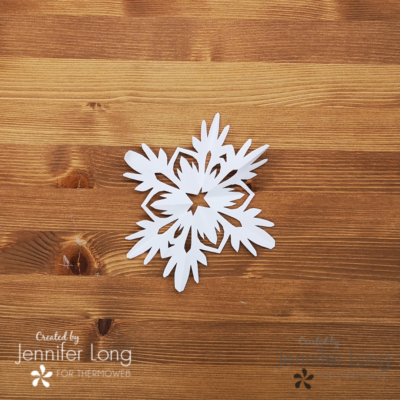
12. Open up the snowflake skirt to reveal the full skirt!
13. Now to add the magic!
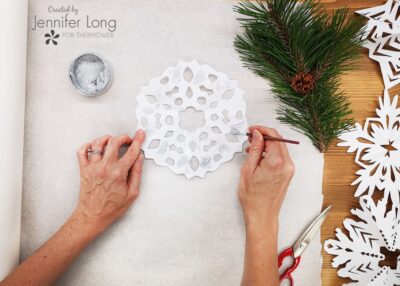
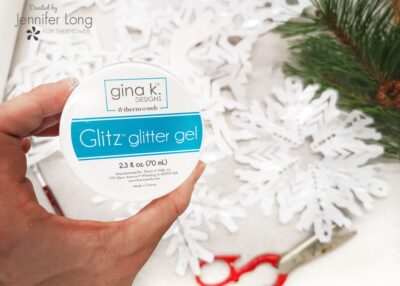
14. Use the Glitz Glitter Gel to liberally paint over the entire top side of the snowflake skirt! This will add so much shimmer against the evening glow of Christmas lights!
15. Repeat this process for all the snowflake skirts you are making and let them dry well.
16. Carefully put each cardstock ballerina through the center of the snowflake skirt making sure the Glitz Glitter Gel is facing up! You will need to gently bend the underskirt to fit the doll through. This is okay. Her underskirt will help give the sparkling snowflake skirt some lift! Just what every snowflake ballerina wants!!!
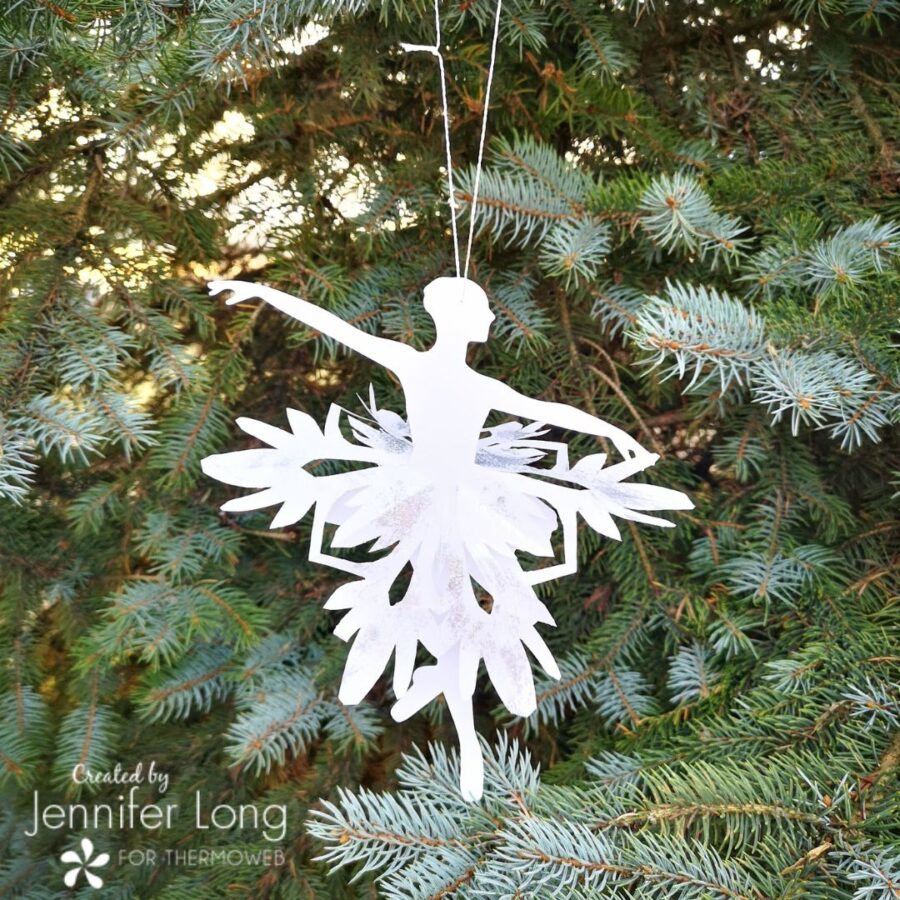
Thank you for joining me today on the Thermoweb Blog today! I can not wait to see your snowflake Ballerinas! For even more inspiration, join my weekly newsletter at http://www.beesewinspired.com. Until next time, keep crafting! – Jennifer Long