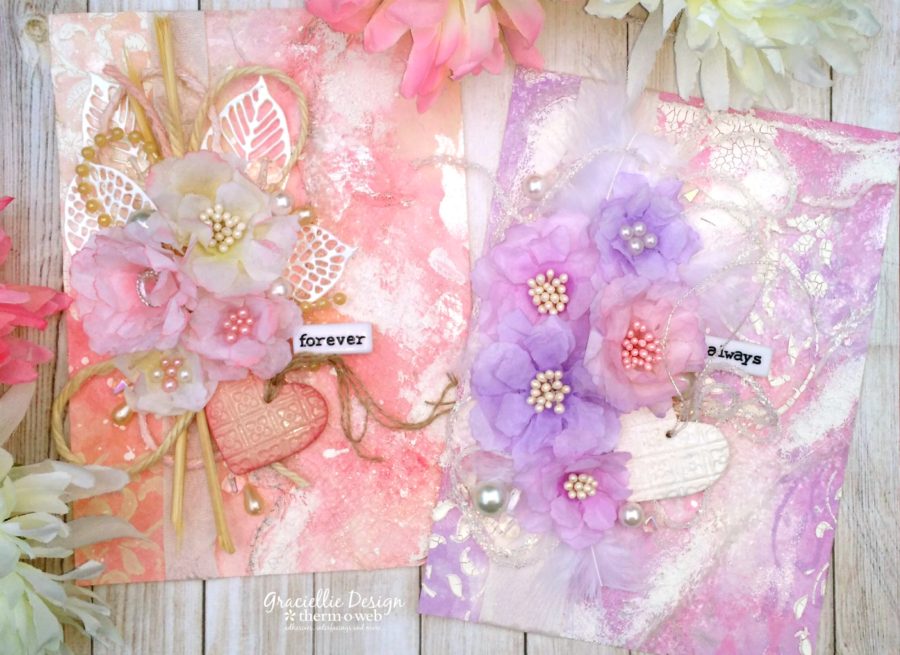
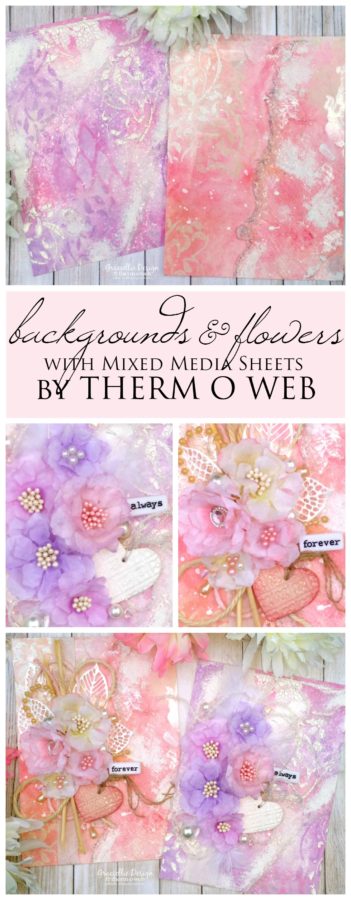
Hello! It’s Gracie Chavez from Graciellie Design and today I have a tutorial using Mixed Media Sheets by Therm O Web to create beautiful backgrounds and unique handmade flowers. I have been using these sheets lately to create backgrounds and even flowers so I thought I’d share with you a tutorial on how I achieved this shabby chic look, with lots of texture and dimension.
 Shabby Chic Backgrounds and Handmade Flowers with Mixed Media Sheets
Therm O Web Supplies:
iCraft® Mixed Media Sheets • Heavy Weight
iCraft® Mixed Media Sheets • Light Weight
iCraft® Mixed Media Adhesive 2.1 fl oz
Other Supplies:
Acrylic Paints in various colors
Brushes
Water mister
Scissors
Stencils
Gauze
Glitter
Texture pastes
Embellishments
Backgrounds with Heavyweight Mixed Media Sheets
1. Cut a 5″ x 7″ piece of iCraft Mixed Media Sheets • Heavy Weight
2. Paint the entire mixed media sheet with white acrylic paint first.
3. Then use soft colors in different coordinating tones to paint the sheet, dabbing the brush until you gradually get the effect you are happy with.
4. Use stencils to add accents with different shades of color, using acrylic paints.
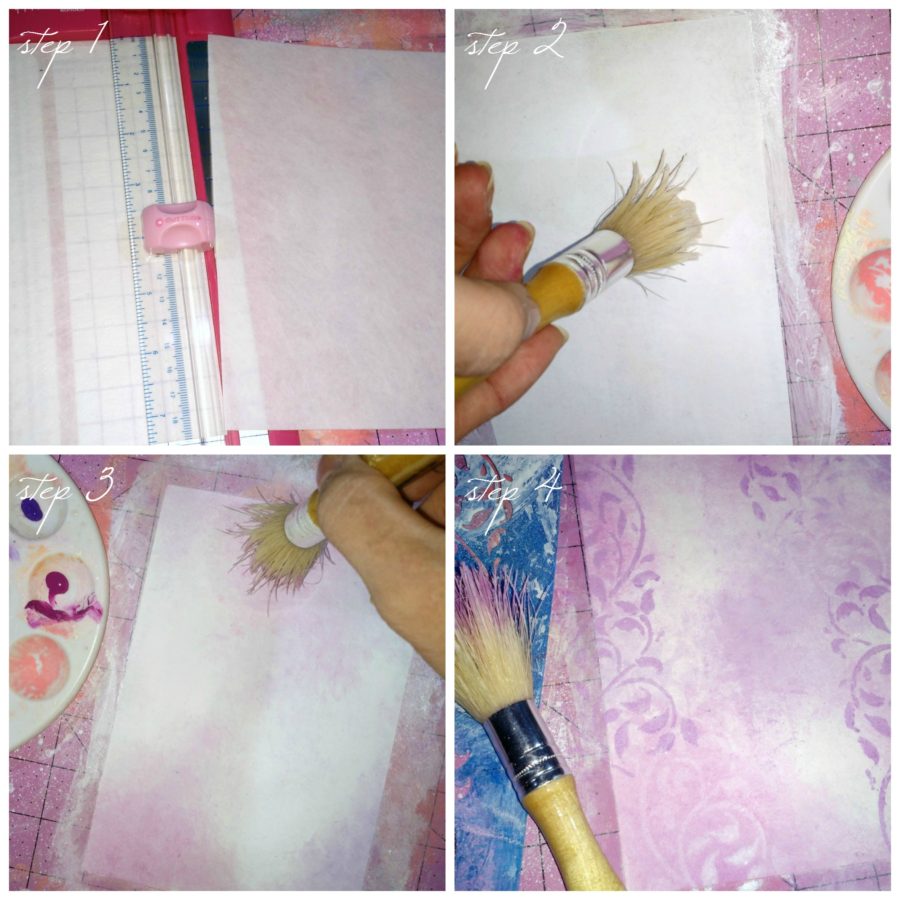 5. Wait for the paint to dry. Add texture to the background using different stencils to apply embossing paste and let dry.
6. Cut a few pieces of gauze.
7. Pour a generous amount of iCraft Mixed Media Adhesive 2.1 fl oz on a scrap of paper.
8. Use a brush to attach the gauze to the corners of the sheet with the adhesive. Add as much adhesive as needed and use the brush to shape the gauze as desired while it’s still wet.
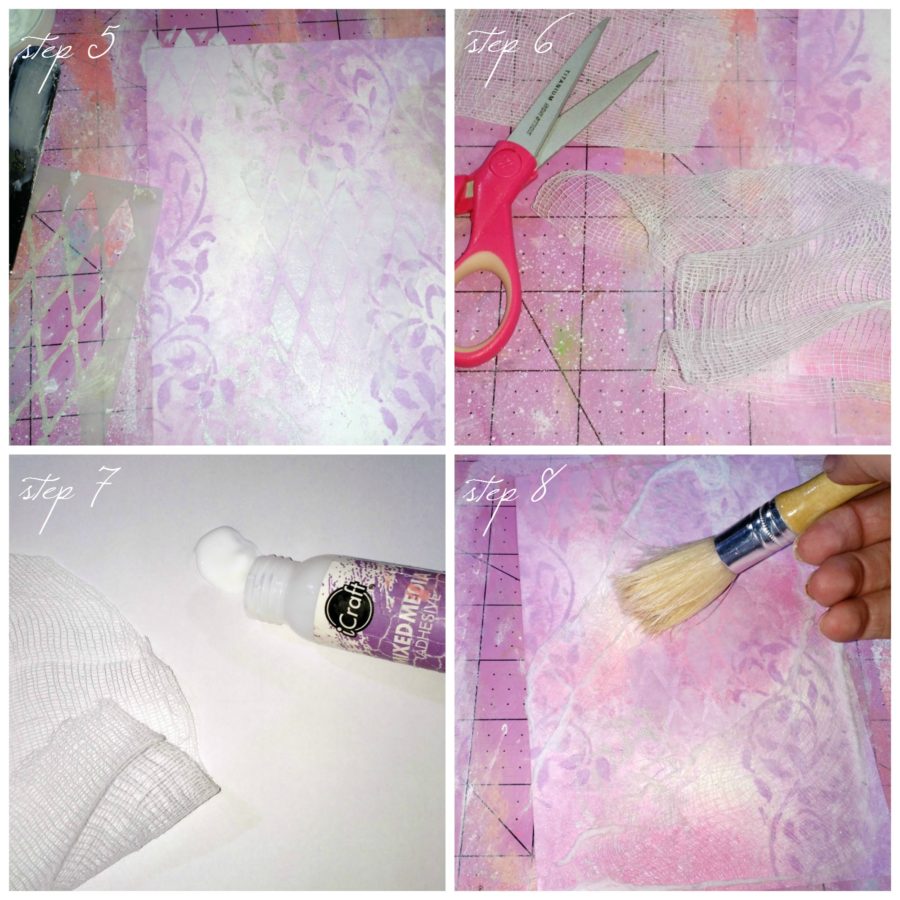
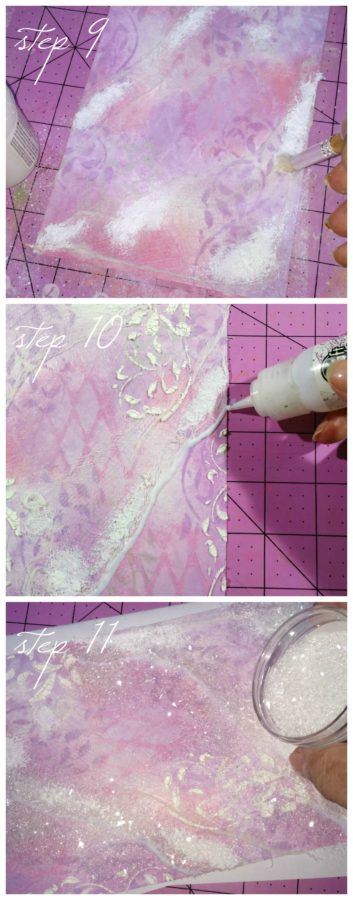
9. Once the gauze has dried, Use a smaller brush to add more texture to the background. You can also use a stencil to add more details.
10. Add a line of Mixed Media Adhesive around the gauze.
11. Pour glitter to the area with adhesive.
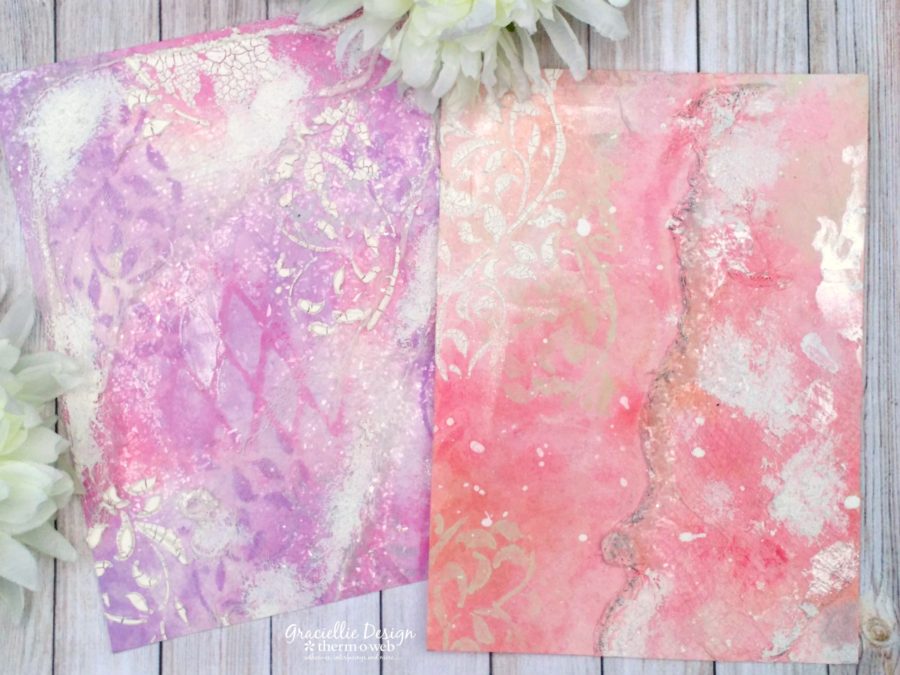
These backgrounds are striking but still very delicate and pretty. These sheets are the perfect canvas and as you could see they hold all sorts of mediums very well. It is really sturdy and I love how the backgrounds turn out when I use it. You can paint a whole sheet and trim it for several projects or cut it into pieces from the start to create backgrounds in different colors. They are easy to adhere to surfaces using Therm O Web tapes and adhesives so you can add it to card fronts or small canvases too!
Handmade Flowers with Lightweight Mixed Media Sheets
I decided to make two shabby chic cards with these, so I went ahead and made coordinating flowers for each background. To make the flowers:
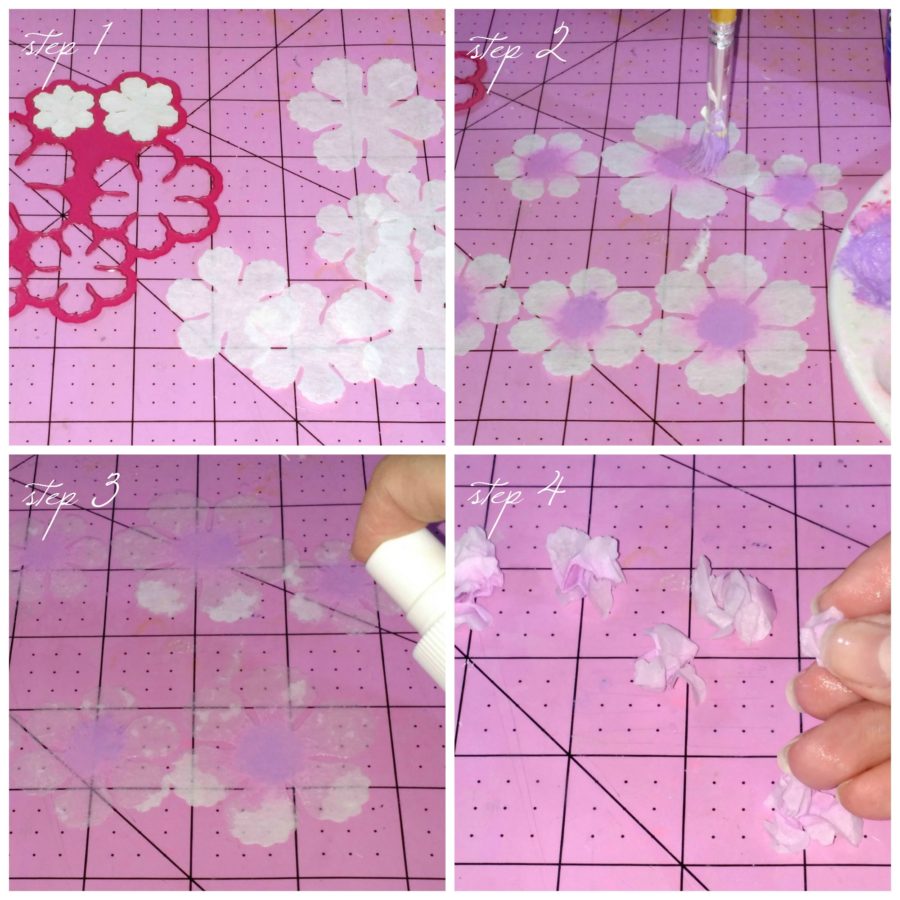
1. Die cut flowers from iCraft Mixed Media Sheets • Light Weight
2. Paint the center of the cards with acrylic paint.
3. Mist the flowers with water.
4. Wrinkle the flowers and let them dry.
5. Open each flower and adhere them with iCraft Mixed Media Adhesive and let dry.
6. Cut the center of the flowers with an exacto knife.
7. Grab some stamens, fold them in half and run them through the center of the flowers.
8. Turn the flower around and add a generous amount of glue to the stamens.
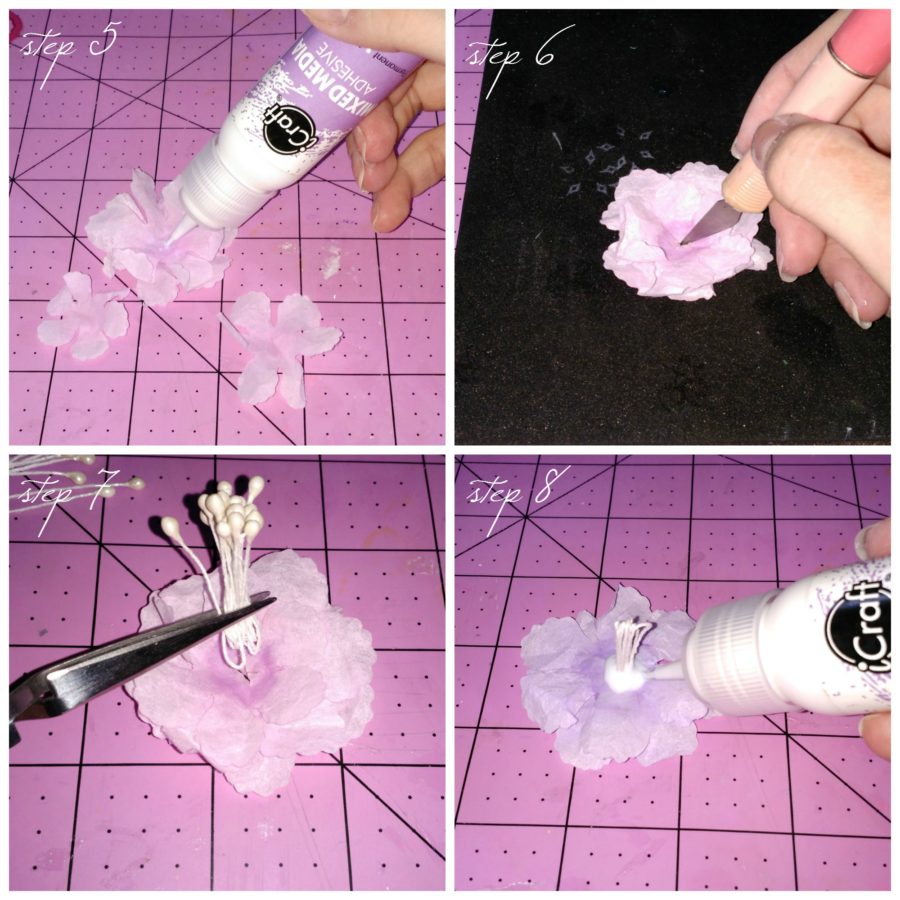 9. Finally once the glue is dry, cut the excess.
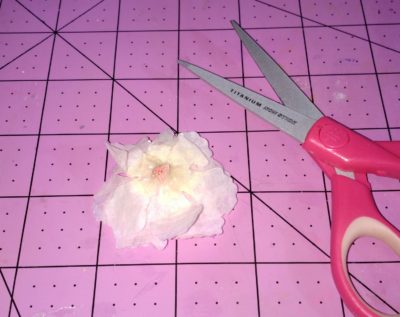
These flowers are so light but yet very sturdy because of the mixed media sheet and the adhesive. I embellished the pink card with ribbon, threads, die cuts, beads and more. For the lilac card I also used feathers.
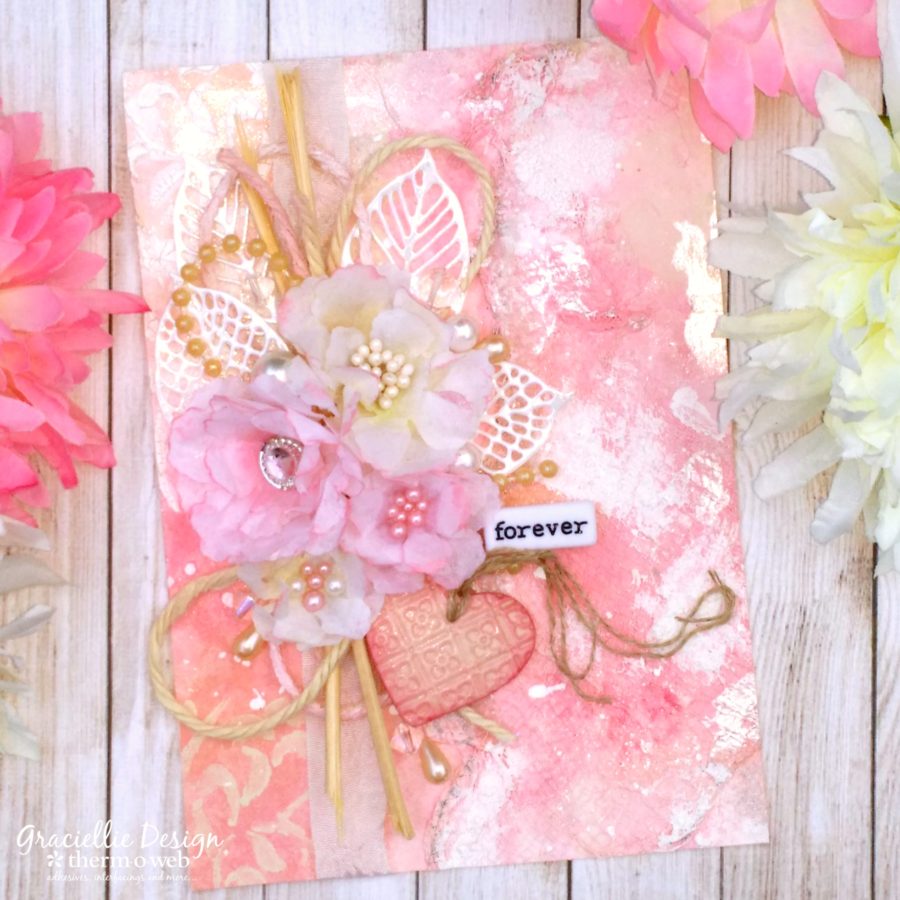
These are beautiful as cards but can also be showcased as mini canvases. The sky is the limit with Mixed Media Sheets since there is so much you can do with them. I used inexpensive acrylic and tempera paints on these backgrounds and the colors blended very well on the sheets. The texture pastes also worked very well and I love the fact that you can keep adding more elements without any worries.
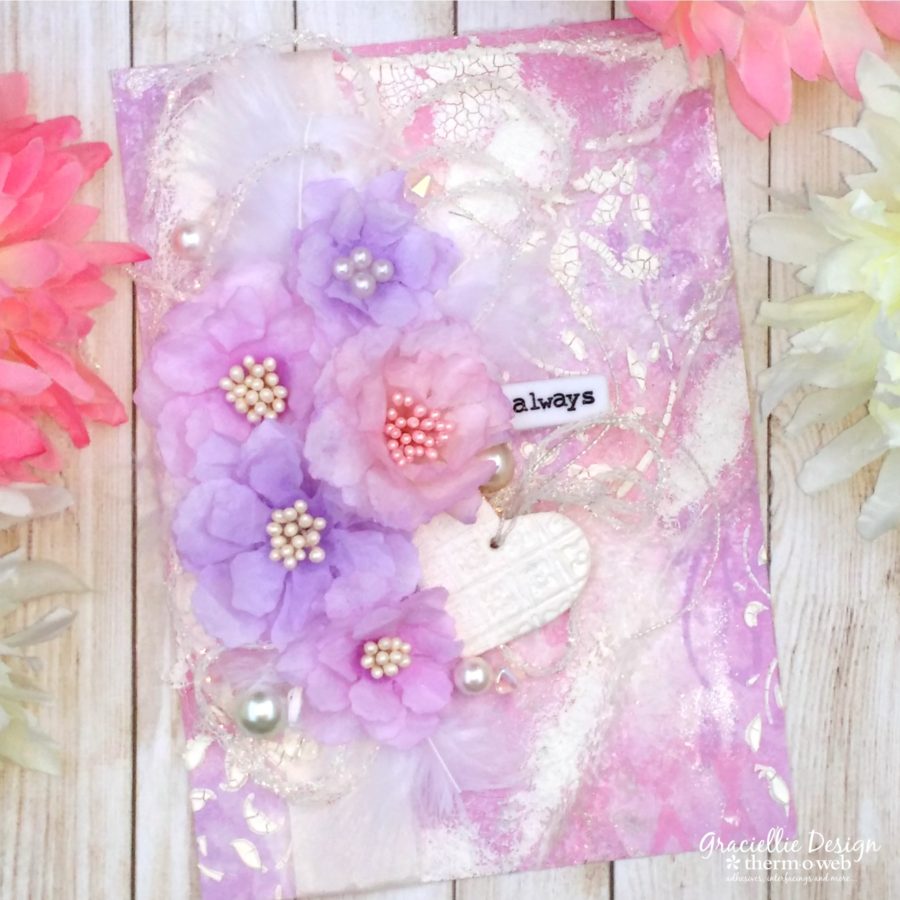

For more ideas and inspiration using Therm O Web Mixed Media products make sure to follow the blog! Until next time.

bcparkison
April 20, 2017 at 9:08 am (8 years ago)Oh my goodness…need to try this.
Helen Gullett
April 21, 2017 at 8:01 am (8 years ago)These are gorgeous, Gracie! Thanks for sharing the tutorial!