


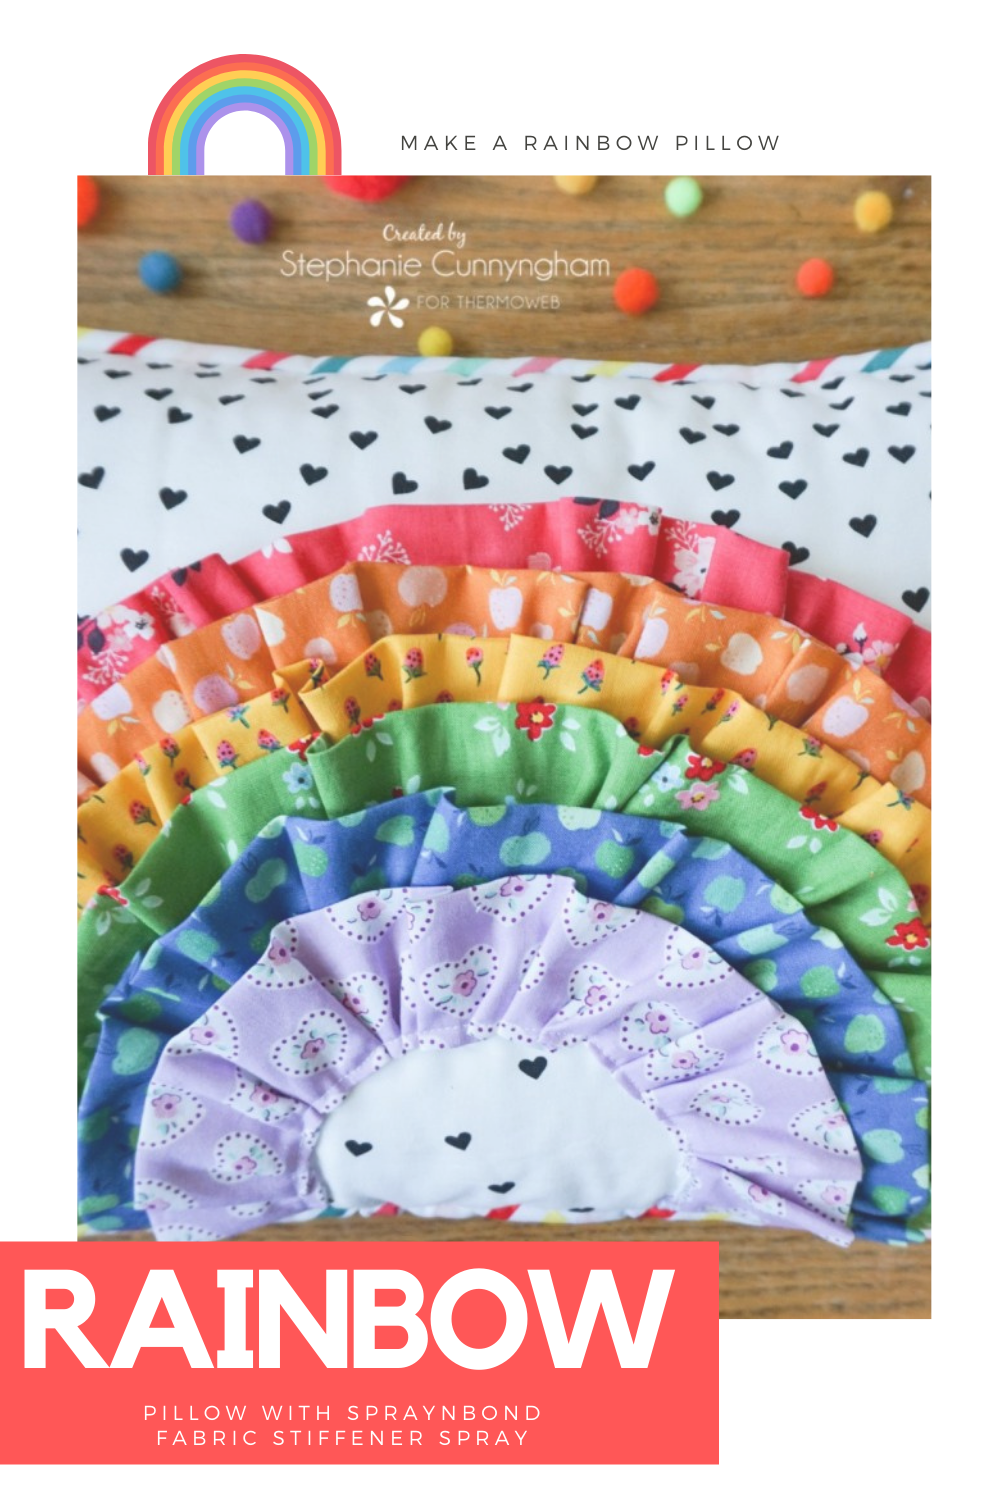

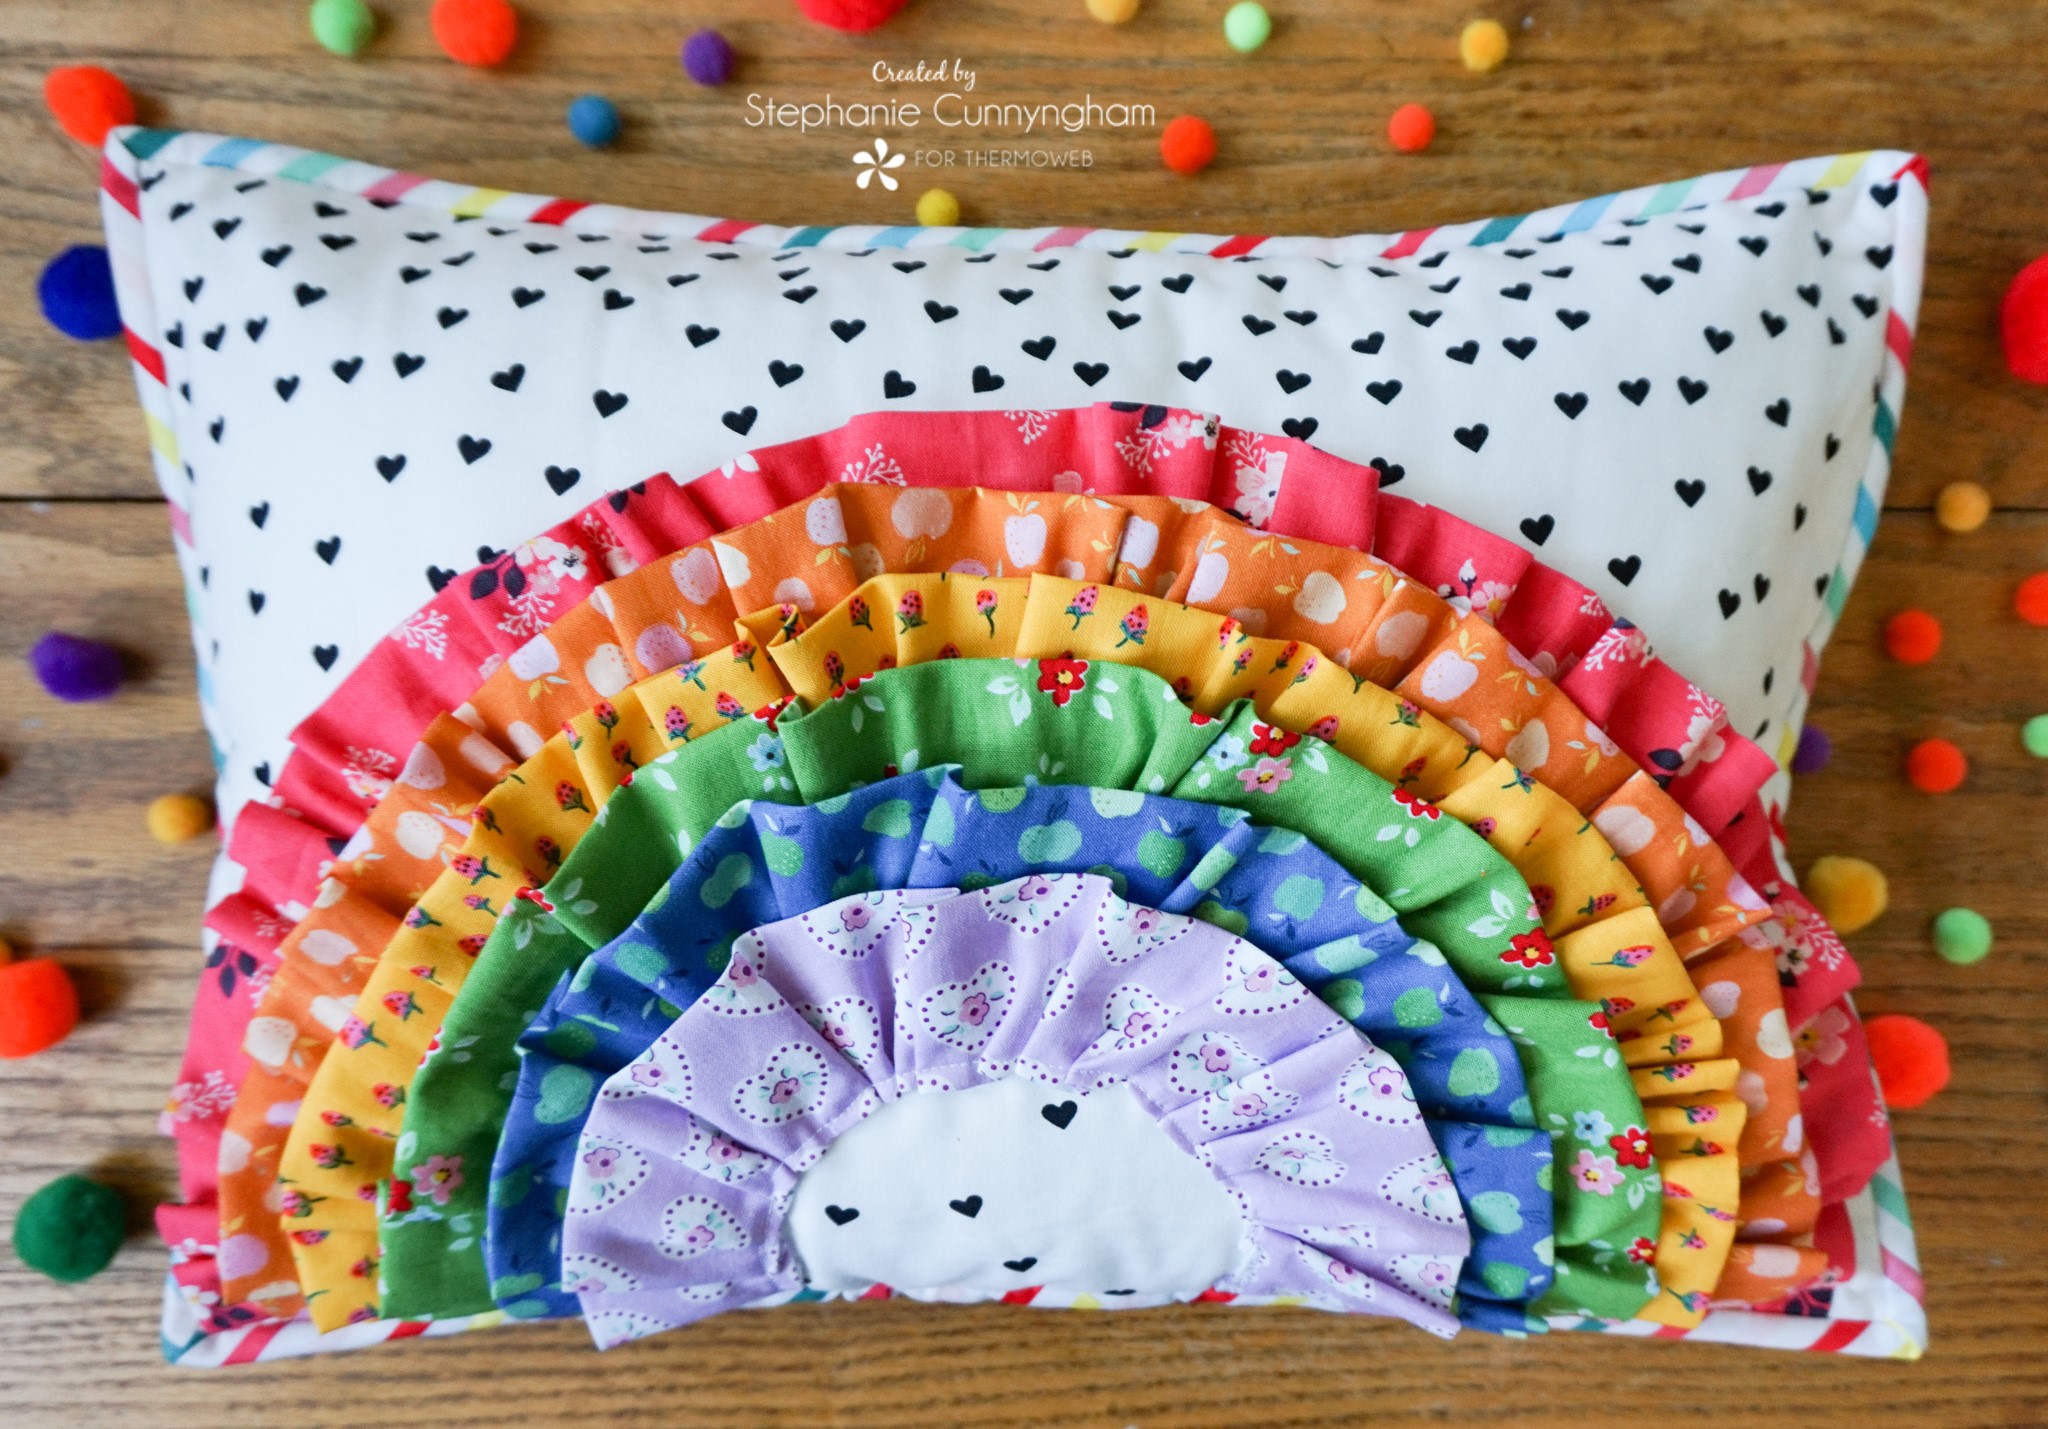
Hello! It’s Stephanie from Sissy Belle Sews, sharing a fun and colorful tutorial with you today! If you follow me on Instagram, then you may have noticed that I have developed a love for ruffles. And if you’ve been following me for a while, then you know I love making pillows. So, the combination of the two seemed like a win-win. And when ThermOWeb sent me some of their new Fabric Stiffener to try, I knew I wanted to use it to make some nice, crisp ruffles. One thing leads to another, and this ruffled rainbow pillow was born! If you want to make one too, keep reading, and I’ll show you how!
Supplies Needed
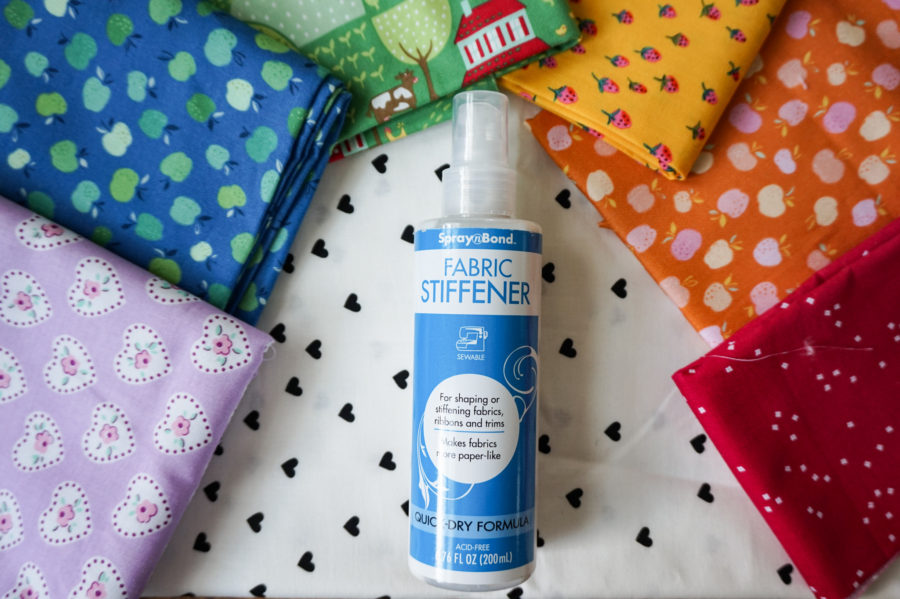
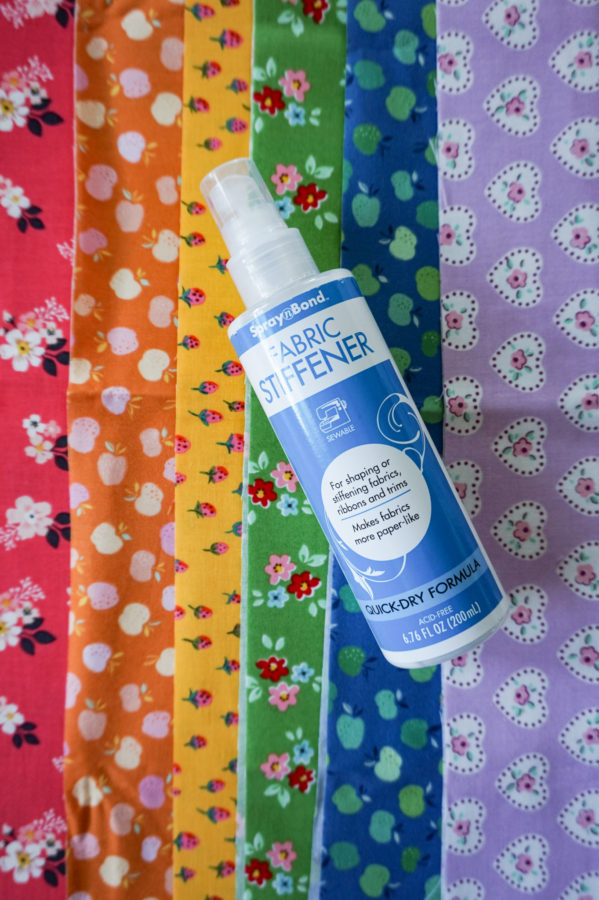
- 1/4 yard cuts of 6 different colorful fabrics
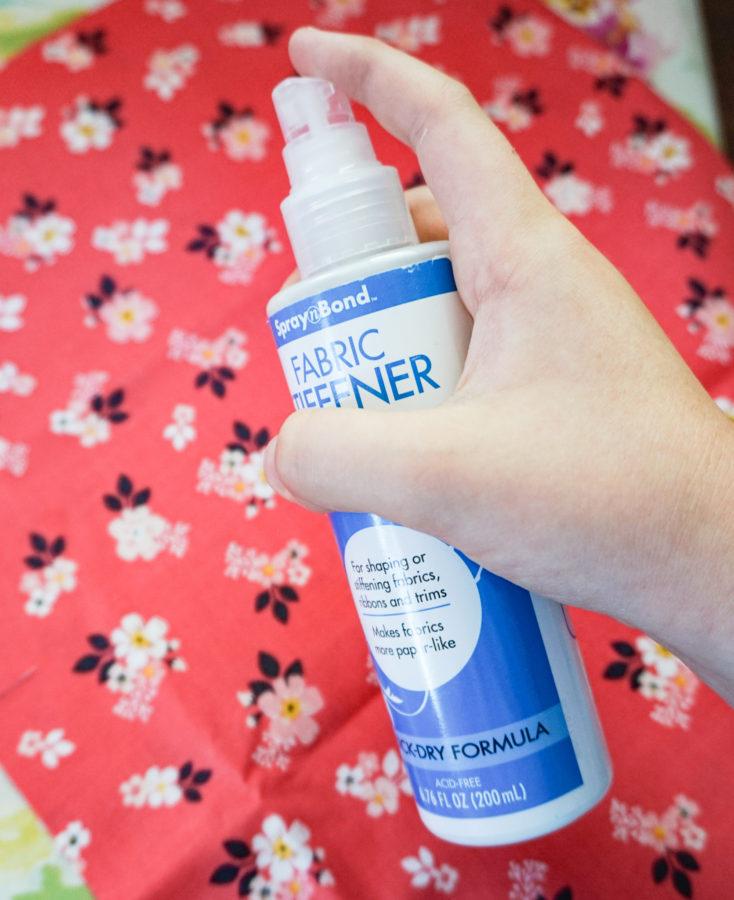
- NEW SpraynBond Fabric Stiffener
- 1/2 yard of background fabric
- Fat quarter for pillow lining
- 13″ x 17″ piece of batting
- One zipper, at least 14″ long
- 1/4 yard fabric for binding
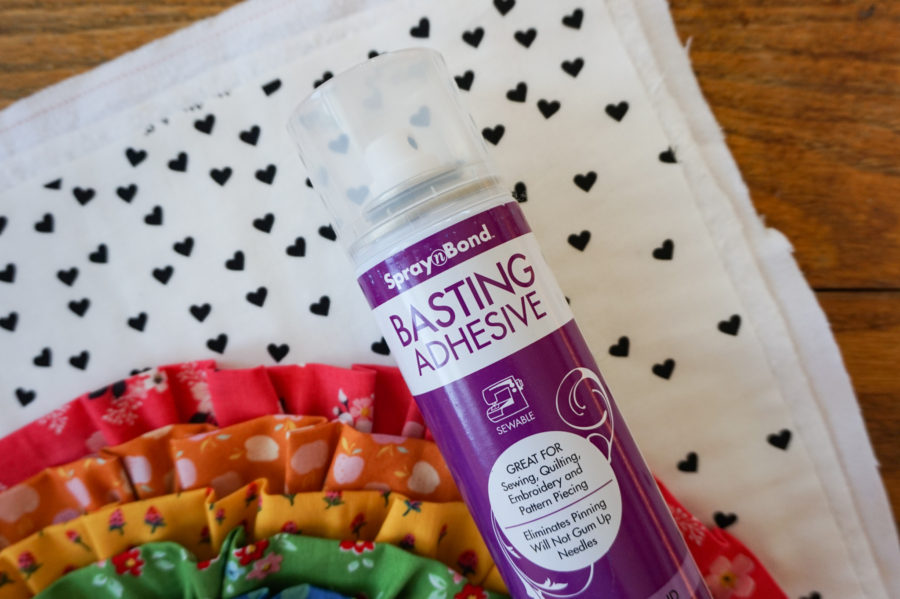
- SpraynBond Basting Spray
- Hand quilting thread (or another type of heavy-duty thread)
Rainbow Pillow Sewing Instructions
- To make the front of the pillow, cut background fabric into a 12.5″ x 16.5″ rectangle
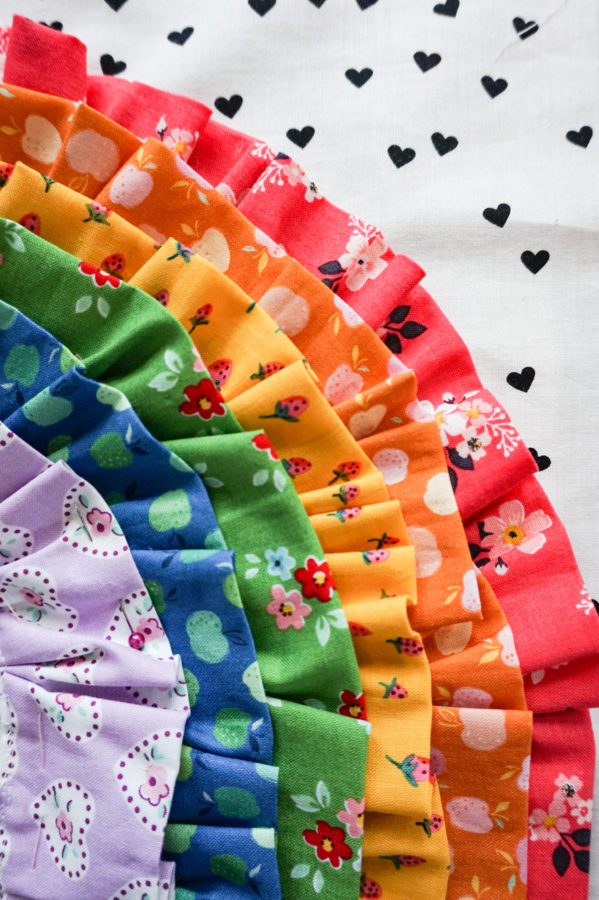
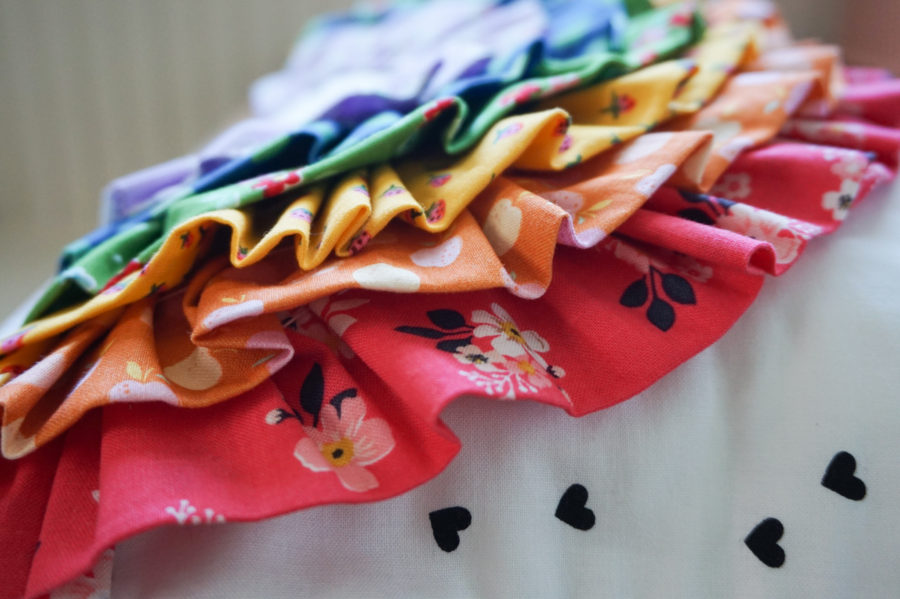
- Cut rainbow fabrics into 4.5″ x WOF strips
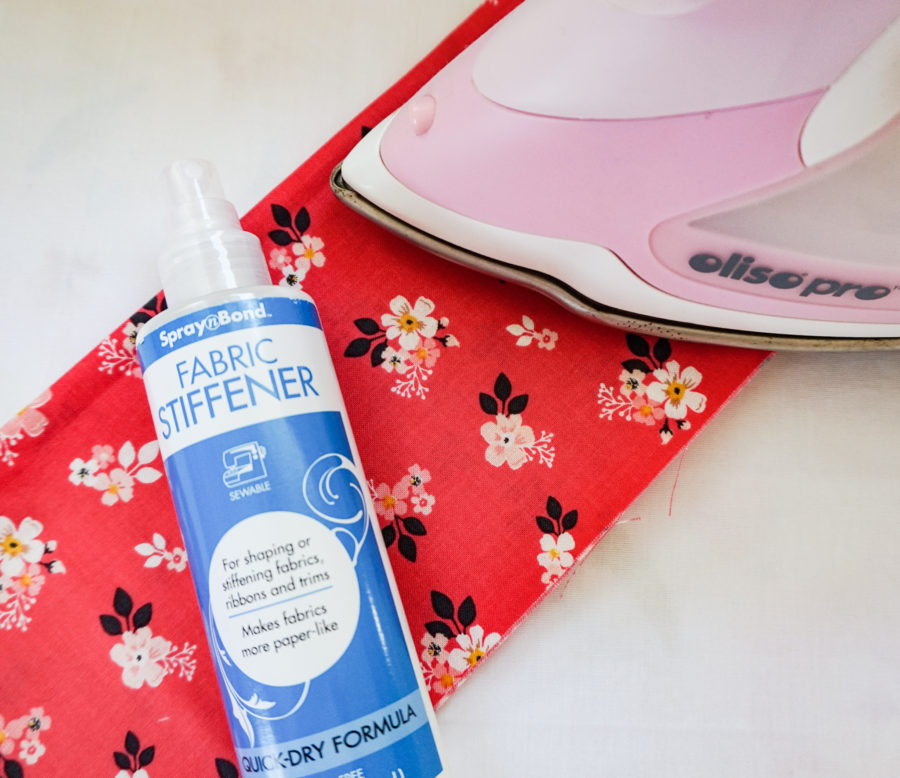
- Spray each strip with SpraynBond Fabric Stiffener and iron according to package directions
- Fold each strip in half, right sides together, and sew along long edges (do not sew short ends)
- Turn each strip right side out and press
- Thread a large needle with a long piece of quilting thread. Tie a knot in one end. Make a large running stitch along the seamed end of each strip of rainbow fabric.
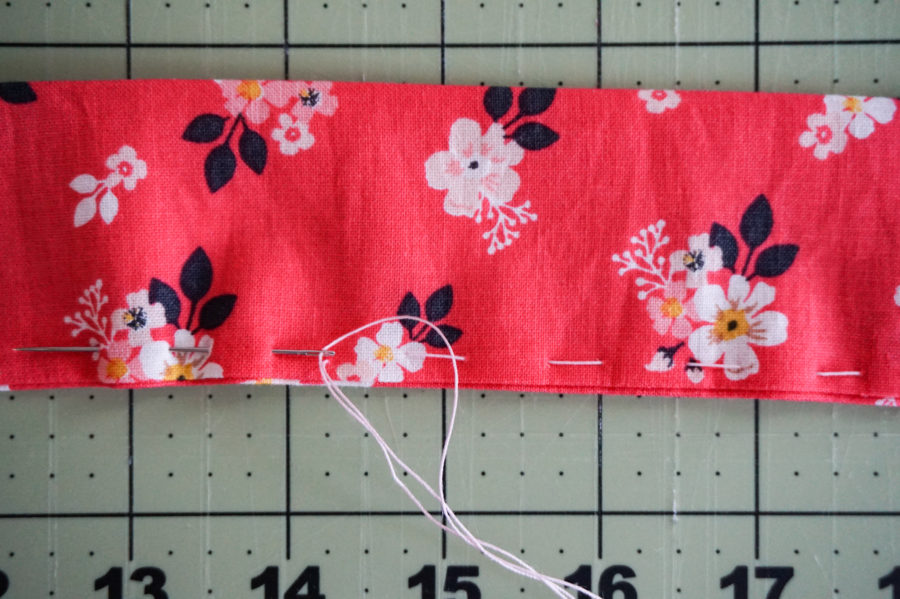
- Pull the thread to gather the fabric until it is approximately 24″ long. Repeat for remaining rainbow strips of fabric.
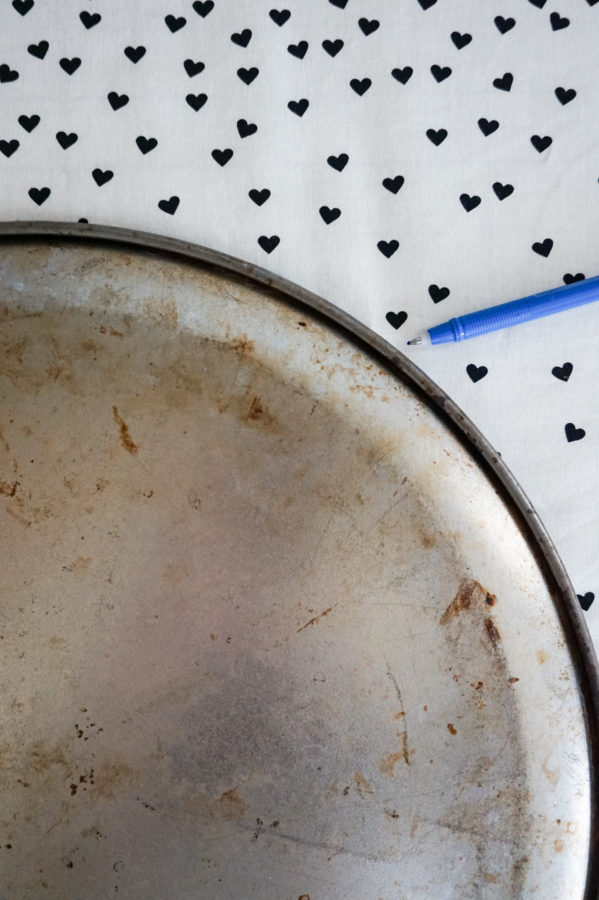
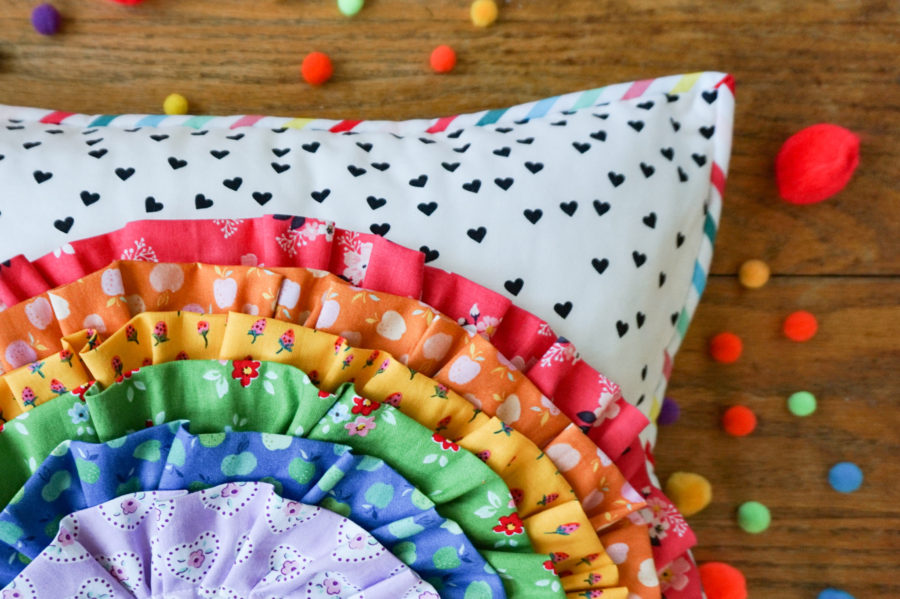
- Draw an arc on the background fabric as a guide for where to place your ruffles. (I traced a pizza pan to make mine!)
- Place your first ruffle along the line you drew and pin in place. Stitch close to the edge of the ruffle. Once you sew it down, pick out the quilting thread you used to make the gathers.
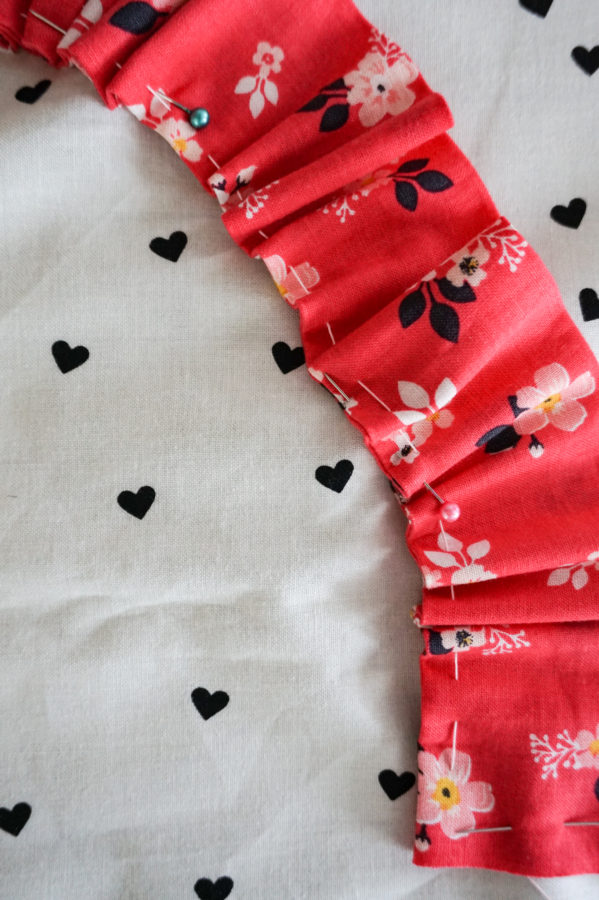
- Repeat this process for each ruffle of the rainbow. I did not draw lines for the rest of the ruffles, I just followed the first ruffle and spaced them to they overlapped but make sure to still show plenty of each color!
- NOTE: you will not use the entire length of fabric for each color. You use less and less of your strip for each ruffle you so on.
- Using SpraynBond basting spray, layer your pillow front, batting, and pillow lining fabric. Quilt as desired.
- NOTE: I did not quilt mine, but I did spray baste the layers together and sew around the edges with a long basting stitch to keep the layers together.
- NOTE: This would be a great quilt as you go project if your machine could handle sewing through the ruffles, batting, and lining.
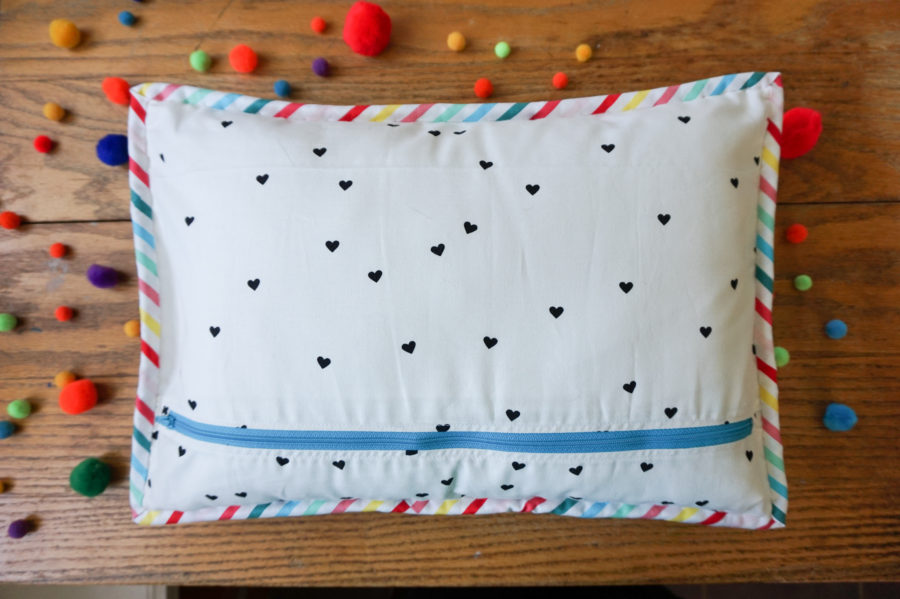
- To make the pillow back, cut two pieces of background fabric:
- 16.5″ x 9″
- 16.5″ x 5″
- 1″ x 3″
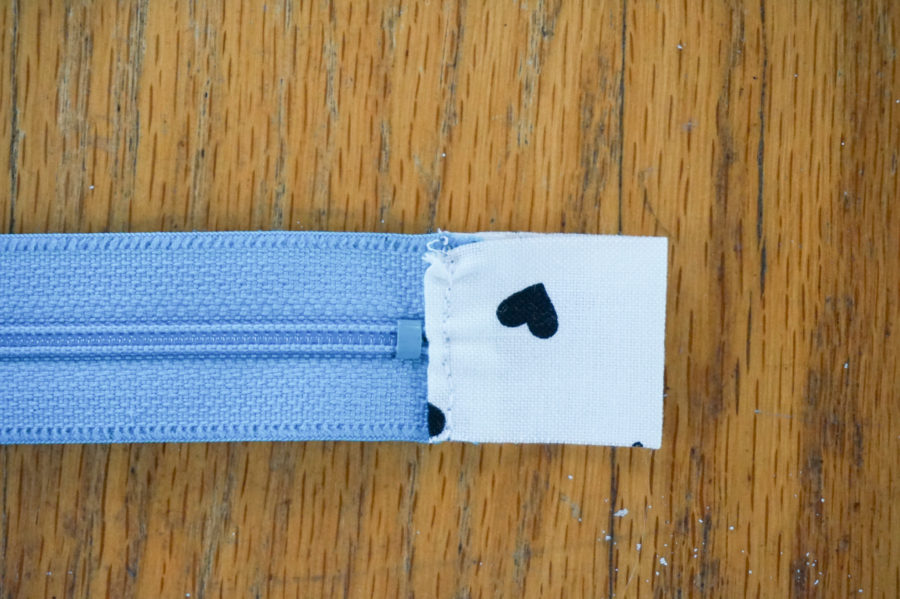
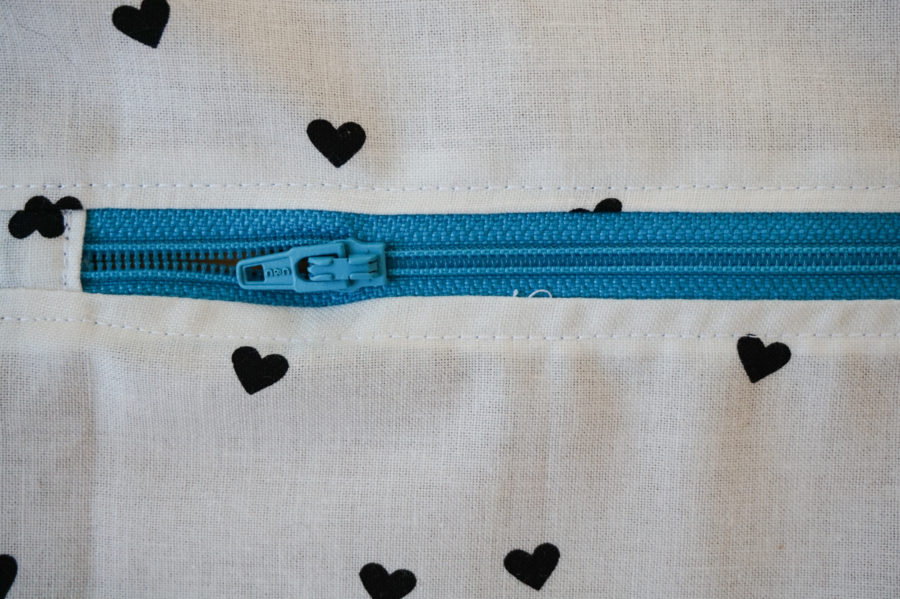
- Fold in the short edges of the 1″ x 3″ rectangles, then fold in half and press.
- These will be your zipper tabs. Once folded and pressed, they should measure 1″ x 1.5″.
- Trim the zipper 1/4″ from the metal zipper stop. Insert edge of zipper into one of the zipper tabs and topstitch.
- Measure 14″ from edge of zipper tab and make a mark on your zipper.
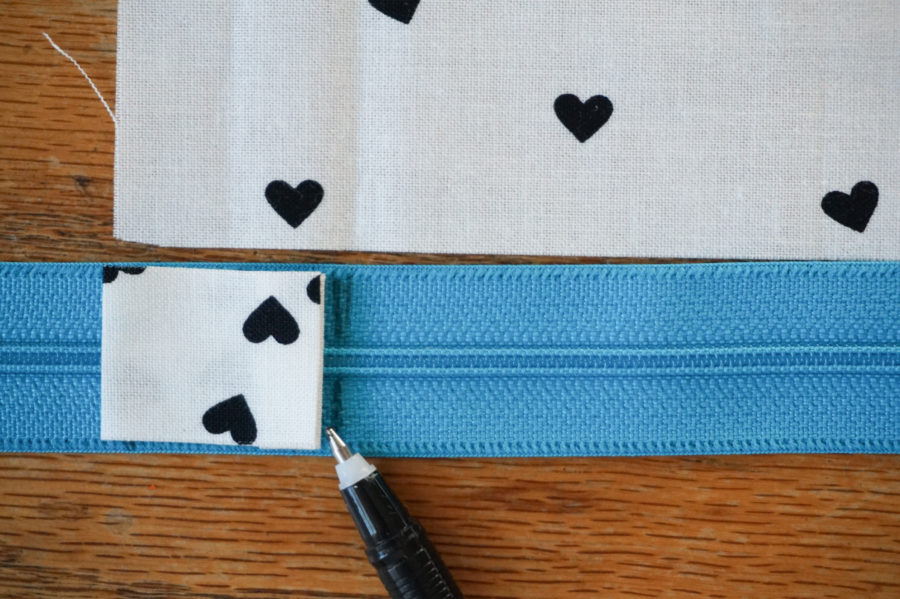
- OPEN YOUR ZIPPER, then trim zipper 1/4″ to the left of the drawn line.
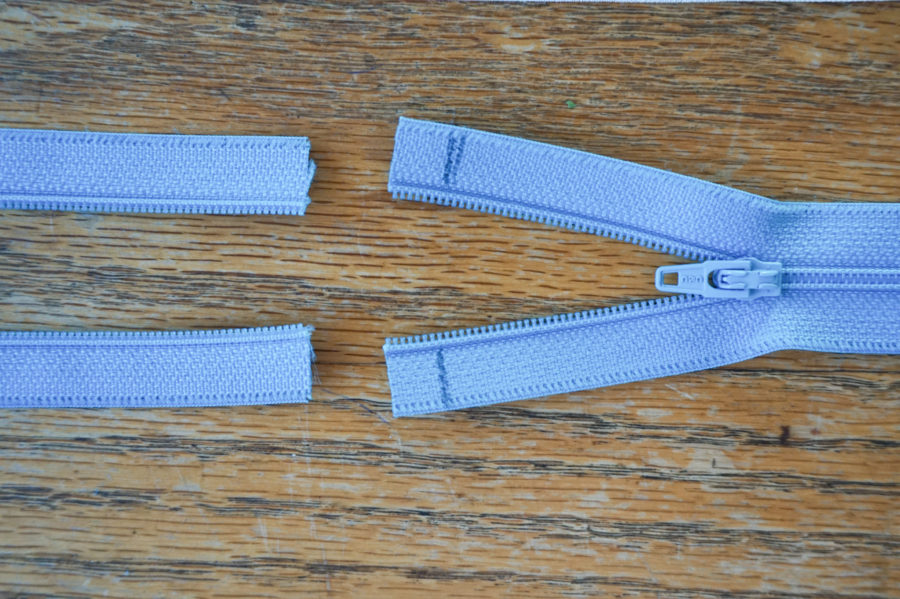
- Insert raw edges into remaining zipper tab and topstitch. Your zipper with tabs should measure 16.5″ total.
- Sew zipper to both pieces of pillow back fabric along 16.5″ edge. Press and topstitch close to zipper.
- Trim pillow back to 12.5″ x 16.5″.
- Cut binding fabric into two 2.25″ x WOF strips and sew together.
- Place pillow front and back together, wrong sides together, and attach binding.
- Enjoy your new pillow and all the amazing texture you created!
BECKY WHITE
March 27, 2021 at 1:53 am (3 years ago)PLEASE UNSUBSCRIBE ME FROM THIS SITE
admin
March 29, 2021 at 1:38 pm (3 years ago)Hi Becky…we’re sorry to see you go however we do not have the ability to unsubscribe our followers. Here are brief instructions for unsubscribing from a blog if you have a WordPress.com username account:
1. click the “unsubscribe” link on the emails of the posts received at the very bottom of the emails.
2. go here > http://wordpress.com/#!/read/edit/ locate and click the “x” next to any blog there to unfollow it and no longer receive posts in the Reader or by email.
3. go to the blog in question and click the unfollow/follow link on your Admin bar.
If you do not have a WordPress.com username account then click the “unsubscribe” link on the emails of the posts received at the very bottom of the emails.