


 Around Valentine’s Day, you can never have too many hearts, right?!
 Hi, I’m Lisa Ruble from Love to Color My World. I love making mini quilts because they’re easy to machine quilt and they sew up quickly. Add in fusible heart “puzzles,” and you’re all set for February 14th! Homemade fabric valentines…what could be better?!
Puzzle Heart Mini Quilt with HeatnBond Lite
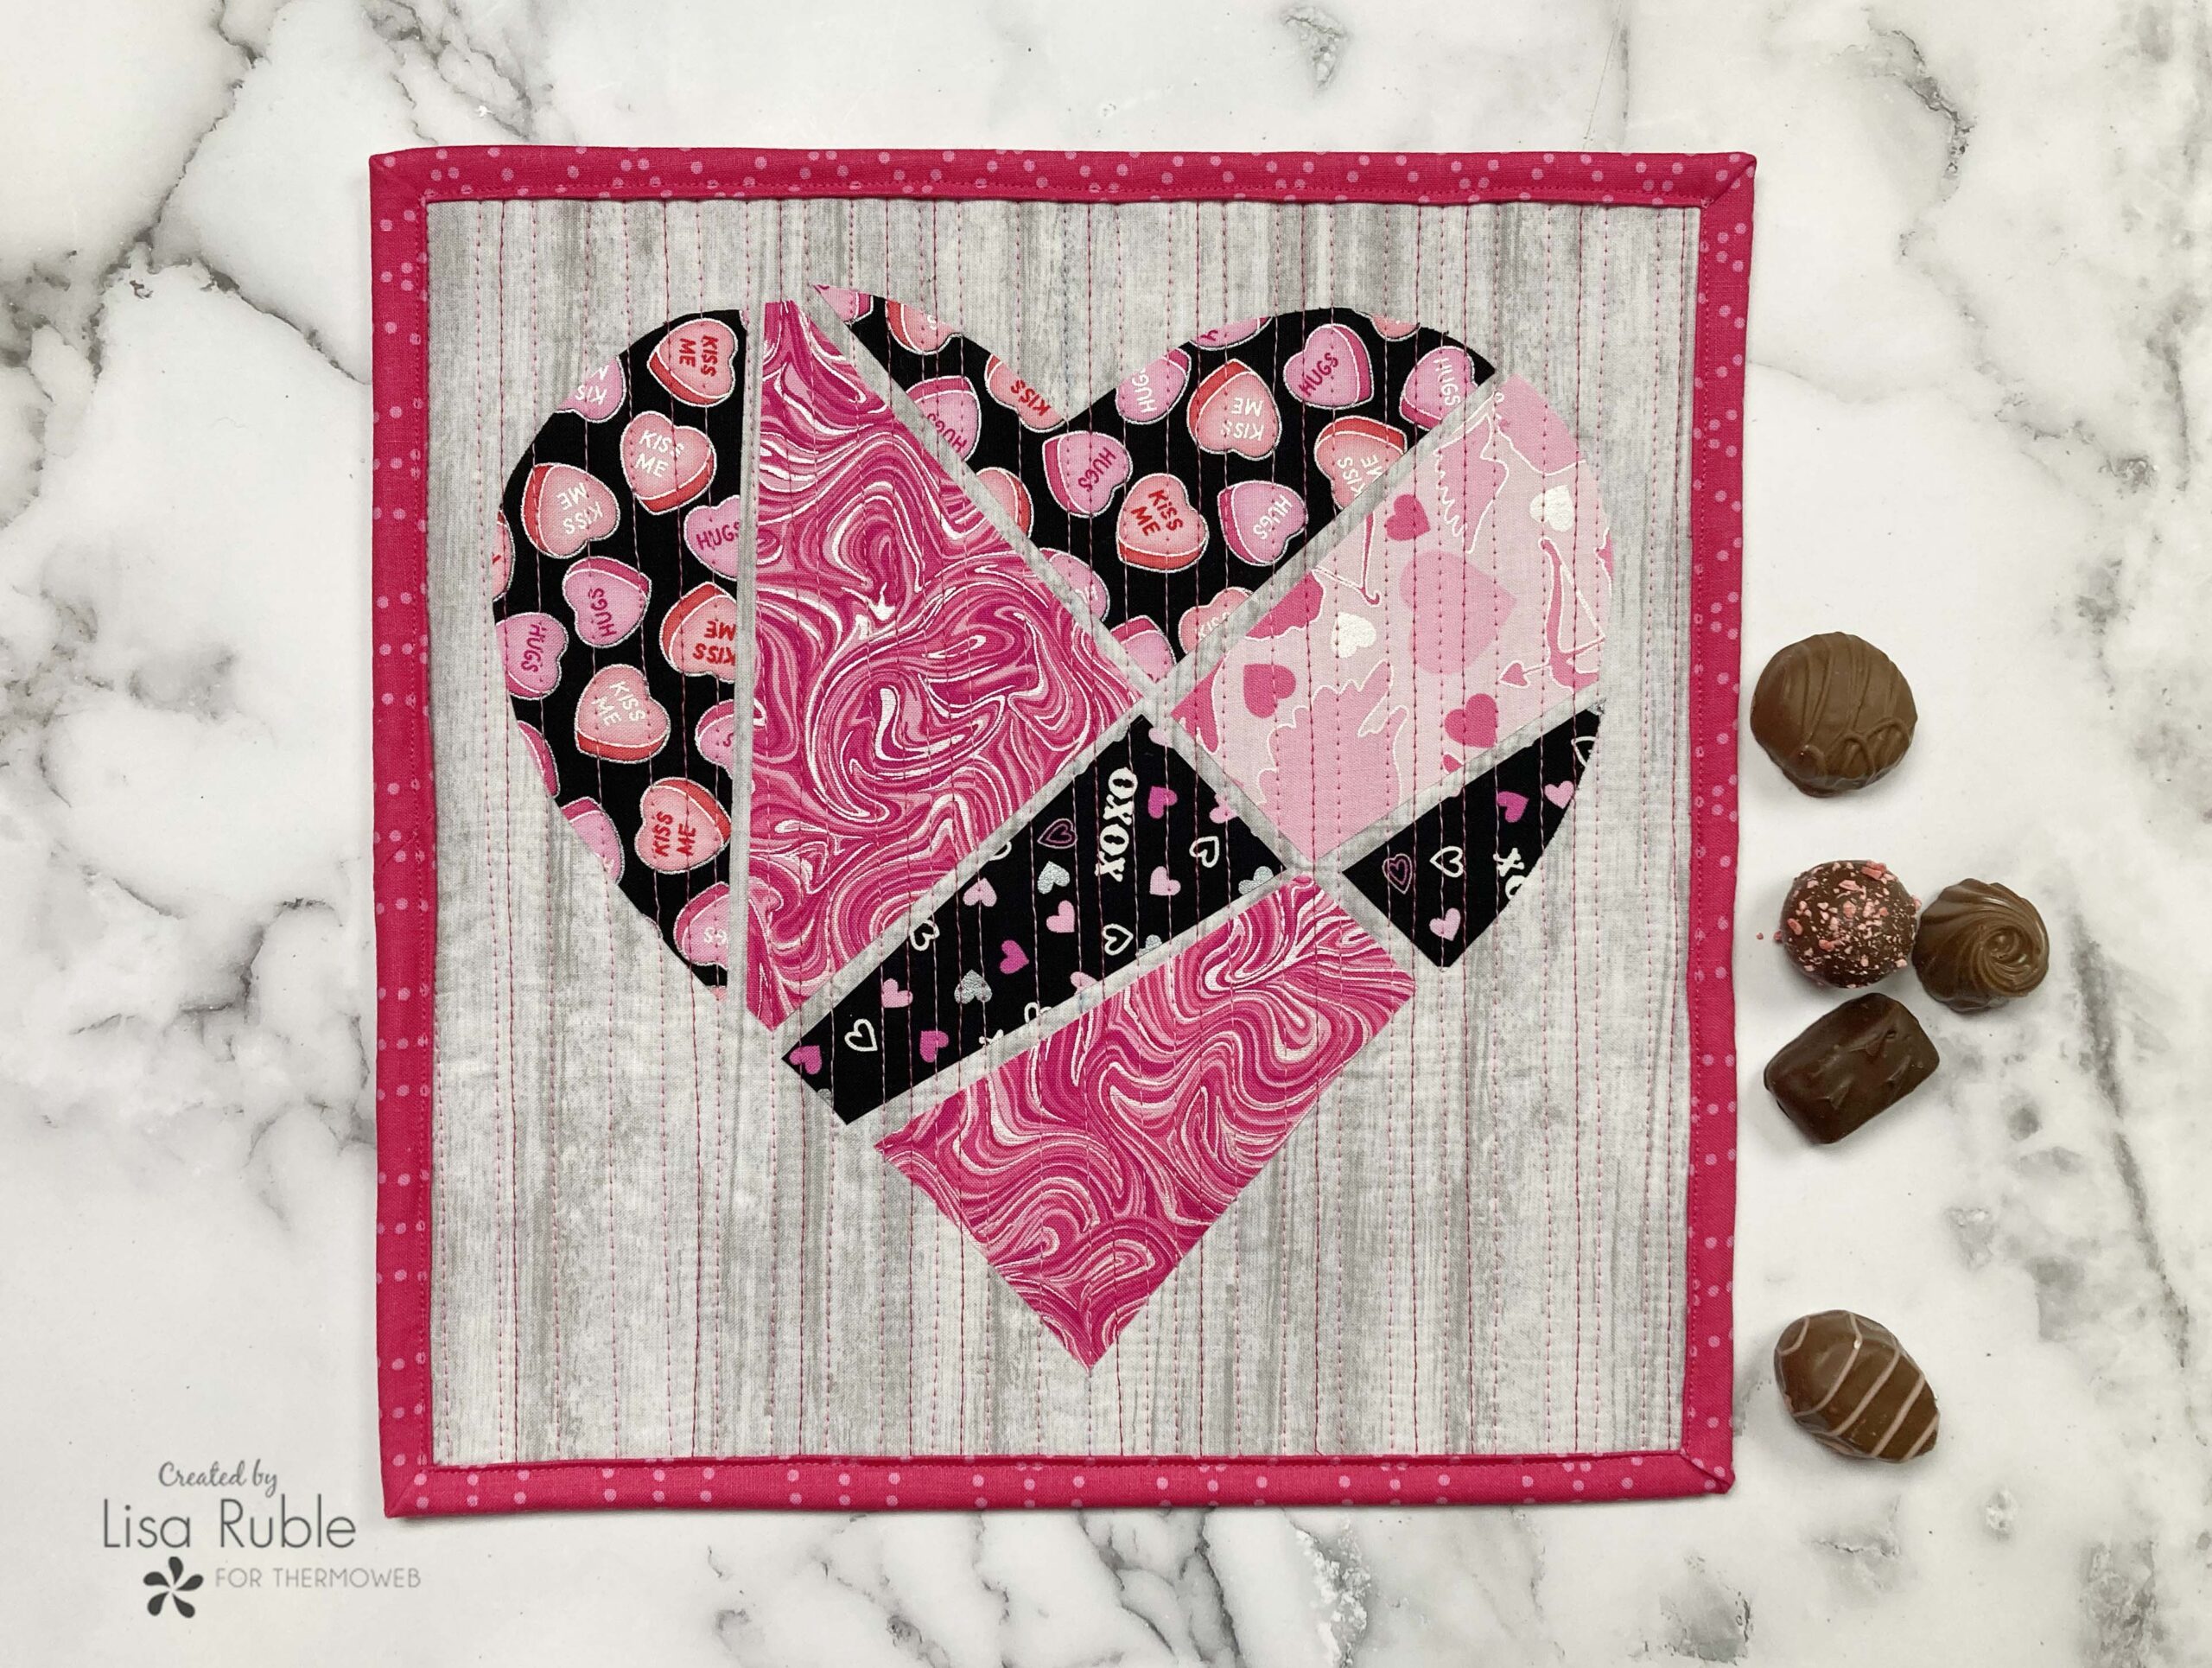
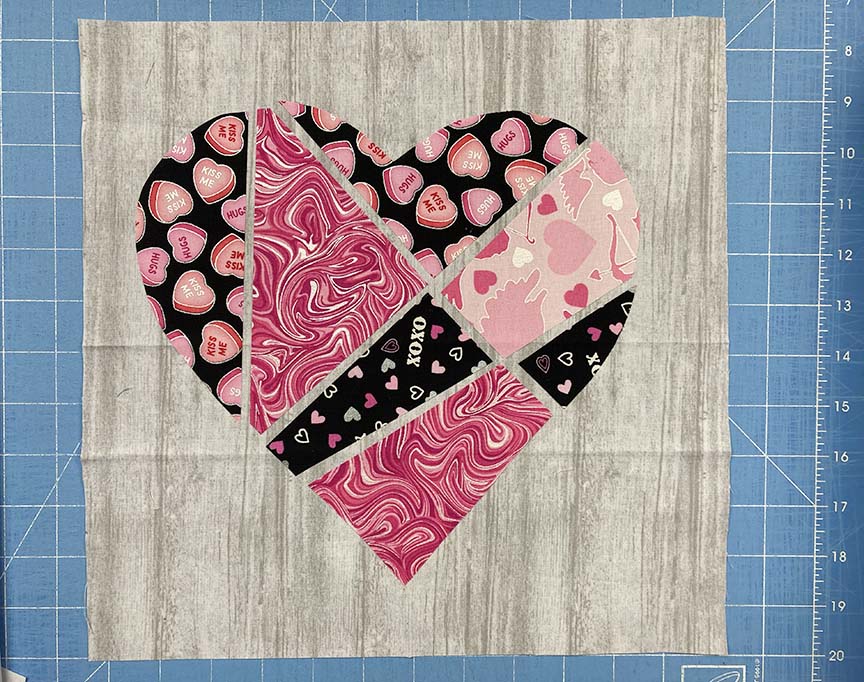
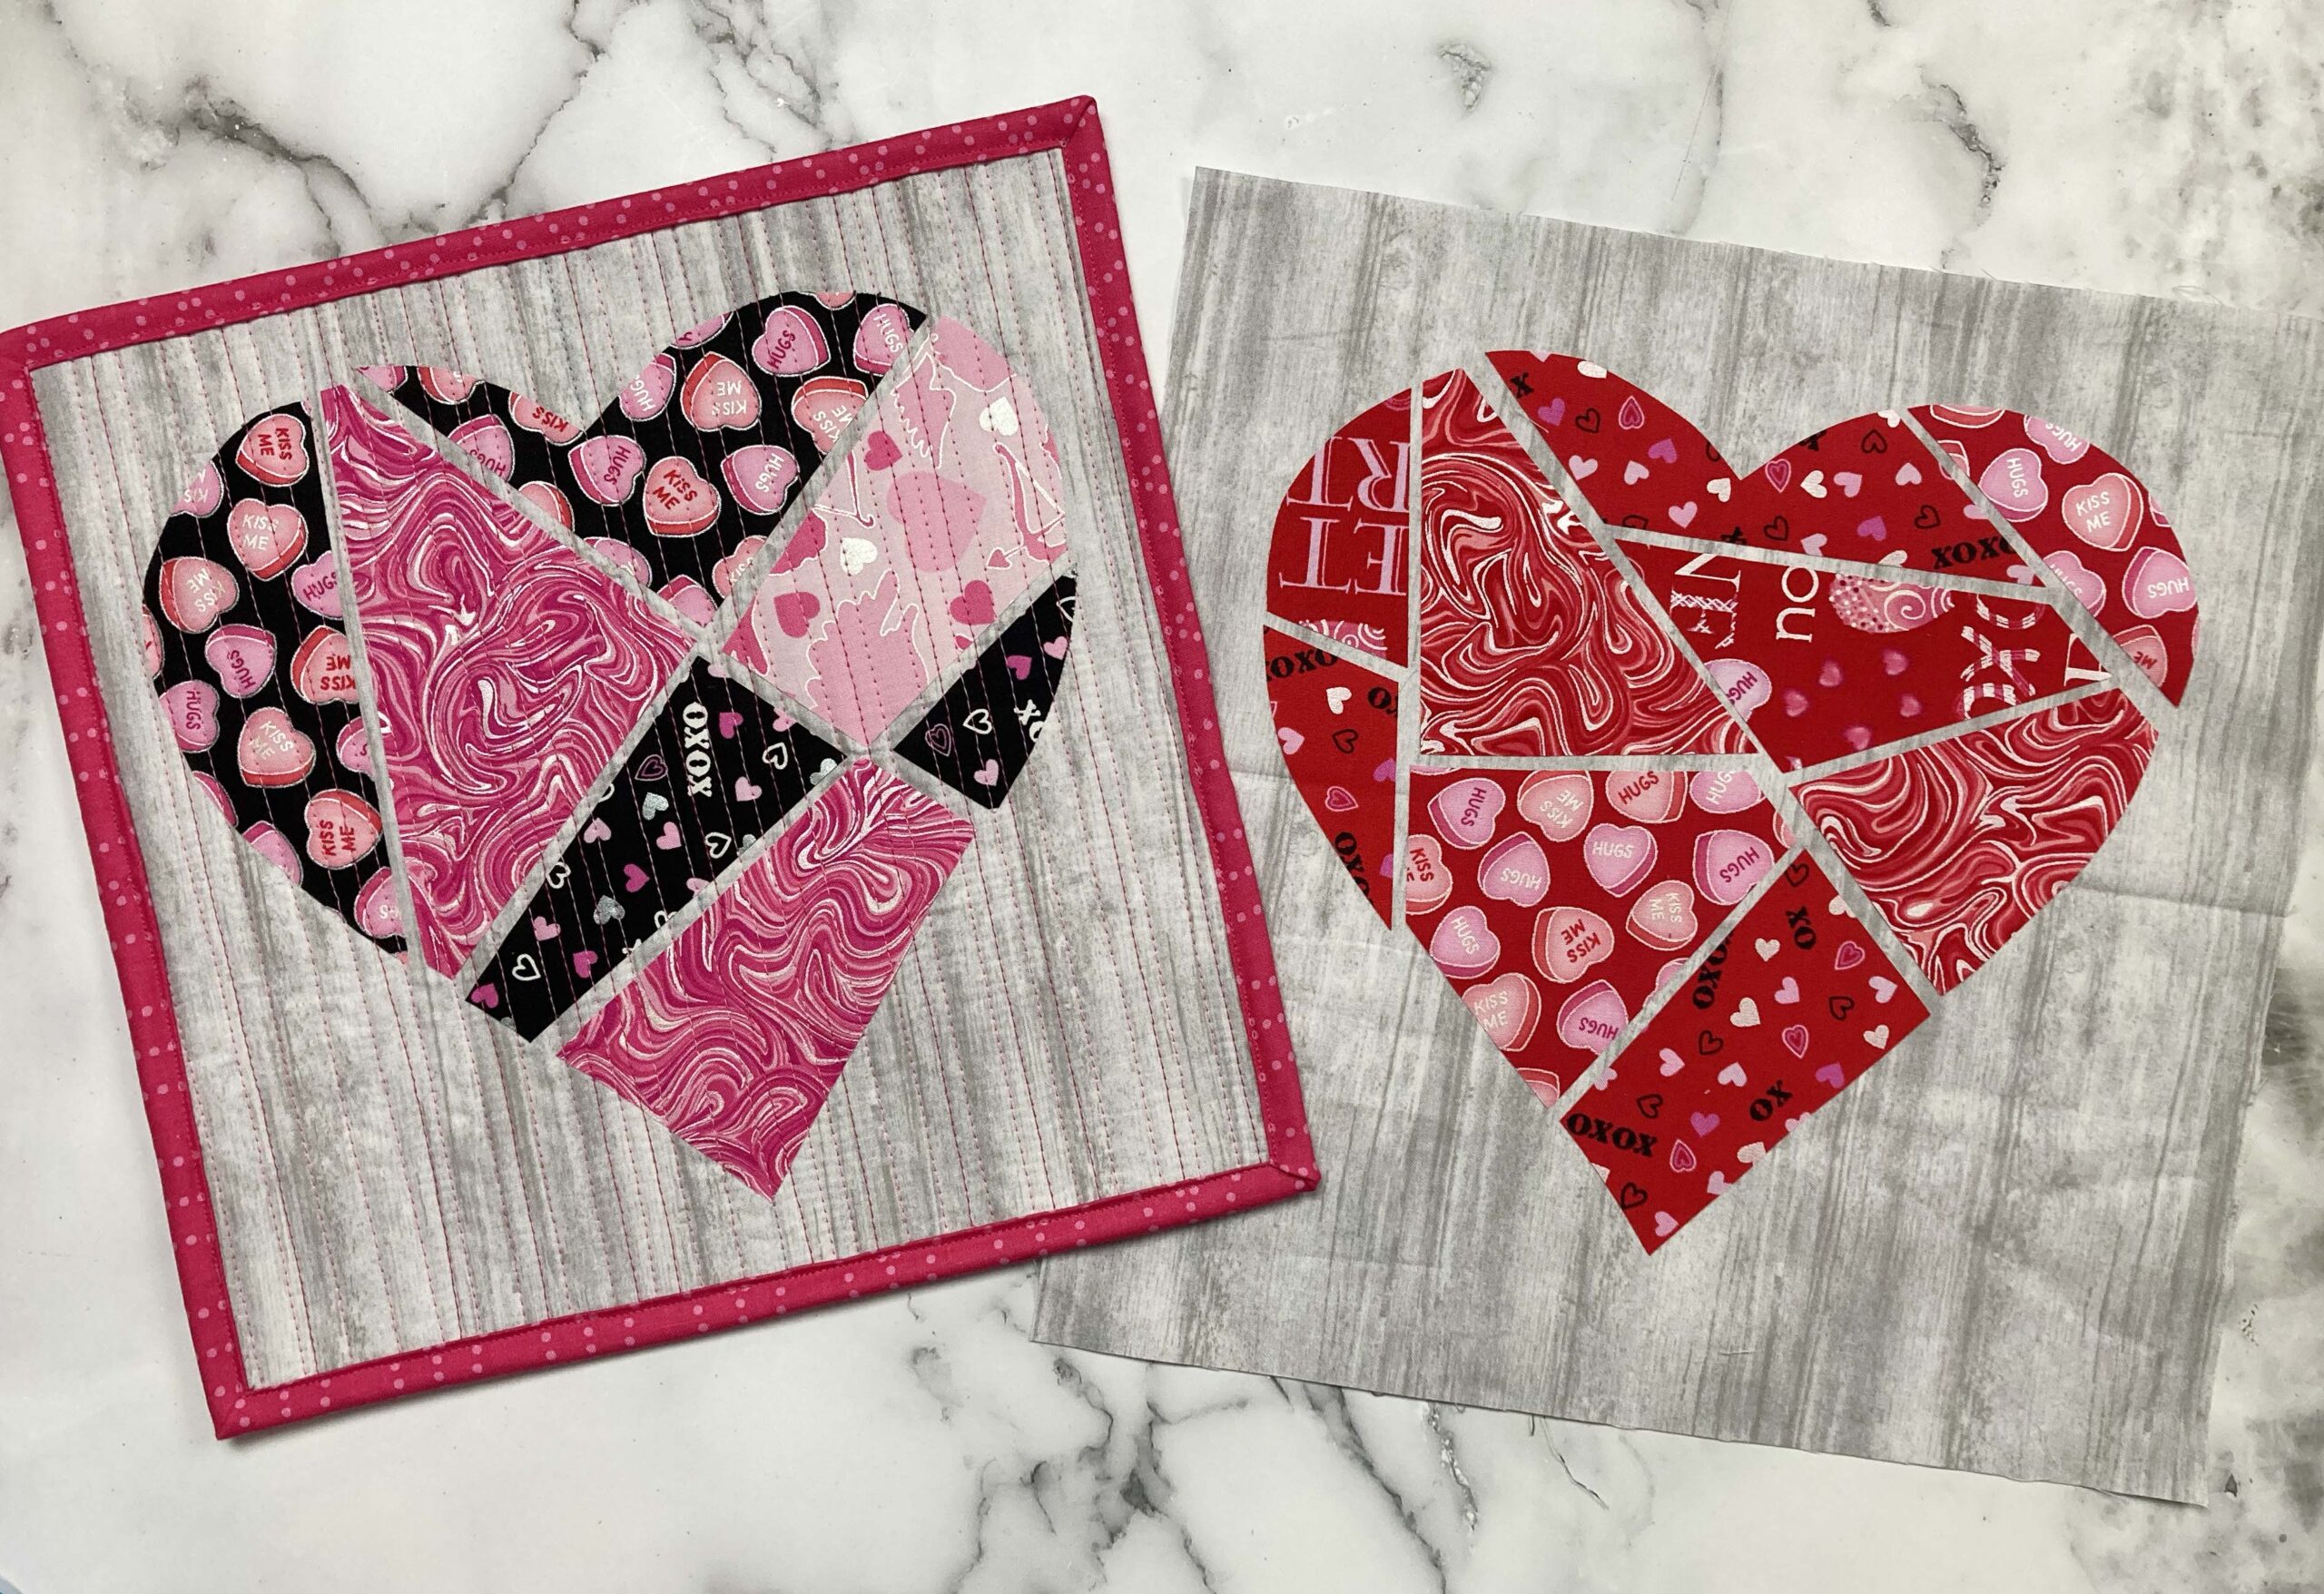
I created this fun no-sew block using four different Valentine-themed fabrics, fusible web, and some very random cut lines. It’s fun to make, and every block is unique. It’s also a great way to use up precut 10” squares, though you can also cut your own from scraps. I hope you’ll give it a try!
Note: This technique actually creates pieces for four blocks. In this tutorial, I’m showing how to turn one block into a mini quilt. If you only want to make one, you’ll need just one background square and you can toss the remaining pink pieces. But with Valentine’s Day around the corner, why not make four adorable mini quilts to give as gifts? Three (or four!) blocks would make a fun table runner or wall hanging.
Puzzle Quilt Mini Size: 11-1/2″ square
You’ll Need:
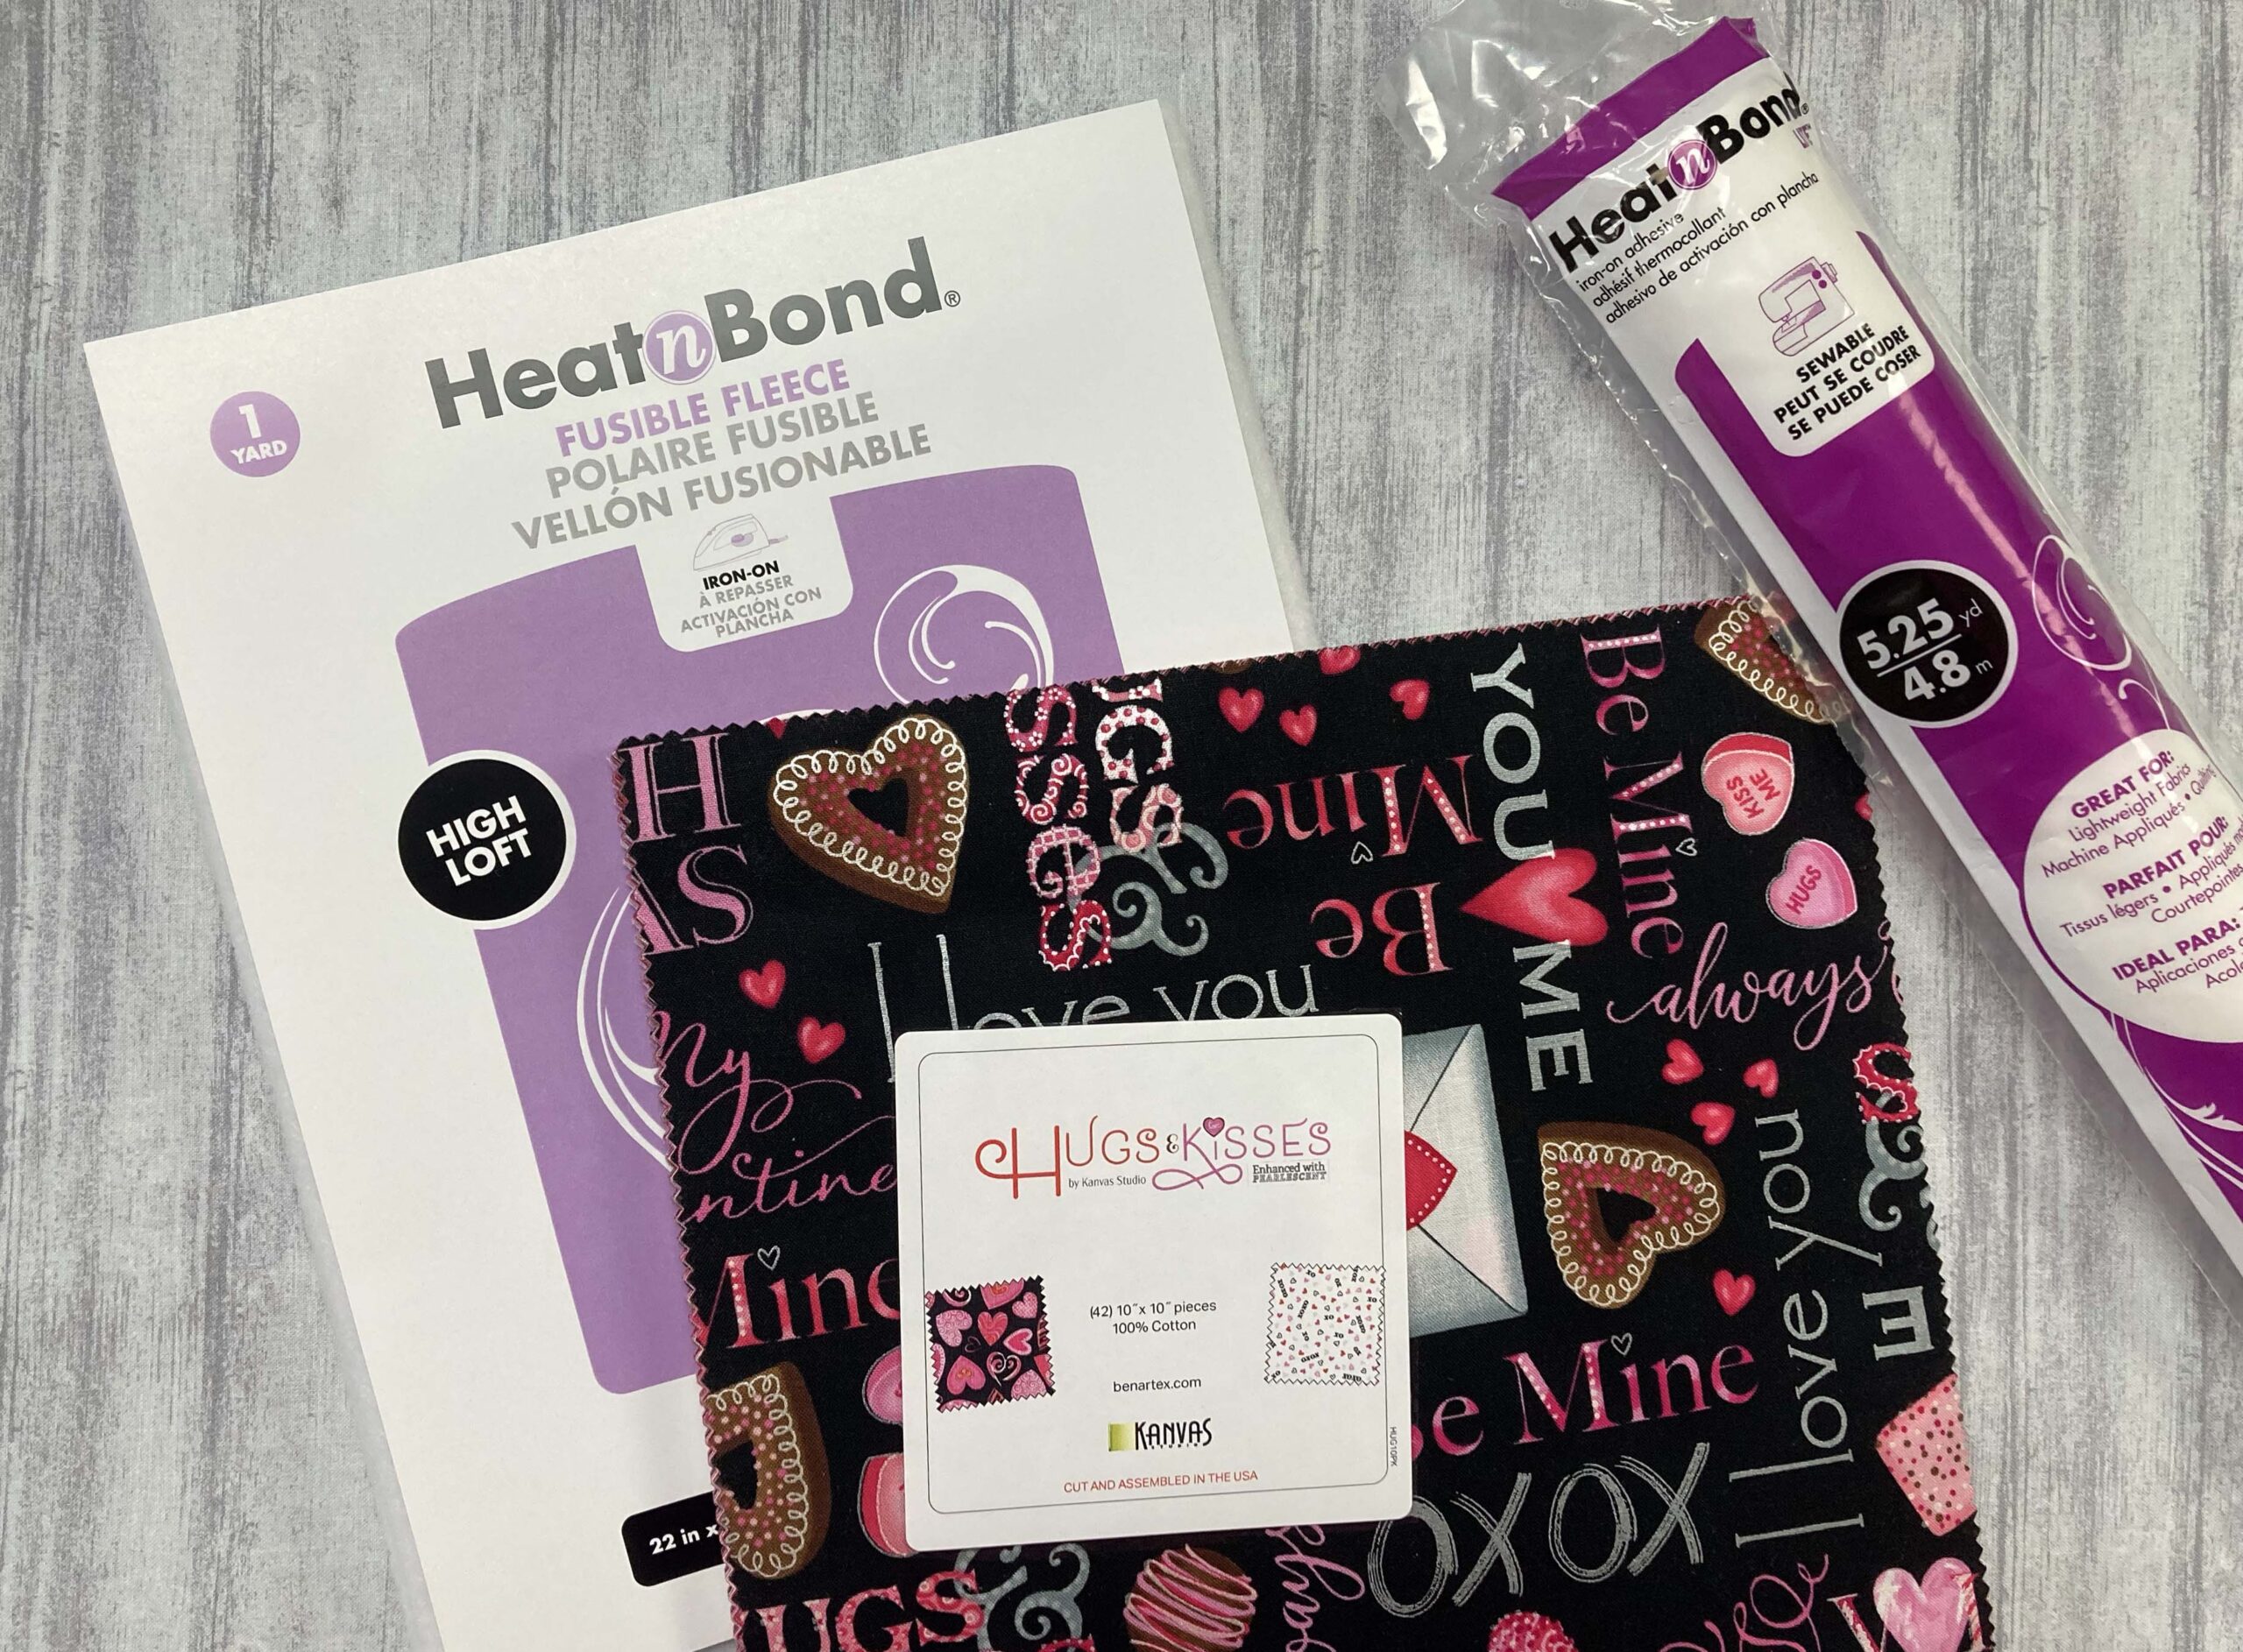
- (4) 10″ squares in varying valentine pinks or reds (I used novelty prints from the Hugs & Kisses collection by Benartex’s Kanvas Studio)
- (1) 12-1/2″ light gray background square (per block you want to make)
- (1) 12-1/2″ background square of HeatnBond Fusible Fleece
- 13” square of backing fabric
- (2) 2-1/4” x WOF coordinating strips for binding
Before you start: Try to complete this project (at least to the point of fusing) all in one sewing session. Once you cut up your hearts, it’s easy to misplace pieces or lose track of where they belong in the puzzle heart if things get shuffled around too much.
Puzzle Heart Mini Quilt
Step 1 Download the half heart template here. You’ll need to trace it onto a folded piece of paper to make a full heart.
Step 2 Trace (4) full hearts onto the paper side of HeatnBond Lite. Cut out loosely beyond the heart shapes and fuse each to the wrong side of a 10″ valentine square.
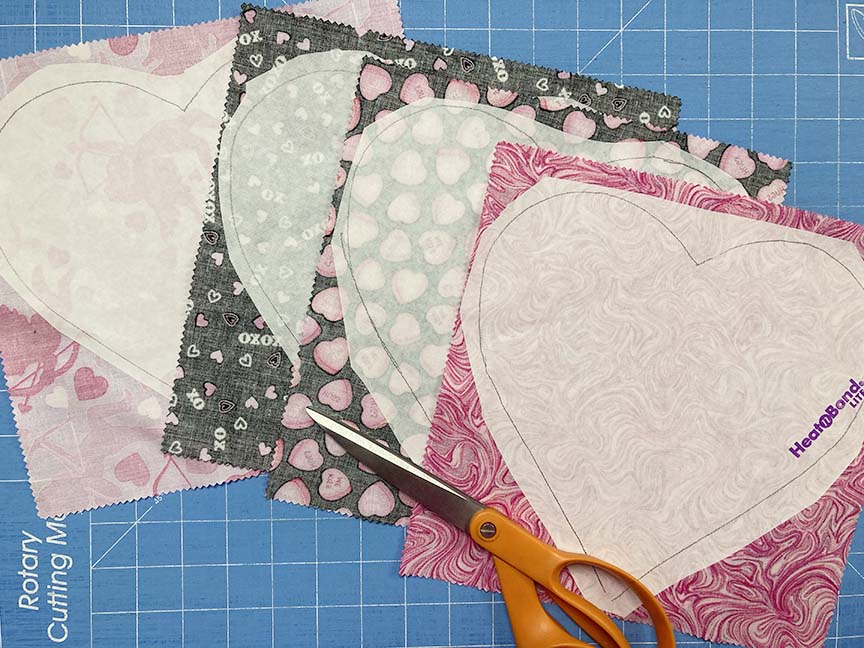
Step 3 Cut out each on the line to create (4) hearts. Remove the paper backing from each heart.
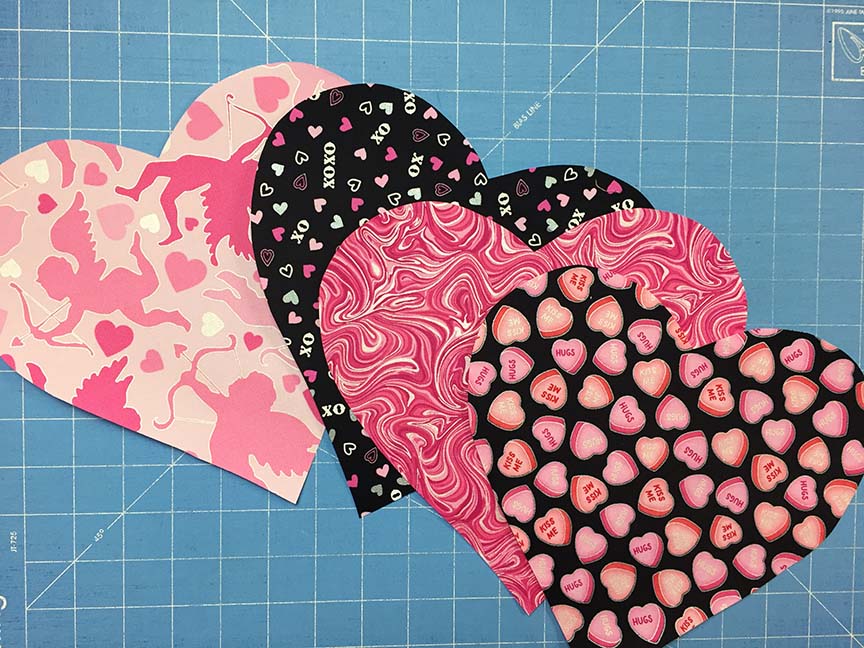
Step 4 Layer the hearts on top of each other with the right sides facing up. Position a ruler on top of the heart stack and cut the hearts at an angle. Keep all pieces stacked. Now comes the fun part! Continue cutting the heart stack in different directions to make a variety of cut shapes. Try to avoid creating really small pieces. My sample heart has 7 different pieces, but I’ve cut as many as 11 before–yours can have more or less. But I wouldn’t do too many more unless you really like puzzles with tiny pieces! 🙂

See this step in action by watching the video demonstration below.
Step 5 Fold the 12-1/2″ background square in half in both directions and crease to find the center. To make your first heart block, choose one of each shape, varying the fabric choices. Position your cut heart pieces into the finished shape on the background square, centering as much as possible. Leave a small gap (1/8″ to 1/4″) in between pieces.
Watch a video demonstration for Steps 5 and 6 below.
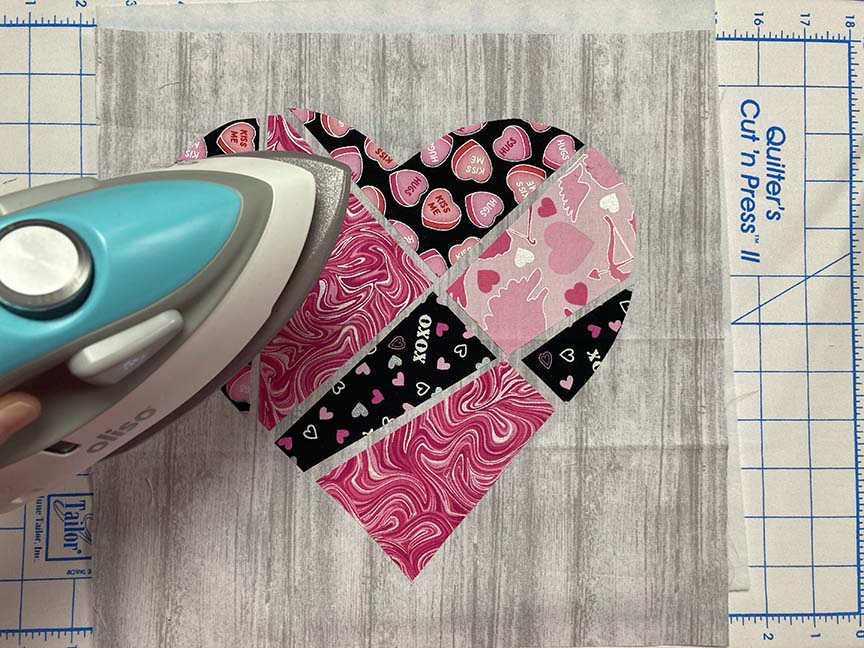
Step 6 When you’re happy with the placement of all pieces, use the iron to fuse in place.
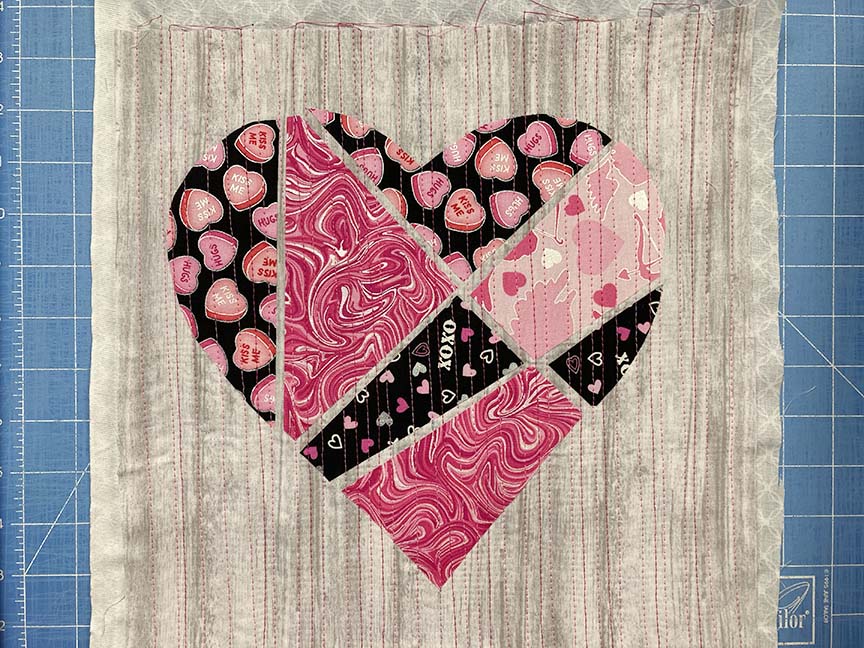
Step 7 Adhere the fusible fleece square to the wrong side of your block. Baste the 13” backing square to the fleece to complete your quilt sandwich and quilt as desired. I used organic (aka not quite straight!) vertical lines.
Step 8 Square up the quilted mini to 11-1/2”, trimming off excess backing and batting. Use the (2) 2-1/4” x WOF strips to bind your mini quilt. That’s it!
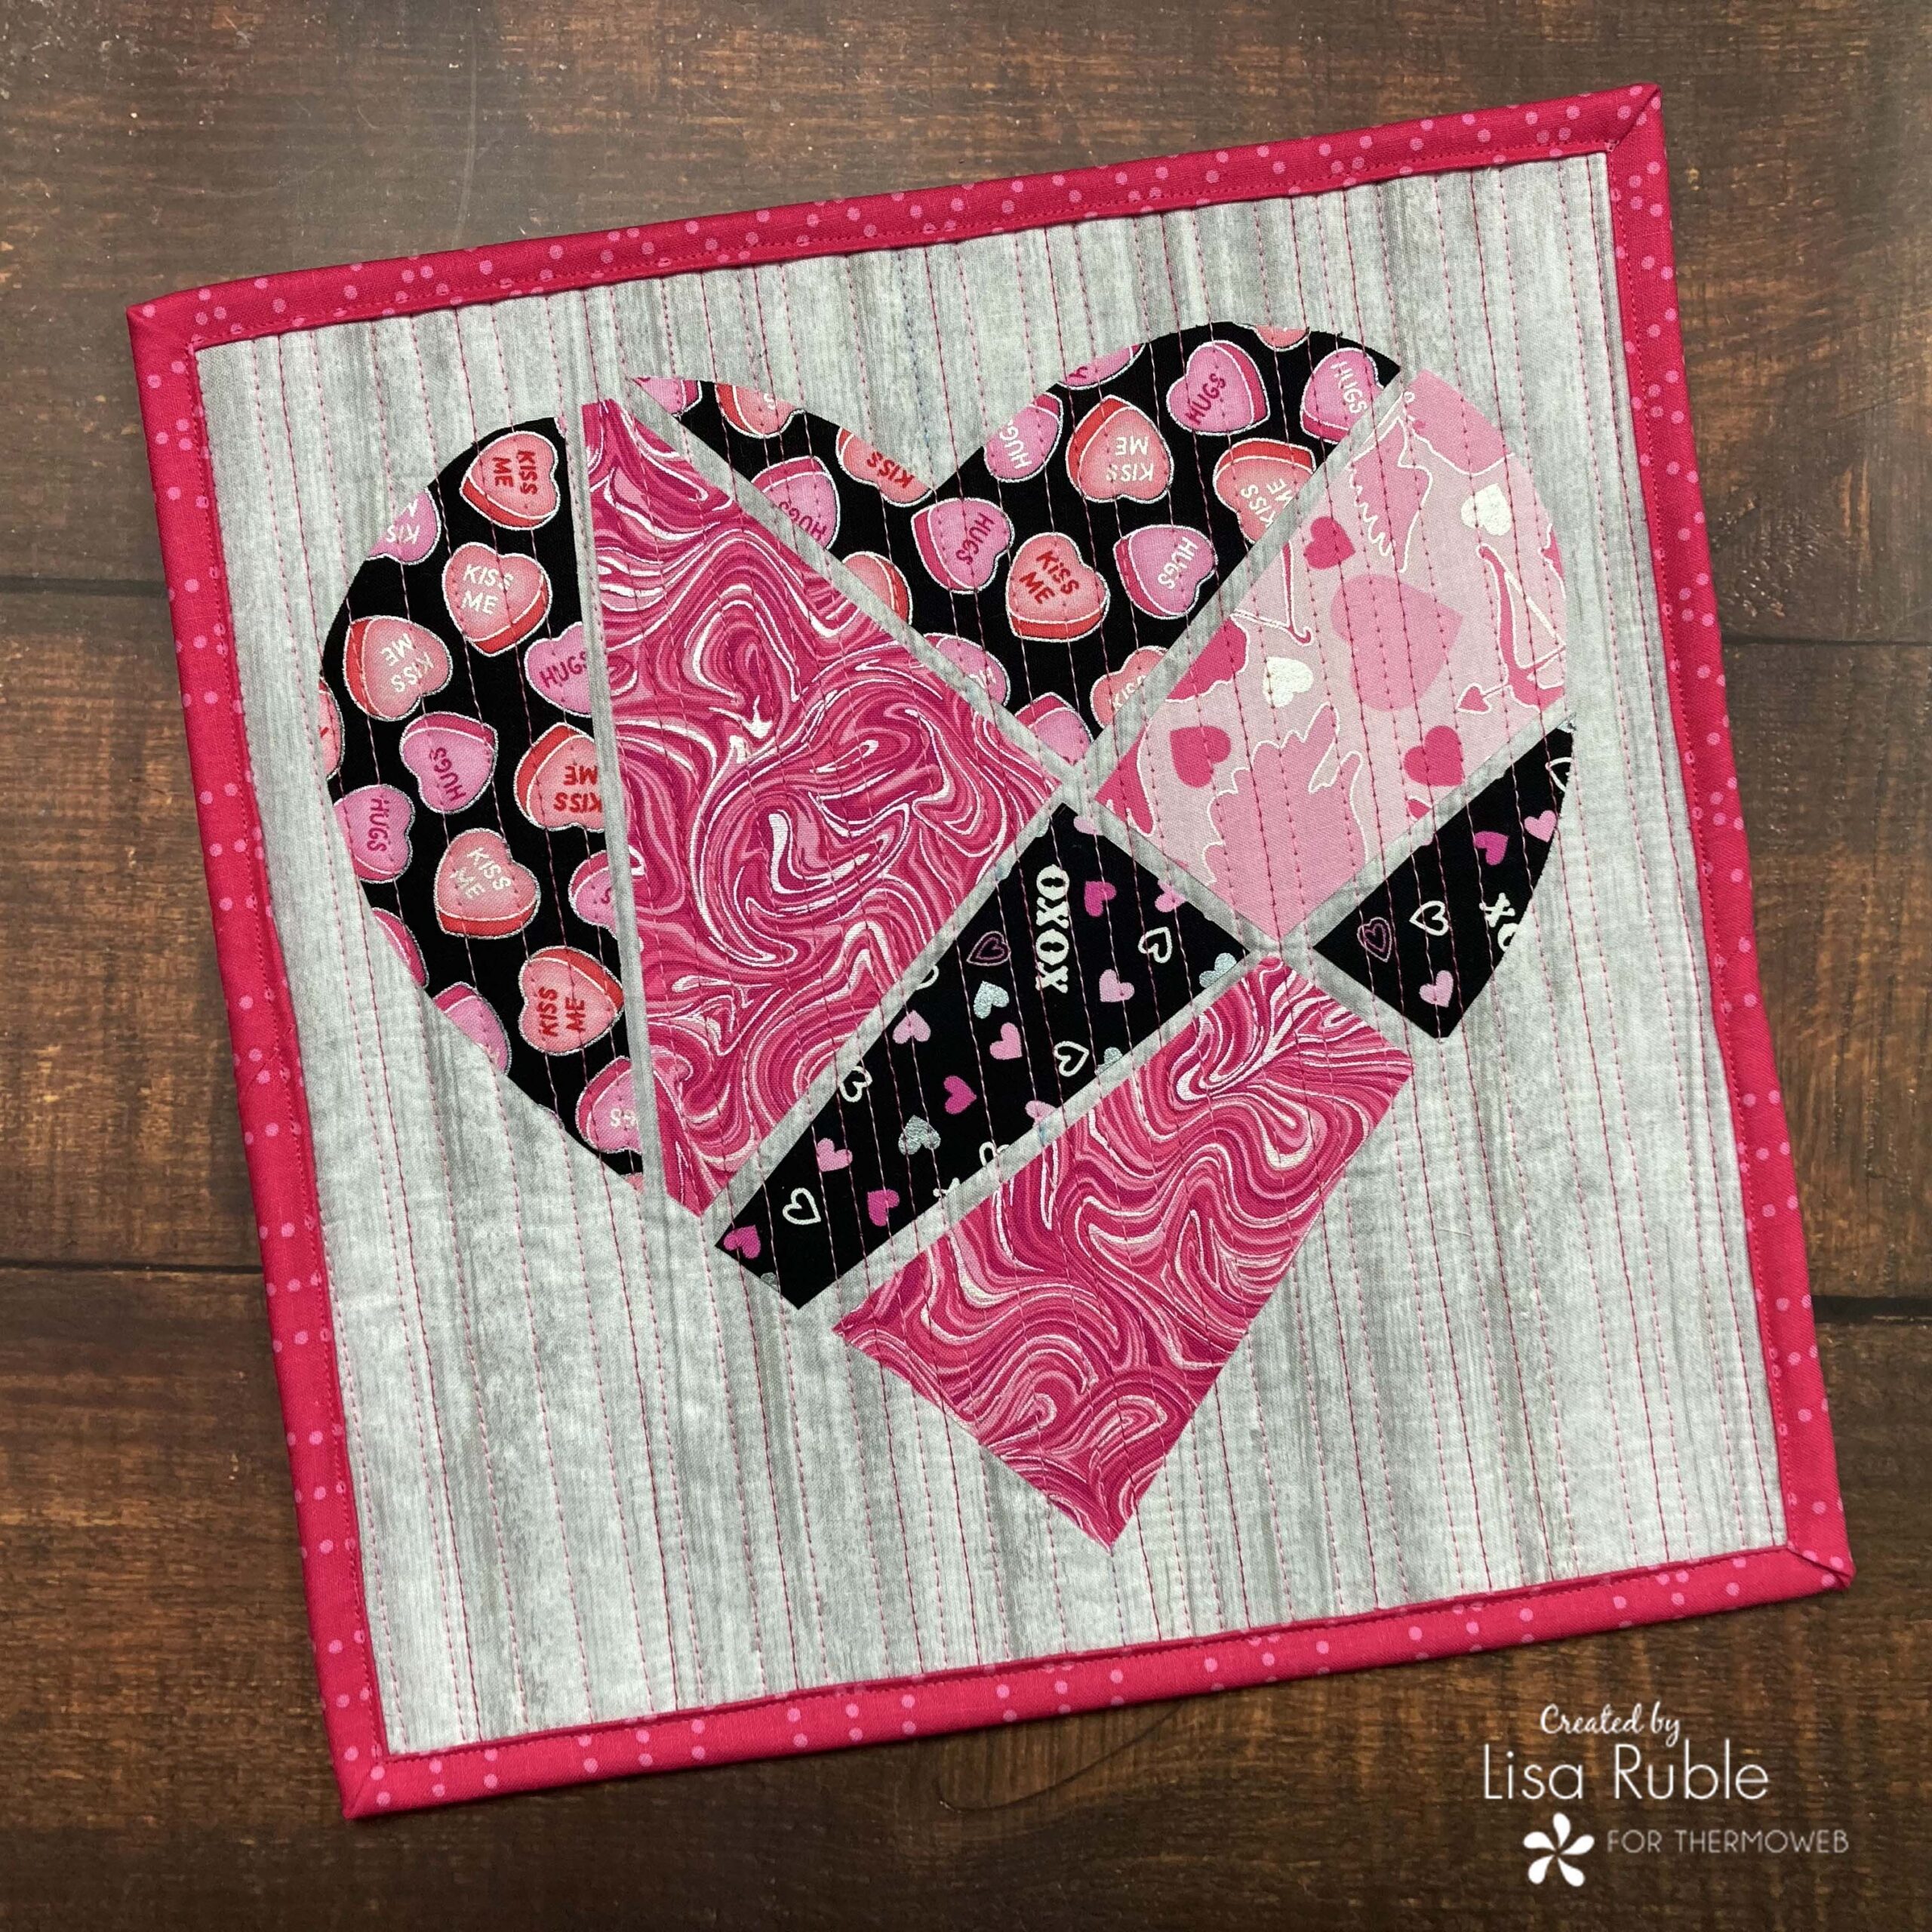
A quilted fabric valentine, ready to deliver to someone you love on February 14th!
Change It Up:
The Hugs & Kisses fabric collection had so many fun prints that I had trouble choosing. So just for fun, I selected four red prints to make more of a one-color heart. Which do you like better?
Go Big:
Want to make more blocks? Head over to my blog for instructions on how to finish three blocks into an easy table runner!
Tip: If you want your blocks to be even scrappier, you can start with more pink squares. You can create one block for every pink square used. Imagine an entire quilt of heart blocks like this – so much fun!TooltipText