


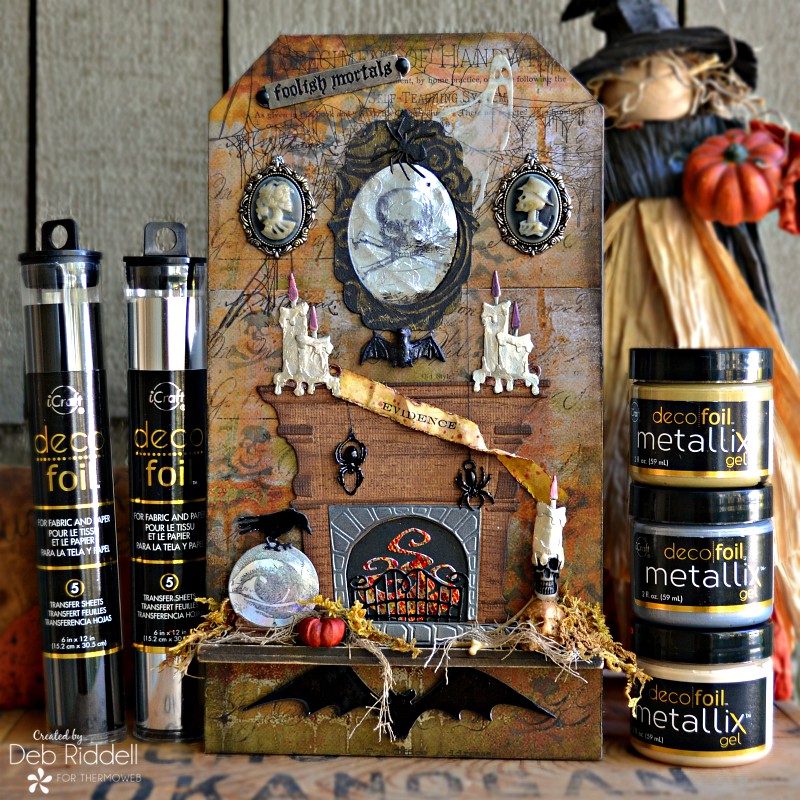
Hello everyone and thanks for stopping by, it’s Deb Riddell here with you today to share a spooky Halloween home decor tag created with Therm O Web’s Deco Foil Metallix Gels and Foil Transfer Sheets.
Poltergeist’s Parlor Halloween Tag
Therm O Web Supplies Used:
Deco Foil Metallix Gel – Glazed Pewter
Deco Foil Metallix Gel – Pure Gold
Deco Foil Metallix Gel – Champagne Mist
Deco Foil Transfer Sheets – Silver
Deco Foil Transfer Sheets – Black
Deco FoilTransfer Sheets – Iridescent
Brutus Monroe Foil Transfer Sheets – Sunrise
Deco Foil™ Toner Sheets
Deco Foil Clear Toner Sheets – Clear
Deco Foil Stencil Pal
Gina K. Designs Premium Cardstock • Black Onyx
iCraft Ultra Bond Adhesive 2 fl oz
Zots™ Singles • 3-D
Other supplies used:
Sizzix – Fireside dies; Stitched Ovals dies; Frightful Things dies; Regions Beyond dies; Bat Crazy dies; Ornate Label #4 Sizzlets die; Flourish Texture Fades Embossing Folder
Stampers Anonymous – Mini Halloween stamps; Cadaverous stamps; Pine stamp; Life Of The Party stamps; Speckles stencil; Batground stencil; Crossbones Mini stencil
Ranger Ink – Distress Archival Ink; Distress Marker; Distress Ink; Distress Oxide Ink; Distress Crayons; Distress Paint; Alcohol Inks
Advantus – Small Etcetera Tag; Abandoned Paper Stash; Skulls Adornment; Crypt Cameos; Wicked Adornments; Boneyard; Ruler Pieces; Mummy Cloth; Bitty Bats; Curiosities Remnant Rubs; Halloween Words Adornments
Miscellaneous – foil laminator; die cutting machine; small chipboard spider; putka pods; moss; brads; sewing thread
There are quite a few details on this tag as you can see so grab a cup of your favorite potion and read on for the how-to!
Poltergeist’s Parlor Halloween Tag Instructions
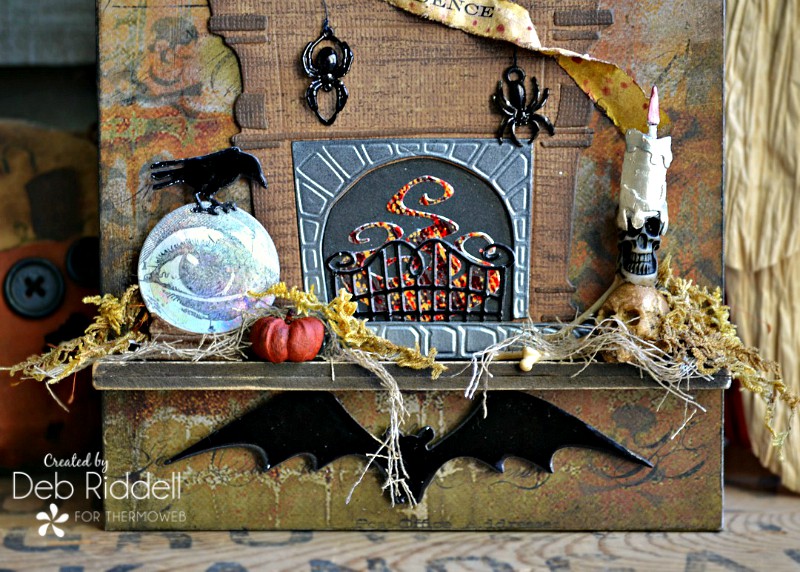
Start by die-cutting the Fireside fireplace from brown cardstock stamped with the Pine background stamp. Assemble the pieces to make the fireplace base.
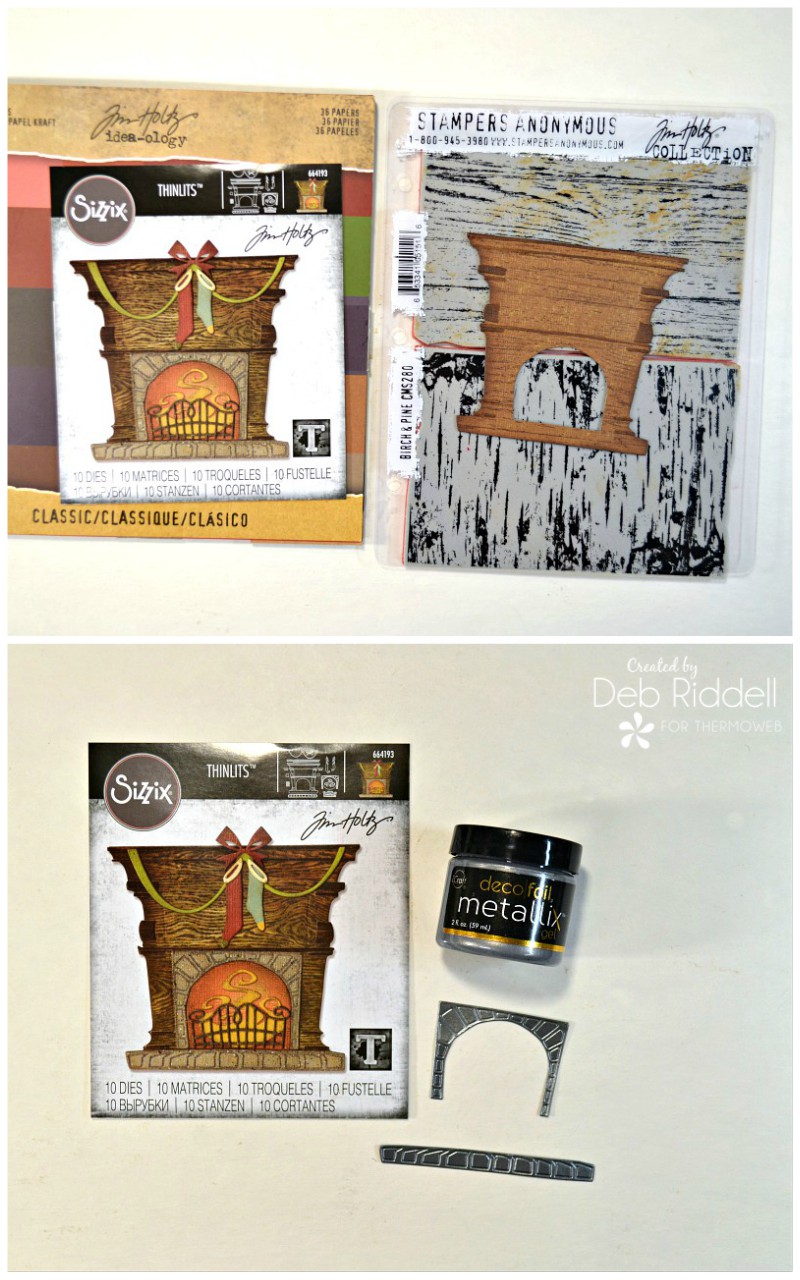
Cover a piece of Gina K. Designs Black Onyx Premium Cardstock with Glazed Pewter Metallix Gel and your Stencil Pal. Let dry thoroughly and die cut the hearth and fireplace surround from the Fireside die.
Preheat your foil laminator and cover a small piece of Deco Foil Toner Sheet with Deco Foil Black Foil Transfer Sheet. Die-cut the fire grate with the Fireside die. Cover another piece of Deco Foil Toner Sheet with Brutus Monroe’s Sunrise Foil Transfer Sheet and die cut the flames with the Fireside die.
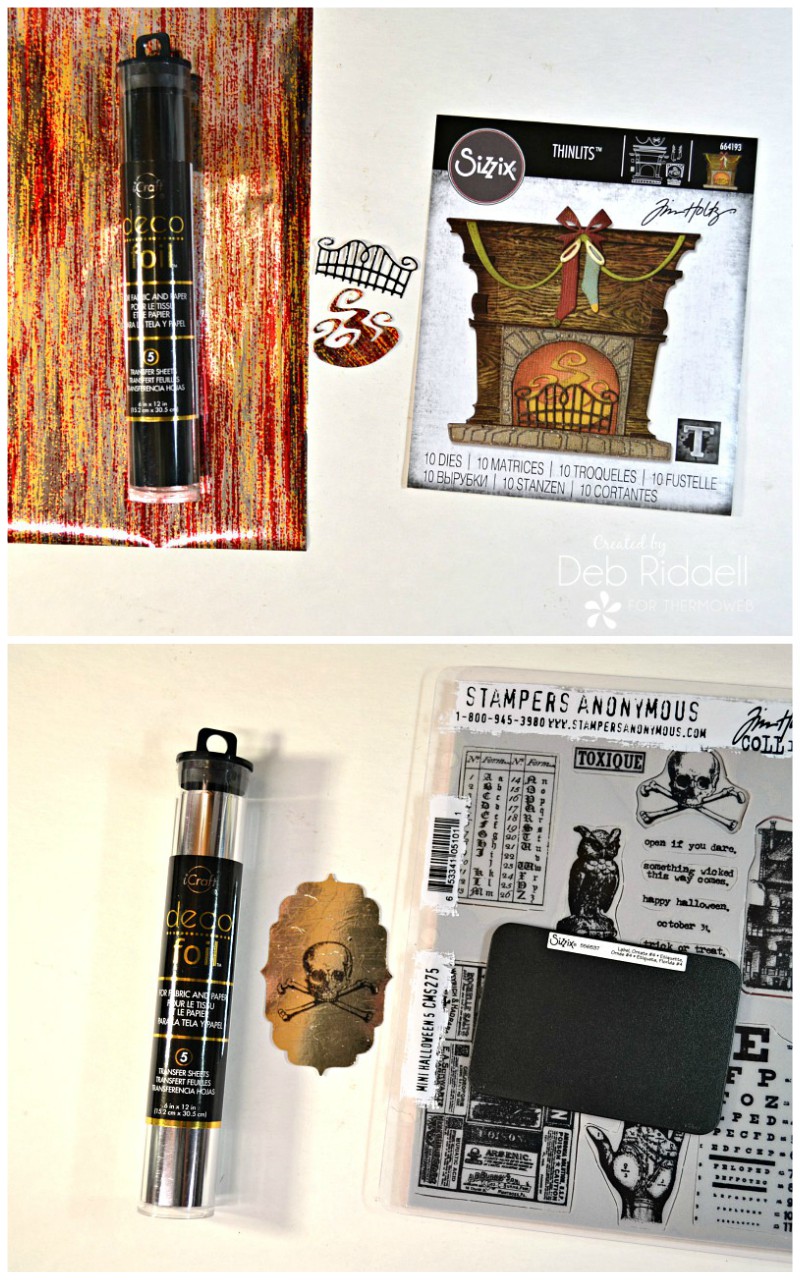
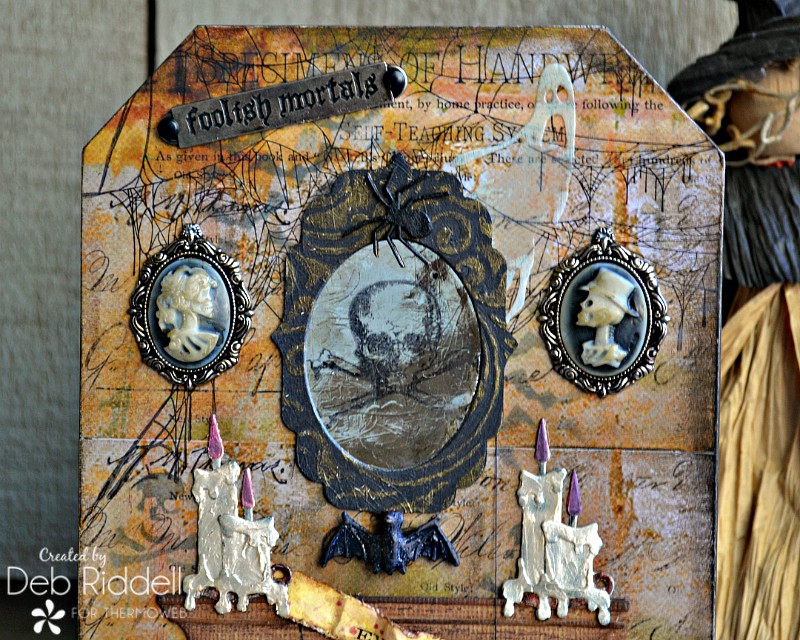
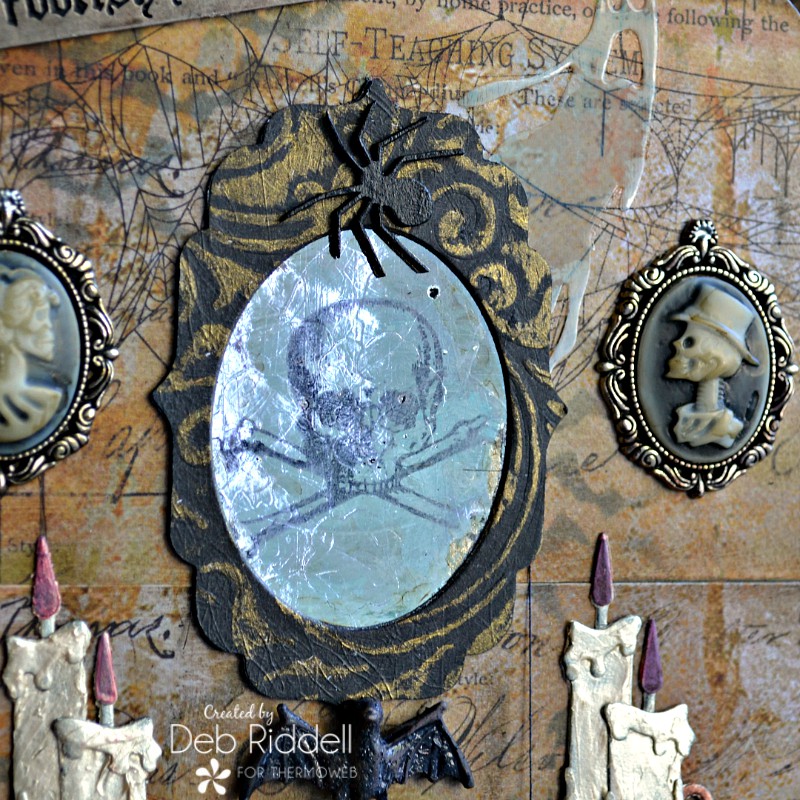
To make the mirror, cover a piece of Deco Foil Toner Sheet with Deco Foil Silver Foil Transfer Sheet and die cut a mirror shape with a label die (this is the Ornate Label #4 Sizzlets die). Stamp the skull and crossbones from the Mini Halloween stamp set onto the ‘mirror’ with black permanent ink.
Emboss a piece of Black Onyx Premium Cardstock with the Flourish embossing folder and take a small amount of Pure Gold Metallix Gel on your fingertip and burnish it over top of the raised embossed pattern. The Metallix Gel makes for a wonderful gilded effect!
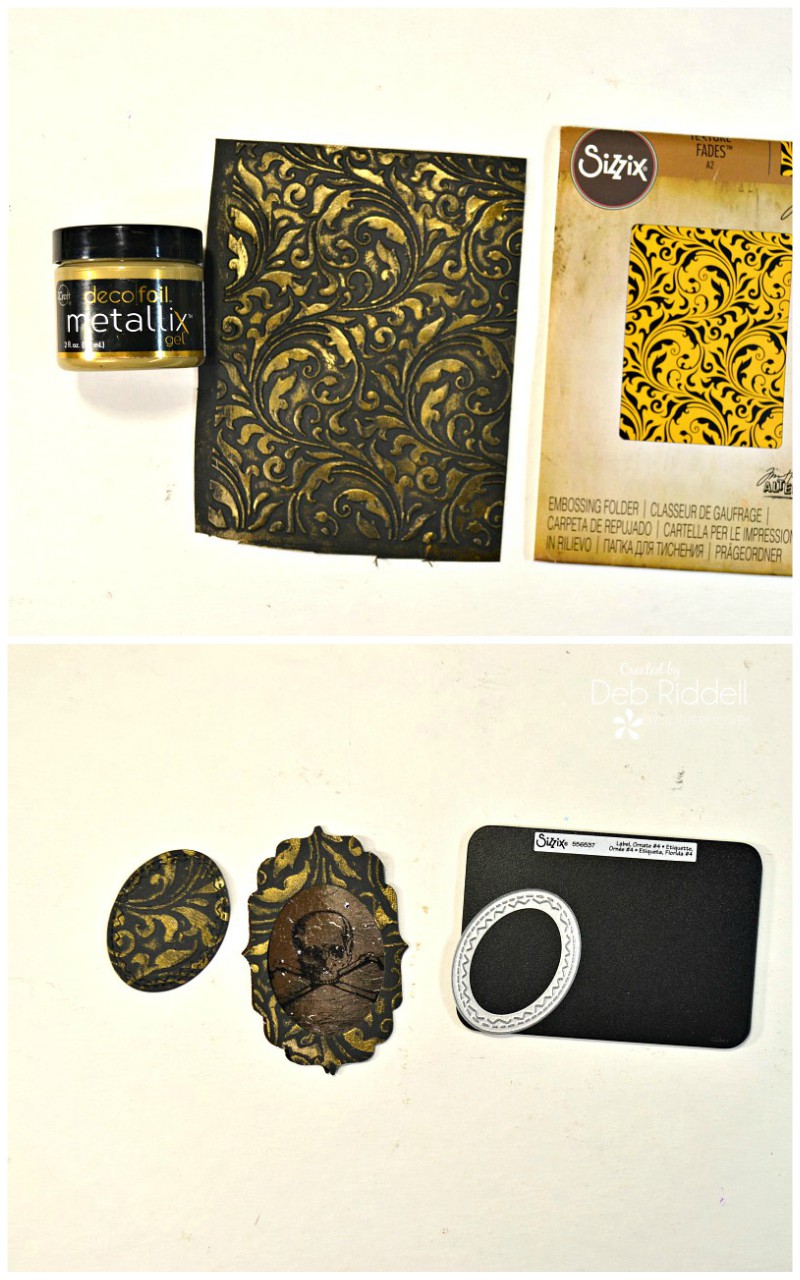
Die-cut another mirror shape from the Metallix gilded cardstock and then cut an opening into the frame with a small oval die. Layer the gilded frame overtop of your Silver foiled mirror and adhere in place with Ultra Bond adhesive.
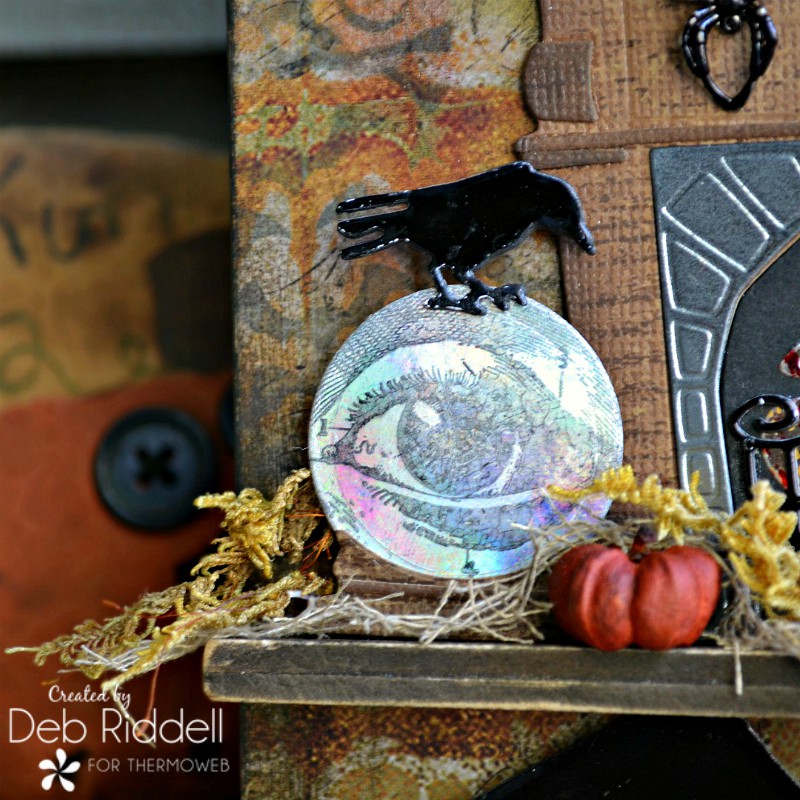
Make the crystal ball by foiling a piece of Deco Foil Toner Sheet with Iridescent Foil Transfer Sheet and die cut it with the small crystal ball die from Regions Beyond. Stamp the eye from the Cadaverous stamp set onto the crystal ball. Die-cut the holder for the crystal ball from the same cardstock you used to make the fireplace with the Regions Beyond dies.
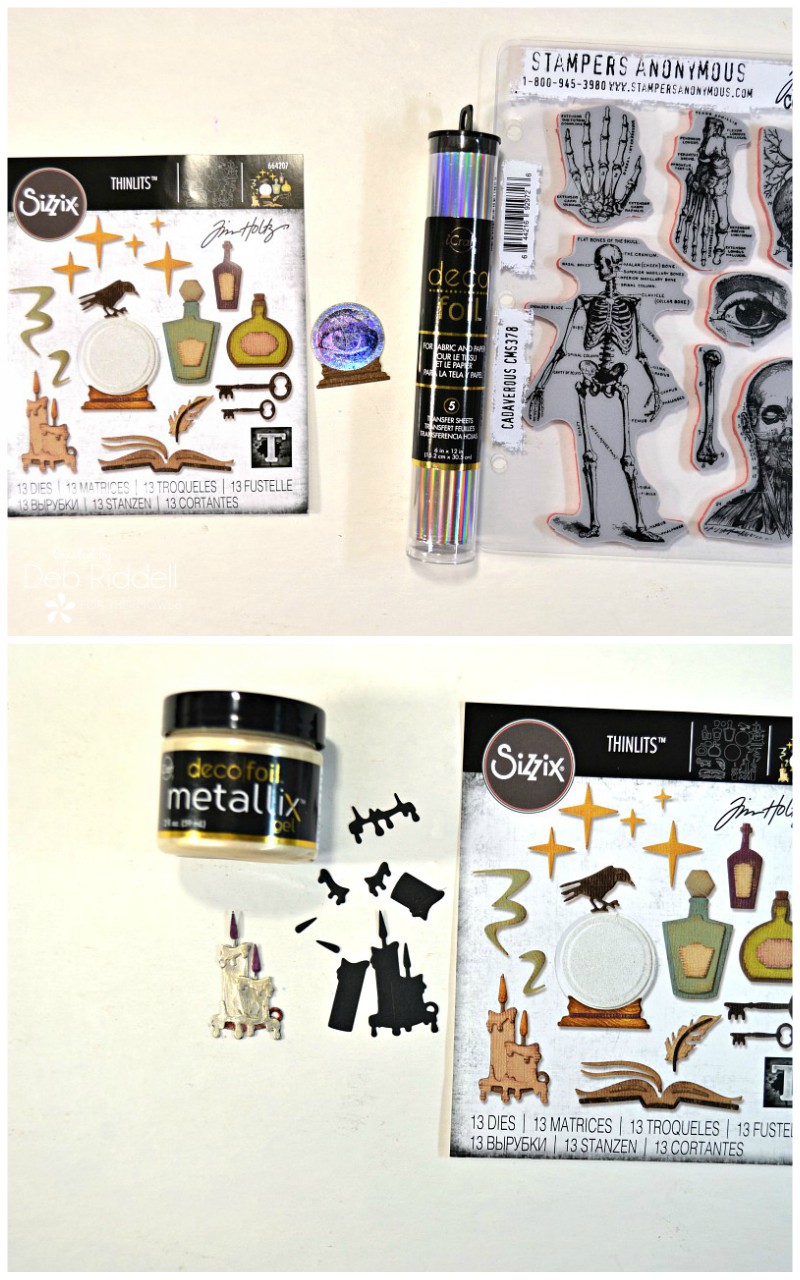
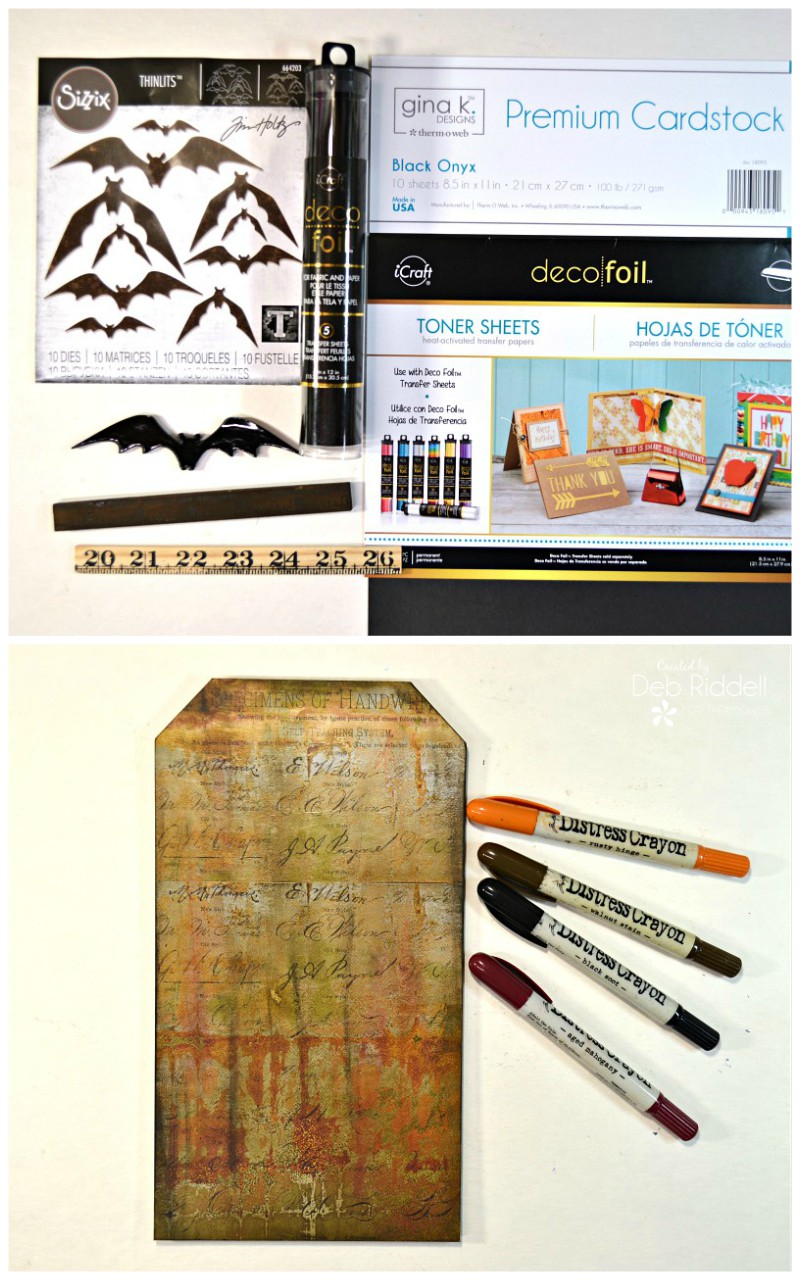
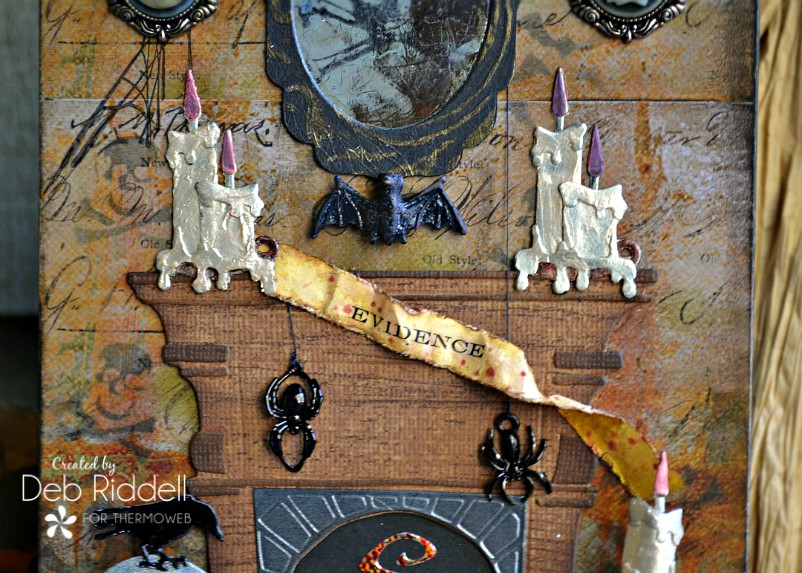
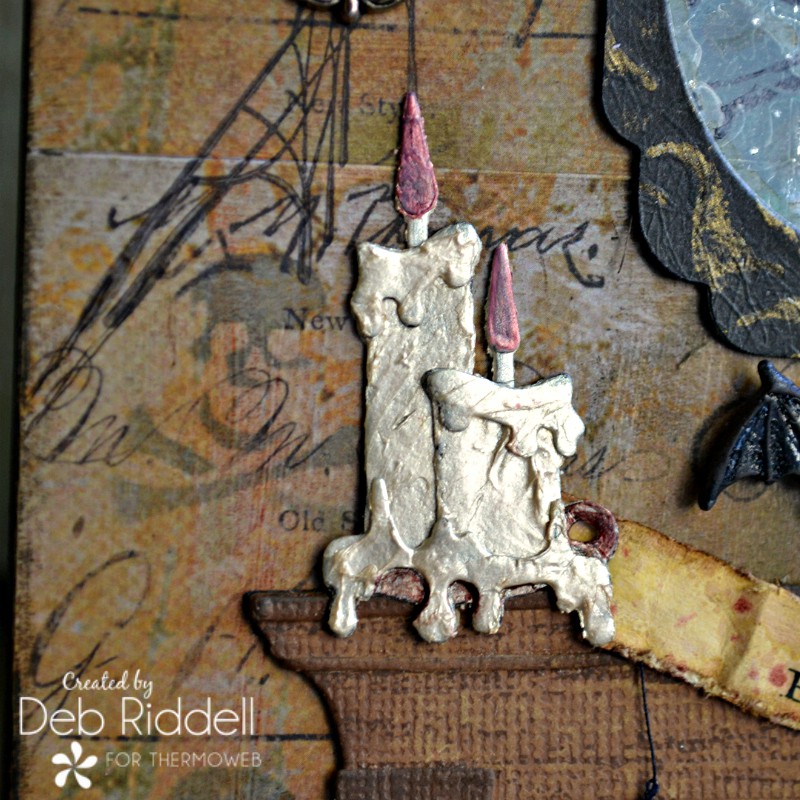
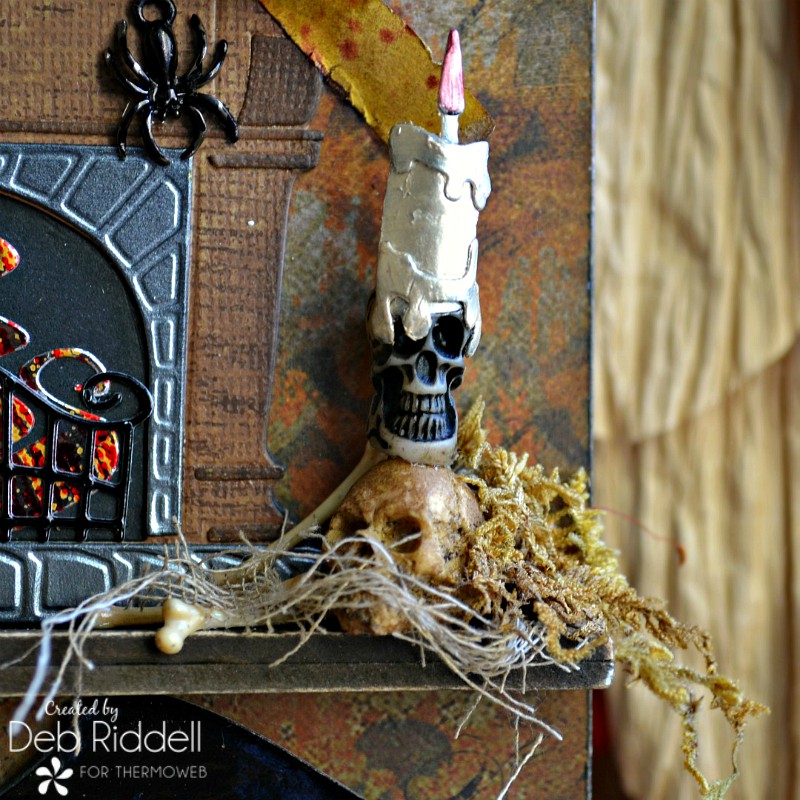
Die-cut three sets of candles from the Regions Beyond die set from Black Onyx cardstock. Apply Champagne Mist Metallix Gel on all of the die-cut pieces with your finger, leaving lots of texture so that it looks like wax. Let dry thoroughly and assemble two of the candles as instructed, colouring the flame and the candle holder with Distress Markers. The third candle will be used to top the stacked skulls, instructions to come shortly!
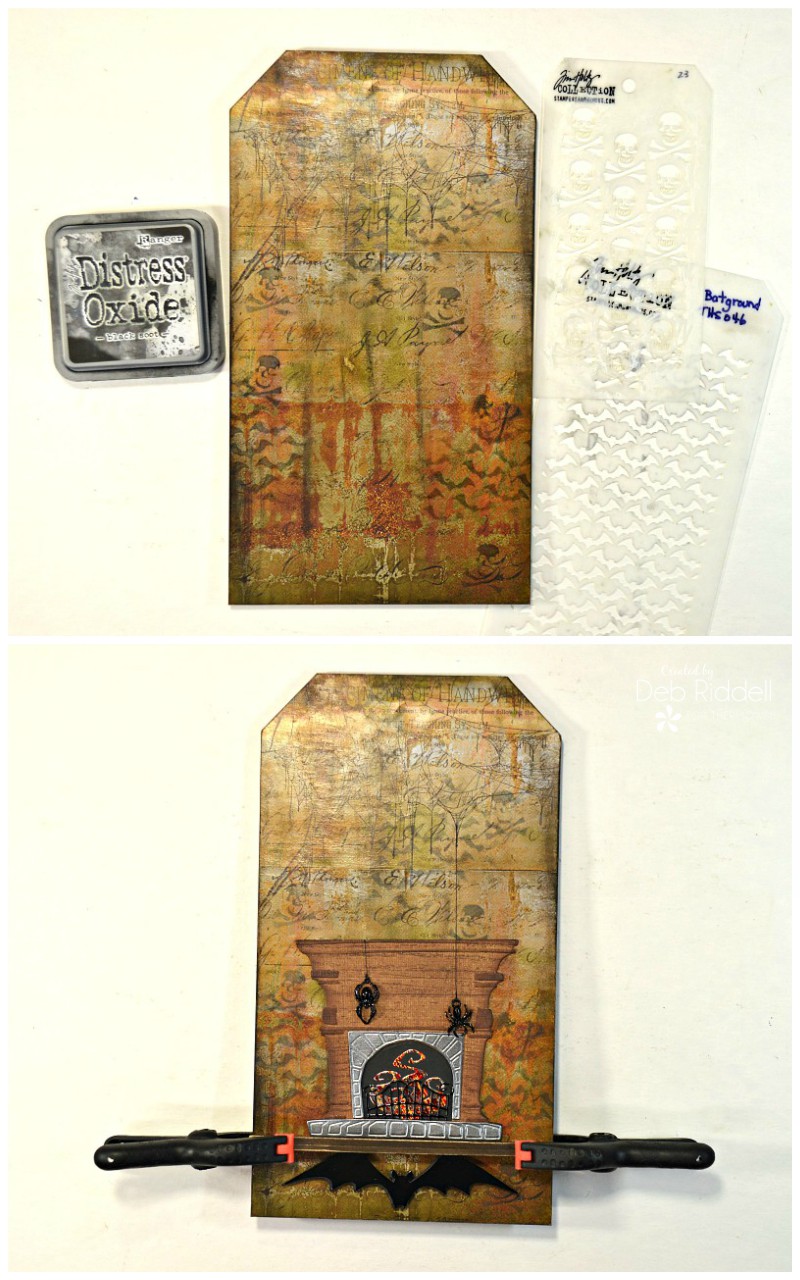
Time to make the shelf for our tag (this shelf design was inspired by Advantus’ Bat Web Etcetera Trims). Adhere two Ruler Pieces together, cut to the same width as your tag and paint with Ground Espresso Distress Paint. Die-cut several Bat Crazy bats (choose the one that fits best on your tag) from Black Onyx cardstock, layering them together with Ultra Bond adhesive until you have the thickness you desire (I ended up layering about 8 cardstock bats on mine). Cover a piece of Deco Foil Toner Sheet with Black Foil Transfer Sheet and die cut one more bat, adhering it on top of the layered cardstock bats.
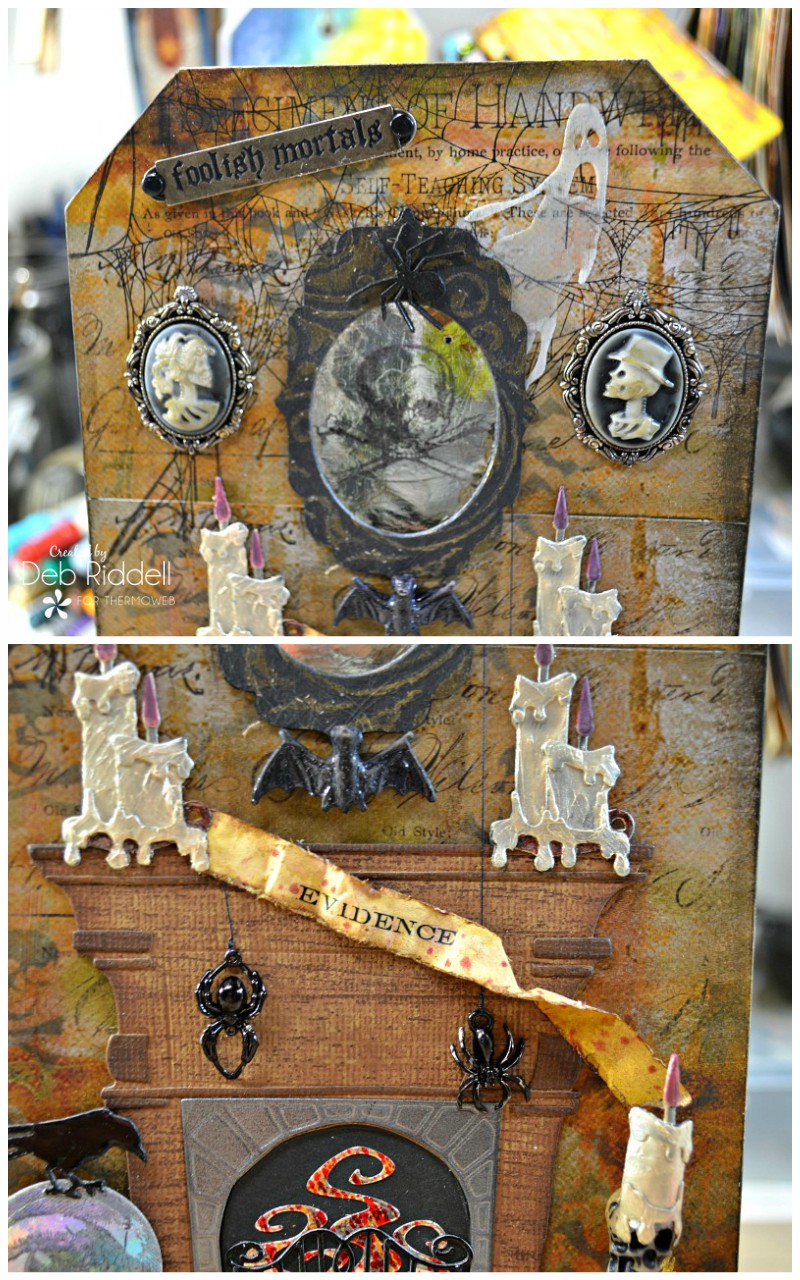
Cover the Small Etcetera Tag with Halloween themed paper (this is from the Abandoned Paper Stash) and randomly add colour on the tag and around the edges with Distress Crayons (Black Soot, Walnut Stain, Rusty Hinge and Aged Mahogany). If you don’t have an Etcetera Tag cut a tag shape from thick chipboard or corrugated cardboard to measure about 10 1/4″ tall by 5 1/2″ wide.
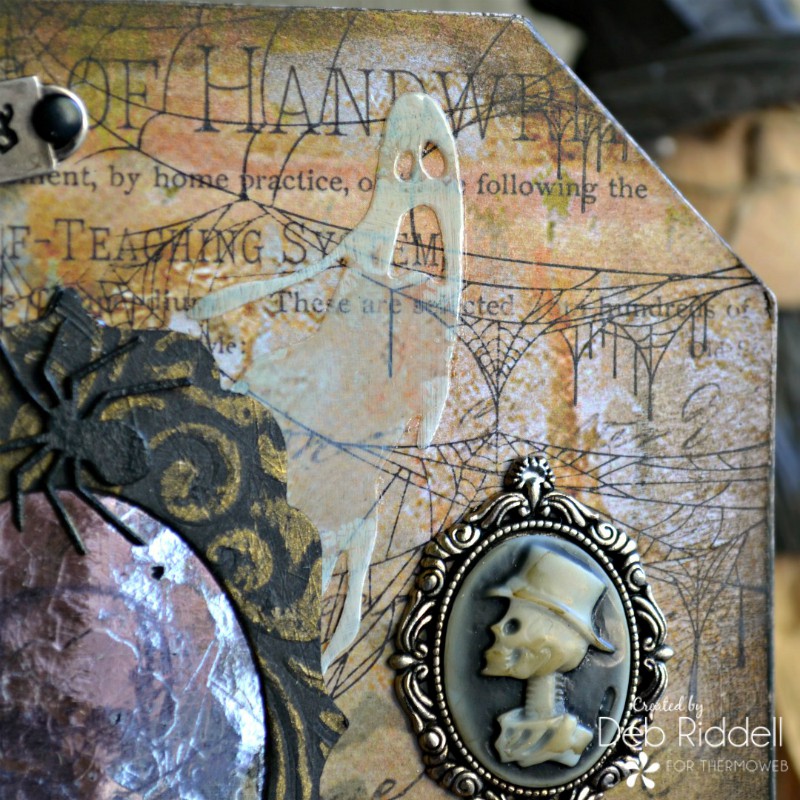
Randomly stencil some bats and skull and crossbones onto the tag with Black Soot Distress Oxide Ink (Batground and mini Crossbones stencils were used here). Stamp a spider web onto the top of the tag (Life Of The Party stamp set) with black permanent ink.
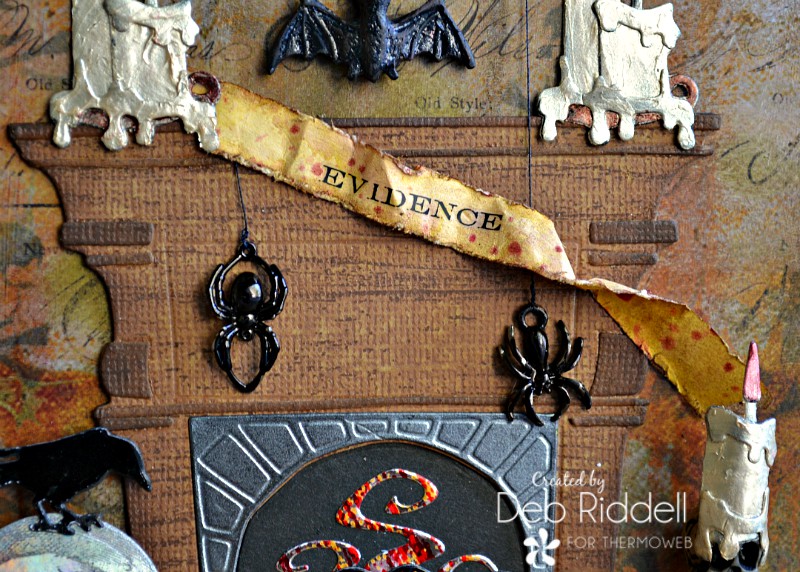
Adhere the shelf on to the tag with the layered bat die cuts underneath using Ultra Bond adhesive. Assemble all of the fireplace pieces and adhere them on top of the shelf. Colour a couple of Wicked spider charms with Pitch Black Alcohol ink and hang them from black sewing thread. Adhere them in place with Ultra Bond adhesive.
Adhere the crystal ball on the left side of the shelf, popping it up with a couple of Zots 3D Singles. Die-cut a crow from Black foiled Toner sheet (Regions Beyond die set) and adhere him on top of the crystal ball. Layer a couple of Skulls Adornments and cut out one of the Metallix candles from the third set you die cut. Gently form the candle so you can glue it on top of the skulls (thanks to Stacy Hutchinson for this fab idea!).

I forgot to take a step out picture of the ghost behind the mirror, sorry about that! Die-cut a Frightful Things ghost from Clear Designer Toner Sheet and ink the back of the die-cut with a small amount of Mushroom Alcohol Ink mixed with Snow Cap Mixative. Adhere him to the tag and layer the mirror on top. Add a couple of Crypt Cameos to either side of the mirror, aging them with a bit of Mushroom Alcohol ink. Adhere the two Metallix candles onto the fireplace mantel. Add A Bitty Bat to the bottom edge of the mirror, colouring him with some Slate Alcohol ink.
Paint a small chipboard spider with Black Soot Distress Paint and adhere him on to of the mirror (you could also die cut the spider from the Frightful Things die set). Ink the ‘foolish mortals’ Halloween Words band with Mushroom Alcohol ink and enhance the letters with Black Soot Distress Crayon. Add a couple of brads to each side of the Word Band and adhere to the tag.
Cut a strip of paper and ink it with Mustard Seed and Vintage Photo Distress Inks. Add the ‘evidence’ Remnant Rub and tatter the edges of the paper strip. Add some ‘blood’ by stenciling through the Speckles Stencil with Aged Mahogany Distress Ink. Crumple up the paper strip and gently smooth it out then adhere in place with Ultra Bond adhesive.
Finally, glue a putka pod pumpkin beside the crystal ball and add some Boneyard bones beside the stacked skulls, adhering them in place with Ultra Bond adhesive.

Tatter and ink Mummy Cloth, cut it into strips and pieces and adhere it here and there along the shelf. Add bits of dried moss to the shelf as desired and you are done!
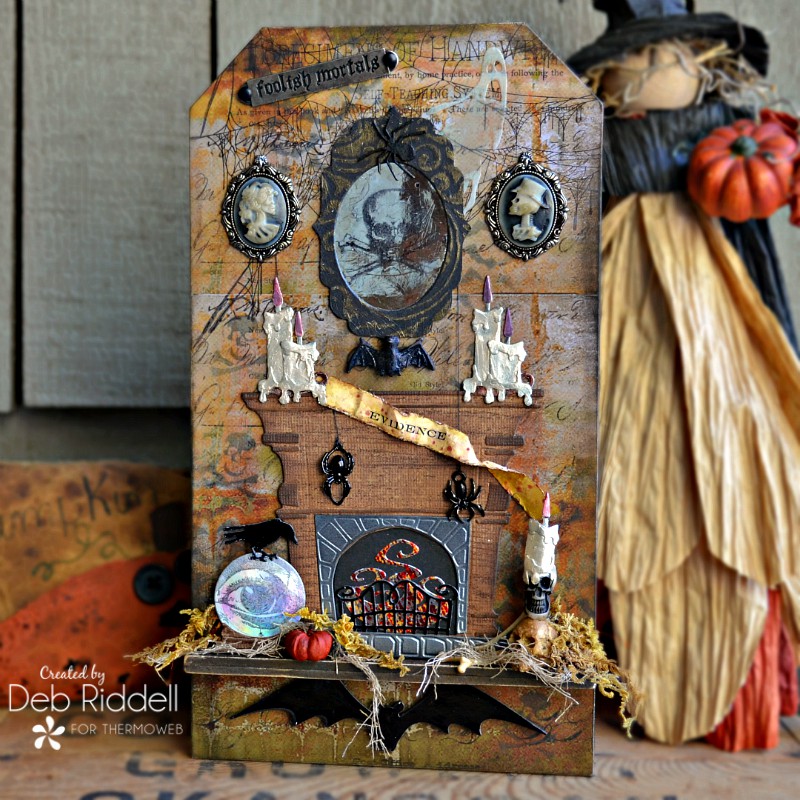
Here are a few closeups of the finished tag.


I hope that you’ve enjoyed seeing my Poltergeist’s Parlor Halloween Tag, I had so much fun making it!

Thanks as always for stopping by today and happy Halloween creating,
Deb xo
Yolande Bergeron
September 30, 2019 at 12:45 pm (5 years ago)J’aime beaucoup.
I can see how much joy you had by creating this beautiful Holloween art.
Thank you by giving us your tutorial to recreate your creation with our imagination.
I really enjoy your beautiful work
Again
Merci Thank you
Yolande MtlQC
Deb Riddell
September 30, 2019 at 3:25 pm (5 years ago)Merci beaucoup Yolande! Deb xo
Toni
October 5, 2019 at 4:22 am (5 years ago)Fabulous Deb! Such attention to detail Toni x
Deb Riddell
October 5, 2019 at 1:49 pm (5 years ago)Thanks so much Toni! Deb xo