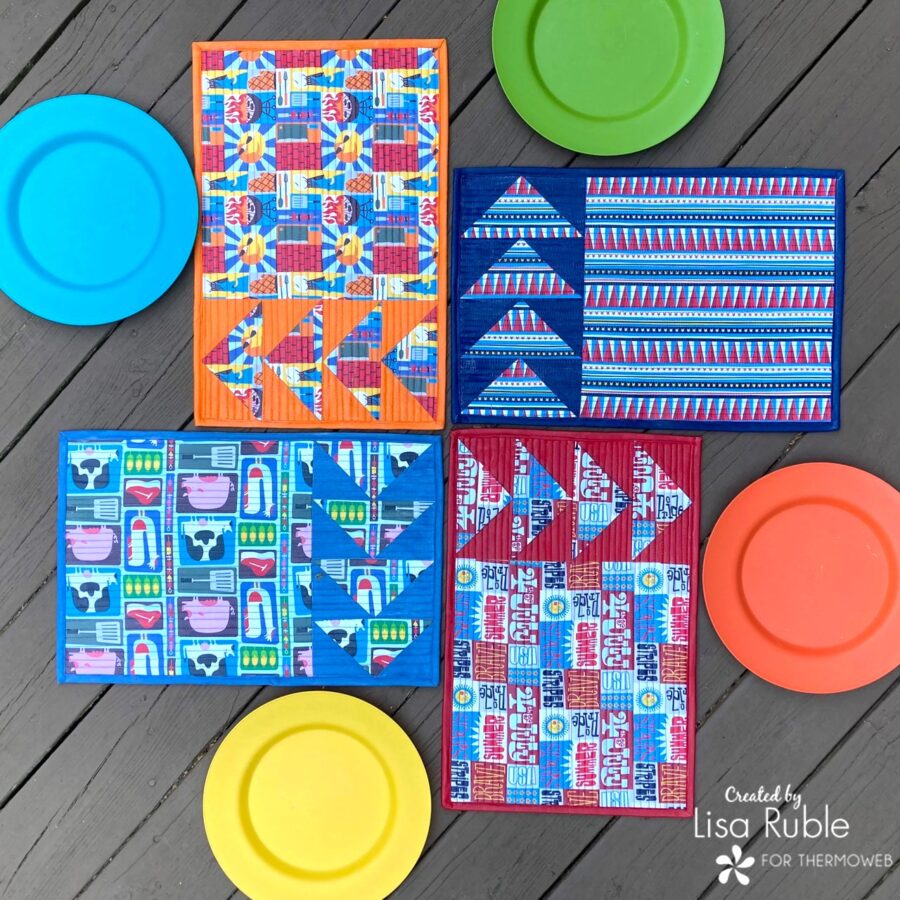
 Do you ever see a fabric and immediately know what you want to make with it? That’s how I felt when I saw the BBQ Block Party prints from PBS Fabrics. Adding in a cool new product – HeatnBond Liquid Vinyl – was just the icing on the cake! I used these bright, summery prints to sew four picnic placemats, using the Liquid Vinyl to make them weather-resistant and easy to clean off – exactly what outdoor table decor should be!
Outdoor Placemats with Liquid Vinyl
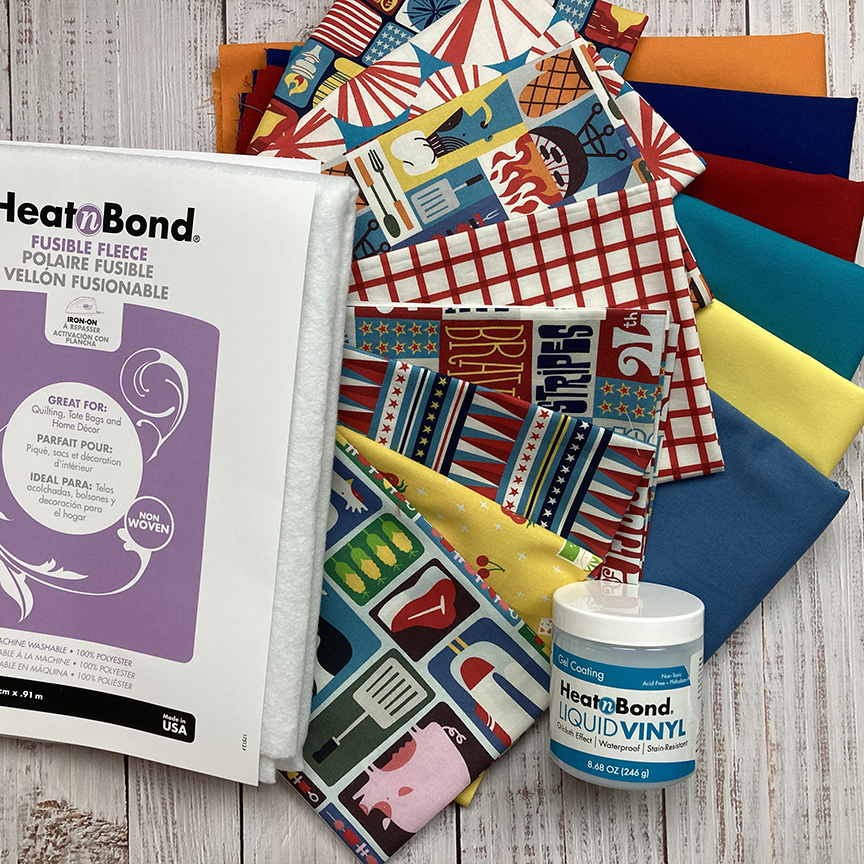
Here’s a look at what I used for this project: BBQ Block Party fat quarters, plus coordinating solids, and then HeatnBond Fusible Fleece for batting, which ensured my placemats are flat and taut, and of course the Liquid Vinyl for water resistance (and/or waterproof-ness, depending on how many coats you use).
 Let’s get started:
You’ll Need:
(to make 4 placemats)
(4) focal print fat quarters (I used BBQ Block Party)
(4) 5/8 yard cuts of coordinating solids (includes backing)
(4) 14″ x 20″ pieces of HeatnBond Fusible Fleece
SpraynBond Basting Adhesive
HeatnBond Liquid Vinyl
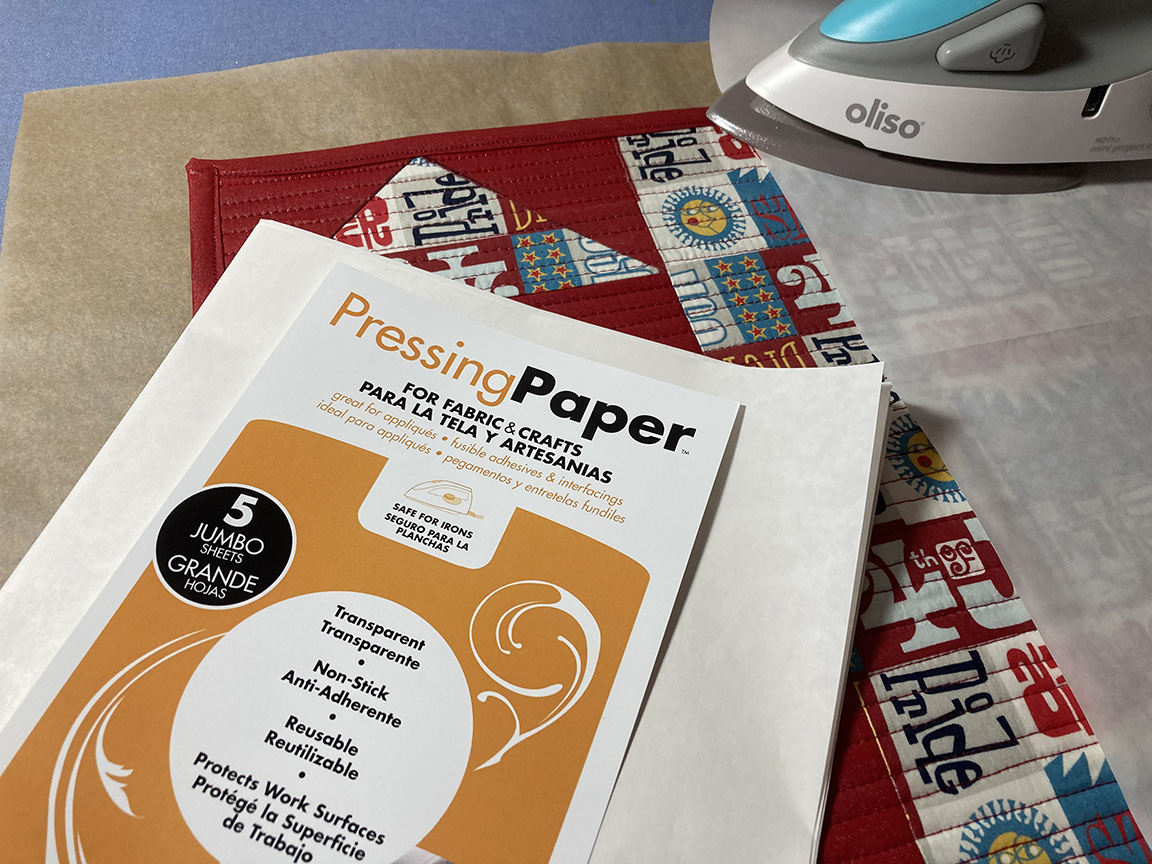
Thermoweb Pressing Paper
Basic sewing supplies
Cutting:
From each focal print (1 per placemat):
(1) 12-1/2″ square
(4) 3-1/2″ x 6-1/2″ pieces
From each coordinating solid:
(1) 15″ x 21″ backing piece
(2) 2-1/4″ x WOF strips for binding
(8) 3-1/2″ squares
Here are my cut pieces for one placemat:

Making the Placemats:
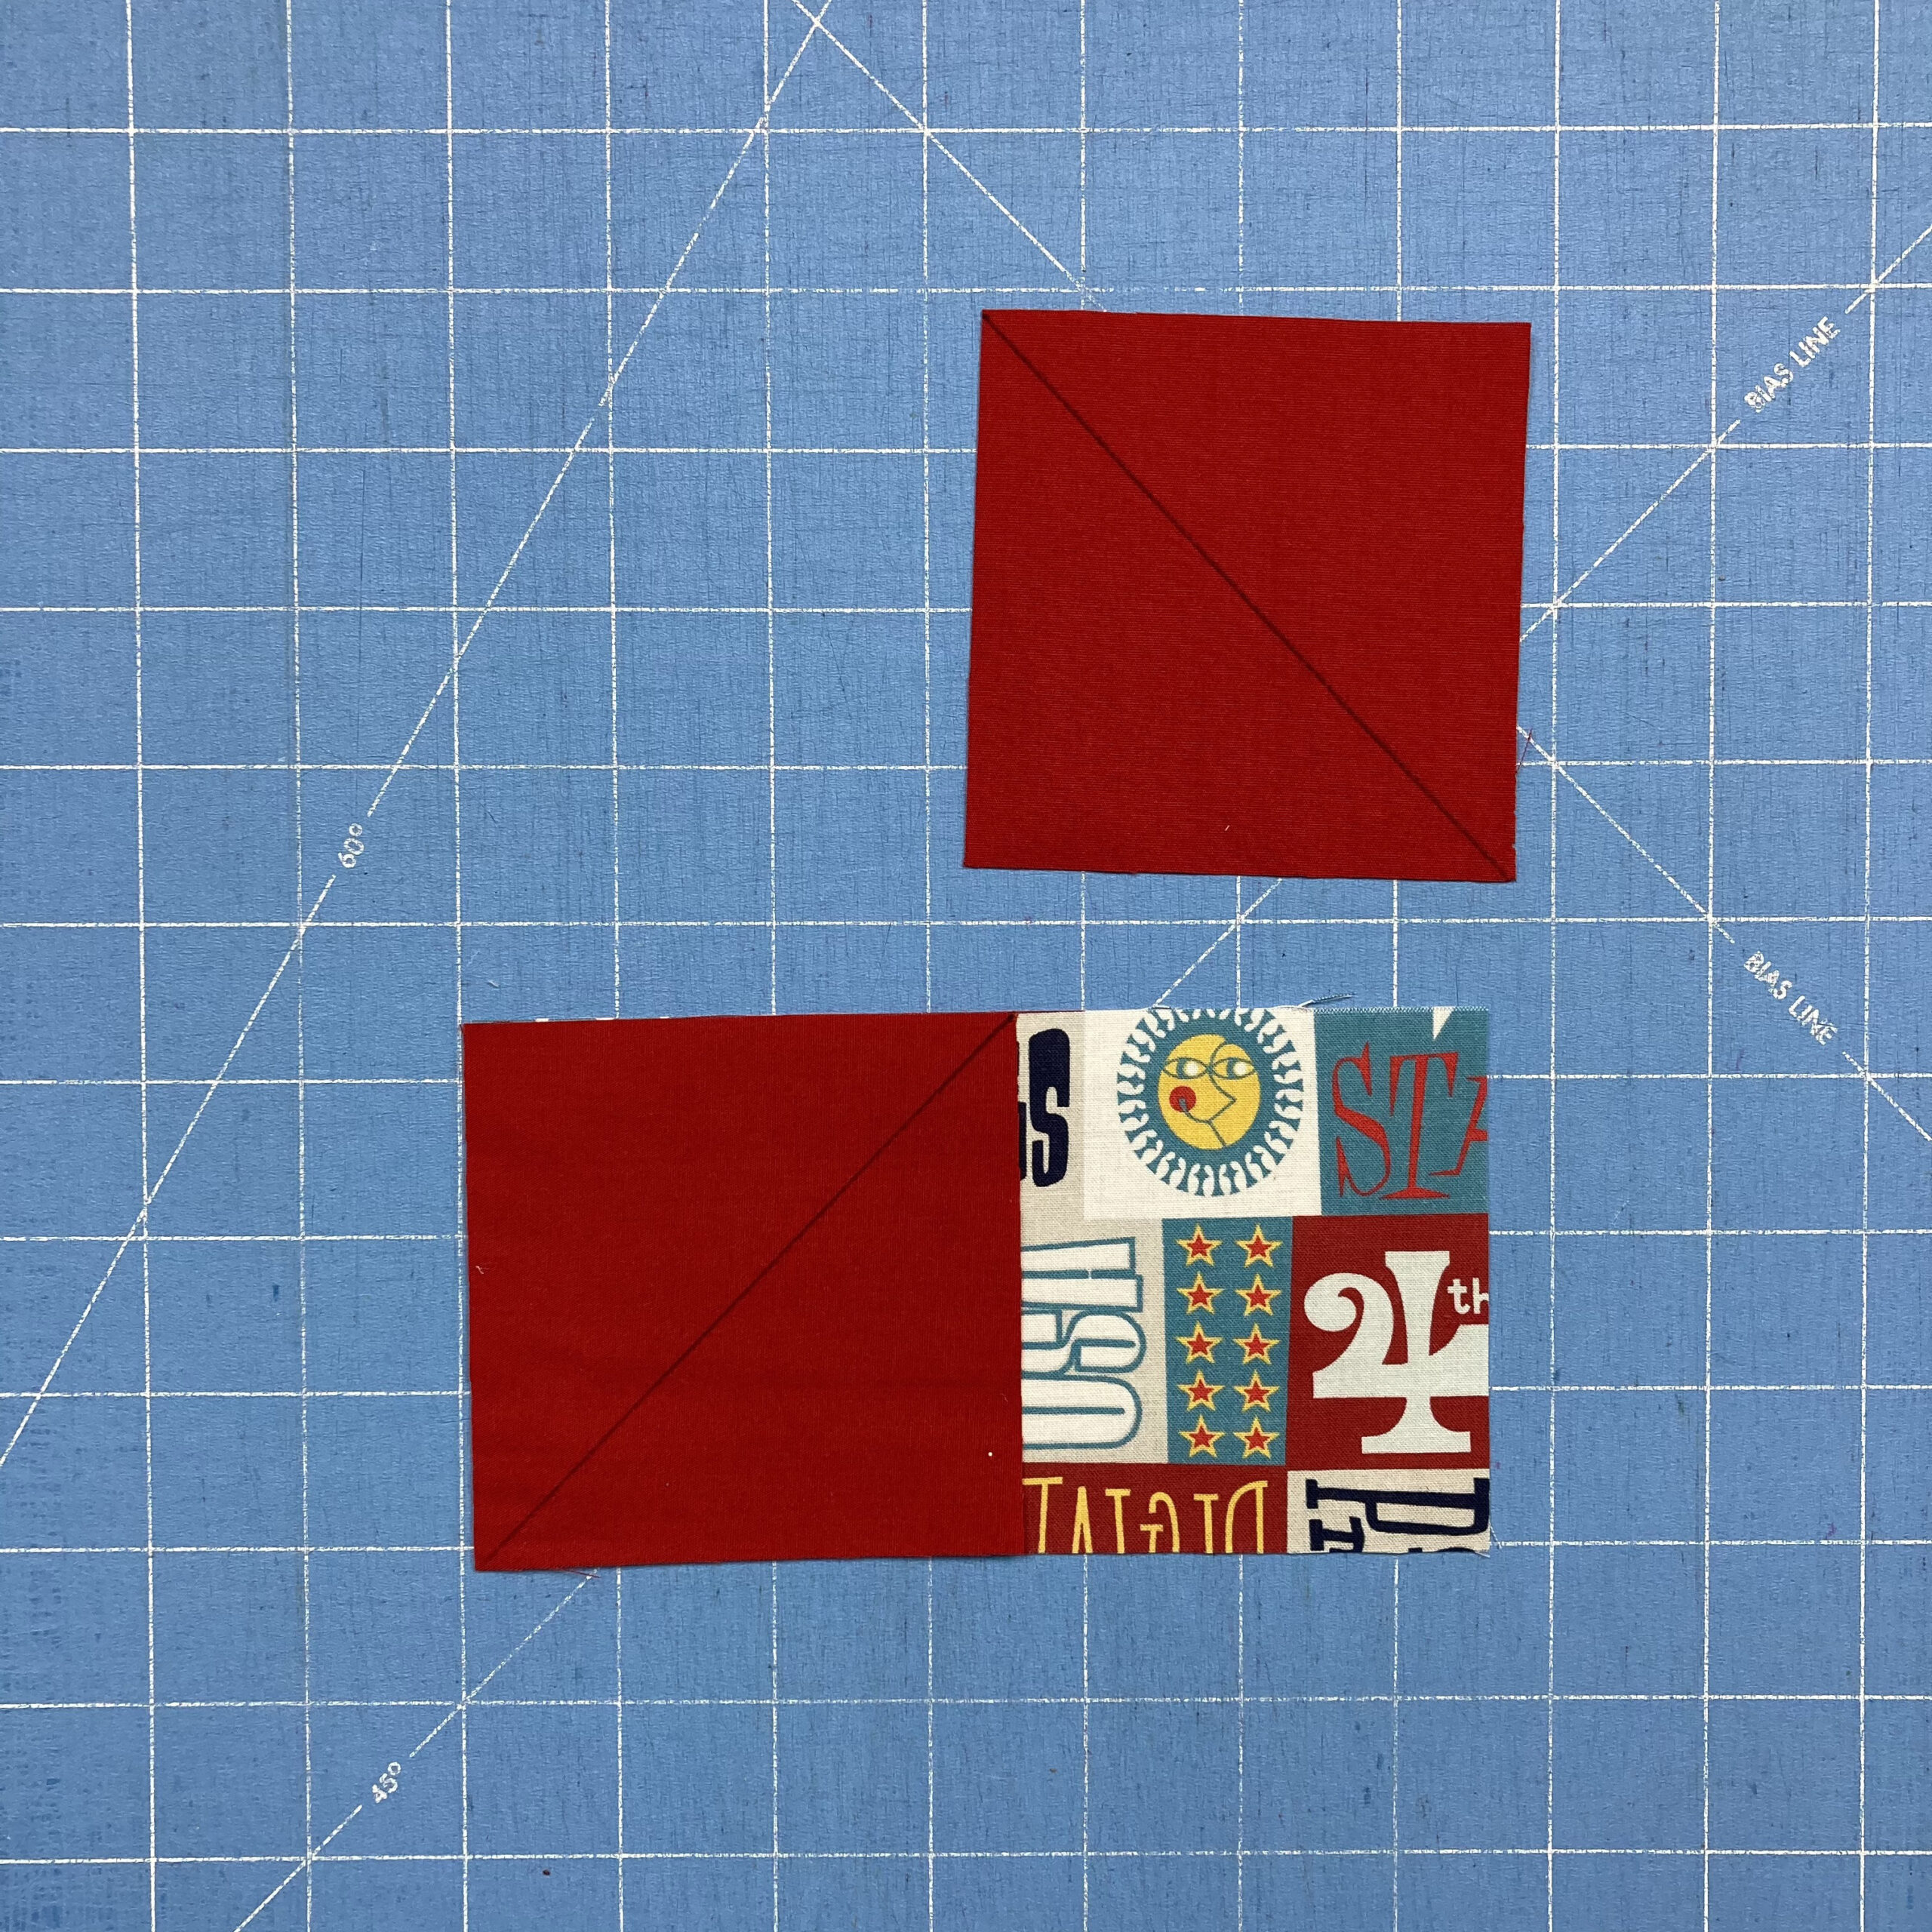
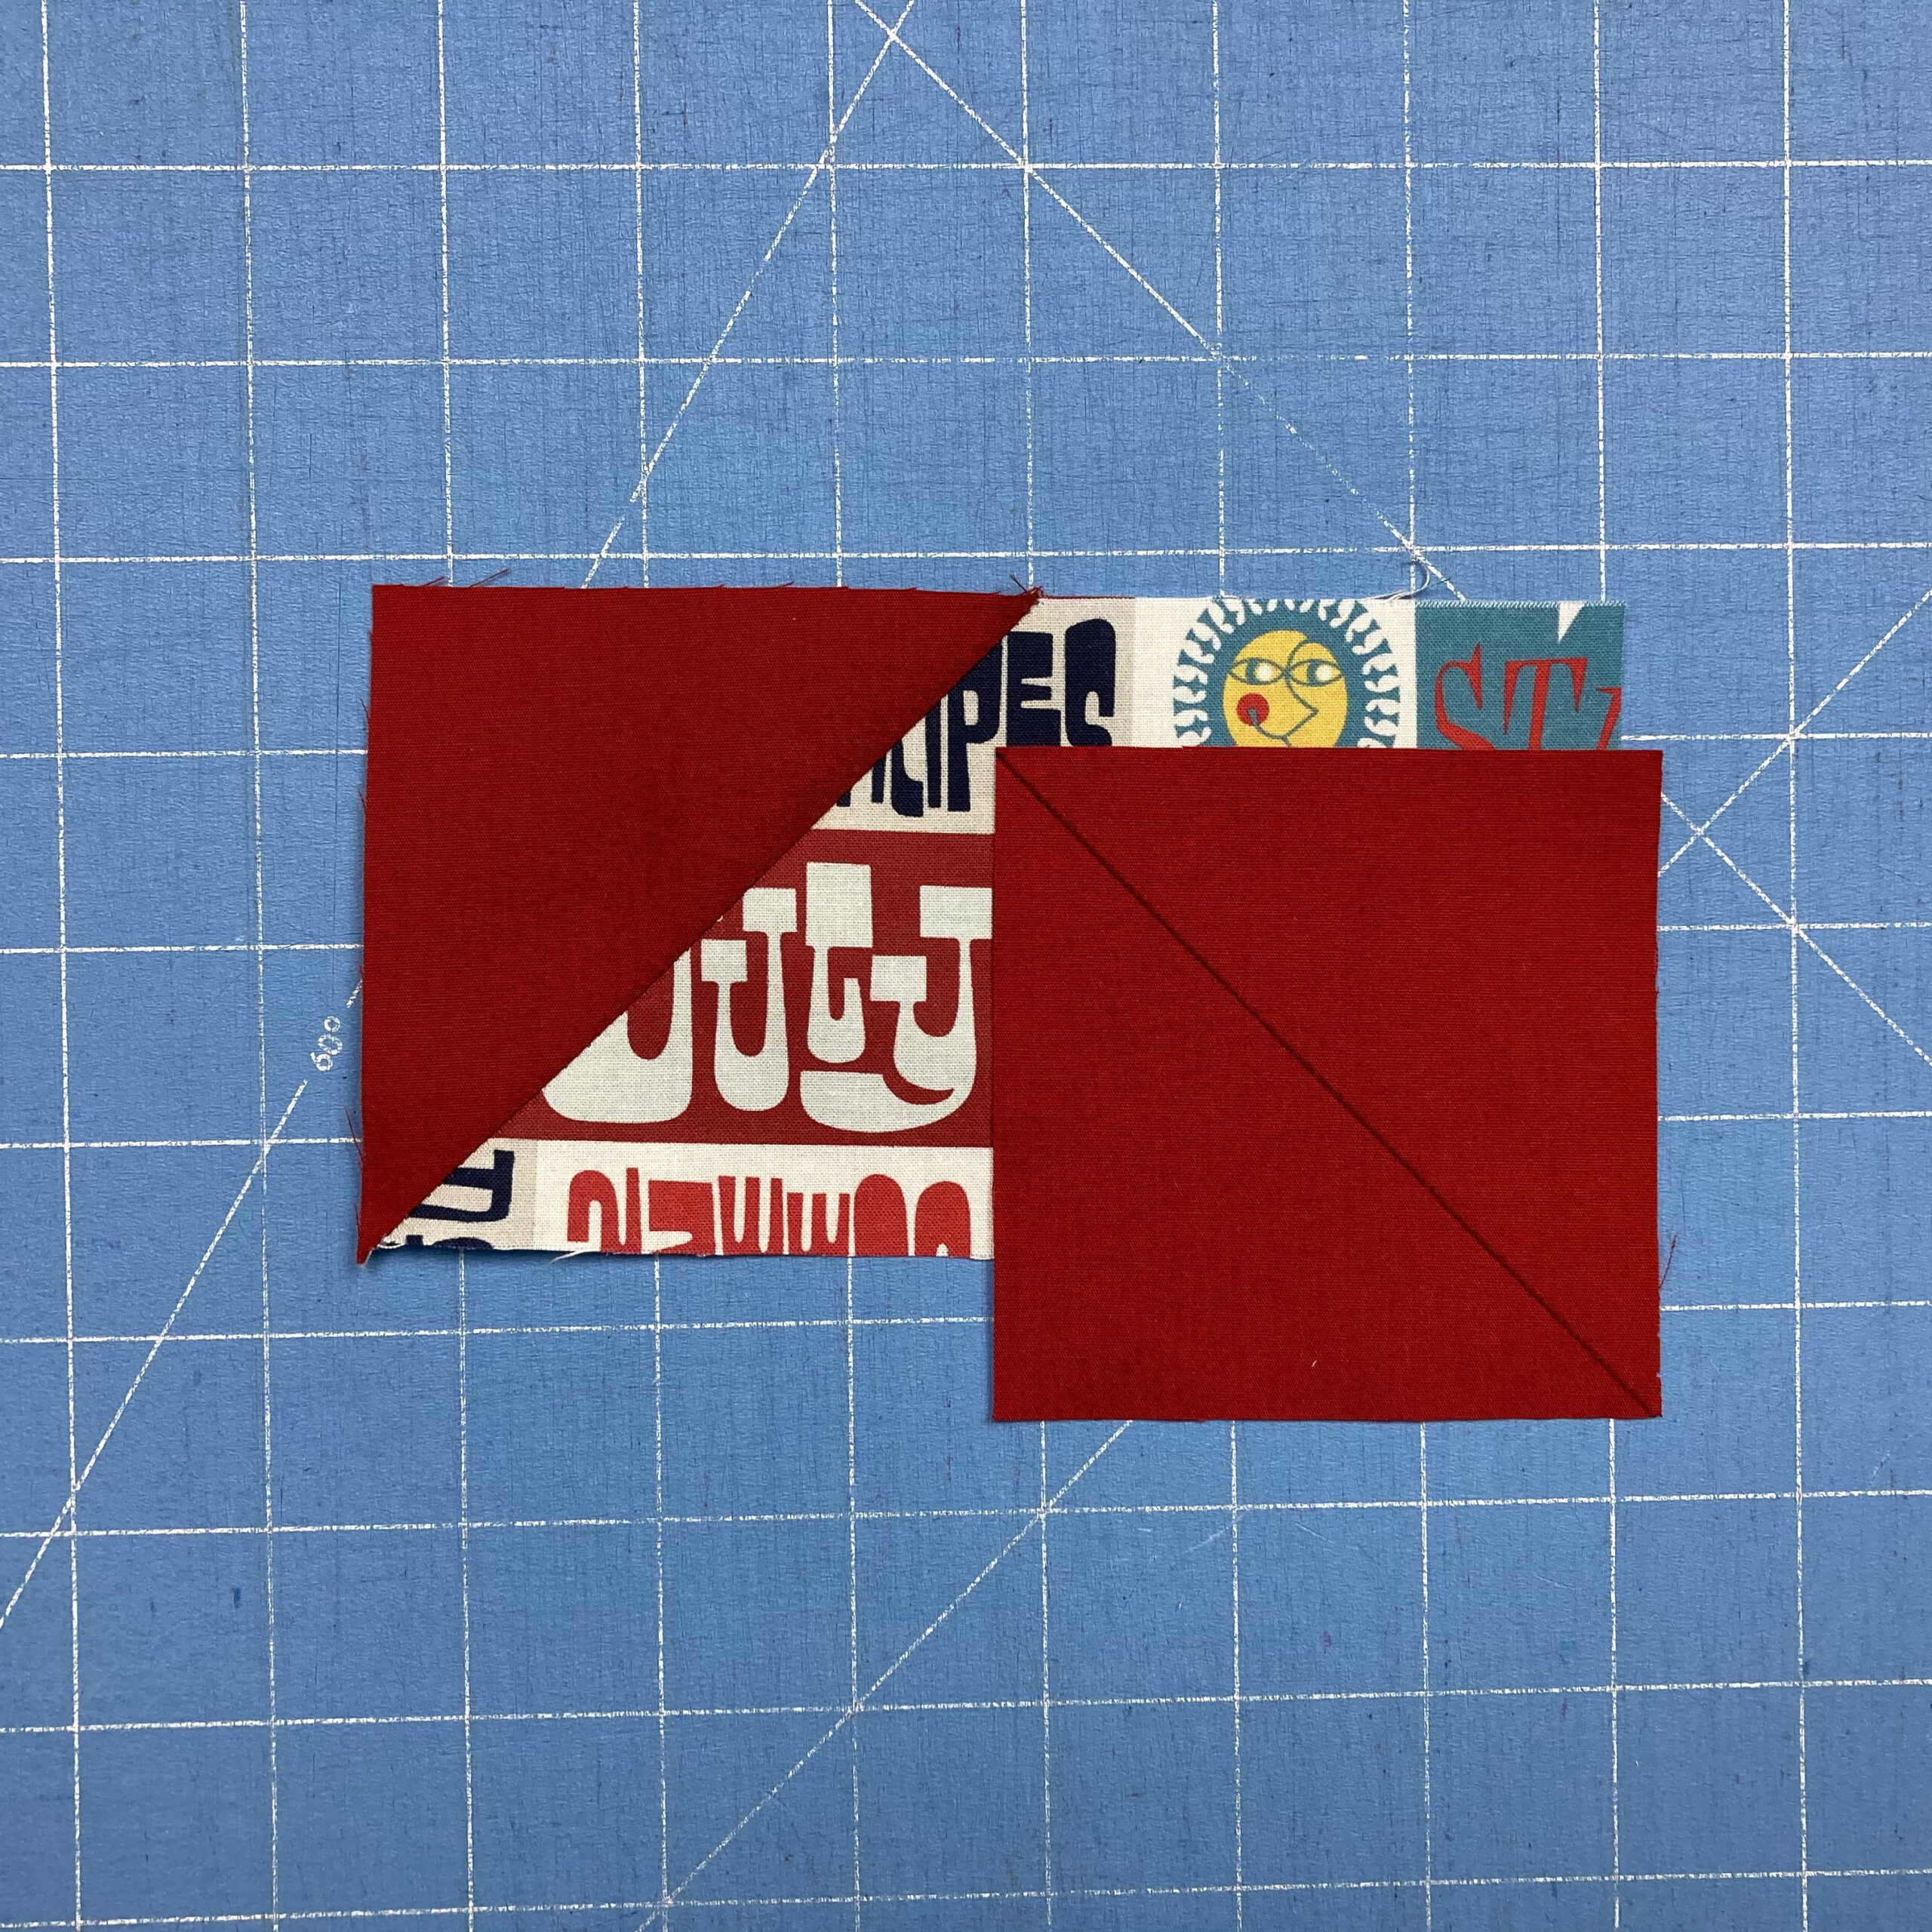
1. Draw a diagonal line on the wrong side of (2) 3-1/2″ solid squares. Position (1) marked square right sides together on the left end of (1) 3-1/2″ x 6-1/2″ print piece as shown.
2. Sew on the drawn line. Trim seam allowance to 1/4″.
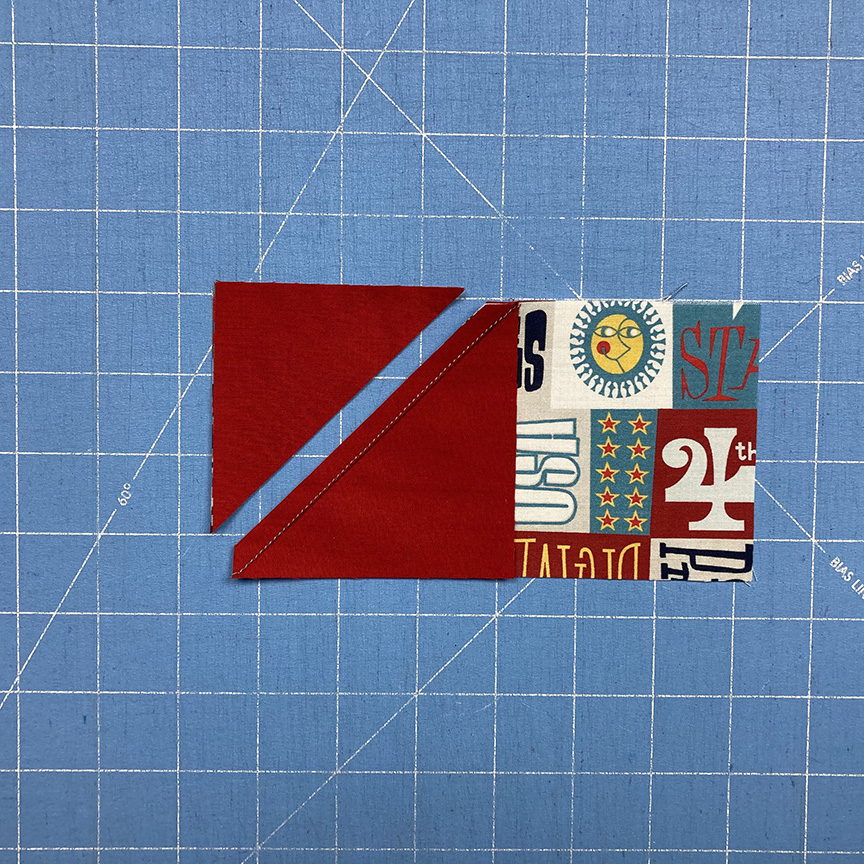
3. Press the. solid corner open. Position the remaining marked square right sides together on the opposite end of the print piece as shown.
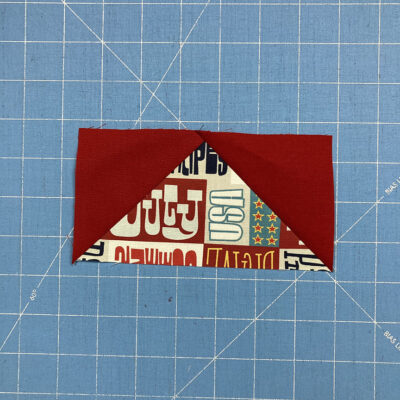
 4. Stitch on the drawn line, trim seam allowance to 1/4″, and press open to make (1) flying geese unit. If needed, trim to measure 3-1/2″ x 6-1/2″.
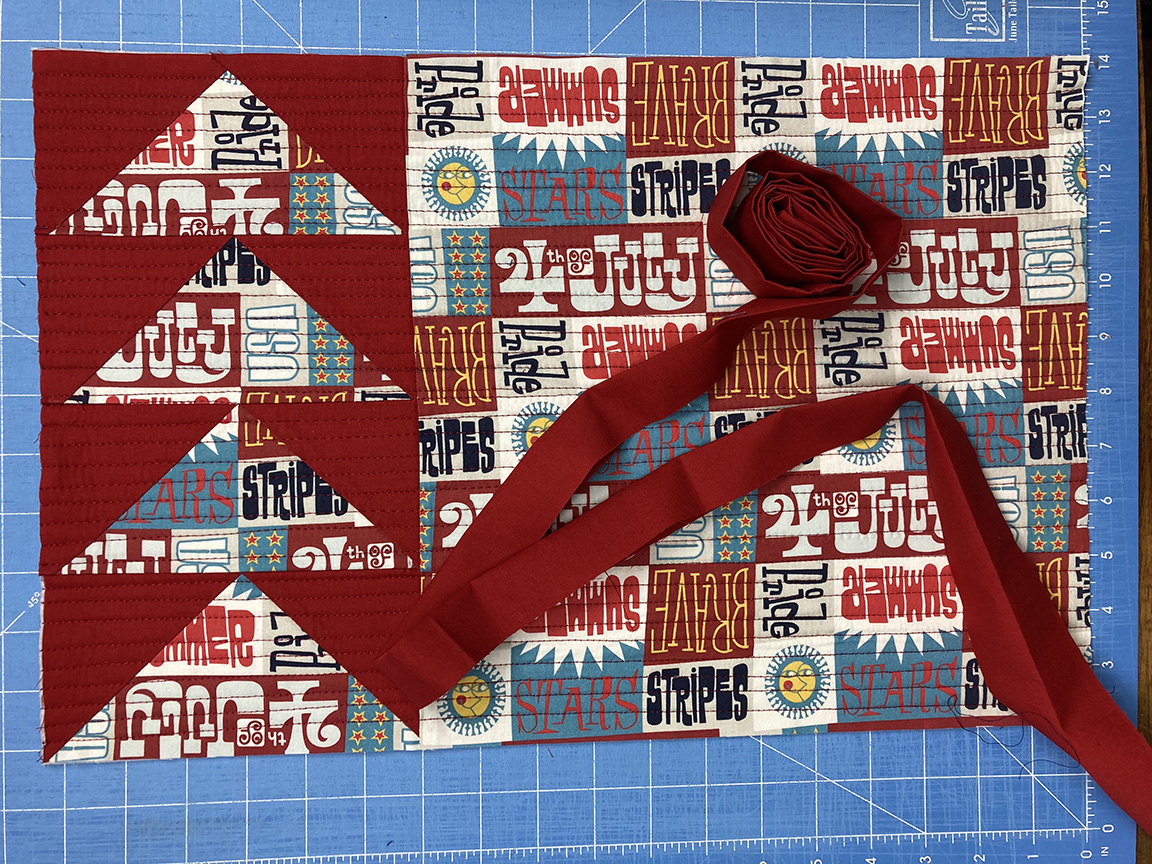
5. Make a total of (4) matching flying geese units. Lay out the flying geese units in a vertical stack as shown, with the matching 12-1/2″ square to the right.
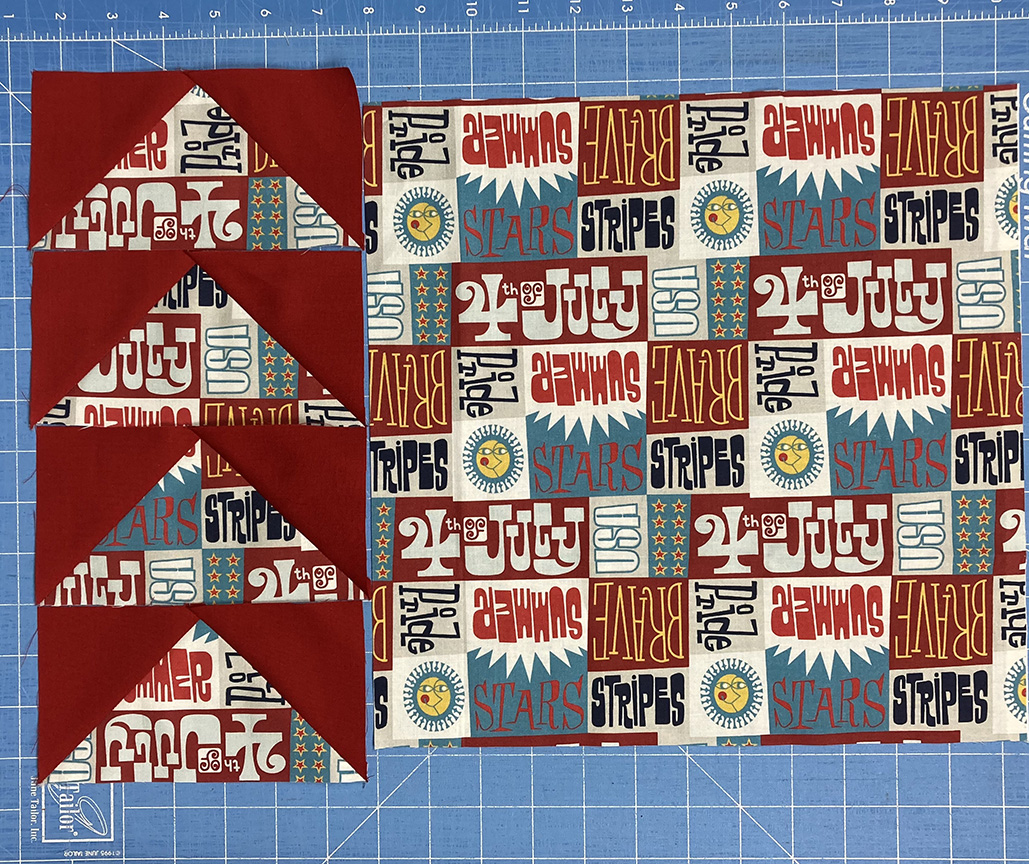
6. Sew the flying geese units into a vertical stack, and add the square to the right side to complete the placemat top.
Tip: When you’re joining the flying geese stack to the square, sew with the wrong side of the geese face up. That way you can adjust your sewing line as needed to keep perfect points on the right edge of the flying geese.
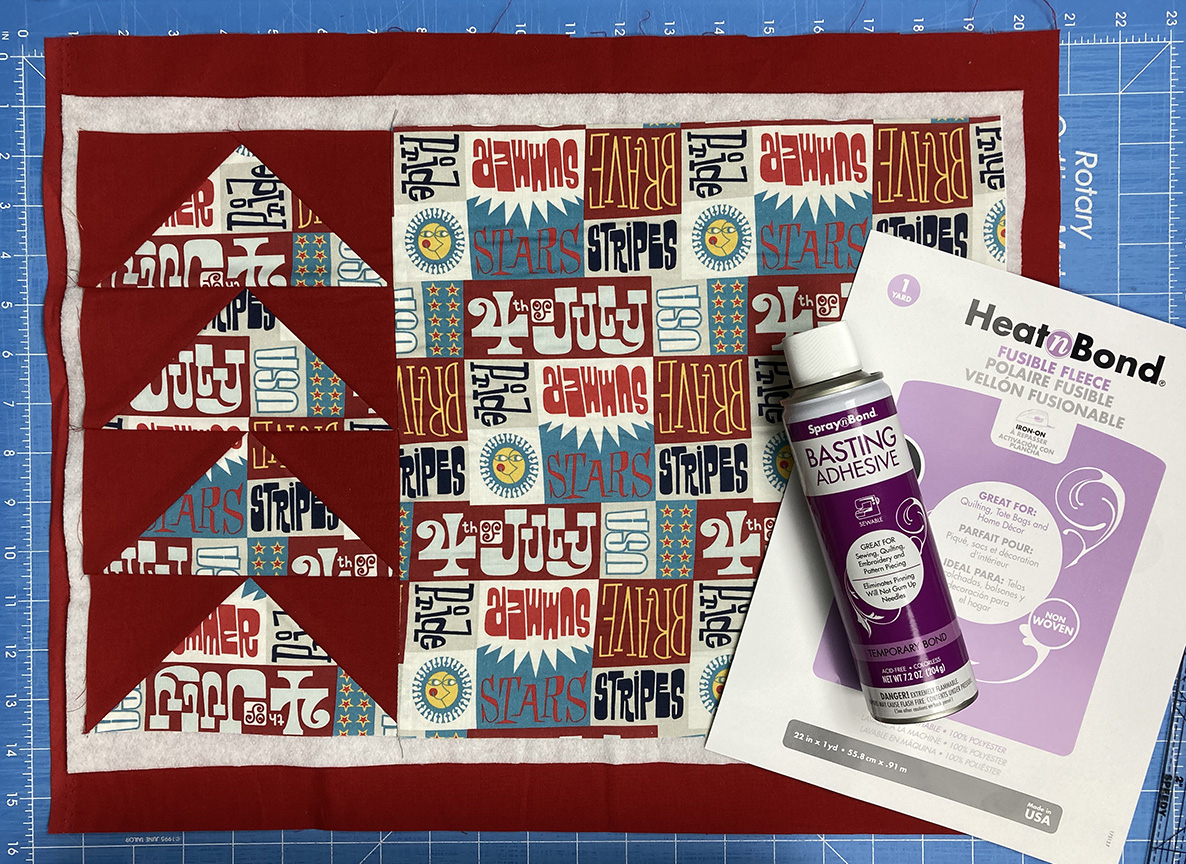
7. Following the manufacturer’s directions, fuse the placemat top to the Fusible Fleece rectangle. Spray baste the opposite side of the Fusible fleece and adhere the backing fabric to it to complete your quilt sandwich.
8. Machine quilt your placemat as desired. I quilted horizontal lines between 1/4″ and 3/8″ apart. Tip: Use a ruler and a fabric marking pen to mark a line near the center of your project to guide your first stitched line. Then align the edge of your sewing machine foot with each previous line to ensure all quilting lines are straight and parallel. Trim the backing and batting even with the placemat top. Use the (2) 2-1/4″ x WOF solid strips to bind the placemat.
9. Repeat steps 1-8 to make a total of (4) placemats.
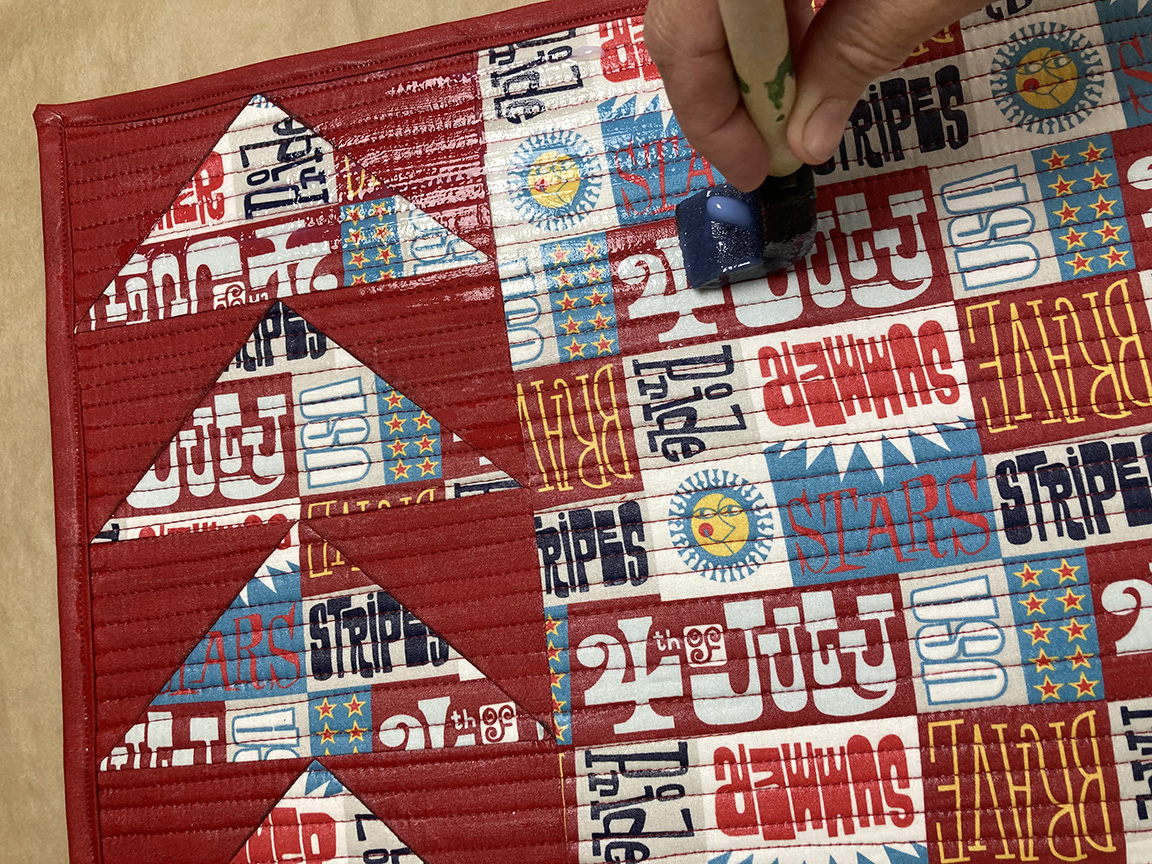
10. Following the manufacturer’s directions, apply 1-3 coats of Liquid Vinyl to each placemat. Use the Pressing Paper to press placemats between coats as directed.
11. Take your placemats outside and enjoy all summer long!