


Oh, Happy Day Bunting by Audrey Pettit
Supplies:
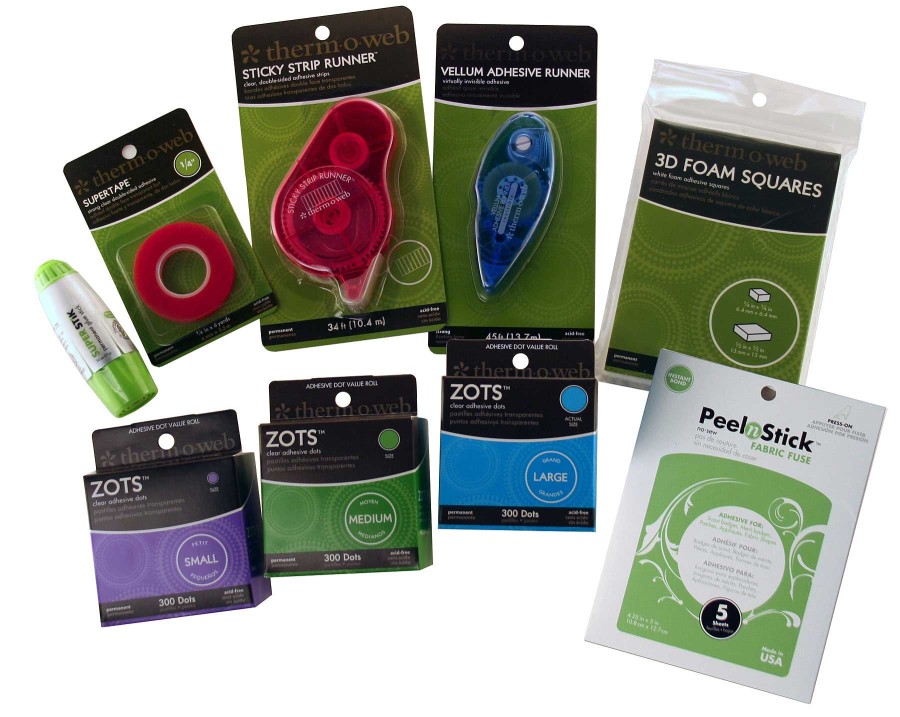
Therm O Web Mini Sticky Tape Runner
Therm O Web Zots Small Clear Adhesive Dots
Therm O Web 3D Adhesive Squares
Therm O Web Sticky Lines
DCWV Sunday Afternoon 12×12 Paper Stack
Round 14 Shape Studio Tool, Round 14 Clear Bubble Caps, Round Silver Brad Fittings: Epiphany Crafts
Trim: Glitz Designs, Stampin’Up, The Twinery
Flowers: Making Memories
Ink: Clearsnap
Paint: Delta
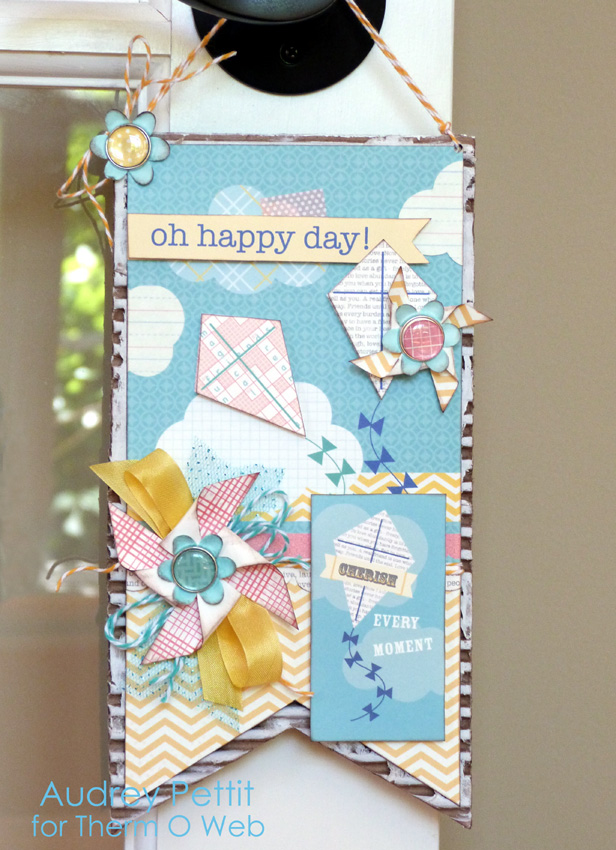
Create some summer fun with a handmade decorative bunting.
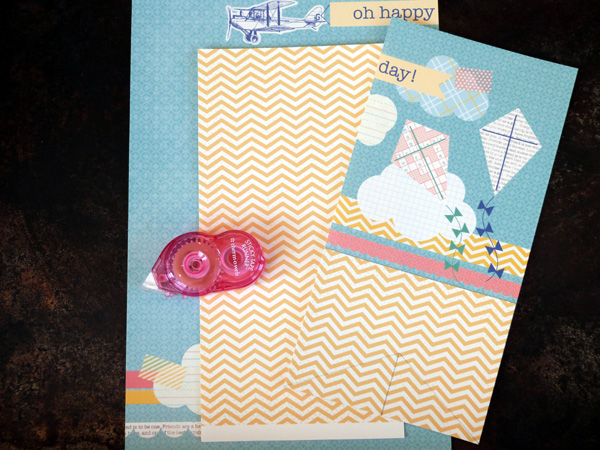
Start by cutting strips from two contrasting patterned papers. Adhere a block of the second print to the bottom of the first print. You can make this panel be any size you wish, depending on how big you want your finished bunting to be. Mine is ~ 4.5″ x 9″.
Measure the center line at the bottom of the paper panel, and then measure up ~ 1.5″ and make a small pencil mark. Draw pencil lines from this top point to both corners, trim along the pencil line, and erase any remaining marks.
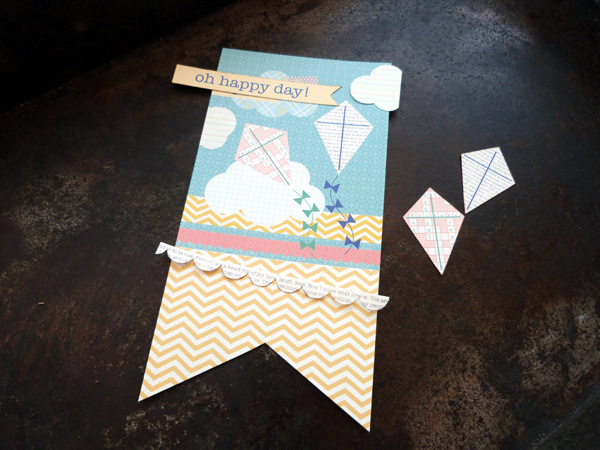
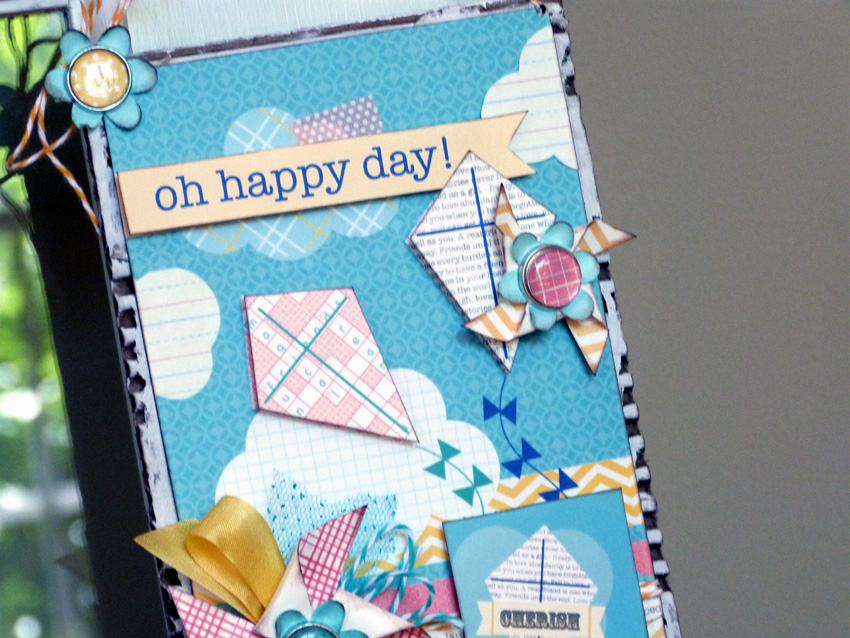
Cut a few decorative elements from the patterned paper. I cut the remaining portion of the one cloud on the left to add to the right side, as well as the scalloped text print border. And since there is a second sheet of each paper, cut out the two kites and the Oh, Happy Day banner strip, too.
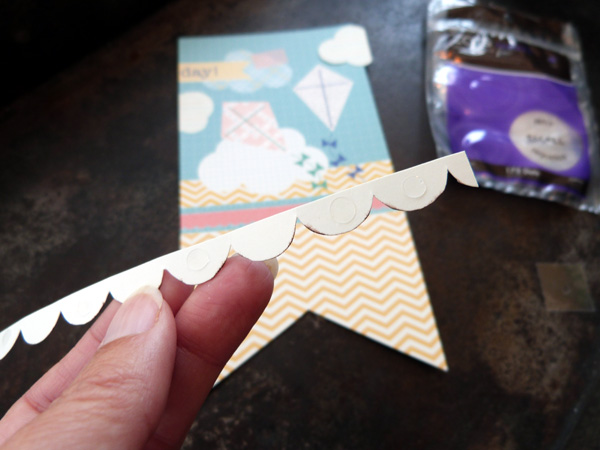
Adhere the scalloped border along the seam where the two papers meet using Small Zots Clear Adhesive Dots. Adhere the cloud to the right side of the bunting using the Mini Sticky Tape Runner.
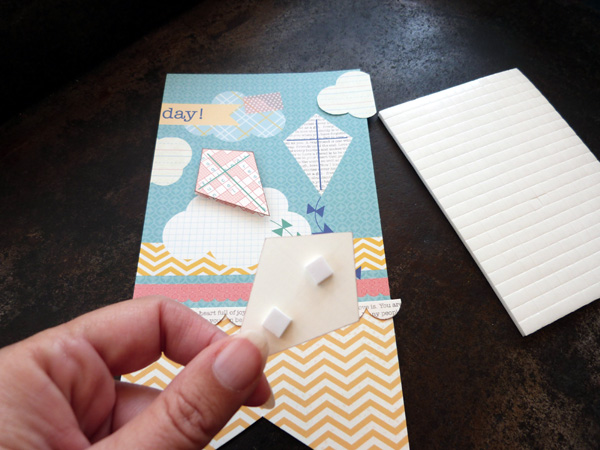
Then adhere the two kites and the sentiment banner strip using 3D Adhesive Squares.
Create pinwheels to embellish the bunting:
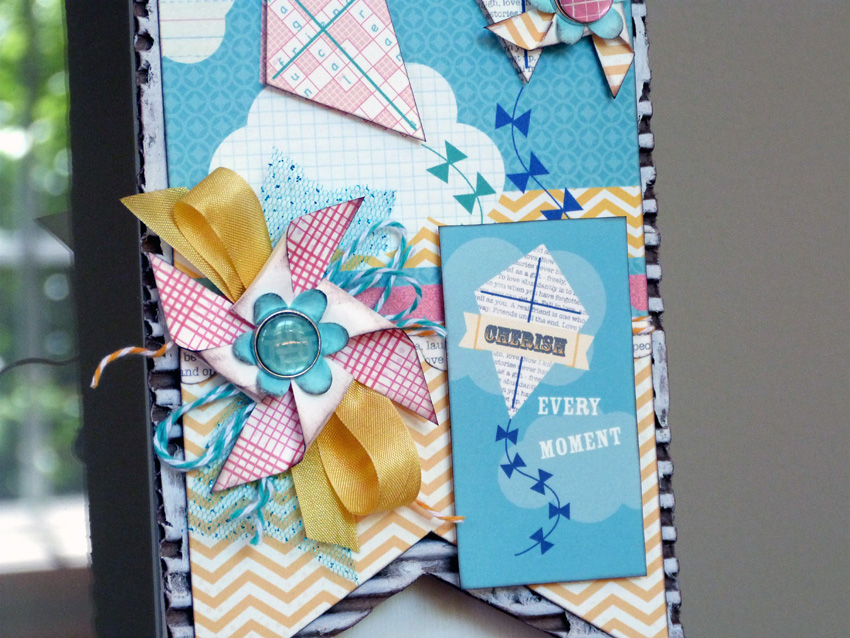
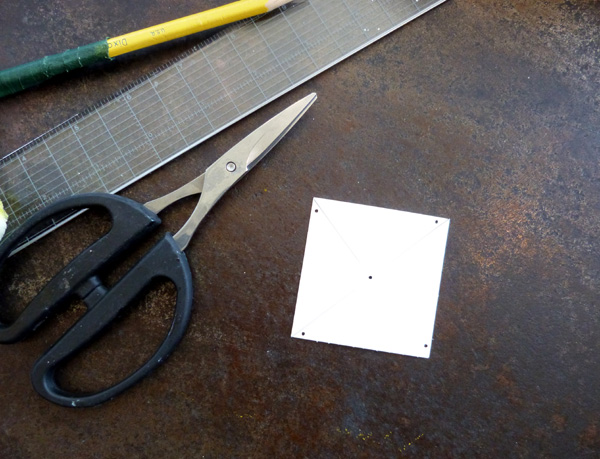
Start with a perfect square of patterned paper. For my pinwheels, I used a 2.25″ square and a 1.5″ square. On the back side, draw an X through the center of the square. Punch a small hole in the center of each square, and in the bottom left point of each of the 4 triangles created by your pencil marks. Cut along each pencil line from the outside points to about 1/4″ from the center hole. Erase pencil marks.
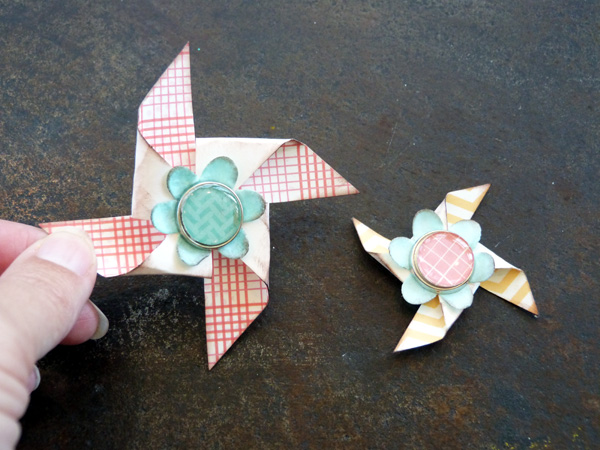
Starting in one corner, grasp a pinwheel flap by the hole and bend it towards the center, lining up the holes. Move to the next flap and repeat the process until you have bent each ray up towards the center. Secure with a decorative brad.
Tie trims around the bunting. Adhere Pinwheels using Zots Clear Adhesive Dots. Cut a journaling block from patterned paper and adhere to the bunting using 3-D Adhesive Squares.
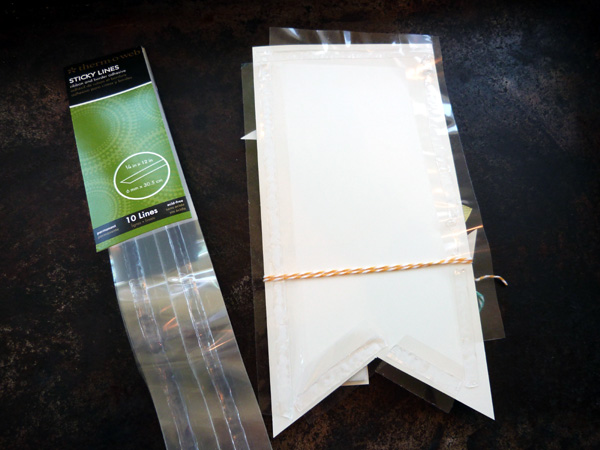
Apply Sticky Lines to the back of the paper panel, and adhere to a corrugated cardboard base.
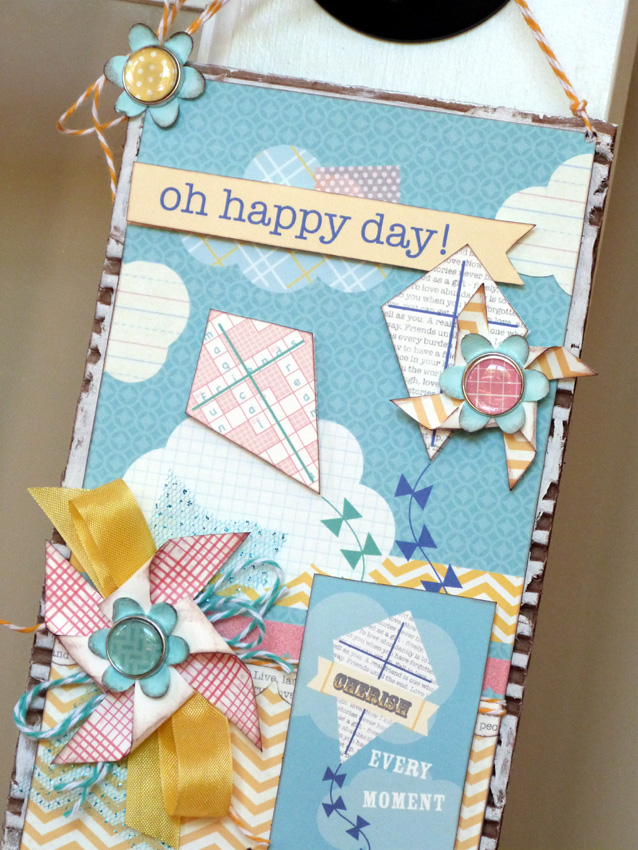
Punch holes to the top of the bunting, and tie with baker’s twine.
We’d like for you to have a chance to create with some of the same products our Designers used for our hop! So we’re going to give you a chance to win not only this prize as shown…but an entire adhesive pack from us too!
And we’ll also include our new Glitter Dust Photo Corners too!
Enjoy the HOP!!
Angie Hall
May 27, 2013 at 8:14 pm (11 years ago)What a cute door hanger for the nursery. I love the choice of papers and embellies.
Rhonda Miller
May 28, 2013 at 11:16 pm (11 years ago)What a fun banner. I love the kites.